What AI Model Wearing Jewelry Actually Means
When you hear "AI model wearing jewelry," it refers to something specific: using artificial intelligence to generate photorealistic images of human models adorned with jewelry pieces, without ever booking a photographer, renting a studio, or hiring talent. The AI takes your product photo and produces an image that looks like a real person wearing your necklace, ring, or bracelet.
Sounds simple, but the implications are massive for anyone selling jewelry online.
Defining AI-Generated Jewelry Model Imagery
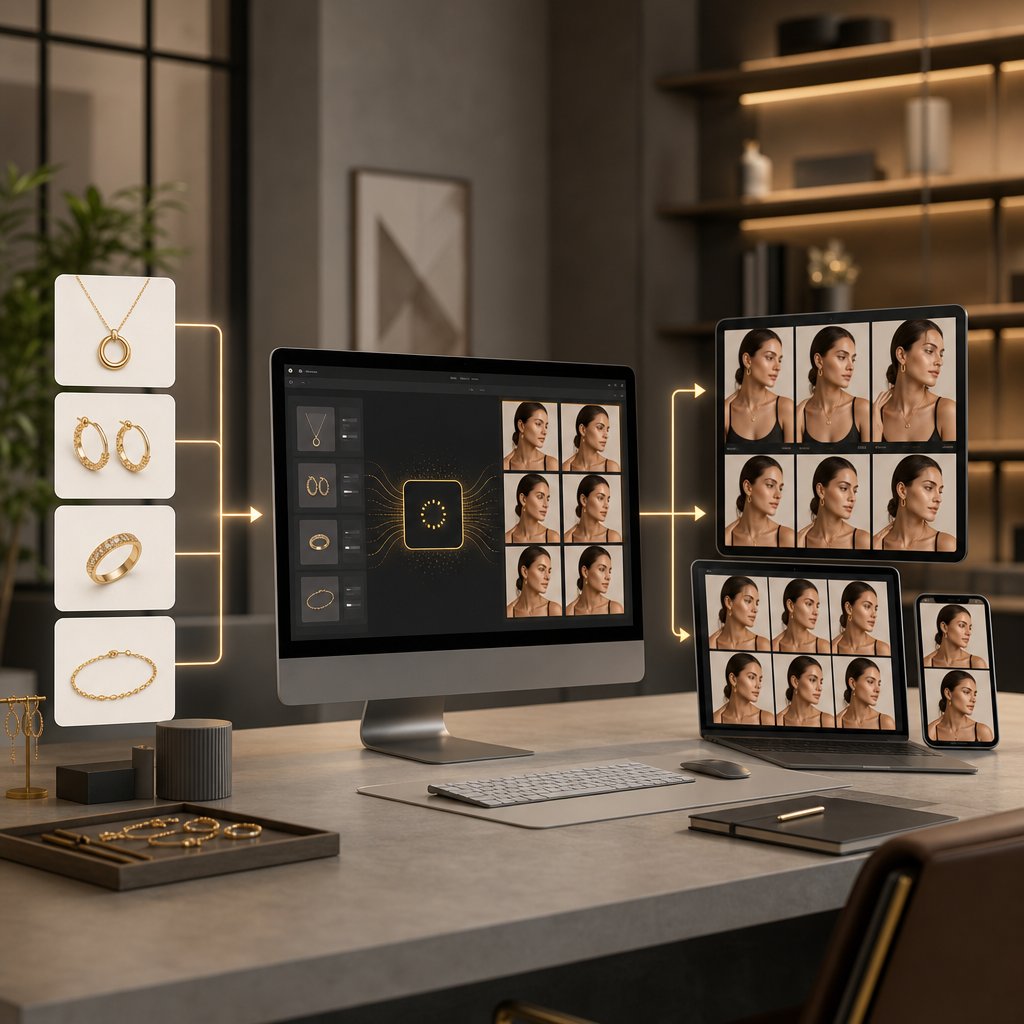
At its core, ai jewelry model imagery is the process of combining a product photo with AI-generated or AI-enhanced human figures. The result is a realistic scene where a digital jewellery model appears to be physically wearing your piece. Think of it as replacing the entire traditional photoshoot pipeline — model casting, lighting setup, post-production editing — with a software workflow that delivers similar results in seconds rather than weeks.
This is not the same as basic photo editing or simple background removal. Artificial intelligence jewelry imaging involves trained neural networks that understand how light interacts with metal, how a pendant drapes against skin, and how a ring sits on a finger. The technology generates new visual information rather than just manipulating existing pixels.
The shift from traditional on-model photography to AI-generated imagery represents the single biggest reduction in production cost and time-to-market that jewelry e-commerce has seen in a decade.
Why Jewelry Sellers Are Adopting This Technology
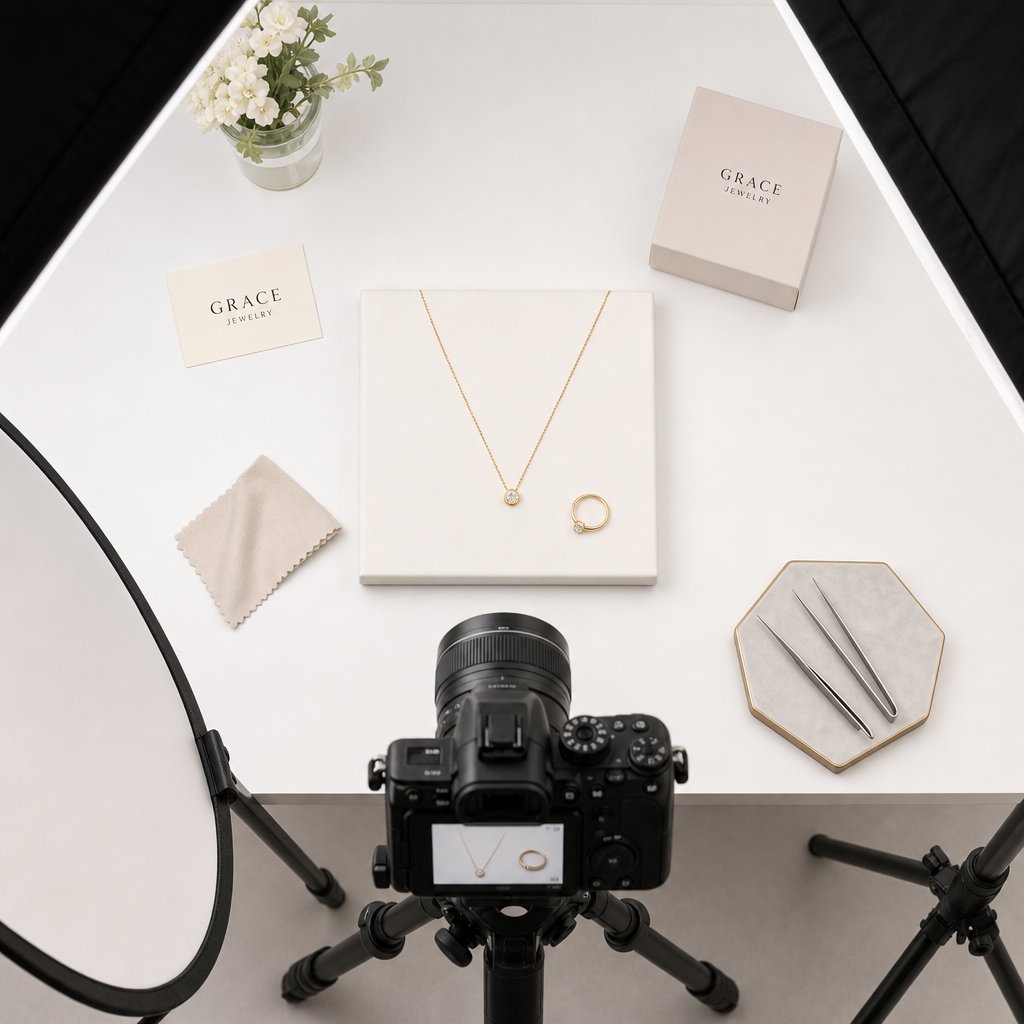
The global online jewelry market has crossed $46.1 billion, with a projected 13.8% CAGR heading toward 2030. In that environment, every seller needs on-model imagery — buyers want to see how a piece looks when worn. But traditional photoshoots cost $50 to $150 per retouched image, and hiring specialized hand or neck models runs $500 to $1,500 per day.
AI jewelry models eliminate that bottleneck entirely. A small Etsy seller launching ten new pieces can generate styled, on-model photos the same afternoon. A DTC brand managing hundreds of SKUs can maintain visual consistency across an entire catalog without coordinating multiple shoot days. The appeal spans the full spectrum: independent artisans gain access to professional-grade imagery they could never afford, while larger brands gain speed and scalability they could never achieve with traditional methods.
Most content you will find on this topic is thinly veiled product marketing. This guide takes a different approach — focusing on what actually works, what fails, and how to get results that do not look obviously artificial. Because the technology is powerful, but it is not magic. The difference between convincing output and obviously fake imagery comes down to understanding how these systems work under the hood.
How the Technology Behind AI Jewelry Models Works
Understanding why your AI-generated jewelry images look fake starts with knowing which technology produced them. Not all AI approaches work the same way, and each handles the unique physics of jewelry differently. Three distinct methods dominate the space right now, and the one you choose directly affects the realism of your output.
Think of it this way: you would not use the same camera settings for a diamond ring and a cotton t-shirt. The same logic applies to AI. Jewelry photography ai demands specialized handling because metals reflect, gemstones refract, and fine details disappear at small scales. Let's break down each approach in plain terms.
Virtual Try-On vs Full Generative Models
The first approach is virtual jewelry try on technology. This method takes an existing photo of a real model and overlays your jewelry piece onto it. The AI analyzes the model's body position, skin tone, and lighting conditions, then composites the jewelry into the scene so it appears naturally worn. You are not creating a new person — you are dressing an existing one.
Virtual try-on works well when you already have strong model photography and simply want to swap products in and out. According to Grid Dynamics' research on generative AI strategies, this approach produces highly realistic images that adapt to the lighting conditions and scene in the source photo, offering realism that traditional 3D and AR solutions often struggle to achieve. The system preserves the model's identity, proportions, and pose while changing only what they are wearing.
The second approach is full generative models. Here, the AI creates an entire image from scratch — the model, the pose, the environment, and the jewelry all generated simultaneously. You provide a product photo and a text prompt describing what you want, and the system invents everything else. This gives you maximum creative flexibility but introduces more variables that can go wrong.
Full generative models shine when you need diverse model representations, varied poses, or lifestyle scenes that do not exist in your photo library. The tradeoff? The AI must "imagine" how your specific piece interacts with skin, hair, and clothing it also invented. That is a lot of guesswork happening at once, which is why full generative outputs often produce the most obvious artifacts around jewelry contact points.
How Inpainting and Compositing Differ
The third approach sits between the other two: inpainting and compositing. This method starts with a model image — either AI-generated or a stock photo — and uses AI to blend your product photo into a specific region. You mask the area where the jewelry should appear (a neck, wrist, or earlobe), and the AI fills that zone with your piece while matching the surrounding lighting and shadows.
Imagine you have a stock photo of a model with a bare neck. You select the neckline area, feed in your pendant photo, and the ai jewelry image generator reconstructs that region with your piece integrated naturally. The AI handles the transition between product and skin, generating shadows, reflections, and contact points that sell the illusion.
This compositing approach is popular because it gives you control over model selection separately from jewelry placement. You can curate exactly the model aesthetic you want, then add products afterward. However, the quality depends heavily on how well the inpainting algorithm understands metallic surfaces and transparent stones — which brings us to the core challenge.
Why Jewelry Is Harder Than Clothing for AI
Clothing is relatively forgiving for AI. Fabric drapes predictably, colors stay consistent across folds, and minor imperfections in texture generation go unnoticed at normal viewing distances. Jewelry offers no such mercy.
Three properties make jewelry uniquely difficult:
- Specular reflections on metal — Gold, silver, and platinum reflect their environment with mirror-like precision. AI models trained primarily on organic textures often produce what retouching professionals describe as "muddy, warped" metallic reflections because the AI lacks context about the 3D geometry of the piece.
- Gemstone refraction and transparency — Diamonds, sapphires, and emeralds bend light through their facets. The AI must simulate how light enters, bounces internally, and exits at different angles. Most ai jewellery generators approximate this poorly, producing stones that look flat or opaque.
- Fine detail at small scale — A necklace pendant might occupy only 5% of the total image area. Engravings, prong settings, and pave stones need to remain sharp at that scale, but generative models tend to smooth out details they cannot confidently reconstruct.
The fidelity problem varies by approach. Virtual try-on preserves your original product photo most faithfully since it composites the actual image data. Full generative models take the most creative liberty, often softening fine details. Inpainting falls somewhere in between, depending on how much of the original product data it retains versus regenerates.
| Approach | Realism | Speed | Input Requirements | Best Use Case | Jewelry Detail Preservation |
|---|---|---|---|---|---|
| Virtual Try-On | High — adapts to existing lighting | Fast (seconds) | Model photo + product photo | Swapping products on established model imagery | Strong — uses original product pixels |
| Full Generative | Variable — depends on prompt quality | Moderate (seconds to minutes) | Product photo + text prompt | Creating diverse lifestyle scenes from scratch | Weakest — AI reconstructs all details |
| Inpainting / Compositing | Medium-High — blends product into scene | Fast (seconds) | Model photo + product photo + mask region | Adding jewelry to curated model selections | Moderate — partial reconstruction at edges |
Each method has legitimate applications. Virtual try-on works best for catalog consistency where you want the same model across dozens of SKUs. Full generative models suit social media content where variety matters more than pixel-perfect accuracy. Inpainting gives you the most editorial control when you need specific model aesthetics paired with specific products.
The real skill is not picking one approach and sticking with it — it is knowing which method matches each jewelry type and use case. A diamond solitaire ring demands different handling than a chunky statement necklace, and the challenges multiply when you factor in how each piece physically interacts with the body.
Unique Challenges for Each Jewelry Type
A diamond solitaire and a layered chain necklace have almost nothing in common from an AI generation standpoint. Each jewelry category interacts with the human body differently, sits at a different scale, and presents its own physics problems that trip up even the best models. If you are feeding every piece through the same workflow and expecting uniform results, that is likely why some outputs look convincing while others look obviously wrong.
Here is what actually matters for each type — and how to set up your input photos to give the AI the best chance of producing realistic results.
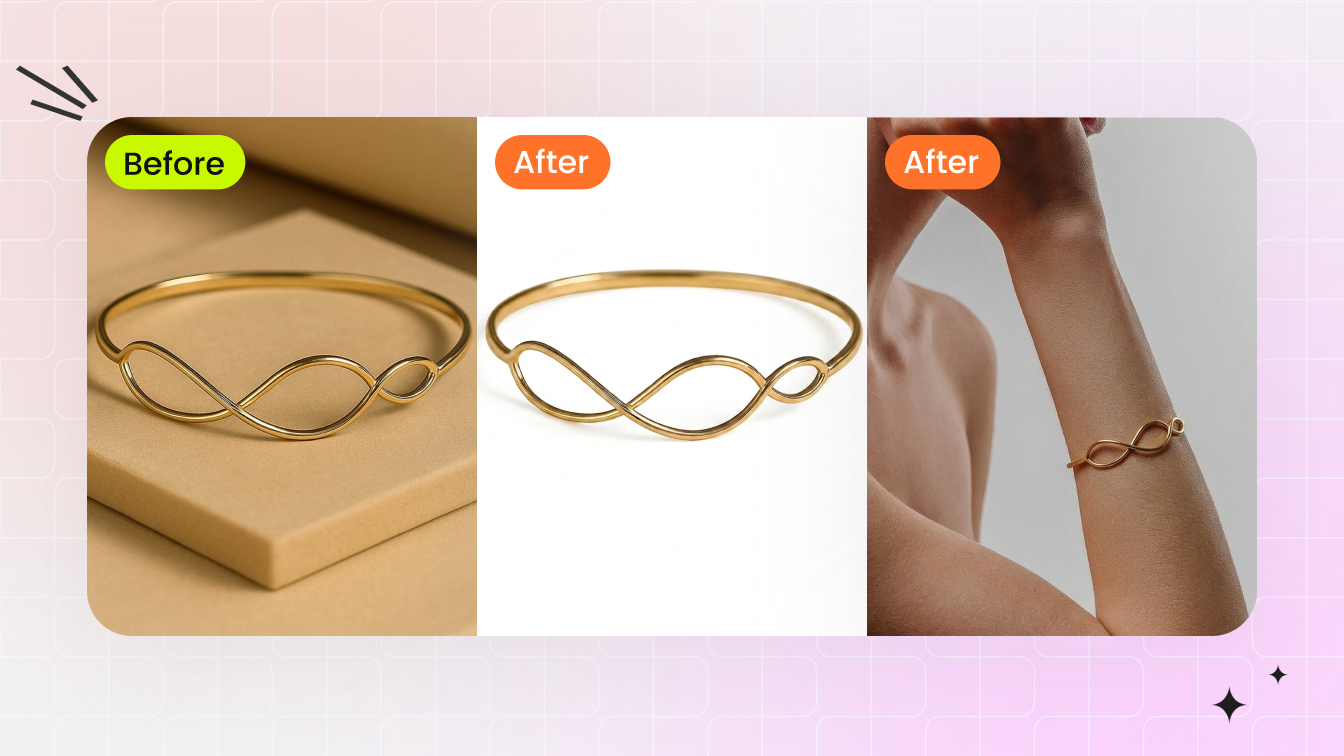
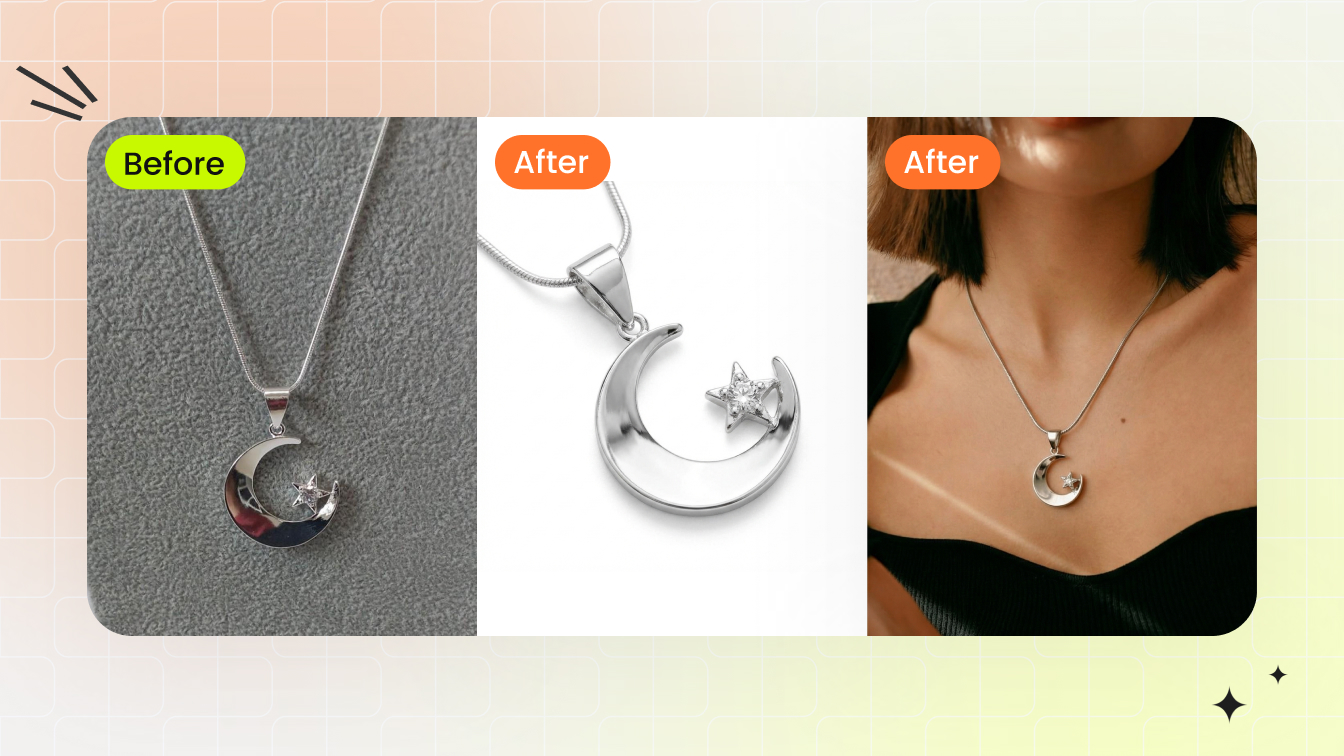
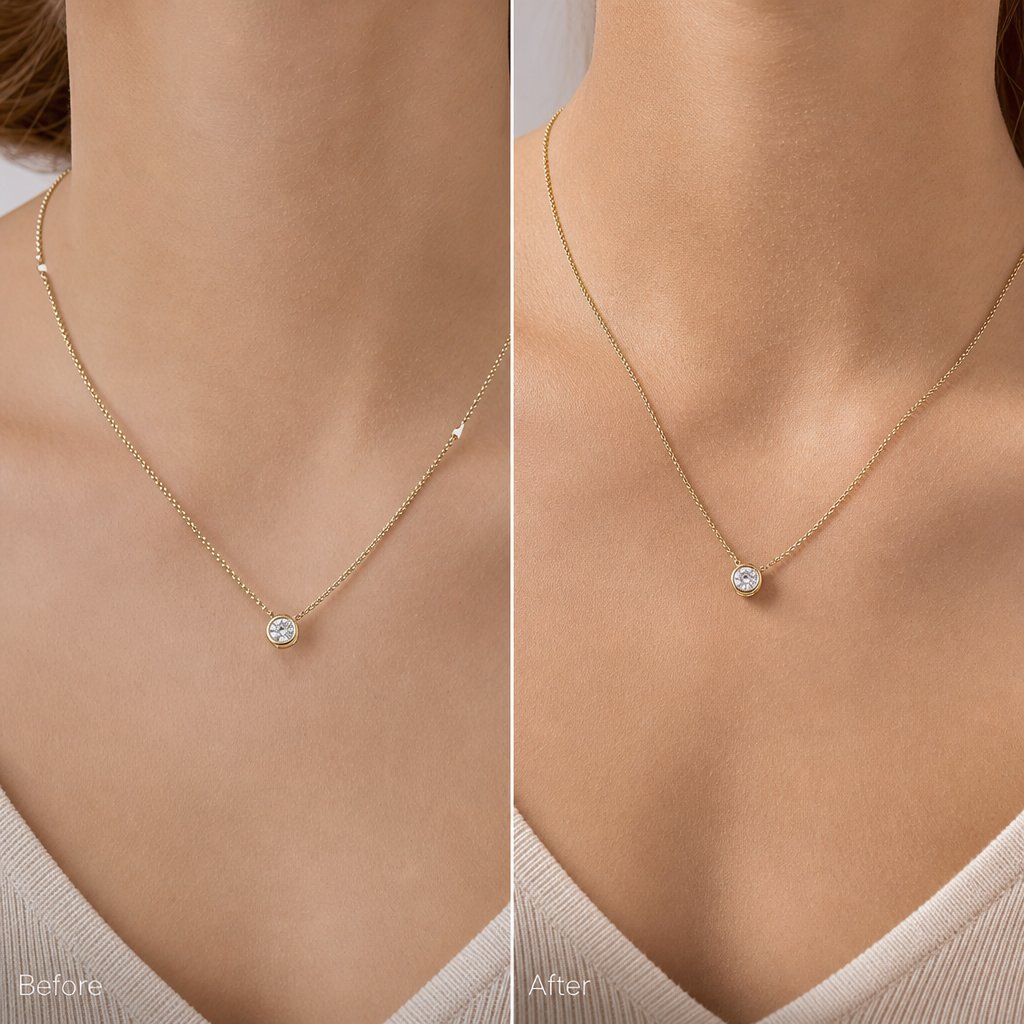
Necklaces and Pendants Need Accurate Draping
Necklaces are one of the most common pieces sellers generate on-model imagery for, and they are deceptively tricky. The AI needs to simulate how a chain follows the curve of a collarbone, how a pendant rests against skin at a natural angle, and how gravity affects the drape differently depending on chain length and weight.
The biggest failure mode? Chains that appear rigid or hover slightly above the skin rather than conforming to the body's contours. This happens when the AI lacks enough visual information about the chain's flexibility and weight distribution.
Even tools marketed as a 3d pendant creator online free often struggle with the transition point where metal meets skin — that subtle shadow and slight indentation that tells your eye the piece has real weight.
- Photograph necklaces laid flat in their natural drape shape, not stretched taut or coiled
- Capture a straight-on front view and a 3/4 angle that shows the pendant's depth and dimension
- Use a resolution of at least 2000px on the longest edge to preserve chain link detail
- Include the clasp area in your source photo — AI models use this to understand the piece's full geometry
- Shoot against a plain white or neutral background with soft, diffused lighting to avoid harsh reflections on the chain
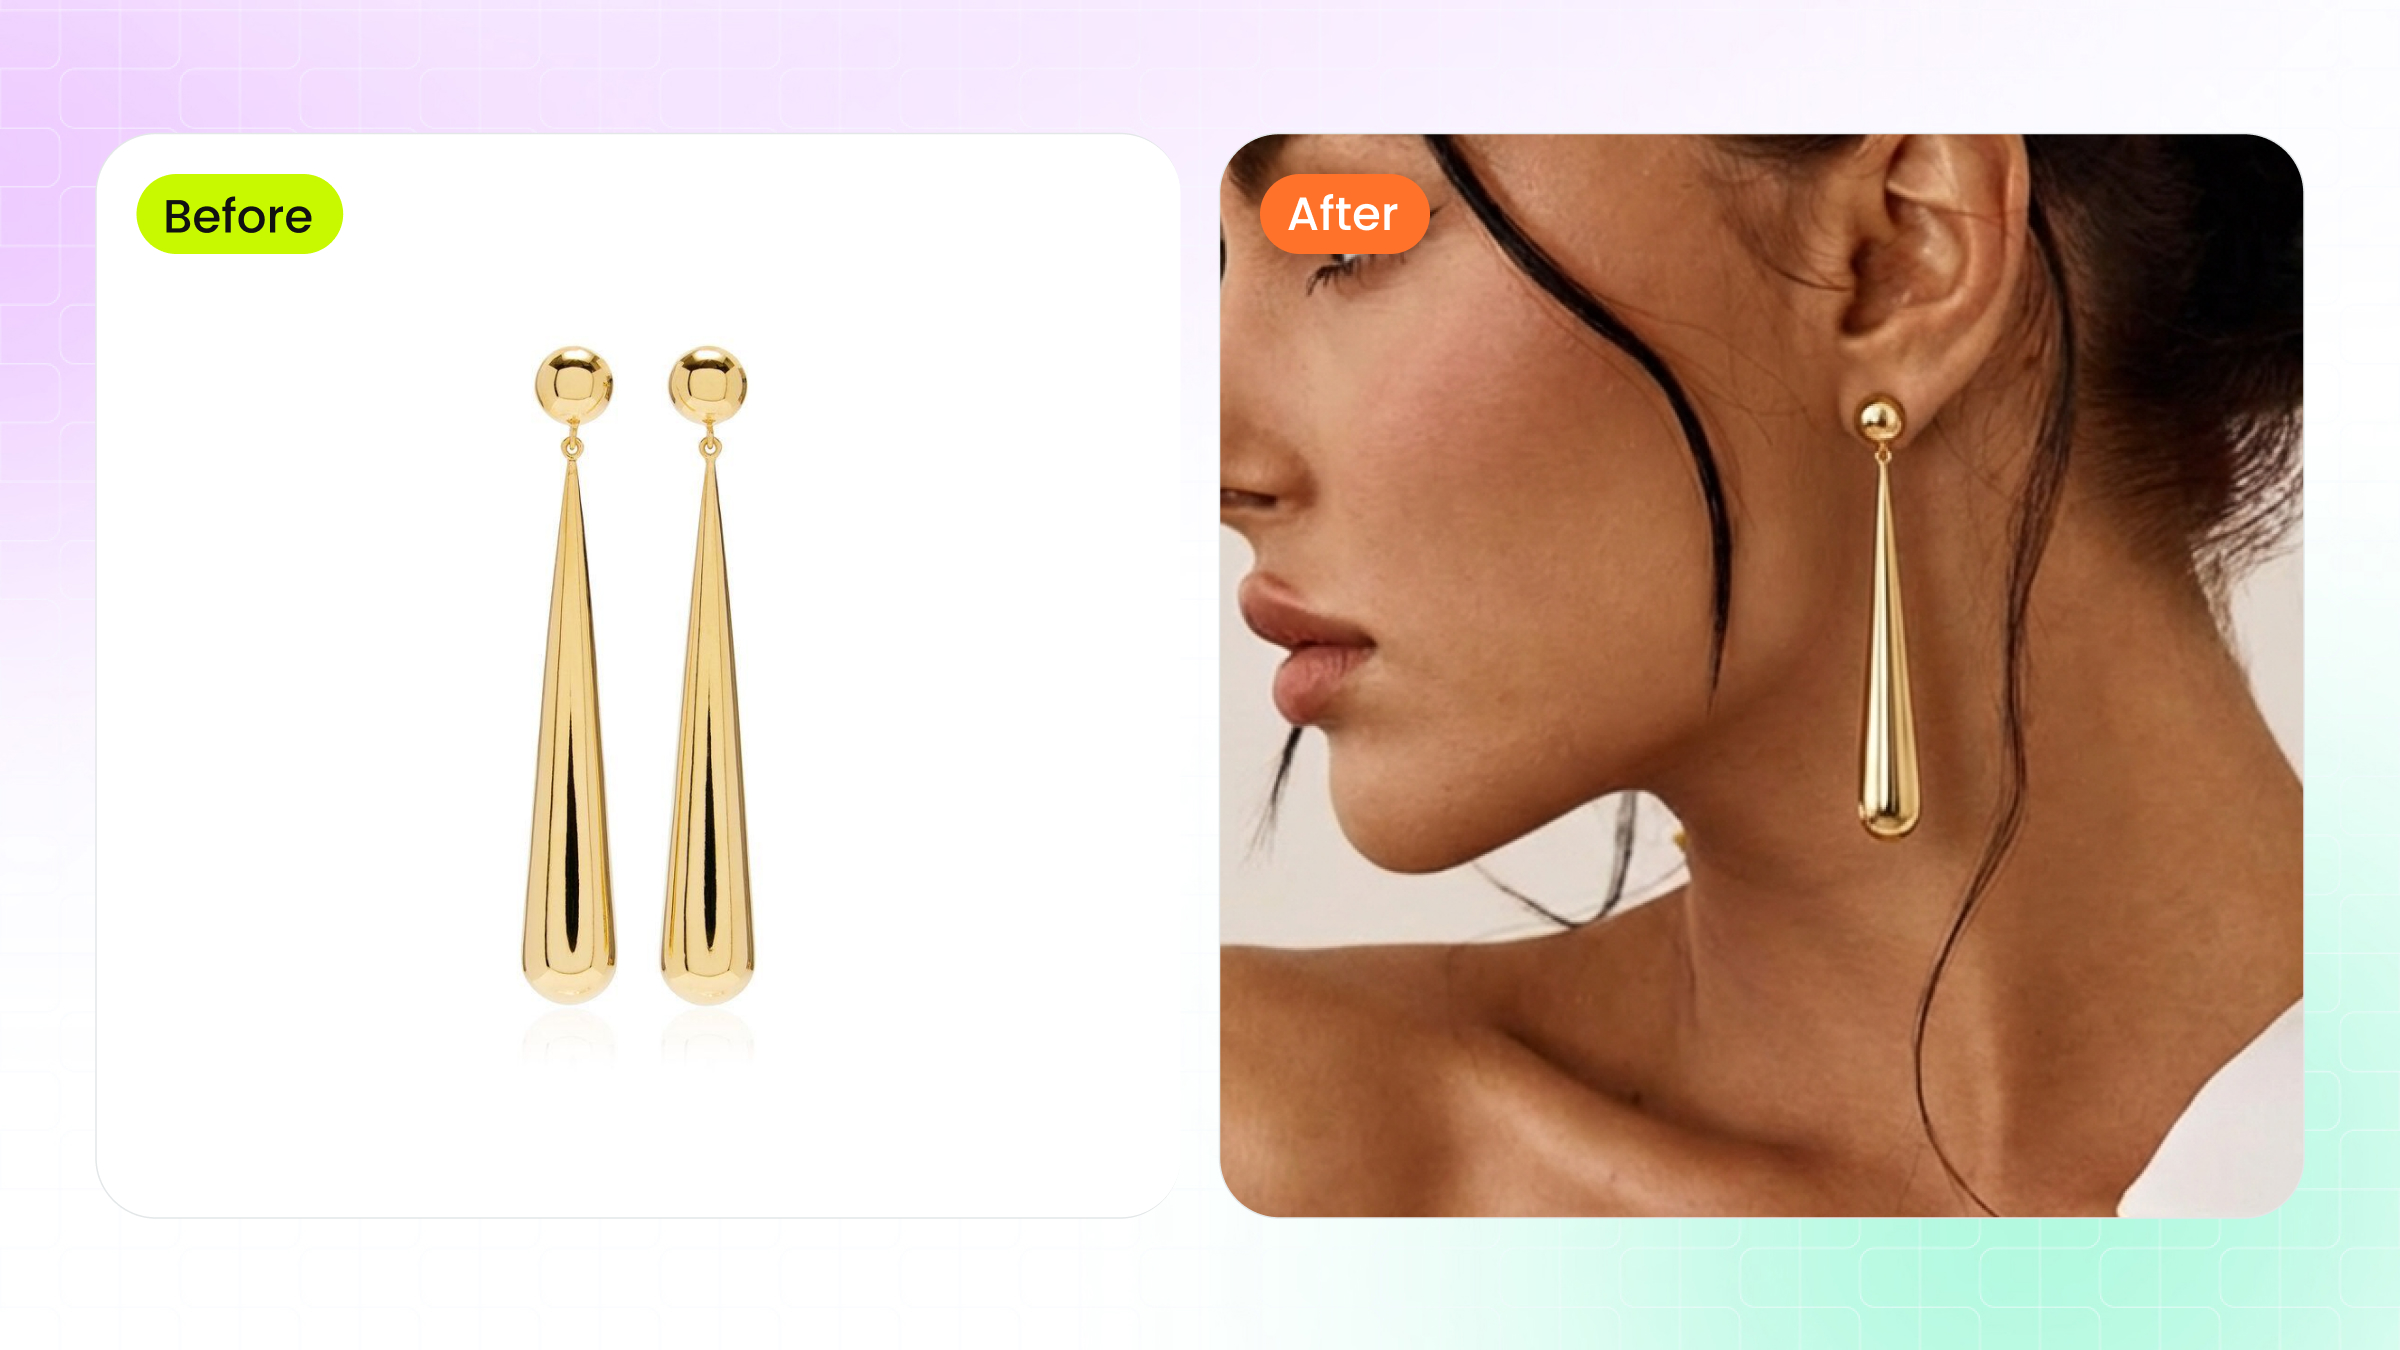
Earrings and the Challenge of Hair Interaction
Modelling earrings with AI introduces a problem that does not exist for any other jewelry category: hair. Earrings sit at the intersection of ear, jawline, neck, and hair — and the AI must correctly render all of those overlapping elements simultaneously. A stud partially hidden behind a strand of hair looks natural. A dangling earring that clips through hair or floats beside the earlobe does not.
When preparing photo earrings for AI generation, the angle of your source image matters enormously. Studs need a clean front-facing shot that shows the full face of the design. Drop earrings and chandeliers require a slight side angle that communicates their length and movement potential. Without that dimensional information, the AI defaults to flattening the piece against the model's head.
- Shoot studs from directly in front, slightly tilted to reveal any stone depth or texture
- Photograph dangling earrings hanging freely — not laid flat — so the AI understands their natural hang and proportions
- Capture both earrings in a single frame if they are a matched pair, giving the AI reference for symmetry
- Use a dark or contrasting background for light-colored metals so the AI can clearly detect edges
- Aim for at least 1500px resolution on the earring itself, not just the overall image
Rings and Bracelets at Small Scale
Rings present the most demanding scale challenge in AI jewelry generation. A ring occupies a tiny fraction of any on-model image, yet buyers zoom in expecting to see every facet, prong, and engraving clearly. The AI must also render convincing finger anatomy — correct proportions, natural skin folds at the knuckle, and realistic contact shadows where the band meets skin.
If you have experimented with any ai ring designer tool, you have probably noticed that outputs frequently get the scale wrong. A delicate band suddenly looks chunky, or a cocktail ring shrinks to look like a simple band. This happens because the AI lacks reliable size reference in the input photo. Shooting your ring next to a common object (like a coin) in a separate reference frame, or on a ring mandrel with visible size markings, helps some tools calibrate proportions correctly.
For anyone exploring free ai ring design generation, the input photo quality matters even more than it does for larger pieces. At small scale, every lost pixel translates to lost detail in the final output.
- Photograph rings at a 45-degree angle to show both the face and the band profile simultaneously
- Include a macro close-up of the stone setting — AI tools that support multiple input images use this for detail reconstruction
- Ensure your source image resolves individual prongs and pave stones clearly; if you cannot see them in the input, the AI will not generate them in the output
- Shoot on a plain background with no competing reflections — rings pick up environmental color casts easily
- For ai ring design workflows, provide both a top-down view and a side profile to communicate band thickness and stone height
Bracelets and watches share similar wrist-wrapping challenges but diverge in their detail requirements. Bracelets need to demonstrate flexibility — how links articulate, how a bangle sits at an angle on a tapered wrist. Watches add the complexity of a flat dial face that must remain legible and undistorted even when the wrist is angled.
- Photograph bracelets in a curved position (draped over a cylindrical object works well) rather than laid flat
- For watches, capture the dial face straight-on at high resolution separately from the band — some tools composite these independently
- Include a shot showing the clasp mechanism, as AI models use this to understand where the piece opens and closes on the wrist
- Shoot at minimum 2500px resolution for watches to preserve dial markings and subdial detail
The pattern across all jewelry types is consistent: the more dimensional information you provide in your source photos, the less the AI has to guess. And every guess the AI makes is a potential artifact in your final image. Getting your inputs right is half the battle — but even perfect source photos cannot overcome problems introduced during the generation process itself.
Preparing Your Jewelry Photos for AI Generation
Knowing which angles and dimensions each jewelry type needs is one thing. Actually capturing source photos that AI tools can work with reliably is another. The gap between a "good product photo" and a "good AI input photo" is wider than most sellers realize — especially for jewelry, where reflective metals and transparent stones introduce problems that a standard product shot never had to solve.
Whether you handle jewelry photo editing yourself or use a free jewelry editing photo service to clean up your images before uploading, the preparation steps below apply universally across tools and platforms.
Image Resolution and Background Requirements
Resolution is non-negotiable. Most AI generation tools perform best with input images between 2048x2048 and 4096x4096 pixels. According to Nightjar's technical breakdown, a default output of 2048x2048 meets the minimum requirements for Amazon (1,600px), Etsy (2,000px minimum, 3,000+ recommended for jewelry), and Shopify (2,048px recommended). Your source photo should match or exceed these dimensions so the AI has enough pixel data to reconstruct fine details.
Background removal is equally critical. A clean, transparent background lets the AI isolate your piece without confusing product edges with environmental clutter. If your jewellery photo editing workflow does not already include background removal, handle it before uploading. Shadows, colored backdrops, and reflective surfaces in the background bleed into the AI's understanding of your product's actual color and shape.
Handling Reflections and Transparent Stones
Here is where jewelry diverges sharply from every other product category. Metals are fully specular — as Light Tracer Render explains, they "virtually do not have their own color" because their appearance depends entirely on what light is bouncing off their surface. If your source photo captures the photographer's reflection, a colored ceiling, or uneven ambient light, the AI will reproduce those artifacts in the generated image.
Gemstones add a second layer of complexity. Transparent and faceted stones need high-contrast lighting to show brilliance and fire. Soft, diffused light — which works perfectly for matte products — kills the sparkle in diamonds and sapphires. You need a lighting setup that balances even illumination on the metal with enough directional contrast to activate the stone's optical properties.
For anyone using a jewelry photo editor to prep images after shooting, be careful not to over-smooth reflections or flatten highlights on stones. The AI uses those highlights as cues for material type. Remove them, and the system may interpret your diamond as plastic.
Preserving Fine Detail in Your Source Photos
Engravings, milgrain edges, pave settings, and filigree work all require macro-level sharpness in your input. If a detail is not clearly visible in your source photo, no AI tool will invent it accurately. The system can only preserve what it can detect.
Shoot at the highest resolution your camera supports, then crop rather than zoom digitally. Use a tripod and remote shutter to eliminate motion blur at macro distances. For pieces with intricate settings, consider focus stacking — capturing multiple frames at different focal points and compositing them into a single sharp image. This jewellery photo edit technique ensures the entire piece stays in focus, from the front prongs to the back of the band.
File format matters too. Save source images as PNG (lossless) rather than JPEG when possible. JPEG compression introduces blocky artifacts that become visible when the AI processes fine metallic textures. If file size is a constraint, use JPEG at maximum quality (95-100%) and avoid re-saving multiple times.
Step-by-Step Preparation Checklist
Before uploading to any AI generation tool, run through this sequence:
- Clean the piece thoroughly — fingerprints, dust, and tarnish show up amplified in AI outputs
- Shoot against a plain white or light gray background using soft, diffused lighting with at least one directional source for gemstone sparkle
- Capture at minimum 2048px on the longest edge; aim for 4000px+ if your camera supports it
- Photograph from multiple angles: front-facing, 3/4 view, and side profile at minimum
- Remove the background using a dedicated tool, leaving a transparent PNG
- Inspect the isolated image at 100% zoom — confirm that prongs, engravings, and stone facets are clearly resolved
- Check color accuracy against the physical piece under neutral lighting; adjust white balance if metals appear too warm or too cool
- Save as PNG for lossless quality, or JPEG at 95%+ quality if size constraints apply
- Verify final file dimensions meet your chosen AI tool's input requirements (most accept up to 4096x4096)
This preparation workflow adds ten to fifteen minutes per piece, but it eliminates the most common source of poor AI output: bad input data. A well-prepared source photo gives the AI accurate color information, clean edges for compositing, and enough resolution to preserve the details that make your jewelry look real rather than generated.
Even with perfect inputs, though, AI generation is not flawless. The next challenge is recognizing when the output has gone wrong — and knowing exactly what to fix.
Common Artifacts and How to Fix Them
You followed every preparation step, uploaded a clean source photo, and hit generate. The result looks almost right — but something is off. Maybe the necklace hovers a millimeter above the collarbone. Maybe the ring looks like it belongs on a different hand entirely. These are the artifacts that separate convincing AI output from images that make buyers scroll past.
Most tools and tutorials gloss over these failure modes. Here is an honest breakdown of what goes wrong when you add jewelry to photo with ai, why it happens, and what you can actually do about it.
When Jewelry Floats or Looks Disconnected
The most common giveaway is jewelry that does not appear to touch the model's body. A pendant hovers above the chest. A bracelet sits slightly outside the wrist's contour. An earring dangles at an angle that defies gravity. Your eye catches it instantly, even if you cannot articulate why.
This happens because the AI struggles to generate accurate contact points — the subtle visual cues where metal meets skin. In reality, a necklace creates a tiny shadow beneath the chain, slightly indents soft skin, and catches light differently at the contact edge. As professional retouchers note, AI algorithms tend to average out the harsh light transitions at these junctions, producing a flat, disconnected look instead of the micro-contrast that signals physical contact.
The fix depends on your workflow. If you are using a virtual try-on tool, providing a higher-resolution source photo with visible chain links helps the AI calculate drape physics more accurately. For full generative outputs, regenerating with a different model pose — particularly one where the body angle creates a clearer surface for the jewelry to rest against — often resolves the issue. In post-processing, manually painting a subtle contact shadow beneath the piece in Photoshop takes thirty seconds and sells the illusion immediately.
Scale Problems and How to Correct Them
Imagine a delicate 16-inch choker that suddenly looks like a chunky statement piece, or a cocktail ring that appears as thin as a simple band. Scale errors are the second most frequent artifact, and they erode buyer trust because the piece looks nothing like what will arrive in the mail.
The root cause is straightforward: most AI tools lack absolute size reference. Your source photo shows a ring, but nothing in that image tells the system whether it is 6mm wide or 12mm wide. Without that context, the AI guesses — and common mistakes documented by jewelry photography specialists confirm that wrong scale relative to the model is one of the top recurring issues across tools.
To correct this, include a known-size reference object (a coin or ruler) in a separate reference frame when your tool supports multi-image input. If it does not, choose model templates where the body part is clearly visible and proportionally standard — a hand with fingers spread, a neck without scarves or high collars. Some ai jewelry photo editor tools also offer manual scale sliders in post-generation editing. Use them. A two-minute adjustment is worth more than a customer return.
Detail Loss in Gemstones and Engravings
This is where AI hits its hardest ceiling. Fine pave settings blur into a smooth surface. Diamond facets lose their individual sparkle and flatten into a generic white blob. Engraved text becomes illegible. The piece looks like a rendering rather than a photograph.
The technical reason is that generative models smooth out details they cannot confidently reconstruct — and at the small scale jewelry occupies in a full-body or half-body shot, there simply are not enough output pixels to resolve every facet. The AI fills in what it cannot see with its best guess, which is almost always softer than reality. Industry analysis of AI photography limitations consistently identifies reflective surfaces and transparent elements as the categories where AI struggles most.
Your best defense is input quality. If your source photo clearly resolves individual prongs and stone facets, the AI has real data to work with rather than guessing. Beyond that, some tools allow you to add jewelry to photo with ai free of detail loss by using a separate high-resolution crop of the stone as a secondary input. Post-processing with a sharpening pass targeted only at the jewelry region — using a layer mask to avoid sharpening skin — recovers some lost crispness without introducing noise elsewhere.
Be honest with yourself about the limits. For pieces where the gemstone is the selling point — a two-carat solitaire, a vivid sapphire, an opal with visible play of color — AI-generated on-model imagery may not yet do the stone justice. In those cases, a traditional macro photograph of the stone paired with AI-generated lifestyle context shots gives buyers both the detail and the scale reference they need.
| Problem | Likely Cause | Recommended Fix |
|---|---|---|
| Jewelry floats above skin | AI cannot generate accurate contact shadows and skin indentation | Regenerate with a clearer body surface angle; add contact shadow manually in post-processing |
| Incorrect scale (too large or too small) | No absolute size reference in the source photo | Include a size reference object; use manual scale sliders; select model templates with visible proportional landmarks |
| Gemstone detail loss / flattening | Insufficient output resolution at jewelry's small image footprint | Provide a high-res macro crop as secondary input; apply targeted sharpening in post |
| Metal color shift (gold turns yellow-green, silver turns blue-gray) | AI trained on general product photography misinterprets metallic reflections | Use jewelry-specialized tools; correct white balance in source photo before uploading |
| Hair clipping through earrings | AI renders hair and jewelry on the same plane without occlusion logic | Select hair-up model templates for earrings; regenerate with a different hairstyle option |
| Unnatural skin-to-metal transition | AI averages out the high-contrast edge where metal meets skin | Use frequency separation in post to restore texture at contact edges; provide higher-resolution inputs |
Not every artifact requires starting over. Some need a quick post-processing touch. Others signal that your input photo was the real problem. And a few — particularly severe detail loss on hero gemstone pieces — indicate that traditional photography remains the right call for that specific SKU. Knowing which category your problem falls into saves hours of regeneration cycles and gets you to publishable output faster.
The harder question is not whether an image has artifacts, but whether the artifacts that remain actually matter for your intended use case. A lifestyle shot for Instagram stories tolerates imperfections that a hero product listing image cannot. Defining that threshold clearly is what separates efficient workflows from perfectionist spirals.
Evaluating Whether AI-Generated Results Are Good Enough
That threshold between "good enough" and "needs another pass" is not universal. It shifts depending on where the image will live, how long a viewer will look at it, and what action you want them to take. A quick Instagram Story viewed for three seconds on a phone screen has fundamentally different quality requirements than a hero product listing image that buyers zoom into before spending $2,000.
Without a clear framework, you end up in one of two traps: either publishing images with obvious flaws that erode trust, or burning hours chasing perfection on content that nobody will scrutinize. Here is how to define the bar for each context.
Quality Standards by Platform and Use Case
Think of AI-generated jewelry models as falling into three quality tiers based on their destination:
Social media content (lower bar) — Stories, Reels, pins, and feed posts are consumed quickly at small display sizes. Viewers scroll past in seconds. Minor artifacts like slightly soft gemstone detail or imperfect hair-to-earring interaction go unnoticed at 1080px wide on a phone. The priority here is visual impact and variety, not pixel-level accuracy. If the overall composition looks natural at a glance, it passes.
Product listing images (medium bar) — These are the images buyers zoom into on Etsy, Amazon, and Shopify before making a purchase decision. 67% of consumers say image quality matters more than product descriptions or customer ratings, so the stakes are real. Jewelry models in listing photos need accurate scale, correct metal color, and convincing skin-to-jewelry contact. Buyers compare what they see to what arrives — any mismatch triggers returns and negative reviews.
Advertising and editorial (highest bar) — Campaign imagery, lookbooks, and paid ads get the most scrutiny. They appear at larger sizes, often alongside professionally shot content, and represent your brand at its most polished. Model with jewellery photography at this tier needs to be indistinguishable from traditional studio work. Shadows must be physically accurate, gemstone refraction must look optically correct, and every contact point must sell the illusion of real weight and presence.
What to Check Before Publishing AI-Generated Images
Regardless of which tier you are targeting, run every output through these evaluation criteria. The difference between tiers is how strictly you enforce each one — not whether you check at all.
- Skin-to-metal contact — Does the jewelry appear to physically rest on the model's body? Look for subtle shadows beneath chains, slight skin compression under heavier pieces, and natural light transitions at the edge where metal meets skin. If the piece looks pasted on, it fails at every tier.
- Shadow consistency — Do the shadows cast by the jewelry match the overall lighting direction in the scene? A pendant casting a shadow to the left while the model's nose shadow falls to the right is an immediate tell. Check that shadow softness also matches — hard directional light produces crisp shadows, not diffused blurs.
- Lighting direction agreement — Highlights on the jewelry should come from the same angle as highlights on the model's skin, hair, and clothing. Mismatched lighting is one of the most common artifacts in composited imagery, and trained eyes — including those of your competitors' customers — catch it quickly.
- Gemstone refraction and sparkle — Do transparent stones show internal light play, or do they look flat and opaque? Real diamonds scatter light into spectral colors. Real sapphires show depth and saturation shifts across facets. If your stones look like painted dots, the image needs regeneration or post-processing.
- Proportional scale accuracy — Does the piece look the correct size relative to the model's body? Compare the generated image against a photo of the piece on a real hand or neck. If a 7mm band looks like 12mm in the output, buyers will feel deceived when the actual product arrives.
- Metal color fidelity — Is rose gold actually rose gold, or has it shifted toward copper or yellow? Does white gold read as silver or platinum? Metal color drift is subtle but cumulative across a catalog — inconsistency makes your brand look careless.
- Edge sharpness at the jewelry boundary — Zoom to 100%. Are the edges of the piece crisp and well-defined, or do they blur into the surrounding skin? Soft edges signal compositing to anyone who looks closely.
When to Reshoot vs When to Regenerate
Not every failed output means your source photo is the problem. Sometimes the AI simply produced a bad generation, and running it again with the same inputs yields a perfectly usable result. Other times, no amount of regeneration will fix an issue rooted in your input data.
Regenerate when the problem is pose-specific — the model's angle created an awkward interaction with the jewelry, or hair fell in an unfortunate position. These are random variables that change with each generation. Also regenerate when you see minor lighting inconsistencies or slight scale drift, since these vary between outputs from the same tool.
Reshoot your source photo when the problem is consistent across multiple generations. If every output shows the same color shift, the same detail loss, or the same edge artifacts, the AI is faithfully reproducing a limitation in your input. Common reshoot triggers include: insufficient resolution on fine details, environmental reflections baked into metallic surfaces, incorrect white balance making gold appear greenish, and backgrounds that were not fully removed leaving color contamination at edges.
A practical rule: if three consecutive generations from the same source photo all exhibit the same flaw, the source photo is the bottleneck. Go back to your preparation checklist and reshoot. If the flaw appears in one out of three generations, simply pick the best output and move on.
For jewelry try on tools specifically, failed outputs often trace back to a mismatch between the piece's visual weight and the model template selected. A heavy statement necklace on a model with a very thin neck, or a delicate chain on a model photographed from too far away — these mismatches produce unconvincing results regardless of how many times you regenerate. Selecting the right model context is as important as preparing the right product photo.
Defining your quality bar upfront — before you start generating — keeps your workflow efficient. You will know immediately whether an output passes, needs one more attempt, or requires going back to the source. That clarity is what turns AI jewelry generation from a frustrating guessing game into a repeatable production process. And once you have that process dialed in, the next decision becomes which tool best supports it at the volume you need.
How to Choose the Right AI Jewelry Model Tool
You have your quality bar defined, your source photos prepared, and a clear sense of which artifacts you will and will not tolerate. The remaining variable is the tool itself. And this is where most sellers waste the most time — bouncing between platforms, burning free credits on tools that were never designed for jewelry, and settling for "good enough" output from a system that was built for t-shirts.
The ai jewelry design software market has exploded over the past year. Dozens of platforms now claim to handle on-model generation, but their capabilities vary enormously depending on whether they were purpose-built for jewelry or adapted from general fashion AI. Choosing well means understanding what actually differentiates these tools beyond their marketing pages.
Key Criteria for Comparing AI Jewelry Tools
When you are evaluating platforms side by side, six criteria matter more than anything else. Ignore feature counts and flashy demos — focus on these:
Jewelry type specialization — Does the tool offer dedicated modes for rings, earrings, necklaces, and bracelets? A platform with specific body-part templates (hand close-ups, ear crops, neck shots) will produce dramatically better results than one that only generates full-body images where your ring occupies 3% of the frame. As the 2026 market analysis from Photta highlights, the biggest challenge in AI jewelry generation is hand anatomy — general tools frequently produce six-fingered hands or unnatural joints that immediately destroy credibility.
Output resolution and macro capability — Jewelry demands macro-level detail. If a tool maxes out at 1024x1024 pixels, your gemstones will look like colored blobs when buyers zoom in. Look for platforms that generate at 2K or 4K resolution, particularly for close-up hand and ear shots where skin texture and stone facets both need to be sharp.
Volume handling and batch processing — A tool that produces one stunning image per hour is useless if you manage a 500-SKU catalog. Evaluate how many generations you can run simultaneously, whether the platform supports batch uploads, and how credits or pricing scale with volume. The true cost per image at your expected volume matters more than the headline subscription price.
Model customization — Can you select skin tone, age, and ethnicity to match your target demographic and complement your metal types? Yellow gold photographs differently against warm skin than cool skin. A platform that locks you into a single model look limits your creative range and your ability to represent diverse customers.
Turnaround speed — According to Colabz AI's buyer's guide, the sweet spot for AI product photography is 30 to 60 seconds per image at high quality. Anything slower than two minutes hurts iteration speed. Anything faster than 15 seconds may signal quality compromises. For jewelry specifically, expect slightly longer generation times than clothing due to the complexity of rendering reflective surfaces.
Budget alignment — Pricing models vary wildly: per-image credits, monthly subscriptions with generation caps, enterprise contracts, and free tiers with watermarks. Calculate your actual cost per usable image (factoring in regenerations for failed outputs) rather than comparing sticker prices. A tool at $0.50 per generation that nails jewelry on the first try is cheaper than a $0.10 tool that requires five attempts.
Specialized Jewelry Tools vs General AI Generators
This is the single most important distinction in the market, and it is the one most sellers get wrong. General-purpose AI image generators — Midjourney, DALL-E, Stable Diffusion — produce visually compelling images across thousands of categories. They are excellent for mood boards, social content, and creative exploration. But they were not trained specifically on jewelry physics, and it shows.
Comparative testing across platforms consistently reveals that general tools struggle with three jewelry-specific requirements: correct prong counts in settings, physically accurate metal reflections, and proportional accuracy at small scale. Midjourney, for example, produces dramatic lighting and beautiful composition but frequently renders structurally impossible settings. DALL-E 3 handles simple designs well but falters on complex multi-stone compositions.
Specialized platforms solve these problems by training their models specifically on jewelry data. They understand that a cathedral setting has six prongs, that 18K rose gold reflects differently than 14K yellow gold, and that a 2mm band should not look like a 5mm band on a model's finger. The artificial intelligence jewelry design capabilities built into these specialized tools translate directly to fewer failed generations and less post-processing work.
Does that mean general tools are useless for jewelry sellers? Not entirely. If you are exploring 3d jewelry design online free for creative inspiration or generating lifestyle mood boards where the jewelry is a small accent in a larger scene, general tools can work. But for product listing images and catalog photography where accuracy drives purchase decisions, specialized platforms pay for themselves in saved time and reduced returns.
The distinction also matters for how well the tool handles your specific input. A jewelry-specialized platform expects product photos shot against white backgrounds with specific lighting. It knows what a flat-lay necklace looks like and how to interpret that into a draped-on-model result. A general tool treats your jewelry photo the same way it treats a handbag or a pair of shoes — with no category-specific intelligence applied to the generation process.
Matching Your Workflow Needs to the Right Platform
Your ideal tool depends on where your bottleneck actually sits. A solo Etsy seller launching five pieces per month has different needs than a DTC brand refreshing 200 SKUs quarterly. Here is how to match your situation to the right platform type:
For high-volume catalog work where consistency across hundreds of SKUs matters most, you need a platform with batch processing, consistent model templates, and fast turnaround. Snappyit's Jewelry Model tool fits this profile — it is built as a conversion-focused destination for sellers actively looking to generate scalable on-model jewelry imagery, with workflows designed for DTC brands and content teams managing large catalogs. The platform handles the volume and consistency requirements that general tools struggle with at scale.
For AR and interactive try-on experiences where customers see jewelry on themselves in real time, enterprise platforms like Perfect Corp lead the market. Their real-time tracking handles dangling earring physics and head movement, but the output looks more like a filter than a photograph — useful for engagement, less useful for product pages.
For size and scale visualization where reducing returns is the primary goal, tools like Tangiblee offer interactive comparison features that let buyers see how large a ring actually looks on a hand relative to familiar objects.
For creative exploration and mood boards where artistic quality matters more than technical precision, general tools like Midjourney produce stunning editorial-style imagery. Just do not expect the output to be production-accurate or suitable as your primary listing photo. Anyone searching for an online jewellery design tool for brainstorming will find value here, even if the results need refinement before commercial use.
The table below maps these criteria against platform types so you can quickly identify which category matches your workflow. Tools designed specifically for ai jewelry design consistently outperform general solutions on the metrics that matter most for selling jewelry online — accuracy, resolution, and jewelry-type specialization.
| Tool / Platform Type | Jewelry Specialization | Volume Handling | Speed per Image | Jewelry Type Support | Best For |
|---|---|---|---|---|---|
| Snappyit Jewelry Model | High — purpose-built for on-model jewelry | Scalable batch processing | Fast (seconds) | Necklaces, earrings, rings, bracelets | DTC brands and content teams needing scalable catalog imagery |
| Specialized jewelry AI (e.g., Photta) | High — macro detail, body-part specific | Credit-based scaling | Fast (seconds) | Neck, ear, hand, wrist close-ups | High-resolution editorial and listing photos |
| AR try-on platforms (e.g., Perfect Corp) | High — real-time tracking | Enterprise infrastructure | Real-time | Earrings, necklaces, rings | Interactive customer engagement on-site |
| General AI generators (e.g., Midjourney, DALL-E) | Low — no jewelry-specific training | Subscription-based | 30-90 seconds | All types, but with accuracy tradeoffs | Mood boards, social content, creative exploration |
| 3D visualization tools (e.g., Style.me) | Medium — requires 3D files | Custom workflows | Variable | Rings, bracelets (3D asset dependent) | Brands with existing 3D jewelry design online free or paid CAD workflows |
A few practical tips before you commit to any platform. First, always run your actual product photos through a free trial before purchasing credits or subscriptions. Marketing demos show best-case outputs — your mileage depends on your specific jewelry types and photo quality. Second, test the tool on your hardest piece, not your easiest. If it handles a multi-stone cocktail ring convincingly, simpler pieces will be no problem. Third, evaluate the failed outputs as much as the successes. How many generations does it take to get one usable image? That ratio determines your real cost per publishable photo.
The right tool eliminates friction between your product photos and your published content. The wrong one adds a new bottleneck — one where you spend more time regenerating and fixing than you would have spent on a traditional shoot. Choose based on your actual workflow needs, not on which platform has the most impressive demo reel. Once you have the right tool locked in, the final piece is building a repeatable process around it that scales with your catalog.
Building a Scalable AI Jewelry Photography Workflow
Picking the right tool solves one problem. Running it efficiently across your entire catalog — without quality drifting, timelines slipping, or your team burning out on manual regeneration cycles — solves the real one. The difference between a seller who generates ten images a week and a brand producing hundreds comes down to workflow design, not tool capability.
Jewelry ai workflows break down the moment you treat each SKU as a one-off creative project. Instead, think of on-model generation as infrastructure. Define your inputs once, standardize your process, and let the system scale.
Batch Processing and Catalog Consistency
Consistency is what makes a product catalog feel like a brand rather than a random collection of images. When buyers browse your store, every listing should share the same lighting mood, model aesthetic, and compositional style. Achieving that manually across 200 SKUs is exhausting. Achieving it through batch processing is straightforward.
Group your products by type before generating. All necklaces in one batch with the same model template and neck angle. All rings in another batch with a consistent hand pose and skin tone. This prevents the visual whiplash that happens when you generate each piece individually with different settings. According to Cylindo's research on scalable AI imagery, the brands that succeed at scale treat their visual system as structured product truth — defining geometry, lighting standards, and composition rules that repeat across every generation rather than leaving those decisions to chance.
Save your generation settings as presets: model type, background style, lighting direction, crop ratio. When new products arrive, you slot them into existing presets rather than reinventing the creative direction each time. This is where ai for jewellery generation shifts from a creative exercise to a production system.
Testing Creative Variations at Scale
Batch consistency does not mean creative stagnation. The real advantage of AI generation is the ability to test variations at a fraction of traditional costs. Want to see how your summer collection looks on three different model aesthetics? Generate all three in the time it would take to book one reshoot.
A practical approach: for every new collection, generate your standard catalog images first using your locked-in presets. Then run a second pass with one variable changed — a different background, a lifestyle context, or an alternative model pose. Compare engagement metrics across the two sets. Over time, you build data on which creative choices actually drive clicks and conversions for your specific audience.
Teams managing high-volume catalogs can use Snappyit's Jewelry Model tool as a practical starting point for this kind of variation testing. Its batch workflows let content teams generate multiple creative directions per SKU without multiplying production time, which is particularly useful during seasonal launches when you need fresh imagery across dozens of pieces simultaneously.
Integrating AI Imagery Into Your Content Pipeline
Generated images are only useful if they flow smoothly into your existing publishing workflow. That means connecting your AI generation step to whatever comes next — whether that is a jewelry description generator for listing copy, a DAM system for asset management, or direct upload to your marketplace channels.
The integration sequence matters. Workflow research from Rewarx shows that ecommerce brands using AI photography reduce listing creation time by 73% — but only when the pipeline is end-to-end. If you generate images in one tool, manually download them, rename files, resize for each platform, and upload individually, you have eliminated the photoshoot bottleneck only to create a new one in post-production.
Here is a recommended workflow sequence that minimizes manual handoffs from preparation through publishing:
- Prepare source photos in batches by jewelry type, following your standardized shooting checklist
- Upload each batch to your AI generation tool with saved presets for model, lighting, and composition
- Generate initial outputs — run three variations per SKU to give yourself selection options
- Review outputs against your quality tier checklist (social, listing, or editorial standard)
- Flag any images that need regeneration or post-processing; batch those corrections together
- Export approved images at platform-specific dimensions (1:1 for Amazon, 4:5 for Instagram, 3:4 for Shopify)
- Feed final assets into your content pipeline — DAM, PIM, or direct marketplace upload
- Pair images with product copy and metadata; use a jewelry description generator if managing volume
- Publish across channels and tag images with generation settings for future reference
- Track performance metrics per creative variation to inform your next batch's presets
That last step closes the loop. Every generation cycle teaches you something about what works for your audience. Over time, your presets get sharper, your rejection rate drops, and your cost per publishable image decreases. The brands that treat this as a feedback system — not a one-time setup — are the ones that scale without quality degradation.
AI-generated jewelry imagery is not a magic button. It is a production tool that rewards structured thinking, consistent inputs, and honest quality evaluation. Get those fundamentals right, and the technology handles the rest at whatever volume your catalog demands.
Frequently Asked Questions About AI Models Wearing Jewelry
1. Why does my AI-generated jewelry look like it's floating above the model's skin?
Floating jewelry happens because AI struggles to generate accurate contact points where metal meets skin. Real jewelry creates micro-shadows, slight skin indentation, and unique light transitions at the contact edge. To fix this, try regenerating with a model pose that offers a clearer body surface for the piece to rest against. You can also add a subtle contact shadow manually in post-processing, which takes about 30 seconds and immediately sells the illusion of physical weight.
2. What is the best image resolution for AI jewelry model generation?
Most AI generation tools perform best with input images between 2048x2048 and 4096x4096 pixels. This resolution meets the minimum requirements for major marketplaces like Amazon (1,600px), Etsy (2,000px minimum), and Shopify (2,048px recommended). For rings and small pieces where fine detail matters most, aim for 4000px or higher on the longest edge. Always save source images as lossless PNG files to avoid JPEG compression artifacts that become visible when the AI processes fine metallic textures.
3. Should I use a specialized jewelry AI tool or a general AI image generator like Midjourney?
For product listing images where accuracy drives purchase decisions, specialized jewelry AI tools consistently outperform general generators. General tools like Midjourney produce visually striking compositions but frequently render structurally impossible settings, incorrect prong counts, and inaccurate metal reflections. Specialized platforms like Snappyit's Jewelry Model tool (https://snappyit.ai/jewelry-model) are trained specifically on jewelry data, so they understand how different metals reflect light, how settings are constructed, and how pieces should scale relative to the body. Use general tools for mood boards and creative exploration, but rely on specialized platforms for commercial catalog imagery.
4. Which jewelry types are hardest for AI to generate realistically?
Rings are the most demanding because they occupy a tiny fraction of the image yet buyers expect to see every facet and prong clearly. The AI must also render convincing finger anatomy with correct proportions and natural skin folds. Earrings rank second in difficulty due to hair interaction challenges, where strands must correctly overlap or sit behind the piece. Necklaces require accurate draping physics along the collarbone. Each type needs specific input photo angles and preparation to give the AI enough dimensional information to avoid guessing.
5. How many AI generations does it typically take to get a usable jewelry image?
With well-prepared source photos and a jewelry-specialized tool, you can expect one usable image from every two to three generations. Poor input photos or general-purpose tools may require five or more attempts per usable output, dramatically increasing your real cost per image. A practical approach is to generate three variations per SKU, review against your quality checklist, and select the best. If three consecutive generations from the same source photo all show the same flaw, the source photo is the bottleneck and needs reshooting rather than further regeneration.