
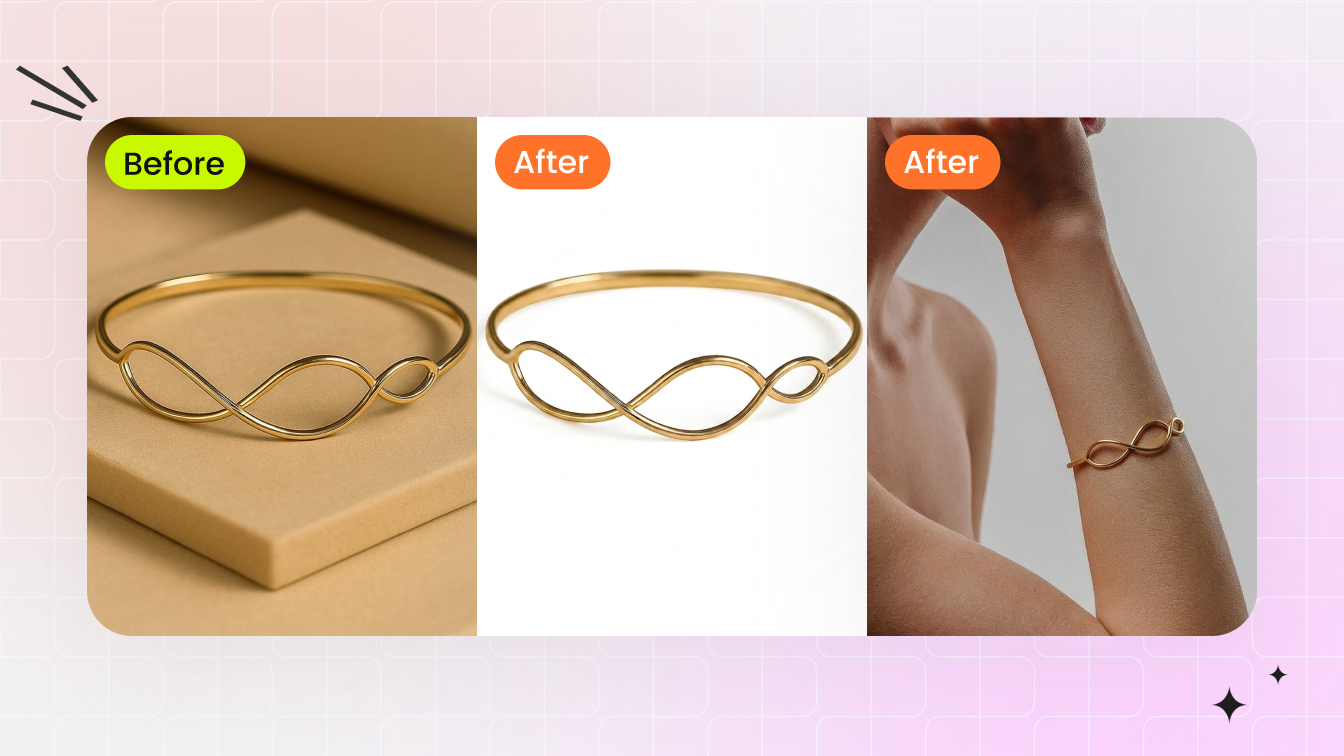

When shoppers cannot hold a ring or inspect a necklace in person, the listing gallery has to close the distance. The main image must make the finish, stones and craftsmanship easy to trust at a glance. The rest of the gallery should answer what a white-background shot cannot: How large does the piece look? Who is it for? What kind of outfit or occasion does it suit?
That puts jewelry sellers on two production tracks. First, turn phone or supplier photos into clean product images with precise edges, believable shine and natural shadows. Then create model-worn and lifestyle images with a model and setting that fit the audience. Both tracks need to preserve the product, and the final set should feel like it came from one shoot—not a collection of unrelated AI generations. Our guide to traditional vs AI jewelry photography explains how this differs from a studio-led production process.
This guide compares each tool against that real listing workflow using the same bracelet for product-photo cleanup and the same earrings for model presentation. The observations below are limited to those test cases; they describe what the visible outputs show rather than assuming that every product or jewelry type will behave identically.
Why jewelry photos are uniquely difficult
Jewelry combines several problems that are easier to hide in larger or less reflective products. Polished gold, silver and platinum mirror every light source around them, while gemstones need controlled highlights to show brilliance without losing their real color. A brighter exposure alone can turn metal white, flatten a stone or make the product look different from what the customer receives.
- Reflections need control: the editor has to preserve a polished surface without leaving blown highlights, dark camera reflections or inconsistent lighting.
- Gemstone brilliance is material-specific: diamonds, colored stones and pearls respond differently to contrast, clarity and color adjustments.
- Dust becomes product detail: fingerprints, lint and micro-scratches become obvious when a small item is enlarged for a marketplace listing.
- Fine structures challenge cleanup: chains, prongs, clasps, holes and open settings can disappear or collect background artifacts during automated masking.
- On-model production adds coordination: rings, earrings, necklaces and bracelets require different body areas, poses and framing, while model fees, scheduling, wardrobe and multiple skin tones increase the cost of a traditional shoot.
That is why a jewelry workflow should be judged on product fidelity as well as visual polish. A clean image is not useful if the edit changes the setting, stone shape, chain structure or scale of the piece.
What jewelry sellers actually need from an editing tool
Create a product image shoppers can trust
The main listing image has to look clean enough for a marketplace and detailed enough for a customer to inspect. A complete jewelry photo retouching workflow should go beyond one-click background removal and still leave the result looking like the real product.
- A clean background: difficult edges around chains, prongs, stones and fine gaps should survive the edit.
- Convincing shine: metal and gemstones should look polished, not overexposed, recolored or plastic.
- A natural shadow: the piece should feel grounded on the surface rather than pasted onto the page.
- Accurate product details: stone shape, setting, engraving, chain structure and proportions must stay true to the item being sold.
Help shoppers picture the piece in real life
Once the main image earns attention, supporting images need to give the jewelry scale, personality and a place in the shopper’s life. A useful tool must do more than generate one attractive model photo.
- The right model: the face, hand, ear, neck or wrist should suit the jewelry type and the customer the brand wants to reach.
- The right setting: wardrobe, pose, lighting and background should support the product instead of competing with it.
- A believable fit: the jewelry needs to sit naturally, at the right scale, without drifting away from the original design.
- A coherent image set: model identity, visual style, color treatment and product details should hold together from one image to the next.
AI jewelry retouch vs background removal
Background removal isolates the jewelry from its original scene and usually returns a transparent or replacement background. It does not necessarily correct dust, uneven metal reflections, dull gemstones, leftover edge contamination or the lack of a natural contact shadow.
AI jewelry retouch should cover that cleanup and finishing layer while protecting the commercial truth of the product. The goal is to refine fine edges, balance shine, preserve metal and gemstone color, remove distracting surface defects and ground the item with a believable shadow—without inventing a new setting, stone, engraving or proportion.
Some sellers may prefer one platform that covers both tasks; others may combine a retouching tool with a model-image specialist. In this test, we judged whether each platform covered the two tasks and whether the visible result preserved enough product detail for an ecommerce listing.
Comparison at a glance
This table summarizes the hands-on results from the shared bracelet and earring inputs. The ranking reflects these specific outputs and the breadth of each tested workflow.
| Tool | Direction 1: product photo retouching | Direction 2: model presentation | Test conclusion |
|---|---|---|---|
| Snappyit | Dedicated Jewelry Retouch produced a clean background, natural shadow, coordinated lighting and improved shine while preserving fine product details. | Dedicated Jewelry Model offered category-specific templates and generated a clear on-model image with high earring fidelity. | Best overall |
| SellerPic | No jewelry retouch workflow was found. Background Remover was the nearest option, but the bracelet cutout was incomplete in this test. | Virtual Try-On (Accessories) placed the earrings on a model, but changed their oval shape to a rounder design. | Limited fidelity |
| Photoroom | Photo Beautifier was not jewelry-specific, but its bracelet result was broadly comparable to Snappyit Jewelry Retouch in this sample. | Fashion Model kept the earring design comparatively accurate and presented it clearly on the model. | Runner-up |
| Claid.ai | No jewelry retouch workflow was found. Background removal left an uneven bracelet cutout and did not provide jewelry-specific finishing. | AI Fashion Models returned a full-body image in which the earrings were too small to inspect reliably. | Apparel-style output |
These findings come from one bracelet retouch test and one earring model-presentation test per platform. They are useful for comparing the visible outputs, but they are not a substitute for testing a seller’s own catalog.
How we compared the tools
Each product was evaluated with shared inputs and the same two output goals. That keeps the comparison focused on image quality and workflow fit rather than differences between source photos.
Shared source material
- The retouch test used the same layered gold bracelet with fine links, a clasp and small colored beads.
- The model-presentation test used the same pair of oval, layered gold earrings with a woven top detail.
- The visible output was judged against the source reference shown inside each product’s result screen.
- No manual Photoshop correction was included in the outputs shown here.
- This round did not test rings, necklaces, multiple related generations or repeatability.
Direction 1 criteria: product photo retouching
For more context on the techniques behind these checks, compare our guides to AI jewelry retouching and how to retouch jewelry in Photoshop.
| Criterion | What to inspect | What to record |
|---|---|---|
| Background removal and cleanup | Edges around chains, prongs, holes, transparent stones and reflective surfaces | Artifacts, missing details, leftover background and whether manual cleanup is needed |
| Shine and material rendering | Metal luster, gemstone clarity, highlight control and color accuracy | What improved, what became artificial and whether the material still matches the source |
| Natural shadow | Contact point, direction, softness, opacity and consistency with the background | Whether the item feels grounded, floating or pasted onto the scene |
| Product fidelity | Stone shape, setting, engraving, links, clasps and overall proportions | Any invented, removed or distorted product detail |
Direction 2 criteria: model presentation
| Criterion | What to inspect | What to record |
|---|---|---|
| Model choice | Model type, skin tone, pose, body area and fit with the intended customer | Available control, suitability and whether a custom model can be used |
| Scene choice | Wardrobe, background, lighting, styling and fit with the jewelry | Available control and whether the scene competes with or supports the product |
| Placement and product fidelity | Position, scale, perspective, contact with skin and preservation of the original design | Any floating, clipping, warping, scale error or product-detail drift |
| Set consistency | Same model identity, pose language, color, lighting, styling and jewelry details across outputs | What changes between images and whether the set can be published together |
Workflow facts for a follow-up test
- Number of steps and amount of control available before generation.
- Generation time, retry rate and whether batch production is possible.
- Output resolution, file format and watermark restrictions.
- Credits used, tested plan and effective cost for a complete product-image set.
Snappyit

Direction 1: product photo retouching
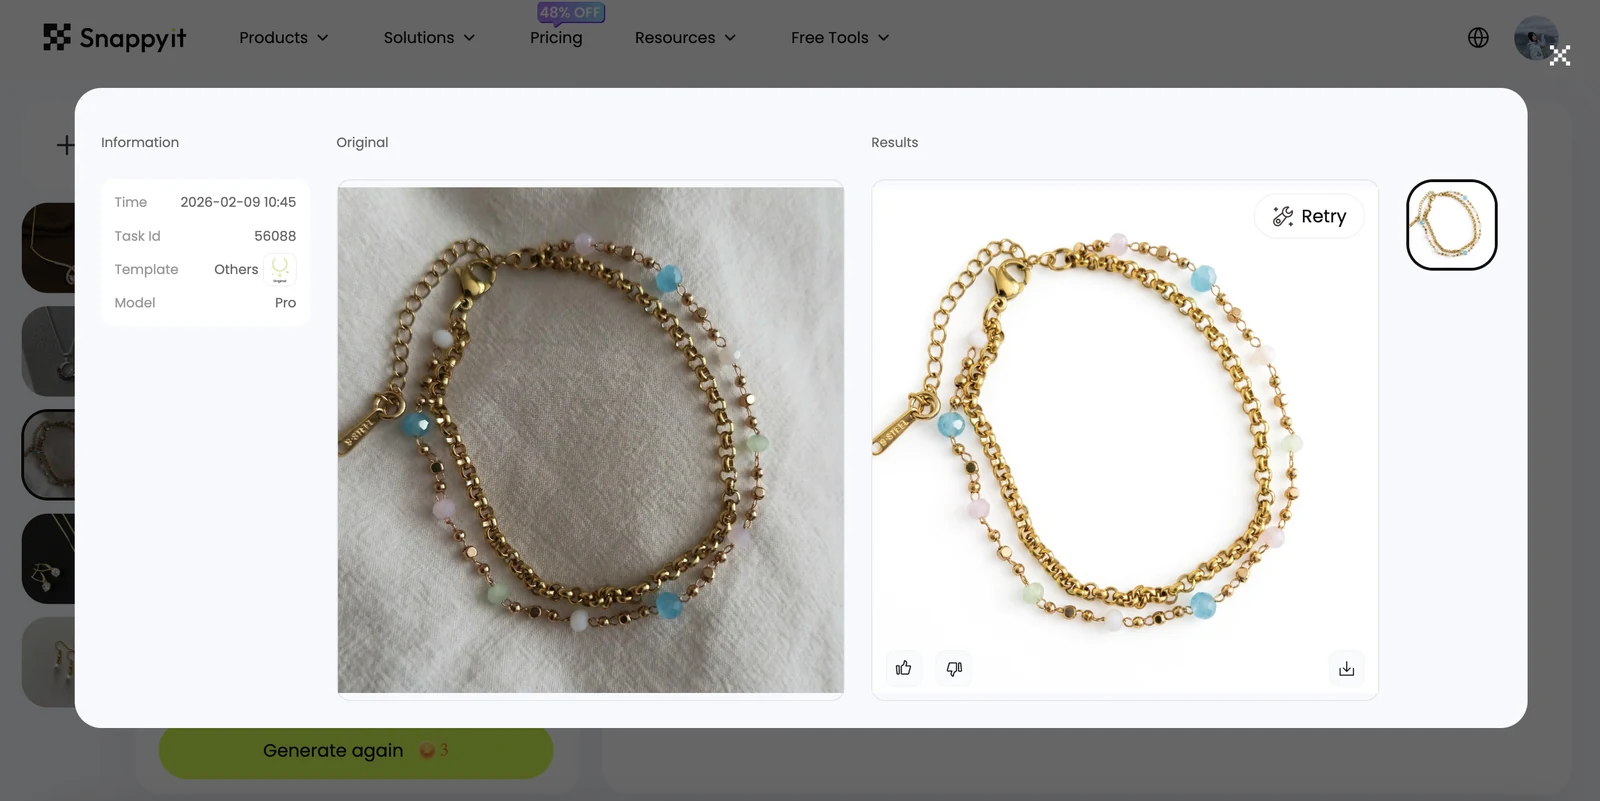
- Background removal and cleanup: Clean, even background around the bracelet and its fine chain structure.
- Shine and material rendering: In the interface preview, the gold finish appeared brighter while the small bead details remained visible.
- Natural shadow: A soft contact shadow grounded the bracelet naturally.
- Product fidelity: In the visible preview, the chain links, clasp, colored beads and overall proportions remained recognizable, with coordinated lighting across the result.
Direction 2: model presentation
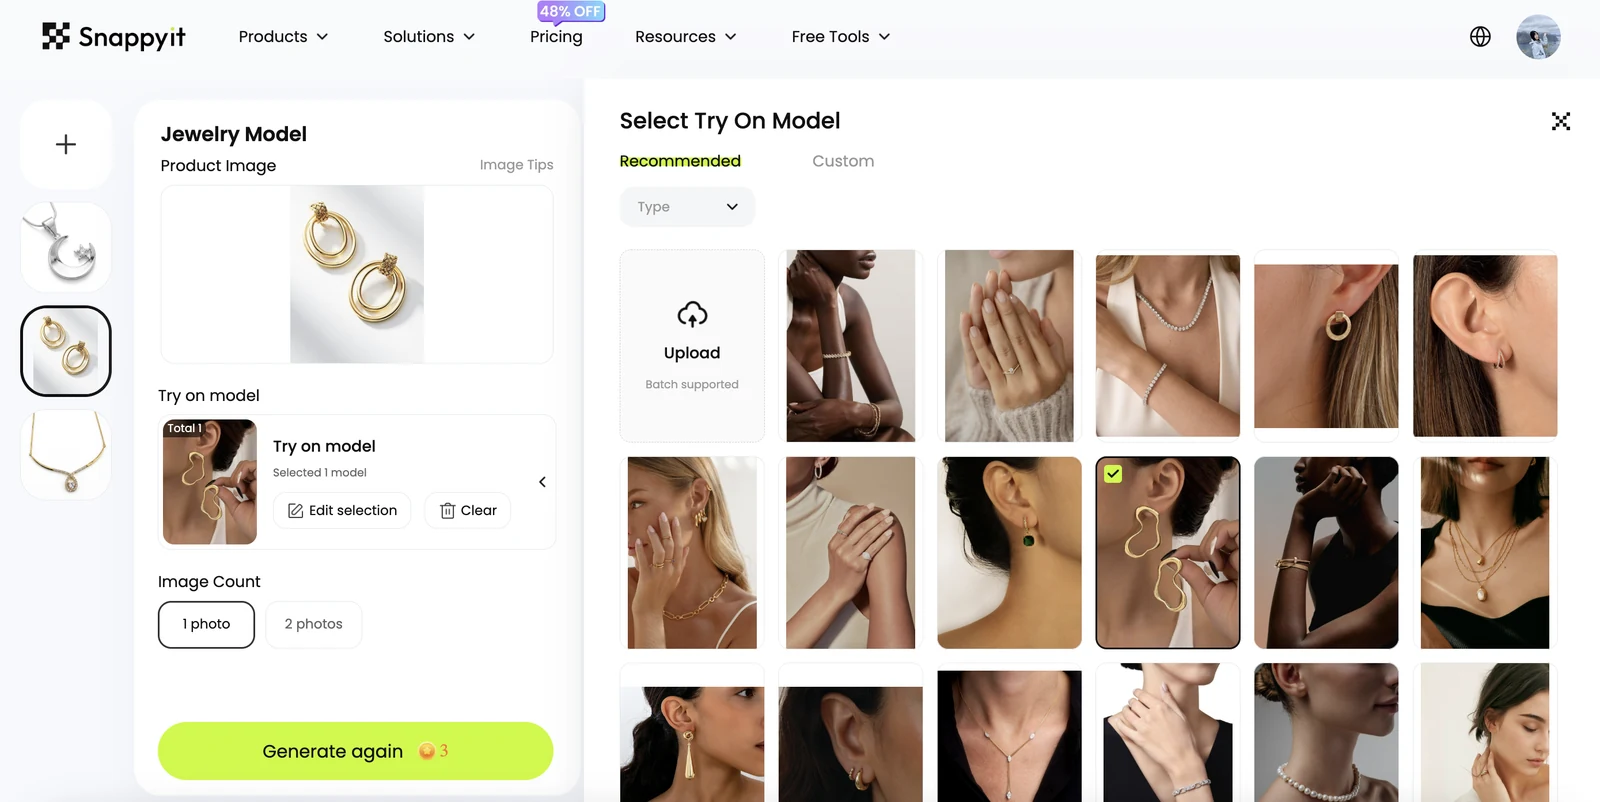
- Model choice: Built-in presentation templates cover different jewelry types, including bracelets, necklaces and earrings.
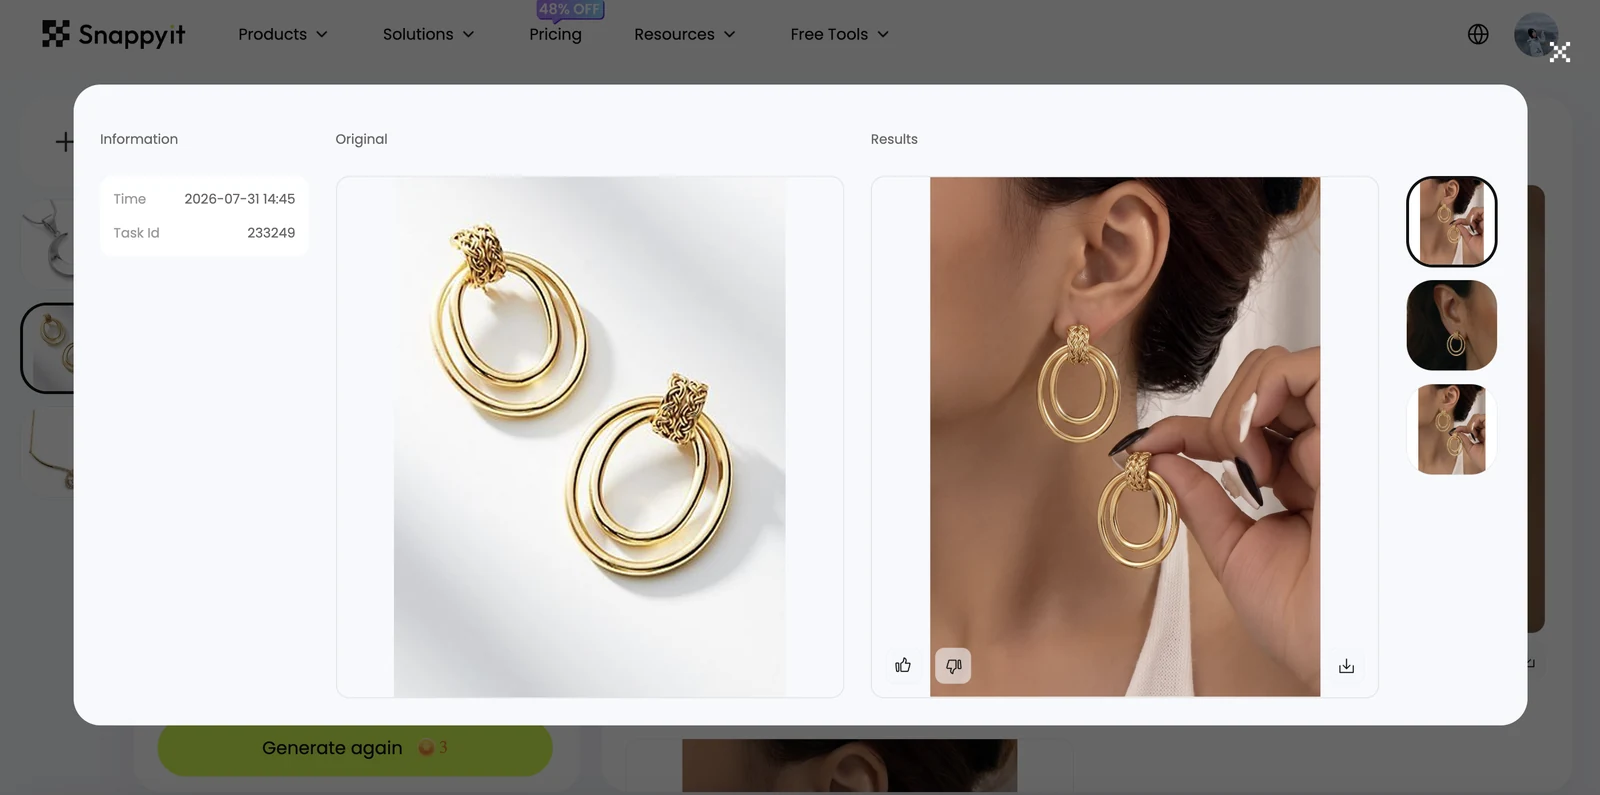
- Scene choice: The selected close-up ear template kept attention on the tested earrings.
- Placement and product fidelity: The oval shape, layered rings and woven top detail remained recognizable at a believable scale in the interface preview.
- Set consistency: Template-led generation provides a controlled starting point; multi-image consistency was not measured in this test.
SellerPic
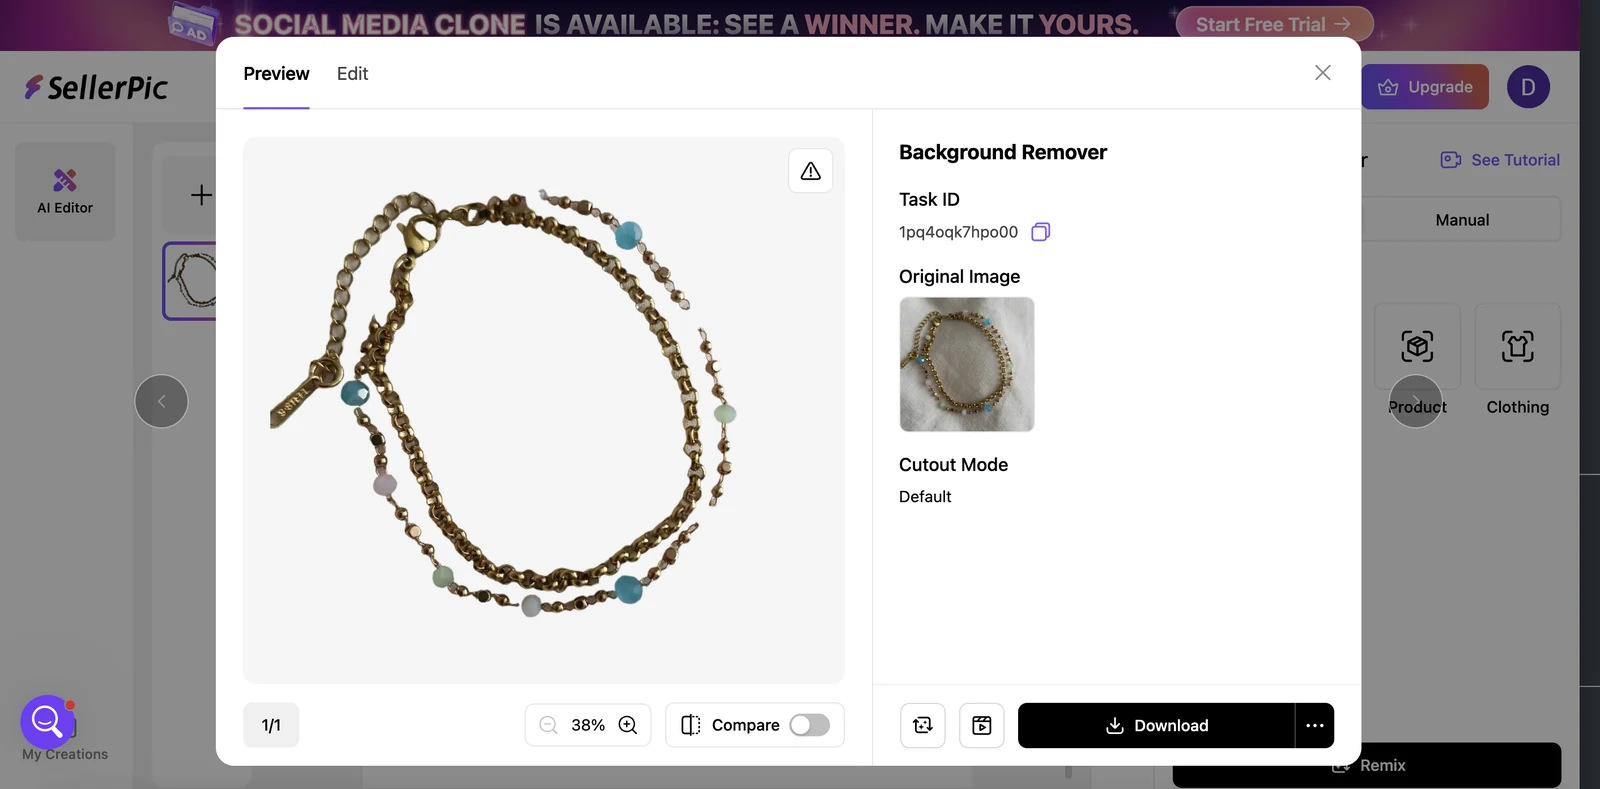
Direction 1: product photo retouching
- Background removal and cleanup: The bracelet cutout was incomplete and uneven around fine chain and bead details.
- Shine and material rendering: Not available in the tested workflow; Background Remover did not provide jewelry-specific polishing.
- Natural shadow: No natural grounding shadow was added in the tested cutout result.
- Product fidelity: The main structure remained visible, but fine edges and small components were not isolated cleanly.
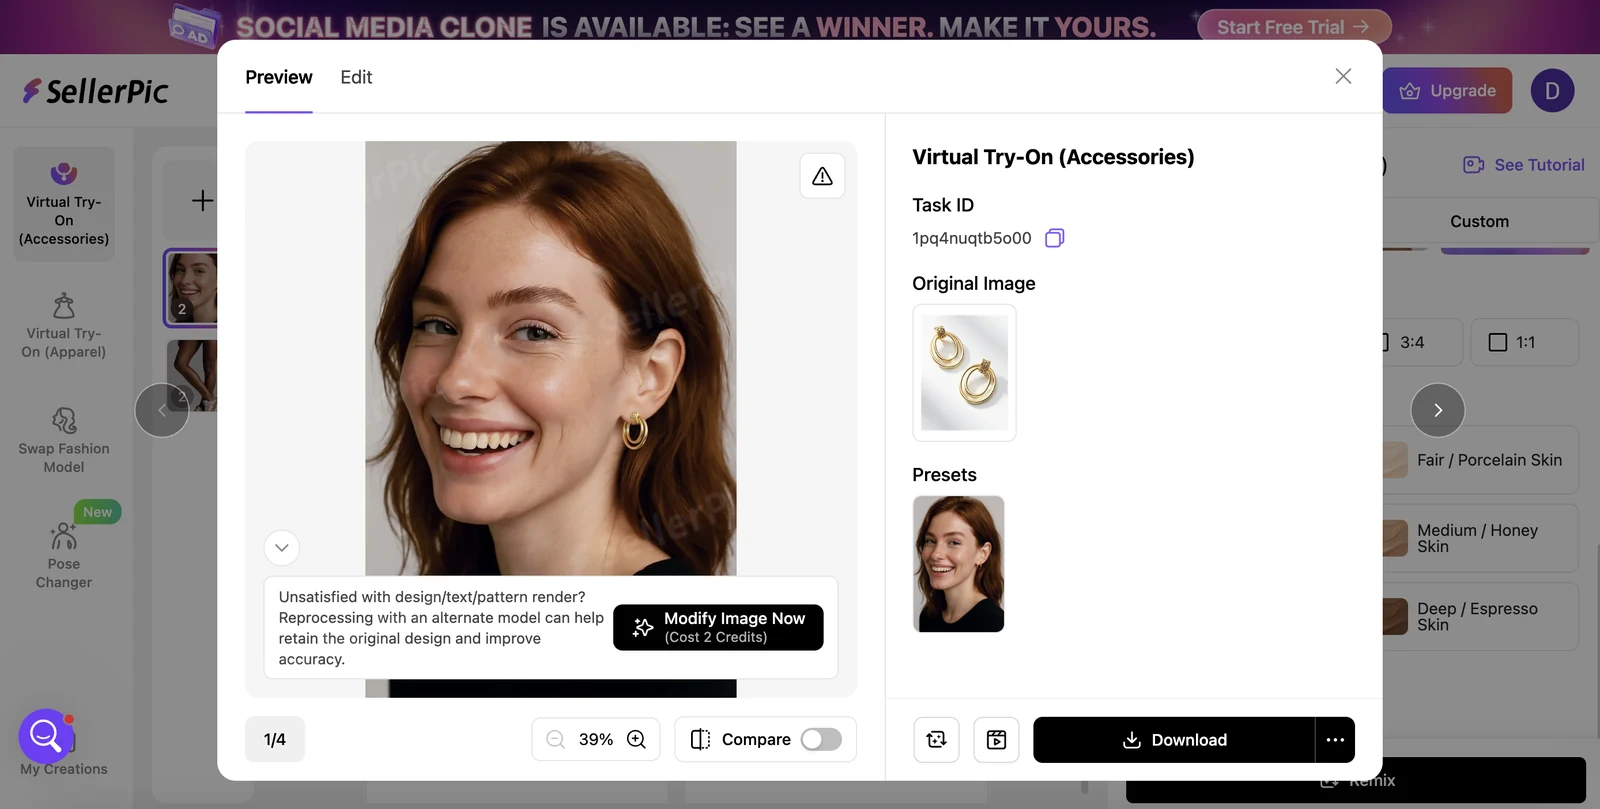
Direction 2: model presentation
- Model choice: Virtual Try-On (Accessories) supplied a suitable close-up model preset.
- Scene choice: The head-and-shoulders crop made the earrings visible.
- Placement and product fidelity: The source earrings’ oval rings became noticeably rounder, so the generated design was not accurate enough for a product listing.
- Set consistency: Not measured; the fidelity issue was already visible in the tested output.
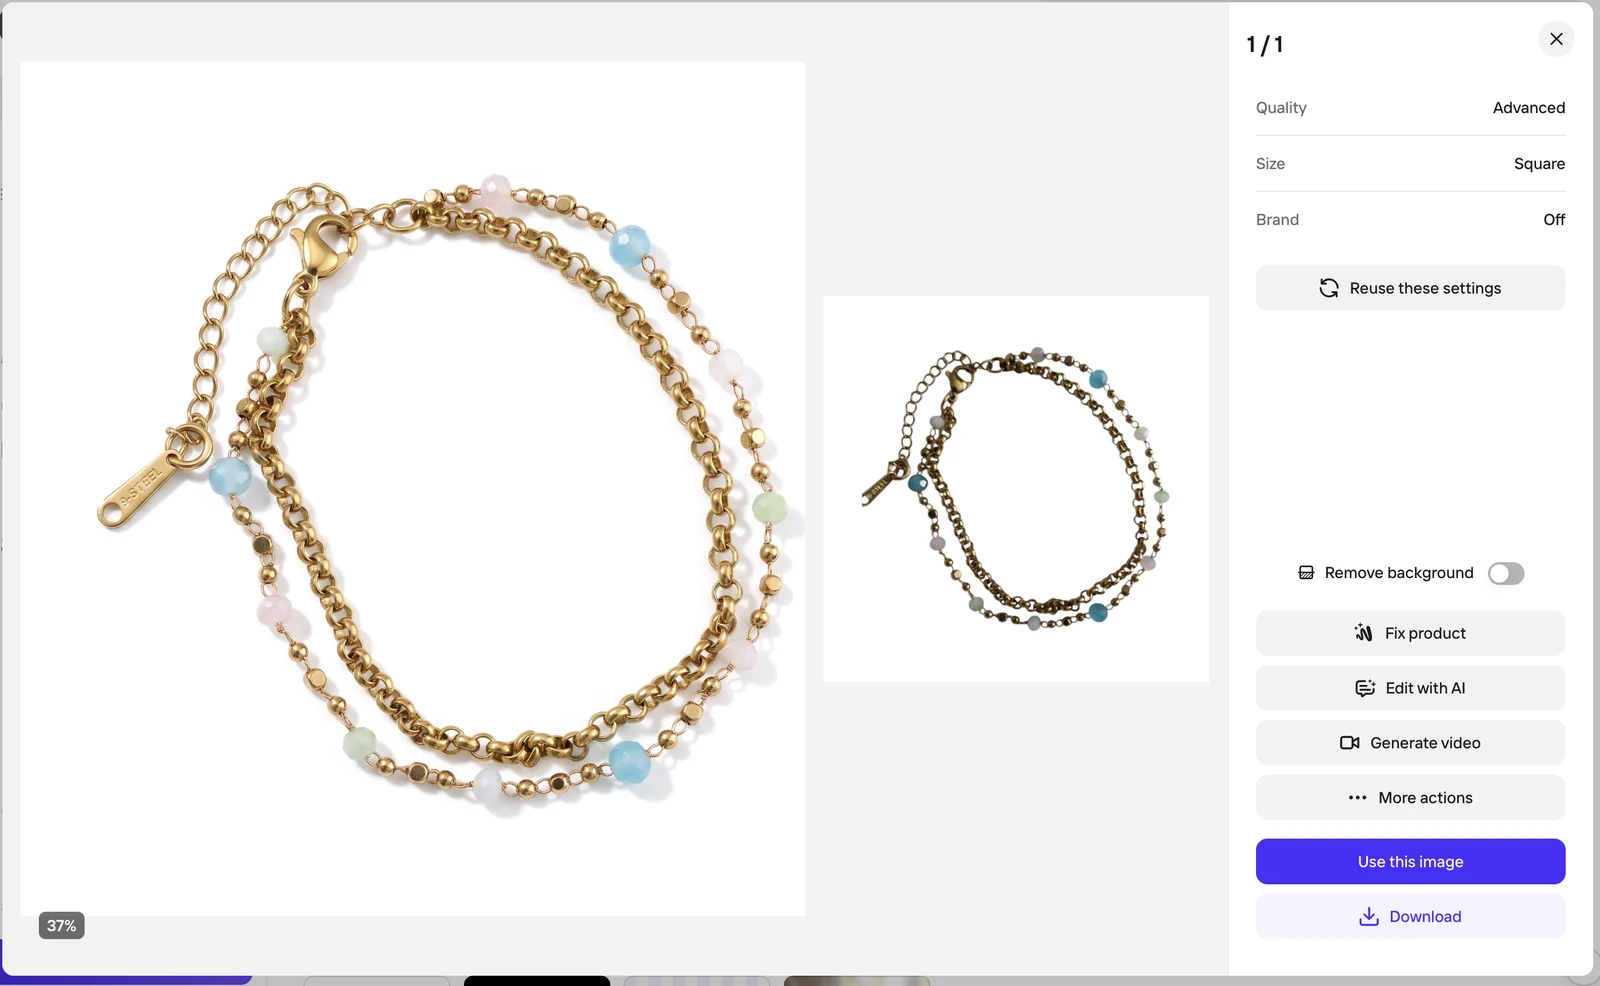
Photoroom

Direction 1: product photo retouching
- Background removal and cleanup: Photo Beautifier produced a clean white product background with well-defined bracelet edges.
- Shine and material rendering: In the interface preview, the gold finish and colored beads appeared bright and clear, broadly comparable to Snappyit in this sample.
- Natural shadow: The generated shadow gave the bracelet a grounded product-photo appearance.
- Product fidelity: Links, clasp, beads and overall bracelet layout remained recognizable.
Direction 2: model presentation
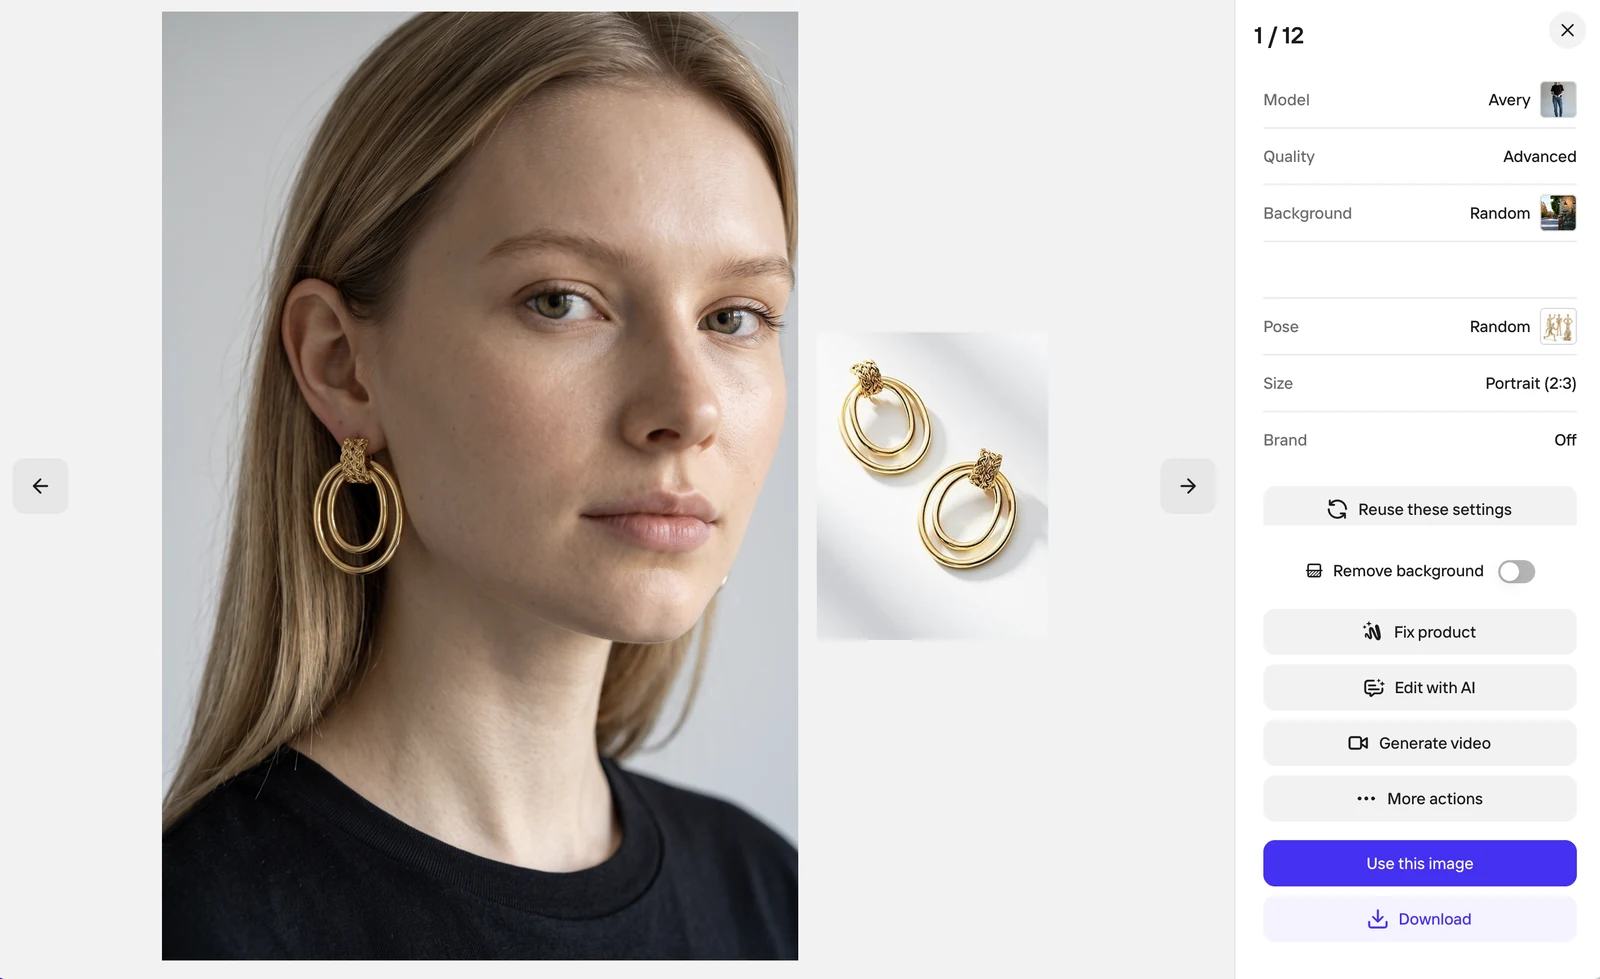
- Model choice: Fashion Model generated a close portrait suitable for showing earrings.
- Scene choice: The simple portrait and neutral styling kept the jewelry easy to inspect.
- Placement and product fidelity: The earrings were placed naturally and retained their oval, layered-ring design comparatively well.
- Set consistency: Not measured in this single-output test.
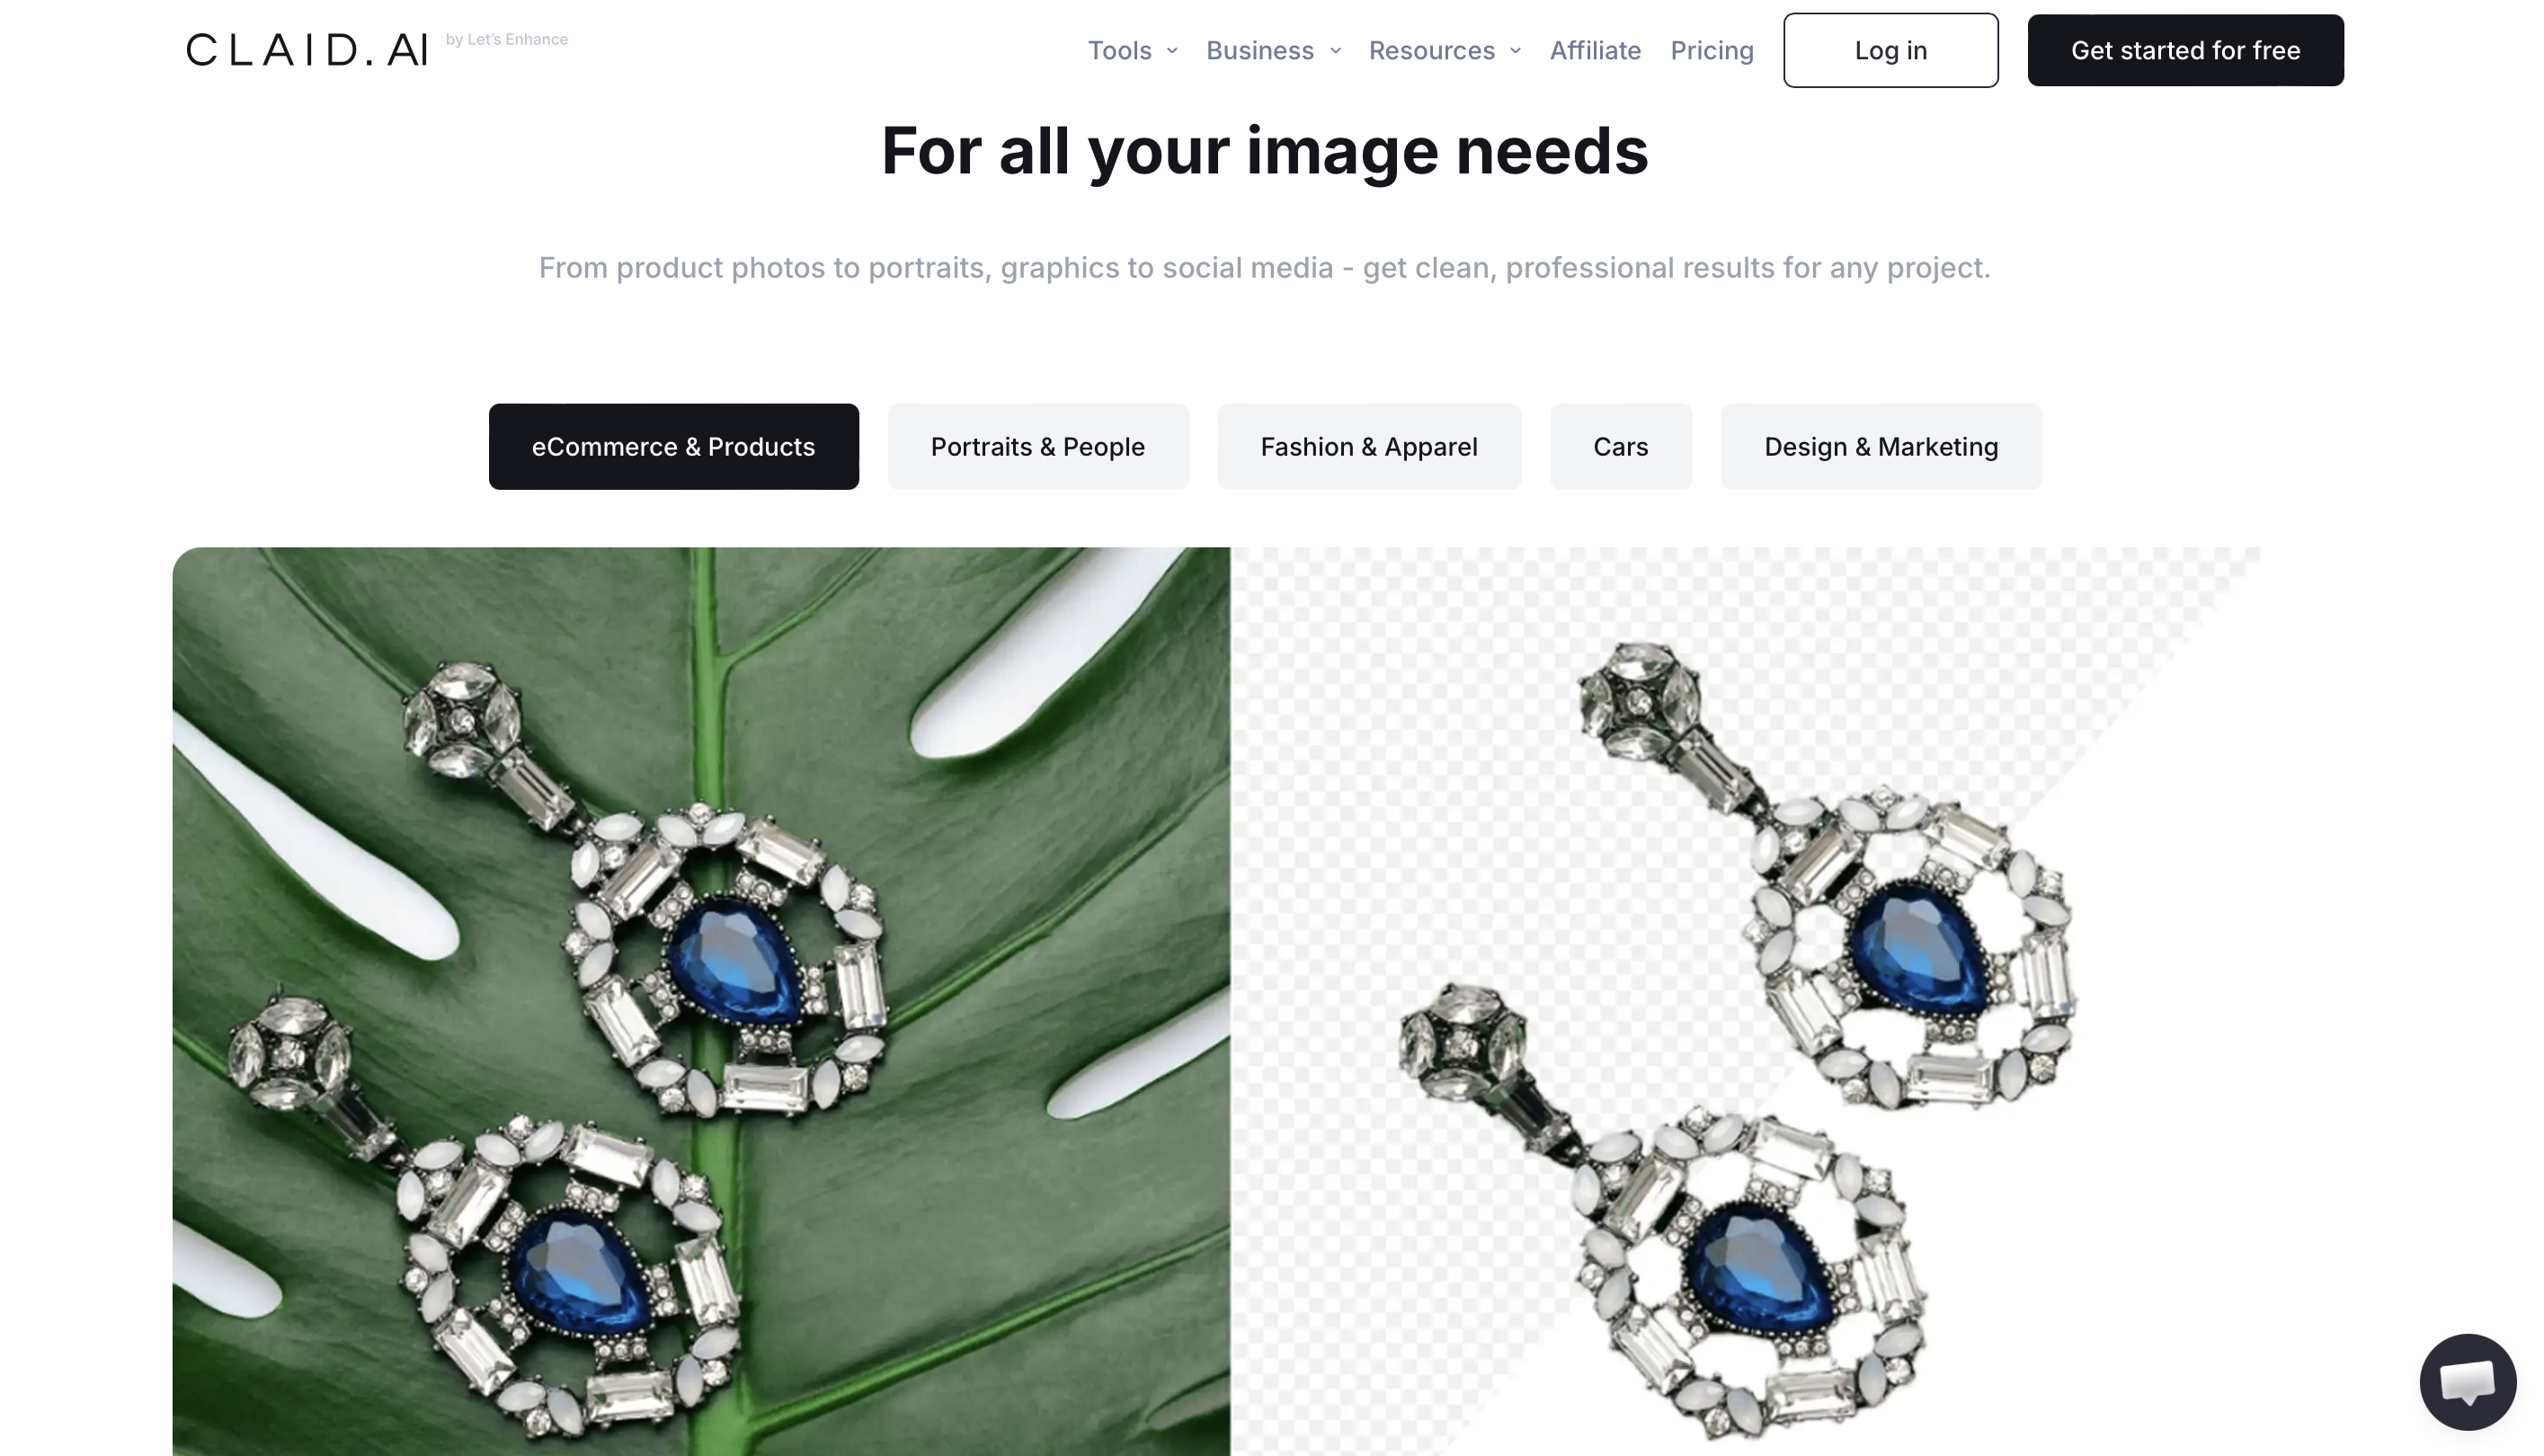
Claid.ai
Direction 1: product photo retouching
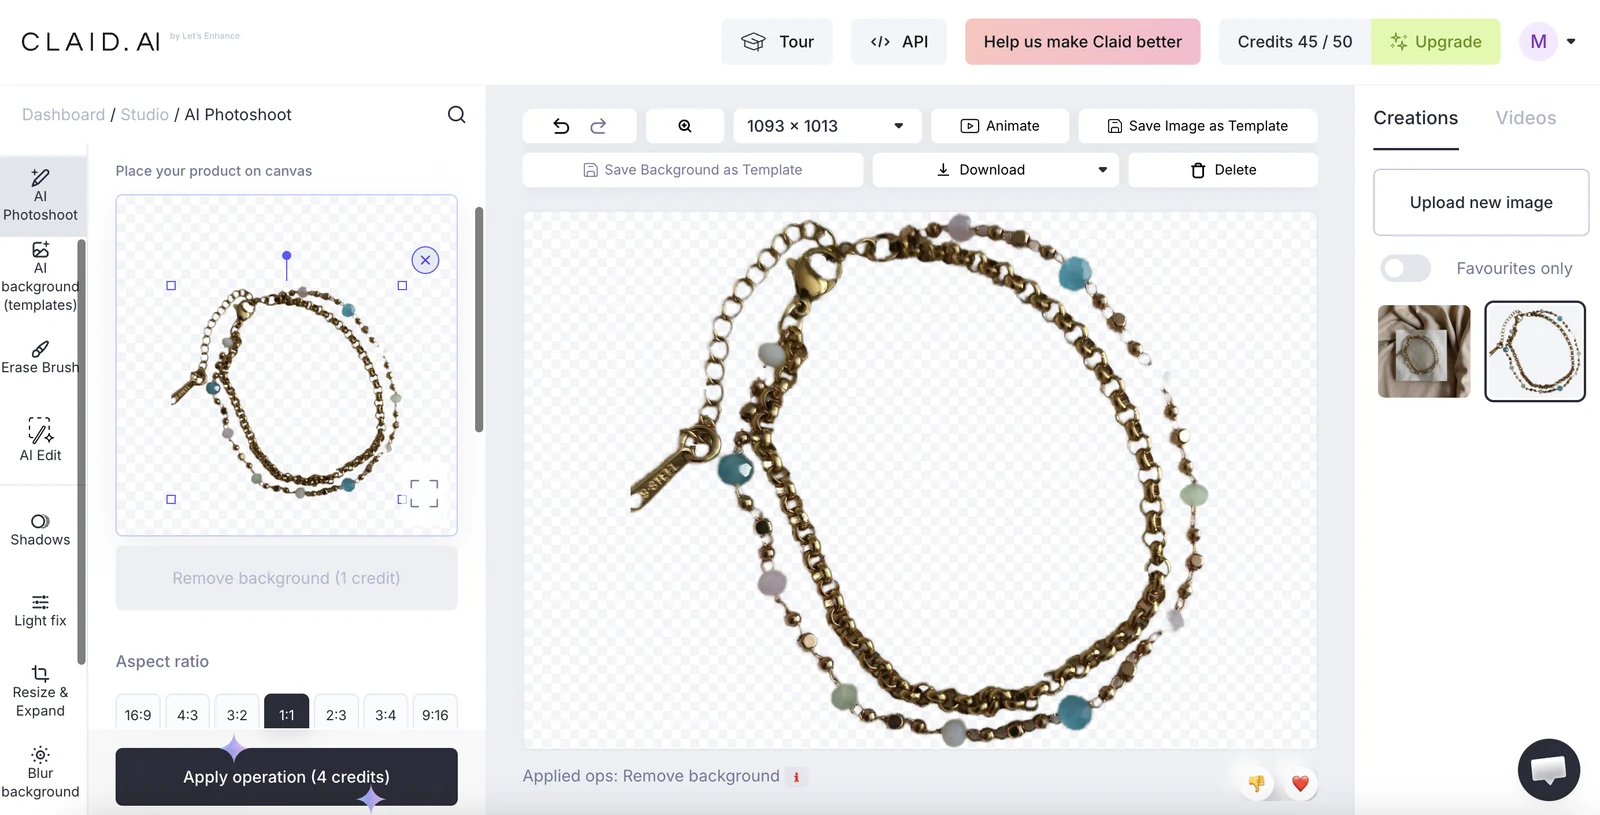
- Background removal and cleanup: The cutout was uneven around the bracelet’s fine chains and small beads.
- Shine and material rendering: Not available in the tested background-removal workflow.
- Natural shadow: No jewelry-ready natural shadow was added.
- Product fidelity: The overall bracelet remained visible, but edge quality was not strong enough for a polished listing image.
Direction 2: model presentation
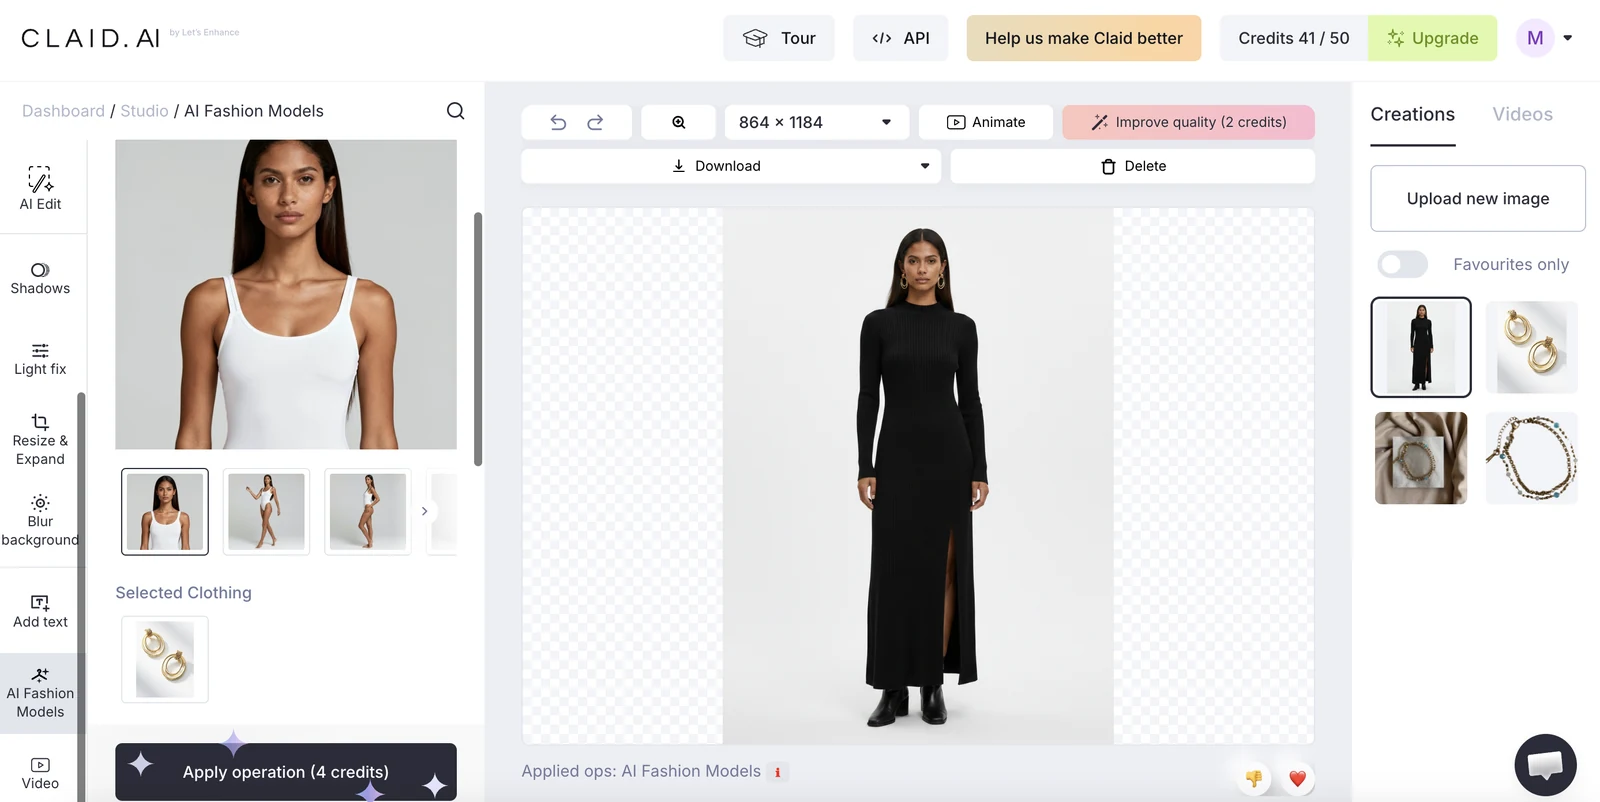
- Model choice: AI Fashion Models generated a full-body fashion model rather than a jewelry-focused close-up.
- Scene choice: The apparel-style framing gave most of the image to the outfit and model.
- Placement and product fidelity: The earrings were too small in frame to inspect their shape and fine details reliably.
- Set consistency: Not measured; the framing made the output unsuitable for the intended jewelry-detail test.
Final comparison and recommendations
For the tested bracelet and earrings, Snappyit offered the strongest combination of jewelry-specific retouching, model templates and visible product fidelity. Photoroom was the closest alternative despite using generic tools. SellerPic and Claid.ai each completed part of the two-task test, but their visible limitations made them weaker choices for these cases.
| Decision | Recommended tool | Evidence-based reason |
|---|---|---|
| Best for product photo retouching | Snappyit | Jewelry Retouch combined a clean background, natural shadow, improved shine, coordinated lighting and strong detail preservation. |
| Best for model presentation | Snappyit | Jewelry-specific templates covered earrings, necklaces and bracelets, while the tested earrings remained clear and faithful to the source. |
| Best coverage across the two tested tasks | Snappyit | It covered both directions with category-specific tools and delivered the strongest combined visible results in these samples. |
| Best alternative | Photoroom | Its generic Photo Beautifier and Fashion Model results were the closest to Snappyit for the tested bracelet and earrings. |
Choose a tool by workflow
- Jewelry-specific retouch plus model presentation: Snappyit was the strongest fit in this test because it covered both jobs with dedicated workflows and preserved the tested products comparatively well.
- A general editor for a mixed ecommerce catalog: Photoroom was the closest alternative in these samples. Its broader workflow may suit sellers editing several product categories, although the tools tested were not jewelry-specific.
- Accessory try-on as the main requirement: SellerPic covered the model-presentation direction, but sellers should check shape and detail fidelity carefully before using an output as a product image.
- API-led or batch background processing: Claid.ai may be relevant to teams building a generic image pipeline. Its background and fashion APIs should be evaluated separately from jewelry-specific retouching, and fine-edge fidelity still needs catalog-level testing.
Frequently Asked Questions
What is the best AI jewelry photo editor?
How can I edit jewelry photos with AI?
Can AI put jewelry on a model?
How do I make jewelry photos look professional?
What is the difference between jewelry photo retouching and background removal?
Can AI jewelry photo editors handle rings, earrings, necklaces and bracelets?
Can AI-edited jewelry images be used on Etsy and Shopify?
References
Official product pages used to verify feature names and workflow availability. Accessed August 3, 2026. Absence statements in this article are limited to the entry-level web interfaces tested on July 31, 2026.
- Snappyit, Jewelry Retouch.
- Snappyit, Jewelry Model.
- SellerPic, Virtual Try-On Jewelry.
- SellerPic, Background Remover.
- Photoroom, Background Remover.
- Photoroom, AI-Generated Fashion Models.
- Claid.ai, Background Removal.
- Claid.ai, AI Fashion Models.