What You Need Before Making a Video from Images
You have hundreds of great photos sitting on your phone or hard drive. Product shots, travel snapshots, event highlights — all compelling on their own, yet falling flat when you drop them into a basic slideshow and hit "export." The result feels lifeless, and your audience scrolls right past it. Sound familiar?
The gap between a forgettable photo reel and a video people actually watch comes down to workflow. This guide walks you through the entire process — from planning your image sequence to exporting a polished final cut — and every step applies regardless of the software you choose. Whether you prefer a browser-based editor, a desktop application, or an AI-powered generator, the principles stay the same.
Why Still Images Deserve to Move
Static images struggle to compete in feeds built for motion. Video consistently outperforms photos in both reach and retention across every major social platform. On TikTok, for instance, engagement rates sit between 4.45% and 5.35% depending on account size, while Instagram Reels pull engagement rates ranging from 0.45% to 0.87% — numbers that dwarf what a single photo post typically achieves. Even on LinkedIn, video content earns engagement rates between 5.05% and 6.60%, rewarding creators who deliver visual depth over static snapshots. The takeaway is clear: if you want your images to reach more people and hold their attention longer, turning them into video is not optional — it is the baseline.
Three Approaches to Image-Based Video
Before you open any editor, it helps to know which path fits your goal. There are three distinct ways to make a video out of pictures, and each produces a very different result:
- Traditional slideshow: Images display one after another with simple transitions and optional background music. This method is fastest and works well for internal presentations, family photo recaps, or quick social posts where speed matters more than polish.
- Polished montage with effects: Images are layered onto a timeline with deliberate pacing, motion effects like zoom and pan, synced audio, and carefully chosen transitions. This approach suits brand storytelling, product launches, and portfolio reels where production quality reflects credibility.
- AI-generated motion video: A still image is fed into an AI tool that animates elements within the frame — clouds drift, hair moves, camera angles shift — producing footage that feels closer to filmed video than a traditional slideshow. This method is ideal for creators who want cinematic results without manual keyframing.
Knowing how to make video with pics and music using any of these methods starts with understanding which outcome you actually need. A quick product teaser for Instagram demands a different approach than a three-minute brand story for YouTube.
What This Guide Covers
The eight steps ahead give you a complete, repeatable system for learning how to make a video with pictures videos and music — one you can reuse for every project. Here is the roadmap: storyboarding your image sequence, preparing and optimizing your photos, choosing the right creation tool, building your timeline, adding transitions and motion effects, layering in music and sound, exporting with platform-specific settings, and troubleshooting the most common quality issues. Each step builds on the last, so by the time you hit "export," every detail has already been handled.
The real difference between amateur results and professional-looking output rarely comes down to the tool itself. It comes down to how you prepare your images and structure your sequence before you ever touch a timeline — which is exactly where the process begins.
Step 1 Plan Your Storyboard and Image Sequence
A folder full of great photos does not automatically become a great video. The order you place those images in determines whether your viewer feels pulled through a story or stuck watching a random photo dump. Sequence is the invisible architecture of every compelling video montage, and it deserves attention before you open any editing tool.
Map Out Your Narrative Arc
Every engaging video follows a basic storytelling structure, even when the "story" is just a collection of images. Think of it in four beats: an opening hook that grabs attention, a rising action that builds interest, a climax that delivers the payoff, and a resolution that closes the loop.
Imagine you are figuring out how to make a montage of pictures for a product launch. Your opening might feature tight, mysterious close-ups of textures and details. The middle section reveals more context — the product in use, lifestyle shots showing it in real environments. The climax is the full hero shot, beautifully lit and unmistakable. The resolution could be a logo card or a call to action. A travel video, on the other hand, might follow chronological order from departure to arrival, or group images by theme — food, architecture, landscapes — to create visual chapters within the piece.
The point is simple: decide what emotional journey you want the viewer to take, then arrange your images to support that journey.
Decide on Pacing and Duration
Pacing controls the energy of your video. At standard frame rates, each image in a slideshow-style video typically displays for 3-5 seconds. But that default is just a starting point. Faster cuts of 1-2 seconds create urgency and excitement — perfect for energetic music or action-packed content. Slower holds of 5-7 seconds invite the viewer to sit with an image, which works well for emotional moments like ceremony highlights or reflective sequences.
Before selecting a single photo, decide your total video length based on where it will live. A 15-second Instagram Story demands a completely different image count and rhythm than a 3-minute YouTube piece. Work backward: if your target is 60 seconds and you plan 4-second holds, you need roughly 15 images. That constraint alone sharpens your selection process and prevents the common mistake of cramming too many photos into too little time.
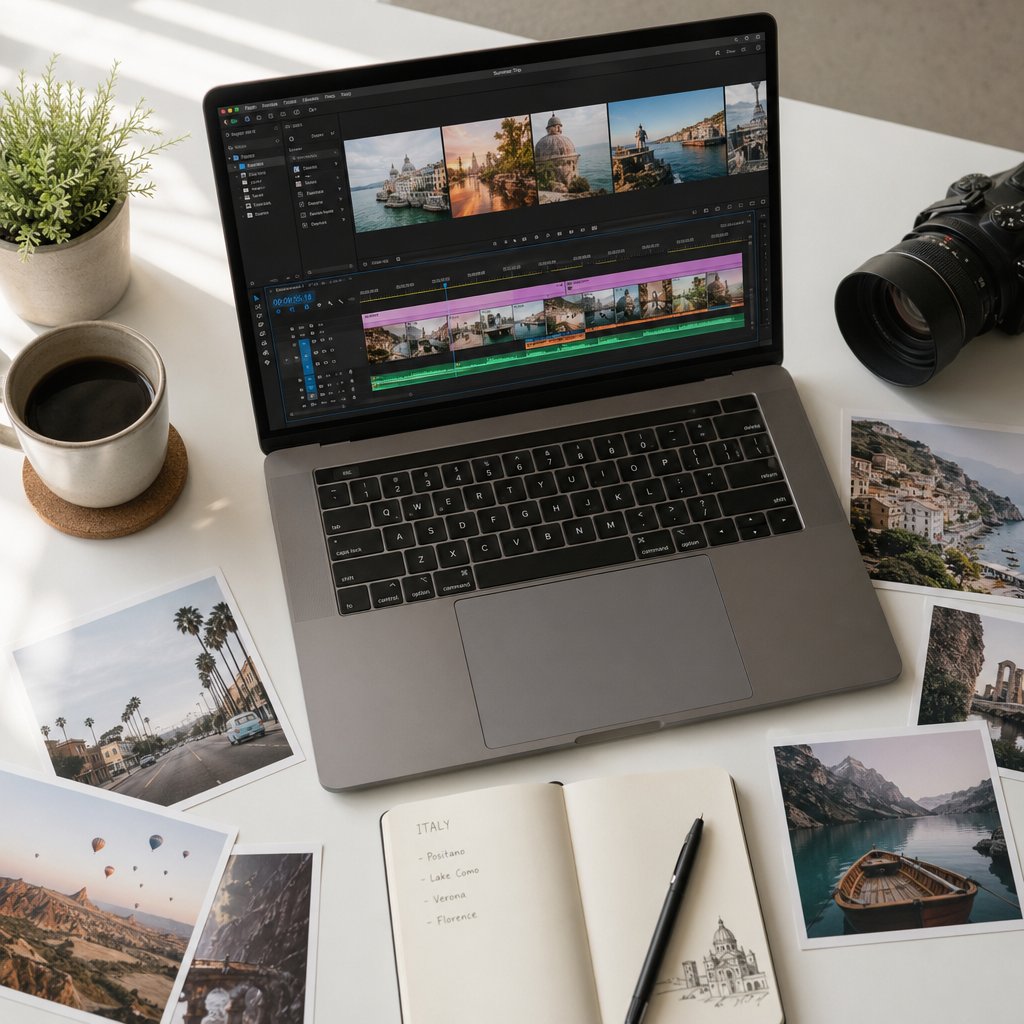
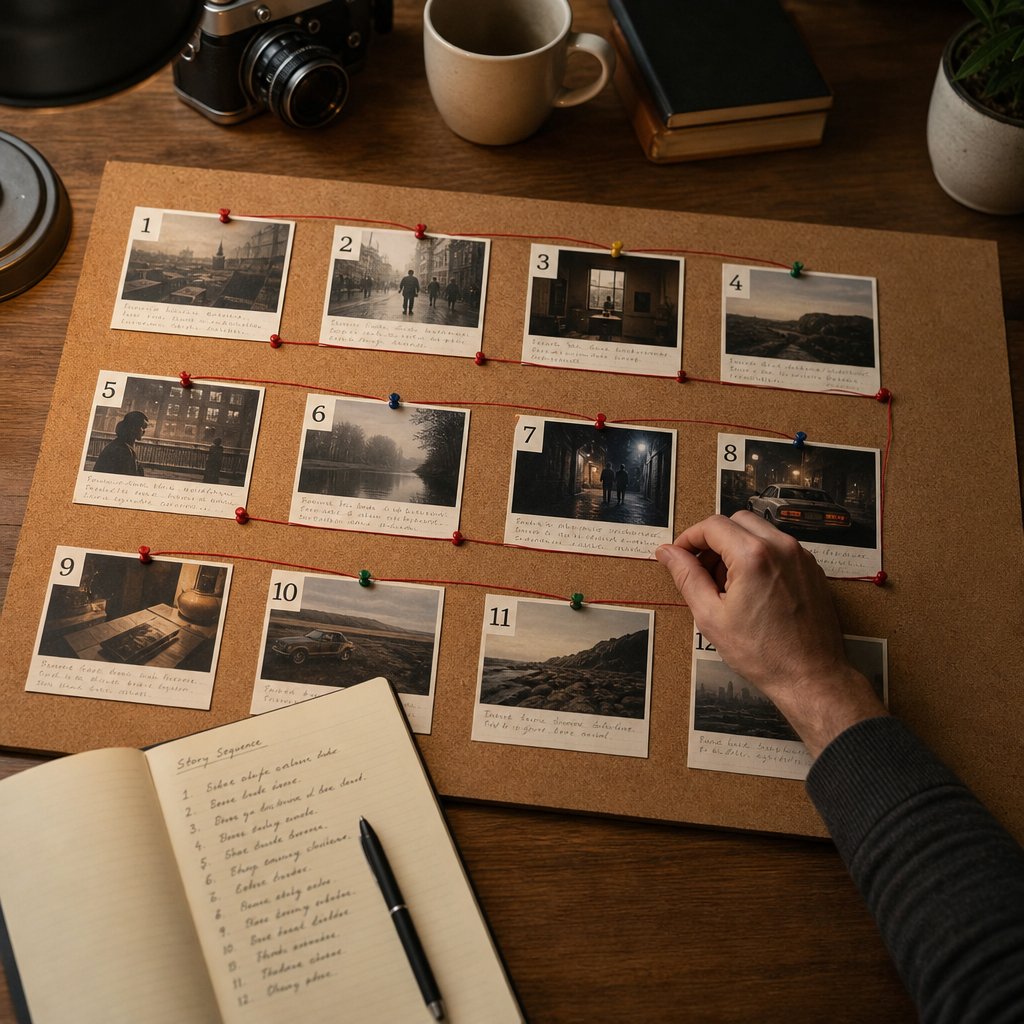
Create a Simple Shot List
You do not need professional storyboard software to make a picture montage that feels intentional. A practical approach works just as well: lay out all your candidate images in a grid — a folder view, a table on your desk, or even a notes app — and number them in the order you want them to appear. Next to each number, jot down any text overlays, specific transitions, or timing notes that image needs. A simple shot list like this turns a vague creative idea into a concrete blueprint you can hand to any editor or follow yourself.
The best image-based videos are edited before they ever reach the timeline.
Planning on paper (or screen) costs almost nothing in time, but it saves hours of rearranging clips later. With your sequence locked and your pacing mapped, the next challenge is making sure every image in that sequence is technically ready to look sharp on screen.
Step 2 Select and Prepare Your Images for Video
A perfectly planned storyboard falls apart the moment you drop a mix of blurry phone photos and high-res camera shots onto the same timeline. One image looks crisp, the next looks soft, and the whole video feels stitched together from mismatched parts. The fix is not better software — it is better preparation. Getting your images ready before they hit the editor is the single most overlooked step in the entire process, and it makes or breaks the final result.
Choose the Right Resolution and Aspect Ratio
Your video output can only be as sharp as the images you feed into it. A low-resolution photo stretched across a full HD canvas will look noticeably blurry, no matter how good your transitions or effects are. As a baseline, aim for source images that are at least 1920x1080 pixels if you are producing standard HD video. For 4K output, you will need images at 3840x2160 pixels or higher. When in doubt, start with the highest resolution available — you can always scale down, but you cannot scale up without losing clarity.
Aspect ratio is the other half of this equation. Every image in your project should share the same orientation and proportions. Mixing a landscape photo with a portrait shot forces the editor to either crop aggressively or pad the frame with black bars, and both options look amateurish. The three ratios you will encounter most often are:
- 16:9 — The standard for landscape video. Used across YouTube, most desktop displays, and widescreen presentations.
- 9:16 — Vertical video for mobile-first platforms like Instagram Reels, TikTok, and YouTube Shorts.
- 1:1 — Square format, commonly used for Instagram feed posts and Facebook carousels.
Pick one ratio based on where your video will live, and commit to it across every image. This single decision eliminates the most common visual problem in image-based videos: inconsistent framing that distracts the viewer from the content itself.
Optimize File Format and Color Consistency
Not all image files behave the same way inside a video editor. The two formats you will work with most are JPEG and PNG, and each has a clear use case.
JPEG uses lossy compression, which means it discards some data to keep file sizes small. For photographic images — product shots, landscapes, portraits — JPEG is perfectly sufficient and keeps your project folder manageable. PNG, on the other hand, uses lossless compression and supports transparent backgrounds. That makes it the better choice for graphics, logos, text overlays, or any element you plan to layer on top of other visuals. If you are working with photo editing software for beginners, most tools default to JPEG export, which is fine for the majority of video projects.
Beyond file format, color consistency across your image set matters more than most people realize. When photos come from different cameras, lighting conditions, or editing sessions, the shifts in white balance, brightness, and contrast become painfully obvious once images sit side by side on a timeline. Batch-editing your images for a unified color grade before importing them solves this. Most editing apps — even free ones — let you copy color adjustments from one image and paste them across an entire set. The goal is a cohesive visual feel where every frame looks like it belongs in the same video, not a jarring jump between warm and cool tones every few seconds.
Crop and Resize for Uniform Framing
Even after matching aspect ratios, individual images often have slightly different compositions. One photo might have the subject centered, while another places it off to the side with extra dead space. Cropping all images to identical pixel dimensions before importing gives you precise control over how each frame looks on screen.
Here are the target resolutions to crop for, based on platform:
- 1920x1080 — YouTube, Facebook, LinkedIn, and most landscape video formats
- 1080x1920 — Instagram Reels, TikTok, and YouTube Shorts
- 1080x1080 — Instagram feed posts and square-format social content
Yes, most video editors can auto-fit or auto-scale images to match your project canvas. But auto-fitting often means the software decides what gets cropped or where black bars appear — and those decisions rarely match your creative intent. Pre-cropping puts you in charge of composition. You decide what stays in frame and what gets cut, image by image. An online image converter or a batch cropping tool can handle this in minutes if you are working with a large set, and many image converter free options let you resize and reformat entire folders at once without installing anything.
Consistent dimensions also prevent a subtle but common issue: the Ken Burns effect (which you will add later) behaving differently on images of varying sizes. When every image starts at the same resolution, zoom and pan movements feel smooth and predictable across the entire video.
With your images cropped, color-matched, and sized to spec, the creative decisions ahead — choosing your tool, building the timeline, layering effects — all become easier. Clean inputs lead to clean outputs, and the next step is picking the right editor to bring those prepared images to life.
Try the AI version first. For most catalog work, AI tools clear the bar for quality and ship in seconds. Try Snappyit Image to Video free →
Step 3. Choose the Right Video Creation Tool
Your images are prepped, sequenced, and sized to spec. The next decision shapes your entire editing experience: which tool do you actually use? The answer depends less on which software is "best" and more on what fits your skill level, timeline, and end goal. A photo video editor app on your phone solves a different problem than a full desktop suite, and both differ from an AI tool that handles the heavy lifting for you.
Compare Tool Categories Side by Side
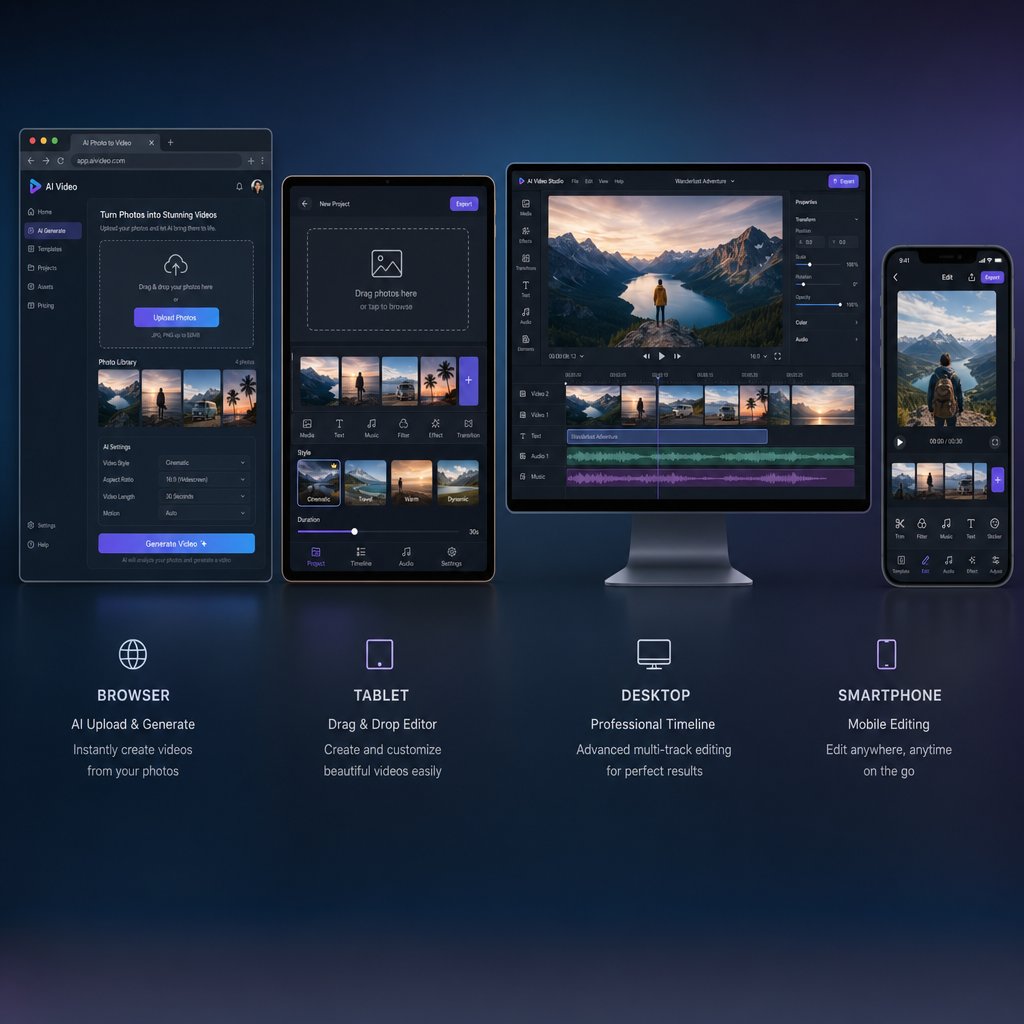
Rather than recommending a single product, it helps to understand the four main categories of tools available for turning images into video. Each comes with real tradeoffs in speed, control, and cost.
| Category | Ease of Use | Output Quality | Best For |
|---|---|---|---|
| AI-powered online tools (e.g., Snappyit Image to Video, Runway, Pika) | Very easy — upload and generate | High, with AI-enhanced motion | Fast turnaround, ecommerce visuals, social content at scale |
| Free online editors (e.g., Canva, Adobe Express, Clipchamp) | Easy — drag-and-drop timeline | Good for standard video | Simple montages, branded social posts, team collaboration |
| Desktop software (e.g., DaVinci Resolve, Premiere Pro, Final Cut) | Moderate to steep learning curve | Professional-grade | Complex edits, multi-track audio, color grading, long-form content |
| Mobile apps (e.g., CapCut, InShot, VN) | Easy — touch-based editing | Good for short-form | Quick Reels and TikToks, on-the-go editing, casual creators |
The honest tradeoff: AI-powered tools and free online editors get you from image to finished video fastest, but they offer less frame-level control. Desktop editors give you granular precision over every cut, keyframe, and audio layer — at the cost of a steeper learning curve and more time invested. Mobile apps land somewhere in between, offering surprising capability for short-form content but struggling with longer, more complex projects.
If your workflow involves Canva video editing for branded templates or quick social posts, that category handles the basics well. The canva image to video workflow, for instance, lets you drop photos onto a timeline, apply preset animations, and export in minutes. For users searching for a free image to video solution, both Canva's free tier and AI tools with free plans cover the essentials without requiring a credit card.
When to Use an AI-Powered Image-to-Video Tool
AI generators shine when you want to skip manual timeline editing entirely and still get a polished result. Instead of dragging images onto a track, setting durations, and keyframing motion by hand, you upload your photos and the automatic video editor handles sequencing, transitions, and even motion synthesis.
This approach is particularly practical for ecommerce sellers who need marketplace-ready product videos on a tight schedule, or marketers producing social content across multiple platforms each week. Tools like Snappyit's Image to Video converter fit this use case well — you feed in product or lifestyle images and get back engaging video content without needing a full production setup. The speed advantage is significant: what might take 30-60 minutes of manual editing compresses into a few minutes of AI processing.
AI image to video free tiers on several platforms let you test the output quality before committing to a paid plan. If the generated result matches your quality bar, you have found your workflow. If you need more control, you still have options.
When to Use a Manual Editor Instead
Speed is not always the priority. Some projects demand the precision that only a manual video montage maker provides. Choose a desktop or timeline-based editor when your project involves:
- Complex multi-track timelines — layering multiple image tracks, text overlays, and graphics that need independent timing
- Precise audio syncing — aligning image transitions to specific musical beats or voiceover cues down to the frame
- Frame-level control — custom keyframe animations, advanced color grading per clip, or effects that AI tools do not yet support
- Long-form content — documentary-style videos, detailed tutorials, or portfolio reels where every second is intentional
The canva photo to video workflow or a mobile app might handle 80% of your projects. But for that remaining 20% — the brand film, the product launch hero video, the carefully scored montage — a manual editor earns its learning curve. As reference material from production teams confirms, many professionals now use a hybrid approach: AI handles first drafts and high-volume content, while human editors polish the pieces that demand nuance and storytelling precision.
The tool you pick determines how the next steps feel — whether you are dragging clips onto a timeline yourself or reviewing what an AI assembled for you. Either way, the process of building that timeline follows the same structural logic.
Step 4 Import Images and Build Your Timeline
You have a tool picked out and a folder of prepped, uniformly sized images ready to go. This is where the project stops being theoretical and starts becoming a video. The import and timeline-building stage looks slightly different in every editor, but the underlying workflow is universal — and getting it right here saves you from tedious rework once transitions and audio enter the picture.
Import Your Images and Set Project Settings
Every editor begins the same way: you create a new project and configure your canvas before importing a single file. Start by setting the canvas to match the aspect ratio and resolution you chose during image preparation. If your images are cropped to 1920x1080, your project canvas should be 1920x1080. If you prepped vertical content at 1080x1920, set the project accordingly. Mismatching these settings is one of the fastest ways to end up with unexpected black bars or soft, upscaled output.
The next setting most people skip — and should not — is the project frame rate. Even though you are working with still images rather than filmed footage, frame rate directly affects how smoothly transitions render between photos. A 24fps setting gives your video a cinematic, slightly warm feel that works well for storytelling and brand content. A 30fps setting delivers standard web video smoothness and is the safest default for general-purpose projects. For most image-based videos, either choice works — but pick one and stick with it. Mixing frame rates within a single project can cause playback inconsistencies and choppy transitions.
With your project settings locked, import all your prepared images at once. Most editors support batch import: select your entire image folder, drag it into the media panel, or use the import dialog to grab everything in one pass. Importing all files upfront keeps your asset library organized and prevents the common mistake of adding images piecemeal, which leads to naming confusion and missed shots later in the edit.
Arrange Images on the Timeline
Here is where your storyboard from Step 1 pays off. Drag your images onto the timeline in the exact sequence you planned. If you numbered your images during the shot list phase, this step is almost mechanical — image 01 goes first, image 02 follows, and so on down the line.
Once all images are on the track, set a default duration for each clip. Most editors let you define a global still image duration — a single setting that applies the same hold time to every photo on the timeline. This is a practical starting point when figuring out how to use photos to make a video that feels cohesive rather than erratic. A 3-4 second hold per image is a reliable baseline for most projects. It gives viewers enough time to register each photo without the pacing feeling sluggish.
That said, uniform duration is just the starting framework. Some images naturally need more screen time — a detailed product shot or an emotional portrait might warrant 5-6 seconds — while simpler or transitional images can hold for just 2 seconds. Adjust individual clip durations after your first pass, not before. The goal at this stage is getting every image in place with a reasonable default so you can evaluate the full sequence as a whole.
If you need to add a photo in the middle of an existing sequence, most timeline editors let you insert a clip between two others without overwriting anything. Knowing how to add pictures in a video after the initial layout is straightforward in virtually every tool: drag the new image to the desired position, and the timeline shifts surrounding clips to make room.
Fine-Tune Timing With a First Preview
Resist the urge to start layering transitions, effects, or music right away. Instead, play through the entire rough cut from start to finish. Watch it at full speed, without pausing, as if you were a first-time viewer. This single preview reveals problems that are invisible when you are zoomed into individual clips: an image that feels out of order, a section where the pacing drags, or a stretch where three similar-looking photos land back to back and blur together.
Get the sequence and pacing right first, then layer in transitions and audio.
This principle matters because rearranging images at this stage takes seconds — you just drag a clip to a new position. Once you have added per-clip transitions, motion keyframes, and audio sync points, moving a single image means re-doing the effects on every neighboring clip. The rough cut preview is your cheapest opportunity to catch structural issues, so take it seriously.
During this preview, keep a mental (or written) note of spots where the rhythm feels off. If a section drags, mark it for shorter durations or fewer images. If a transition between two photos feels jarring, note whether the issue is sequencing or simply a visual mismatch that a crossfade might soften later. You are not solving these problems yet — you are cataloging them so the next steps are targeted rather than guesswork.
How to add photo in video projects efficiently comes down to this discipline: build the skeleton first, confirm it holds together, then dress it up. With your timeline assembled and your pacing validated through a rough preview, the sequence is ready for the layer that transforms a static photo reel into something that actually feels alive — transitions and motion effects.
Step 5 Add Transitions and Motion Effects That Make Photos Feel Alive
A timeline full of properly sequenced, well-paced images is a solid foundation — but it still looks like a slideshow. The difference between a flat photo reel and a video that holds attention comes down to what happens between and within each frame. Transitions control how one image hands off to the next. Motion effects control what happens while a single image is on screen. Together, they turn static photos into something that feels cinematic rather than mechanical.
Essential Transition Types and When to Use Each
Transitions are not decoration. Each type creates a specific psychological effect on the viewer, and choosing the right one depends on the mood and pacing of that particular moment in your video. The table below breaks down the four transitions you will use most often, along with clear guidance on when each one earns its place.
| Transition Type | Visual Effect | Best Used For |
|---|---|---|
| Cut | Instant switch from one image to the next — no animation at all | Fast-paced sequences, energetic montages, and any moment where you want to maintain momentum without slowing the viewer down |
| Crossfade / Dissolve | One image gradually fades out while the next fades in, briefly overlapping | Emotional or reflective moments, storytelling transitions, and sequences where you want a fluid, artistic feel between scenes |
| Slide / Push | One image physically pushes the other off screen in a directional wipe | Sequential content, before-and-after comparisons, tutorial steps, and presentation-style videos that need a sense of forward progress |
| Fade to Black | The current image fades to a black screen before the next image appears | Section breaks, chapter endings, dramatic pauses, and closing sequences where you want the viewer to feel a clear shift in tone or topic |
Here is the rule that separates professional-looking results from amateur ones: pick one or two transition types and use them consistently throughout your video. Cycling through every flashy effect in your editor's library — star wipes, page curls, 3D cubes — signals a lack of intentionality. As video professionals consistently emphasize, transitions should serve the narrative, not showcase the software. A simple crossfade used with purpose looks far more polished than a dozen different effects competing for the viewer's attention.
When learning how to create a slideshow that actually feels like a video, the transition choices you make are the first thing that elevates the result. A video slideshow maker with a hundred transition options is only as good as the restraint you bring to using them.
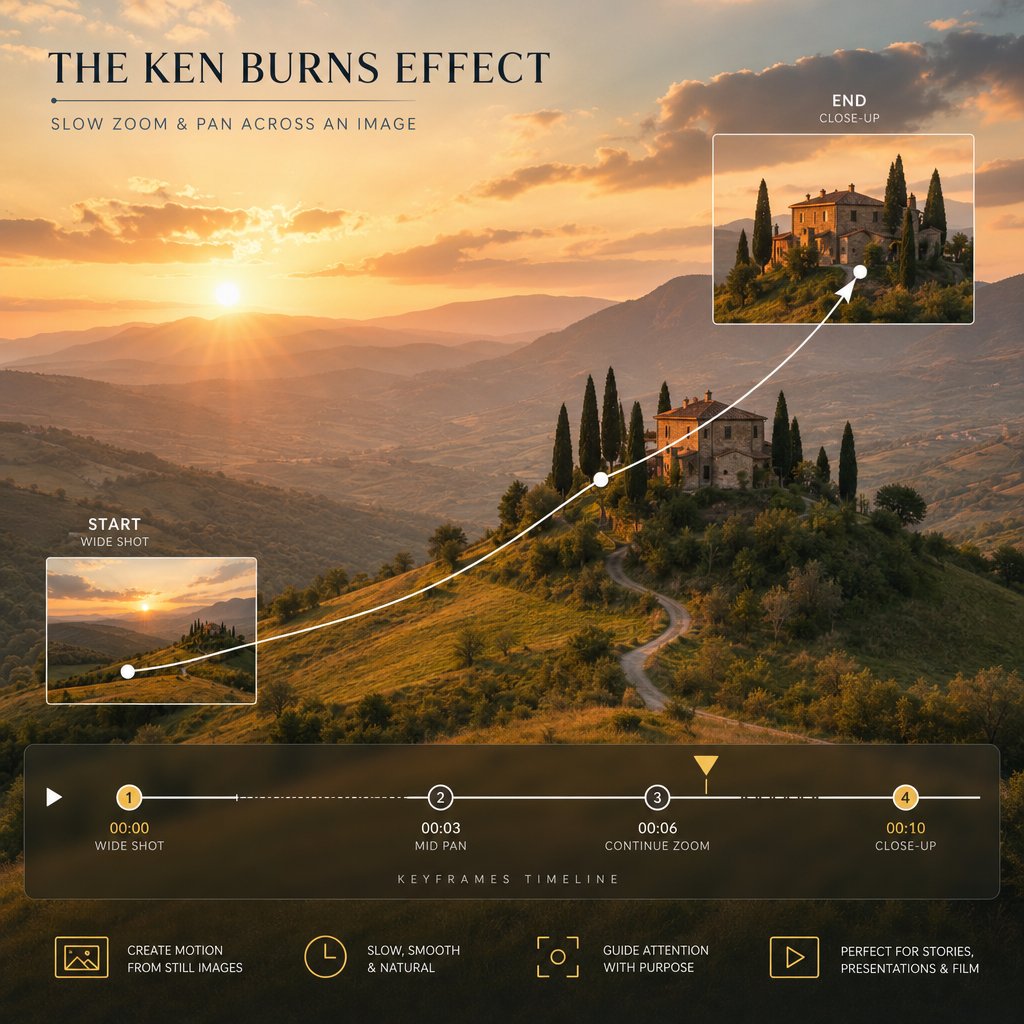
Add the Ken Burns Effect for Natural Motion
If there is one technique that single-handedly transforms a static photo into something that feels alive, it is the Ken Burns effect. Named after the documentary filmmaker who popularized it, this technique applies a slow zoom and pan across a still image, creating the illusion that a camera is gently moving within the scene. It is the most effective tool in your arsenal for making photos feel dynamic without any actual video footage.
The Ken Burns effect works by setting two keyframes: a start position (where the camera begins) and an end position (where the camera finishes). The editor then interpolates the movement between those two points, producing a smooth, gradual shift over the duration of the clip. You control three variables at each keyframe — horizontal position, vertical position, and zoom level — which gives you a surprising amount of creative range from a simple technique.
Here is how to apply it in practice, regardless of which slideshow software or editor you are using:
- Set your start keyframe — position the frame on the area of the image you want the viewer to see first, and set your initial zoom level (for example, 100% showing the full image).
- Set your end keyframe — move the frame to where you want the viewer's eye to land by the end of the clip, and adjust the zoom (for example, 110-115% to create a subtle push-in).
- Let the editor interpolate — the software automatically generates the smooth movement between your two points over the clip's duration.
The key word here is subtle. A 10-15% zoom change over 4-5 seconds feels natural and cinematic. A 40% zoom over 2 seconds feels dizzying and pulls the viewer out of the experience. Think of it as mimicking the way your eye naturally drifts across a photograph — slow, deliberate, and drawn toward a focal point. Zooming in works well for drawing attention to a specific detail, like a product feature or a person's expression. Zooming out reveals context, showing the viewer the broader scene after starting on a close detail.
Panning — horizontal or vertical movement without changing zoom — adds a different kind of energy. A slow horizontal pan across a landscape photo simulates the feeling of scanning a vista. A vertical tilt up a building or down a menu creates a sense of discovery. When you are figuring out how to make a photo slideshow that does not feel static, the Ken Burns effect alone can carry the entire visual experience.
Layer Multiple Motion Effects for Depth
Once you are comfortable with basic zoom and pan, the next level is combining them. A slow zoom-in paired with a gentle horizontal pan creates a diagonal movement path that feels more organic than either effect alone. Imagine a travel photo where the camera slowly pushes in while drifting from left to right — the viewer's eye follows a natural trajectory across the image, picking up details along the way.
You can also pair motion within the image with a transition to the next clip. For example, a slow zoom-in on one photo that ends with a crossfade into the next image — where a slow zoom-out begins — creates a breathing rhythm that feels intentional and polished. This push-pull pattern is a staple of documentary editing and works beautifully in any image-based video.
A word of caution for intermediate users eager to experiment: stacking too many effects on a single clip works against you. Adding a zoom, a pan, a rotation, and a blur overlay to one image does not create depth — it creates visual noise that distracts from the photo itself. The images are your content. Motion effects exist to support them, not compete with them. A good rule of thumb is to limit each clip to one primary motion (zoom or pan) and one transition to the next image. If a particular photo is strong enough to hold the viewer's attention on its own, a simple cut with no motion at all can be the most powerful choice.
With your transitions chosen and motion effects applied, the visual layer of your video is in place. But visuals only tell half the story — what the viewer hears while watching those images move shapes the emotional impact just as much as what they see.
Step 6 Layer in Music and Sound to Make Picture Video to Music
A well-paced sequence of images with smooth transitions can look polished — but watch it on mute and then watch it with the right soundtrack, and you will feel the difference immediately. Audio is what transforms a visual sequence into an emotional experience. It sets the mood before the viewer consciously registers it, guides pacing in ways the eye alone cannot, and gives your video a sense of completeness that silent visuals never achieve. Understanding how to make a slideshow with music that actually resonates starts with choosing the right track, then syncing your visuals to its rhythm.
Find Royalty-Free Music That Fits Your Mood
The track you choose matters as much as the images themselves. Background music shapes how viewers interpret every photo in your sequence — the same product shots feel aspirational with a warm acoustic guitar underneath and clinical with a minimal electronic beat. Before browsing any library, decide on the emotional tone you want your video to carry, then find music that reinforces it.
You have three main categories of royalty-free music sources to work with:
- Platform built-in libraries — Most online editors and mobile apps include a curated selection of licensed tracks you can use without leaving the tool. These are convenient and legally safe, though the selection can feel limited for niche moods.
- Dedicated royalty-free sites — Services like Artlist, Epidemic Sound, and Musicbed offer large catalogs organized by mood, genre, and tempo. A subscription eliminates licensing headaches and gives you access to professionally produced tracks across every style.
- Creative Commons and public domain sources — Sites like the Free Music Archive and Archive.org offer free tracks, though quality varies and some Creative Commons licenses include restrictions on commercial use. Always check the fine print before publishing.
Once you have identified your source, match the music's tempo to your video's pacing. Fast cuts and energetic montages pair naturally with upbeat, driving tracks. Slower, contemplative sequences work better with ambient or acoustic music that gives each image room to breathe. Here is a quick mood-to-content map to guide your selection:
- Energetic and upbeat — product launches, event recaps, fitness content, sale announcements
- Warm acoustic — personal stories, family videos, behind-the-scenes content, nonprofit storytelling
- Minimal electronic — tech product demos, SaaS walkthroughs, modern brand content
- Cinematic and orchestral — travel videos, portfolio reels, brand films, documentary-style pieces
When you add music to a photo sequence, the genre and energy of the track become the invisible narrator. Get this choice right, and the images feel like they belong together. Get it wrong, and even perfectly edited visuals feel disconnected from the viewing experience.
Sync Image Transitions to the Beat
This single technique separates amateur image videos from ones that feel professionally produced: aligning your image transitions to the musical beats or phrase changes in your soundtrack. When a new photo appears exactly as a drum hit lands or a melodic phrase shifts, the viewer perceives the visuals and audio as one unified piece rather than two separate layers stacked on top of each other.
The manual method is straightforward. Import your chosen track onto the audio timeline, then play it through while watching the waveform. Mark the timestamps where prominent beats, downbeats, or musical phrases land — most editors let you drop markers or snap points directly on the audio track. Then go back to your image clips and adjust their individual durations so each transition falls on one of those marked beats. This means some images might hold for 3.5 seconds while others hold for 2.8 seconds, depending on where the music naturally accents.
Some editors offer automatic beat detection that analyzes your audio track and places markers for you, which speeds up the process considerably. Whether you mark beats manually or let the software detect them, the result is the same: your images change in rhythm with the music, and the whole video feels intentional. If you have ever wondered how to create a picture slideshow with music that feels like a real production, beat-synced transitions are the answer. It takes an extra 10-15 minutes of adjustment, but the perceived quality jump is dramatic.
Add Voiceover or Sound Effects
Music with images creates mood. A voiceover adds meaning. If your video needs to explain, narrate, or sell, layering a spoken track on top of your background music gives viewers both the emotional pull and the informational clarity they need.
Recording a voiceover does not require a studio. A quiet room, a smartphone or computer microphone, and a separate audio track in your editor are enough to get clean, usable results. Record your narration as a standalone file, import it onto its own track above the music, and align key phrases to the images they reference. The critical adjustment: drop your background music volume to roughly 20-30% of its original level whenever voiceover is present. This keeps the music audible as an emotional undercurrent without competing with the spoken words. Production guidelines recommend dialogue sitting around -12 dB to -15 dB while music sits at -18 dB to -22 dB — a practical starting point you can fine-tune by ear.
For projects that do not need narration, subtle sound effects add a layer of polish most viewers feel but cannot name. A soft whoosh on a slide transition, a gentle click when text appears on screen, or a quiet ambient tone under a landscape photo — these small details fill the sonic space between music beats and make the video feel finished rather than bare. Use them sparingly. One or two well-placed effects per sequence add professionalism; a sound effect on every single transition becomes distracting noise.
Knowing how to add songs to photos and layer in voiceover or effects gives you complete control over the emotional arc of your video. The visuals tell the viewer what to look at. The audio tells them how to feel about it. With both layers working together, the final step is making sure all of that work translates cleanly when you hit export — which means understanding the format, resolution, and platform-specific settings that preserve your quality from timeline to upload.
Step 7 Export and Optimize for Every Platform
Your timeline is locked, your transitions land on the beat, and the audio mix sounds clean. All of that work lives inside your editor right now — and it stays there until you export. The export step is where careful projects either preserve their quality or quietly lose it, because the wrong format, resolution, or compression setting can undo hours of editing in a single click. Knowing exactly which settings to use for each platform turns your finished timeline into a file that looks and sounds the way you intended, everywhere it gets uploaded.
Choose the Right Output Format and Resolution
When you export your image-to-MP4 file, you are choosing a container format and a codec that together determine compatibility, quality, and file size. Three formats cover virtually every use case you will encounter:
- MP4 with H.264 codec — This is the universal default. MP4 files encoded with H.264 play on nearly every device, browser, and social platform without conversion. If you are unsure which format to pick, this is the answer. It offers an excellent balance between visual quality and compression efficiency, which is why every major social network lists MP4 as its recommended upload format.
- MOV — Preferred within Apple ecosystems and professional post-production workflows. MOV files retain high-quality video and audio data, making them a solid choice if your video will be handed off to another editor for further work in Final Cut Pro or Motion. The tradeoff is larger file sizes and less universal playback support outside Apple devices.
- WebM — A lightweight, open-source format optimized for web embedding. If your video will live on a website rather than a social platform — embedded in a landing page or product page, for example — WebM delivers efficient compression with broad browser support. It is less common for social uploads but ideal for developers and web teams.
Resolution is the other half of the export equation. For most social platforms, 1080p (1920x1080 or 1080x1920 for vertical) is the sweet spot — sharp enough to look professional on any screen, small enough to upload quickly. Choose 4K (3840x2160) when you are publishing to YouTube and want maximum sharpness, or when the video serves as a portfolio piece where visual fidelity matters. Drop to 720p only when file size is a hard constraint, like email attachments or bandwidth-limited environments. Keep in mind that higher resolution means larger files and longer upload times, so match the resolution to where the video will actually be watched rather than defaulting to the highest option available.
If you need to convert a presentation to video free of charge, most online editors and even presentation tools like Google Slides or PowerPoint offer direct MP4 export. The same format and resolution principles apply — set your output to 1080p with H.264, and the result will play cleanly on any platform.
Platform-Specific Export Settings
Each platform has its own combination of aspect ratio, resolution ceiling, duration limits, and recompression behavior. Exporting a single file and uploading it everywhere sounds efficient, but it usually means your video looks great in one place and awkward in three others. The table below gives you a quick-reference guide for the five platforms where image-based videos perform best, along with a recommended image count based on typical pacing.
| Platform | Aspect Ratio | Recommended Resolution | Max Duration | Recommended Image Count |
|---|---|---|---|---|
| YouTube | 16:9 | 1920x1080 (or 3840x2160 for 4K) | 15 min (default, up to 12 hrs verified) | 20-60 images |
| Instagram Reels | 9:16 | 1080x1920 | 90 seconds (up to 15 min uploaded) | 8-20 images |
| TikTok | 9:16 | 1080x1920 | 10 minutes (uploaded from file) | 10-30 images |
| 16:9 or 1:1 | 1920x1080 or 1080x1080 | 240 minutes | 15-50 images | |
| 16:9 or 1:1 | 1920x1080 or 1080x1080 | 10 minutes | 10-30 images |
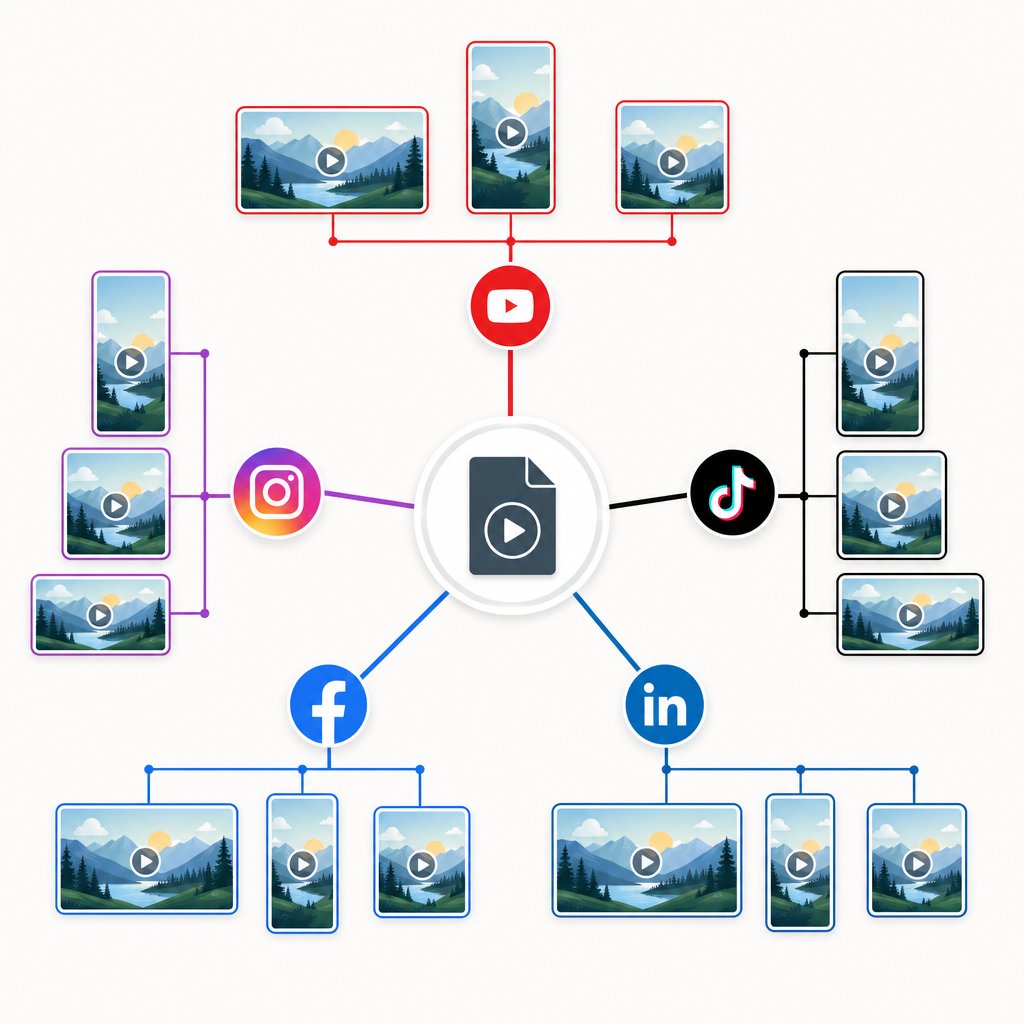
A few details worth noting. YouTube is the only platform where 4K uploads make a meaningful visual difference to viewers, since it preserves higher bitrate streams for users on large screens. Instagram Reels and TikTok both use 9:16 vertical video, but their duration limits and audience behavior differ — Reels tend to reward tighter edits under 30 seconds, while TikTok audiences are more willing to watch longer content. Facebook accepts both landscape and square formats, so choose based on whether your audience primarily watches on desktop (16:9) or mobile (1:1 often performs better in the feed). LinkedIn follows similar logic, though its audience skews toward professional content where landscape format feels more natural.
For creators who publish across multiple platforms, the most efficient approach is to export two or three versions from the same project: a 16:9 landscape cut for YouTube and LinkedIn, a 9:16 vertical cut for Reels and TikTok, and optionally a 1:1 square version for Facebook feed posts. Most editors let you duplicate your project and swap the canvas dimensions without rebuilding the entire timeline. A video ratio converter tool can also handle reformatting after export, though you lose some control over how images get cropped to fit the new frame.
Optimize File Size Without Losing Quality
File size comes down to one setting more than any other: bitrate. Bitrate controls how much data is allocated per second of video, and it directly determines the balance between visual quality and file weight. A higher bitrate preserves more detail but produces larger files. A lower bitrate shrinks the file but can introduce compression artifacts — blurriness, color banding, or blocky patches in areas of subtle gradient.
For image-based videos exported at 1080p, a bitrate range of 8-12 Mbps using Variable Bitrate (VBR) encoding delivers a strong balance. VBR is generally preferred over Constant Bitrate (CBR) for pre-recorded uploads because it allocates more data to visually complex frames and less to simpler ones, resulting in better quality at a smaller overall file size. For 4K exports, aim for 35-45 Mbps to maintain sharpness across the larger frame.
Most editors simplify this decision with quality presets labeled High, Medium, and Low. When in doubt, choose High. The extra file size is worth it because platforms like YouTube, Instagram, and TikTok all recompress your video after upload. Starting with a higher-quality source file means the platform's recompression has more data to work with, and the final result viewers see retains more of your original detail. Uploading a Medium-quality file that then gets recompressed again can push the output below the quality threshold where artifacts become visible — especially in photos with fine textures, gradients, or text overlays.
If your exported file is too large for a platform's upload limit or your internet connection, there are a few ways to reduce size without a dramatic quality hit:
- Switch to VBR 2-pass encoding — The encoder analyzes your video twice, allocating bitrate more efficiently than a single pass. Export takes longer, but the file is smaller at the same perceived quality.
- Lower the bitrate slightly — Dropping from 12 Mbps to 8 Mbps for a 1080p export often produces a visually indistinguishable result at a noticeably smaller file size.
- Use H.265 (HEVC) instead of H.264 — H.265 achieves comparable visual quality at roughly 25-50% smaller file sizes. The caveat: not all platforms and older devices support H.265 playback natively, so H.264 remains the safer default for broad distribution.
A video converter app can also re-encode your exported file at a lower bitrate if your editor does not offer granular compression controls. Tools like HandBrake are free, handle batch processing, and give you precise control over output bitrate and codec — useful when you need to hit a specific file size target without re-exporting from your editor.
With the right export settings dialed in for each platform, your video arrives looking the way you built it — sharp images, smooth transitions, clean audio. But even a well-exported video can reveal issues that were invisible on the timeline, from blurry frames to pacing that felt fine in the editor but drags on a phone screen. The final step is catching and fixing those problems before your audience does.
Step 8 Troubleshoot Common Issues and Refine Your Video
You exported your video, hit play, and something looks off. Maybe the images appear soft, or the transitions feel choppy, or the pacing that seemed perfect on the timeline now drags on your phone screen. These problems are common, predictable, and fixable — if you know where to look. Most people asking how do i make a video using pictures and music run into the same handful of issues, and each one traces back to a specific misstep earlier in the workflow.
Fix Blurry Output and Resolution Mismatches
The most frequent quality complaint is blurry video, and the cause is almost always the same: low-resolution source images being upscaled to fill an HD or 4K canvas. When a 640x480 photo gets stretched across a 1920x1080 frame, the editor invents pixels that do not exist in the original file, producing a soft, muddy result. The fix is not a sharpen filter — it is prevention. Always start with images at or above your target video resolution. If your project canvas is 1080p, every source image should be at least 1920x1080 pixels.
The second most common visual problem is black bars appearing on the sides or top and bottom of the frame. This happens when you mix landscape and portrait images in the same project, or when an image's aspect ratio does not match the project canvas. The root cause is always an aspect ratio mismatch between the source image and the container it lives in. The solution: crop all images to a uniform aspect ratio during the preparation step, before they ever reach your timeline. If you followed Step 2 of this guide, you have already eliminated this issue entirely.
Solve Jarring Transitions and Pacing Problems
Even with proper resolution, a video can feel disjointed if the visual style shifts dramatically between images. Photos from different cameras, lighting conditions, or editing sessions create jarring jumps in color temperature and contrast that no transition can smooth over. The fix is batch color-grading all images to a consistent look before importing — a step that takes minutes but prevents the "stitched together from random sources" feel that undermines otherwise solid projects.
Pacing issues are subtler but equally damaging. If your video feels rushed, increase per-image duration by 1-2 seconds and give viewers time to absorb each frame. If it drags, resist the urge to shorten all durations uniformly — instead, cut your weakest images entirely. Removing a mediocre photo tightens the sequence more effectively than shaving half a second off every clip. When you are learning how to make a video out of photos that holds attention, editing by subtraction is often more powerful than editing by compression.
Run through these quick diagnostic checks before calling your video finished:
- Preview at full speed without pausing — does the overall rhythm feel natural?
- Watch without audio to isolate the visual flow — do any transitions feel abrupt or any holds feel too long?
- Watch with audio to check sync — do image changes land on musical beats or feel disconnected from the soundtrack?
Streamline Your Workflow for Faster Results
If you have followed all eight steps — storyboarding, image prep, tool selection, timeline building, transitions, audio, export, and troubleshooting — you now have a repeatable system for how to make a picture video with music at a professional level. Every future project becomes faster because the framework stays the same; only the images and creative choices change.
For readers who want to skip the manual editing steps altogether, AI-powered tools offer a dramatically compressed workflow. Snappyit's Image to Video converter lets you go from still images to finished video in minutes — upload your photos, and the tool handles sequencing, motion, and transitions automatically. This is especially useful for ecommerce sellers producing marketplace-ready product videos at volume, or marketers creating social content at scale who need to turn photos into a video without a full production setup. The manual eight-step process gives you maximum creative control; the AI route gives you maximum speed. Many creators use both depending on the project.
Here is your reusable checklist for how to create a video with pictures and music every time:
- Plan your storyboard and image sequence
- Select and prepare images at the correct resolution and aspect ratio
- Choose the right tool for your skill level and timeline
- Import images and build your rough timeline
- Add transitions and motion effects with restraint
- Layer in music, sync transitions to beats, and add voiceover if needed
- Export with platform-specific settings and optimized bitrate
- Troubleshoot, refine, and publish
Whether you are figuring out how to make video using photos and music for the first time or refining a workflow you have used for years, this system scales. The tools will evolve, platforms will shift their specs, and AI will keep getting faster — but the fundamentals of sequencing, pacing, and intentional design remain constant. Start with a clear plan, prepare your inputs, and let the creative decisions drive the technical ones. That is how to make a video with photos and music that people actually watch.
Frequently Asked Questions
1. How many images do I need to make a video?
The number of images depends on your target video length and pacing. At a standard 3-4 second hold per image, a 60-second video needs roughly 15-20 images. For YouTube videos running 2-3 minutes, plan for 30-60 images. Short-form content like Instagram Reels or TikTok (15-30 seconds) works well with 8-15 images. Always work backward from your target duration and platform requirements rather than trying to fit too many photos into too little time.
2. What is the best image resolution for making a video?
For standard HD video output, use source images that are at least 1920x1080 pixels. For 4K video, you need images at 3840x2160 pixels or higher. The key rule is that your source images should always match or exceed your target video resolution. Low-resolution images stretched to fill an HD canvas will appear blurry because the editor has to invent pixels that do not exist in the original file. When in doubt, start with the highest resolution available since you can scale down but cannot scale up without quality loss.
3. Can I create a video from images for free?
Yes, several free options exist across different tool categories. Free online editors like Canva and Clipchamp offer drag-and-drop timelines with basic transitions and music libraries. Mobile apps like CapCut and VN provide touch-based editing at no cost. Desktop software like DaVinci Resolve offers professional-grade editing for free. AI-powered tools such as Snappyit's Image to Video converter also offer free tiers that let you test output quality before committing to a paid plan, making them ideal for quick turnaround on product visuals or social content.
4. How do I add music to a video made from pictures?
Import a royalty-free music track onto a separate audio timeline in your editor, then align image transitions to the musical beats for a polished result. Match the music tempo to your video pacing: upbeat tracks for fast cuts, ambient tracks for slower sequences. Keep background music at 20-30% volume if you add voiceover. Most online editors include built-in music libraries, or you can source tracks from dedicated royalty-free sites like Artlist or Epidemic Sound. Syncing image changes to beat timestamps is the single technique that most dramatically elevates perceived production quality.
5. What is the Ken Burns effect and how does it help image videos?
The Ken Burns effect applies a slow zoom and pan across a still image, creating the illusion of camera movement within the scene. You set a start position and zoom level, then an end position and zoom level, and the editor interpolates smooth movement between them. A subtle 10-15% zoom change over 4-5 seconds feels natural and cinematic. This technique is the single most effective way to make static photos feel alive in video without any actual footage. It works in virtually every video editor, from free mobile apps to professional desktop software.
Generate your first results in 90 seconds
Skip the manual grind for 80% of your catalog. Run a flat-lay or supplier photo through Snappyit Image to Video and ship listing-ready imagery in under two minutes — free to try, no credit card.
Try Snappyit Image to Video free →