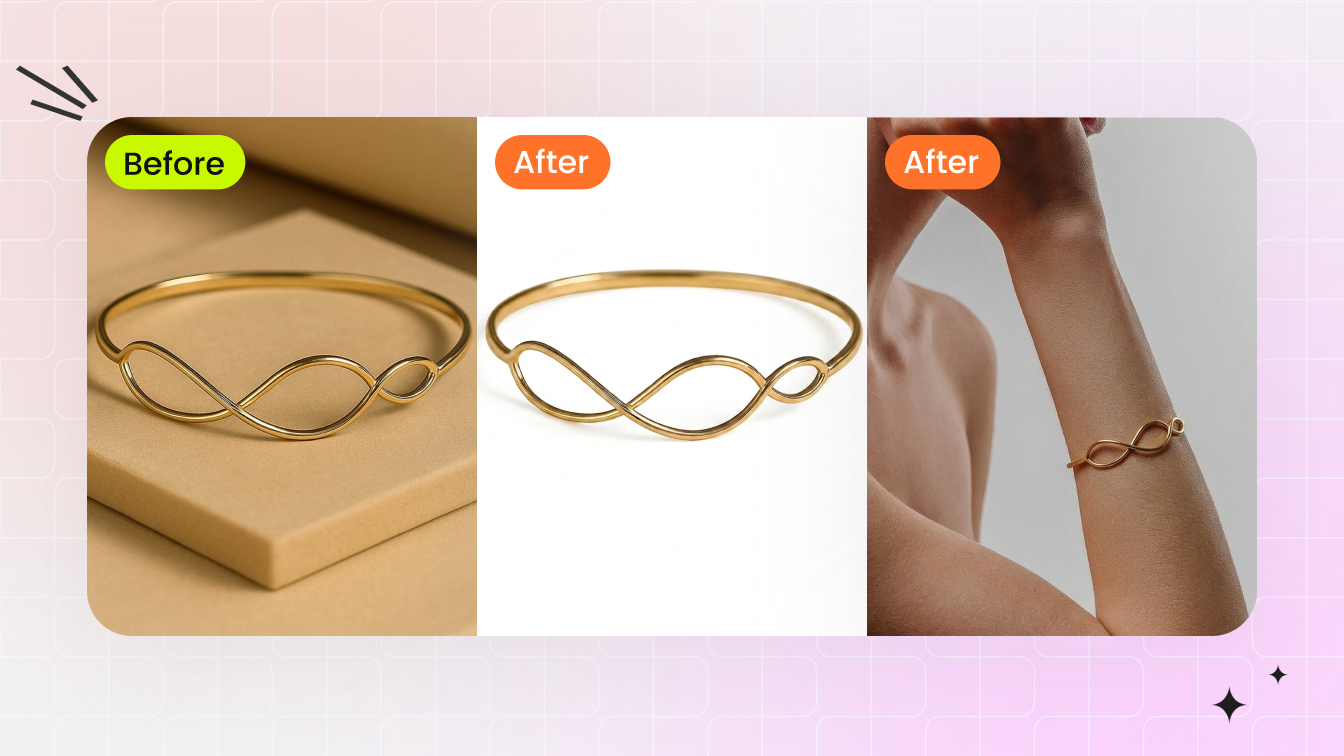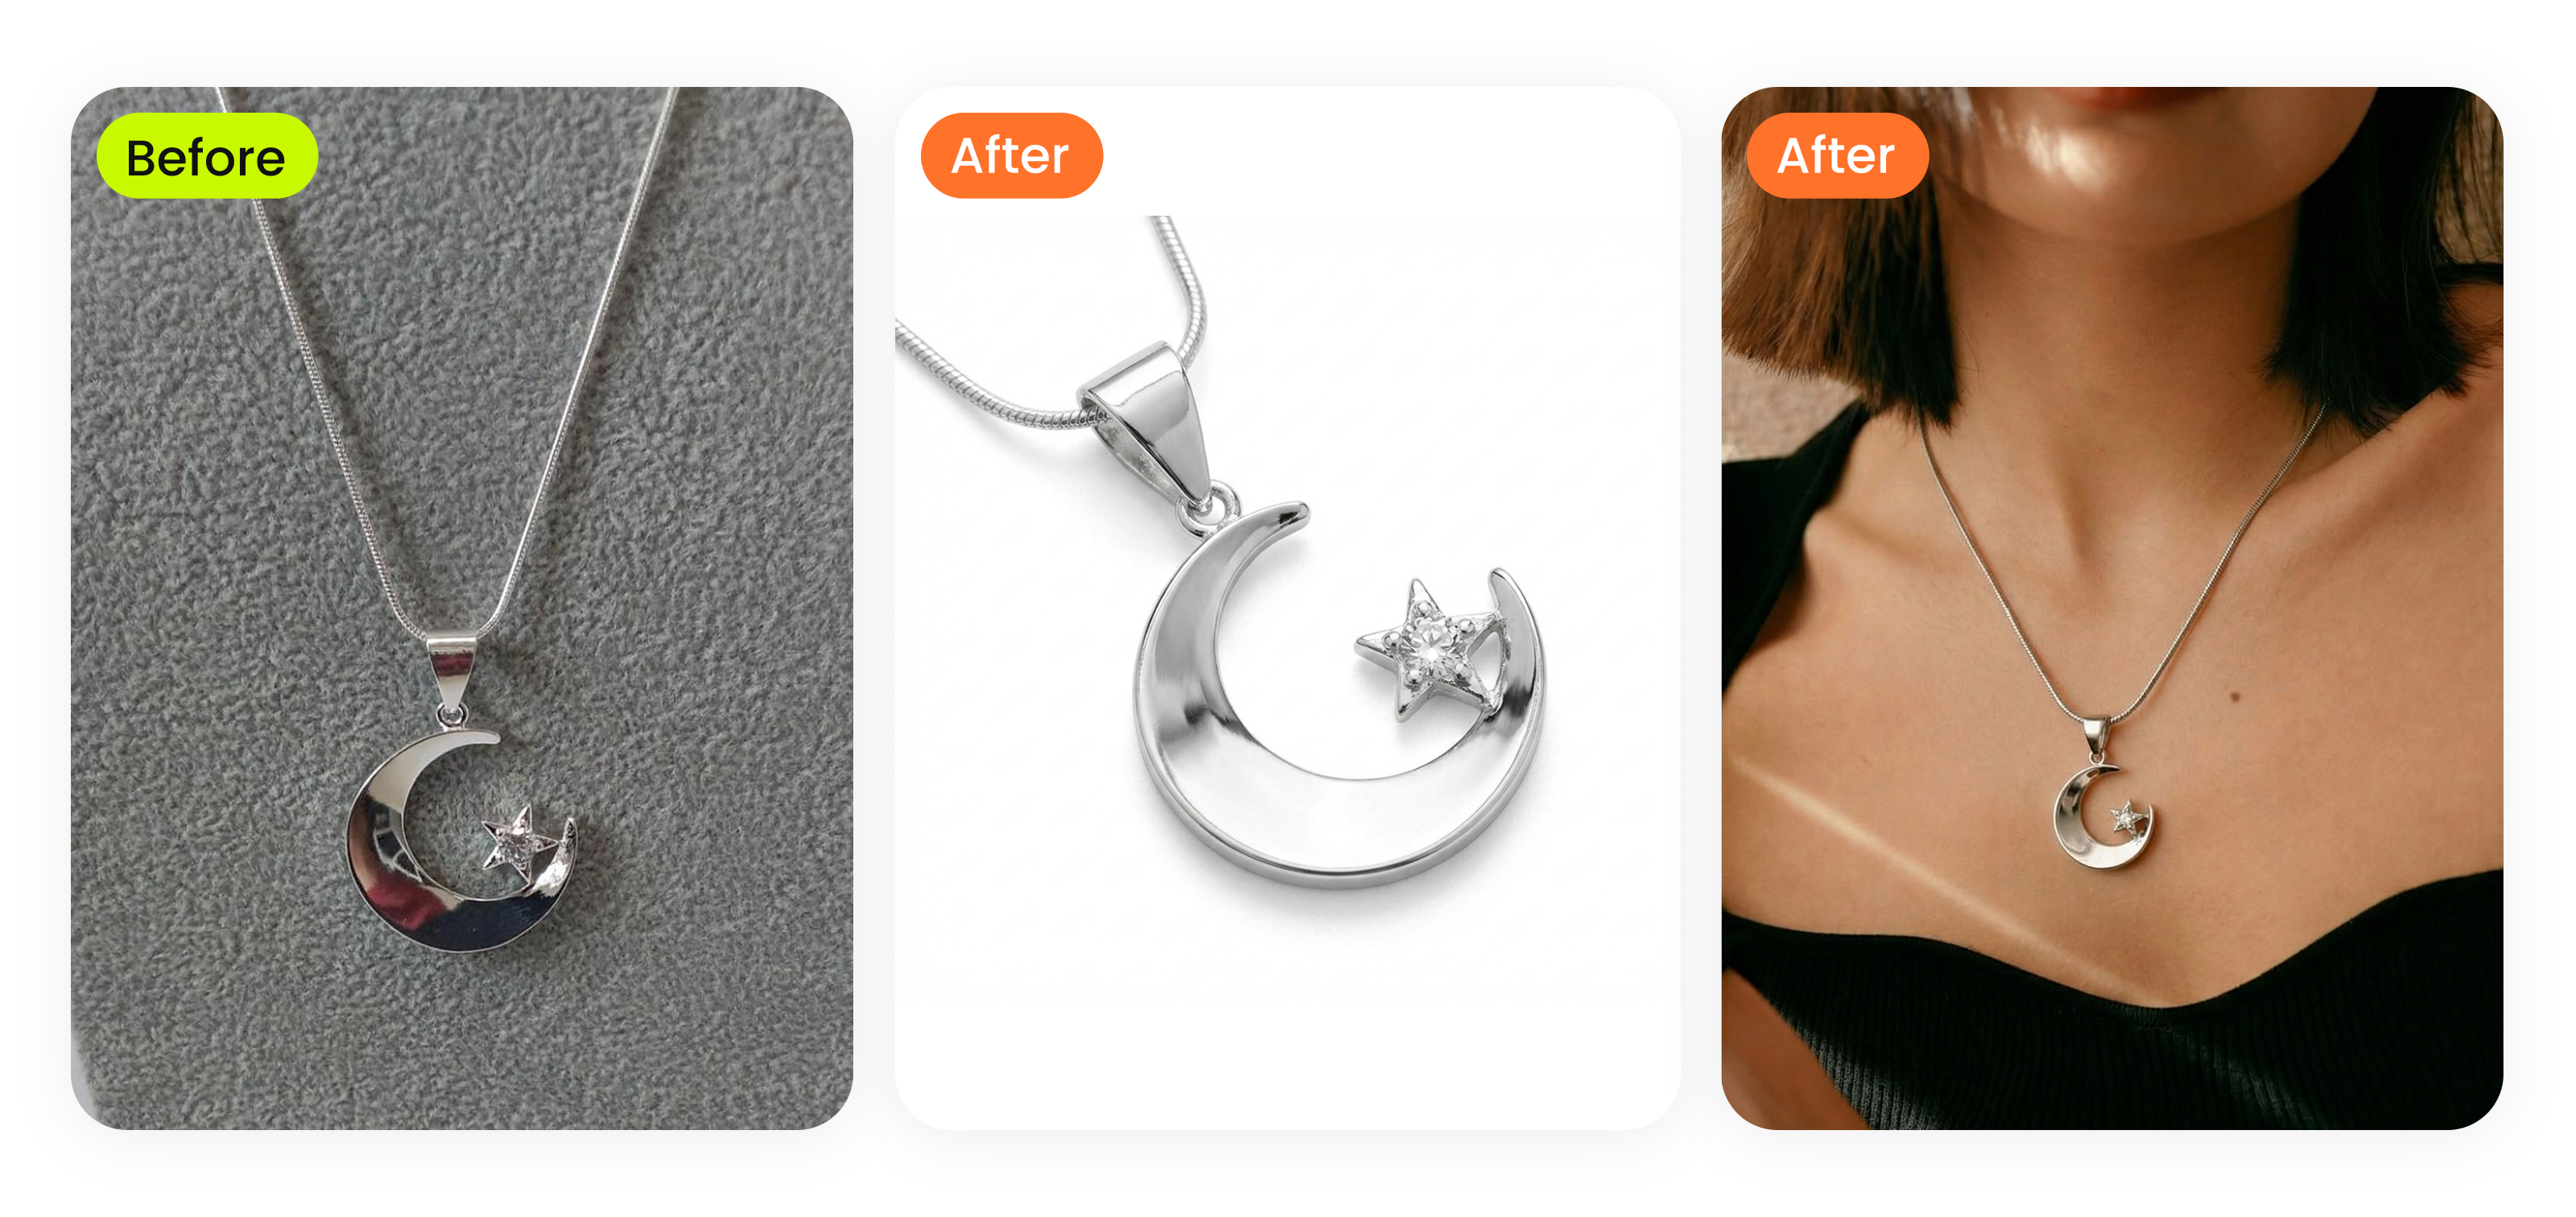
At a glance
Jewelry photo retouching guide — camera setup, focus stacking, and Photoshop techniques for metals, gemstones, and ecommerce-ready exports.
| Need | What to do |
|---|---|
| Get oriented | Read the short summary, then use the checklist below. |
| Create a test image | Try Jewelry Retouch Free |
What Jewelry Photo Retouching Actually Means
Imagine photographing a diamond ring. In person, it catches every flicker of light in the room. On camera, it looks flat, dusty, and slightly blue. That gap between what your eyes see and what the lens captures is exactly where jewelry photo retouching lives.
Jewelry photo retouching is the process of digitally refining jewelry photographs to correct imperfections, enhance the appearance of metals and gemstones, and produce images that accurately represent the piece for commercial or editorial use.
Defining Jewelry Photo Retouching
This discipline sits in its own category, separate from general product retouching. A sneaker or a handbag has matte surfaces, predictable textures, and forgiving light behavior. Jewelry is the opposite. You're working with objects that are small, highly reflective, and packed with transparent or translucent elements like faceted gemstones and enamel coatings. These materials interact with light in complex, unpredictable ways. A polished gold band acts like a tiny curved mirror, picking up everything in the room. A sapphire refracts light internally, creating color shifts that change with every angle. Jewellery photo retouching accounts for all of these optical quirks, using targeted techniques that generic editing workflows simply don't address.
Who This Guide Is For
Whether you're a hobbyist jeweler photographing pieces for your first Etsy shop, a professional photographer expanding into product work, an ecommerce store owner managing hundreds of SKUs, or a retouching beginner looking to build a new skill, this guide covers the full lifecycle you need. You'll walk through pre-shoot preparation that cuts your editing time in half, tool-level Photoshop techniques for metals and gemstones, core jewelry retouching methods explained step by step, and platform-specific export settings that keep your images sharp from Amazon to Shopify.
The real challenge, though, starts before you ever open an editing application. It starts with understanding why jewelry images fail in the first place and what makes them so uniquely difficult to get right.
Why Jewelry Images Demand Professional Retouching
A polished platinum band is essentially a tiny curved mirror. A faceted emerald bends light through dozens of internal surfaces. A strand of pearls shifts color depending on the temperature of the light source hitting it. These aren't minor inconveniences for a camera sensor. They're fundamental optical problems that make straight-from-camera jewelry shots unreliable for selling, storytelling, or brand building.
Optical Challenges Unique to Jewelry
Jewelry photography sits among the most technically complex categories in product imaging. The difficulty comes down to physics. Metal surfaces act like mirrors, bouncing specular highlights straight into the lens and picking up reflections of the camera, the photographer, and every object in the studio. Gold alloys shift color under different lighting conditions: a warm tungsten bulb pushes yellow gold toward orange, while a cool LED panel can make the same piece look greenish. White gold and platinum reflect their surroundings so faithfully that even a colored shirt worn during the shoot can tint the metal in the final image.
Gemstones introduce a second layer of complexity. Faceted stones refract and reflect light internally, creating brilliance and fire that the human eye perceives in real time but a single camera exposure often flattens or misses entirely. Transparent stones like diamonds scatter light across dozens of facet junctions, while translucent materials like opals and moonstones produce a soft internal glow that harsh or poorly angled lighting can kill completely.
Then there's the macro magnification problem. Jewelry is small, so you're shooting close. At macro distances, every speck of dust, every fingerprint oil smudge, and every micro-scratch invisible to the naked eye becomes glaringly obvious on screen. A ring that looks flawless in your hand suddenly reveals surface imperfections across the entire band once you view the image at full resolution.
Here are the most common visual problems that jewelry photo editing needs to solve:
- Dust particles and micro-scratches magnified by macro lenses
- Uneven specular reflections on polished metal surfaces
- Color casts from studio lighting that shift gold, silver, and gemstone tones
- Background distractions, including reflections of studio equipment in the metal
- Loss of sparkle and fire in gemstones due to single-exposure limitations
- Inconsistent shadows and highlights across pieces shot at different times
How Retouching Impacts Ecommerce Conversions
These optical challenges aren't just aesthetic annoyances. They directly affect whether a customer clicks "add to cart" or bounces to a competitor. Research shows that 93% of consumers cite visual appearance as the key deciding factor in online purchases, and jewelry is one of the highest-stakes categories for that decision. Customers can't hold the piece, turn it in the light, or compare it against their skin tone. The image is the entire experience.
When product photos don't accurately represent color, clarity, or finish, returns spike. Ecommerce stores using unretouched jewelry images see return rates of 15-20%, compared to 8-12% for stores that invest in professional jewelry image retouching. The most common reason cited? "Color different than expected." That's a problem retouching solves directly through precise color correction and white balance calibration.
Conversion rates tell a similar story. Professionally retouched jewelry images have been linked to 30-40% higher conversion rates compared to unedited alternatives. Consider what that means in practice: the same traffic, the same ad spend, the same product, but significantly more sales simply because the image builds enough trust for the customer to commit.
Brand consistency amplifies this effect across an entire catalog. When you're managing hundreds of SKUs, each shot at different times and possibly under different lighting conditions, the visual experience can feel disjointed. One ring looks warm and inviting, the next looks cold and clinical, and a third has a slightly gray background while the rest are pure white. Customers notice this, even subconsciously. Inconsistent visuals lower perceived value and erode brand trust, making even high-quality pieces look ordinary. Jewelry retouching services address this by applying uniform tone, shadow, and background treatment across every image in a product line, so the catalog reads as one cohesive collection rather than a patchwork of separate photo sessions.
The business case is clear: jewelry image retouching isn't a cosmetic luxury. It's a conversion tool, a return-rate reducer, and a brand-consistency engine. The real question becomes how much of that work you can prevent before you ever open Photoshop, starting with what happens behind the camera.
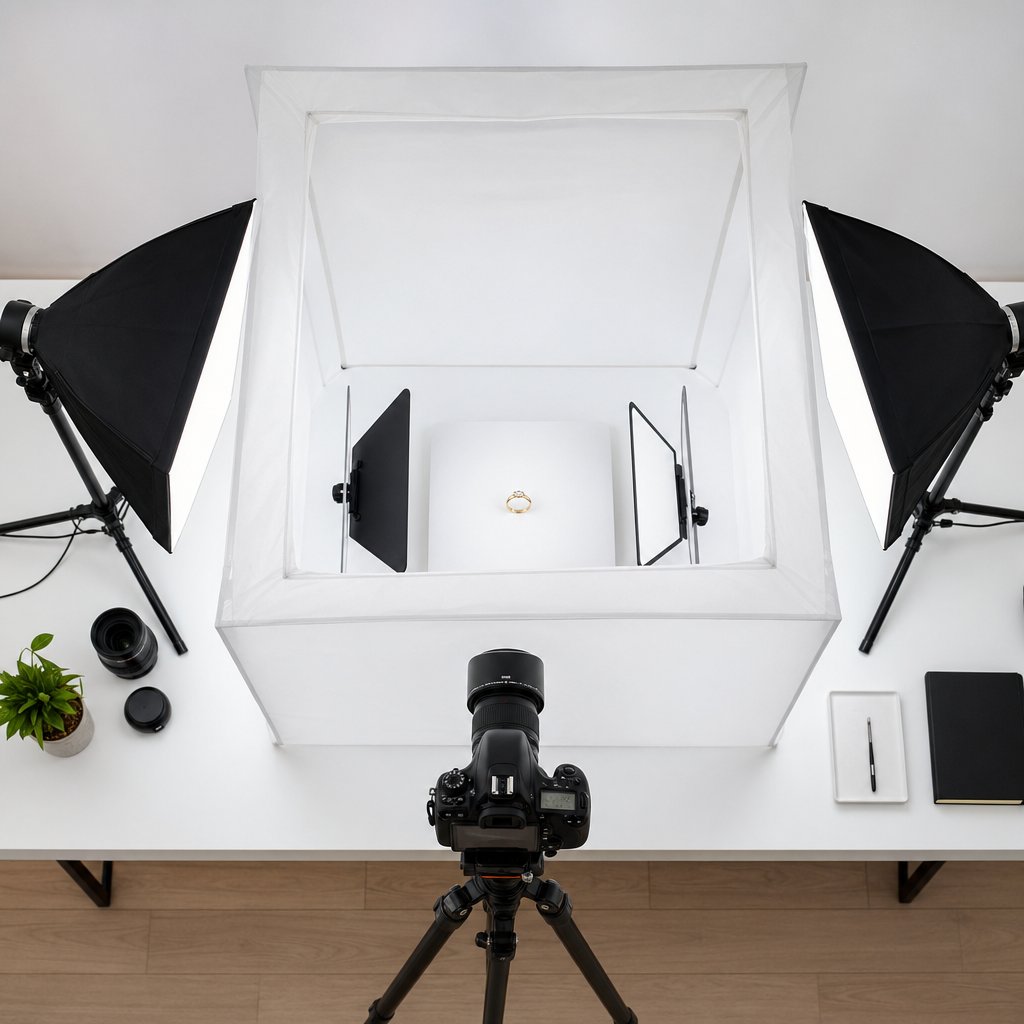
Photography Preparation That Minimizes Retouching Work
Every minute you invest behind the camera can save five or more in front of the screen. The fastest way to cut your jewellery photo editing time is to capture a cleaner image from the start. That means dialing in your lighting, camera settings, and lens choice before you fire a single frame. When these fundamentals are right, you'll spend less time fixing problems and more time refining details.
Lighting and Camera Settings That Save Editing Time
Lighting is the single biggest variable in jewelry photography retouching workload. Two setups dominate the field, and each serves a different purpose.
A diffused light tent wraps the piece in soft, even illumination from all sides. This approach minimizes harsh specular highlights on polished metal and reduces the chance of reflecting studio equipment back into the shot. As COLBOR's jewelry lighting guide notes, placing two lights overhead with a white paper cyc wall beneath and behind the piece creates a gentle, shadow-free environment ideal for rings, earrings, and bracelets.
Directional strobes positioned at a 45-degree angle offer more contrast and dimension, which works well for editorial or lifestyle shots. A foam board or tabletop V-flat bounces light back onto the shadow side, keeping detail visible without flattening the piece entirely. This setup rewards you with more dramatic images but demands more careful reflection management in post.
Whichever lighting path you choose, a few shooting fundamentals apply across the board:
- Small aperture (f/11 to f/16) for maximum depth of field. PhotoRobot's jewelry photography tests found that f/16 delivered noticeably sharper results across an entire piece compared to f/11, where parts of the object fell out of focus.
- Low ISO (100 to 200) to keep noise at an absolute minimum. Some mirrorless bodies handle ISO 400 without visible degradation, but staying at 100 is the safest bet for clean files.
- Manual white balance set to match your light source. Auto white balance shifts between frames, creating color inconsistencies that are tedious to correct across a catalog. Lock it manually and you'll edit jewelry photos with far more predictable color from shot to shot.
- Dedicated macro lens in the 90-105 mm range. A 100 mm or 105 mm macro lets you fill the frame with small pieces while maintaining enough working distance to avoid casting shadows on the subject. These lenses also deliver a 1:1 reproduction ratio, capturing fine prong details and engraving at actual size.
Shooting angle matters just as much as gear. Position the camera slightly off-axis rather than dead-on to the piece. This small shift moves the direct reflection of the lens and photographer out of the polished metal surface. Black bounce cards placed just outside the frame absorb stray light and create contrast-defining dark edges on curved bands, while white cards opposite them open up shadow areas. Together, these cards give you control over specular highlights without adding extra lights or complexity.
Focus Stacking for Full Sharpness on Small Pieces
Even at f/16, depth of field at macro distances is razor-thin. Imagine photographing a ring at an angle: the front of the band is tack-sharp, but the back fades into a soft blur. Your eye would never see the ring that way in person, and neither should your customer.
Focus stacking solves this. You capture multiple frames of the same piece, each focused on a different depth slice, then merge them into one image where everything is sharp from front to back. It's the technique that separates amateur close-ups from professional-grade product shots.
Here's how to do it:
- Lock the camera on a sturdy tripod. Even the slightest shift between frames will misalign the stack. Use a remote shutter release or a two-second timer to eliminate vibration from pressing the button.
- Set your lens to manual focus. Auto-focus will hunt between frames and land on different points unpredictably. Manual mode gives you full control over each focal increment.
- Shoot the first frame focused on the nearest point of the jewelry. For a ring shot at an angle, that's typically the front edge of the band or the top of the stone setting.
- Shift focus slightly deeper into the scene and shoot again. Move in small, consistent increments. For web-resolution images, three to five frames usually cover a ring or pendant. Magazine-quality prints at larger sizes may need 10 to 15 frames at a wider aperture like f/5.6 for maximum sharpness per slice.
- Repeat until the farthest point of the piece is in focus. Check your last frame to confirm the back edge or clasp is sharp before moving on.
- Merge the stack in software. In Photoshop, go to File > Scripts > Load Files into Stack, select all frames, then run Edit > Auto-Align Layers followed by Edit > Auto-Blend Layers. Photoshop analyzes each frame, creates layer masks that reveal only the sharpest areas, and composites them into a single fully focused image.
The result is a crisp, edge-to-edge image that looks the way the piece actually appears in hand. From here, any remaining cleanup, like dust removal, background replacement, or color correction, becomes a refinement task rather than a rescue mission. And that's exactly where the right Photoshop tools come in.
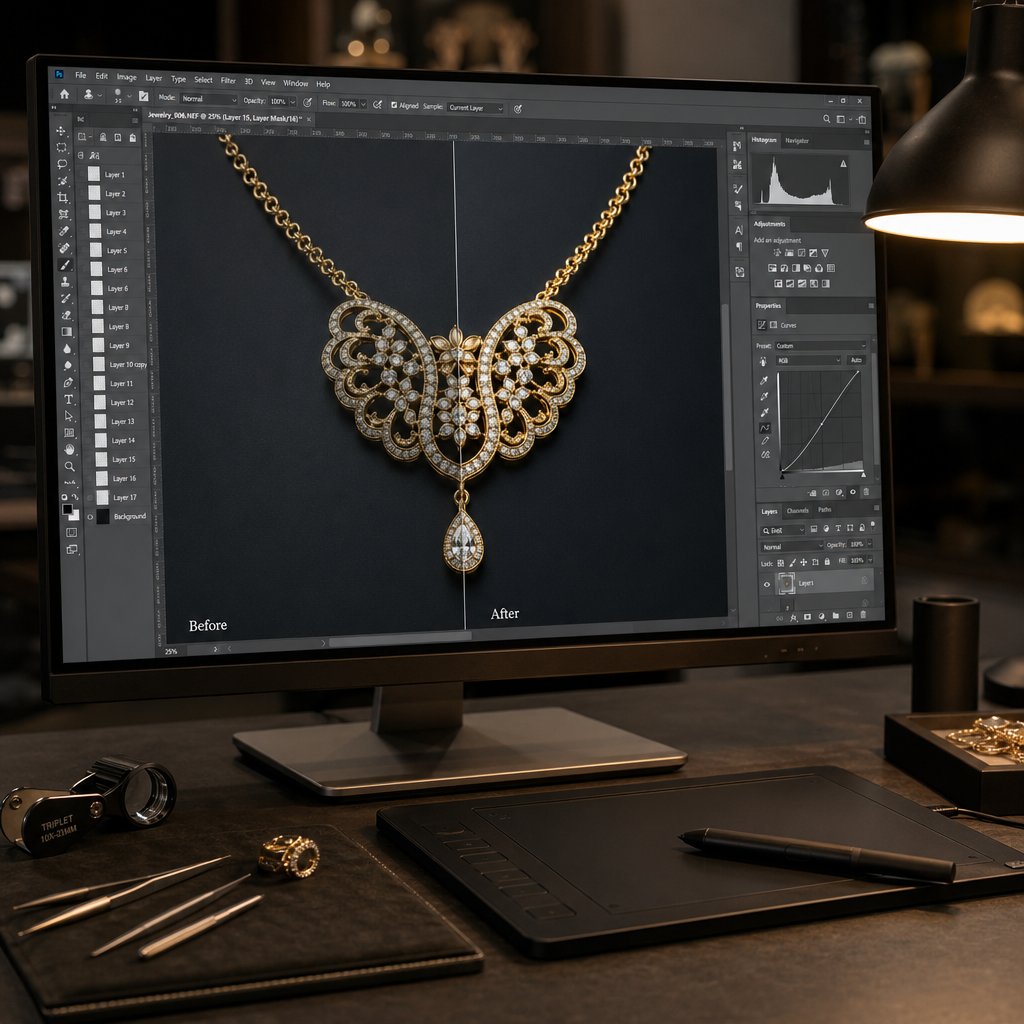
Essential Photoshop Tools for Jewelry Image Editing
A clean, well-exposed capture gives you a strong starting point. Turning that starting point into a polished, catalog-ready image depends on knowing which Photoshop tools to reach for and, just as importantly, how each one behaves on reflective metals and transparent stones. Many guides list these tools by name. Here, you'll learn exactly what each one does when you're retouching jewelry photos.
Clipping Paths and Selection Tools for Intricate Settings
The Pen Tool (P) is the foundation of precise jewellery image retouching. Automated selection tools like Quick Select or Magic Wand struggle with jewelry because polished metal edges blend into bright backgrounds, and prong tips are only a few pixels wide. The Pen Tool lets you draw a manual vector path that hugs every curve of a filigree setting, wraps around individual prongs, and follows the outline of a chain link by link. Once the path is closed, you convert it to a selection or a clipping path for clean background removal with crisp, artifact-free edges.
For dust, fingerprints, and micro-scratches magnified by macro lenses, two cleanup tools share the workload. The Clone Stamp Tool (S) samples a clean area of metal texture and paints it over a flaw, giving you full control over source point and blending. The Healing Brush Tool (J) does something similar but automatically matches the texture, lighting, and shading of the surrounding area. Use the Clone Stamp when you need pixel-exact control near edges, like cleaning a scratch that runs right up to a prong tip. Switch to the Healing Brush for broader surface blemishes on a ring band where seamless blending matters more than precision placement. As Adobe's documentation recommends, always retouch on a separate empty layer with "Sample All Layers" enabled so you can discard or adjust cleanup work independently.
Tonal and color tools handle the optical challenges covered earlier. Curves and Levels adjustment layers give you fine-grained control over brightness and contrast on reflective metals, letting you deepen shadows in the inner curve of a band or lift highlights along its top edge without blowing out detail. Hue/Saturation adjustment layers correct gold color casts by targeting the Yellows channel specifically, so you can warm up a pale 18k band without shifting the blue of a sapphire sitting in its setting. Dodge and Burn tools, used on a 50% gray layer set to Overlay blending mode, let you sculpt light manually: brighten the crest of a highlight on a platinum shank, deepen the shadow beneath a bezel, or intensify the sparkle along individual gemstone facets. This is the technique that separates flat-looking jewellery retouching from images with real three-dimensional depth.
Layer Masks tie everything together by isolating adjustments to specific areas. You can apply one Curves layer to boost contrast in the metal and a completely different Curves layer to enhance brilliance inside a gemstone, each masked so they affect only their target zone. This level of selective control is what makes Photoshop the standard tool for jewelry image editing at every skill level.
The table below maps each tool to its specific jewelry application and the skill level needed to use it effectively:
| Photoshop Tool | Jewelry-Specific Use Case | Skill Level |
|---|---|---|
| Pen Tool (P) | Clipping paths around prongs, chains, and intricate settings for background removal | Intermediate |
| Clone Stamp Tool (S) | Removing scratches and dust near edges, prong tips, and hinge mechanisms | Beginner |
| Healing Brush Tool (J) | Seamless cleanup of surface blemishes, fingerprints, and sensor spots on metal bands | Beginner |
| Curves / Levels Adjustment Layers | Tonal control on reflective metals; boosting contrast inside gemstone facets | Intermediate |
| Hue/Saturation Adjustment Layer | Correcting gold color casts without shifting gemstone hues; fine-tuning metal warmth | Intermediate |
| Dodge and Burn (on 50% gray Overlay layer) | Sculpting highlights and shadows on ring bands; enhancing gemstone sparkle | Advanced |
| Layer Masks | Isolating adjustments to metal vs. stone areas so each receives independent treatment | Intermediate |
| Smart Objects | Embedding raw files or layers for reversible scaling, filtering, and Camera Raw re-edits | Advanced |
Non-Destructive Editing With Adjustment Layers and Smart Objects
Every tool listed above shares one critical principle: keep your edits reversible. When retouching jewelry photos for a client, revision requests are inevitable. A brand manager may ask you to swap the background from white to light gray, shift the gold tone warmer to match a seasonal campaign, or re-crop for a different platform, all after you've delivered what you thought was the final file.
Adjustment layers make this painless. Each one, whether Curves, Levels, Hue/Saturation, or Color Balance, sits above your image as a separate, editable layer. You can toggle it on or off, reduce its opacity, or change its settings at any point without touching the original pixel data. Adobe defines this as nondestructive editing: making changes to an image without overwriting the original data, so image quality never degrades regardless of how many adjustments you stack.
Smart Objects take this a step further. Converting a layer to a Smart Object lets you apply filters like Unsharp Mask or Gaussian Blur as Smart Filters, which remain fully editable after the fact. You can also embed a Camera Raw file as a Smart Object, meaning you can double-click it at any time to reopen the raw processor and adjust white balance, exposure, or noise reduction from scratch. For jewelry workflows where color accuracy is non-negotiable, this flexibility is invaluable.
Together, adjustment layers, layer masks, and Smart Objects form the backbone of a professional jewellery retouching workflow. They let you experiment freely, respond to client feedback quickly, and maintain a single master file that can output multiple variations without starting over. With these tools in hand, the next step is applying them to the specific retouching techniques that transform a clean capture into a truly polished product image.
Core Retouching Techniques for Jewelry Photo Editing Services
Knowing which Photoshop tools to use is one thing. Knowing how to combine them into a sequence that turns a raw capture into a sell-ready image is something else entirely. Each technique below builds on the tools covered in the previous section, applied in the order a professional jewelry photo retouching service would follow from start to finish.
Background Removal and Shadow Creation
A clean background is the first thing a viewer registers, even if they don't realize it. The process starts with the clipping path you drew with the Pen Tool. Once the path is converted to a selection, you isolate the jewelry on its own layer and fill the background layer with pure white (RGB 255, 255, 255) for marketplace compliance or a subtle gradient for editorial use. The key detail most tutorials skip: don't delete the original shadow. Instead, preserve it on a separate layer at reduced opacity so the piece still looks grounded rather than floating in empty space.
When the original shadow is too messy or inconsistent, you'll build one from scratch. Two types work for jewelry:
- Drop shadow - a soft, offset shadow beneath the piece that suggests overhead lighting. Duplicate the jewelry layer, fill it with black, apply Gaussian Blur at 8-15 pixels, reduce opacity to 30-50%, and nudge it slightly downward.
- Reflection shadow - a mirrored fade beneath the piece that mimics a glossy surface. Flip a copy of the jewelry layer vertically, position it directly below, apply a gradient layer mask from white to black, and lower opacity to 20-35%.
Drop shadows suit catalog grids where consistency matters. Reflection shadows work better for hero images and luxury brand lookbooks where you want that polished, high-end feel.
Color correction comes next. Studio lights introduce color casts that shift metal tones away from their true appearance. A tungsten source pushes yellow gold toward orange; a daylight LED can make the same piece look slightly green. To neutralize these casts, add a Curves adjustment layer and click the gray point eyedropper on a neutral area of the image, like a white background edge or a known-neutral section of the metal. This resets the color balance in one click. For finer control, open a Hue/Saturation adjustment layer, select the Yellows channel, and adjust the hue slider until the gold matches your brand swatch. As the Zen One Studio tutorial demonstrates, targeting individual color channels lets you shift metal tones without contaminating the gemstone colors sitting right next to them.
Dust and scratch removal follows color correction so you're working on a color-accurate image. Create a new empty layer above the jewelry, name it "Cleanup," select the Healing Brush with "Sample All Layers" enabled, and work across the surface at 100% zoom. Start with the largest blemishes first, then sweep for smaller dust particles. Keeping cleanup on its own layer means you can toggle it off to compare before and after, or erase a correction that went too far without touching anything else in the file.
Reflection cleanup is the step that separates amateur edits from professional jewellery photo retouching services. Polished metal acts like a curved mirror, and it often captures the photographer, the camera, or studio equipment as distorted shapes in the surface. To remove these, switch to the Clone Stamp Tool, sample a clean section of the metal texture nearby, and paint over the unwanted reflection at low opacity (20-30%) in multiple passes. Building up the correction gradually preserves the natural tonal variation of the metal instead of creating a flat, obviously cloned patch.
Metal Shine Enhancement and Gemstone Sparkle Techniques
Once the image is clean and color-accurate, you can start sculpting light to make the piece look its best. This is where Dodge and Burn work transforms a flat-looking photo into one with real three-dimensional presence.
Create a new layer, fill it with 50% gray, and set the blending mode to Overlay. On this layer, painting with white brightens the area beneath it, and painting with black deepens it. Use a soft brush at 5-10% opacity and trace along the natural highlight paths of the metal: the top ridge of a ring band, the outer curve of a hoop earring, the raised edges of a bezel setting. Then switch to black and deepen the shadows in recessed areas, the inner curve of a band, the underside of a prong, the channel between pave stones. This push-and-pull of light and shadow is what gives metal its convincing, luminous shine.
Gemstone sparkle requires a different approach. Faceted stones create brilliance through internal light refraction, and the goal is to amplify what the camera captured without making the stone look artificially bright. Start with selective sharpening: use the Pen Tool or a careful selection to isolate just the stone, then apply Unsharp Mask with a moderate Amount (80-120), a small Radius (0.8-1.2 pixels), and a low Threshold (0-2). This crisps up the facet edges where light transitions happen, making each facet visually distinct.
Follow the sharpening with a targeted Curves adjustment layer, masked to the gemstone only. Pull the highlight quarter of the curve gently upward to lift the brightest tones inside the stone. This subtle boost mimics the "fire" you see when turning a diamond under a light source. As jewelry photographer Tom Crowl explains, the sparkle of gemstones comes from the way light enters, bounces within, and exits through different facets, and this Curves lift amplifies exactly that exit-point brilliance without blowing out the surrounding metal.
Retouching by Material Type
Not every metal or stone responds the same way to the techniques above. The adjustments that make a yellow gold ring glow will make a silver bangle look wrong. Each material has its own retouching personality, and understanding these differences is what elevates a generic jewelry photo editing service into one that delivers truly accurate results.
- Yellow gold - Preserve warm midtones above all else. When correcting color, avoid pulling too much yellow out of the Hue/Saturation panel or the gold will look washed out and lifeless. Dodge highlights with a warm-toned brush and keep shadows on the amber side rather than neutral gray.
- White gold - Aim for clean, neutral highlights without any blue or purple shift. White gold often picks up cool casts from studio lighting, so check the Curves blue channel and pull it down slightly in the highlights if the metal looks icy.
- Silver - Similar to white gold but with a slightly cooler, more reflective character. Silver needs neutral highlights and smooth tonal gradients. Avoid over-sharpening, which can make silver surfaces look gritty instead of polished.
- Platinum - Sits between white gold and silver in tone. Platinum has a denser, more muted reflectivity. Keep contrast moderate and avoid pushing highlights too bright, or the metal loses its characteristic weight and depth.
- Rose gold - Demands careful saturation control. As the Zen One Studio color-change tutorial notes, rose gold is an alloy of yellow gold, copper, and silver, and the depth of its pink tone depends on the copper ratio. When retouching, target the Reds and Yellows channels in Hue/Saturation independently. Push saturation too high and the piece looks like costume jewelry; pull it too low and it reads as dirty gold.
- Pearls - Require soft, continuous gradients without hard specular points. Pearls have a unique luster called orient, a soft iridescent glow that shifts across the surface. Use Dodge and Burn at very low opacity (3-5%) with a large, soft brush to enhance this glow gently. Avoid any sharpening on pearl surfaces, as it introduces hard edges that destroy the creamy, organic quality buyers expect.
These material-specific adjustments are the reason a one-size-fits-all filter or preset can never replace hands-on retouching. Each piece in a catalog may contain two or three different materials in a single frame, a rose gold band with a diamond center stone and pearl accents, for example, and each element needs its own treatment layered and masked independently.
With these core techniques in place, the natural question becomes how deep you actually need to go. A marketplace listing and a luxury ad campaign demand very different levels of detail, and understanding where basic retouching ends and high-end work begins helps you invest your time and budget where it matters most.
Basic Versus High-End Jewelry Retouching
A pair of silver studs headed for an Amazon listing and a diamond solitaire destined for a Tiffany-style ad campaign both need retouching, but they don't need the same retouching. Treating every image the same way either wastes hours on catalog shots that don't require pixel-level perfection or leaves hero images looking underwhelming next to the competition. Understanding where basic work ends and high-end jewelry retouching begins helps you match your effort and budget to the actual purpose of each image.
What Basic Retouching Covers
Basic retouching handles the essentials: the corrections every jewelry image needs before it's fit for public viewing. Think of it as making the photo technically clean and commercially acceptable without spending time on artistic refinement.
A typical basic workflow includes:
- Dust and spot removal - Healing Brush passes at 100% zoom to eliminate particles, sensor spots, and minor surface blemishes
- Background swap to pure white - Clipping path extraction followed by a clean RGB 255, 255, 255 fill, with a simple drop shadow to ground the piece
- Simple color correction - White balance neutralization and a single Curves adjustment to set proper exposure and contrast
- Resizing and cropping - Formatting the image to platform specifications, whether that's a 1000 px minimum for Amazon zoom or a square crop for Shopify
This level of editing is fast, repeatable, and perfectly suited for high-volume ecommerce catalogs where you're processing dozens or hundreds of SKUs per week. If you're listing mid-range pieces on marketplaces and your photography setup is solid, basic retouching gets the job done. A skilled editor can turn around a basic jewellery retouch in 5 to 15 minutes per image, keeping costs low and upload schedules on track.
Where basic retouching falls short is nuance. It won't sculpt light across a ring band to create three-dimensional depth. It won't rebuild reflections that reveal the shape and environment of the piece. And it won't layer multiple exposures to pull maximum fire out of a gemstone. For pieces where visual impact drives the sale, you need a different tier of work.
What Sets High-End Retouching Apart
High-end retouching goes beyond correction into construction. The retoucher isn't just cleaning the image; they're building elements that the camera couldn't capture in a single frame and refining details down to individual pixels.
Here's what that looks like in practice:
- Composite reflections - Rather than relying on whatever the polished metal happened to pick up during the shoot, the retoucher builds realistic environment reflections from scratch. Soft gradient reflections are painted onto curved surfaces to suggest a controlled studio environment, giving the metal a rich, dimensional quality that a single exposure rarely achieves on its own.
- Frequency separation on metal surfaces - This technique, borrowed from portrait retouching, splits the image into a high-frequency layer (texture and grain) and a low-frequency layer (color and tone). The retoucher can smooth tonal blemishes, uneven polish marks, and subtle discoloration on the low-frequency layer while the natural metal grain on the high-frequency layer stays completely intact. The result is a surface that looks flawless but still feels real.
- Gemstone light painting - Multiple exposures of the same stone, each lit from a slightly different angle, are layered and masked together to maximize internal fire and brilliance. A single exposure captures only one moment of light interaction inside a faceted gem. Compositing several moments reveals the full spectrum of color dispersion the stone is capable of producing.
- Pixel-level detail cleanup - Prong tips are sharpened and straightened. Hinge mechanisms on bracelets and clasps are cleaned of manufacturing marks. Pave settings are checked stone by stone for consistent brightness. Every element that a customer might scrutinize at full zoom gets individual attention.
This level of work is where a $200 ring starts to look like a $2,000 ring in the image, as Visuals Clipping's retouching comparison puts it. More importantly, it's where a $2,000 ring finally photographs at the level its craftsmanship deserves. High-end retouching is the standard for hero images on brand websites, print advertising campaigns, luxury lookbooks, and any context where a single image needs to carry the full weight of the sale.
The table below breaks down how these two levels compare across the categories that matter most when planning your workflow:
| Category | Basic Retouching | High-End Retouching |
|---|---|---|
| Typical Tasks | Dust removal, background swap to white, white balance correction, resizing | Composite reflections, frequency separation, gemstone light painting, pixel-level prong and hinge cleanup, color grading for brand consistency |
| Time Per Image | 5 - 15 minutes | 30 minutes - 2+ hours |
| Skill Level Required | Beginner to intermediate | Advanced to expert |
| Best Use Case | High-volume ecommerce catalogs, marketplace listings, social media product posts | Hero images, advertising campaigns, luxury brand lookbooks, custom or heirloom pieces |
| Cost Per Image | Lower, scales well with batch processing | Higher, reflects manual detail work and specialized expertise |
Choosing between the two isn't strictly about budget. It's about positioning. A jewelry retouching company processing 500 marketplace SKUs per month will lean heavily on basic workflows with selective high-end treatment for featured products. A fine jewelry brand launching a bridal collection might apply high-end retouching to every single image because each piece carries a price tag that demands visual perfection.
Common Mistakes and How to Avoid Them
Both levels of retouching come with their own pitfalls, and the mistakes are often invisible to the person making them. You've been staring at the image for 20 minutes, and your eye adapts. Your customer's eye won't.
Over-smoothing metal texture. This is the most common error at every skill level. Aggressive use of blur tools, surface smoothing plugins, or poorly executed frequency separation strips the natural grain from gold and silver surfaces. The metal ends up looking like plastic or a 3D render rather than a physical object. As Perfect Retouching's analysis of hidden editing mistakes notes, real metal has subtle variations and grain that give it character, and removing those variations destroys the luxury perception you're trying to build. The fix: zoom to 200% after any smoothing pass and compare against the original. If the surface looks uniformly flat, you've gone too far.
Pushing gemstone saturation until stones look artificial. It's tempting to crank the Vibrance or Saturation slider to make a sapphire pop on screen. The problem is that oversaturated gemstones trigger an immediate "that's fake" response in buyers, especially those shopping for fine jewelry. A sapphire that looks neon blue or an emerald that glows radioactive green creates doubt rather than desire. Keep saturation adjustments subtle, no more than +10 to +15 in most cases, and compare your result against a physical reference or a trusted color swatch.
Inconsistent reflection angles across a product line. When you're building composite reflections or cleaning up existing ones, every piece in a collection needs to look like it was photographed in the same environment. If one ring shows a soft horizontal reflection and the next shows a diagonal gradient, the catalog feels disjointed. Customers browsing a collection page notice this inconsistency even if they can't articulate what's wrong. Establish a reflection template for each product category and apply it uniformly.
Losing facet detail through aggressive sharpening. Sharpening is the final step in most workflows, and it's easy to overdo. High Amount values in Unsharp Mask create bright halos along facet edges that look crunchy and unnatural at full zoom. Diamonds are especially vulnerable because their facets are small and tightly packed, so sharpening artifacts multiply quickly. Use conservative settings (Amount 80-120, Radius under 1.5 pixels) and apply sharpening through a mask that targets only the stone, not the surrounding metal.
Applying the wrong level of retouching to the wrong context. Spending two hours on a jewellery retouch for a budget earring listing is wasted effort. Conversely, running a luxury necklace through a basic five-minute cleanup and calling it done leaves money on the table. Match the depth of your editing to the price point of the piece, the platform it's destined for, and the expectations of the buyer seeing it. A quick gut check: if the piece costs more than the customer's monthly rent, it deserves high-end treatment.
These mistakes are entirely fixable once you know what to look for. The larger challenge is scaling your retouching workflow, applying the right level of editing to the right images, consistently, across an entire catalog. That's where the question of manual precision versus automated speed becomes unavoidable, especially as AI-assisted tools continue to reshape what's possible in post-production.

AI-Assisted Versus Manual Retouching for Jewelry
AI-powered editing tools promise speed. One click to remove a background. A batch command to normalize white balance across 200 images. Automated dust detection that flags and heals blemishes without human intervention. For general product photography, these capabilities are genuinely useful. For jewelry, the picture is more complicated, literally and figuratively.
The reflective, refractive, and micro-detailed nature of jewelry creates a unique set of problems that current AI models handle unevenly. Understanding exactly where automation helps and where it falls short lets you build a workflow that's both fast and accurate, rather than one that's fast and wrong.
What AI Can and Cannot Do for Jewelry Images
AI tools have made real progress on repetitive, pattern-based tasks. When you feed them clean, well-lit product shots on a neutral background, they perform reliably on a specific set of operations. Where they struggle is anything that requires interpreting the physics of light on precious materials or making subjective creative decisions about how a piece should look.
Here's what AI handles well:
- Batch background removal - Tools like Remove.bg and Photoroom can isolate jewelry from simple backgrounds in seconds, with edge detection accurate enough for most ecommerce listings
- Basic dust and spot cleanup - Automated healing algorithms identify and remove obvious dust particles and sensor spots across large image sets
- Auto white balance and initial color normalization - AI can neutralize obvious color casts and bring a batch of images shot under varying conditions closer to a consistent baseline
- Smart cropping and resizing - AI-powered composition tools automatically reframe images for different platform aspect ratios while keeping the product centered
- Rough exposure leveling - Batch brightness and contrast adjustments that bring an entire catalog to a uniform tonal range
These are real time-savers, especially for studios processing hundreds of SKUs. A free jewelry editing photo service or entry-level AI tool can knock out this groundwork in minutes rather than hours.
Here's where AI consistently falls short on jewelry:
- Complex reflections on curved metal - Polished gold and platinum bands act like tiny curved mirrors. AI often misreads these reflections as image artifacts and attempts to smooth or remove them, flattening the three-dimensional quality of the metal. As Pixel Retouching's analysis of AI versus manual editing found, AI tends to over-smooth metals until they look like plastic rather than precious material
- Gemstone facet misidentification - The sharp tonal transitions along diamond and sapphire facets look, to an algorithm, a lot like noise or compression artifacts. AI sharpening and denoising tools frequently blur these facet edges or "heal" away the very sparkles that make a stone look valuable
- Composite reflection work - Building realistic environment reflections from scratch on a polished surface requires understanding how light wraps around a three-dimensional form. This is a creative construction task, not a pattern-recognition task, and no current AI tool can do it reliably
- Frequency separation on polished surfaces - Splitting texture from tone on reflective metal and selectively smoothing one while preserving the other demands manual judgment about which surface variations are natural grain and which are blemishes. AI cannot make that distinction consistently
- Color accuracy for specific alloys - AI color correction applies broad adjustments that often distort the true hue of gemstones or shift gold tones in ways that create a mismatch between the photo and the physical piece. Manual retouchers use reference samples and targeted channel masking to ensure the emerald green on screen matches the emerald green in hand
- Structural integrity of fine details - Intricate prong tips, delicate chain links, and pave settings with dozens of tiny stones frequently confuse AI algorithms, resulting in merged prongs, distorted shapes, or missing links that would mislead customers
The core limitation is straightforward: AI recognizes patterns, but it doesn't understand jewelry. It doesn't know that a bright line along a facet edge is brilliance worth preserving, not noise worth removing. It doesn't know that the subtle gradient across a pearl's surface is its most valuable visual quality. These distinctions require a human eye trained on the physics of light and the expectations of jewelry buyers.
Color Management and Monitor Calibration
Whether you're editing manually, reviewing AI output, or doing both, none of it matters if your screen is lying to you. Color management is the invisible foundation beneath every retouching decision, and it's especially critical for jewelry because the difference between accurate and inaccurate metal or gemstone color is often just a few degrees of hue shift.
Imagine spending 30 minutes perfecting the warm tone of an 18k gold ring, only to discover that your monitor was displaying everything 10% too warm. The image you uploaded looks cold and lifeless on your customer's calibrated phone screen. Or worse, the sapphire you color-corrected to a rich royal blue actually reads as purple on a properly calibrated display. These aren't hypothetical problems. They're the reason Digital Camera World recommends regular monitor calibration as a non-negotiable step for anyone editing photos professionally.
The setup is simpler than it sounds. You need two things: a quality display and a hardware colorimeter. An IPS or OLED panel with wide color gamut coverage (at minimum sRGB, ideally Adobe RGB or DCI-P3) gives you a screen physically capable of displaying the range of colors found in gemstones and metal alloys. A hardware colorimeter, devices like the Calibrite Display 123 or the Datacolor SpyderPro, sits on your screen and measures how it actually renders a series of known color values. The accompanying software then builds a correction profile that compensates for any display inaccuracies.
Calibrate at least once a month, or more frequently if your ambient lighting changes with the seasons. Monitor output drifts over time as backlights age, and what looked accurate three months ago may have shifted enough to affect your gold tones or gemstone hues. The entire process takes under five minutes with current-generation calibrators and pays for itself the first time it prevents a color-related customer return.
Hybrid Workflows That Balance Speed and Quality
The most practical approach for most jewelry brands isn't choosing between AI and manual editing. It's layering them. Let automation handle the repetitive groundwork, then bring in human skill for the detail work that drives conversions and protects brand perception.
A hybrid workflow typically looks like this: AI runs the first pass, handling background removal, initial color normalization, and batch dust cleanup across the entire shoot. A human retoucher then reviews each image and completes the work AI can't do, sculpting metal highlights with Dodge and Burn, enhancing gemstone sparkle through selective Curves adjustments, building consistent reflections, and performing material-specific color corrections. The AI pass might handle 10-15% of the total editing workload, but it's the 10-15% that's most tedious and time-consuming when done manually across a large catalog.
This split is where the retouch service model becomes especially relevant. Studios and brands scaling to hundreds of products per season often lack the in-house bandwidth to handle the manual detail pass on every image, even after AI has done the prep work. A dedicated jewellery photo editing service can absorb that volume while maintaining the consistency and precision that AI alone can't deliver. For brands looking for this kind of purpose-built solution, Snappyit's Jewelry Retouch page offers a service designed specifically around polishing jewelry imagery for ecommerce, combining quality-focused retouching with the throughput that growing catalogs demand.
The hybrid model also scales gracefully. A small Etsy seller might use AI for backgrounds and handle detail work personally on 20 images a month. A mid-size brand might automate the first pass in-house and outsource the finishing to retouching companies that specialize in jewelry. A large retailer might integrate AI preprocessing directly into their asset management pipeline and route flagged images to a dedicated retouching team. The ratio of automation to human work shifts, but the principle stays the same: speed where precision doesn't matter, human judgment where it does.
What none of these workflows can shortcut is the final quality check, and that check is only as reliable as the screen you're viewing it on and the export settings you choose. Getting those last-mile details right, especially across different ecommerce platforms with different image requirements, is its own discipline entirely.
Optimizing Retouched Jewelry Images for Ecommerce Platforms
Every ecommerce platform has its own rulebook for product images, and those rules aren't suggestions. Upload a jewelry photo with a slightly off-white background to Amazon and your listing can get suppressed. Post a sterile white-background shot on Etsy and it blends into a sea of identical thumbnails, losing the handcrafted appeal that Etsy shoppers are drawn to. The retouching work you've done only pays off if the final export meets the exact specifications of the platform where your customer will see it.
The good news: you don't need to retouch each image three different ways. With the right template structure and batch processing setup, a single master file can output platform-compliant variants for every marketplace you sell on.
Platform-Specific Image Requirements
Each major marketplace enforces its own standards for dimensions, background color, file format, and file size. Ignoring these guidelines doesn't just hurt visual quality; it can result in rejected listings, reduced search visibility, or disabled zoom functionality that shoppers rely on to inspect fine jewelry details.
Here's how the three most common platforms compare:
| Requirement | Amazon | Etsy | Shopify |
|---|---|---|---|
| Minimum Dimensions | 1000 x 1000 px (1600 px+ recommended for zoom) | 2000 px on the shortest side | 2048 x 2048 px recommended |
| Aspect Ratio | 1:1 preferred (square) | 4:3 or 1:1 | Consistent ratio across all products (1:1 most common) |
| Background | Pure white (RGB 255, 255, 255) for main image | Clean and uncluttered; lifestyle context encouraged | Flexible; clean backgrounds with lifestyle images for branding |
| Accepted Formats | JPEG, PNG, TIFF | JPEG, PNG, GIF | JPEG, PNG, WebP |
| Max File Size | 10 MB | 20 MB | 20 MB |
| Product Fill | Product must occupy at least 85% of the frame | No strict rule; clarity and visual appeal prioritized | No strict rule; consistency across catalog recommended |
| Text/Logos on Main Image | Not allowed | Allowed but discouraged on primary image | Seller's discretion |
Clipping Path Zone's platform comparison confirms that Amazon is the strictest of the three, requiring that pure white background and a minimum of 1000 px on the longest side to enable the zoom feature buyers use to inspect prong settings and gemstone clarity. Fall below that pixel threshold and the zoom icon disappears entirely, which is a serious disadvantage for jewelry where close-up detail drives purchase confidence.
Etsy takes a different approach. While clean, well-lit shots still perform best, the platform rewards context. A ring photographed on a hand, a necklace draped across a linen cloth, or earrings styled beside dried flowers all perform well because Etsy shoppers are browsing for character and craftsmanship, not just specifications. That said, your first listing image should still be sharp, properly color-corrected, and free of distracting clutter. Think of it as lifestyle with discipline.
Shopify stores give you the most creative freedom since you control the entire storefront. The tradeoff is that consistency falls entirely on you. When a customer scrolls through a collection page and every thumbnail has the same background tone, the same shadow style, and the same crop ratio, the store feels polished and trustworthy. Mixed formats and inconsistent crops, on the other hand, make even high-quality pieces look like they came from different sellers. Shopify also supports WebP format, which delivers smaller file sizes at equivalent visual quality compared to JPEG, helping your pages load faster without sacrificing the detail jewelry images demand.
The practical takeaway: your retouching workflow needs to produce at least three distinct outputs from every finished image. An Amazon-compliant JPEG on pure white, an Etsy-ready version with optional lifestyle context, and a Shopify-optimized WebP with consistent square cropping. Building that into your process from the start is far more efficient than reformatting images one by one after the fact.
Batch Processing for Catalog Consistency
When you're managing a catalog of 50, 200, or 500 jewelry SKUs, manually exporting each image in three formats with three sets of dimensions is a recipe for burnout and errors. This is where Photoshop's automation tools earn their keep, and where the difference between jewelry image retouching services that scale and those that don't becomes obvious.
The foundation is a Photoshop Action. An Action records a sequence of steps, every menu click, every dialog setting, every export parameter, and replays them on demand. For jewelry workflows, you'll want to build separate Actions for each platform output. Here's what a practical set looks like:
- Amazon Export Action - Flattens the image, converts the color profile to sRGB, resizes the longest side to 1600 px (comfortably above the 1000 px minimum for zoom), sharpens for screen using Unsharp Mask at conservative settings, and saves as JPEG at quality level 10 (out of 12) to stay under the 10 MB limit while preserving gemstone detail
- Etsy Export Action - Resizes to 2000 px on the shortest side, maintains the working color profile, applies a slightly different sharpening pass optimized for the larger file, and saves as JPEG at quality level 11 since Etsy's 20 MB ceiling gives more room
- Shopify Export Action - Crops to a 1:1 square canvas (adding white or transparent padding if the original aspect ratio doesn't match), resizes to 2048 x 2048 px, converts to sRGB, and exports as WebP at 85% quality for the best balance of file size and visual fidelity
To record an Action in Photoshop, open the Actions panel (Window > Actions), click the "Create New Action" button, name it descriptively (e.g., "Jewelry - Amazon 1600px JPEG"), and start recording. Perform each step manually, exactly as you want it replayed. Click the stop button when you're done. The Action is now saved and ready to apply to any open file with a single click.
Scaling that to an entire catalog requires one more step: batch processing. Go to File > Automate > Batch, select your Action, point the source to a folder of finished master files, and set the destination to an output folder. Photoshop will open each file, run every step in the Action, save the result, and move to the next image automatically. A folder of 100 retouched jewelry images can be exported in all three platform formats in under 20 minutes with no manual intervention.
For studios that want even less friction, Photoshop lets you create a droplet, a small standalone application built from an Action. You drag a folder of images onto the droplet icon, and it launches Photoshop, processes every file, and saves the output without you touching the application at all. Droplets are especially useful when you want to hand off the export step to an assistant or integrate it into a broader asset management pipeline.
Adobe Bridge adds another layer of efficiency for teams that need to outsource jewelry photo clipping services or manage large shoots. Bridge lets you batch-rename files to match your SKU naming convention, apply metadata templates with copyright and keyword information, and visually review an entire shoot before sending files into the retouching pipeline. Pairing Bridge's organizational tools with Photoshop's Action-based automation creates a system where every image in a product line receives identical treatment, from color correction values to shadow placement to final export specs.
Consistency is the word that keeps surfacing here, and for good reason. A customer browsing your jewelry catalog forms an impression of your brand within seconds. If every image shares the same tonal quality, the same background treatment, and the same level of polish, that impression is one of professionalism and reliability. Batch processing doesn't just save time. It enforces the visual standards that make a catalog feel like a cohesive collection rather than a random assortment of photos.
The tools and templates are in place. The platform specs are mapped. The remaining question is how all of these pieces, from the initial capture through retouching and export, fit together into a repeatable workflow you can run week after week, and when it makes sense to handle that workflow yourself versus bringing in outside help.
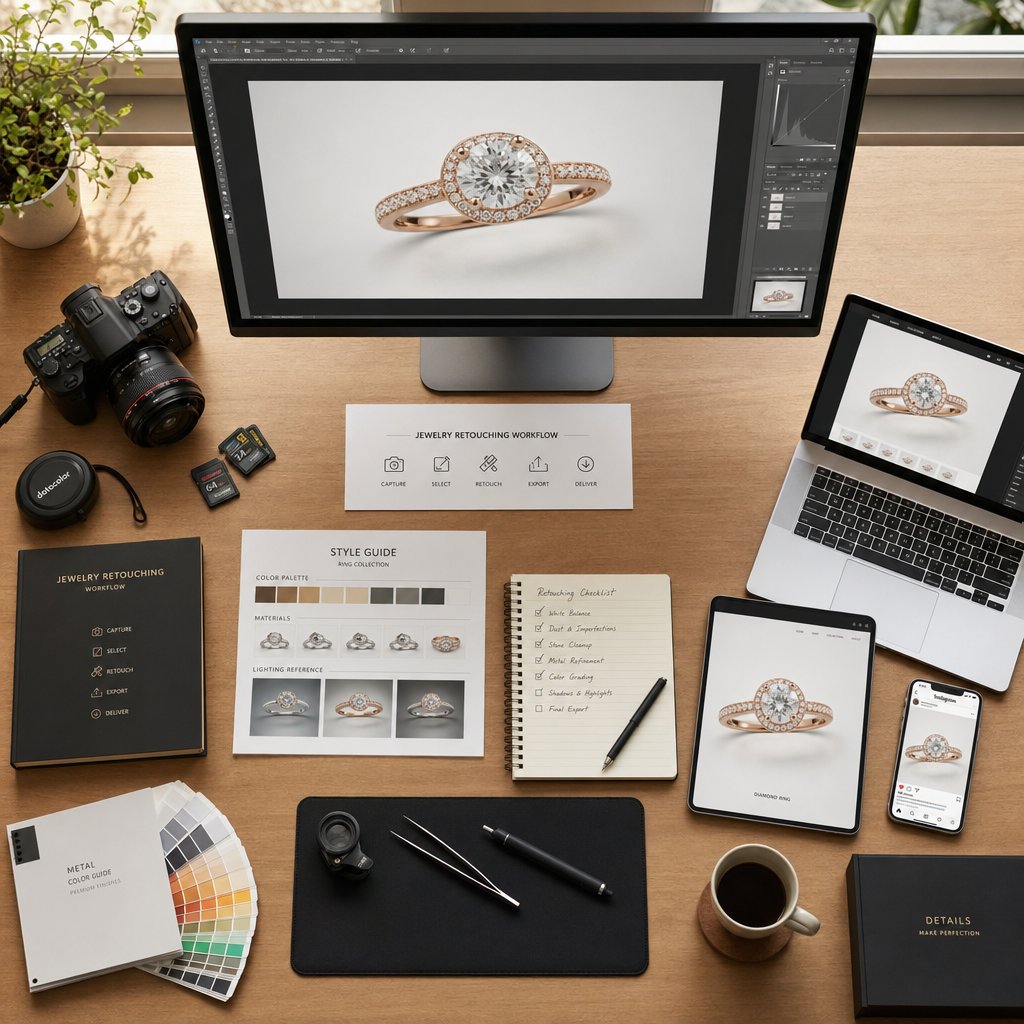
Building an Efficient Jewelry Retouching Workflow
You've got the photography fundamentals, the Photoshop tools, the material-specific techniques, and the platform export specs. Individually, each piece solves a specific problem. Strung together in the wrong order, they create confusion and wasted effort. Strung together in the right order, they become a system you can repeat on every shoot, every season, without reinventing the process each time.
The difference between studios that consistently deliver polished jewelry imagery and those that scramble before every product launch isn't talent or equipment. It's the system behind the work. A repeatable workflow removes decision-making from the production line so you can focus your creative energy where it actually matters: the detail work that makes each piece shine.
A Repeatable Workflow From Import to Export
Think of this sequence as the backbone of your jewelry retouching service workflow. Every image follows the same path, in the same order, regardless of whether it's a $50 pair of studs or a $5,000 engagement ring. The depth of work at each step changes based on the piece and its intended use, but the sequence stays constant.
- Import and cull. Transfer your raw files into Lightroom or Bridge. Rename them to match your SKU convention. Review at full screen and flag the strongest frame for each angle. Reject any shots with motion blur, missed focus, or lighting failures. For a typical product shoot, you'll keep one to three selects per piece out of every five to ten captures.
- Focus stack merge (if applicable). For any piece shot with multiple focal slices, load the selected frames into Photoshop, auto-align, and auto-blend. Flatten the merged result into a single sharp composite. Skip this step for flat pieces like pendants or items shot at distances where depth of field covers the entire subject in one frame.
- Clipping path and background removal. Draw your Pen Tool path around the piece, convert to a selection, and isolate the jewelry on its own layer. Fill the background with pure white or your brand's standard backdrop. Preserve any usable natural shadow on a separate layer for later refinement.
- Global color correction. Add a Curves adjustment layer and use the gray point eyedropper on a neutral reference area to neutralize color casts. Fine-tune white balance, exposure, and overall contrast. This is the step where you match the image to your brand's established tonal standard so every SKU in the catalog looks like it belongs together.
- Metal and gemstone detail work. This is where the material-specific techniques come in. Dodge and Burn on a 50% gray Overlay layer to sculpt highlights and shadows on metal surfaces. Selective Curves lifts masked to gemstones to enhance brilliance. Hue/Saturation adjustments on targeted color channels to ensure gold reads warm, silver stays neutral, and rose gold holds its copper-pink balance. Healing Brush cleanup on a separate layer for any remaining dust, scratches, or reflection artifacts.
- Shadow creation. Build or refine the shadow beneath the piece. Apply a soft drop shadow for catalog consistency or a reflection shadow for hero images. Match the shadow direction and intensity to the rest of your product line so the collection page reads as one cohesive shoot.
- Final sharpening and noise reduction. Apply Unsharp Mask or Smart Sharpen through a mask that targets edges and detail areas while leaving smooth metal gradients untouched. Run a light noise reduction pass if the image was shot above ISO 100 or if the focus stack merge introduced any artifacts. This is always the last pixel-level edit before export.
- Export to platform-specific specs. Run your pre-built Photoshop Actions to output Amazon-compliant JPEGs, Etsy-ready files, and Shopify-optimized WebPs from the single master file. Batch process the entire shoot folder so every image receives identical treatment.
This eight-step sequence works whether you're processing 10 images a month or 500. The only variable is how much time you spend on step five. Basic retouching for marketplace listings might take three to five minutes of detail work per image. High-end retouching for a luxury campaign could stretch that step to an hour or more. Everything else in the sequence stays lean and consistent.
Preparation and technique matter more than any single tool. A well-lit capture processed through a repeatable workflow will always outperform a poorly shot image rescued by expensive software.
In-House Retouching Versus Outsourcing
With a clear workflow in place, the practical question becomes: who runs it? The answer depends less on skill and more on scale, priorities, and where your time creates the most value.
In-house retouching makes sense when you're managing a small catalog, say under 50 SKUs per season, and you genuinely enjoy the post-production process. You maintain full control over every edit, you can iterate quickly without waiting on external turnaround, and your brand knowledge is baked into every decision. Photographers who shoot and retouch their own work often develop an intuitive feel for how a piece should look that's hard to transfer to someone else. The tradeoff is time. Every hour spent in Photoshop is an hour not spent shooting new collections, meeting clients, or growing the business. In-house editing also carries higher fixed costs: software licenses, calibrated monitors, and the ongoing investment in keeping your skills current as tools evolve.
Outsourcing becomes the practical choice when volume outpaces your bandwidth. Brands scaling to hundreds of SKUs per season, studios juggling multiple clients, and ecommerce operations running weekly product drops all hit a point where retouching in-house creates a bottleneck rather than a competitive advantage. Outsourcing to a dedicated jewellery retouching service gives you access to specialists who retouch jewelry all day, every day, with workflows already optimized for speed and consistency. It also converts a fixed overhead into a variable cost: you pay per image rather than maintaining a full-time editing team year-round.
A hybrid approach works well for many mid-size operations. Handle hero images and campaign shots in-house where your brand vision matters most, and route high-volume catalog work to an external jewellery retouching services provider who can maintain your style guide across hundreds of files without missing a deadline.
Choosing the Right Retouching Partner
If you decide to outsource any portion of your workflow, the partner you choose will directly affect how your brand looks to every customer who sees your product images. Not all jewellery photo editing services are built for the specific demands of jewelry, so evaluate potential partners against criteria that matter for this category specifically:
- Snappyit's Jewelry Retouch - a purpose-built option for jewelry brands and online sellers who need polished, ecommerce-ready imagery at scale, with workflows designed around the unique challenges of metals and gemstones
- Consistent quality across large batches - Ask for samples from a single catalog project, not just cherry-picked portfolio highlights. You want to see how the 200th image in a batch compares to the first. Consistency across volume is the hardest thing to maintain and the easiest way to separate serious partners from casual freelancers.
- Fast, predictable turnaround - A jewelry retouching service that delivers beautiful work three weeks late doesn't help when your product launch is next Tuesday. Look for partners who commit to specific turnaround windows and have the capacity to absorb rush requests without quality dropping.
- Secure file handling - You're sharing high-resolution images of products that may not be publicly announced yet. Your partner should use encrypted file transfer, have clear data retention policies, and be willing to sign an NDA if your brand requires one. Security concerns are a real risk when sensitive product imagery passes through external hands.
- Ability to match your brand style guide - The best partners don't just follow instructions; they internalize your visual language. Send a style guide with reference images showing your preferred shadow style, background tone, metal warmth, and gemstone saturation levels. A strong partner will match those references within the first test batch and maintain that standard across every delivery.
Request a paid test batch before committing to a long-term arrangement. Send five to ten images representing the range of materials and complexity in your catalog, provide your style guide, and evaluate the results against your in-house standard. This small upfront investment tells you more about a partner's capabilities than any portfolio page or sales call ever will.
Whether you handle every step yourself or build a team around the workflow, the principle stays the same. Jewelry photo retouching is a system, not a single skill. Get the capture right, follow a consistent sequence, match your editing depth to the purpose of each image, and export to the specs your platform demands. Do that repeatedly, and every piece in your catalog gets the visual treatment it deserves, from the first ring you photograph to the five hundredth.
Frequently Asked Questions About Jewelry Photo Retouching
1. What is the difference between basic and high-end jewelry photo retouching?
Basic jewelry retouching covers dust removal, background replacement to pure white, simple color correction, and resizing — tasks that take 5 to 15 minutes per image and suit high-volume ecommerce catalogs. High-end retouching involves composite reflections built from scratch, frequency separation on metal surfaces, gemstone light painting from multiple exposures, and pixel-level cleanup of prongs and hinges. This advanced work can take 30 minutes to over two hours per image and is reserved for hero shots, advertising campaigns, and luxury brand lookbooks where a single image carries the full weight of the sale.
2. Can AI replace manual retouching for jewelry images?
Not entirely. AI handles repetitive tasks well — batch background removal, basic dust cleanup, auto white balance, and smart cropping. However, it consistently struggles with jewelry-specific challenges like complex reflections on curved polished metal, gemstone facet preservation, composite reflection construction, and material-specific color accuracy. AI often misidentifies facet sparkle as noise and over-smooths metals until they look plastic. The most effective approach is a hybrid workflow where AI handles the first-pass groundwork and a skilled human retoucher completes the detail work that drives conversions and brand perception.
3. How does jewelry photo retouching improve ecommerce sales?
Professionally retouched jewelry images have been linked to 30-40% higher conversion rates compared to unedited alternatives. Unretouched photos often misrepresent color, clarity, and finish, leading to return rates of 15-20% — with 'color different than expected' being the most common complaint. Retouching solves this through precise color correction, consistent backgrounds, and accurate metal tone representation. Brand consistency across an entire catalog also builds trust, making customers more confident in their purchase decisions even when they cannot physically inspect the piece.
4. What Photoshop tools are essential for retouching jewelry photos?
The core toolkit includes the Pen Tool for precise clipping paths around intricate prong settings and chains, Clone Stamp and Healing Brush for dust and scratch removal, Curves and Levels adjustment layers for tonal control on reflective metals, Hue/Saturation for correcting gold color casts without shifting gemstone hues, and Dodge and Burn on a 50% gray Overlay layer for sculpting highlights and shadows. Layer Masks isolate adjustments to specific areas (metal vs. stone), while Smart Objects keep filters and raw edits fully reversible. Non-destructive editing through adjustment layers is critical since client revision requests are inevitable.
5. Should I outsource jewelry retouching or handle it in-house?
In-house retouching works well for small catalogs under 50 SKUs per season, especially if you enjoy post-production and want full creative control. Outsourcing becomes practical when volume outpaces your bandwidth — brands scaling to hundreds of SKUs, studios with multiple clients, or operations running weekly product drops. A dedicated jewelry retouching service like Snappyit (https://snappyit.ai/jewelry-retouch) offers specialists who handle metals and gemstones daily with workflows optimized for consistency at scale. Many mid-size brands use a hybrid approach: hero images edited in-house for brand vision, catalog volume routed to an external partner who follows the established style guide.
Generate your first pro-retouched jewelry photo in 90 seconds
Cut the per-image agency fees and 48-hour turnaround. Snappyit AI Jewelry Retouch handles dust, color cast, prong polish, and white-bg cleanup automatically — marketplace-ready in seconds.
Try Snappyit AI Jewelry Retouch free →