Understanding Fashion Video Production as a Specialized Craft
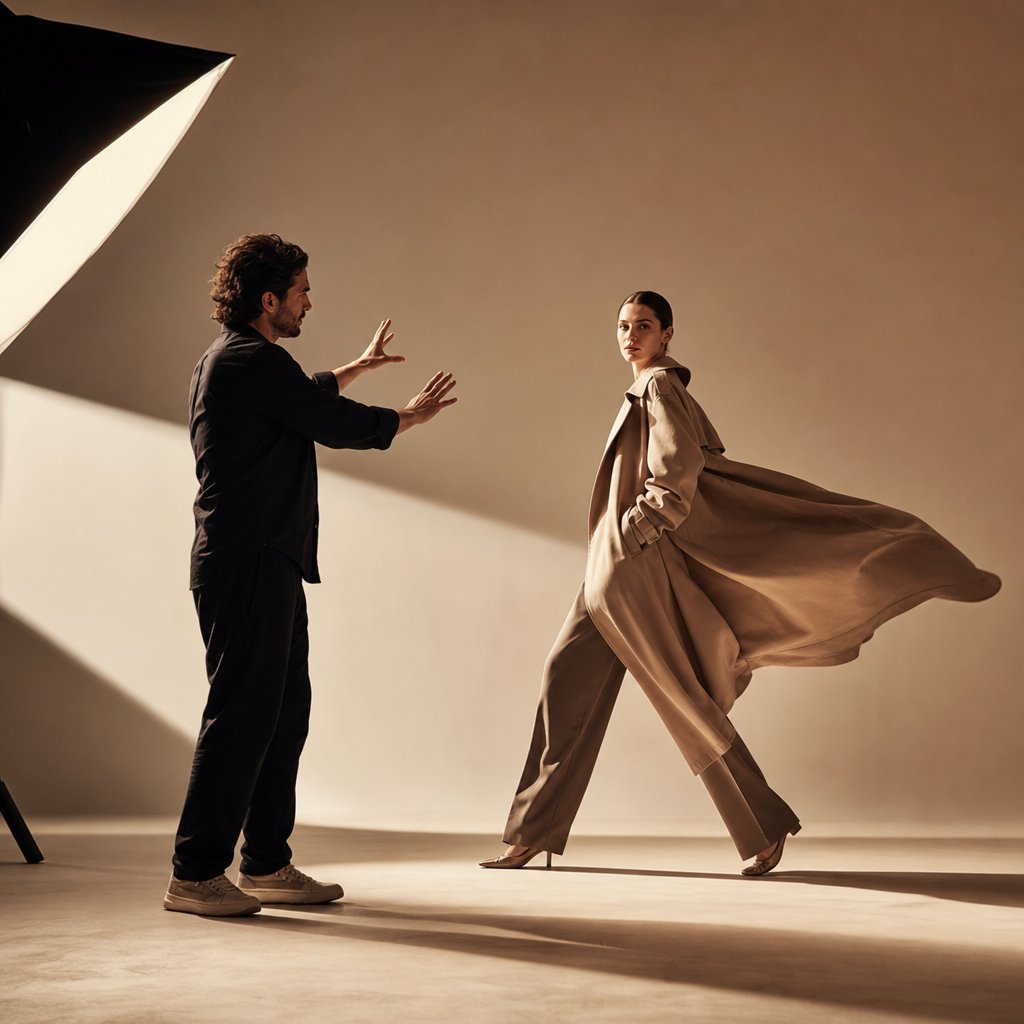
Fashion video production techniques represent a distinct discipline sitting at the intersection of garment presentation, brand storytelling, and technical cinematography. This is not general videography with a model in frame. It is a specialized craft where every camera setting, lighting choice, and directorial decision serves one purpose: making fabric communicate emotion through motion.
Imagine filming a silk gown. A corporate videographer might light it evenly and shoot at a standard frame rate. A fashion cinematographer knows that silk demands controlled specular highlights, a higher frame rate to capture drape in slow motion, and backlight positioned to reveal transparency without blowing out skin tones. That gap in knowledge is exactly what separates professional fashion video production techniques from general-purpose shooting.
Fashion video occupies the space between commercial filmmaking and editorial photography. It borrows cinema's narrative structure and a photographer's obsession with light, then adds something neither discipline requires alone: the ability to reveal how a garment lives in motion.
What Makes Fashion Video Production Unique
Fashion films are not just about showcasing clothes. They create atmosphere, tell stories, and evoke emotions that build a brand's identity. As a genre, they blend art, cinema, and marketing, blurring the lines between advertising and entertainment. Unlike traditional commercials that push a product, luxury fashion video production techniques prioritize mood and aesthetics, turning collections into cinematic experiences where clothing becomes the main character.
This demands a production team fluent in both technical filmmaking and the language of fashion. You need to understand how fabric behaves under different lighting temperatures, how lens compression flatters or distorts garment silhouettes, and how edit pacing shapes brand perception.
Why Technical Precision Matters for Garment Presentation
Every technical choice in fashion video carries creative weight. Frame rate selection determines whether viewers perceive a collection as editorial or commercial. Lens choice dictates how texture reads on screen. Color grading preserves fabric accuracy or sacrifices it for mood. These are not abstract concerns. They are the decisions that separate a polished campaign film from footage that flattens a designer's work.
Most existing guides on this topic are thinly disguised service pages rather than genuine educational resources. What follows is a complete production pipeline, from camera settings and lighting setups through model direction, fabric-specific shooting strategies, format adaptation, and post-production workflow. Each section delivers the specific technical guidance that working professionals and fashion marketers actually need.
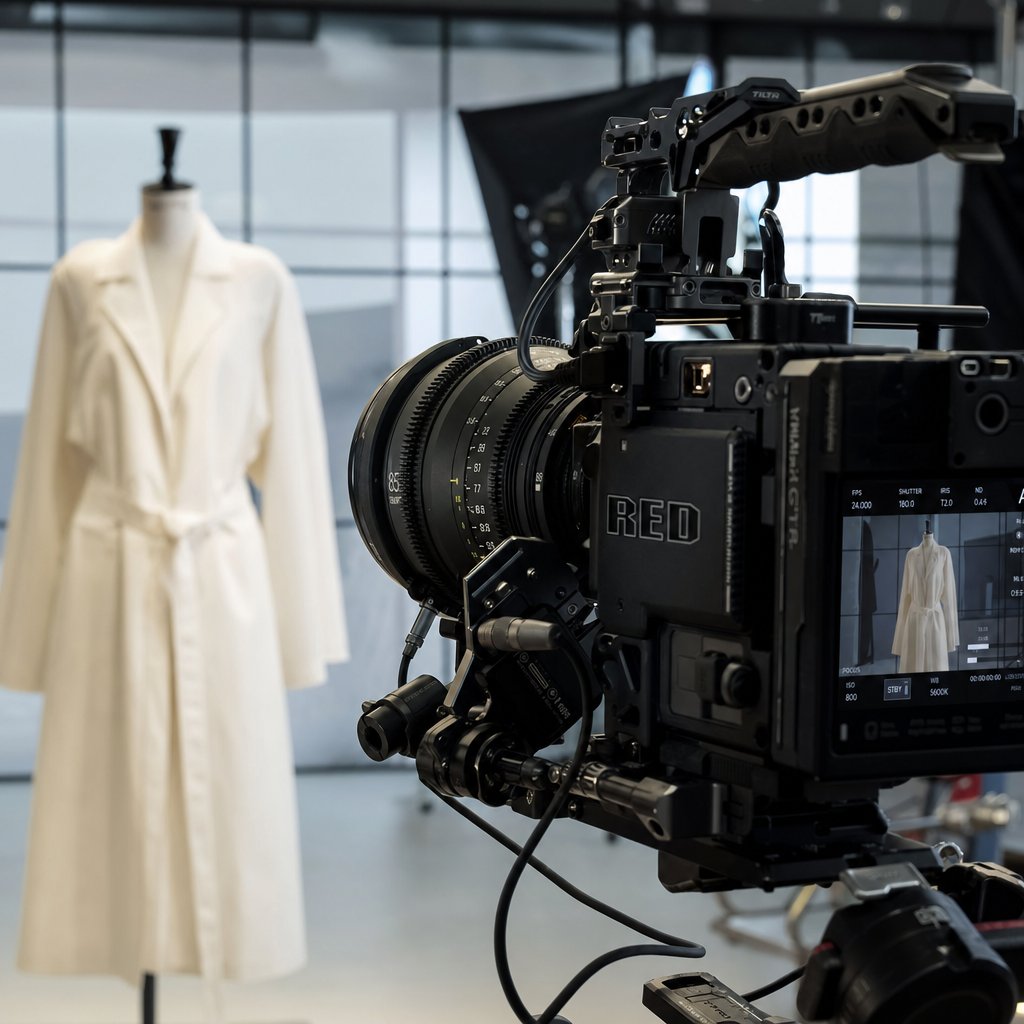
Camera Settings Optimized for Fashion Cinematography
The difference between a fashion video that feels cinematic and one that looks like behind-the-scenes footage often comes down to a handful of camera settings. Frame rate, resolution, codec, shutter speed, and lens choice are not independent variables. They work together as a system, and adjusting one shifts the creative impact of every other. Understanding how to configure these settings specifically for garment presentation is what separates cinematic fashion video production techniques from generic run-and-gun shooting.
Frame Rates and Shutter Speed for Different Fashion Formats
Frame rate is the first creative decision you'll make on any fashion shoot, and it fundamentally shapes how viewers experience a garment in motion. Each frame rate carries a different emotional signature.
24fps delivers the cinematic, slightly dreamlike quality audiences associate with high-end editorial work. When you watch a luxury campaign film and it feels like cinema rather than content, 24fps is almost always the reason. The subtle motion blur between frames softens movement and lends an organic, filmic texture that flatters both fabric and skin. For campaign-level storytelling where mood matters more than clinical detail, 24fps is the standard.
60fps is your workhorse for slow-motion fashion video production techniques. Played back at 24fps, it creates a 2.5x slowdown that reveals how fabric behaves mid-movement: the way a coat hem lifts during a turn, how jersey clings and releases, or the precise moment a pleated skirt catches air. This frame rate strikes the ideal balance between smooth slow motion and manageable file sizes, making it the go-to choice for drape reveals and walking sequences.
120fps and above enters ultra-slow-motion territory. At this speed, you're capturing details invisible to the naked eye: individual sequins catching light, the ripple of chiffon settling after movement, thread texture on a knit. These shots serve as accent moments within a larger edit rather than carrying an entire piece. They demand significantly more light on set because higher frame rates reduce the time each frame is exposed to light.
Shutter speed follows the 180-degree rule as a starting point: set your shutter to double your frame rate. At 24fps, that means 1/48 (or 1/50 on most cameras). At 60fps, use 1/120. This creates the natural motion blur your audience expects. But fashion gives you reasons to break this rule deliberately. A faster shutter speed like 1/200 at 24fps produces sharper, more staccato movement that can make structured garments feel more architectural. A slower shutter speed introduces dreamy streaking that works for flowing, romantic pieces. The key is making it a conscious creative choice rather than a default.
| Fashion Video Format | Recommended Frame Rate | Shutter Speed | Creative Rationale |
|---|---|---|---|
| Campaign Film | 24fps | 1/48 – 1/50 | Cinematic mood, editorial pacing, filmic motion blur |
| Lookbook Video | 24fps or 30fps | 1/50 – 1/60 | Clean presentation, consistent pacing, product clarity |
| Social Reel (Instagram/TikTok) | 24fps – 30fps (with 60fps B-roll) | 1/50 – 1/60 | Fast-paced cuts, occasional slow-motion accents for hooks |
| Runway Capture | 60fps | 1/120 | Flexibility for slow-motion replays, sharper freeze frames |
| Fabric/Texture Detail Shots | 120fps+ | 1/240+ | Ultra-slow-motion reveals of material behavior and sheen |
Resolution and Codec Selection for Maximum Post-Production Flexibility
Resolution and codec are where creative ambition meets practical workflow. Get these wrong, and you'll either drown in unusable file sizes or discover your footage falls apart the moment you try to color grade it.
Shoot 4K as your minimum resolution, even if you plan to deliver in 1080p. The extra resolution gives you critical crop flexibility in post-production. You can punch in on a garment detail, reframe a slightly off-center composition, or stabilize handheld footage without visible quality loss. For high fashion video production techniques, this flexibility is not a luxury; it is a practical necessity when clients request alternate crops for different platforms from a single shoot day.
Codec selection determines how much latitude you'll have in color grading, and this is where many productions quietly succeed or fail. The choice often comes down to ProRes versus H.265, and each serves a fundamentally different purpose.
ProRes uses intraframe compression, meaning every single frame contains complete image data. Your editing software can jump to any frame instantly without reconstructing it from surrounding frames. This makes scrubbing, trimming, and grading feel responsive and fluid. ProRes also supports 10-bit and even 12-bit color depth with 4:4:4 sampling in its higher variants, preserving the subtle color gradations that matter when you're grading a collection with tonal fabrics. The tradeoff is file size: a single minute of 4K ProRes 422 can consume 3-4GB of storage. For fashion productions with multiple takes across an entire shoot day, storage costs add up fast.
H.265 (HEVC) achieves roughly half the file size of H.264 at comparable quality, making it attractive for longer shoots where storage is constrained. It also supports 10-bit color depth more readily than its predecessor. However, H.265 relies on interframe compression, which means your editing software must reconstruct frames by calculating differences from reference frames. This taxes your processor heavily during editing and grading, and color corrections applied to heavily compressed interframe footage tend to reveal artifacts faster than the same adjustments on ProRes material.
The professional approach for camera settings for fashion video production techniques is straightforward: capture in ProRes (or your camera's highest-quality intraframe codec) whenever your storage and camera body support it, then deliver final exports in H.264 or H.265 for distribution. You get maximum grading latitude where it matters and efficient file sizes where audiences consume the content. If ProRes recording is not available on your camera, shooting H.265 at the highest available bitrate and transcoding to ProRes before editing dramatically improves your timeline performance.
Lens Choices That Flatter Garments and Fabrics
Lens selection shapes how a garment reads on screen more than most cinematographers realize. Wide-angle lenses distort proportions, stretching limbs and warping garment lines in ways that rarely serve a designer's intent. The sweet spot for fashion cinematography lives in the moderate telephoto range.
An 85mm prime is the versatile foundation of most fashion video lens kits. It compresses perspective just enough to flatter the human form while keeping garment proportions true to life. You can frame a full-length look with enough working distance to avoid making the model self-conscious, and the shallow depth of field at wide apertures isolates clothing against soft backgrounds. For lookbook content and medium shots, this focal length rarely disappoints.
Step up to a 135mm prime and you'll notice a more pronounced compression effect. Background elements flatten and blur more aggressively, which pushes the garment forward as the undeniable focal point. This lens excels at waist-up and detail-oriented shots where you want a single design element, like a collar structure or draping at the hip, to command attention. The tighter framing and heavier compression also lend a more editorial, high-fashion quality that aligns with cinematic campaign aesthetics.
For extreme textile detail, a macro lens in the 90-105mm range reveals what no other focal length can: individual thread patterns, the weave structure of tweed, the microscopic sheen gradient across silk. These shots punctuate an edit with tactile intimacy, reminding the viewer that fashion is ultimately about physical material. When shooting macro, use a tripod or rail system because even minor camera shake at high magnification becomes distracting.
One often-overlooked consideration: prime lenses consistently outperform zoom lenses for fashion work. The sharper rendering, wider maximum apertures, and superior bokeh characteristics of primes create the polished optical quality that distinguishes professional fashion cinematography from content that merely looks "good enough." Carry two or three primes rather than one zoom, and you'll find your footage has a clarity and dimensionality that elevates every garment in frame.
With your camera dialed in for resolution, frame rate, codec, and lens choice, the next variable that shapes how fabric reads on screen is light itself, and lighting for fashion video introduces challenges that no amount of camera optimization can solve on its own.
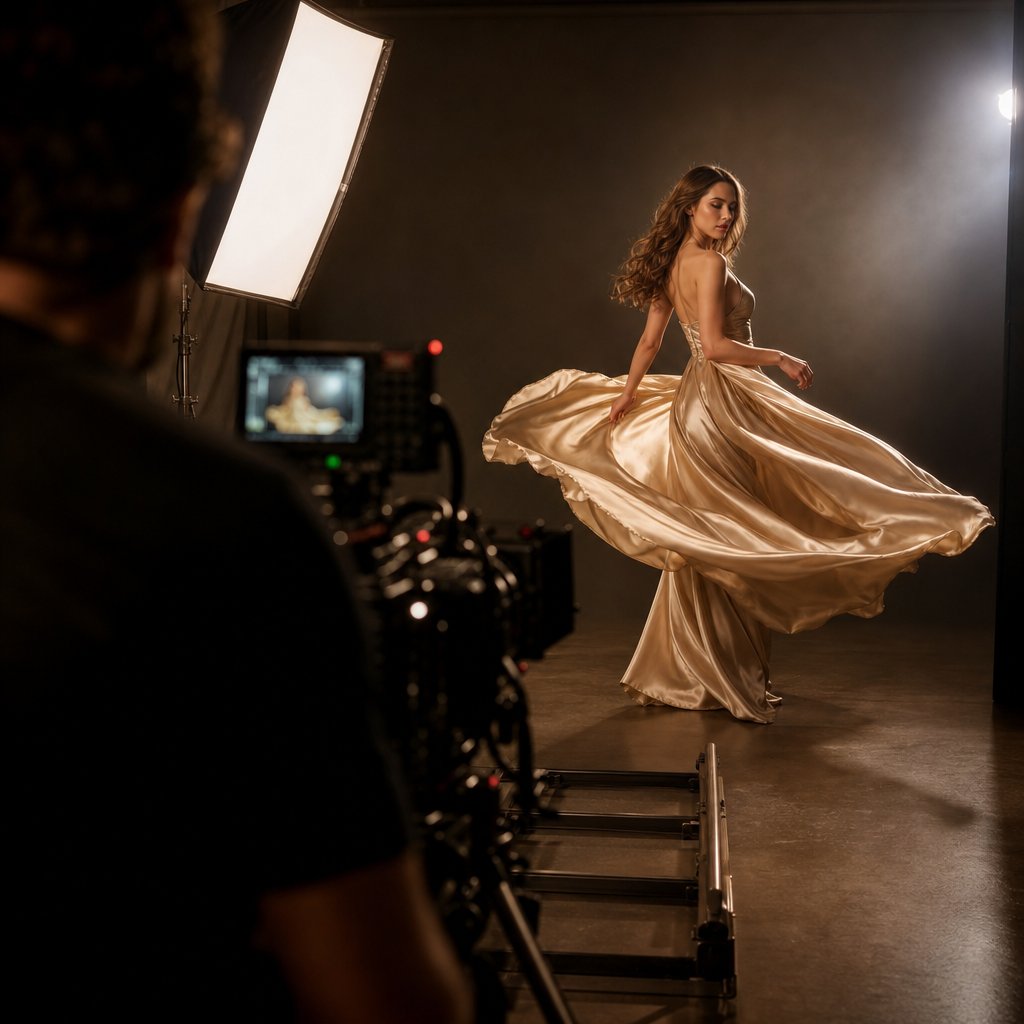
Lighting Techniques That Reveal Texture and Flatter Fabric
Light does not just illuminate a garment. It defines it. The same dress can look flat and lifeless under one setup, then sculptural and alive under another. Studio lighting fashion video production techniques require a dual focus that general videography rarely demands: you need to flatter human skin and reveal fabric texture simultaneously, often with competing requirements. A lighting choice that smooths skin might erase the weave of a tweed jacket. A hard source that carves out leather texture might create unflattering shadows across a model's face.
This tension is what makes fashion lighting a specialized skill. Unlike flash-based photography where you freeze a single moment, continuous lighting for video must maintain consistent quality across sustained movement, shifting angles, and changing fabric positions within a single take. You cannot fire a strobe and check the result frame by frame. Your lighting must work from every angle the model moves through.
Three-Point Lighting Adapted for Fabric and Skin
The classic three-point setup (key, fill, back) serves as a starting framework, but fashion video demands significant adaptation. A standard interview-style three-point rig prioritizes even facial illumination. For editorial fashion video production techniques, you're reshaping that foundation to serve the garment as much as the person wearing it.
Your key light should be positioned to reveal fabric texture rather than simply illuminating the model evenly. For structured garments like tailored blazers or textured knits, move the key slightly more to the side than you would for a beauty setup. This creates the shadow gradients across the fabric surface that communicate three-dimensionality. A key placed at roughly 45 to 60 degrees from camera axis strikes the balance between flattering facial modeling and garment texture revelation.
The fill light controls how deep your shadows read. In premium fashion video production techniques, you typically want less fill than a commercial talking-head setup. Deeper shadows give garments more visual weight and dimension. However, go too dark and you lose detail in dark fabrics entirely. As Beverly Boy Productions notes, black clothing absorbs more light than it reflects, meaning you can easily lose texture and detail, causing outfits to appear flat. The solution is using reflectors or low-powered fill sources positioned to gently lift shadow areas without flattening the overall contrast.
Your backlight (or hair/rim light) becomes especially critical for fashion. It separates the model and garment from the background while creating edge definition that outlines the silhouette. For dark garments, backlighting is particularly effective because it accentuates edges and makes clothing pop even in shadowy environments. Position it high and behind the subject, angled down to catch shoulders and the garment's outer contour.
Color Temperature Strategy for Different Garment Palettes
Color temperature is not a set-it-and-forget-it decision in fashion video. Different fabric colors respond dramatically to shifts in Kelvin value, and matching your lighting temperature to the collection's palette can mean the difference between garments that sing on screen and ones that look muddy or off-brand.
For earth-toned collections (camel, rust, olive, chocolate), warming your lights slightly to 3800-4500K enriches the natural warmth already present in the fabrics. These tones absorb cooler light and can appear dull or grayish under standard 5600K daylight-balanced sources.
For metallics, whites, and cool-toned fabrics, shift toward 5600-6500K. Cooler temperatures preserve the crispness of whites without introducing a yellow cast and allow metallic fabrics to retain their reflective, modern quality. Silver sequins under warm light read as gold. That might not match the designer's intent.
For mixed collections spanning warm and cool tones, set your key light at a neutral 5000-5200K and use gels on accent lights to selectively warm or cool specific areas of the frame. This gives you a balanced foundation while still allowing targeted color enhancement for individual garments.
One critical principle: always white-balance to your key light source and let accent lights create intentional color contrast. If you white-balance to ambient room light instead, your key will introduce an unwanted color shift across both skin and fabric.
Continuous Lighting Modifiers for Fashion Video
The modifier you place in front of your light source shapes its character more than the fixture itself. A bare LED panel and that same panel behind a deep softbox produce fundamentally different results on fabric. Choosing the right modifier for each light in your setup is where minimalist fashion video production techniques become practical. You do not need a dozen fixtures. You need the right modifiers on the fixtures you have.
Here is the essential modifier kit for fashion video, with specific use cases for each:
- Large softbox (3x4 ft or larger) — Your primary key light modifier. Creates soft, even illumination that flatters skin while preserving enough directionality to show fabric texture. Position it close to the model for maximum softness on skin, or pull it back for slightly harder light that reveals more garment detail.
- Strip softbox (1x3 ft or 1x4 ft) — Ideal for edge lighting and garment accents. The narrow shape produces a controlled vertical band of light that sculpts the sides of garments, defining sleeves, lapels, and silhouette lines without spilling across the entire scene. As Fstoppers' modifier comparison demonstrates, strip softboxes keep light fairly even in the vertical direction while remaining hard in the horizontal, which is perfect for sculpting faces or adding accents on garments.
- Large diffusion frame or butterfly silk (6x6 ft or 8x8 ft) — Placed between a harder source and the model, this creates an enormous soft source that wraps light around the body. Essential for full-length shots where you need consistent quality from head to toe without visible falloff.
- Reflectors (white or silver) — Used as passive fill to bounce existing light into shadow areas without adding a second powered source. White reflectors add fill without color cast. Silver reflectors add slightly more punch and a cooler quality. Avoid gold reflectors for fashion video unless you specifically want warm fill on skin, as they introduce color shifts that complicate fabric accuracy in grading.
- Flags and negative fill (black solids) — Equally important as light sources. Placing black fabric or foam core on the fill side deepens shadows and adds contrast to garments that need more dimension. Dark fabrics like leather and velvet often benefit from negative fill because it prevents ambient bounce from flattening their surface character.
- Grid or egg crate attachments — Added to softboxes to reduce spill and increase contrast. When working in smaller studios where light bounces off walls, grids keep your key light from contaminating the background or fill side. This gives you more control over the ratio between lit and shadow areas on the garment.
The interplay between these modifiers matters more than any single piece. A large softbox as key, a strip box as rim, negative fill on the opposite side, and a reflector for subtle shadow lift creates a four-element setup that handles most fashion video scenarios. You can shoot an entire lookbook with this configuration, adjusting only the positions and distances between takes.
Lighting sets the stage, but fabric only truly comes alive when a model moves through it with intention. How you direct that movement, the pace of a walk, the timing of a turn, the way a pause lets drape settle, determines whether your carefully crafted light actually reveals what it was designed to show.
Skip the studio — generate fashion video with AI →
Directing Models for Motion Instead of Still Frames
A perfectly lit set with ideal camera settings still produces lifeless footage if the model moves without intention. In photography, you capture a single peak moment. A fraction of a second where expression, posture, and garment position align. In video, you're asking a model to sustain that alignment across seconds or minutes of continuous motion, hitting multiple visual peaks within a single take while making it all look effortless.
This is where model direction fashion video production techniques diverge sharply from still photography direction. You're no longer calling out "chin down, shoulder forward, hold." You're choreographing a performance where walking pace, turn timing, gesture speed, and emotional expression must flow together as one continuous sequence. The garment is your co-star, and every movement instruction you give the model is ultimately about how fabric behaves in response.
Communicating Movement and Pacing to Models
Most models train for still photography first. They know how to find angles, hold poses, and shift weight between frames. Video asks something fundamentally different: sustained, rhythmic movement where transitions between positions matter as much as the positions themselves.
When directing walking pace, avoid vague instructions like "walk naturally" or "move slowly." Instead, give concrete references. "Walk as if you're three steps behind the beat of the music" communicates tempo. "Imagine the floor is slightly sticky" communicates weight and deliberation. These sensory cues translate into physical movement far more reliably than abstract speed instructions.
Turn timing is where many fashion videos fall apart. A model who turns too quickly creates a blur that wastes your carefully designed lighting. One who turns too slowly breaks the rhythm of the edit. The solution is rehearsing turns to a count. "Walk four steps, pause for a half-beat, then rotate your shoulders first and let your hips follow over two counts." This staggered rotation creates the cascading fabric movement that reads beautifully on camera, especially for editorial campaign fashion video production techniques where every frame needs to feel intentional.
Emotional expression in video cannot be a single frozen look. It needs to evolve. Direct models to think in emotional arcs rather than fixed expressions. "Start with quiet confidence, let curiosity build as you approach the camera, then shift to something more distant as you turn away." This gives the editor multiple emotional textures to cut between and prevents the flat, unchanging gaze that makes fashion video feel robotic.
Matching movement speed to music tempo is critical for edit rhythm. If you know the final track will be 90 BPM, have the model walk on the beat or on the half-beat during filming. This creates natural sync points in post-production where cuts land on musical accents without forcing awkward speed adjustments. Even when the final music has not been selected, establishing a consistent internal tempo during shooting gives the editor a rhythmic foundation to build on.
Garment-Specific Direction for Maximum Visual Impact
Every garment type demands its own movement vocabulary. What makes a structured coat look powerful on camera will make a flowing dress look stiff. Luxury fashion brand video production techniques require directors who understand how specific fabrics respond to specific movements and can translate that knowledge into clear, actionable direction on set.
For coats and outerwear, instruct the model to walk with slightly longer strides and a deliberate heel strike. This generates the forward momentum that makes a coat's hem lift and swing. Ask them to keep their arms relaxed but slightly away from the body so the coat's silhouette remains visible. On turns, a quick shoulder rotation followed by a slower hip follow-through creates that satisfying coat flare that reads as both powerful and elegant.
For flowing dresses and skirts, slower movement with sudden directional changes produces the most dramatic fabric behavior. Ask the model to walk at a measured pace, then execute a sharper-than-expected turn. The fabric continues moving after the body stops, creating that suspended moment where chiffon or silk catches air and light simultaneously. Pausing after a turn for one to two seconds lets drape settle naturally, giving you a clean endpoint for the shot.
For structured tailoring (blazers, trousers, architectural pieces), minimize extraneous movement. Clean, linear walks with controlled gestures let the garment's construction speak for itself. Ask the model to keep shoulders level and avoid bouncing in their step. The goal is to present the garment as a precise object, and any unnecessary body movement distracts from its lines.
For knitwear and jersey, gentle, continuous movement works better than sharp transitions. These fabrics cling and release with the body, so fluid arm movements, slow weight shifts, and gradual turns reveal how the material drapes and stretches. Abrupt movements on clingy fabrics tend to create unflattering bunching that is difficult to fix in post.
Bridging the Photography-to-Video Transition on Set
Photographers moving into fashion runway video production techniques face a specific set of transition challenges that go beyond simply pressing record instead of clicking a shutter. The shift requires rethinking how you communicate with talent, manage your set environment, and structure your shooting time.
The first challenge is continuous performance. In photography, you can fire 200 frames and select the one perfect moment. In video, every second of a take must work. This means directing models to maintain energy and intention throughout an entire movement sequence rather than spiking for a single instant. It also means your direction must be more detailed upfront because you cannot rely on volume to find the moment.
The second challenge is audio awareness. Photography sets are often noisy, with music blasting, the photographer calling out directions mid-shoot, and assistants adjusting things between frames. Video sets require quiet during takes. If you plan to use any on-set audio, even ambient sound for texture, you need to communicate direction before rolling and use hand signals or pre-rehearsed cues during takes rather than verbal coaching.
The third challenge is sustained lighting consistency. Flash photography forgives ambient light fluctuations because the strobe overpowers everything for a fraction of a second. Continuous lighting for video exposes every flicker, every cloud passing over a window, every reflective surface that bounces unexpected color. You need to control your environment more rigorously and monitor exposure throughout each take rather than checking it once before shooting.
Here is a step-by-step model direction workflow that bridges rehearsal through final take, applicable to everything from lookbook shoots to full campaign productions:
- Wardrobe walkthrough — Before the model is on set, examine each garment and identify its key movement characteristics. Note which pieces need slow turns, which benefit from walking momentum, and which require stillness to read properly.
- Blocking rehearsal (no camera) — Walk the model through the movement path on set. Establish start and end marks, turn points, and pause positions. Let them feel the space and the garment together without performance pressure.
- Movement rehearsal with tempo — Play the reference track or count a tempo aloud. Have the model repeat the blocking at the intended pace, adjusting speed and timing until the garment responds the way you need it to on camera.
- Technical rehearsal (camera rolling, no pressure) — Record a practice take so the camera operator can confirm focus marks, the gaffer can verify lighting holds across the movement path, and the model can see playback of how the garment reads in motion.
- Feedback and refinement — Review the technical rehearsal with the model. Show them specific moments where the garment looked best and explain what movement created that result. Models who understand the "why" behind direction deliver better subsequent takes.
- Performance takes — Shoot with full intention. Give minimal direction between takes, focusing on one specific adjustment at a time rather than overwhelming with multiple notes. "Same energy, but let the turn happen a half-beat later" is more actionable than a list of five corrections.
- Variation takes — Once you have a solid base take, ask for variations in pace, intensity, or emotional tone. These give the editor options and often produce unexpected moments that elevate the final cut beyond what was planned.
The relationship between direction and garment behavior is ultimately about physics. Fabric responds to velocity, acceleration, and gravity. Your job as a director is translating those physical principles into human language that a model can execute intuitively. When that translation works, the garment stops being a costume and starts performing alongside the talent.
Of course, different fabrics respond to identical movements in completely different ways. A turn that makes silk billow will barely register on denim. Understanding how to adjust your entire shooting approach, from lighting angle to camera movement, based on the specific material in front of your lens is where technical craft meets creative problem-solving.
Shooting Different Fabrics and Textures on Video
Silk does not behave like denim. Sequins do not respond to light the way chiffon does. Yet many production teams apply the same camera settings, the same lighting angles, and the same movement strategies regardless of what fabric is actually in front of the lens. This is where fabric texture fashion video production techniques become essential. Each material has its own physics, its own relationship with light, and its own demands on camera movement. Treating all textiles identically is like lighting every scene the same way regardless of mood. It technically works, but it never excels.
Techniques for Capturing Sheen, Drape, and Texture
Different fabric categories require fundamentally different approaches to lighting angle, camera speed, and filtration. Here is how to handle the four major fabric families you will encounter on fashion shoots.
Silk and satin (sheen fabrics) — These materials reflect light in concentrated, directional ways that can easily blow out highlights or create distracting hot spots. As Rich Art Productions notes, shiny materials like silk and satin reflect light and cause glare that makes lighting difficult to control. The solution is twofold. First, use a circular polarizing filter on your lens. Rotating the polarizer lets you selectively reduce specular reflections from the fabric surface without affecting the overall exposure or color saturation of the scene. Unlike most post-production effects, the result of a polarizer cannot be accurately replicated after the fact. Second, control your specular highlights by using larger, softer light sources positioned at oblique angles. A large diffusion frame between your key light and the garment spreads the reflection across a wider area of the fabric, turning a harsh hot spot into a gentle, rolling sheen that communicates luxury rather than glare.
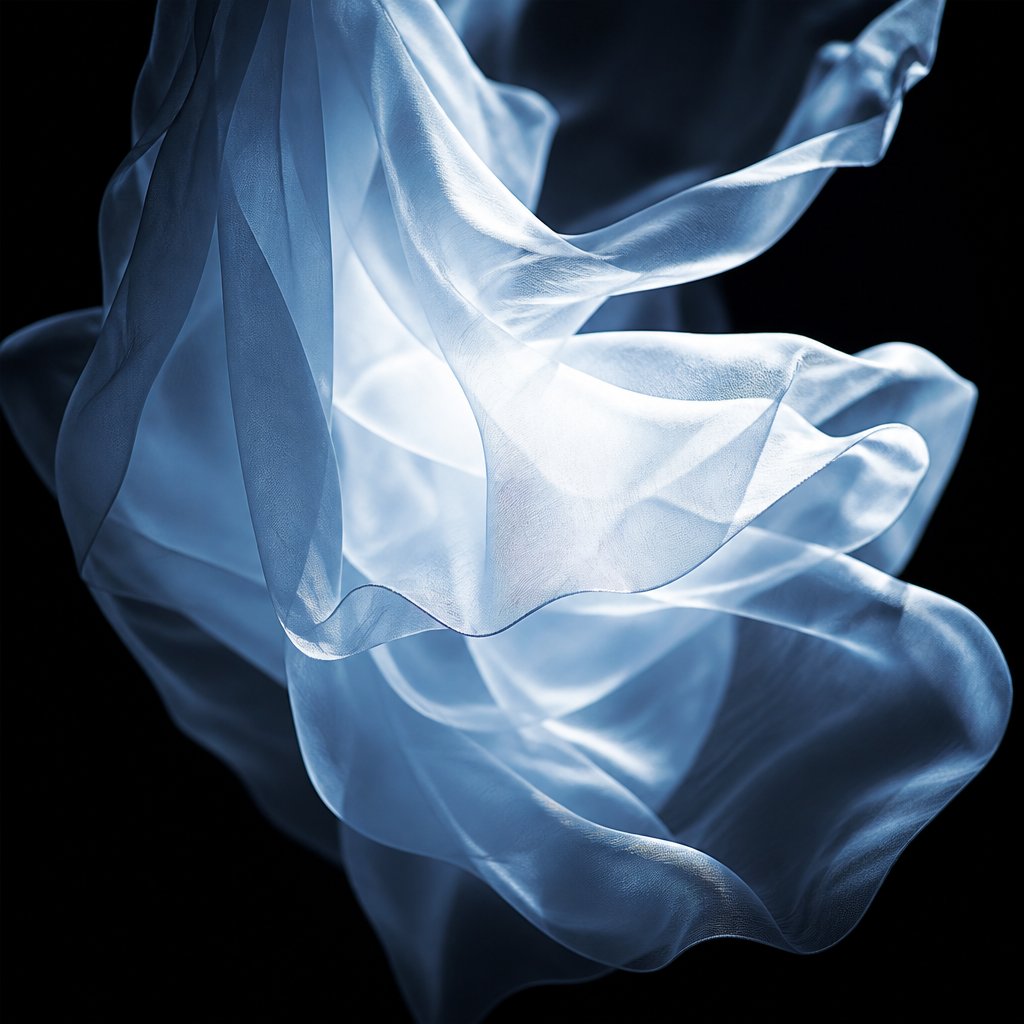
Chiffon and sheer fabrics (drape and transparency) — These materials live in motion. Their beauty is in how they float, layer, and reveal what is beneath them. Slower camera movements are essential here because fast pans or whip movements turn delicate fabric into an indistinct blur. Backlight becomes your primary storytelling tool. Position a soft source behind and slightly above the model so light passes through the sheer material, revealing its layered translucency. This backlighting technique transforms chiffon from a flat, opaque surface into something ethereal and dimensional. Shoot at 60fps or higher to capture the way these fabrics settle after movement, giving you slow-motion options that reveal drape behavior invisible at real-time speed.
Tweed, denim, and structured fabrics (texture) — These materials communicate quality through their surface detail: the weave pattern of tweed, the warp and weft of raw denim, the ribbing of corduroy. Side lighting at a steep angle (60-80 degrees from camera axis) rakes across the fabric surface, casting micro-shadows within the texture that make it pop on screen. Tighter focal lengths in the 100-135mm range compress the depth of field and isolate specific texture areas, drawing the viewer's eye to craftsmanship details. For winter fashion video production techniques featuring heavy wool coats or layered knits, this side-lighting approach reveals the material's weight and density in ways that flat, frontal lighting simply cannot.
Sequins, metallics, and leather (reflective materials) — Highly reflective surfaces act like mirrors, bouncing back every light source, crew member, and piece of equipment in the studio. The primary tool here is negative fill: placing black flags, solids, or fabric on the sides of the set to absorb stray light rather than bouncing it back into the garment. This creates deeper, more controlled contrast on leather surfaces and prevents sequins from becoming a chaotic scatter of blown-out points. Flag your light sources aggressively, using barn doors or black wrap to narrow the beam so only the intended area of the garment catches the highlight. For leather specifically, a single, well-controlled strip light creates the long, elegant specular streak that communicates the material's smooth surface without overwhelming the frame.
Camera Movement Matched to Garment Character
The way your camera moves should mirror the character of the garment it is capturing. A flowing piece demands fluid, continuous motion. A structured piece benefits from deliberate, precise movement or intentional stillness. Mismatching camera movement to fabric personality creates a subtle but real disconnect that audiences feel even if they cannot articulate why.
Dolly shots for garment reveals — A slow dolly push-in is one of the most effective ways to reveal a garment's details progressively. As WeVideo's dolly guide explains, a dolly can shift from one angle to another without a single edit, moving from a wide shot that establishes silhouette to a close-up that reveals construction detail in one uninterrupted motion. For fashion, this means starting wide to show the full look, then pushing in to highlight a specific design element like a collar, a belt, or embroidery. The uninterrupted movement gives the viewer time to absorb the garment as a complete piece before focusing on its details. Ensure the movement is motivated: the endpoint should reveal fresh information about the garment, not just be where the camera happens to stop.
Gimbal work for walking sequences — When a model is moving through space, a gimbal provides the stabilized tracking that keeps the garment centered in frame without the setup time of dolly track. Gimbals excel at urban fashion video production techniques where you are shooting on location, following a model down a street or through an architectural space. The slight organic float of gimbal movement adds energy without the mechanical precision of a dolly, which suits the more spontaneous feel of street-style and outdoor fashion video production techniques. Keep your gimbal movements smooth and directional. Avoid the temptation to orbit or arc unnecessarily, as unmotivated movement distracts from the garment.
Static framing for structured garments — Sometimes the most powerful choice is not to move at all. Structured pieces like tailored suits, architectural dresses, and rigid outerwear benefit from a locked-off camera that lets the garment's lines speak without competing motion. A static wide shot with the model walking toward or past camera allows the viewer to study proportions, construction, and fit without any visual distraction. This approach also works well for pieces with strong geometric elements where camera movement would warp the clean lines.
Dynamic movement for flowing pieces — Conversely, lightweight and flowing garments come alive when the camera moves with them. A lateral tracking shot that matches the model's walking speed creates a sense of shared momentum, while the fabric billows and shifts in response to the model's movement. Combining a slow dolly or gimbal track with a 60fps frame rate gives you the option to slow the footage in post, stretching those moments where chiffon catches air or a silk lining flashes during a turn.
Troubleshooting Fabric-Specific Challenges on Set
Even with careful planning, certain fabric problems only reveal themselves once you are rolling. Knowing how to diagnose and solve these issues quickly keeps your shoot day on schedule.
Fabric glare and blown highlights — If shiny fabrics are creating uncontrollable hot spots despite your lighting adjustments, try these solutions in order: rotate your polarizing filter to find the angle that reduces the specific reflection; reposition the model so the angle of incidence between light source and fabric changes; add a larger diffusion layer between the light and the garment; or as a last resort, reduce the power of your key light and compensate with a wider aperture or higher ISO. The goal is controlling the reflection, not eliminating all sheen, because some specular highlight is what communicates the fabric's luxurious surface quality.
Color cast from environments — Shooting on location introduces color contamination that studio work avoids. A model standing near a red brick wall will pick up warm color reflected onto the garment's shadow side. Green foliage bounces a subtle green cast onto white or light-colored fabrics. The fix is twofold: use negative fill (a black flag or solid) between the colored environment and the garment to block reflected color, and shoot a gray card reference at the model's position so you can correct any remaining cast precisely in post-production. For outdoor fashion video production techniques, this environmental awareness is critical because you cannot control the color of your surroundings the way you can in a studio.
Moire patterns on fine textures — Tightly woven fabrics like herringbone, fine pinstripes, or certain knit patterns can create moire, a wavy visual distortion that occurs when the fabric's pattern frequency conflicts with the camera sensor's pixel grid. Adjusting your distance to the subject (moving slightly closer or further) often resolves it by changing the apparent size of the pattern relative to the sensor. Alternatively, opening your aperture slightly to soften the fabric's pattern just enough to eliminate the interference without losing overall sharpness can solve the problem without repositioning.
Fabric noise on audio — Stiff synthetics, nylon, and heavily starched materials create rustling sounds that microphones pick up easily. If you are recording any on-set audio, even ambient room tone, be aware that certain fabrics generate noise with every movement. Soft, flexible materials like cotton blends and jersey are significantly quieter. When shooting noisy fabrics, either plan to replace all audio in post or use directional microphones positioned to minimize pickup of fabric sound.
| Fabric Type | Recommended Lighting | Camera Movement | Lens Choice | Key Consideration |
|---|---|---|---|---|
| Silk / Satin | Large diffused source at oblique angle; polarizer on lens | Slow dolly push-in or static | 85mm or 135mm prime | Control specular highlights without eliminating sheen entirely |
| Chiffon / Sheer | Strong backlight for transparency; soft frontal fill | Slow tracking or gentle gimbal float | 85mm prime at wider aperture | Shoot 60fps+ to capture settling drape in slow motion |
| Tweed / Denim | Hard side light at 60-80 degrees for texture | Static or minimal movement | 100-135mm prime or macro for detail | Steep lighting angle reveals weave and surface character |
| Sequins / Metallics | Narrow strip light; heavy negative fill; flagged sources | Slow, controlled dolly or static | 85mm prime | Flag aggressively to prevent chaotic reflections |
| Leather / Patent | Single controlled strip light for specular streak; negative fill | Dolly or static; avoid handheld shake | 85-135mm prime | One clean highlight line communicates surface quality |
| Jersey / Knit | Soft key with moderate contrast; avoid hard sources | Gentle gimbal tracking matching model pace | 85mm prime | Fluid movement reveals cling-and-release behavior |
| Wool / Heavy Knit | Raking side light for texture; warm color temperature | Static or slow push-in | 100-135mm for texture isolation | Side light communicates weight and density of material |
Mastering fabric-specific approaches gives you the technical vocabulary to handle any garment that arrives on set. But a single shoot day rarely involves just one fabric type or one output format. The same collection might need a cinematic campaign film, a set of social reels, a lookbook sequence, and runway coverage, each demanding a different production approach, pacing strategy, and delivery specification. Adapting your techniques across these formats without multiplying your budget is where production efficiency meets creative versatility.
Adapting Techniques Across Fashion Video Formats
A single collection shoot might need to produce a 60-second Instagram Reel, a three-minute campaign film, a lookbook sequence for buyers, runway documentation, and behind-the-scenes content for brand storytelling. Each of these formats demands a different production mindset, different pacing, different framing, and different delivery specs. Applying the same approach across all of them is like wearing the same outfit to a board meeting, a gallery opening, and a beach party. Technically possible, but never quite right.
This is where social media fashion video production techniques diverge from long-form cinematic work, and where many production teams waste budget by treating every deliverable identically. Understanding the distinct creative and technical requirements of each format lets you plan a shoot day that captures material for multiple outputs efficiently, without compromising quality on any single one.
Short-Form Social Content Production Approach
Short form fashion video production techniques follow a fundamentally different logic than traditional campaign work. You are not building toward a narrative payoff over minutes. You are fighting for attention in the first half-second and delivering visual satisfaction within 15 to 60 seconds.
The hook-first structure is non-negotiable. Your opening frame must arrest the scroll. This means leading with your most visually striking moment: a dramatic fabric reveal, an unexpected texture close-up, or a bold color contrast. Save the brand logo and context for later. If the first frame does not stop a thumb mid-scroll, nothing that follows matters.
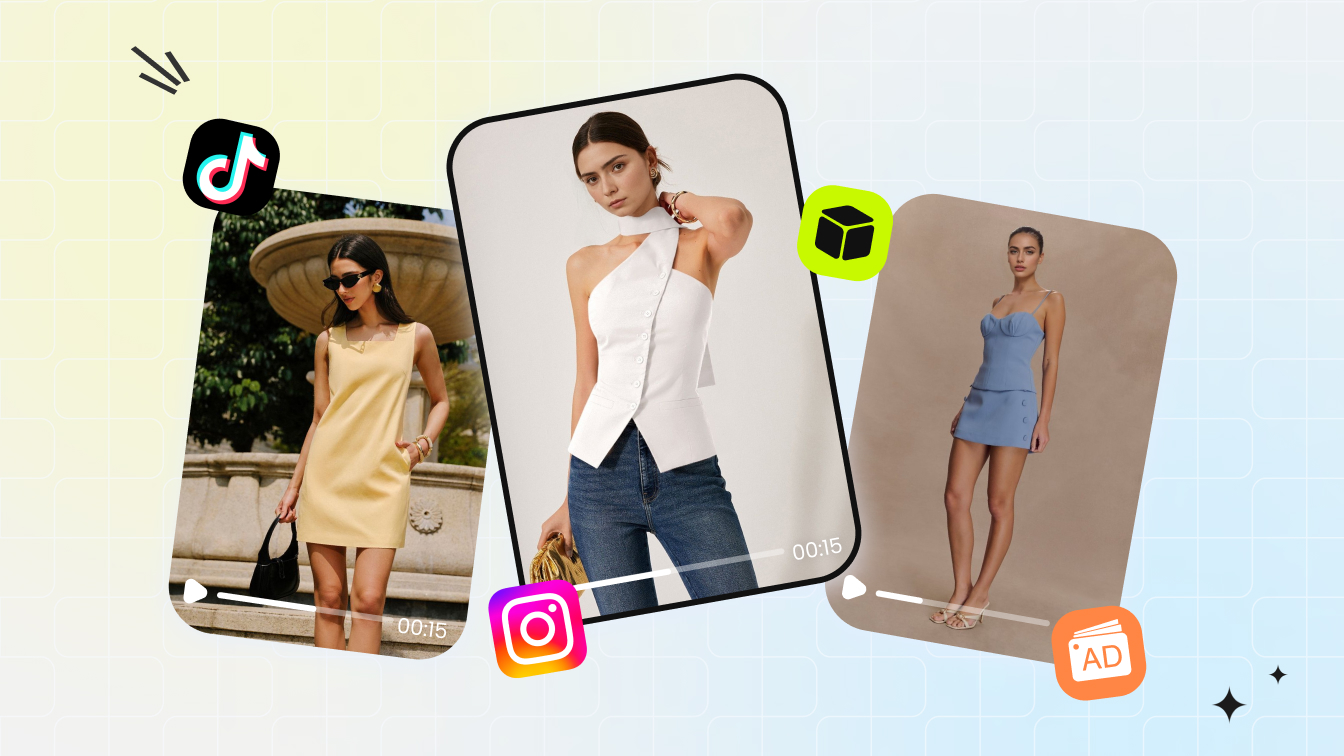
Framing shifts entirely for vertical platforms. Instagram Reels require a 9:16 aspect ratio at a minimum resolution of 1080x1920 pixels, with video lengths up to 15 minutes for uploaded content though the algorithm favors content under 90 seconds. TikTok follows the same 9:16 vertical format at 1080x1920 resolution. YouTube Shorts also use 9:16 with content up to 3 minutes. This vertical orientation changes your entire compositional approach. You are working with a tall, narrow frame where full-length garment shots become natural and horizontal movement reads differently than in widescreen.
For 15 second fashion video production techniques specifically, every cut must carry new visual information. A typical structure might be: hook shot (0-2 seconds), three to four rapid garment angles (2-10 seconds), a slow-motion accent moment (10-13 seconds), and a closing brand frame (13-15 seconds). Cut timing should land on musical beats, with transitions every 1.5 to 3 seconds to maintain energy without feeling chaotic.
Shoot your social content at 24-30fps for the base footage, with select moments captured at 60fps for slow-motion accents that punctuate the edit. Keep camera movements short and purposeful. A quick tilt from shoes to face, a snap zoom into a detail, or a whip pan between two looks gives you the kinetic energy that short-form content demands. Avoid long, lingering shots that work beautifully in campaign films but feel static in a feed environment.
Campaign Films and Long-Form Brand Storytelling
Campaign films operate on entirely different principles. Here, you have the luxury of time and the responsibility of narrative. A three-minute brand film needs an emotional arc: an opening that establishes mood, a middle that builds tension or desire, and a resolution that leaves the viewer with a feeling they associate with the brand. This is where cinematic fashion video production techniques reach their full expression.
Aspect ratio shifts to widescreen. A 2.39:1 or 16:9 frame communicates cinema immediately, separating your content from the vertical scroll of social feeds. The wider frame also gives you compositional room to place garments within environments, using negative space and architectural elements to contextualize the collection within a lifestyle or narrative world. As Flying Solo's visual strategy guide explains, a campaign captures the emotional essence of your brand, transforming your collection into a lifestyle or story where art direction, casting, and location come together to create striking visuals that resonate with your audience.
Pacing slows dramatically. Shots hold for 3 to 8 seconds, allowing viewers to absorb garment details, environmental context, and emotional performance simultaneously. Cut rhythm follows the music's phrasing rather than its beat, with transitions landing on melodic shifts or dynamic changes rather than every downbeat. This creates a breathing quality that feels considered rather than frantic.
Shoot campaign material at 24fps for the cinematic motion blur that audiences associate with high-end filmmaking. Use dolly and crane movements that unfold slowly, revealing information progressively rather than delivering it all at once. Every camera movement should be motivated by narrative purpose: pushing in to signal intimacy, pulling back to reveal context, tracking laterally to suggest journey.
Export for YouTube at 16:9 with a minimum resolution of 1920x1080, though 4K (3840x2160) delivery is increasingly expected for premium brand content. For website embedding, H.264 at a bitrate of 10-20 Mbps balances quality with load time.
Lookbook and Runway Capture Techniques
Lookbook videos serve a commercial function that campaign films deliberately avoid. They exist to show buyers and customers exactly what a collection contains, with clarity, consistency, and completeness taking priority over artistic expression. Think of them as the structured counterpart to a campaign's emotional storytelling. The lookbook documents the collection clearly while the campaign builds desire around it.
Lighting must remain consistent across every look. Set your key light, lock your exposure, and maintain identical color temperature throughout the entire sequence. Transitions between looks should be clean and predictable: simple cuts, dissolves, or match-cut transitions that maintain visual rhythm without drawing attention to themselves. The garment is the subject, not the editing.
Frame each look with product-focused composition. Full-length shots that show proportion, medium shots that reveal construction details, and close-ups of key design elements like hardware, stitching, or fabric texture. Shoot at 24-30fps with a locked-off camera or minimal, controlled movement. The goal is clarity and consistency that lets a buyer compare pieces across the collection without visual distractions.
Runway capture introduces a completely different challenge: you cannot control the pace, the lighting changes as models move through the space, and you get exactly one chance at each look. Multi-camera coverage is essential. Position one camera at the end of the runway for straight-on full-length shots, a second at an angle for three-quarter views that show garment dimension, and a third for detail close-ups using a long telephoto with continuous follow-focus. Shoot at 60fps across all cameras to give yourself slow-motion flexibility in post, and record continuously rather than starting and stopping between looks. The few seconds of transition between models often capture candid moments that work beautifully in final edits.
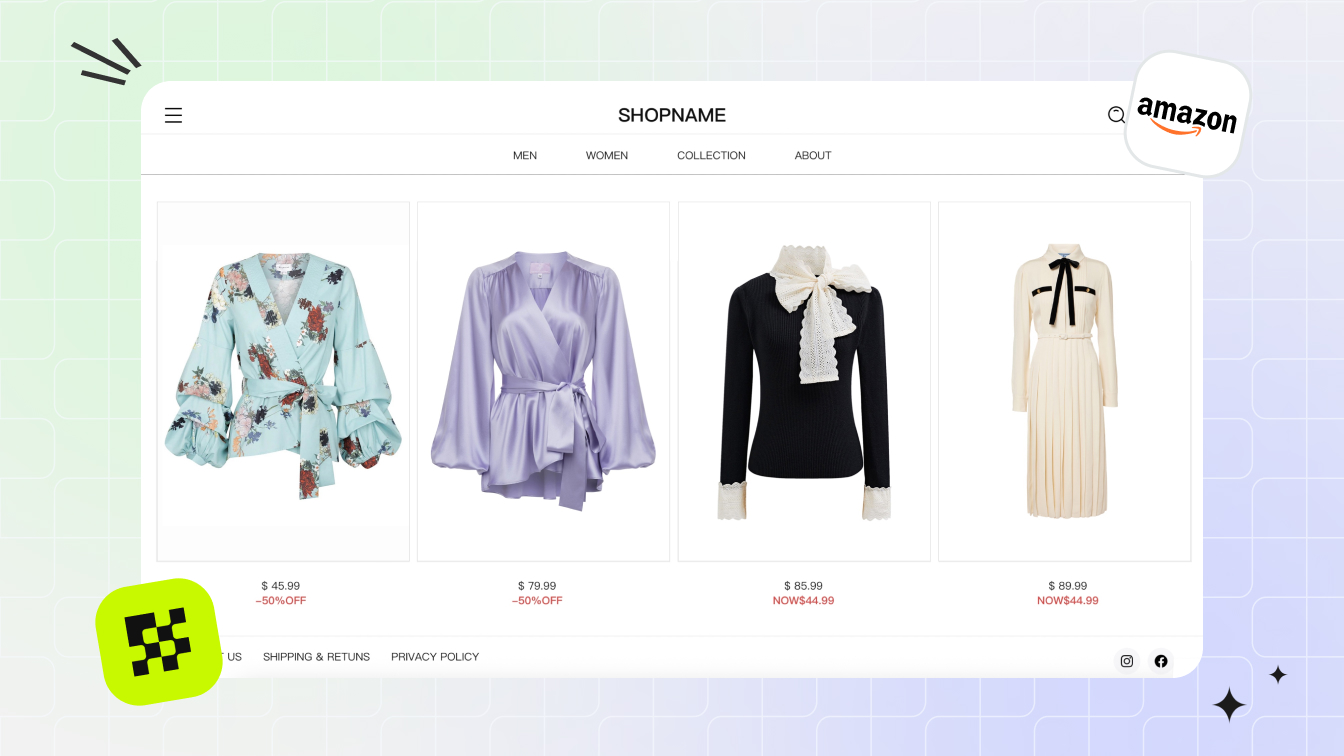
For teams producing across multiple formats from a single collection, the challenge is maintaining polished presentation quality without scaling production budgets proportionally for each deliverable. Tools like Snappyit's Fashion Video offer a practical bridge here, particularly for brands that need to maintain consistent visual quality across short-form social content and lookbook presentations without dedicating separate production days to each format. The efficiency gain comes from streamlining the gap between raw footage and platform-ready output.
| Format Type | Duration | Aspect Ratio | Pacing Style | Primary Platform | Frame Rate |
|---|---|---|---|---|---|
| Instagram Reel / TikTok | 15-90 seconds | 9:16 (1080x1920) | Fast cuts every 1.5-3 seconds; hook-first | Instagram, TikTok, YouTube Shorts | 24-30fps (60fps for accents) |
| Brand Campaign Film | 2-4 minutes | 16:9 or 2.39:1 | Cinematic pacing; 3-8 second holds; narrative arc | YouTube, brand website, paid media | 24fps |
| Lookbook Video | 1-3 minutes | 16:9 or 4:5 | Consistent rhythm; clean transitions; product-focused | Brand website, buyer presentations, social | 24-30fps |
| Runway Capture | 5-20 minutes (full show) | 16:9 | Continuous; real-time with slow-motion highlights | YouTube, brand website, press | 60fps (all cameras) |
| Behind-the-Scenes | 30 seconds - 3 minutes | 9:16 or 16:9 | Candid; handheld energy; natural pacing | Instagram Stories, TikTok, YouTube | 24-30fps |
Behind-the-scenes content deserves a brief mention because it follows rules opposite to everything above. Handheld camera work, natural or available lighting, and candid moments are the point. Overly polished BTS footage feels inauthentic. Shoot on a smaller camera or even a phone to maintain the spontaneous energy audiences expect from this format. The imperfection is the aesthetic.
Regardless of format, every piece of footage eventually lands in post-production, where color grading, edit pacing, and audio design transform raw material into a finished piece that carries brand identity. The technical choices you made on set, from codec selection to frame rate, now determine how much creative latitude you have in that final stage.
Turn any look into a marketplace-ready clothing video →
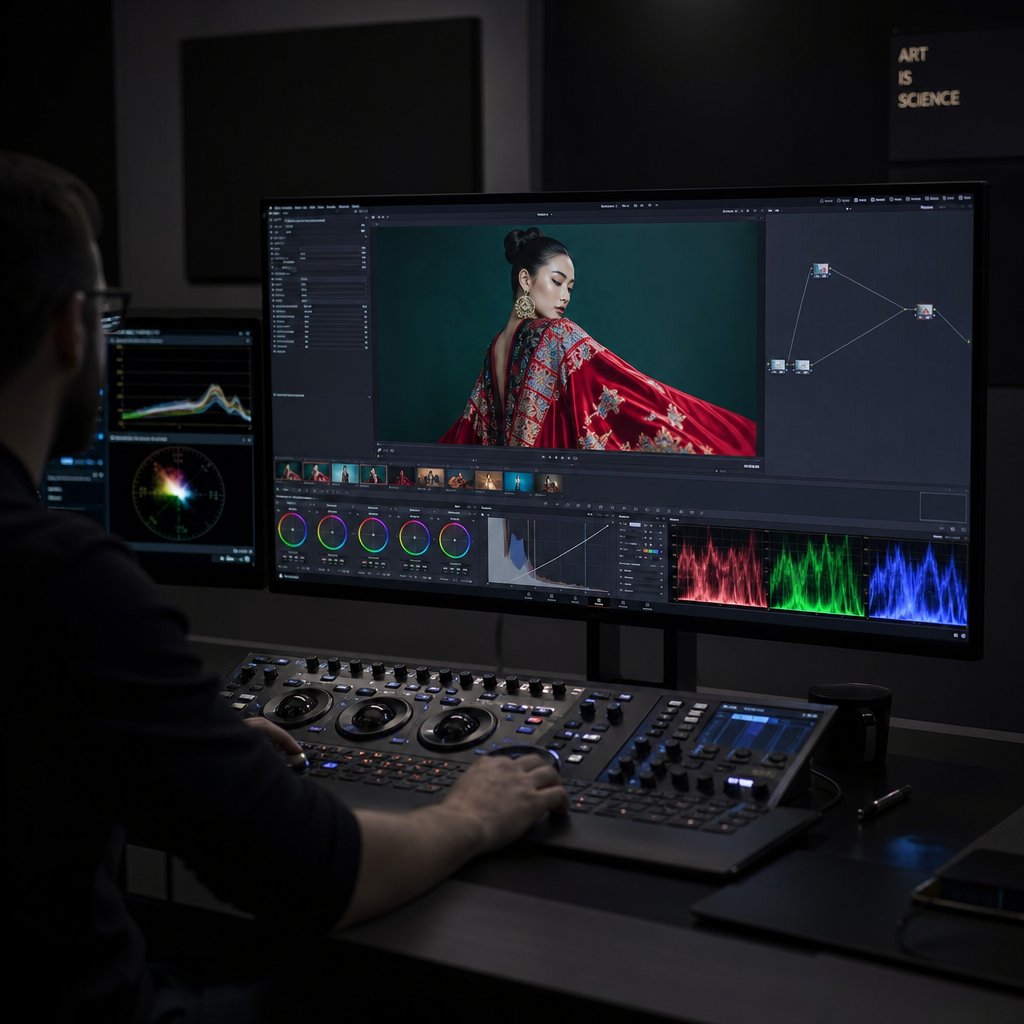
Post-Production Workflow From Color Grade to Sound Design
Raw footage is potential. Post-production is where that potential becomes a finished piece with emotional weight, brand identity, and narrative coherence. Yet most discussions of post production fashion video production techniques stop at "color correct your footage and add music." The reality is far more nuanced. Color grading for fashion serves dual masters: fabric accuracy and emotional mood. Edit pacing must synchronize with garment movement, musical phrasing, and brand personality simultaneously. And audio design, often treated as an afterthought, shapes how audiences perceive a collection as powerfully as any visual choice.
This is the stage where advanced fashion video production techniques reveal their full value. Every decision you made on set, from shooting ProRes for grading latitude to capturing at 60fps for slow-motion flexibility, now pays dividends or exposes limitations. The post-production pipeline for fashion is where technical craft and brand storytelling fashion video production techniques converge into a single, unified creative act.
Color Grading for Fabric Accuracy and Brand Mood
Here is the central tension of color grading fashion video production techniques: you want to create mood, but you cannot sacrifice fabric truth. A designer spent months selecting exact Pantone values for a collection. If your grade shifts a burgundy toward brown or pushes a navy into black, you have misrepresented the product. At the same time, a flat, technically accurate grade with no creative direction feels lifeless and fails to communicate the emotional world the brand inhabits.
The solution is working in layers. Start with technical corrections that establish accuracy, then apply creative grading on top without disturbing the foundation.
Your first pass should address white balance, exposure normalization, and any color casts introduced by mixed lighting or environmental reflections on set. This is where shooting a gray card reference at the model's position pays off. Match your footage to the reference, and you have a neutral starting point where fabrics read true to life.
The second pass introduces your creative grade. This is where you align the footage with brand identity. A luxury house known for understated elegance might call for desaturated midtones with rich, deep shadows. A youth-focused streetwear brand might push saturation and contrast for energy. As color grading specialists note, muted tones communicate luxury while bold, saturated colors signal youthful energy. The key is applying these mood shifts primarily to the background, shadows, and highlights while protecting the garment's midtone color accuracy.
Skin tone preservation across diverse models adds another layer of complexity. Different skin tones respond differently to the same grade. A teal-orange color balance that flatters lighter skin might push deeper skin tones toward an unnatural orange. The HSL (Hue, Saturation, Luminance) panel becomes your precision tool here, allowing you to isolate and protect specific hue ranges associated with skin while adjusting the surrounding colors freely. Always check your grade across every model in the project, not just the first shot you graded.
Use this checklist to verify your color grade before final export:
- Fabric fidelity — Compare graded footage against physical garment swatches or approved color references. Key pieces should match within a perceptible tolerance, especially hero garments featured in close-up.
- Skin tone consistency — Review every model's skin across multiple shots. Tones should feel natural and consistent regardless of the creative grade applied to the surrounding image. Check vectorscope readings to confirm skin stays along the skin tone line.
- Brand palette alignment — Ensure the overall color mood matches the brand's established visual identity. If the brand uses cool, minimal tones across their website and print materials, the video grade should live in the same family without being an exact copy.
- Shadow detail retention — Verify that dark fabrics retain visible texture in shadows. Crushing blacks for mood is tempting, but losing garment detail defeats the purpose of the shoot.
- Highlight control — Confirm that white and light-colored garments retain detail in highlights without clipping. Blown-out whites lose all fabric texture information permanently.
- Consistency across shots — Play the sequence in real time. Grade shifts between cuts should feel invisible. If a viewer notices the color changing between shots, the grade is pulling attention away from the garment.
- Platform-specific rendering — Export a test clip and view it on the target platform (Instagram, YouTube, website player). Compression and display differences can shift your grade noticeably, especially in shadows and saturated colors.
Edit Pacing and Rhythm in Fashion Storytelling
Editing rhythm in fashion video is not simply about cutting fast or slow. It is about creating a temporal relationship between the garment's movement, the music's structure, and the emotional arc you want the viewer to experience. Get this relationship right, and the edit feels inevitable. Get it wrong, and even beautiful footage feels disjointed.
As film editor Leo Trombetta explains, rhythm in editing keeps the viewer's attention on the story and performances rather than on the editing itself. The same principle applies to fashion: when cuts feel natural, the audience stays immersed in the garment and the world around it. When cuts feel arbitrary, they become aware of the edit and disengage from the emotional experience.
Cut timing should respond to three simultaneous signals:
Musical phrasing — Cuts that land on downbeats create energy and forward momentum. Cuts that land between beats create a floating, dreamlike quality. For campaign films, align major transitions (new looks, scene changes) with musical phrase boundaries, typically every 4 or 8 bars. For social content, cut on every beat or half-beat to maintain the rapid pace audiences expect.
Garment movement completion — Cut away from a shot only after the garment's movement has resolved. If a model turns and the dress is still settling, cutting mid-settle feels abrupt and wastes the visual payoff you choreographed on set. Let fabric complete its motion arc before transitioning. This is why shooting at higher frame rates gives editors more control: you can extend a moment by using slow motion to let the fabric finish its movement within the musical timing you need.
Emotional arc — Pacing should accelerate and decelerate in service of feeling. A campaign film might open with longer, contemplative holds that establish mood, then gradually shorten shot duration as energy builds toward a climax, before returning to longer holds for the resolution. This wave-like structure, tension building and releasing, mirrors how audiences naturally engage with narrative content. Editor Kelley Dixon describes this as rhythm's power to throw people's equilibrium off by doing things that are intentionally off-rhythm, creating subversive moments that heighten emotional impact.
One practical technique: edit your first assembly without music. Cut purely based on garment movement and visual flow. Then lay in the music and adjust timing so cuts align with musical accents. This two-pass approach prevents you from becoming a slave to the beat at the expense of visual storytelling. The music should support the edit, not dictate it entirely.
Audio Design and Music Licensing Strategy
Sound is the invisible architecture of fashion video. Audiences rarely consciously notice audio design, but they immediately feel its absence or its misalignment. The wrong track can make a luxury collection feel cheap. The right one can elevate simple footage into something that feels like cinema.
Music selection shapes brand perception more directly than most teams realize. As ELLE's coverage of runway sound design illustrates, sound has become a transcendent power for fashion presentations. Damien Quintard of Miraval Studios, who composed Pierpaolo Piccioli's debut soundtrack at Balenciaga, describes the parallel between sonic and textile craftsmanship: "Whether it's producing an artist or just composing something from A to Z, I always reflect on the amazing work they do in those couture houses, where you see all those little intricate details that, from far away, might not strike you at first, but when you get closer, you see the amount of details. And what I realized was that it's exactly the same with sound."
When selecting music, consider these dimensions:
Tempo and energy match — The track's BPM should align with the pacing you established in your edit. A 70 BPM ambient track under footage cut at 130 BPM energy creates cognitive dissonance. Conversely, a driving electronic track under slow, contemplative footage fights the visual mood rather than supporting it.
Genre and brand alignment — Musical genre carries cultural associations that transfer directly to the brand. Classical orchestration signals heritage and luxury. Minimal electronic suggests modernity and precision. Lo-fi textures communicate authenticity and approachability. Choose genres that reinforce rather than contradict the brand's positioning.
Licensing pathway — You have two primary options. Sync licensing secures rights to existing commercial tracks, giving you recognizable music that carries its own cultural weight, but at significant cost (often thousands to tens of thousands for well-known tracks) and with usage restrictions that may limit where and how long you can use the content. Royalty-free libraries offer unlimited usage at a flat fee, with quality ranging from generic to genuinely excellent depending on the platform. For most fashion productions below major campaign level, curated royalty-free libraries provide the best balance of quality, cost, and usage flexibility. Reserve sync licensing for hero campaign pieces where a specific track's cultural association directly serves the brand narrative.
Beyond music, sound design adds a layer of tactile immersion that separates polished fashion films from simple footage-over-track edits. Consider these elements:
Ambient texture — A subtle room tone, outdoor atmosphere, or environmental sound bed grounds the visual in a physical space. Even when the final mix is 90% music, a whisper of ambient sound beneath it creates a sense of place that pure music lacks.
Foley for fabric movement — The rustle of silk, the structured swish of a wool coat, the soft compression of leather. These sounds, recorded separately and mixed subtly beneath the music, create a subconscious connection between the viewer and the material. You do not need them to be loud or obvious. A barely perceptible fabric sound during a close-up shot triggers a tactile response that reinforces the visual experience of texture.
Silence as a tool — Strategic moments of reduced audio, where music drops away or thins dramatically, create emphasis on whatever visual occupies that space. A garment reveal that coincides with a musical pause gains weight and significance that the same shot buried within a continuous track would never achieve.
The interplay between grade, edit rhythm, and audio design is what transforms raw footage into a cohesive brand statement. Each element reinforces the others: the color mood sets emotional tone, the edit pacing controls how that emotion unfolds over time, and the audio design makes the experience feel immersive rather than observed from a distance. When all three align with the brand's identity and the collection's intent, the result is a fashion film that does not just show clothing but makes an audience feel something about it.
Putting It All Together for Your Next Production
Every technique covered in this guide, from frame rate selection through fabric-specific lighting to post-production audio design, serves a single purpose: making garments communicate emotion through motion. These are not isolated skills to master independently. They form an interconnected system where each decision amplifies or undermines the others. A 135mm lens choice only delivers its full compression effect when paired with the right lighting angle for that fabric type, directed movement that plays to the lens's strengths, and a color grade that preserves what the lens captured.
Building a Repeatable Production Framework
The most effective fashion production teams do not reinvent their approach for every project. They build repeatable frameworks where technical decisions flow logically from creative intent. When a brief arrives, the framework translates brand goals into specific, actionable choices across the entire pipeline.
Here is a prioritized action list that synthesizes the modern fashion video production techniques covered throughout this guide:
- Define the format and platform first — Aspect ratio, duration, and pacing style determine every downstream decision. A 15-second Reel and a 3-minute campaign film require fundamentally different shooting and editing approaches.
- Match frame rate to garment behavior — Choose 24fps for cinematic mood, 60fps for fabric movement reveals, and 120fps+ only for accent texture shots that punctuate the edit.
- Select lenses based on fabric character — 85mm for versatile full-look coverage, 135mm for editorial compression and detail isolation, macro for textile close-ups that communicate craftsmanship.
- Design lighting around the specific material — Diffused sources for sheen control on silk, raking side light for texture on tweed, backlight for transparency on sheers, negative fill for reflective surfaces.
- Direct movement to serve the garment — Rehearse turns, walking pace, and pauses based on how each fabric responds to motion. Let the material dictate the choreography.
- Shoot in the highest-quality codec your workflow supports — ProRes or equivalent intraframe codecs preserve grading latitude. The flexibility you gain in post justifies the storage cost.
- Grade in layers — Establish fabric accuracy first, then apply creative mood without disturbing the foundation. Protect skin tones across diverse models throughout.
- Design audio as architecture, not afterthought — Select music that reinforces brand positioning. Add subtle foley and ambient texture to create tactile immersion beneath the track.
Balancing Quality and Efficiency in Fashion Video
Budget friendly fashion video production techniques are not about cutting corners. They are about eliminating waste through smarter planning. The most expensive mistake in fashion video is not a costly lens or a premium lighting fixture. It is shooting without a clear technical plan and discovering in post that your footage lacks the flexibility you need.
Scalable fashion video production techniques start with capturing material that serves multiple deliverables from a single shoot day. Shoot wide and tight coverage of every look. Capture at frame rates that give you both real-time and slow-motion options. Record in codecs that survive aggressive grading. When your raw material is versatile, you can produce campaign films, social reels, and lookbook content from the same footage without returning to set.
For teams applying these techniques at scale, tools like Snappyit's Fashion Video bridge the gap between technical knowledge and practical execution. Particularly for fashion marketers and premium brands producing across multiple formats, this kind of resource streamlines the path from raw footage to polished, platform-ready content without requiring proportional budget increases for each additional deliverable.
The throughline across everything in this guide is simple: technical precision serves creative expression. When you understand why a specific frame rate, lens, or lighting modifier produces a particular emotional response, you stop guessing and start making intentional choices that turn fabric into feeling. That is the craft. That is what separates fashion video from footage of someone wearing clothes.
Frequently Asked Questions About Fashion Video Production Techniques
What frame rate should I use for fashion video production?
The ideal frame rate depends on your format and creative intent. Use 24fps for cinematic campaign films that need an editorial, filmic quality with natural motion blur. Choose 60fps when you want slow-motion fabric reveals, as it creates a smooth 2.5x slowdown when played back at 24fps, perfect for capturing how coats swing or pleated skirts catch air. Reserve 120fps and above for ultra-slow-motion accent shots that highlight individual sequins catching light or chiffon settling after movement. For social reels, a mix of 24-30fps base footage with 60fps slow-motion accents works best to maintain energy while adding visual variety.
How do you light different fabric types for fashion video?
Each fabric family requires a distinct lighting approach. Silk and satin need large, diffused sources at oblique angles paired with a circular polarizing filter to control specular highlights without eliminating sheen. Sheer fabrics like chiffon benefit from strong backlighting that reveals their translucency. Textured materials such as tweed and denim require hard side lighting at 60-80 degrees from the camera axis to cast micro-shadows that reveal weave patterns. Reflective surfaces like sequins and leather demand heavy negative fill with flagged, narrow light sources to prevent chaotic reflections. The key principle is balancing skin tone flattery with fabric texture revelation simultaneously.
What is the best lens for fashion cinematography?
The 85mm prime lens serves as the versatile foundation for most fashion video work, offering flattering perspective compression while maintaining true garment proportions. It works well for full-length looks and medium shots. A 135mm prime provides stronger background compression and a more editorial quality, ideal for waist-up shots and isolating specific design elements like collars or draping. For extreme textile detail showing thread patterns and weave structures, a 90-105mm macro lens is essential. Prime lenses consistently outperform zooms for fashion due to sharper rendering, wider maximum apertures, and superior bokeh that creates the polished optical quality distinguishing professional work.
How do you direct models differently for video versus photography?
Video direction requires choreographing sustained, rhythmic movement rather than capturing single peak moments. Instead of calling out static pose adjustments, you communicate walking pace through sensory cues like 'walk as if you're three steps behind the beat.' Turn timing should be rehearsed to a count so fabric cascades properly on camera. Emotional expression needs to evolve across a take rather than holding one fixed look. The workflow involves a wardrobe walkthrough to identify each garment's movement characteristics, blocking rehearsals without camera, tempo-matched movement rehearsals, technical rehearsals with playback review, and finally performance takes with minimal single-adjustment direction between each.
How can fashion brands produce video content for multiple platforms efficiently?
The most efficient approach is capturing versatile raw material from a single shoot day that serves multiple deliverables. Shoot both wide and tight coverage of every look, capture at frame rates that provide real-time and slow-motion options, and record in high-quality codecs like ProRes that survive aggressive grading and reframing. Plan your shoot with all output formats in mind, from vertical 9:16 social reels to widescreen campaign films. Tools like Snappyit's Fashion Video (https://snappyit.ai/fashion-video) help bridge the gap between raw footage and platform-ready output, allowing teams to maintain polished presentation across formats without dedicating separate production days or proportionally scaling budgets for each deliverable.
Generate your first fashion video in 90 seconds
You can absolutely build out the studio, dial in the camera settings above, and master a full color-graded post-production workflow — that path produces beautiful, brand-defining films, and serious fashion houses still rely on it. But if you need a polished clothing video for a marketplace listing, a social reel, or a lookbook today, without booking a cinematographer, two softboxes, or a colorist, Snappyit's AI clothing video tool turns a single garment image into a 9:16 / 1:1 / 16:9 fashion video in about 90 seconds. Same drape-revealing motion. No gimbal, no warp tool, no reshoots. Free to try, no credit card.
Try the AI fashion video generator →