What Is the Ghost Mannequin Effect in Photoshop
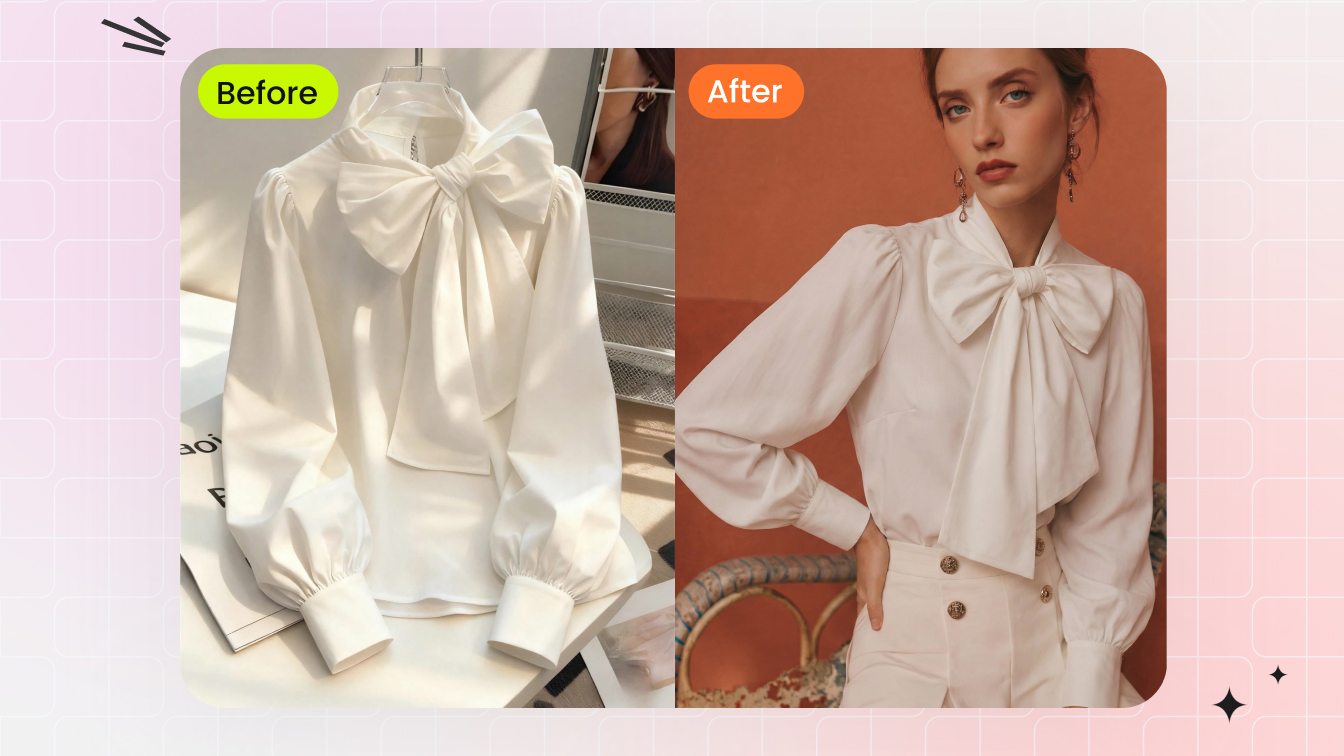
Ever wonder how online clothing stores make garments look like they're worn by an invisible person? That hollow, three-dimensional shape you see in product catalogs isn't magic. It's a Photoshop compositing technique called the ghost mannequin effect, and it has become the visual standard for ecommerce fashion imagery.
What the Ghost Mannequin Effect Actually Is
The concept is straightforward. You photograph a garment on a mannequin, capture a separate shot of the interior details (collar, neckline, waistband), then remove the mannequin in Photoshop. The two images are composited together so the clothing appears to float in a realistic, human-like shape with visible depth and dimension.
The ghost mannequin effect is a Photoshop compositing technique where a garment is photographed on a mannequin, the mannequin is digitally removed, and inner-garment shots are layered in to create a hollow, three-dimensional product image.
Unlike flat lay photography, which captures clothing from above in a two-dimensional layout, the invisible mannequin approach preserves a garment's natural drape and structure. And unlike on-model shoots, it keeps the focus entirely on the product without the cost of hiring talent. This technique sits in the sweet spot between the two, delivering shape and fit information at a fraction of the production overhead.
Why Ecommerce Brands Rely on This Technique
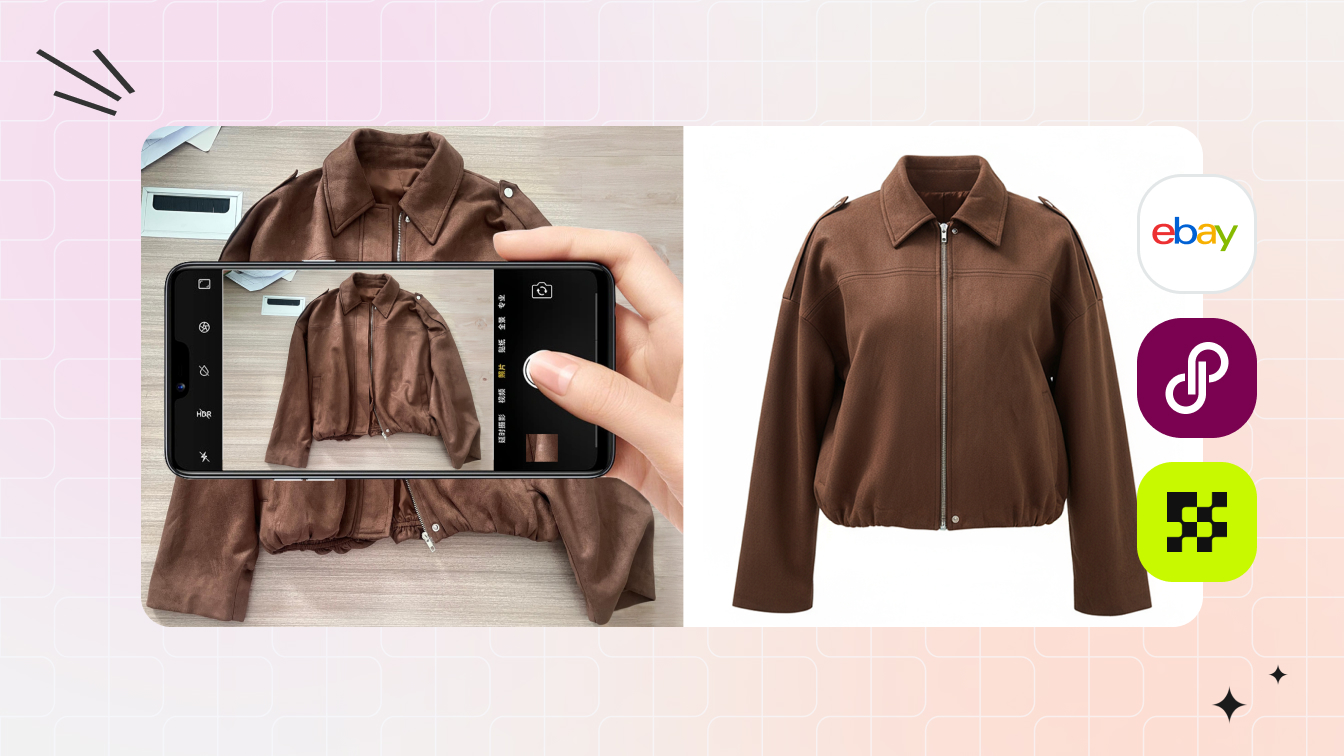
The business case is compelling. Ghost mannequins give brands a consistent catalog look across hundreds of SKUs without scheduling a single model. Turnaround is faster, per-image cost is lower, and the results directly support conversions. Research compiled by Shopify shows that products with professional-quality photos see a 33% higher conversion rate, and the ghost mannequin effect is one of the most efficient ways to achieve that level of polish at scale.
Shoppers can't touch fabric or check stitching through a screen. They rely on images to judge fit, construction, and quality in seconds. A well-executed ghost mannequin photo answers those questions instantly by showing how a garment actually sits on a body, building buyer confidence and reducing return rates.
The real challenge? Brands managing large catalogs need a repeatable ghost mannequin Photoshop workflow that balances quality with speed. That's exactly where the editing process itself becomes the bottleneck, and where the right techniques make all the difference.
Shooting Techniques That Make Photoshop Editing Easier
Every minute you spend getting the shot right is five minutes saved in Photoshop. Most guides treat photography and editing as separate steps, but they're deeply connected. A few deliberate choices during your mannequin photoshoot can cut compositing time in half and produce cleaner results.
Camera Settings and Lighting for Clean Composites
Lock your camera on a tripod and leave it there for the entire session. Consistent framing between your outer and inner shots is what makes layer alignment painless later. Set your white balance manually, not on auto. If the color temperature shifts between shots, you'll spend extra time correcting mismatched tones at the composite seam.
For lighting, position two softbox lights at roughly 45-degree angles on either side of the mannequin for photography. This diffused setup minimizes harsh shadows on fabric folds and keeps tonal values even across the garment. Shoot in manual mode with an aperture between f/8 and f/11. That range delivers edge-to-edge sharpness with enough depth of field to keep buttons, collars, and hems all in focus. Keep ISO at 100 or 200 to avoid introducing noise that complicates masking.
Mannequin Positioning and Inner-Garment Shots
Understanding how to photograph clothing on a mannequin for the ghost effect means thinking in pairs. You need two shots per view: the outer shot with the garment on the mannequin, and an inner shot that reveals the collar interior, neckline, or waistband. This second image fills the hollow space left once the mannequin is removed.
The critical rule? Don't move the camera or the garment between shots. If you're using a mannequin with detachable neck and arm sections, remove only those pieces to expose the interior, then shoot immediately. For garments where the interior isn't accessible on the mannequin, pin or tape the fabric open on a flat surface to reveal the inner construction. Use clips along the back where they won't appear in frame, and avoid pulling so hard that you distort the garment's natural shape. The closer your inner shot matches the angle and scale of the outer shot, the less warping you'll need in Photoshop.
Background and Color Choices That Save Editing Time
A plain white or light gray seamless backdrop is the standard for ghost mannequin for photography, and for good reason. High contrast between the background and the garment edge gives Photoshop's selection tools clean data to work with. The Pen Tool, Quick Selection, and Select Subject all perform better when there's a sharp tonal boundary to follow.
The same logic applies to your photoshoot mannequin color. If you're shooting a white shirt, avoid a white mannequin. A light gray or skin-toned form creates enough contrast for accurate masking. Dark garments, on the other hand, separate easily from a white mannequin. Matching the mannequin color to the garment is the single fastest way to double your editing time, so plan the pairing before you start shooting.
With consistent lighting, aligned shots, and smart color contrast locked in, the real work shifts to Photoshop, where each garment type demands a slightly different editing approach.
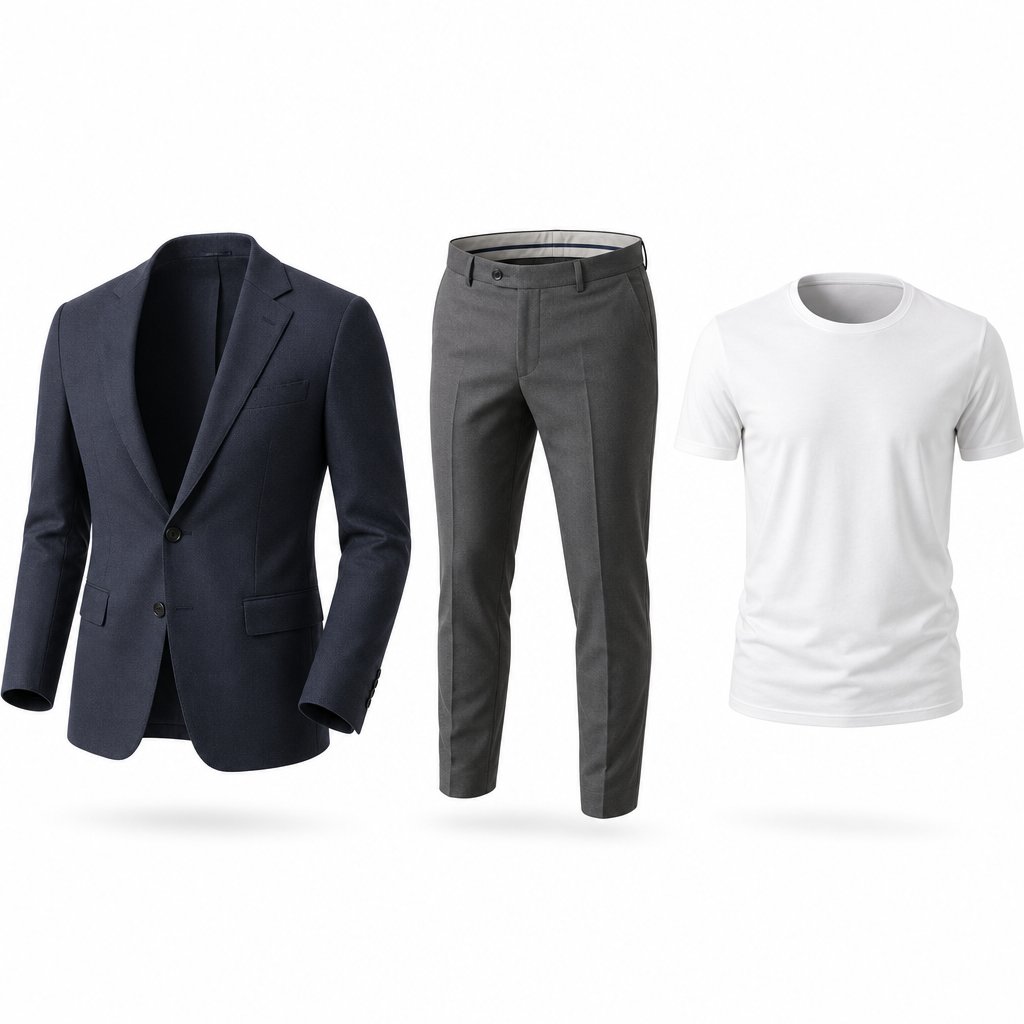
Ghost Mannequin Types and the Photoshop Workflow for Each
Not every garment hides the mannequin in the same place. A button-down shirt conceals the form behind its collar and neckline. A pair of trousers buries it behind the waistband. A blazer with rolled cuffs adds yet another zone where the mannequin needs to vanish. Each of these scenarios is a distinct joint type, and each one calls for a different compositing strategy in Photoshop. Treating them all the same is one of the fastest ways to produce ghost mannequin clothing photography that looks unfinished.
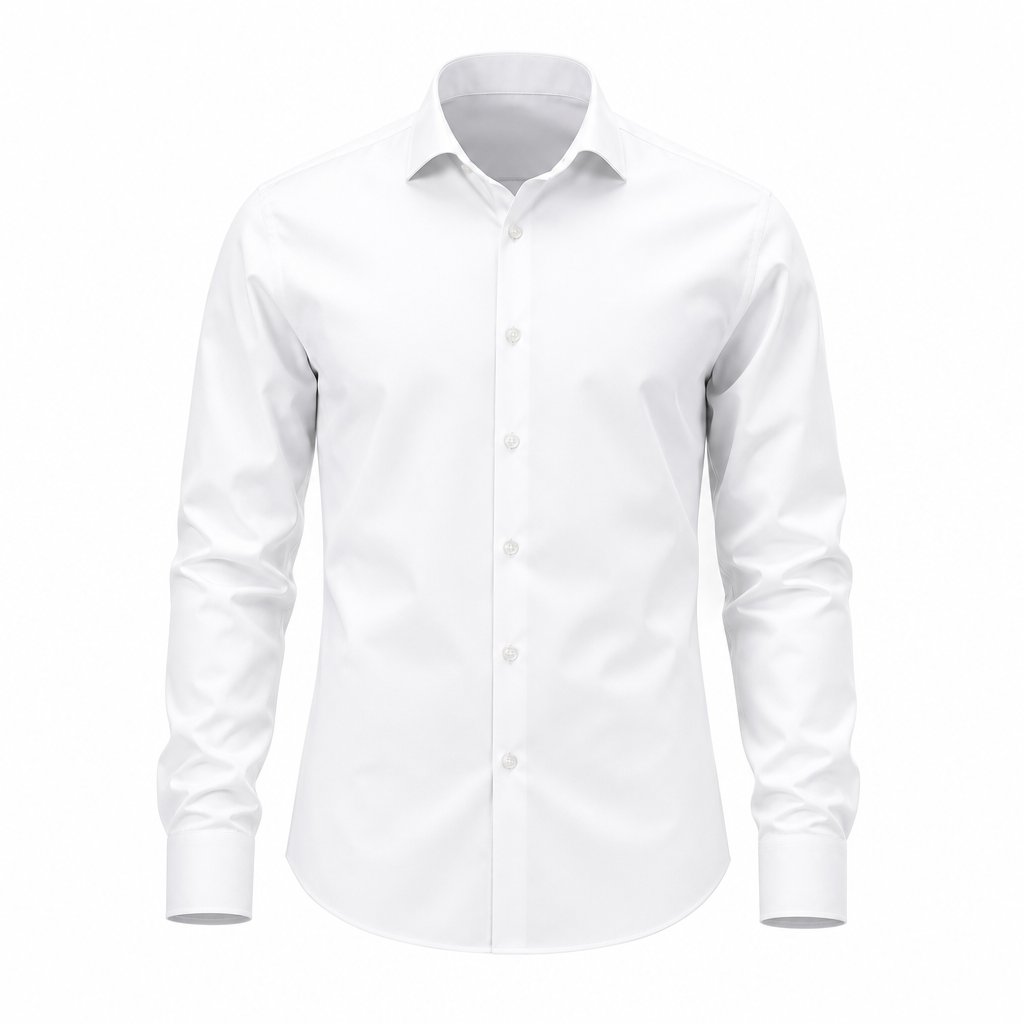
Neck Joint Editing for Tops and Shirts
The neck joint is the most common type you'll encounter in ghost mannequin product photography. It applies to virtually any upper-body garment: t-shirts, polos, dress shirts, blouses, hoodies, and crew-neck sweaters. The goal is to create that signature hollow-neck illusion where the collar appears to wrap around an invisible body.
Here's how it works. Your outer shot captures the garment on the mannequin from the front. Your inner shot reveals the back of the collar, the neckband, and sometimes the brand label or inner lining. In Photoshop, you stack these as separate layers, with the inner shot placed behind the outer. Use the Pen Tool to trace the mannequin's outline on the outer layer, convert that path to a selection, and create a layer mask that hides the mannequin. The inner collar layer then shows through the gap, filling the hollow space with realistic fabric detail.
Alignment is everything. If the inner shot was captured at even a slightly different angle, you'll notice the collar seam doesn't line up. Use Edit > Free Transform to nudge and rotate the inner layer until the stitching matches. A soft brush on the layer mask at the transition point blends the two layers so the seam disappears. When done well, the viewer sees a garment that looks naturally worn, with visible depth inside the neckline.
Bottom Joint for Pants and Skirts
The bottom joint restores the parts of a garment hidden by the mannequin's lower form, typically the inner waistband, the back yoke of trousers, or the hemline and lining of a skirt. It's the same compositing principle as the neck joint, but the join point shifts from the neckline down to the waist or hem.
This difference matters more than it sounds. Waistbands are wider and more structured than collars, so the inner shot needs to capture a broader area. For pants, you'll photograph the inside of the waistband separately, often by laying the garment flat or draping it over a board to expose the interior. Skirts and dresses with high-low hems or visible linings require extra care because the drape of the fabric changes between the mannequin shot and the flat interior shot.
In Photoshop, the workflow mirrors the neck joint: mask the mannequin from the outer layer, position the inner waistband or hem layer behind it, and blend the seam. The extra challenge is matching the curve. Waistbands wrap around a wider circumference than collars, so you may need to use Edit > Transform > Warp to bend the inner layer into the correct arc. Color and exposure matching is also critical here, since the interior of a waistband often sits in shadow during the original shoot, creating a tonal mismatch that needs a clipped Curves adjustment layer to correct.
Sleeve Joint and Full Mannequin Removal
Sleeve joint editing comes into play for garments with rolled cuffs, open sleeves, or three-quarter-length arms where the mannequin's form is visible inside the sleeve opening. Imagine a linen blazer with the sleeves pushed up. The mannequin arm peeks through, and you need to remove it while preserving the hollow, tubular shape of the rolled fabric.
The approach is similar to the neck joint but on a smaller, tighter scale. Photograph the sleeve interior separately, mask the mannequin arm from the outer shot, and composite the inner sleeve layer behind it. Because sleeve openings are narrow, precision matters even more. A 1-pixel misalignment at the cuff is far more noticeable than the same error at a wide neckline. Work at 200% zoom or higher and use a small, hard-edged brush on the mask to keep the transition clean.
Full mannequin removal combines all three joint types into a single edit. Jackets, coats, and structured dresses often require neck, sleeve, and bottom joints in the same image. The entire mannequin disappears while the garment retains its three-dimensional shape. This is the most complex scenario in invisible mannequin product photography, and it demands careful layer organization. Group your layers by joint type (Neck, Sleeves_Left, Sleeves_Right, Bottom) so you can refine each composite zone independently without accidentally shifting another.
Quick Reference: Joint Types by Garment Category
Not sure which joint type your product needs? Use this checklist as a starting point:
- T-shirts, polos, and crew-neck tops — Neck joint only
- Button-down shirts and blouses — Neck joint; sleeve joint if cuffs are open or rolled
- Blazers and sport coats — Neck joint + sleeve joint; bottom joint if the jacket is long enough to hide the mannequin base
- Dresses — Neck joint + bottom joint for hemline and lining; sleeve joint for sleeveless or open-arm styles
- Trousers and shorts — Bottom joint for waistband interior; sometimes a secondary bottom joint at the leg opening for cropped or cuffed styles
- Skirts — Bottom joint to restore hemline drape and inner lining
- Outerwear and coats — Full removal: neck joint + sleeve joint + bottom joint
- Accessories (scarves, vests, waistcoats) — Neck joint in most cases; evaluate on a per-item basis
Identifying the correct joint type before you open Photoshop saves time and prevents rework. It also shapes how you shoot: a garment that needs only a neck joint requires one inner shot, while a full-removal piece may need three or four. With the joint type mapped out, the next step is walking through the actual Photoshop editing process, tool by tool and setting by setting.
Try the AI version first. For most catalog work, AI tools clear the bar for quality and ship in seconds. Try Snappyit AI Ghost Mannequin free →
Step-by-Step Ghost Mannequin Editing in Photoshop
Knowing which joint type your garment needs is one thing. Executing the edit with the right tools, the right settings, and the right order of operations is where the real skill lives. Most tutorials tell you to "use the Pen Tool" and "create a layer mask" without specifying a single value. That leaves you guessing at feather radius, brush hardness, and path tolerance, which is exactly where ghost mannequin photo editing goes sideways.
This walkthrough covers a standard neck joint composite from start to finish. Every setting is explicit. Every shortcut is included. Once you have this process down, adapting it to bottom joints and sleeve joints is a matter of changing where you draw the path, not how you draw it.
Layer Setup and Aligning Inner and Outer Shots
Start by opening both your outer mannequin shot and your inner collar shot in Photoshop. Go to File > Scripts > Load Files into Stack, select both images, and check the box labeled "Attempt to Automatically Align Source Images." This imports them as separate layers in a single document and runs alignment in one step.
If you prefer manual control, open both files separately, then drag the inner shot's layer into the outer shot's document while holding Shift (this centers it). Select both layers in the Layers panel, then go to Edit > Auto-Align Layers and choose "Auto" as the projection method. Photoshop analyzes overlapping detail and shifts the layers into registration.
Rename your layers immediately. Double-click the layer name and type something clear: "Outer_Front" for the mannequin shot, "Inner_Collar" for the interior. This sounds minor, but when you're editing your twentieth garment of the day, vague names like "Layer 1 copy" slow you down. Right-click each layer and choose Convert to Smart Object before making any transformations. This preserves the original pixel data so you can re-scale or re-rotate later without cumulative quality loss. Non-destructive habits start here, not after something goes wrong.
Masking the Mannequin with the Pen Tool
Select the Outer_Front layer. Press P to activate the Pen Tool. In the Options bar at the top, make sure the tool mode is set to "Path" (not "Shape"), and leave the path tolerance at its default. You'll be placing anchor points manually, so tolerance only matters if you're using the Freeform Pen, which you should avoid for ghost mannequin editing. Precision is the whole point.
Begin placing anchor points along the garment's outer edge where it meets the mannequin. Click to set a corner point, or click and drag to create a smooth curve. Space your anchors 1 to 2 pixels apart on tight curves like armholes and collar bends, and wider on straight runs like side seams. The goal is a path that hugs the fabric edge without cutting into it or leaving a sliver of mannequin visible.
A few practical tips that save time:
- Hold Ctrl (Cmd on Mac) to temporarily switch to the Direct Selection Tool and reposition an anchor without leaving the Pen Tool.
- Hold Alt (Option on Mac) and click an anchor to convert a smooth point to a corner point, useful where a collar meets a shoulder seam at a sharp angle.
- Zoom to at least 200% (Ctrl/Cmd + Plus) when tracing curves. At 100%, a 2-pixel error is invisible on screen but obvious in the final image.
Once your path is closed, open the Paths panel (Window > Paths) and you'll see your work path listed. Right-click it and choose "Make Selection." In the dialog box, set the Feather Radius to 0.5 px. This adds a barely perceptible softness to the selection edge that prevents the harsh, cut-out look of a zero-feather mask. Leave Anti-aliased checked. Click OK.
With the selection active (marching ants visible), go back to the Layers panel, make sure Outer_Front is selected, and click the "Add Layer Mask" button at the bottom of the panel. The mannequin disappears, and the garment edge is preserved by the mask. To inspect your mask directly, hold Alt (Option on Mac) and click on the mask thumbnail. The canvas switches to a black-and-white view of the mask itself. White areas are visible, black areas are hidden. This view makes it easy to spot rough edges or missed sections. Alt-click the thumbnail again to return to normal view.
Compositing the Inner Layer and Refining Edges
Your Outer_Front layer now shows the garment with a clean cutout where the mannequin used to be. The Inner_Collar layer sits behind it. Drag Inner_Collar below Outer_Front in the Layers panel if it isn't already. You should immediately see the collar interior filling the hollow neckline area.
If the inner layer doesn't align perfectly, select it and press Ctrl+T (Cmd+T on Mac) for Free Transform. Nudge it into position using the arrow keys for single-pixel moves. Hold Shift while pressing an arrow key to move in 10-pixel increments. Match the stitching lines and fabric grain between the two layers. When the seam looks right, press Enter to commit the transformation.
The transition between the outer and inner layers almost always needs blending. Click on the Outer_Front layer mask thumbnail to make it active (you'll see a thin border around it). Press B to select the Brush Tool. In the Options bar, set the brush hardness to 0-20% and opacity to 80-100%. Choose black as your foreground color (press D for defaults, then X to swap if needed). Paint along the seam line where the outer garment meets the inner collar. The soft brush gradually reveals more of the inner layer, creating a smooth gradient instead of a hard line.
For garments with fuzzy or textured edges, like knitwear, fleece, or loosely woven fabrics, the Pen Tool mask alone won't capture the soft boundary. This is where the Select and Mask workspace becomes essential. With the Outer_Front mask selected, go to Select > Select and Mask (or click the "Select and Mask" button in the Options bar). In the workspace, set the View mode to "On Layers" so you can see the composite in context. Increase the Edge Detection Radius to 2-4 px for knitwear. Turn on Smart Radius, which automatically adapts the detection zone to different edge types within the same selection. Use the Refine Edge Brush Tool (the second tool in the left toolbar) to paint over fuzzy areas like ribbed cuffs or loose yarn. Photoshop recalculates those edges, preserving fine fiber detail that a hard mask would clip.
Before leaving Select and Mask, check the Shift Edge slider. A value of -10% to -20% contracts the mask edge slightly, which eliminates any thin halo of mannequin color that might remain. Set the Output to "Layer Mask" and click OK. Always check your edges at 200% zoom against both a white background and a dark background. Halos that are invisible on white become obvious on gray or black.
Shadow Creation and Final Cleanup
A garment floating on pure white with no shadow looks pasted in. A subtle shadow grounds the image and adds realism without distracting from the product. Create a new layer below all garment layers and name it "Shadow." Press B for the Brush Tool, choose a soft round brush with hardness at 0%, and set the foreground color to black. In the Options bar, drop the brush opacity to 5-15%. Paint a gentle shadow directly beneath the garment's bottom edge. Build it up gradually with multiple passes rather than one heavy stroke. For a drop shadow, concentrate the darkest area right under the hem and let it fade outward. For a reflection shadow (common on white seamless backgrounds), paint a slightly wider, more diffused area that suggests the garment is resting on a surface.
If you want more control, try this alternative: go to Layer > Layer Style > Drop Shadow on the Outer_Front layer. Set the opacity to 10-20%, distance to 2-5 px, spread to 0%, and size to 8-15 px. This gives you a live-preview shadow you can adjust anytime. Right-click the effect in the Layers panel and choose "Create Layer" if you want to paint on it manually afterward.
Final cleanup catches the small artifacts that survive masking. Press S to select the Clone Stamp Tool, set it to "Current & Below" in the sample dropdown, and use a small brush (10-20 px) to stamp out any remaining mannequin fragments, color spill along edges, or dust spots on the fabric. For smoother corrections on skin-toned remnants, the Healing Brush (press J) often blends more naturally because it matches texture and tone from the surrounding area. Zoom to 300% for this pass. If it looks clean at 300%, it will look flawless at the sizes ecommerce platforms actually display.
The Complete Ghost Mannequin Editing Sequence
Here's the full process in order, from open to export:
- Import both outer and inner shots as layers using File > Scripts > Load Files into Stack.
- Run Edit > Auto-Align Layers (projection: Auto) to register the two images.
- Rename layers clearly: "Outer_Front" and "Inner_Collar" (or appropriate names for your joint type).
- Convert both layers to Smart Objects (right-click > Convert to Smart Object).
- Select the Outer_Front layer and trace the garment edge with the Pen Tool (mode: Path).
- Convert the path to a selection: right-click the path > Make Selection > Feather Radius 0.5 px.
- Add a layer mask to Outer_Front from the active selection.
- Position Inner_Collar behind Outer_Front and align using Free Transform (Ctrl/Cmd+T).
- Blend the seam with a soft brush (hardness 0-20%, opacity 80-100%) on the Outer_Front mask.
- Refine fuzzy edges in Select > Select and Mask if needed (Smart Radius on, Shift Edge -10% to -20%).
- Create a Shadow layer beneath all garment layers and paint with a soft black brush at 5-15% opacity.
- Clean up artifacts with Clone Stamp or Healing Brush at 300% zoom.
- Save the working PSD with all layers intact, then export a flattened copy for your product catalog.
This sequence works for any joint type. For bottom joints, you're tracing the waistband instead of the neckline. For sleeve joints, you're masking the arm opening instead of the collar. The tools, settings, and order stay the same.
With the manual workflow locked in, the natural question becomes: can any of these steps be automated? Photoshop's newer AI-powered selection tools can replace or accelerate several of the steps above, especially the initial masking pass, and they're worth understanding as part of a modern ghost mannequin photo editing toolkit.
AI-Powered Photoshop Tools That Speed Up Ghost Mannequin Work
Tracing every garment edge by hand with the Pen Tool produces precise results, but it's slow. A single neck joint can take 10 to 15 minutes of careful anchor placement. Multiply that across a catalog of 200 SKUs and you're looking at days of repetitive path work. Photoshop's AI-driven selection tools can compress that initial masking pass from minutes to seconds, giving you a strong starting point that you refine with the manual techniques covered above. Think of them as accelerators, not replacements. They handle the heavy lifting so you can focus your attention where it actually matters: the seams, the edges, and the fine details that make a ghost mannequin photo look convincing.
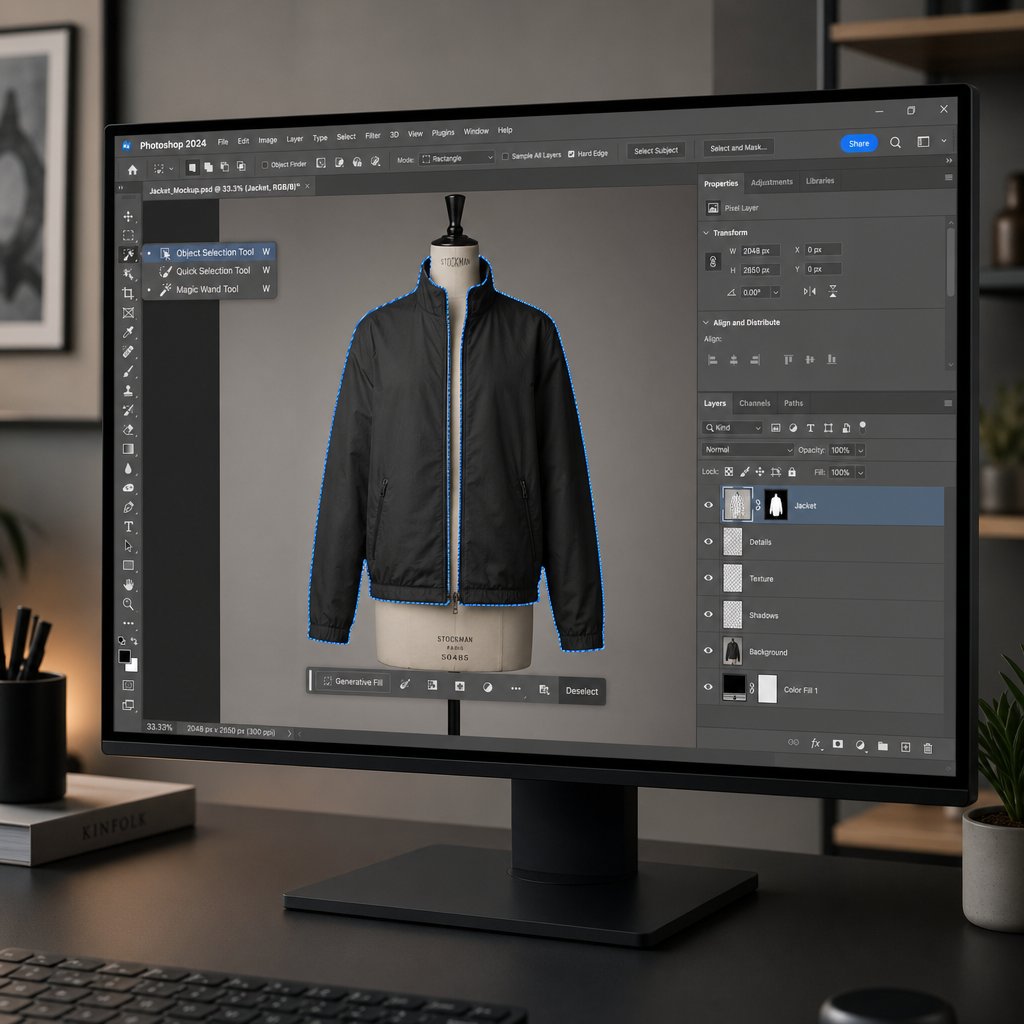
Select Subject and Object Selection Tool for Initial Masking
The fastest way to generate a starting mask is Select Subject. Go to Select > Subject, and Photoshop's AI analyzes the entire layer and creates a selection around what it identifies as the primary object. For a mannequin photo with a garment on a clean white background, this usually isolates the clothing in under five seconds. The cloud-based processing mode (enabled under Photoshop > Settings > Image Processing) delivers noticeably better edge accuracy than on-device processing, especially around intricate details like button plackets and collar points.
You'll also find Select Subject in the Contextual Task Bar that appears below your image when no selection is active. Click it, wait a moment, and the marching ants appear. From there, you can click the Mask icon in the same bar to convert the selection directly into a layer mask, skipping the Paths panel entirely.
When you need more control over what gets selected, switch to the Object Selection Tool (press W, then cycle through the tool group if needed). It offers two modes in the Options bar:
- Rectangle mode — Draw a bounding box around the garment area you want to isolate. Photoshop detects the object edges within that box and snaps the selection to them.
- Lasso mode — Draw a rough freehand loop around a specific section, like a single sleeve or a collar zone. The AI refines your loose outline into a tight selection.
For straightforward ghost mannequin images on a high-contrast background, Select Subject alone often gets you 85-90% of the way to a usable mask. The Object Selection Tool fills the gap when you need to isolate a specific garment region rather than the entire subject.
That said, these tools have clear weak spots. Thin spaghetti straps, translucent or sheer fabrics, and areas where the mannequin color closely matches the garment color all confuse the AI. In those situations, the algorithm either clips the strap out of the selection entirely or includes chunks of mannequin along with the fabric. You'll still need the Pen Tool for those edges. The practical workflow is to let Select Subject handle the broad shape, then zoom in and manually correct the problem zones with the techniques from the previous section.
Remove Background and Content-Aware Fill for Gap Areas
Photoshop's Remove Background feature (found under the Quick Actions panel in the Properties window, or via the Contextual Task Bar) works as a one-click background eraser. It runs the same AI engine as Select Subject but automatically applies a layer mask instead of leaving you with a selection. For a quick first pass on a photo mannequin shot, it saves a couple of clicks. The result is rarely perfect for ghost mannequin work, though, because the AI doesn't distinguish between the background and the mannequin itself. You'll typically get a mask that hides the backdrop but leaves the mannequin partially visible inside the garment. Treat it as a rough starting point, then refine the mask manually to remove the remaining mannequin areas.
The more powerful AI tool for this workflow is Content-Aware Fill. Once you've masked the mannequin from the outer layer and composited the inner shot, you'll sometimes find small gaps where the mannequin was visible through open areas of the garment: between buttons, through armholes, or along loosely draped fabric. Content-Aware Fill patches those gaps by synthesizing surrounding pixel data.
Here's how to use it precisely:
- Use the Lasso Tool (L) to select the gap area on the garment layer.
- Go to Edit > Content-Aware Fill. This opens a dedicated workspace.
- In the workspace, adjust the green sampling area overlay to include only the surrounding fabric, not the background or other garment sections. Drag the edges of the sampling region to exclude anything that would introduce unwanted texture or color.
- Set the Output to "New Layer" in the Output Settings panel on the right. This keeps the fill non-destructive, so you can delete or modify it later without touching the original garment layer.
- Click OK. Photoshop generates a fill that blends with the surrounding fabric texture.
Content-Aware Fill works best on solid or subtly textured fabrics like cotton, denim, and jersey. Patterned fabrics (stripes, plaids, prints) often produce visible mismatches because the algorithm struggles to continue a repeating pattern accurately. For those, manual cloning with the Clone Stamp Tool still gives better results.
One practical note: if you're using Generative Fill (the AI-powered version introduced in recent Photoshop releases) for ghost mannequin neck joints, you may occasionally encounter a "Guidelines Violation" error. Adobe's safety filters can misinterpret hollow necklines or residual skin tones as inappropriate content. Workarounds include using descriptive prompts like "fabric interior" or "cotton shirt collar inside" instead of leaving the prompt blank, or pre-filling the area with traditional Content-Aware Fill before applying Generative Fill. Contracting your selection by 2-3 pixels (Select > Modify > Contract) before running the fill also helps by pulling the selection away from any edge pixels that might trigger the filter.
Which Photoshop Versions Include These Tools
Not every version of Photoshop gives you access to these AI features. Here's a quick compatibility breakdown:
| Feature | Minimum Version | Notes |
|---|---|---|
| Select Subject | Photoshop CC 2018 (v19.1) | Cloud processing requires CC 2020 or later and an active internet connection |
| Object Selection Tool | Photoshop CC 2020 (v21.0) | Rectangle and Lasso modes both available from initial release |
| Remove Background | Photoshop CC 2020 (v21.1) | Requires a Creative Cloud subscription; not available in perpetual license versions |
| Content-Aware Fill Workspace | Photoshop CC 2019 (v20.0) | The dedicated workspace with sampling controls; basic Content-Aware Fill available in earlier versions |
| Generative Fill | Photoshop v25.0 (2024) and later | Requires Creative Cloud subscription and internet connection; subject to Adobe's content policies |
Users on Photoshop Elements have limited access. Elements includes a basic version of Select Subject but lacks the Object Selection Tool, the Content-Aware Fill workspace, and Generative Fill entirely. If you're processing mannequin photos regularly, the full Creative Cloud version of Photoshop is worth the subscription for these tools alone.
AI selection tools cut the roughing-in phase dramatically, but they don't solve every challenge in a production environment. When you're editing the same garment types day after day with consistent lighting and framing, the real efficiency gains come from structuring your PSD files for reuse and building non-destructive workflows that survive client revisions without starting from scratch.
Non-Destructive Editing and PSD File Organization
A single ghost mannequin edit might look perfect the moment you finish it. Then the client asks you to brighten the collar area, shift the white balance, or re-crop for a different marketplace template. If you flattened your layers or applied adjustments directly to pixel data, those revisions mean starting over. In mannequin product photography at any real volume, rework is the silent productivity killer, and the fix is a non-destructive editing workflow paired with disciplined file organization.
Smart Objects and Adjustment Layers for Easy Revisions
Converting your garment layers to Smart Objects before any transformation is the single most important non-destructive habit you can build. A Smart Object wraps the original pixel data in a protective container. You can scale it down for a thumbnail, scale it back up for a hero banner, rotate it, warp it, and the underlying image stays untouched. Without that conversion, every Free Transform pass degrades quality permanently, and there's no undo once you save and close the file.
The same principle applies to tonal corrections. Instead of using Image > Adjustments > Curves directly on a garment layer (which bakes the change into the pixels), add a Curves or Levels adjustment layer and clip it to the specific garment layer below. Right-click the adjustment layer and choose "Create Clipping Mask," or hold Alt (Option on Mac) and click between the two layers. The adjustment now affects only that one layer, not the entire composite. You can double-click the adjustment layer's thumbnail at any point, even weeks later, and tweak the curve without touching a single pixel.
This approach is especially valuable in mannequin photography for ecommerce, where lighting conditions can shift slightly between shooting sessions. If the inner collar shot is half a stop darker than the outer garment, a clipped Curves layer corrects the mismatch instantly. When the client requests a warmer tone across the catalog, you adjust the curve values rather than re-editing every mask and composite from scratch.
Layer Naming Conventions and Group Structure
Imagine opening a PSD file you edited three months ago. You see "Layer 1," "Layer 1 copy," "Layer 3," and "Group 1." Which one is the outer garment? Which is the shadow? You have no idea, and neither does anyone else on your team. Proper layer management isn't just tidiness. It's the difference between a five-second revision and a twenty-minute archaeology project.
For a ghost mannequin photography studio processing dozens of SKUs per day, a consistent naming convention keeps every editor on the same page. A practical system uses top-level groups named by garment view, with sub-groups that separate each component of the composite. Here's a sample layer panel structure for a typical front-view ghost mannequin PSD:
| Group | Sub-Group | Layer Name | Layer Type |
|---|---|---|---|
| Front | Outer | SKU-1234_Front_Outer | Smart Object |
| SKU-1234_Front_Outer_Mask | Layer Mask (attached) | ||
| Inner | SKU-1234_Front_Inner_Collar | Smart Object | |
| Adjustments | SKU-1234_Front_Curves_Match | Clipped Curves Adjustment | |
| Shadow | — | SKU-1234_Shadow_Drop | Raster Layer (Soft Brush) |
| — | SKU-1234_Shadow_Reflection | Raster Layer (Soft Brush) | |
| Background | — | BG_White_Fill | Solid Color Fill Layer |
| — | BG_Guide_Grid | Guide Layer (hidden) |
The SKU prefix ties every layer back to the product it belongs to, which matters when you have multiple garment files open simultaneously. The view label (Front, Back, Detail) tells you which angle you're looking at. The component label (Outer, Inner, Shadow) tells you what role the layer plays in the composite. When a teammate opens this file, they can find and modify any element in seconds.
One practical tip: keep rasterized pixel layers (like shadow brushwork and cleanup) at the bottom of each group, with adjustment layers stacked above them. This ordering preserves the non-destructive flexibility of your adjustments and prevents accidental pixel changes from affecting tonal corrections higher in the stack.
Saving Templates for Repeatable Workflows
Once you've built a well-organized PSD with the correct layer structure, mask settings, adjustment layers, and shadow layers for one garment, you don't need to rebuild it for the next. Save that file as a template.
The process is simple. Take your completed PSD, select each garment Smart Object layer, and replace its contents with a neutral placeholder (a solid gray rectangle works well). Keep all masks, adjustment layers, clipping relationships, and group structures intact. Save the file as "Ghost_Mannequin_Template_NeckJoint.psd" (or whichever joint type it represents). For the next product, open the template, double-click the placeholder Smart Object, paste in the new garment shot, save and close the Smart Object window, and the entire layer structure updates around it.
This template approach delivers consistency across an entire product catalog. Every image shares the same shadow style, the same adjustment layer configuration, and the same export-ready group structure. New editors can follow the template without guessing at layer order or naming conventions. And when the brand updates its style guide, say, switching from a drop shadow to a reflection shadow, you update the template once and apply it going forward.
For teams running a high-volume operation, templates also pair naturally with Photoshop Actions. You can record an Action that opens the template, imports a new garment image into the placeholder Smart Object, and runs an initial Select Subject pass, all in a single playback. That combination of templates and automation is where individual edits start to become a scalable production pipeline.

Batch Processing and Scaling Ghost Mannequin Editing
A polished template and a clean PSD structure get you through one garment efficiently. But what happens when the queue holds 300 SKUs and the deadline is Friday? Manual ghost mannequin editing, even with Smart Objects and organized layers, hits a throughput ceiling fast. The techniques that make a single image look great don't automatically scale. Bridging that gap requires automation, and Photoshop offers several built-in tools to help before you ever need to look outside the application.
Photoshop Actions and Batch Processing Setup
Photoshop Actions let you record a sequence of editing steps and replay them on any file with a single click. For ghost mannequin for ecommerce workflows, this means capturing the repetitive parts of your process so you're only doing manual work where it actually matters.
Here's how to set one up. Open a representative garment image, then go to Window > Actions to open the Actions panel. Click the "Create New Action" button, give it a descriptive name like "GM_NeckJoint_BasePass," and hit Record. From this point, Photoshop tracks every operation you perform. Run Select > Subject to generate an initial mask, convert the selection to a layer mask, create your shadow layer, and save the working PSD. When you're done, click the Stop button in the Actions panel.
To apply that Action across an entire folder of images, go to File > Automate > Batch. In the dialog box, select your Action from the dropdown, point the Source to the folder containing your raw mannequin shots, and set the Destination to a separate output folder. Check "Override Action Save As Commands" so each file saves individually with the correct name and format. Click OK, and Photoshop processes every image in the folder using your recorded steps.
A few things to keep in mind. Actions work best when your shooting conditions are consistent: same lighting, same background, same mannequin position. If those variables shift between sessions, the automated mask from Select Subject will vary in quality, and you'll spend more time on manual cleanup. Actions also can't make decisions. They won't skip a step for a sleeveless top or add an extra mask for a rolled cuff. Every garment still needs a human eye for final refinement.
Droplets and Scripting for Larger Catalogs
For teams that want batch processing without opening the Batch dialog every time, Photoshop Droplets offer a drag-and-drop alternative. Go to File > Automate > Create Droplet, select your Action, choose an output folder, and save the Droplet as an executable file on your desktop. From that point on, you can drag a folder of images directly onto the Droplet icon and Photoshop launches the batch automatically. It's a small convenience, but for a ghost mannequin photographer processing daily uploads, it removes friction from the routine.
Teams with developer resources can go further with ExtendScript, Photoshop's built-in JavaScript-based scripting language. Unlike Actions, scripts support conditional logic. You could write a script that checks the garment's dominant color, selects the appropriate masking strategy, and applies different feather values based on fabric type. That level of automation requires programming knowledge, but for studios handling invisible ghost mannequin photography at serious volume, the time investment pays for itself within a few production cycles.
When to Move Beyond Manual Photoshop Workflows
Even with Actions, Droplets, and scripting in place, Photoshop-based workflows have a natural ceiling. Every image still opens inside the application, still consumes local processing power, and still requires a trained editor to review and refine the output. For a ghost mannequin photography service handling a few dozen images per week, that's manageable. For ecommerce operations pushing hundreds of SKUs weekly across multiple marketplaces, the per-image time cost adds up regardless of how much you automate the rough-in phase.
This is where dedicated editing platforms enter the picture. Rather than automating steps within Photoshop, these tools are purpose-built to deliver the ghost mannequin look from upload to finished image. Snappyit's Ghost Mannequin solution, for example, is designed specifically for photographers, retouchers, and ecommerce operators who need production-quality results without the per-image Photoshop time investment. It handles the mannequin removal, compositing, and cleanup in a streamlined pipeline built for catalog-scale volume.
How do the two approaches compare in practice? Here's a side-by-side breakdown:
- Snappyit's Ghost Mannequin platform — Faster turnaround with no Photoshop expertise required. Built for ecommerce volume, so it scales without adding editor headcount. Consistent output quality across large catalogs. Ideal for teams that have outgrown manual workflows or lack dedicated retouching staff.
- Photoshop Actions and batch processing — Maximum creative control over every mask, shadow, and adjustment. Best suited for studios with experienced editors who need pixel-level precision on complex garments. Requires consistent shooting conditions to keep automation reliable. Scales linearly with editor hours.
Neither approach invalidates the other. Many teams use Photoshop for hero shots and complex garments that need custom attention, while routing high-volume standard products through a dedicated platform. The right mix depends on your catalog size, turnaround requirements, and how much editing expertise you have in-house.
Regardless of which path you choose, certain editing problems show up again and again: misaligned seams, color mismatches between inner and outer layers, and stubborn edge halos that survive even careful masking. Knowing how to diagnose and fix these issues quickly is what separates a competent editor from a fast one.
Troubleshooting Common Ghost Mannequin Editing Mistakes
Even experienced retouchers run into the same handful of problems on nearly every ghost mannequin edit. The composite looks great at 100% zoom, then you check the neckline at 200% and spot a visible seam. Or the inner collar layer is half a shade warmer than the outer garment, and the join line glows. These issues don't mean your technique is wrong. They mean the two-shot compositing process introduces variables that need targeted fixes. Knowing exactly which Photoshop tool solves each problem, and why the problem appeared in the first place, is what keeps ghost clothing photography looking seamless at any zoom level.
Fixing Misaligned Seams Between Inner and Outer Layers
Misalignment is the most common ghost mannequin effects issue, and it usually traces back to the shoot. Even a slight shift in camera position or garment placement between the outer and inner shots throws the composite off. Stitching lines don't meet, collar edges overlap awkwardly, and the seam between layers becomes visible.
Start by selecting the inner layer and pressing Ctrl+T (Cmd+T on Mac) for Free Transform. Use the arrow keys for single-pixel nudges until the stitching and fabric grain line up with the outer layer. If the misalignment isn't uniform, meaning one side matches but the other doesn't, right-click inside the Free Transform bounding box and choose Warp. Warp mode lets you push individual grid points, so you can bend the inner collar or waistband into the exact curve of the outer garment without distorting the rest of the layer.
Once the layers are aligned, the seam itself may still show a hard transition. Click on the outer layer's mask, select a soft brush (hardness 0-15%, opacity around 80%), and paint along the join line with black to gradually reveal the inner layer beneath. Build the blend in short strokes rather than one long pass. Check the result against a neutral gray background, not just white, because subtle seam lines that vanish on white become obvious on darker tones.
Correcting Color and Exposure Mismatch
When you remove the mannequin from the outer shot and reveal the inner layer behind it, any difference in lighting between the two exposures creates a visible tonal break at the composite join. The inner collar might look darker, cooler, or slightly more saturated than the surrounding fabric. This happens because the interior of a garment sits in shadow on the mannequin, and even consistent studio lighting can't fully eliminate that difference.
The fix is a Curves adjustment layer clipped to the inner layer. Add the adjustment layer (Layer > New Adjustment Layer > Curves), then right-click it and choose Create Clipping Mask so it only affects the inner shot. Now sample the outer layer's tonal values as your target. Select the Eyedropper Tool (I), hold Shift, and click on a highlight area of the outer garment to set a sample point. Do the same for a shadow area. In the Curves dialog, adjust the curve until the inner layer's highlights and shadows match those sample values. This approach, recommended as a standard correction for mannequin ghost composites, keeps the fix non-destructive and editable at any point.
For white balance mismatches specifically, switch to the individual color channels (Red, Green, Blue) inside the same Curves dialog and adjust each channel independently. A warm inner layer usually needs the Blue channel lifted slightly in the midtones. A cool inner layer needs the opposite. Small moves here, 3 to 5 points on the curve, are usually enough.
Removing Edge Artifacts and Shadow Inconsistencies
The halo effect is the telltale sign of imprecise masking. A thin fringe of mannequin color, usually light gray or skin tone, clings to the garment edge and becomes painfully obvious against any background other than pure white. Two methods handle this reliably.
The first is preventive. Before creating your final layer mask, go to Select > Modify > Contract and shrink the selection by 1 to 2 pixels. This pulls the mask boundary just inside the garment edge, clipping off the fringe before it ever appears. Apply the contracted selection as your mask, and the halo is gone.
The second is corrective. If you've already created the mask and notice halos, select the mask thumbnail, open Select and Mask (Select > Select and Mask), and drag the Shift Edge slider to the left, around -10% to -20%. This contracts the existing mask edge inward without requiring you to redraw anything. For localized halos that only appear in certain areas, skip the global slider. Instead, select the mask, take a small hard brush (hardness 85-100%, size 3-8 px), set the foreground color to black, and paint directly along the problem edge at 200-300% zoom. This removes the fringe pixel by pixel without affecting clean edges elsewhere.
Shadow inconsistencies are subtler but equally distracting. If your painted shadow layer casts light from the left while the original shoot lit the garment from the right, the image feels wrong even if the viewer can't articulate why. Match the shadow direction to the lighting angle visible in the garment's own fabric shadows. If the original light came from the upper left, your drop shadow should fall toward the lower right. Keep shadow opacity low (5-15%) and build gradually. An overdone shadow draws more attention than no shadow at all.
Quick-Reference Troubleshooting Table
Bookmark this table for fast diagnosis during your editing sessions:
| Problem | Cause | Photoshop Fix |
|---|---|---|
| Visible seam between inner and outer layers | Camera or garment shifted between shots | Free Transform (Ctrl+T) with Warp mode to reposition inner layer; blend seam with soft brush (hardness 0-15%) on layer mask |
| Color or exposure mismatch at composite join | Different lighting conditions on inner vs. outer shots | Clipped Curves adjustment layer on inner layer; match highlight and shadow values using Eyedropper sample points |
| White balance difference between layers | Auto white balance shifted between shots | Adjust individual R, G, B channels in clipped Curves layer; lift Blue channel for warm-to-neutral correction |
| Halo or fringe along garment edge | Mask boundary includes mannequin-colored pixels | Contract selection by 1-2 px (Select > Modify > Contract) before masking; or use Shift Edge slider (-10% to -20%) in Select and Mask |
| Jagged or rough mask edges | Low-resolution source or hard-edged mask without feathering | Apply 0.5 px feather when converting path to selection; refine at 200-300% zoom with Refine Edge Brush in Select and Mask |
| Shadow direction doesn't match garment lighting | Shadow painted without referencing original light angle | Delete shadow layer and repaint, matching direction of fabric shadows visible in the garment; keep opacity at 5-15% |
| Mannequin remnants visible through button gaps or armholes | Incomplete masking in open garment areas | Select gap area with Lasso Tool, apply Content-Aware Fill (Edit > Content-Aware Fill) with output set to New Layer |
| Inner layer fabric texture doesn't match outer layer | Different focus or sharpness between shots | Apply matched sharpening via Filter > Sharpen > Unsharp Mask on inner Smart Object; or soften outer layer slightly with Gaussian Blur at 0.3-0.5 px |
Most of these fixes take under a minute once you know what to look for. The real time savings come from diagnosing the root cause immediately rather than cycling through trial-and-error adjustments. With these troubleshooting techniques in your toolkit, the remaining question is strategic: when is the ghost mannequin approach the right choice for your products, and when does a different photography style serve you better?

Ghost Mannequin vs Flat Lay vs On-Model Photography
Knowing how to execute a flawless ghost mannequin edit doesn't answer a more fundamental question: is this technique even the right fit for your products? Not every garment benefits equally from the invisible mannequin treatment, and not every brand needs the same photography style across its entire catalog. The smartest approach starts with understanding what each method does well, where it falls short, and how the three options compare on the metrics that actually matter to e commerce product photography teams.
Here's a side-by-side breakdown across the factors that drive most production decisions:
| Factor | Ghost Mannequin | Flat Lay | On-Model |
|---|---|---|---|
| Cost Per Image | Medium ($2-$10 depending on complexity and volume) | Low ($0.50-$3 with minimal setup) | High ($15-$50+ including model fees, styling, retouching) |
| Editing Time | Moderate (10-25 min per image for manual Photoshop work) | Low (basic cropping and color correction) | Moderate to High (skin retouching, background cleanup, color grading) |
| Required Skill Level | Intermediate to Advanced (Pen Tool masking, compositing, layer management) | Beginner (straightforward shooting and minimal post-production) | Advanced (directing models, complex lighting, extensive retouching) |
| Best Garment Types | Structured clothing: blazers, button-downs, outerwear, dresses, trousers | Accessories, folded knitwear, casual basics, flat items like scarves | Hero products, lookbook pieces, garments where movement and drape matter |
| Visual Impact | High: 3D shape with visible depth, clean and distraction-free | Moderate: clean layout but lacks dimension and fit information | Very High: emotional connection, real fit and fabric movement |
| Scalability | High: repeatable workflow, consistent output across hundreds of SKUs. Teams at volume can further accelerate production through platforms like Snappyit's Ghost Mannequin solution, which removes the Photoshop bottleneck entirely. | Very High: fastest to produce, minimal post-processing | Low: scheduling models, coordinating stylists, and maintaining consistency across large catalogs is difficult and expensive |
Ghost mannequin photography lands in the middle on almost every axis, and that's precisely its strength. It delivers more dimension than flat lay, more affordability than on-model, and enough consistency to hold a 500-SKU catalog together visually.
When Ghost Mannequin Is the Strongest Choice
Structured garments benefit the most. Think blazers with defined shoulders, button-down shirts with collar architecture, tailored trousers with a clean waistband, and outerwear that needs to show its silhouette. These pieces have a three-dimensional shape that flat lay photography simply can't communicate. Laying a blazer flat on a surface collapses its structure and makes it look shapeless. Putting it on an invisible mannequin preserves the shoulder line, the lapel roll, and the way the fabric drapes from chest to hem.
Mannequin photography also shines when visual consistency matters more than lifestyle storytelling. Ecommerce catalogs where shoppers scroll through dozens of products in a single session need a uniform look. Every image should share the same framing, the same shadow style, and the same background. Ghost mannequin workflows deliver that consistency naturally because the process is repeatable. The mannequin doesn't change poses, doesn't need a break, and doesn't introduce the subtle variations in posture and expression that make on-model catalogs harder to keep uniform. Industry comparisons consistently rank invisible mannequin photography highest for catalog-level consistency and return rate reduction.
When Flat Lay or On-Model Works Better
Flat lay earns its place for products that don't have inherent three-dimensional structure. Accessories like belts, wallets, and sunglasses look natural photographed from above. Folded knitwear, where the texture and color are the selling points rather than the silhouette, reads well in a flat layout. Brands with a lifestyle-oriented aesthetic, especially those selling on platforms like Etsy or through social media, often find that styled flat lays with curated props communicate their brand personality more effectively than a clinical product-on-white approach.
On-model photography is worth the investment when you need to show movement, drape, and real-world fit. A flowing maxi dress looks dramatically different on a person than it does on a static mannequin. Hero products that anchor a seasonal campaign, lookbook content designed to inspire styling ideas, and garments where fabric behavior is a key selling point (think silk blouses or jersey wrap dresses) all justify the higher production cost. The emotional connection a model creates, the way a shopper can picture themselves in the outfit, is something neither ghost mannequin nor flat lay can replicate.
The honest assessment? Each method has a job it does better than the other two. Choosing one and ignoring the rest leaves gaps in your product presentation.
Combining Approaches for a Complete Product Page
The strongest product pages don't commit to a single photography style. They layer multiple approaches to give shoppers every piece of visual information they need to buy with confidence. A practical combination looks like this:
- Primary image (ghost mannequin) — The main product photo showing the garment's shape, structure, and fit on a clean white background. This is the image that appears in search results, category grids, and marketplace listings.
- Secondary images (flat lay or detail shots) — Close-ups of fabric texture, stitching, labels, and hardware. Flat lay arrangements showing the garment paired with complementary accessories for styling context.
- Supplementary image (on-model) — One or two shots of the garment worn by a model to show real-world fit, movement, and styling. This is especially valuable for garments where drape and proportion are hard to judge from a mannequin shot alone.
This layered approach gives you the consistency and scalability of ghost mannequin photography for your core catalog imagery, the detail and lifestyle appeal of flat lay for supporting views, and the emotional pull of on-model for products that need it. You're not choosing between the three. You're assigning each one the role it plays best.
For teams running this combined strategy at scale, the ghost mannequin images are typically the highest-volume asset since every SKU needs at least one. That's where workflow efficiency matters most. Routing those images through a dedicated platform like Snappyit's Ghost Mannequin tool frees up your retouching team to focus their Photoshop skills on the detail shots and on-model edits that genuinely require a human touch.
Whichever combination you choose, the goal stays the same: give shoppers enough visual information to feel confident clicking "Add to Cart" without ever touching the fabric. Ghost mannequin photography handles the structural clarity. Flat lay handles the details. On-model handles the emotion. Together, they cover every angle a product page needs.
Frequently Asked Questions
1. How do you create a ghost mannequin effect in Photoshop?
To create the ghost mannequin effect, photograph your garment on a mannequin and capture a separate inner shot showing the collar or waistband interior. Import both images as layers in Photoshop, align them using Edit > Auto-Align Layers, then use the Pen Tool to trace the garment edge on the outer layer. Convert the path to a selection with a 0.5 px feather, apply it as a layer mask to hide the mannequin, and position the inner layer behind the masked outer layer. Blend the seam with a soft brush on the mask, add a subtle shadow layer beneath, and clean up any artifacts at 300% zoom. The entire process takes 10-25 minutes per image depending on garment complexity.
2. What Photoshop tools work best for ghost mannequin editing?
The Pen Tool is the primary tool for precise garment edge masking, set to Path mode with a 0.5 px feather on the final selection. For faster initial masks, Select Subject (Select > Subject) generates an AI-powered selection in seconds that works well on high-contrast backgrounds. The Object Selection Tool handles isolating specific garment zones like sleeves or collars. For blending composite seams, use a soft Brush (hardness 0-20%, opacity 80-100%) on layer masks. Content-Aware Fill patches gaps where the mannequin showed through open areas like button gaps or armholes. Select and Mask with Smart Radius refines fuzzy edges on knitwear and textured fabrics.
3. How many shots do you need for ghost mannequin photography?
The number of shots depends on the garment type and which joint types are involved. A basic t-shirt or crew-neck top requires two shots: one outer shot on the mannequin and one inner shot revealing the collar interior. Button-down shirts with open cuffs may need three shots to cover the neck joint and sleeve joints. Complex garments like blazers or outerwear requiring full mannequin removal can need four or more shots covering neck, both sleeves, and the bottom hem. Keep the camera locked on a tripod and avoid moving the garment between shots so layers align cleanly in Photoshop.
4. Can you automate ghost mannequin editing for large product catalogs?
Yes, partially. Photoshop Actions let you record repeatable steps like running Select Subject, creating base masks, and saving working PSDs, then apply them across entire folders using File > Automate > Batch. Droplets offer drag-and-drop batch processing without opening dialog boxes each time. However, Actions cannot make decisions about different garment types or handle variable shooting conditions, so manual refinement is still needed per image. For teams processing hundreds of SKUs weekly, dedicated platforms like Snappyit's Ghost Mannequin solution handle mannequin removal, compositing, and cleanup in a pipeline built for catalog-scale volume without requiring Photoshop expertise.
5. Why does my ghost mannequin edit have a visible halo around the garment edge?
The halo effect happens when your layer mask boundary includes mannequin-colored pixels, typically light gray or skin tone, along the garment edge. Fix it preventively by contracting your selection 1-2 pixels (Select > Modify > Contract) before creating the mask. For existing masks, open Select and Mask and drag the Shift Edge slider to -10% to -20% to push the mask boundary inward. For localized halos in specific areas, paint directly on the mask with a small hard brush (hardness 85-100%, size 3-8 px) at 200-300% zoom using black as your foreground color. Always check edges against both white and dark backgrounds, since halos invisible on white become obvious on gray or black.
Generate your first results in 90 seconds
Skip the manual grind for 80% of your catalog. Run a flat-lay or supplier photo through Snappyit AI Ghost Mannequin and ship listing-ready imagery in under two minutes — free to try, no credit card.
Try Snappyit AI Ghost Mannequin free →