At a glance
To change a color in Photoshop, make a clean selection and apply a Hue/Saturation adjustment layer with a mask. Here's the full method for every object type.
| Need | What to do |
|---|---|
| Get oriented | Read the short summary, then use the checklist below. |
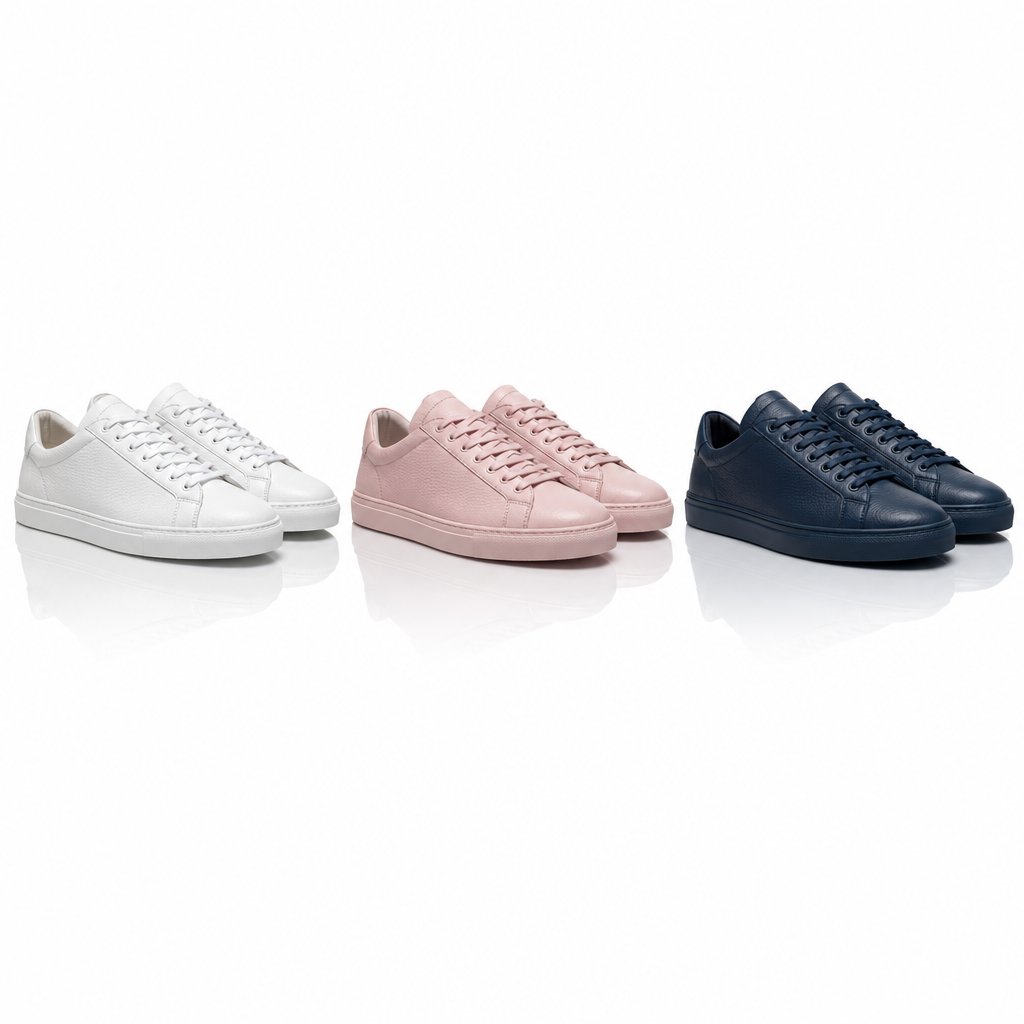
| Create a test image | Try Color Change Free |
To change the color of an image in Photoshop, make a precise selection of the object you want to recolor, then add a Hue/Saturation adjustment layer. Your active selection becomes the layer's mask automatically, so dragging the Hue slider only shifts color inside the object. That single workflow covers most saturated objects. The rest of this guide handles the cases it doesn't: neutrals, metallics, quick global swaps, and recoloring at scale.
Pick the Right Method for the Job
Photoshop has five solid ways to change a color, and choosing the wrong one is what produces edits that look obviously faked. Match the method to the object before you touch a slider.
| Method | Best for | Non-destructive | Works on neutrals |
|---|---|---|---|
| Hue/Saturation adjustment layer | Saturated objects: clothing, cars, packaging | Yes | No |
| Replace Color dialog | Quick global swap of one specific color | No | No |
| Color Replacement Tool | Painting color onto small, irregular areas | No | Limited |
| Solid Color fill on Color blend mode | White, black, gray, or metallic surfaces | Yes (new layer) | Yes |
| Color Range + adjustment layer | Recoloring one color wherever it appears | Yes | No |
A faster way to read that: if the object already has a strong color and clear edges, use Hue/Saturation. If you want one color changed everywhere in the frame in a hurry, use Replace Color. If you're recoloring something white, black, or chrome, you need the Color blend mode trick covered later. For a small detailed patch, paint with the Color Replacement Tool.
If you want to see how to change the color of a shirt end to end, the same logic applies: clean selection first, then the matching adjustment.
Step 1: Isolate the Object With a Clean Selection
A color change is only as good as the selection behind it. Color spilling onto the background is the single fastest way to make an edit look fake, so the boundary matters more than the slider work that follows.
Select Subject and Quick Selection
For well-defined objects like clothing, shoes, or furniture, start with Select > Subject. In recent Creative Cloud versions this analyzes the image and selects the most prominent object in one click. When it grabs too much or misses an area, refine with the Quick Selection Tool (W): drag across the target and Photoshop detects the edges as you go. Use a smaller brush near edges, and hold Alt (Option on Mac) to paint out anything it picked up by mistake. Work at 100% zoom on tricky boundaries so you can see what's actually being selected.
Refine Edges in Select and Mask
Hair, fur, and feathered fabric need more than a hard-edged selection. With a selection active, open the Select and Mask workspace from the Select menu. The Refine Edge Brush recalculates which pixels belong to the subject along fuzzy boundaries. Keep the Feather slider low (around 0.5–1.5 px) to avoid a visible halo, and use Shift Edge to pull the boundary in slightly if you're getting a fringe. Set Refine Mode to Object Aware for hair, then output the result as a Layer Mask so it stays editable.
Target a Color With Color Range
Sometimes the area you want isn't one object but one color scattered across the frame, like the red flowers in a floral print. Go to Select > Color Range, click the color you want with the eyedropper, and watch the preview where white is selected and black is protected. The Fuzziness slider controls how far the selection reaches into similar tones, around 40 is a reasonable start. Use the + and − eyedroppers to add or remove tones. The resulting selection feeds straight into an adjustment layer mask, which makes it a clean starting point for the next step.
Always keep selections on adjustment layer masks rather than committing them to a pixel layer. A mask can be repainted; a baked-in selection locks you in.
Step 2: Change Color With a Hue/Saturation Layer
This is the workhorse method, and it's non-destructive. It works on anything that already carries a distinct, saturated color, because all it does is rotate existing hue values.
With your selection still active, go to Layer > New Adjustment Layer > Hue/Saturation (or click the half-filled circle icon at the bottom of the Layers panel). Because a selection was active, Photoshop turns it into a layer mask automatically. White areas of the mask get the color change; black areas stay untouched. No extra masking step.
Target one color channel
The Master dropdown shifts every color in the masked area at once. For precision, switch it to a specific channel: Reds, Yellows, Greens, Cyans, Blues, or Magentas. A range indicator appears between the two color bars at the bottom of the panel showing exactly which slice of the spectrum you're affecting, and you can drag its edges to widen or narrow it. This is how you change a red car parked on orange leaves without touching the leaves: target Reds, narrow the range.
Use the sliders the right way
- Hue rotates the color wheel (−180 to +180). This is the slider that actually changes the color.
- Saturation controls intensity. A small boost after a hue shift often helps the new color feel as rich as the original.
- Lightness adjusts brightness. Use it sparingly. Push it far and you flatten the texture, which is what gives the edit away.
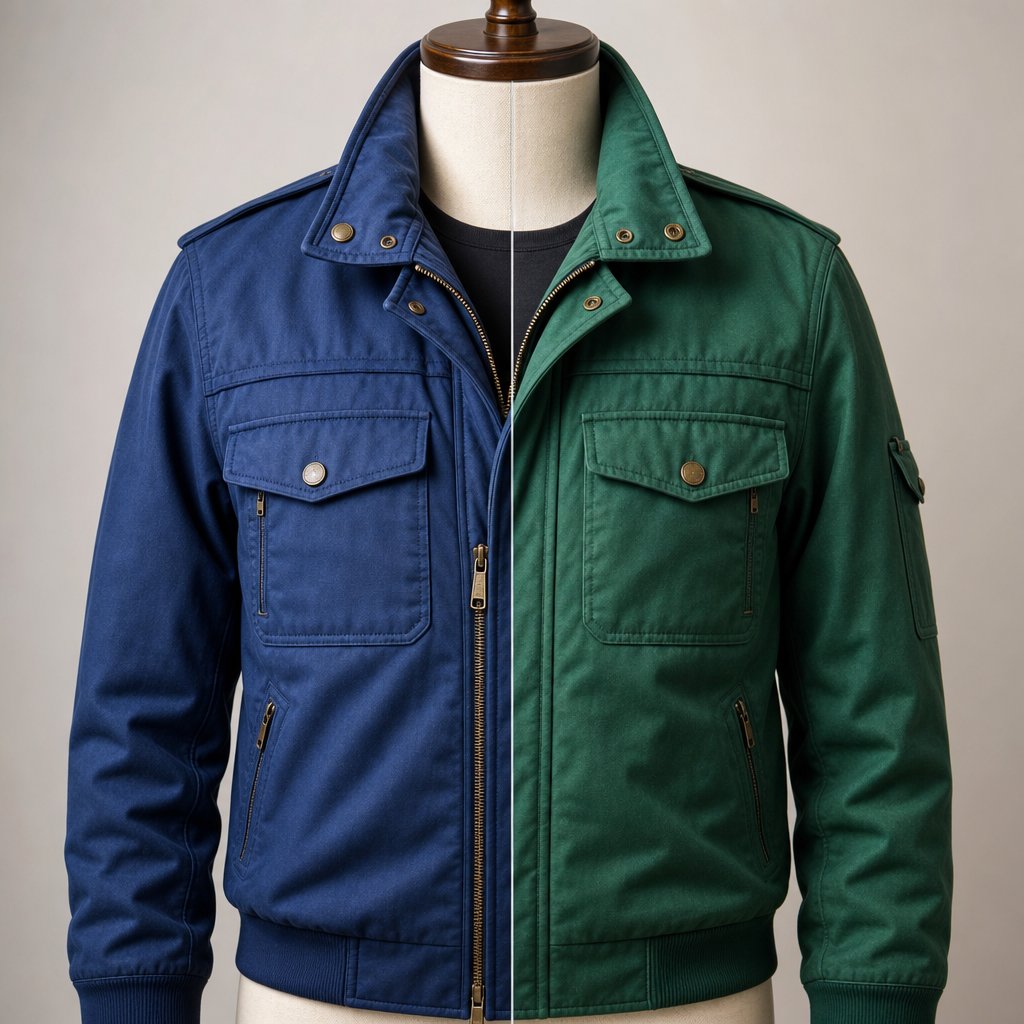
To turn a blue jacket green: select the Blues channel, drag Hue toward +60, nudge Saturation up a touch, and leave Lightness at 0. The jacket changes color while keeping every fold, shadow, and highlight from the original shot. The reason it stays realistic is that you never touched the underlying brightness data.
The catch is built into how the method works. White, black, and gray have no hue to rotate, so dragging the Hue slider on a white shirt does nothing. Those need a different approach, covered in Step 4.
Step 3: Swap a Color Fast With Replace Color
When you just want to point at a color, pick a new one, and move on, the Replace Color dialog bundles selection and adjustment into one window. Go to Image > Adjustments > Replace Color.
Click the color you want to change with the eyedropper, either on the canvas or in the dialog's preview, which shows your selection as a black-and-white mask. Most objects have tonal variation, so add tones with the + eyedropper and subtract stray pixels with the − eyedropper. The Fuzziness slider works like tolerance: higher values pull in a broader range of similar colors. Watch the preview as you drag and aim for the object showing fully white without bleeding into the background. If the same color appears in both subject and background, tick Localized Color Clusters to limit the change to the area around your sample point.
The three sliders at the bottom (Hue, Saturation, Lightness) set the new color, or click the Result swatch to open the full Color Picker and enter an exact hex value for a brand color. For broader context on quick recoloring, this overview of AI recolor tools for product photos is useful.
Replace Color edits pixels directly, so it's destructive. Duplicate the layer (Ctrl+J / Cmd+J) or convert it to a Smart Object first so you can revisit the change.
Step 4: Recolor White, Black, Gray, and Metallic Objects
A white sneaker, a black bag, a chrome faucet. These are the objects people most often want to recolor, and they're exactly where Hue/Saturation and Replace Color fail. Those tools rotate existing hue, and neutral pixels sit at zero saturation, so there's nothing to rotate. You have to inject color, not shift it.
The Solid Color fill on Color blend mode
This is Adobe's own method for neutrals, and it works because it separates color from brightness:
- Select the object using any method from Step 1.
- Go to Layer > New Fill Layer > Solid Color. The active selection becomes a mask automatically. The object turns a flat block of color.
- Pick your target color and click OK.
- In the Layers panel, change the fill layer's blend mode from Normal to Color. The original shadows, highlights, folds, and texture reappear, now wearing the new hue.
- Clip a Levels or Curves layer to the fill (Alt-click between the two layers) to fine-tune brightness.
The Color blend mode keeps the brightness of the pixels underneath and only applies the fill's hue and saturation. That's why a white couch turned yellow still shows every cushion crease. Switch the same fill to Multiply and the yellow deepens into a richer gold with more shadow; Overlay adds contrast, good for fabrics; Soft Light gives a subtle tint instead of a full change.
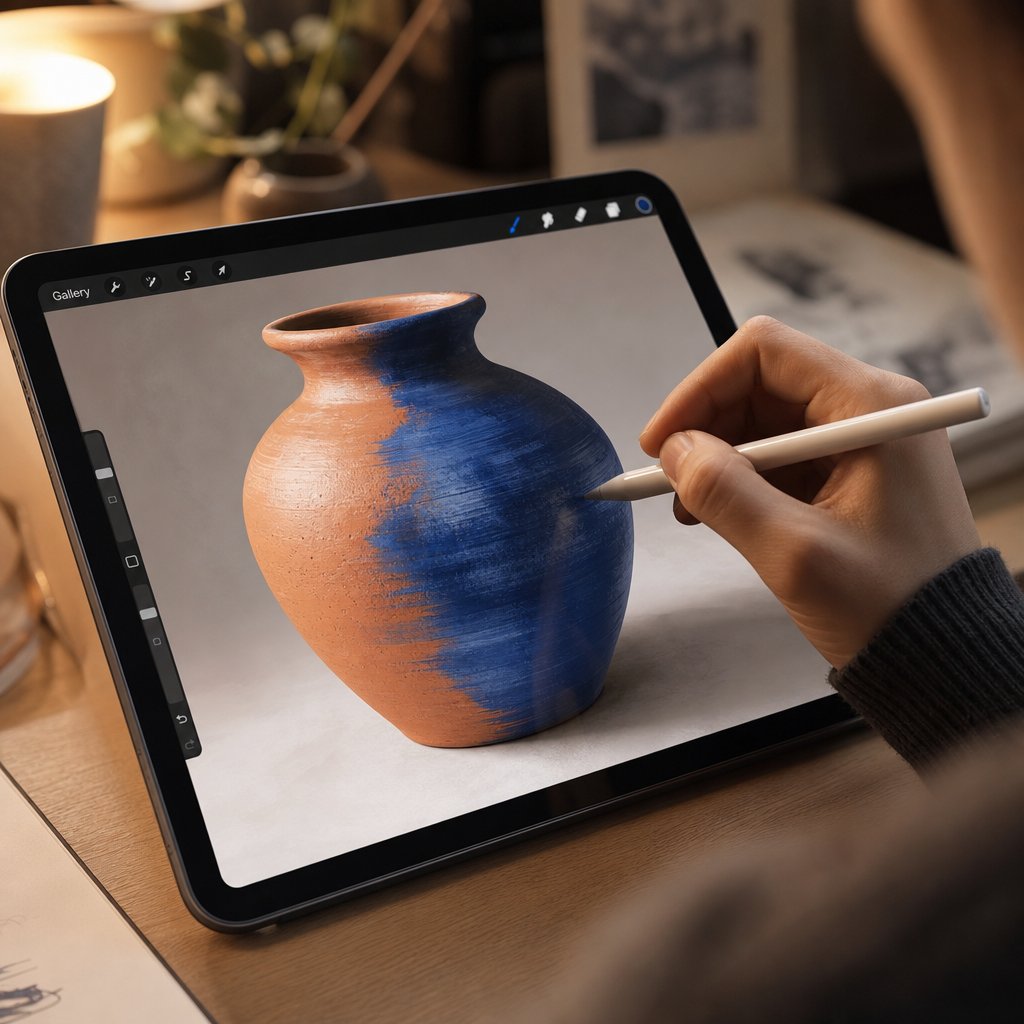
Paint metallics by hand
Chrome, brushed steel, and multi-toned gray surfaces reflect light unevenly, so a single flat fill looks wrong on them. Create a blank layer (Ctrl+Shift+N / Cmd+Shift+N), set its blend mode to Color before painting, choose a soft round brush at reduced opacity, and build up the hue gradually. Paint lighter on the highlights where metal catches light and heavier on the body. That mimics how color actually sits on a reflective surface rather than smothering it in uniform tint. Pull back with a low-opacity Eraser anywhere the color reads too strong.
Step 5: Paint Color With the Color Replacement Tool
For a small, irregular patch where automated methods keep spilling, the Color Replacement Tool lets you paint the new color directly under the cursor. It's nested under the Brush Tool: right-click (Control-click) the Brush icon and choose Color Replacement Tool.
Set up the Options Bar before painting. A reliable starting point is Mode: Color (changes hue and saturation while keeping the original brightness), Sampling: Once (samples only where you first click), Limits: Contiguous (stops at color boundaries), and Tolerance: 30%. Set your foreground to the new color, then position the crosshair over the color you want gone and drag.
The one habit that makes this tool work: keep the crosshair on the original color the whole time. The brush circle can overlap into other areas safely, because only pixels matching the sampled color get changed. Drift the crosshair onto a different color and Photoshop resamples; undo and reposition. If color bleeds into nearby areas, lower Tolerance to 20% or below. If the replacement is patchy, raise it toward 50–70% or switch Sampling to Continuous. Reduce brush Hardness for soft gradients, raise it for crisp logo edges. Like the other pixel-level methods, this is destructive, so duplicate your layer first.
Step 6: Refine Edges and Match Lighting
Applying the color is half the job. What separates an invisible edit from an obvious one is the cleanup afterward.
Clean up the mask
Click the layer mask thumbnail, grab the Brush (B), and paint with black to hide the color change and white to bring it back. Use a soft brush at around 50% opacity along edges so the transition builds up gradually instead of cutting off hard. To inspect the mask itself, Alt-click (Option-click) the mask thumbnail: the canvas shows it as grayscale, which makes gaps and rough edges easy to spot. Zoom to 200–300% along any edge where the object meets a contrasting background and clean up fringe with a small brush, because a one-pixel spill is visible there.
Match the lighting
A color shift can leave the object looking flat, because the original color carried tonal cues the new one doesn't replicate. Clip a Curves adjustment layer to your color layer (Alt-click between them so it only affects the recolored area). Lift the highlights slightly and deepen the shadows to bring back dimension. Then drop the color layer's opacity a little so a hint of the original tone shows through. Real objects rarely have perfectly uniform color, and that small variation reads as realistic where 100% opacity reads as digital.
Keep the stack editable
Build the layers so every decision stays reversible: locked original at the bottom, the Hue/Saturation or Solid Color layer with its mask, a clipped Curves layer for lighting, and an optional Color-blend layer for touch-ups on top. This follows Adobe's non-destructive editing principles. The practical payoff: to produce several colorways from one shoot, group the layers (Ctrl+G), duplicate the group, and change the adjustment values in the copy. Save as PSD or TIFF so layers and masks survive; flattening to JPEG discards the whole stack.
Fixing the Three Common Color-Change Problems
Three issues account for most failed edits: color bleeding past the edge, lost texture, and banding in gradients. Each has a specific cause.
Color bleeding
Bleed shows as a tinted fringe along edges. It usually means the selection was too loose, Fuzziness or Tolerance was too high, or the feather was too wide. The fastest fix is painting black on the mask along the affected edge with a small brush. For widespread bleed, redo the selection in Select and Mask and pull Shift Edge inward. With the Replace Color dialog, bleed is common because it selects globally, so use Localized Color Clusters or lasso a rough area first.
Lost texture
If a denim jacket loses its weave after a recolor, the Lightness slider was pushed too far or the blend mode flattened the tones. Pull Lightness back toward zero and handle brightness with a clipped Curves layer instead, which preserves the full tonal range. If a blend mode flattened the detail, duplicate the original image layer, move it above your color layers, and set it to Luminosity at reduced opacity. That reintroduces surface detail while keeping the new hue.
Banding
Banding is visible striping in what should be a smooth gradient, and aggressive hue shifts make it worse. The best prevention is working in 16-bit mode (Image > Mode > 16 Bits/Channel) before adjusting. An 8-bit image has 256 tonal levels per channel; 16-bit has far more room to redistribute values smoothly, as this guide to banding explains. If banding is already in a finished edit, add a small amount of monochromatic Gaussian noise (Filter > Noise > Add Noise) to break up the stripes, then soften it with a very slight Gaussian Blur.
Before calling a color change done: check edges at 200% zoom, confirm the blend mode is correct (Color for fills, Normal for Hue/Saturation), and inspect the final result at 100%, the only zoom that shows true pixel quality.
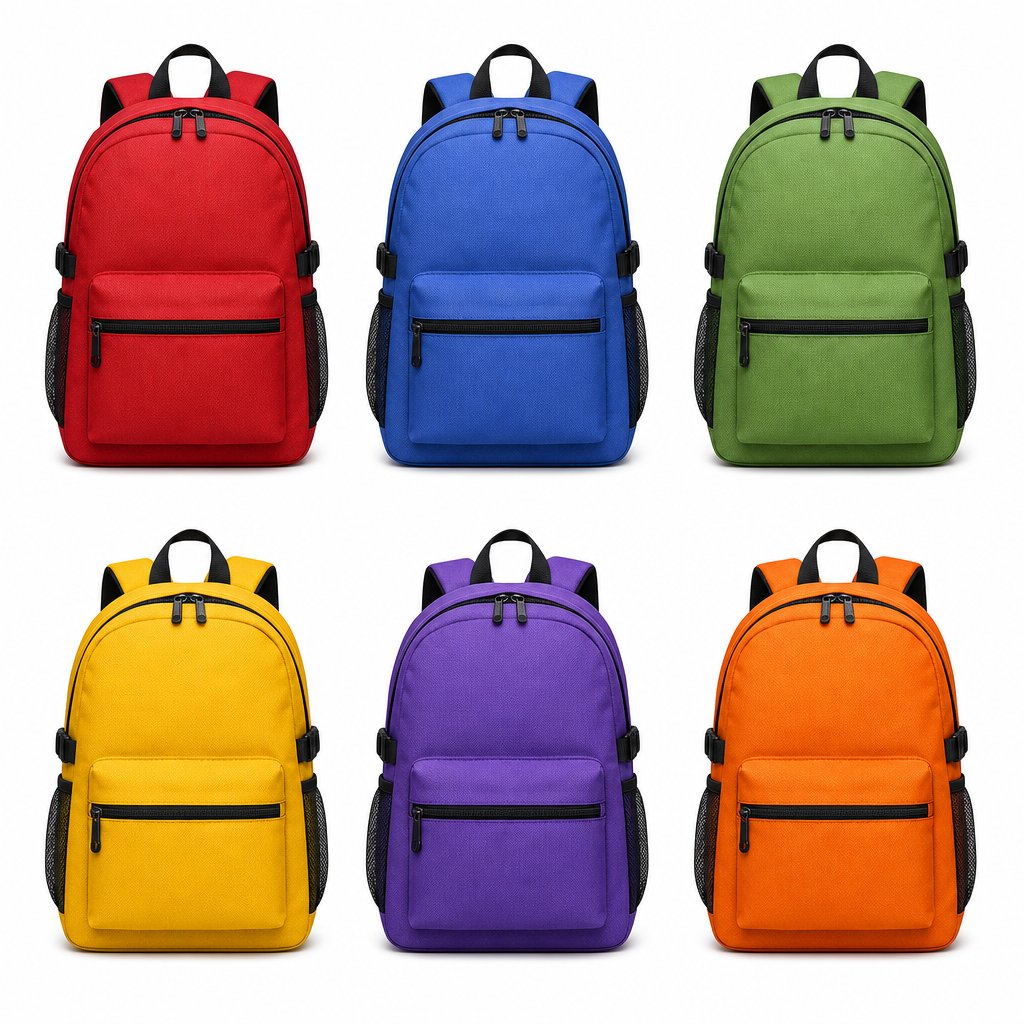
Scaling Color Changes for Product Photography
Every method above works beautifully on a single image. The problem is volume. An ecommerce store launching a product in eight colorways needs eight edits per angle, per product. A 50-item catalog shot at six angles in eight colors is thousands of individual color changes, each still requiring selection, adjustment, cleanup, and export. At that point it stops being a creative task and becomes an operational bottleneck.
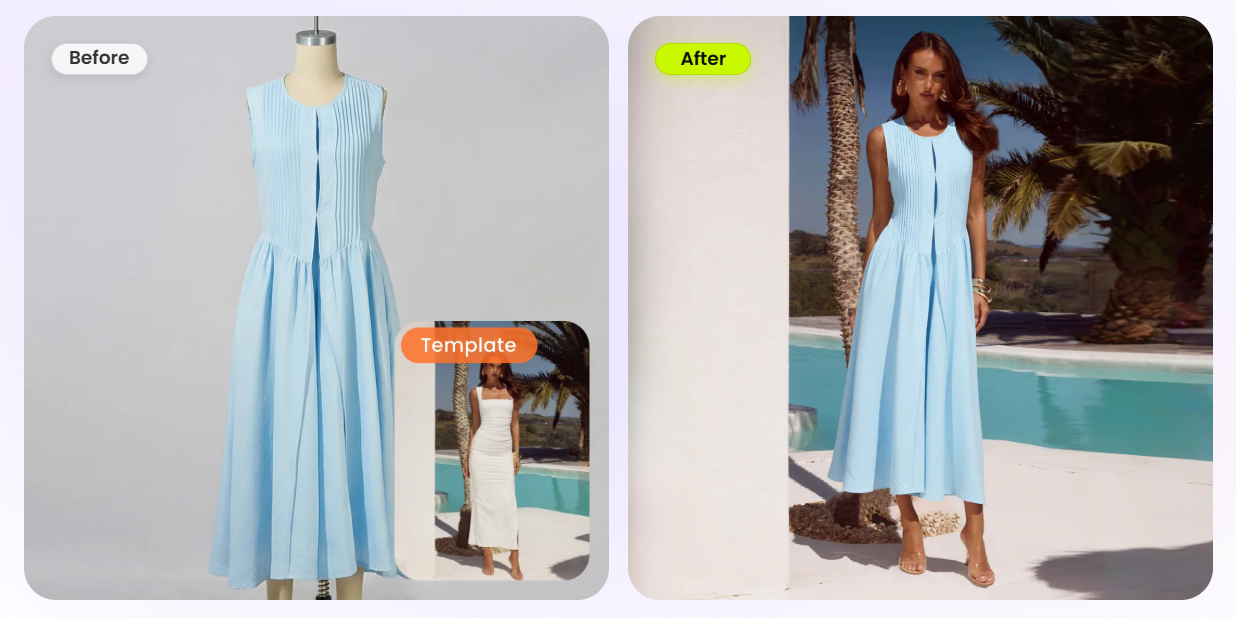
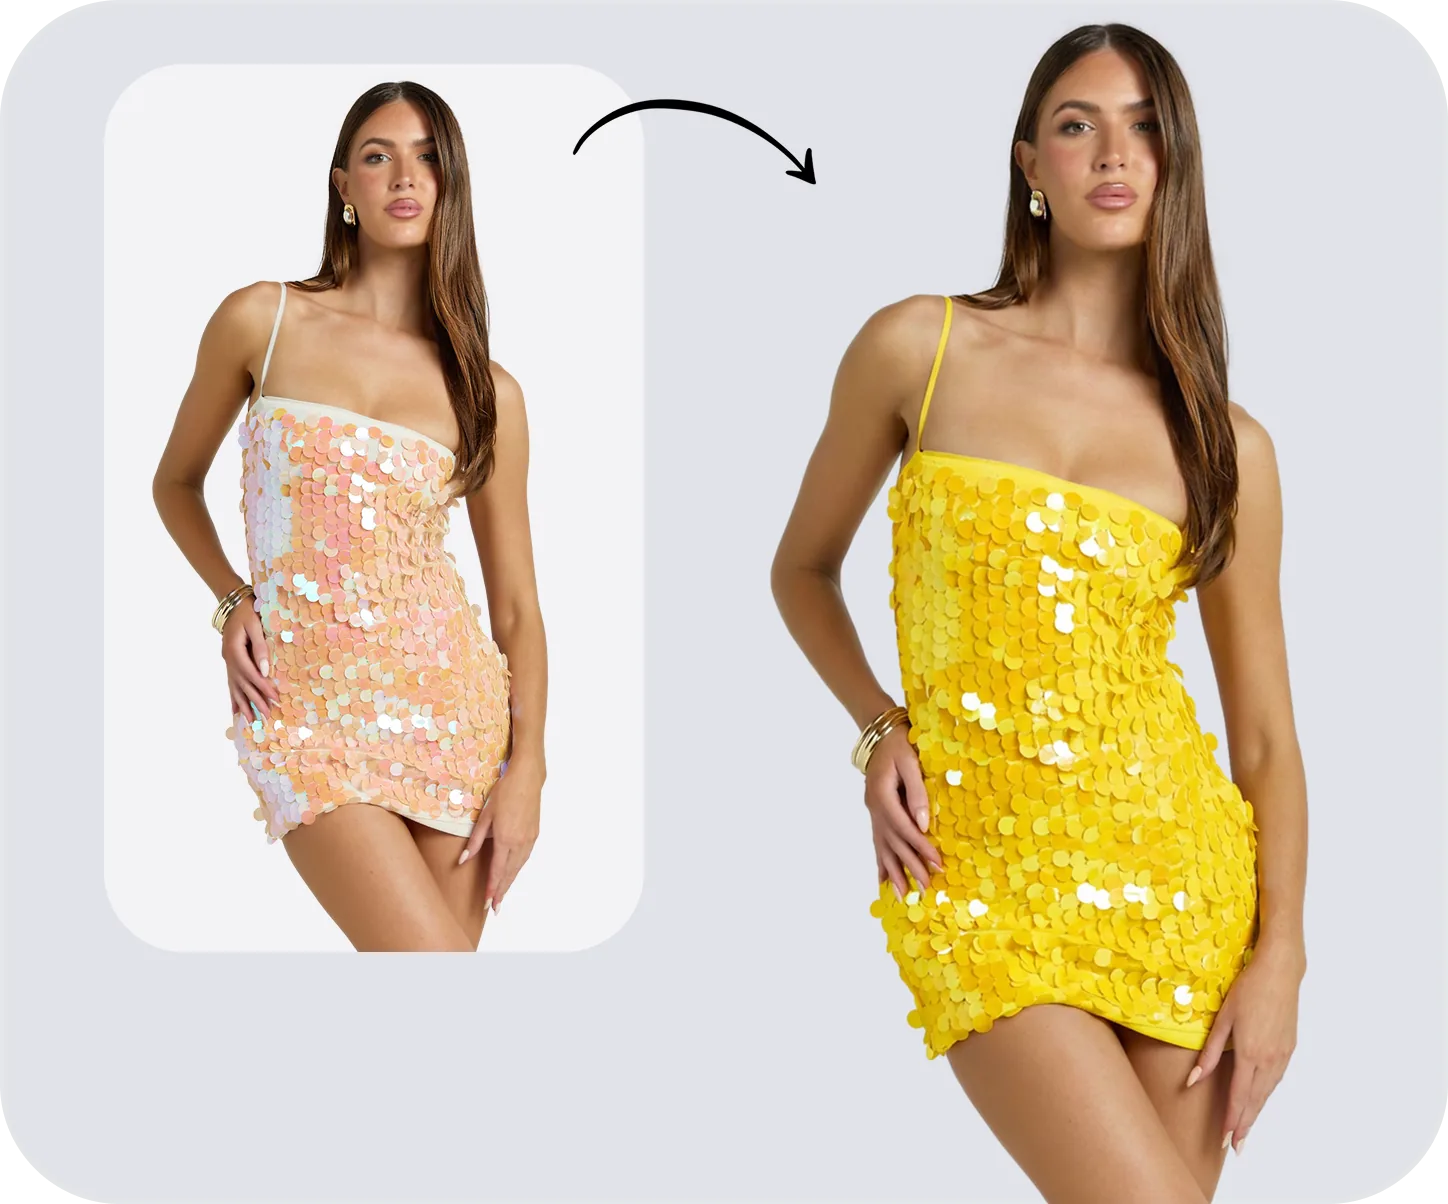
Purpose-built tools fill that gap. Snappyit's Color Change tool handles the recolor without manual selection, layers, or mask refinement: you upload a product image, specify the area and target color, and it returns a realistic variant while preserving fabric texture and shadow detail. It's built for the volume case, not the one-off.
The two approaches are complementary. Reach for Photoshop when you need full creative control, complex compositing, or a single high-stakes edit that wants a human eye. Reach for an automated color changer when you're generating product variants from a hero shot, A/B testing color options, or refreshing seasonal palettes across hundreds of listings, where speed and consistency matter more than pixel-level manual work. For single images and complex projects Photoshop is still the gold standard; for production at scale, a dedicated tool closes the gap between what's technically possible and what fits a real deadline.
Frequently Asked Questions
How do I change the color of a white or black object in Photoshop?
Hue/Saturation fails on white, black, and gray because those pixels have no hue to rotate. Instead, select the object, add a Solid Color fill layer in your target color, and set the layer blend mode to Color. That injects new hue and saturation while keeping the original shadows and highlights. Try Multiply or Overlay for deeper results, and for metallics paint the color by hand on a blank Color-blend layer at reduced opacity.
What is the difference between Hue/Saturation and Replace Color?
Hue/Saturation is a non-destructive adjustment layer you can re-edit any time, and it pairs cleanly with a selection-based mask. Replace Color combines selection and adjustment in one dialog for speed but writes the change directly to the pixel layer, so it's destructive. Use Hue/Saturation for editable, precise work and Replace Color for a quick global swap when you've duplicated the layer as a safety net.
Why does my color change look fake?
It usually comes down to three things: pushing the Lightness slider too far and flattening texture, a loose selection causing color to bleed past the edge, or skipping lighting refinement. Keep Lightness near zero and use a clipped Curves layer for brightness, tighten the selection in Select and Mask, and drop the color layer's opacity slightly so original tones show through. Always check at 100% zoom.
Can I change the color of multiple objects at once?
Yes. Use Select > Color Range to target a color wherever it appears, then apply an adjustment layer with that selection as its mask and every instance updates together. Adjust Fuzziness to control how broadly similar tones are included. If you want separate control over objects that share a color, use Localized Color Clusters in Replace Color or build a hand-painted mask per object.
How do I change colors in bulk without editing each image?
For high-volume work like multiple colorways per SKU, manual editing stops being practical. Photoshop Actions help with repeatable steps but struggle when selections differ across images. AI tools such as Snappyit's Color Change tool automate selection, color application, and texture preservation per image, which suits ecommerce teams producing variants or updating seasonal palettes across many listings.
Recoloring is a single step in a much bigger pipeline of AI product photography on Snappyit.