At a glance
To change the color of something in Photoshop, isolate the object first, then choose the technique that matches the source color: Hue/Saturation for colored objects, Solid Color plus blend modes for exact color values, and Multiply, Overlay, or Screen adjustments for white, black, and gray objects.
| Object type | Best Photoshop method | Why it works |
|---|---|---|
| Already colorful | Hue/Saturation adjustment layer | Shifts hue while preserving most shadows and texture. |
| Exact brand color | Solid Color fill layer with Color, Multiply, or Overlay | Lets you enter a specific hex value and tune realism with opacity. |
| White, black, or gray | Blend-mode layer plus mask refinement | Adds chroma where Hue sliders have little color information to shift. |
Need variants faster? For ecommerce colorways, use Photoshop for final manual control and Snappyit Color Change when you need many reviewed product variants from one clean source image.
Pick the Right Color Change Method for Your Situation
You open Photoshop, stare at the object you want to recolor, and immediately hit a wall. Hue/Saturation? The Color Replacement Tool? A Solid Color fill layer? Photoshop offers at least five viable ways to change colors of an image, and every tutorial you find walks through just one of them without explaining why that method fits your specific situation. The result? You pick the wrong approach, get muddy or flat-looking output, and start the whole process over.
The real issue is not a lack of tutorials. It is a lack of a decision framework. How to change the color of something in Photoshop depends on three variables: the source color of your object (is it vibrant, neutral, or white?), the target color you want to achieve, and the complexity of the object's edges. Get any one of those wrong, and even the most popular technique will let you down.
Why Most Color Change Tutorials Leave You Stuck
Most guides treat color replacement as a one-size-fits-all task. They show you a single method on a perfectly lit product shot and call it done. But imagine trying to use a Hue slider on a white sneaker or applying a basic color replacer brush to a detailed lace pattern. Different scenarios demand different tools. This article covers five distinct methods, each suited to a specific combination of source color, target color, and edge complexity, so you always know which path to take. Modern AI-powered selection tools in Photoshop CC have also changed the game, making it faster than ever to isolate objects before you even touch a color slider.
Match Your Scenario to the Right Technique
Instead of reading every section front to back, use the table below to jump straight to the method that fits your project. Think of it as a quick-reference color change image guide based on what you are actually working with.
| Scenario | Recommended Method | Difficulty Level |
|---|---|---|
| Bright object to another bright color (e.g., red shirt to blue) | Hue/Saturation Adjustment Layer (Step 2) | Beginner |
| Quick, localized recolor on a simple shape | Color Replacement Tool (Step 3) | Beginner |
| Exact hex or brand color match needed | Solid Color Fill Layer + Blend Mode (Step 4) | Intermediate |
| White, black, or gray object to a vivid color | Solid Color Layer with Multiply/Screen (Step 5) | Intermediate |
| Color bleeding or edge halos after any method | Layer Mask Refinement (Step 6) | Intermediate |
Each method builds on a shared foundation: a clean, accurate selection of the object you want to recolor. Whether you plan to use Photoshop CC to change the color of an object for a product catalog or a personal creative project, the quality of that initial selection determines everything that follows. Rushing past it is the single biggest reason color changes look fake.
That foundation is exactly where the workflow begins.
Step 1: Select Your Object with AI-Powered Tools
Every color change method in Photoshop shares one non-negotiable requirement: a precise selection around the object you want to recolor. Skip this step or rush through it, and you will spend twice as long fixing color bleeding, edge halos, and unnatural transitions later. The selection is the invisible scaffolding that holds the entire edit together.
So how does Adobe change color work under the hood? It applies adjustments only to the pixels you tell it to target. That means the cleaner your selection, the more convincing the final result. Photoshop now offers AI-driven selection tools that handle most of the heavy lifting, turning what used to be a tedious manual process into something you can finish in seconds. Before you reach for any photoshop color replacement tool or adjustment layer, invest a few moments here first.
Use the Object Selection Tool for Clean Edges
The Object Selection Tool is the fastest way to isolate a subject when you need a reliable starting point. You will find it in the toolbar or by pressing W on your keyboard.
- Activate the Object Selection Tool (W) from the Tools panel.
- Hover over the object you want to recolor. Photoshop highlights detected objects automatically as your cursor moves across the canvas.
- Click the highlighted object to create an instant selection, or drag a loose rectangle or lasso around it and let the AI snap to the edges.
- For images with people, select the Select People option in the Options bar. This lets you target specific attributes like hair, clothing, or accessories individually rather than selecting the entire figure.
This tool works remarkably well on clearly defined objects like clothing, cars, furniture, and product shots. Where it gets tricky is with fine details like flyaway hair, semi-transparent fabrics, or objects that blend into a similarly colored background. When you notice the marching ants cutting into the edges of your object or grabbing chunks of the background, that is your signal to refine the selection further rather than pushing ahead.
Refine Your Selection with Select and Mask
For complex boundaries, the Select and Mask workspace is where rough selections become professional-grade. With your initial selection active, open it by going to Select > Select and Mask (or click the Select and Mask button in the Options bar).
Inside this workspace, four sliders give you precise control over the selection edge:
- Smooth — reduces jagged, irregular edges. Useful for organic shapes but keep values low to avoid rounding off important detail.
- Feather — softens the transition between selected and unselected areas. A value of 0.5 to 1.5 pixels works well for most objects. Go higher only for intentionally soft-edged composites.
- Contrast — sharpens the selection boundary. Increasing this to around 10-15% can tighten up edges that look too soft after feathering.
- Shift Edge — contracts or expands the selection border. Setting this to a small negative value (around -20% to -30%) pulls the edge inward, which is one of the most effective ways to eliminate background fringing.
The real power here is the Refine Edge Brush. Select it from the left toolbar inside the workspace, then paint along tricky boundaries like hair, fur, or lace. Photoshop analyzes the pixels you brush over and separates foreground from background automatically. For hair selections, enable Smart Radius to let the tool adapt to both hard edges (like a shoulder) and soft edges (like individual strands) within the same selection. Check Show Radius temporarily to confirm you have covered every edge that needs refinement.
A clean selection is the foundation for every color change method that follows. If the selection is off, no amount of slider tweaking will save the result.
Save Your Selection for Later Use
Complex selections take time to build. If there is any chance you will need to revisit or adjust the color change later, save the selection as a channel so you can reload it instantly without starting from scratch.
- With your selection active, go to Select > Save Selection.
- In the dialog box, give the selection a descriptive name (for example, "red jacket" or "product outline").
- Click OK. Photoshop stores the selection as an alpha channel in the Channels panel.
- To reload it later, go to Select > Load Selection, choose the saved channel by name, and click OK.
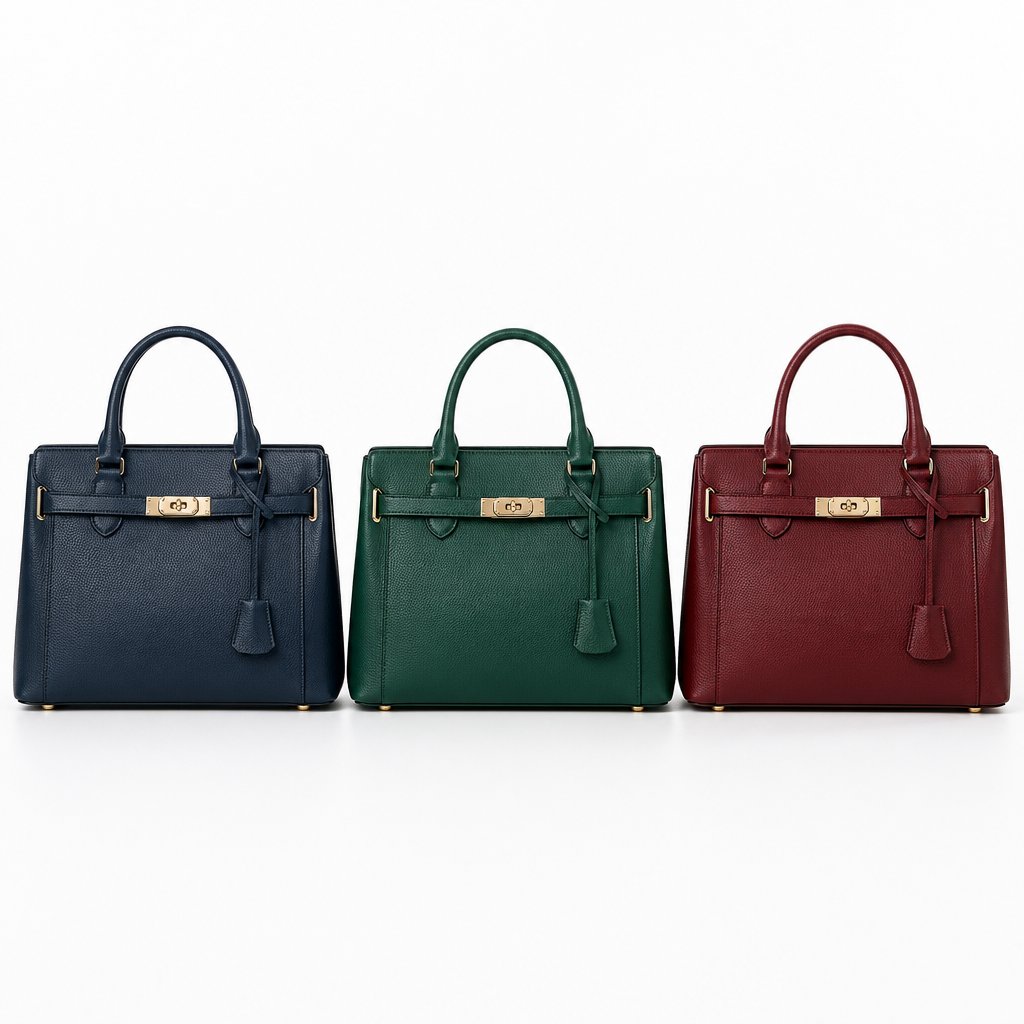
This is especially valuable when you need to change the color of an object in Photoshop multiple times, for instance producing the same product shot in five different colorways. Build the selection once, save it, and reuse it for every variation.
With a solid selection locked in, the next question becomes which color adjustment to apply. The most versatile starting point, and the one that handles the widest range of scenarios, is a Hue/Saturation adjustment layer.
Step 2: Photoshop Replace Color Using Hue and Saturation
The Hue/Saturation adjustment layer is the go-to color substitution method in Photoshop for one simple reason: it gives you real-time, non-destructive control over hue, intensity, and brightness in a single panel. Unlike brush-based tools that paint directly onto pixels, this approach lives on its own layer. You can tweak it, toggle it off, or delete it entirely without ever touching the original image. For anyone learning how to colour change in Photoshop, this is the technique to master first.
Create a Hue/Saturation Adjustment Layer
With your object selection still active (those marching ants should be visible), open the Adjustments panel and click the Hue/Saturation icon. Photoshop automatically creates an adjustment layer with a layer mask shaped to your selection, meaning the color shift only affects the area inside the marching ants. If the Adjustments panel is not visible, go to Window > Adjustments to bring it up.
If you created the adjustment layer without an active selection, you can still clip it to a specific layer. Hold Alt (Windows) or Option (Mac) and click between the adjustment layer and the layer below it in the Layers panel. A small downward arrow appears, indicating the adjustment is now clipped and only affects that single layer.
At the top of the Properties panel, you will notice a dropdown menu set to Master by default. This means every color in the selected area is affected equally. For broad color shifts, Master works fine. But when you need precision, switch to an individual color channel: Reds, Yellows, Greens, Cyans, Blues, or Magentas. Photoshop's updated Hue/Saturation interface now displays clickable color icons alongside the dropdown, making it faster to jump between channels visually instead of scrolling through a list.
Dial In the Exact Color Shift
Three sliders control the entire color transformation. Understanding what each one does prevents the trial-and-error frustration that trips up most beginners.
- Hue — rotates the color wheel. Dragging it left or right shifts every targeted pixel to a new position on the spectrum. A value of 0 means no change. Moving to +180 or -180 takes you to the opposite side of the wheel.
- Saturation — controls color intensity. Positive values make colors more vivid; negative values pull them toward gray. Pushing this too high creates an unnatural, neon look, so keep adjustments moderate.
- Lightness — adjusts overall brightness. This slider is tempting but dangerous. Increasing it washes out detail, and decreasing it crushes shadows. In most color change workflows, you will get better results leaving Lightness at 0 and handling brightness separately with Curves or Levels.
Imagine you have a red shirt and you want to turn it blue. Start by selecting Reds from the channel dropdown (or clicking the red color icon). Then drag the Hue slider to approximately +120 to +150. You will see the red tones rotate through orange, yellow, green, and land in the blue range. Fine-tune the Saturation slider by a few points in either direction until the blue looks natural against the surrounding image. That is the core of how to replace a color in Photoshop using this method: isolate the color channel, rotate the hue, and adjust saturation to taste.
For subtler shifts, like turning a warm red into a cooler crimson, you might only need a Hue adjustment of -10 to -20. The key is working in small increments and checking the result against the rest of the image at each step. Keyboard modifiers speed this up: hold Shift while dragging a slider to move in larger jumps, or hold Alt/Option to slow the movement down for finer control.
Use the Eyedropper to Target Specific Tones
Sometimes the color channel dropdown is not precise enough. A red jacket might contain warm orange highlights and cool magenta shadows, and selecting the Reds channel alone could miss half the tones you need to shift. This is where the on-image eyedropper inside the Hue/Saturation panel becomes essential.
At the bottom of the Properties panel, you will see a color range bar with two vertical sliders defining the affected range. Instead of adjusting these manually, select the eyedropper tool (the leftmost of the three eyedropper icons) and click directly on the color you want to target in your image. Photoshop automatically narrows the color range to match the sampled pixel. Use the + eyedropper to add more tones to the range, or the - eyedropper to exclude tones that should stay untouched.
This approach is especially useful when you need to adjust only the pink areas of a floral pattern without shifting nearby red tones, or when you want to target a specific shade of green in foliage without affecting the yellow highlights. Double-clicking a color icon in the updated interface also opens the color picker for even more precise targeting.
Hue/Saturation works best when the source object already has a saturated, non-neutral color. If the object is white, black, or gray, there is no existing hue data for the slider to rotate, and you will need a different technique entirely.
The color replacement tool in Photoshop's Hue/Saturation panel is powerful, but it is not the only option. For situations where you need a faster, more freehand approach, or when you are working on a quick edit that does not justify setting up adjustment layers, a brush-based method offers a more direct path.
Step 3: Use the Color Replacement Tool for Quick Edits
Adjustment layers are great for precision, but sometimes you just want to grab a brush and paint a new color directly onto an object. That is exactly what the Color Replacement Tool is built for. It is faster, more intuitive, and ideal for straightforward edits where you need to change color in Photoshop without building a stack of layers.
You will find it nested under the Brush Tool in the toolbar. Right-click (Windows) or Control-click (Mac) on the Brush Tool icon, and select Color Replacement Tool from the fly-out menu. Your cursor changes to a circle with a small crosshair in the center. As you drag across the image, Photoshop continuously samples the color under that crosshair and replaces it with your current Foreground color. Any pixel within the larger circle that matches the sampled color gets swapped in real time.
The key difference from Hue/Saturation? This tool works directly on pixels rather than through a separate adjustment layer. That makes it faster for simple tasks but also means the edit is destructive. Before you start painting, duplicate your layer (Ctrl+J / Command+J) so the original pixels remain untouched on the layer below.
Configure the Color Replacement Tool Settings
Three settings in the Options bar control how the tool behaves. Getting these right before you start painting saves a lot of undo steps.
Sampling mode determines how Photoshop picks the color to replace. Three icons sit next to the Mode dropdown:
- Continuous (default) — Photoshop re-samples the color under the crosshair as you drag. Best when the object contains gradients or multiple shades of the same hue.
- Once — Photoshop samples only the color you first click on and keeps replacing that single color for the entire stroke. Use this when changing colors on a solid-toned object to prevent the tool from bleeding into neighboring areas.
- Background Swatch — replaces only pixels that match your current Background color. Useful as a fallback when the other two modes are not selective enough.
Limits controls where replacement happens within the brush circle:
- Contiguous (default) — only replaces pixels connected to the crosshair area. Start here for most edits.
- Discontiguous — replaces every matching pixel inside the circle, even if separated by a different color. Helpful for objects with holes or patterns.
- Find Edges — similar to Contiguous but tries to preserve sharper edge detail. Worth trying on objects with well-defined outlines.
Tolerance sets how closely a pixel must match the sampled color to be replaced. The default of 30% is a solid starting point. If you notice the tool leaving behind fringing along edges, bump it up to 40-50%. If it is spilling into areas you want to keep, drop it to 15-20%.
Paint Over the Object to Swap Colors
With your settings dialed in, click the Foreground color swatch in the toolbar and pick your target color from the Color Picker. You can also hold Alt (Windows) / Option (Mac) to temporarily switch to the Eyedropper and sample a color directly from the image. Then adjust your brush size using the bracket keys ([ to shrink, ] to enlarge) and paint over the object. Keep the crosshair inside the area you want to recolor. If it drifts onto the background, Photoshop starts sampling and replacing the wrong pixels. When that happens, press Ctrl+Z / Command+Z to undo and reposition.
A common frustration: you try to choose another color in Photoshop but the Color Picker only lets you select shades of grey. This almost always means the image is in Grayscale mode. Go to Image > Mode and confirm it is set to RGB Color. Another cause is having a layer mask selected instead of the image thumbnail. Click the layer thumbnail in the Layers panel to make sure you are painting on actual pixel data, not the mask.
The Color Replacement Tool is a practical way to handle how to replace color in Photoshop when speed matters more than layer-based flexibility. It shines on simple, well-defined objects. Where it falls short is matching an exact hex value or brand color, because you are eyeballing the Foreground swatch rather than entering precise numbers. For that level of accuracy, a Solid Color fill layer paired with the right blend mode gives you pixel-perfect control.
Step 4: Apply a Solid Color Fill Layer for Exact Color Values
Brand guidelines do not say "make it roughly blue." They say #1A73E8. Product catalogs, ecommerce listings, and marketing assets all demand exact color values, and eyeballing a Foreground swatch or dragging a Hue slider will never get you there reliably. This is where a Solid Color fill layer paired with the right blend mode becomes essential. It is the professional technique for how to change color of object in Photoshop when precision is non-negotiable.
The concept is straightforward: you place a flat layer of your exact target color above the object, then use a blend mode to merge that color with the original texture, lighting, and shadow detail underneath. The result looks realistic because Photoshop handles the math of combining color data with luminosity data on a per-pixel basis. You get the exact hex code you need without flattening the image into a lifeless block of color.
Create a Solid Color Fill Layer
With your object selection active (or a saved selection loaded from the Channels panel), follow these steps:
- Go to Layer > New Fill Layer > Solid Color, or click the Create New Fill or Adjustment Layer icon at the bottom of the Layers panel and choose Solid Color.
- The Color Picker opens immediately. Locate the hexadecimal input field at the bottom (marked with a # symbol) and type or paste your exact hex code. You can also enter precise RGB values in the R, G, and B fields on the right side of the picker.
- Click OK. Photoshop creates a fill layer with a mask automatically shaped to your selection, so the solid color only covers the target object.
- If you created the fill layer without an active selection, clip it to the object layer instead. Hold Alt (Windows) or Option (Mac) and click between the Solid Color layer and the layer below it. The small downward arrow confirms the clipping mask is active.
At this point, your object is covered by a flat block of color. It looks completely wrong, and that is expected. The magic happens when you change the blend mode.
Apply the Right Blend Mode for Realistic Results
The blend mode tells Photoshop how to combine the solid color layer with the pixel data underneath. Each mode uses a different formula, and picking the right one is the difference between a natural-looking replace color result and something that looks painted on. Adobe's blending mode documentation describes dozens of options, but for color replacement work, four modes handle the vast majority of scenarios.
| Blend Mode | What It Changes | Best Use Case |
|---|---|---|
| Color | Replaces hue and saturation while preserving the original luminosity (highlights, shadows, texture) | General-purpose color changes on most objects |
| Hue | Changes only the hue, leaving both saturation and luminosity untouched | Subtle shifts where you want to keep the original color intensity |
| Multiply | Darkens the underlying layer by multiplying it with the fill color | Applying color to white or very light objects |
| Screen | Lightens the underlying layer by screening the fill color over it | Applying color to dark or black objects |
For most everyday edits, Color mode is the safest starting point. It swaps the hue and saturation of every pixel beneath it while keeping the original brightness values intact. That means highlights still gleam, shadows still recede, and fabric weave or surface texture remains fully visible. You are essentially telling Photoshop: "Use my exact color, but keep the light and dark detail from the original photo."
Hue mode is more conservative. It only rotates the color without touching saturation, so a muted olive jacket stays muted even after shifting to blue. This is useful when the original saturation already looks correct and you just need to change the colour of an object in Photoshop without making it more or less vivid.
Multiply and Screen serve a different purpose entirely. They are designed for neutral-toned objects where Color mode produces weak or washed-out results. Multiply darkens, which makes it ideal for adding color to white surfaces. Screen lightens, which works for injecting color into dark surfaces. These two modes become critical in the next section when dealing with white, black, and gray objects specifically.
To change the blend mode, select the Solid Color fill layer in the Layers panel and use the dropdown menu at the top left (it defaults to Normal). You can also hover over each option in the dropdown to see a live preview directly on the canvas before committing.
Fine-Tune Opacity for Natural Blending
Even with the correct blend mode, a 100% opacity fill layer can sometimes look too intense or too uniform. Real-world objects rarely display a single, perfectly consistent color. Light falls unevenly, fabric dye varies slightly across folds, and surface finishes shift between matte and glossy areas.
Reducing the fill layer's Opacity slider (found at the top right of the Layers panel) lets some of the original color data bleed through, creating a more organic result. Try dropping opacity to 85-90% as a starting point. For color replacement tool Photoshop workflows where the original object had a strong color of its own, you might go as low as 70% to let the underlying tones add warmth or coolness to the final output.
There is also a Fill slider directly below Opacity. For Solid Color layers, Opacity and Fill behave identically in most blend modes. The distinction matters more when layer styles like Drop Shadow are involved, but for pure color changes, adjusting Opacity alone is sufficient.
The real advantage of this entire method is that it is completely non-destructive. Double-click the color swatch on the fill layer at any time to reopen the Color Picker and swap in a different hex code. Change the blend mode with a single click. Adjust opacity with a slider drag. Your original image data stays untouched on the layer below, and every parameter remains editable. For product photography teams producing the same item in multiple colorways, this means building the setup once and swapping hex codes in seconds for each variant.
This technique handles saturated and moderately toned objects with ease. But what happens when the source object has no color at all? White sneakers, black leather bags, gray concrete walls: these neutral tones break every method covered so far, and they require a fundamentally different approach.
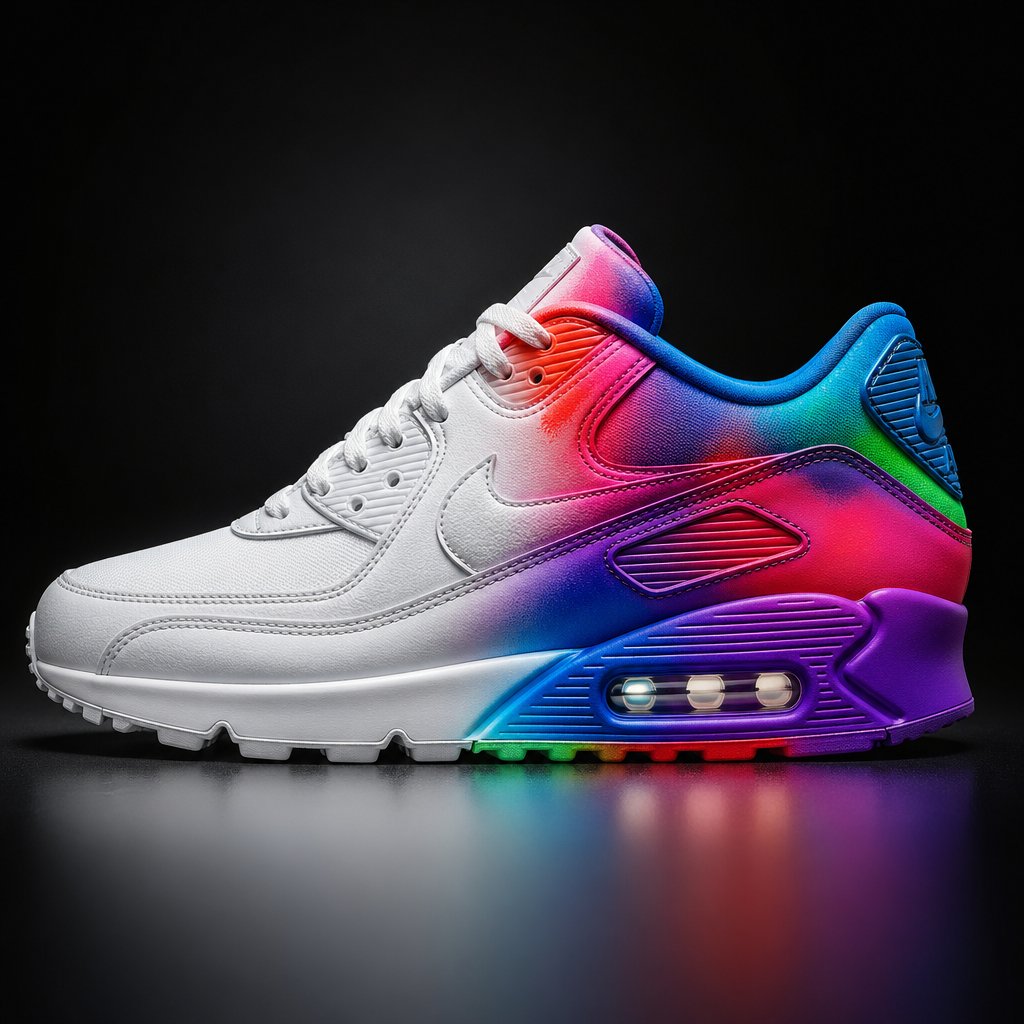
Step 5: Change Neutral Colors Like White, Black, and Gray
This is the step where most Photoshop color change tutorials quietly fall apart. You follow every instruction perfectly, drag the Hue slider with confidence, and nothing happens. The white t-shirt stays white. The black handbag stays black. The gray hoodie barely flickers. You try choose another color in Photoshop, bump the saturation up, drag the slider further, and still get nothing useful. It is not a bug, and it is not user error. It is a fundamental limitation of how hue-based adjustments work on neutral tones, and understanding the reason behind it is the key to solving it.
Why Hue Sliders Do Not Work on Neutral Colors
Every color in Photoshop is built from three components: hue (the actual color), saturation (the intensity of that color), and lightness (how bright or dark it is). When you look at a red jacket, all three components are active. The hue is red, the saturation is high, and the lightness sits somewhere in the midrange. Dragging the Hue slider rotates that red to blue, green, or any other position on the color wheel because there is existing hue data to rotate.
White, black, and gray objects have zero saturation. They sit at the dead center of the color wheel with no hue information at all. Rotating a value of zero still gives you zero. That is why the Hue slider produces no visible change, and why cranking the Saturation slider on a neutral tone just introduces ugly, uneven noise rather than a clean color. The pixel data simply has nothing for Photoshop to grab onto and shift.
This is the root cause of frustration for anyone learning how to change a color in Photoshop on product shots, fashion photography, or interior design mockups where white and black objects are everywhere. The fix is not a different slider setting. It is a completely different method: adding color from an external source rather than trying to transform color that does not exist.
Use a Solid Color Layer with Multiply or Screen Blend Modes
The solution builds on the Solid Color fill layer technique from the previous step, but swaps in blend modes specifically designed to interact with neutral tones. Instead of relying on the Color blend mode (which still needs some saturation in the base layer to produce a strong result), you use Multiply, Screen, or Color depending on whether the source object is white, black, or gray.
Here is how to change colors in Photoshop for each neutral scenario:
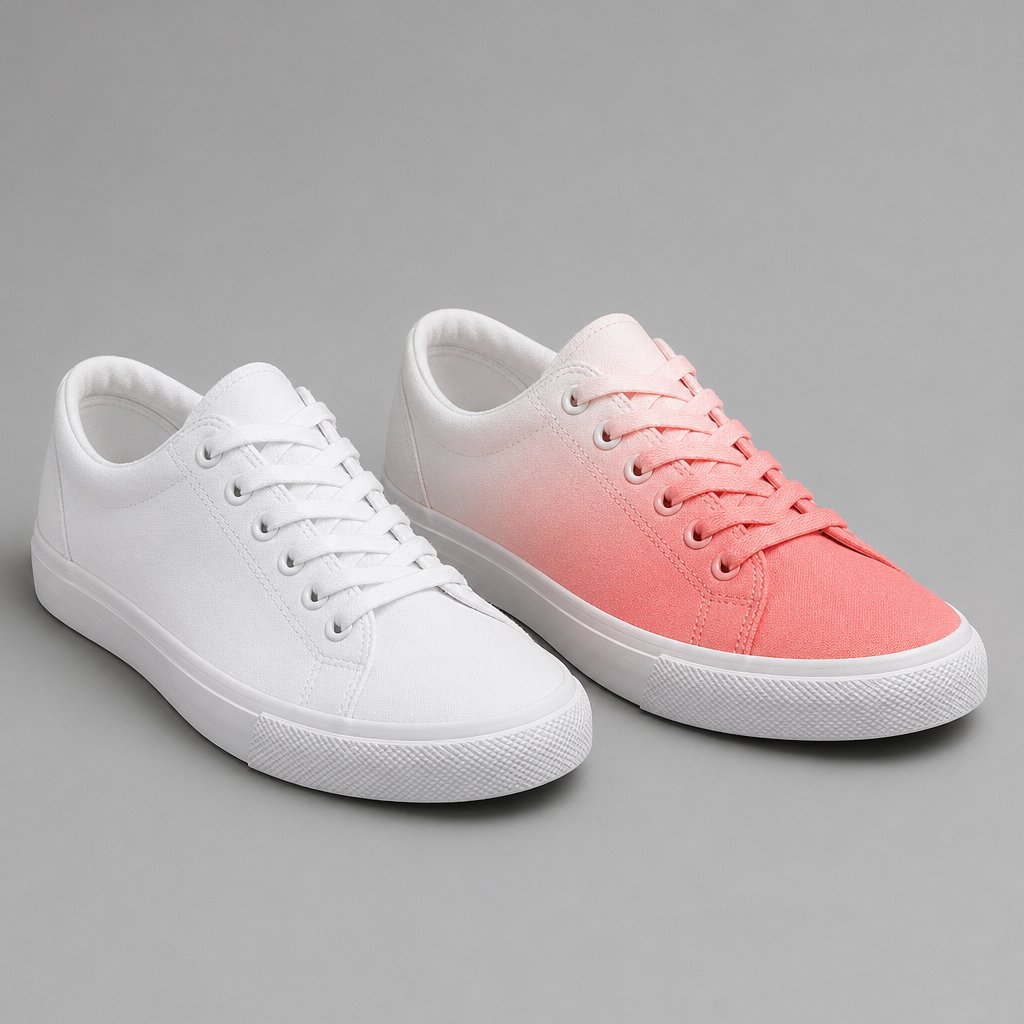
For white objects: Create a Solid Color fill layer set to your target color and change the blend mode to Multiply. Multiply works by multiplying the luminosity of the base layer by the blend layer. White pixels (luminosity value of 1) multiplied by any color return that exact color. Lighter areas of the object pick up the target hue while preserving the natural highlights and fabric texture underneath. The result is a convincing color replacement photoshop users can achieve without painting a single brushstroke.
For black objects: Multiply will not help here because black pixels (luminosity value of 0) multiplied by anything still return black. Instead, set the Solid Color fill layer to Screen blend mode. Screen does the opposite of Multiply: it lightens the base layer by screening the fill color over it. Black pixels become transparent to the Screen calculation, allowing the target color to emerge while darker shadow areas retain depth. You may need to increase the fill layer opacity or even duplicate it to push enough color into very dark surfaces.
For gray objects: Gray sits between the two extremes, so the Color blend mode often works here, but you will need to boost the result. After applying the Solid Color layer in Color mode, add a Hue/Saturation adjustment layer clipped above it and push the Saturation slider to +20 to +40. This compensates for the low saturation in the original gray pixels and gives the new color enough intensity to read as vivid rather than washed out.
Use this quick-reference table to image replace color on any neutral-toned object:
| Source Color | Recommended Blend Mode | Notes |
|---|---|---|
| White | Multiply | Preserves highlights and texture. Lower opacity for pastel results. |
| Black | Screen | Lightens dark pixels to reveal color. May need a duplicate layer for intensity. |
| Light gray | Multiply or Color | Multiply for stronger saturation; Color for a subtler shift. |
| Medium gray | Color | Boost with a clipped Hue/Saturation layer at +20 to +40 Saturation. |
| Dark gray | Screen or Color | Screen pushes more color into shadows; Color keeps the tone closer to the original. |
Combine with Curves for Depth and Realism
Applying a Solid Color layer with Multiply or Screen gets the color onto the object, but the result can look flat. Multiply tends to darken the overall image slightly and compress the tonal range, while Screen can blow out highlights and reduce contrast. The object ends up looking like it was dipped in tinted water rather than dyed or manufactured in that color.
A Curves adjustment layer placed directly above the color layer fixes this. Clip it to the same object layer so it only affects the recolored area, then pull the curve into a gentle S-shape: drag a point in the upper quarter slightly upward to brighten highlights, and drag a point in the lower quarter slightly downward to deepen shadows. This restores the contrast that the blend mode flattened and gives the color a sense of three-dimensional depth.
For white objects recolored with Multiply, focus on lifting the highlights. The Multiply calculation naturally darkens everything, so pulling the upper portion of the curve back up recovers the bright spots where light would naturally hit the surface, like the toe cap of a white sneaker or the shoulder seam of a white shirt. According to Adobe's Curves documentation, moving a control point in the upper portion of the curve upward lightens highlights, while adjusting the lower portion controls shadow depth.
For black objects recolored with Screen, do the opposite: deepen the shadows by pulling the lower portion of the curve downward. Screen lightens aggressively, and without this correction the object loses the shadow detail that makes it look solid and real.
You can also target individual color channels within the Curves adjustment. If the Multiply result skews too warm or too cool, switch the Curves channel dropdown from RGB to the specific channel that needs correction (Red, Green, or Blue) and make a small adjustment. This level of control is what separates a quick mockup from a production-ready image.
If a Hue slider produces no visible change on your object, the problem is almost always zero saturation in the source pixels. Switch to a Solid Color fill layer with Multiply or Screen, and the color will appear immediately.
Getting the color onto a neutral object is only half the challenge. The edges where the new color meets the original background are where amateur results reveal themselves. Color bleeding, fringing, and hard transitions all need targeted cleanup, and that is where layer masks and advanced blending controls take over.
Step 6: Refine Your Results with Layer Masks
The color is on the object. The blend mode looks right. But zoom in to 100%, and you will almost certainly spot problems: color spilling onto the background along one edge, a thin halo where the selection was not quite tight enough, or a hard transition that screams "this was edited." These artifacts are the line between an amateur result and a professional one, and layer masks are how you erase that line. Knowing how to change the colour of something in Photoshop is only half the skill. Knowing how to clean up the edges is the other half.
Paint a Layer Mask to Protect Surrounding Areas
Every adjustment layer and Solid Color fill layer you created in the previous steps already has a layer mask attached to it, visible as the black-and-white thumbnail next to the layer icon in the Layers panel. White areas on the mask reveal the color change. Black areas hide it. Your job is to paint black over any spot where the new color should not appear.
Click the mask thumbnail to make sure it is selected (you will see a thin border around it). Set your Foreground color to black by pressing D on your keyboard, then select the Brush Tool (B). Now paint directly on the canvas over any area where color is bleeding into the background or onto a neighboring object. The color change disappears wherever you paint.
Brush hardness matters more than most people realize. A hard brush (80-100% hardness) creates a crisp, defined edge, which works well along straight lines like the seam of a jacket or the rim of a product. A soft brush (10-30% hardness) feathers the transition gradually, which is better for organic boundaries like skin meeting fabric or foliage overlapping a wall. You can toggle between painting black (hide) and white (reveal) by pressing X to swap Foreground and Background colors, making it easy to correct mistakes without reaching for Undo.
Fix Color Bleeding and Edge Artifacts
Manual brushwork handles localized problems, but when color bleeding runs along the entire perimeter of an object, painting every pixel by hand is slow and inconsistent. Photoshop offers filter-based solutions that adjust the entire mask boundary at once.
The Maximum and Minimum filters are the fastest way to contract or expand a mask edge by a precise amount. Click the layer mask thumbnail, then go to Filter > Other > Minimum to shrink the mask inward (hiding the outermost fringe of color) or Filter > Other > Maximum to push it outward. A radius of 1 to 2 pixels is usually enough. Set the Preserve option to Roundness for organic shapes or Squareness for hard-edged objects like boxes or electronics.
For softer corrections, open the Properties panel with the mask selected. Two sliders give you real-time control:
- Feather — softens the mask edge by blurring the boundary. A value of 0.5 to 1.5 pixels smooths out jagged transitions without making the edge look mushy. This is especially useful when you photoshop cc replace color on objects with slightly imprecise initial selections.
- Density — controls the maximum opacity of the masked area. Lowering Density from 100% to around 90% lets a hint of the original color show through at the edges, which can make the transition look more natural on translucent or semi-reflective surfaces.
Here are the most common refinement problems and their mask-based fixes:
- Thin color halo around the object — Apply Filter > Other > Minimum at 1-2 px radius to contract the mask edge inward.
- Color spilling onto the background — Paint the mask with a hard black brush along the affected edge, or use Select > Modify > Contract before creating the adjustment layer.
- Harsh, unnatural edge transition — Increase the Feather slider in the Properties panel to 0.5-1.5 px.
- Spotty artifacts or "snow" inside the mask — Apply a small Gaussian Blur to the mask, then use Levels (Ctrl+L / Command+L) on the mask to push the black and white points inward, cleaning up stray gray pixels.
- Color change looks too strong at highlights or shadows — Use the Blend If sliders (covered below) to automatically exclude those tonal ranges.
Use Blend If Sliders for Automatic Masking
Sometimes the problem is not the edge of the selection but specific tones within it. Imagine you replace color in image areas that include both the fabric of a shoe and its glossy white sole. The color change looks great on the fabric but turns the sole an unnatural tint. Painting a mask around every highlight is tedious. Blend If handles this automatically.
Double-click the empty space to the right of your adjustment or fill layer in the Layers panel. This opens the Layer Style window. At the bottom, under Blending Options, you will find two gradient bars labeled Blend If.
The Underlying Layer slider is the one you want. Drag the white point slider to the left, and the brightest pixels from the original image start showing through the color change. This effectively excludes highlights from the recolor without touching a brush. To avoid a harsh cutoff, hold Alt (Windows) or Option (Mac) and click the slider to split it in half. Drag the two halves apart to create a smooth, gradual transition between affected and unaffected tones.
The same logic works in reverse. Drag the black point slider to the right to exclude the darkest shadows from the color change, preserving deep shadow detail that would otherwise look muddy or oversaturated. This is a powerful way to photoshop cc replace color on complex objects while keeping specular highlights and deep creases looking natural, all without a single manual brushstroke.
Between manual mask painting, filter-based edge corrections, and Blend If's automatic tonal exclusions, you have a complete toolkit for turning any image color replacer result from "close enough" into production-ready. Still, even with these refinements, certain problems keep recurring. Flat-looking output, unexpected grey results, and persistent edge halos each have specific root causes and targeted fixes worth knowing before you start troubleshooting from scratch.
Step 7: Fix Common Color Change Problems
You followed every step, picked the right blend mode, refined the mask, and the color still looks off. Maybe the object appears flat and plasticky. Maybe the output is stubbornly grey no matter what color you select. Maybe a thin bright line traces the entire edge of your selection like a neon outline. These are the three problems that send people back to search engines after their first attempt fails, and each one has a specific, fixable cause. Before you scrap the edit and start over, run through these targeted fixes.
Result Looks Flat or Plastic
This is the most common complaint when people change color of object in Photoshop for the first time. The new color is technically correct, but the object looks like it was spray-painted in a single flat coat. All the subtle tonal variation, the way light wraps around a fold of fabric or catches the curve of a product surface, has vanished.
The usual culprit is the Lightness slider in the Hue/Saturation adjustment. Dragging Lightness in either direction overwrites the original luminosity data, which is the information that encodes texture, depth, and three-dimensionality. Push Lightness up, and highlights and shadows compress into a washed-out midtone. Push it down, and everything collapses into a muddy dark mass. In both cases, the object loses the light-and-shadow interplay that makes it look real.
The fix: leave the Lightness slider at 0. If you need the color to appear brighter or darker, handle that with a separate Curves or Levels adjustment layer clipped above the color change. This way, you control brightness independently without destroying the luminosity detail underneath.
The second cause is using the wrong blend mode on a Solid Color fill layer. If the layer is set to Normal instead of Color, the fill completely covers the original pixel data. There is no luminosity information showing through, so you get a flat rectangle of color with no texture. Switch the blend mode to Color, and Photoshop immediately preserves the original highlights and shadows while applying only the hue and saturation from your fill layer. The Color blend mode applies both the hue and saturation of the blend layer to the luminosity of the base layer, which is exactly what keeps surface detail intact.
Color Change Only Shows Grey
Few things are more frustrating than picking a vivid blue or red in the Color Picker and watching the result render as a dull grey on the canvas. If you are wondering how do I change a color in Photoshop without getting this washed-out output, check these three things in order:
1. Image Mode. Go to Image > Mode and look at which option is checked. If the image is set to Grayscale, Photoshop physically cannot display color information. Every hue you apply gets converted to a grey value on the spot. Switch it to RGB Color. Photoshop will ask if you want to discard color information or merge layers. Click OK, and the full color spectrum becomes available again. If the image is in CMYK mode, some blend modes and tools behave differently than expected. For screen-based work, RGB is almost always the correct choice.
2. Layer lock status. Check the Layers panel for a small lock icon on the layer you are editing. A fully locked layer prevents any pixel changes, and some partial lock states restrict color data specifically. Click the lock icon to toggle it off before applying your color change.
3. Foreground color swatch. If you are using the Color Replacement Tool or painting on a layer, glance at the Foreground color swatch at the bottom of the toolbar. A swatch that looks colored on a high-DPI display might actually be set to a near-neutral tone like #808080. Click it, confirm the hex value, and pick a fully saturated color. Also verify you have not accidentally selected the layer mask thumbnail instead of the layer itself. Painting color onto a mask only adds white or grey values to the mask, producing no visible color change on the object.
Edges Show Halos or Fringing
A thin bright or dark line tracing the boundary of your recolored object is an edge halo. It is one of the most visible signs of a color change, and it almost always traces back to the selection rather than the color method. Edge halos can be caused by a selection that extends slightly beyond the object boundary, picking up a sliver of background pixels that then get recolored along with the object. They can also appear when the original image has slight overexposure along high-contrast edges, creating bright fringing that the color change makes more obvious.
The most reliable preventive fix is to contract the selection before applying the color change. Go to Select > Modify > Contract and enter 1 to 2 pixels. This pulls the selection boundary inward just enough to exclude the problematic edge pixels without visibly shrinking the recolored area. Apply this before creating your adjustment or fill layer, and the halo disappears at the source.
If the color change is already applied and you do not want to rebuild it, use the Decontaminate Colors option inside the Select and Mask workspace. Load your selection, open Select > Select and Mask, scroll to the bottom of the Output Settings, and check Decontaminate Colors. This replaces the fringe pixels with colors sampled from the fully selected interior of the object, effectively painting over the halo with matching tones. Adjust the Amount slider to control how aggressively Photoshop replaces those edge pixels.
Most color change failures trace back to the selection quality, not the color method itself. If the result looks wrong, check the selection edges before adjusting any color sliders.
Before you start over on any color change edit, run through this quick checklist:
- Check Image Mode — Confirm the file is set to RGB Color, not Grayscale or CMYK (Image > Mode).
- Check the blend mode — Make sure your adjustment or fill layer is set to Color, Hue, Multiply, or Screen rather than Normal.
- Check the Lightness slider — If using Hue/Saturation, verify Lightness is at 0. Adjust brightness with a separate Curves layer instead.
- Check the selection edges — Zoom to 100% and inspect the boundary. Contract by 1-2 pixels or apply Decontaminate Colors if halos are visible.
- Check which layer is selected — Confirm you are editing the layer thumbnail, not the mask. Click the correct thumbnail in the Layers panel.
These five checks resolve the vast majority of issues when you photoshop change color of object and the result does not match expectations. Most of the time, the fix takes less than a minute once you know where to look. With these problems solved, the remaining question is not about technique but about scale: what happens when you need to apply these same color changes across dozens or hundreds of images?
Scale Your Color Changes for Multiple Images
Changing the color of an object in Photoshop on a single image is satisfying. Doing it on fifty product photos by Friday is a different story. Every method covered in this guide, from Hue/Saturation layers to Solid Color fills with Multiply blending, works beautifully on individual files. But ecommerce teams, product marketers, and creative operators rarely deal with just one image. A typical product launch might require the same sneaker in eight colorways, each needing clean selections, precise hex values, mask refinements, and final quality checks. Multiply that across an entire catalog, and the manual Photoshop workflow becomes a bottleneck rather than a solution.
The techniques themselves are not the problem. The repetition is. Each image demands the same sequence of steps: build a selection, create an adjustment or fill layer, dial in the blend mode, refine the mask, check the edges. Even with saved selections and Photoshop Actions, you are still opening each file individually, verifying the selection fits correctly (product angles shift, lighting varies between shots), and tweaking parameters that rarely transfer perfectly from one image to the next. For a team trying to replace color photo by photo across hundreds of SKUs, the time cost adds up fast.
When Photoshop Is the Right Choice
Photoshop remains the best tool for specific scenarios, and nothing in this section changes that. If your project involves any of the following, the manual methods from Steps 1 through 7 are exactly where you should be:
- One-off creative projects — editorial composites, social media graphics, or portfolio pieces where each image gets individual art direction.
- Complex composites with multiple elements — scenes where the recolored object interacts with reflections, transparency, or overlapping subjects that require manual mask painting and Blend If adjustments.
- Pixel-level precision — retouching work where you need to control exactly how color interacts with specific highlights, shadow pockets, or surface textures on a per-pixel basis.
- Mixed-material objects — products with multiple fabrics, finishes, or components that each need a different blend mode or opacity setting.
In these cases, the granular control Photoshop offers is irreplaceable. You are making creative decisions that require human judgment at every step, and no automated tool can replicate that level of nuance. The photoshop color replacement workflow you have built through this article gives you complete authority over every pixel.
When to Use a Dedicated Color Change Tool Instead
The calculus shifts when the task is volume, not complexity. Imagine you have a single well-lit product photo and you need to generate ten color variants for an ecommerce listing. Each variant requires the same object isolated, the same texture preserved, and a different target color applied. The creative decisions are minimal. The repetitive execution is massive.
This is where dedicated color change tools earn their place in the workflow. Snappyit's Color Change tool is built specifically for this scenario. You upload a product image, select the area to recolor, enter a hex code or pick from a palette, and the tool generates a realistic color variant in seconds. It handles object detection, edge refinement, and texture preservation automatically, which means you skip the manual selection-building and mask-painting steps that consume most of the time in Photoshop.
For product catalogs where the same item needs multiple colorways, this approach can turn repeated manual editing into a repeatable workflow. Keep one approved mask, leave your adjustment layers editable, and review every exported variant against the real product color before publishing.
The honest tradeoff? A dedicated tool will not give you the same per-pixel control as Photoshop. You cannot manually paint a mask to exclude a specific highlight, split Blend If sliders to protect shadow detail, or stack multiple adjustment layers with different blend modes for a single object. For straightforward product color changes on clean, well-lit photos, that level of control is rarely necessary. For complex creative work, it is essential.
Here is how the two approaches compare side by side:
| Factor | Dedicated Color Change Tool | Manual Photoshop Workflow |
|---|---|---|
| Speed | Seconds per variant | 15-30 minutes per variant |
| Precision | High for standard product shots | Pixel-level control for any scenario |
| Learning Curve | Minimal, upload-and-go interface | Moderate to advanced, requires layer and blend mode knowledge |
| Best For | Batch product variants, ecommerce catalogs, rapid prototyping | Creative composites, complex edits, mixed-material objects |
The smartest workflow is not choosing one over the other. It is knowing when each tool fits. Use Photoshop when you need to how to change a colour of an image in Photoshop with full creative control, layered adjustments, and manual refinement. Use a dedicated tool when you need ten color variants of the same product shot by end of day. The techniques you have built through this article give you the foundation to handle any color change scenario. The decision now is simply whether the job calls for a scalpel or a production line.
Create Color Variants Faster
Photoshop is still the right place for deep manual control. When you need many ecommerce colorways from the same clean product photo, Snappyit can generate review-ready variants faster so you only spend manual time on the images that need it.
More Resources on Product Color Editing
 Related guideHow to Change Color of an Image in PhotoshopCompare manual Photoshop color edits with AI-assisted recolor workflows for product photos.
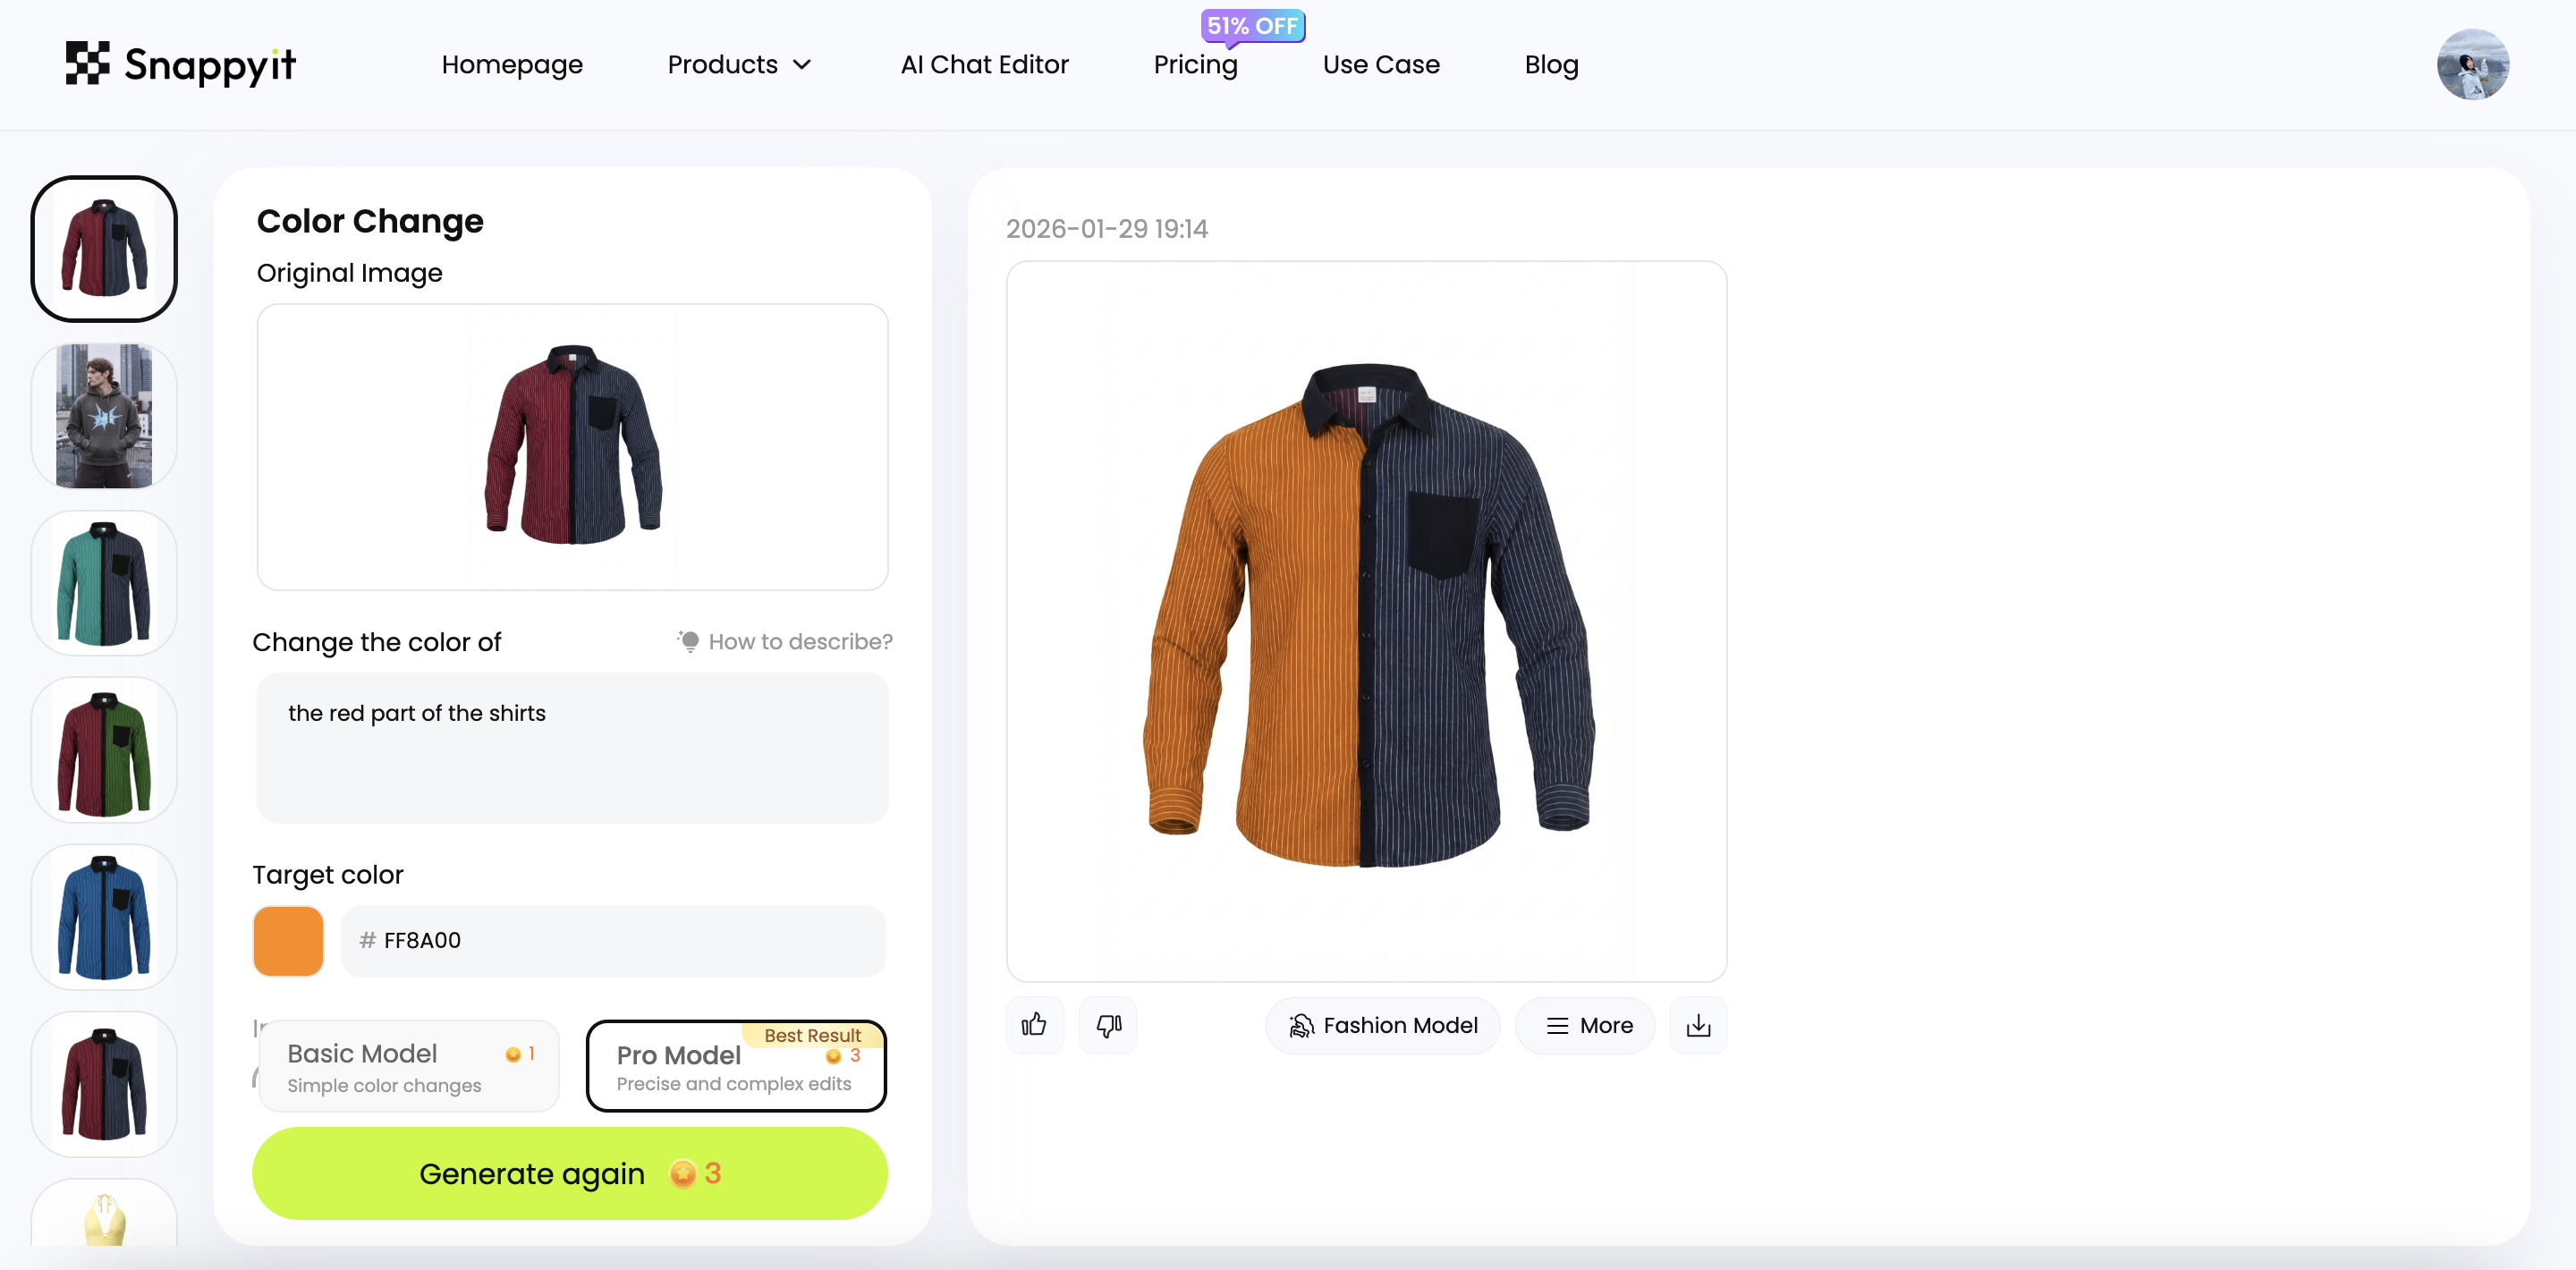 Related guideBest AI Recolor Tools for Product PhotosSee which AI recolor tools fit ecommerce colorways, catalog updates, and marketplace assets.
 Related guideAI Color Change ToolGenerate product color variants online when manual masking would slow down the catalog workflow.
Frequently Asked Questions About Changing Colors in Photoshop
1. Why does my color change look flat or plastic in Photoshop?
A flat-looking color change usually happens when you adjust the Lightness slider in Hue/Saturation or leave a Solid Color fill layer set to Normal blend mode. The Lightness slider overwrites luminosity data that encodes texture and depth. Keep it at 0 and handle brightness separately with a Curves adjustment layer. For fill layers, switch the blend mode to Color so Photoshop preserves the original highlights and shadows while applying only your new hue and saturation values.
2. How do I change a white or black object to a different color in Photoshop?
Standard Hue/Saturation adjustments fail on white, black, or gray objects because these neutral tones have zero saturation — there is no hue data to rotate. Instead, create a Solid Color fill layer with your target hex code and set the blend mode to Multiply for white objects or Screen for black objects. Multiply darkens white pixels to your chosen color while preserving texture, and Screen lightens black pixels to reveal the new hue. Add a Curves layer above to restore contrast and depth.
3. Why can I only select grey when choosing a color in Photoshop?
This almost always means your image is in Grayscale mode, which physically cannot display color information. Go to Image > Mode and switch to RGB Color. Other causes include having a layer mask selected instead of the layer thumbnail (masks only accept black, white, and grey values) or a locked layer preventing color edits. Click the layer thumbnail directly in the Layers panel and confirm the lock icon is toggled off before applying your color change.
4. What is the fastest way to change an object's color in Photoshop?
For quick, simple edits, the Color Replacement Tool is the fastest option. It is nested under the Brush Tool in the toolbar. Set your foreground color to the target hue, choose Sampling mode Once for solid-toned objects, set Tolerance to 30%, and paint directly over the area. For non-destructive speed on well-defined objects, a Hue/Saturation adjustment layer with an AI-generated selection from the Object Selection Tool takes under a minute and remains fully editable afterward.
5. How do I change colors on multiple product images without repeating the process manually?
Photoshop excels at single-image precision but becomes a bottleneck at scale. For batch color changes across dozens of product photos, dedicated tools like Snappyit's Color Change tool (snappyit.ai/color-change) automate object detection, edge refinement, and texture preservation in seconds per variant. You upload the image, select the target area, enter a hex code, and receive a realistic color variant without building selections or masks manually. Use Photoshop for complex creative edits and a dedicated tool when volume and speed matter most.