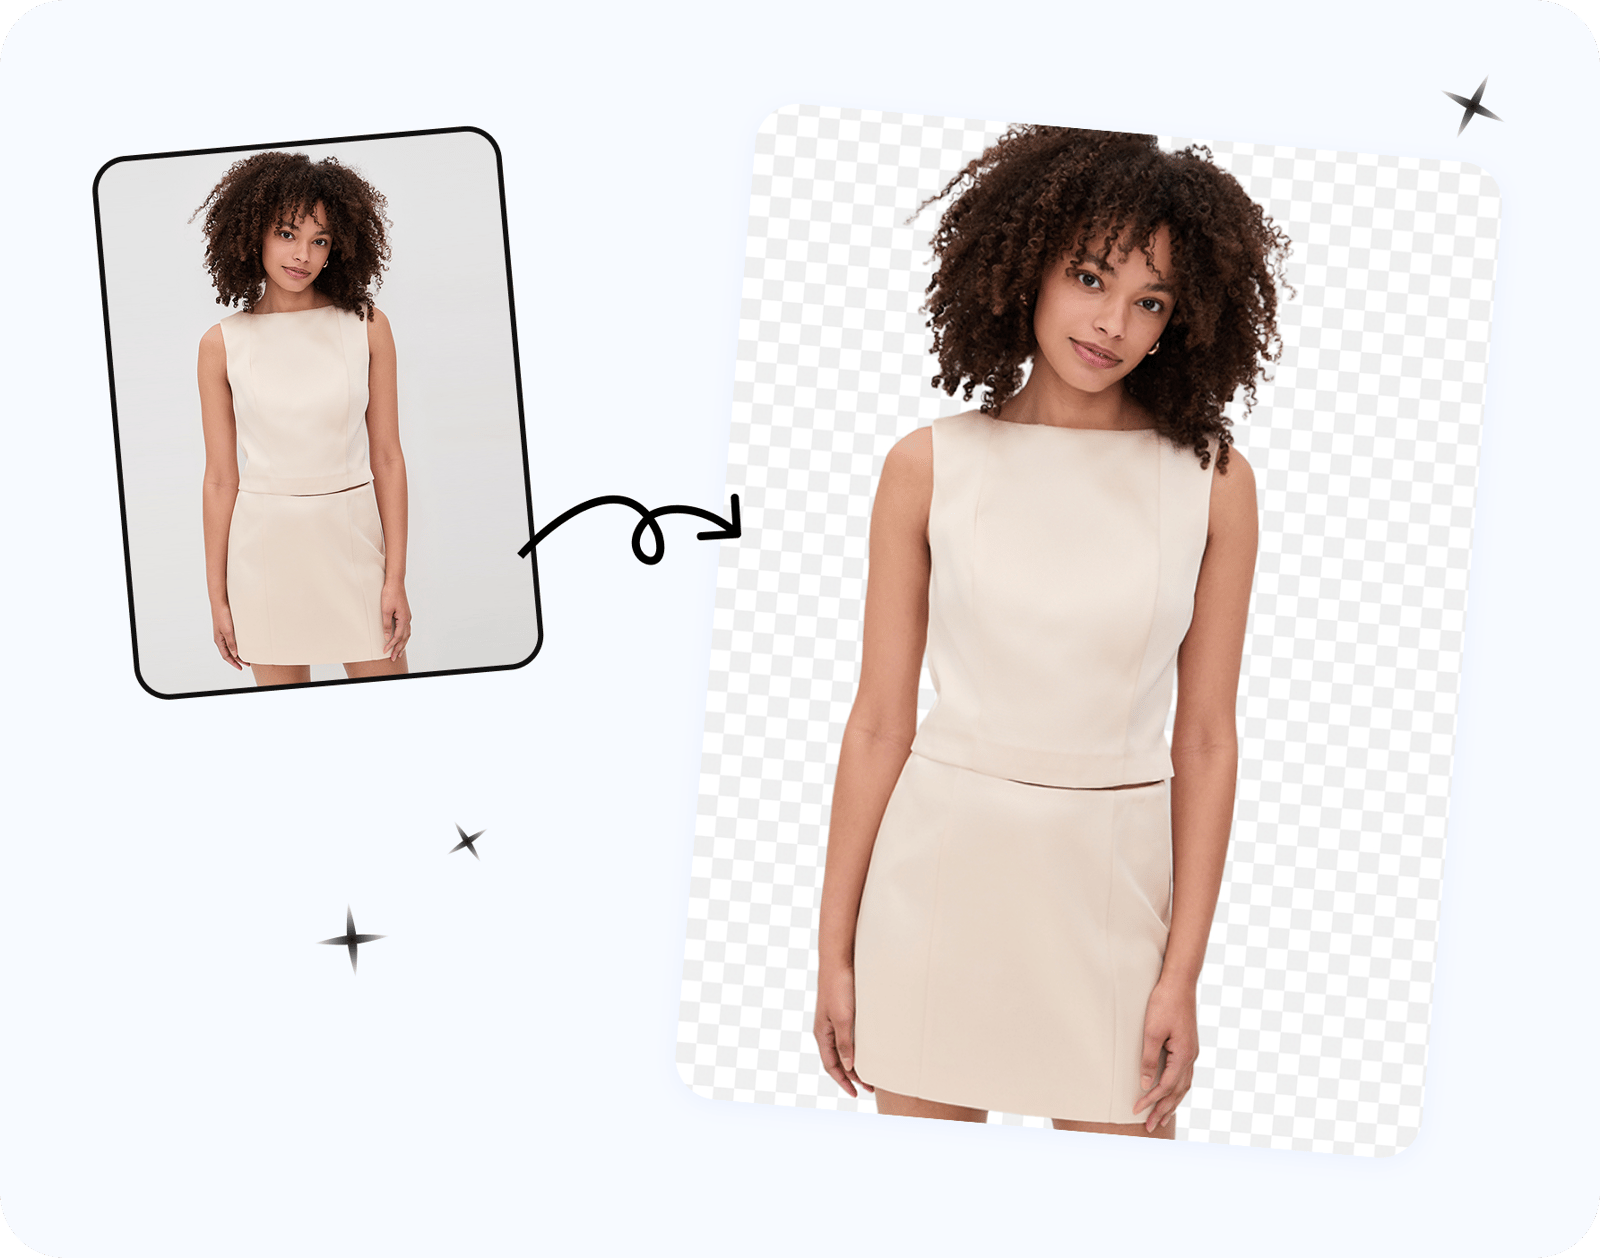

Quick Answer: Remove Product Backgrounds Without Losing Resolution
A background remover can preserve the canvas dimensions of a product photo, but the downloaded file—not the editor preview—is what matters. Compare its pixel width and height with the source, then check the cutout edges on the background customers will see.
We uploaded the same 1070 × 1458 chiffon-dress photo to five background removers in August 2026 and measured each saved file. Two downloads matched the upload dimensions; three came back smaller.
- Check pixel dimensions, not DPI. Compare the original and downloaded width × height.
- Keep a full-size PNG master. It preserves transparency and avoids another lossy JPEG save.
- Inspect the edge on the background you will use. Hair, lace, fur and sheer fabric can hide halos on a checkerboard preview.
- Create marketplace versions from the master. Do not enlarge a reduced free download and expect the missing detail to return.
How to Remove a Product Background Without Losing Quality
A clean product cutout depends on both file resolution and mask quality. Background removal does not need to shrink the canvas, but it does change partly transparent pixels around the subject. Most disappointing exports come from a smaller free download, the wrong format, or an edge mask that removed product detail.
Why Background-Removed Images Lose Quality
1. The free download was downsized
Some tools show a sharp editor preview but return a smaller free file. The quickest diagnosis is to compare the saved width and height with the upload. A 1070 × 1458 upload should still be 1070 × 1458 if the tool preserved its dimensions.
2. The file was saved in the wrong format
JPEG does not support transparency and uses lossy compression. For a reusable cutout, download PNG and keep that file as the master. Export JPEG only after adding a solid background for a marketplace or campaign that needs one.
3. The mask damaged fine product edges
A file can keep its original dimensions and still have weak edges. Check lace, fur, fringe, thin straps, reflective hardware and sheer fabric at 100% zoom. Place the cutout on white and on a contrasting color; that makes leftover background tint and missing details easier to see.
Five-Step Background Removal Workflow
- Start with your best original. Upload the full-resolution source, not a screenshot, messaging-app copy or repeatedly saved JPEG. Convert to sRGB first if needed.
- Remove the background without resizing. Let the tool isolate the product on the original canvas.
- Refine difficult edges. Review hair, lace, fur, fringe and translucent fabric; use keep and remove brushes where available.
- Measure the downloaded file. Compare its pixel width and height with the original before using it in a listing.
- Save the right master. Keep the full-size transparent PNG, then generate smaller WebP or solid-background JPEG versions from that master.
How to Remove a Clothing Background for Free
Clothing needs a closer mask review than a box or bottle. Start with the original garment photo and run the automatic cutout, then inspect lace, ruffles, fringe, thin straps and sheer fabric at 100% zoom. If the photo uses a mannequin or dress form, decide whether it belongs in the final listing: automatic tools may treat it as part of the garment, so remove it manually without brushing away fabric.
Download the free result as a transparent PNG, check its saved dimensions, and place it on both white and a contrasting color. The second background often reveals pale fabric loss or a colored halo that the checkerboard preview hides. Approve the PNG as your catalog master only after those checks.
The 60-second resolution check
- Read the original width and height in Finder, Windows Properties or your image editor.
- Download the background-removed file and read the saved dimensions in the same place.
- If either number is smaller, the export was downscaled. Check the tool's current free-tier limits before processing the rest of your catalog.
- If the dimensions match, inspect the subject at 100% zoom. Resolution and edge quality are separate checks.
If a download is smaller, return to the original and use an export that preserves more pixels. Upscaling can make the file larger, but it cannot recreate every texture discarded by the smaller export.
The workflow in Snappyit
We used the same sheer chiffon dress from the comparison below. The source was 1070 × 1458 px, and the dress form made the edge test more demanding than a simple product shot.
Steps 1 and 2 — upload and run the automatic cutout. The automatic result kept the ruffles and sheer hem, but it also kept the dress form. Every tool in this five-tool test treated the form as part of the garment.
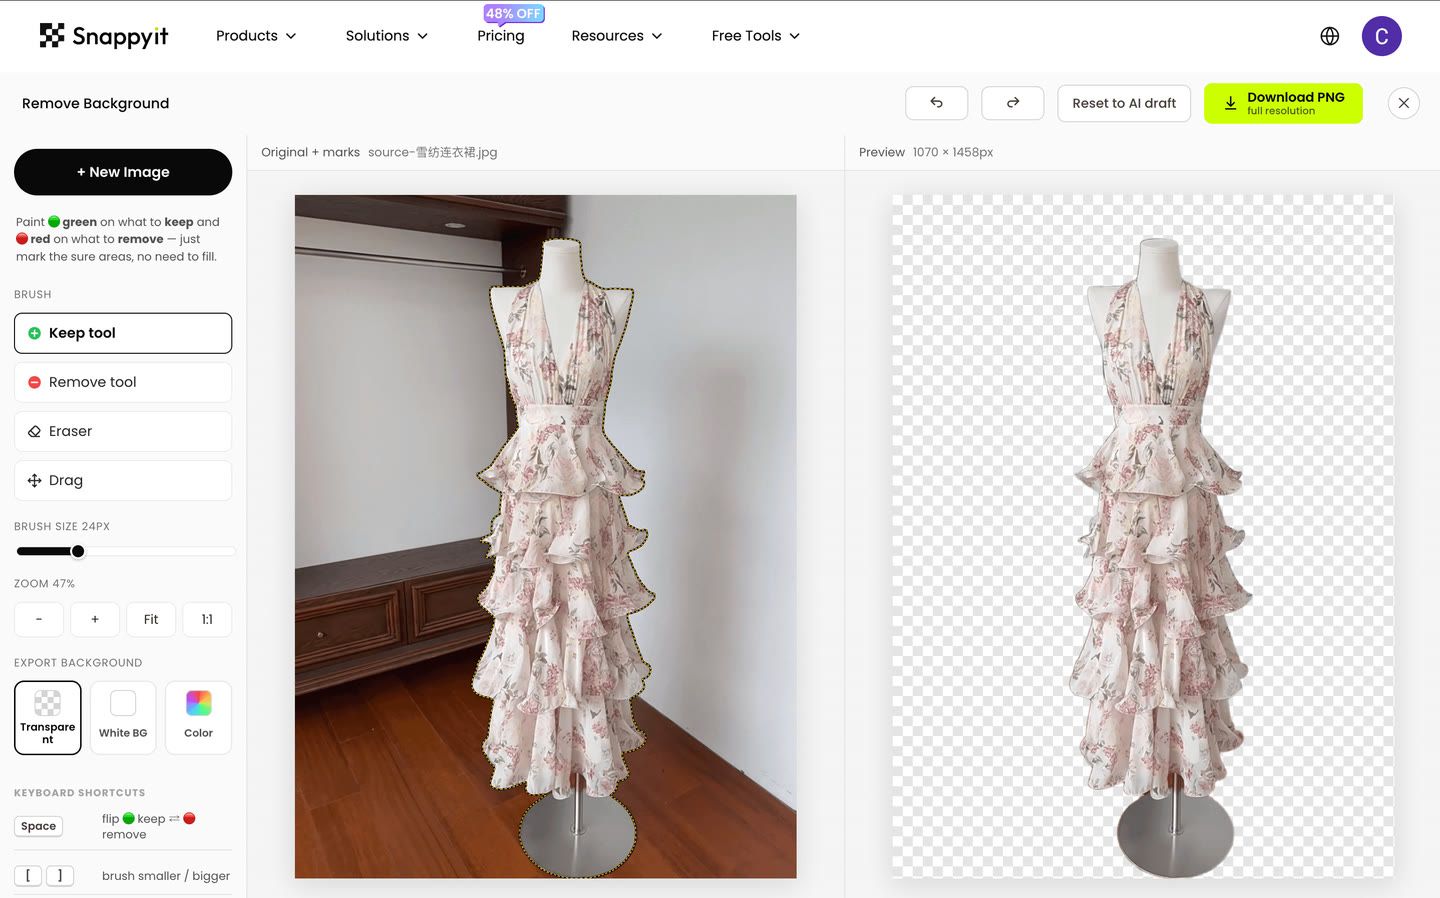
The editor showed a 1070 × 1458 preview, matching the uploaded canvas. Tested August 21, 2026.
Step 3 — refine the mask. Red remove marks over the neck and base of the stand cleared the dress form. If a remove mark takes away fabric, green keep marks can paint it back.
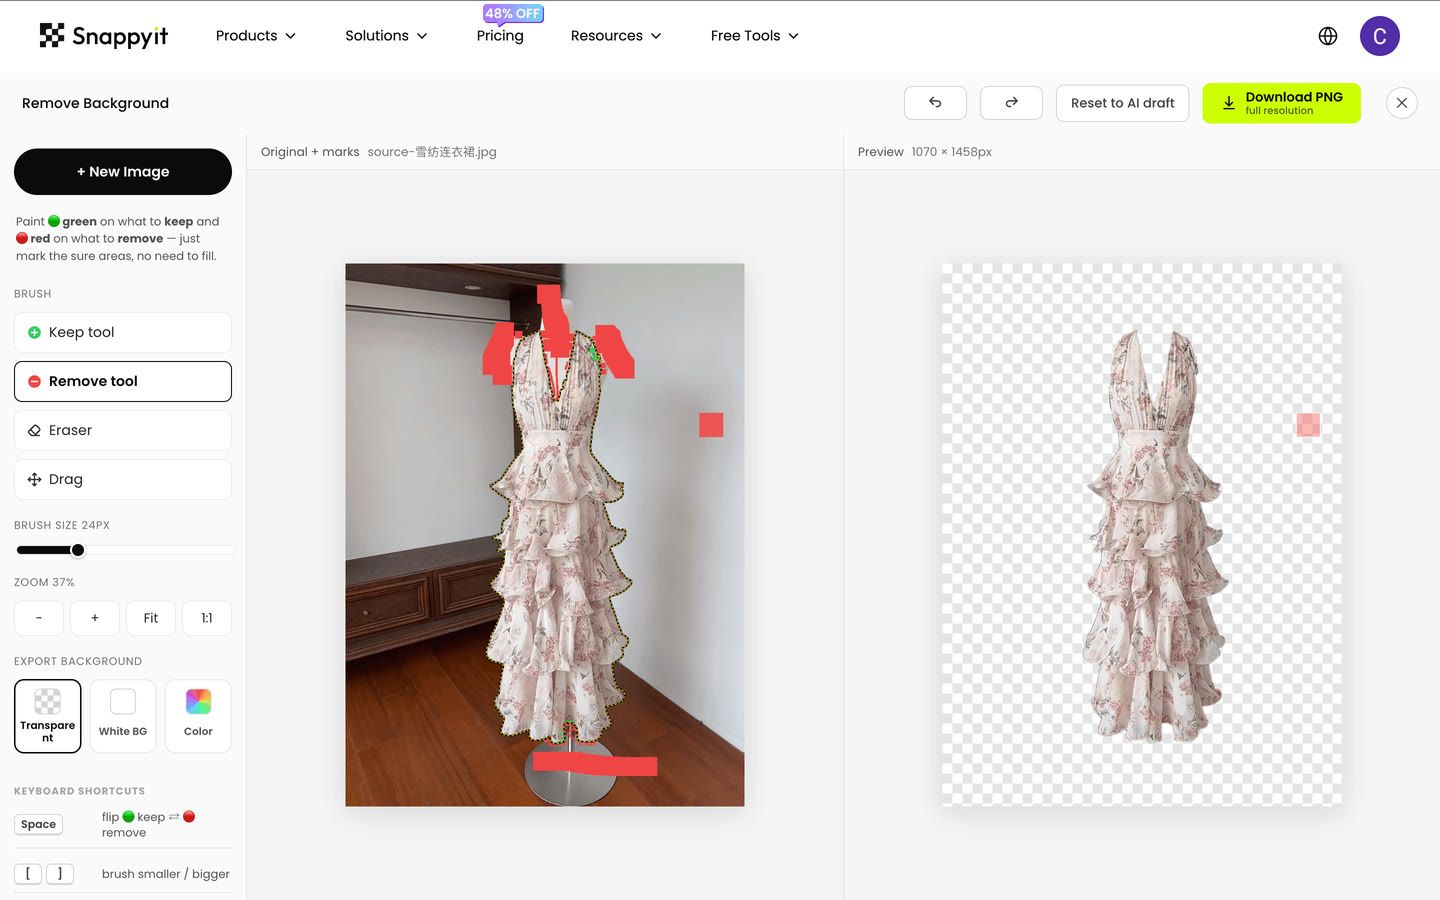
Manual marks separate the garment from the dress form. Tested August 21, 2026.
Steps 4 and 5 — download and inspect the PNG. Finder reported 1070 × 1458 and an alpha channel. That confirms the saved file matched the upload dimensions and retained transparency in this test.
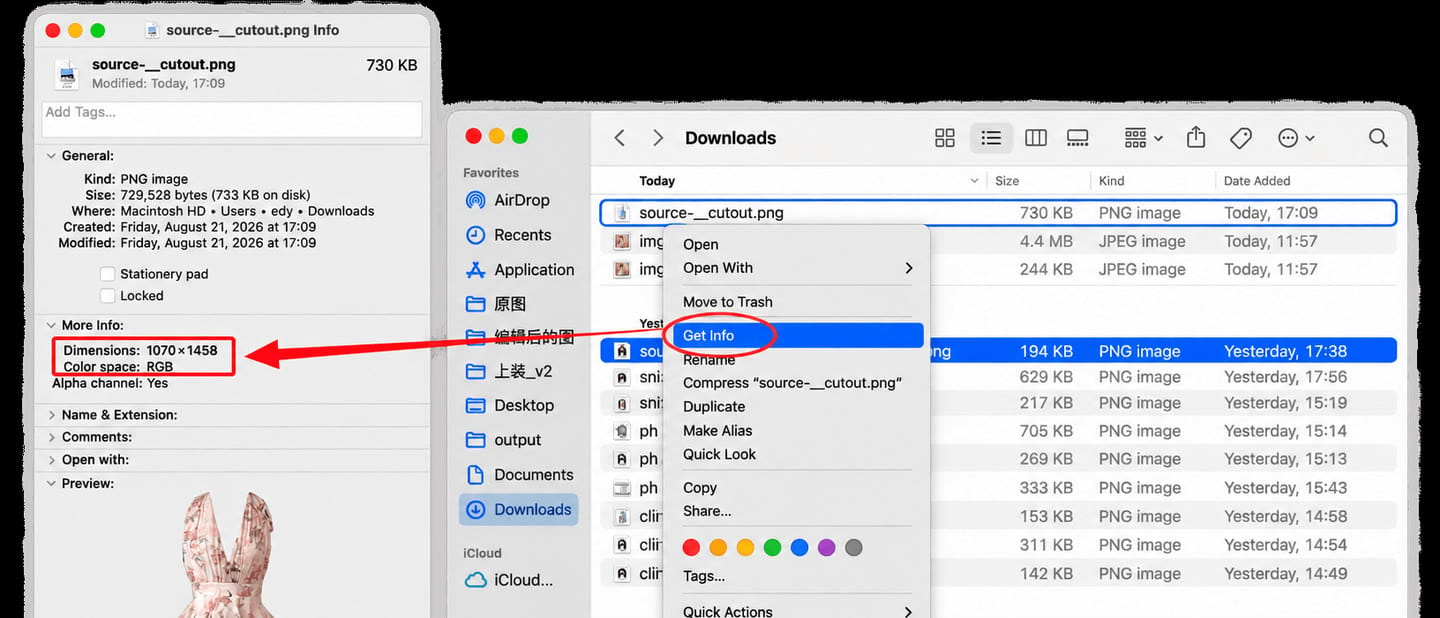
Dimensions measured from the saved file on August 21, 2026.
Five Background Removers: Saved Dimensions and Visible Watermarks
Test method
We uploaded one 1070 × 1458 garment photo to five tools, used the download workflow available in each session, made no payment during the test, and inspected the saved files. We recorded dimensions and visible watermarks, but not the sign-in state, account type or use of trial credits. Those fields are therefore marked Not recorded, and the test does not establish general free-plan availability or future limits.
Snappyit publishes this article and is one of the tools in the test. We used the same source file and the same saved-file dimension check for every result.
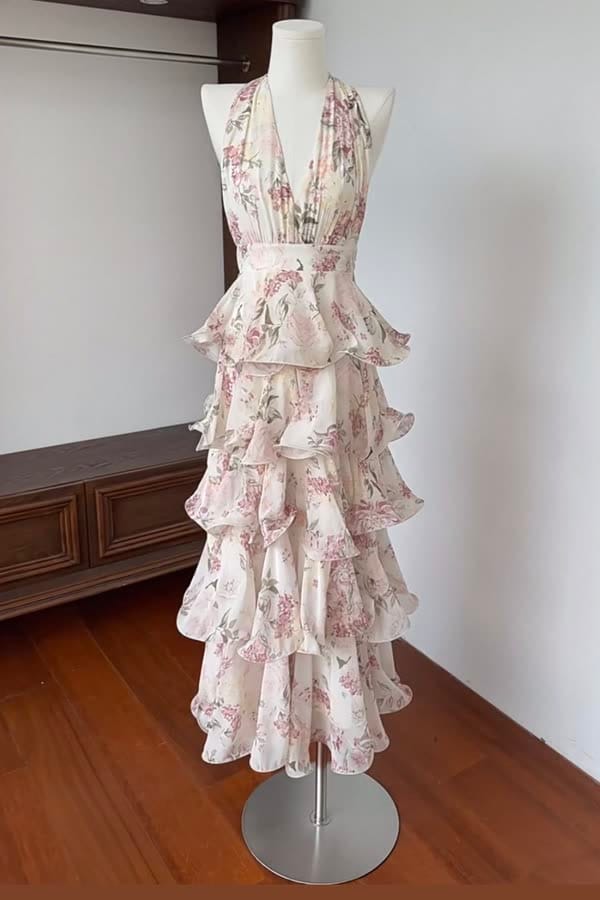
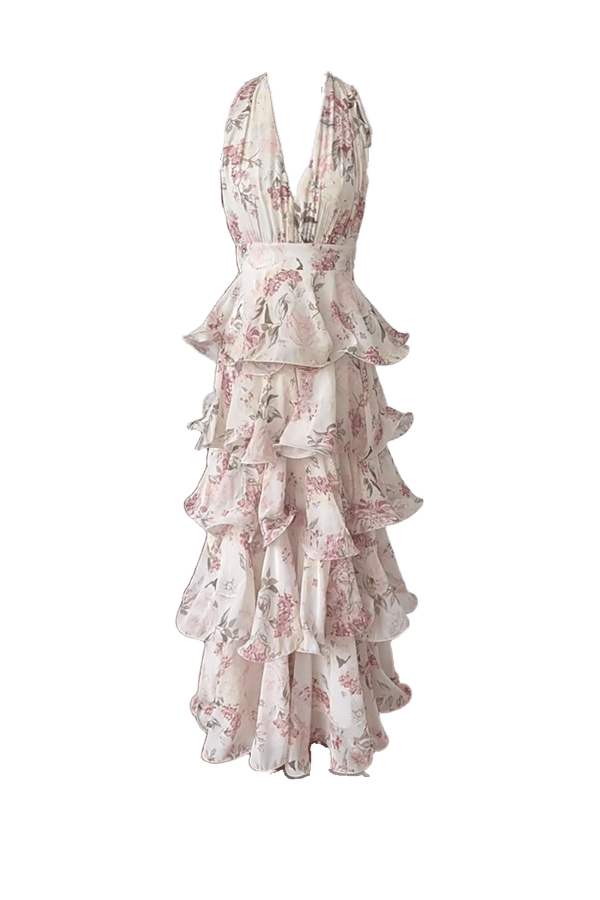
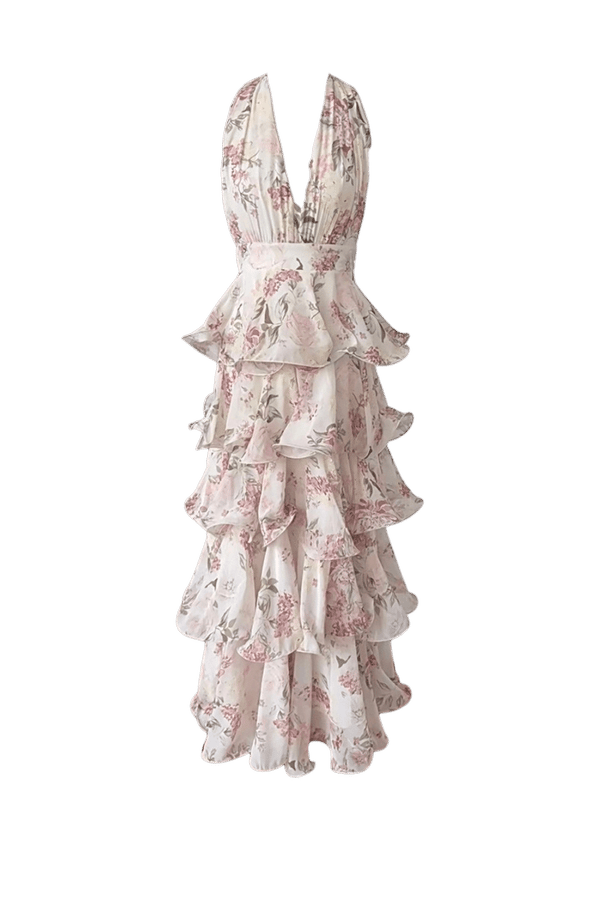
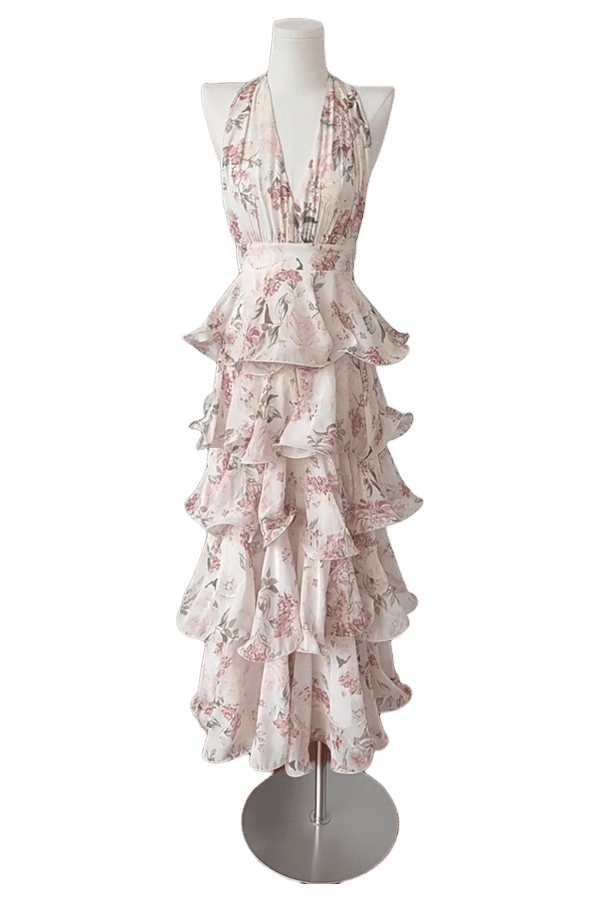
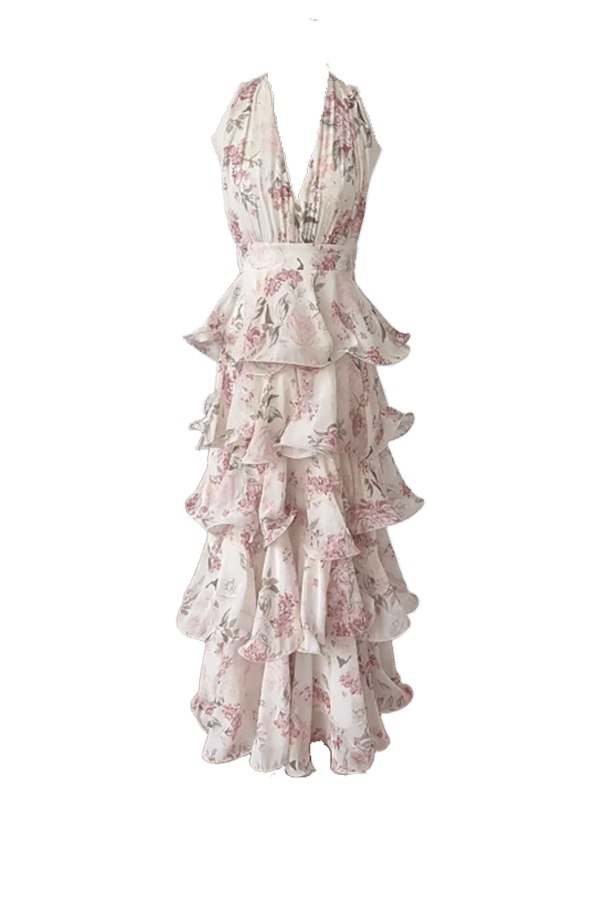
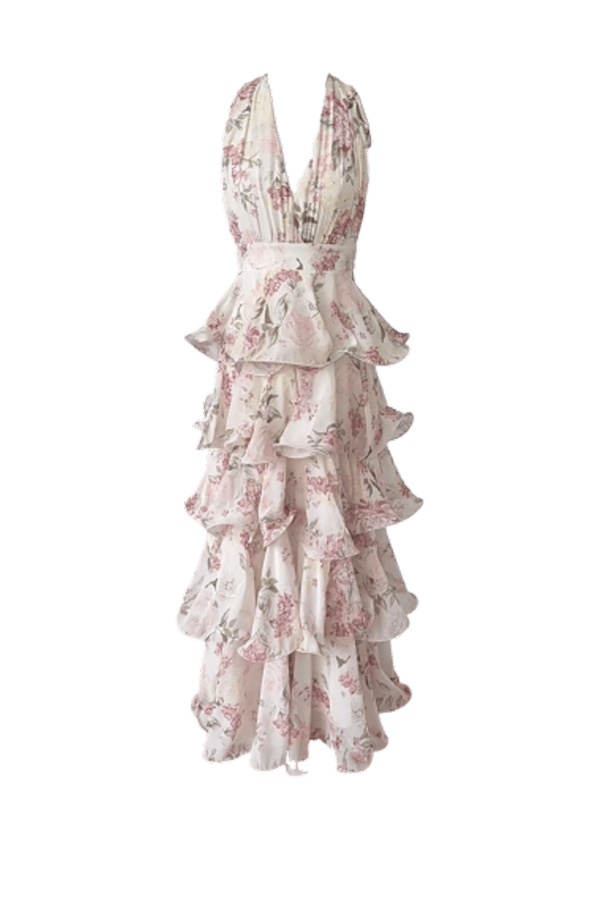
Automatic results before manual cleanup. Display copies are normalized to 600 × 900 for page performance; labels and table values come from the original files saved on August 20, 2026.
Saved-file results
| Tool | Saved dimensions | Visible watermark | Sign-in status | Observed result |
|---|---|---|---|---|
| Snappyit | 1070 × 1458 | None observed | Not recorded | Matched the upload dimensions |
| Photoroom | 1070 × 1458 | None observed | Not recorded | Matched the upload dimensions |
| Erase.bg | 803 × 1094 | None observed | Not recorded | About 75% of the uploaded width and height |
| PhotoScissors | 528 × 720 | None observed | Not recorded | Download was 720 px tall |
| Clipping Magic | 428 × 584 | None observed | Not recorded | 249,952 pixels, just under 0.25MP |
None of the five saved images showed a visible watermark, and two matched the upload dimensions. The other three were smaller. These observations describe the files we saved, not permanent free-plan policies; verify a current download before committing a product catalog to any tool.
Transparent PNG vs White Background for Product Photos
The practical answer is to keep both, but for different jobs. A transparent PNG is the reusable master: its alpha channel lets your team place the same approved cutout on white, a brand color or a campaign scene without removing the background again. A white-background JPEG is a delivery file for channels that require or reliably display a solid background.
| Choose | When it works best | Trade-off | Seller workflow |
|---|---|---|---|
| Transparent PNG | Catalog master, design handoff and flexible storefront layouts | Often larger for photographic products; transparency can look different in viewers or after platform processing | Keep at full resolution with an alpha channel |
| White-background JPEG | Marketplace main images, feeds and predictable white presentation | No transparency; every new background needs another export | Flatten a copy onto real white and export in sRGB |
| Transparent WebP | Storefront assets when the theme supports transparency | Often smaller at comparable visual quality; browser and theme support can vary | Generate from the approved PNG, not from a reduced listing file |
Lossless does not mean full resolution. A 500 × 500 PNG can preserve every pixel it contains while holding much less product detail than a 4000 × 3000 source. Check dimensions first, then transparency, compression and edge quality. If the source is already too small, use the workflow for making product photos higher resolution before preparing marketplace exports.
| Channel | Practical export choice | What to verify |
|---|---|---|
| Amazon | Flatten the main image onto pure white; keep the transparent master separately | Current category rules, image dimensions and product framing |
| Etsy | Use a white or styled JPEG when you need predictable presentation | Published thumbnail, first listing image and mobile crop |
| eBay | Use a clean solid-background export and avoid added text, borders or watermarks | Current picture policy and uploaded sharpness |
| Shopify | Use PNG or WebP if the theme intentionally displays transparency | Theme background, responsive crop and page weight |
Marketplace rules and storefront themes change. Keep the transparent master, note each marketplace's current requirements, and create final exports from that file. For the wider shoot-to-listing process, see Snappyit's AI product photography workflow.
How to Diagnose a Transparent PNG That Looks Black on Etsy
A transparent area has no color of its own. Some image viewers display that area against black, and a platform or downstream tool may flatten transparency during processing. That means a PNG that looks black is not necessarily filled with black pixels. Open the downloaded file in an editor that shows a transparency grid, then place it over white and a bright contrasting color to find out whether the problem is only the viewer, the alpha channel, or the cutout edge.
For an Etsy listing where the background must stay predictably white, do not rely on transparency. Etsy accepts JPG, GIF and PNG listing images and recommends the sRGB color profile; check its current guidance before upload. A flattened JPEG removes ambiguity because every background pixel has a defined color.
- Open the full-resolution PNG master. Do not start from a screenshot or a marketplace-downloaded copy.
- Add a real white layer beneath the product. Use RGB 255, 255, 255 rather than leaving the canvas transparent.
- Check the edge on white. Remove gray halos, colored spill and stray background pixels without erasing fine product detail.
- Convert the document to sRGB. This reduces avoidable color shifts between editing and web display.
- Export a high-quality JPEG at the required pixel dimensions. Keep the PNG master untouched for future channels.
- Upload and inspect the published listing. Check the thumbnail and full image on desktop and mobile; platform processing is part of the final QA.
If the local JPEG is white but the published image is not, confirm that you uploaded the new flattened file, check whether Etsy has updated the listing thumbnail, and allow time for image processing. Clear the browser or app cache only if the old version still appears. These checks show whether the problem is the uploaded listing image or the cutout itself.
Product Background Removal QA Checklist
Run this check on the saved file, not only inside the editor. For batch work, approve one difficult SKU first and record the accepted settings before processing the catalog.
- Dimensions: compare saved width × height with the source and the current channel requirement.
- Watermark: inspect the corners, product area and transparent canvas at normal size and 100% zoom.
- Silhouette: check thin straps, handles, hair, fur, lace, fringe and translucent fabric for missing pieces.
- Contamination: view the cutout on white and a contrasting color to reveal halos and leftover background.
- Transparency: confirm that the PNG has an alpha channel and that intended holes and gaps are actually transparent.
- Color: confirm the expected profile, neutral whites and accurate product color.
- Composition: check product scale, centering, margins and consistent placement across sibling SKUs.
- Delivery: upload the final listing file and inspect the processed image on desktop and mobile.
White Background Product Photo QA Checklist
- Confirm the background is a real solid-white layer rather than transparency displayed over white.
- Sample the corners and around the product to catch off-white patches, shadows or missed background.
- Inspect the boundary at 100% for gray outlines and clipped detail, especially around pale or reflective products.
- Check that the product remains correctly exposed; whitening the background should not wash out the item.
- Export in sRGB at the required dimensions and quality, then reopen the saved file for one last check.
- Review the uploaded image after platform processing and compare its framing with the rest of the listing set.
Frequently Asked Questions About Product Background Removal
1. Which tested downloads matched the uploaded dimensions and had no visible watermark?
In our August 2026 test, Snappyit and Photoroom each saved a 1070 × 1458 PNG that matched the uploaded dimensions, and neither saved image showed a visible watermark. These results come from one garment photo and do not establish free-plan availability or performance for every file. Check the current download conditions and the saved image before processing a full catalog.
2. How can I remove a clothing background for free without losing detail?
Use the original clothing photo and keep its canvas size. Refine problem areas such as lace, fringe, thin straps, sheer fabric and any dress form. Then download a transparent PNG, compare its dimensions with the source, and inspect the edges at 100% zoom on white and a contrasting color.
3. Should product photos use a transparent PNG or white background?
Keep a transparent PNG as the editable catalog master. Export a separate white-background JPEG when a marketplace requires white, when transparency may not display reliably, or when a JPEG gives you a smaller file at acceptable quality. This preserves one flexible source while giving each channel the format it needs.
4. Why does my transparent PNG look black on Etsy?
The black area may be a viewer background or the result of transparency being flattened during processing; it is not always black pixels in the PNG. For a predictable Etsy listing image, place the cutout over a real white layer, convert the document to sRGB, export a high-quality JPEG, upload it, and inspect the published listing on desktop and mobile.
5. What should I check after removing a product background?
Check the saved dimensions and transparency first, then inspect the edges and leftover background at 100% zoom. Finally, review the uploaded listing for color, framing and changes caused by marketplace processing.
6. Did Snappyit downscale the tested download?
No downscaling was observed in this run. The saved Snappyit PNG was 1070 × 1458, the same dimensions as the upload, with an alpha channel and no visible watermark. This is a measured result for the tested file, not a universal promise for every image or future product version.
References
The first five references identify the interfaces used for the saved-file test. The remaining sources support the marketplace and image-format guidance. Measurements were recorded on August 20–21, 2026; verify current platform rules before processing a large catalog.
- Snappyit, Free Background Remover
- Photoroom, Background Remover
- Erase.bg
- PhotoScissors
- Clipping Magic, Background Remover
- Amazon Seller Central, Product image requirements
- Amazon Seller Central, Technical image specifications
- Etsy, Listing image requirements
- eBay, Adding pictures to listings
- eBay, Picture policy
- Google, WebP documentation
- W3C, Portable Network Graphics (PNG) Specification