Upscale or Reshoot: Ask the Right Question First
Every seller hits this wall eventually. A supplier sends a 480-pixel thumbnail. A best-selling SKU was shot three years ago at a resolution your marketplace no longer accepts. An influencer photo you have permission to use looks great but is far too small for a listing page. The instinct is to treat it as binary: live with the small image, or block out an afternoon to reshoot.
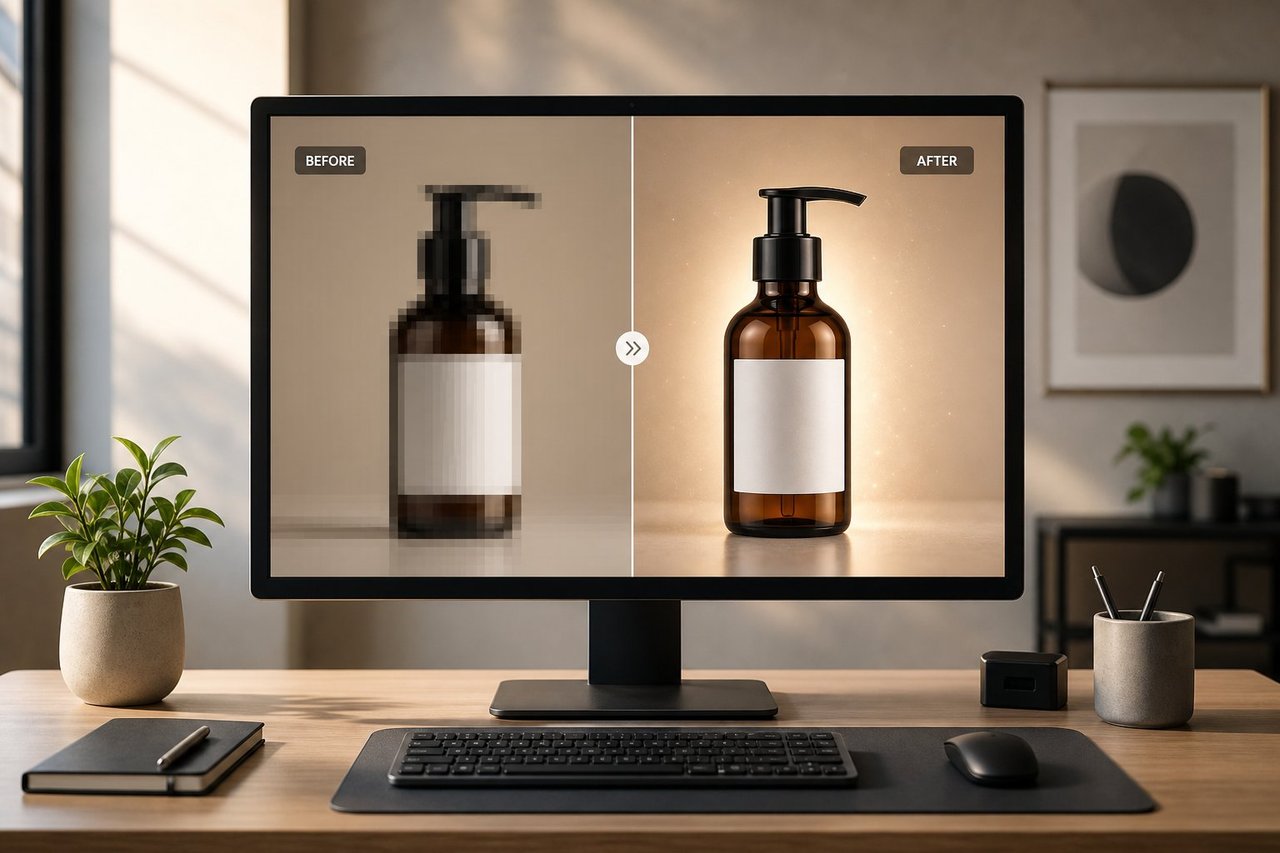
There is a third option, and most sellers either over-trust it or dismiss it entirely. AI upscaling can turn that 480-pixel file into a crisp 1,920-pixel image in a few seconds. But it is not magic, and it is not a substitute for a camera in every case. The useful skill is not "how do I make this bigger" — it is knowing, before you process anything, whether a given photo has enough real signal for the AI to build on. Get that judgment right and you save hours of reshoot time on photos that did not need it, while sparing yourself the embarrassment of publishing an upscaled image that looks synthetic on a product page where buyers zoom in.
The rest of this guide builds that judgment. We will cover why AI upscaling is fundamentally different from a resize, the source conditions that decide upscale versus reshoot, how far you can realistically push the resolution, and the one variable most sellers forget to check: what the product is actually made of.
Reconstruct, Don't Average: Why Upscaling Beats Resizing
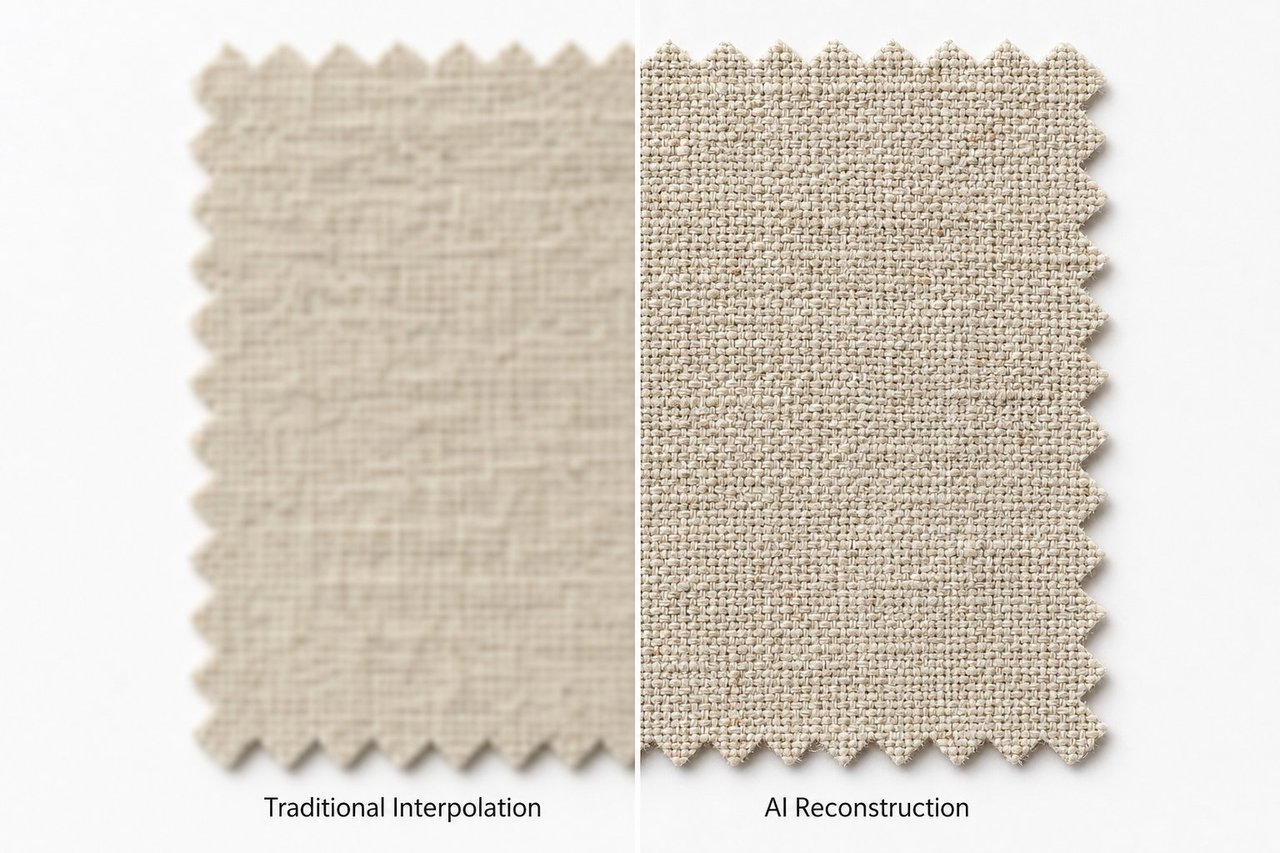
When you drag the corner of an image in a basic editor, the software uses interpolation — it looks at the pixels that already exist and calculates in-between values by averaging neighbors. Bicubic interpolation, the default in most editors, samples a small grid of surrounding pixels and blends them into smooth transitions. It is fast and predictable, but it shares one hard limit with every interpolation method: it can only redistribute information that is already present. It cannot create a single new piece of detail. Enlarge a watch face this way and the hour markers go soft, the logo bleeds into the dial, and any engraved text turns to mush.
AI upscaling works on a different principle entirely. The model was trained on millions of paired images — sharp originals that were deliberately shrunk, compressed, and degraded, then learned back to their full-resolution form. Over countless examples it builds an internal sense of how textures, edges, and letterforms behave at high resolution. So when it meets a soft gray patch, it does not average it; it recognizes a likely cotton weave and rebuilds plausible thread-level texture. A blurry metallic blob becomes a sharpened zipper pull with a clean edge. The model is, in effect, making an educated reconstruction of detail that is statistically consistent with what should be there.
This distinction is the whole reason the upscale-versus-reshoot decision exists. Because the AI predicts rather than copies, the quality of its prediction depends entirely on how much trustworthy signal sits in your source. Feed it a clean, well-lit photo and the reconstruction is convincing. Feed it a dark, smeared, heavily compressed file and the model is forced to guess aggressively — and guessing aggressively is exactly when you get hallucinated detail that looks wrong. That dependency is what the next section turns into a rule you can apply in seconds.
The Upscale-vs-Reshoot Decision Framework
Here is the core of it. The deciding question is never the final resolution you want — it is whether the source photo contains enough quality signal for the AI to reconstruct from. A well-lit, in-focus 500-pixel image upscaled to 1,500 pixels will beat a poorly lit 1,200-pixel image every time, because resolution without quality is just bigger mediocrity. Run any problem image through this table before you decide.
| Source condition | Verdict | Why |
|---|---|---|
| 500px+ on the long edge, sharp, evenly lit | Upscale | The sweet spot. Enough real detail for the model to anchor an accurate 2x prediction. |
| Good composition, minor softness, needs ~2x | Upscale | A modest scale on a decent original is virtually indistinguishable from a native high-res shot. |
| 200–500px but in focus and well lit | Upscale, then inspect | Often fine for web display at 2x; check fabric and edges at 100% before publishing. |
| Under 200px on any side | Reshoot | Too little data; the output looks synthetic even at 2x. |
| Motion blur or camera shake | Reshoot | AI cannot rebuild crisp edges that motion erased; it only invents soft, odd textures. |
| Poor lighting or wrong white balance | Reshoot | Upscaling adds pixels; it does not relight a scene or fix a color cast. |
| Heavy JPEG compression with visible blocking | Reshoot or re-source | Upscaling amplifies blocky artifacts into sharpened noise and halos. |
One nuance that trips people up: a resolution problem and a photography problem are not the same thing, and only one of them is fixable by software. Upscaling is the right tool when the photo is fundamentally good and merely small — legacy catalog shots, discontinued SKUs you can no longer photograph, well-shot user content. It is the wrong tool when the photo is broken at capture. If your only files come from a manufacturer and they arrive dark and blocky, the better move is to fix low-quality AliExpress supplier photos by re-sourcing or correcting them first, then upscale a clean version — not to enlarge the damage.
How Far You Can Push: Scale Factors as a Ceiling
Once you have decided to upscale, the next question is how aggressively. Scale factor — 2x, 4x, 8x — multiplies both width and height, but the number that matters is how much of the final image the AI has to invent. At 2x, the model generates roughly three-quarters of the pixels but has substantial original data to anchor every prediction. At 4x it is creating around 94% of the pixels. At 8x, well over 98% of the final image is reconstructed from learned patterns rather than anything that was actually photographed.
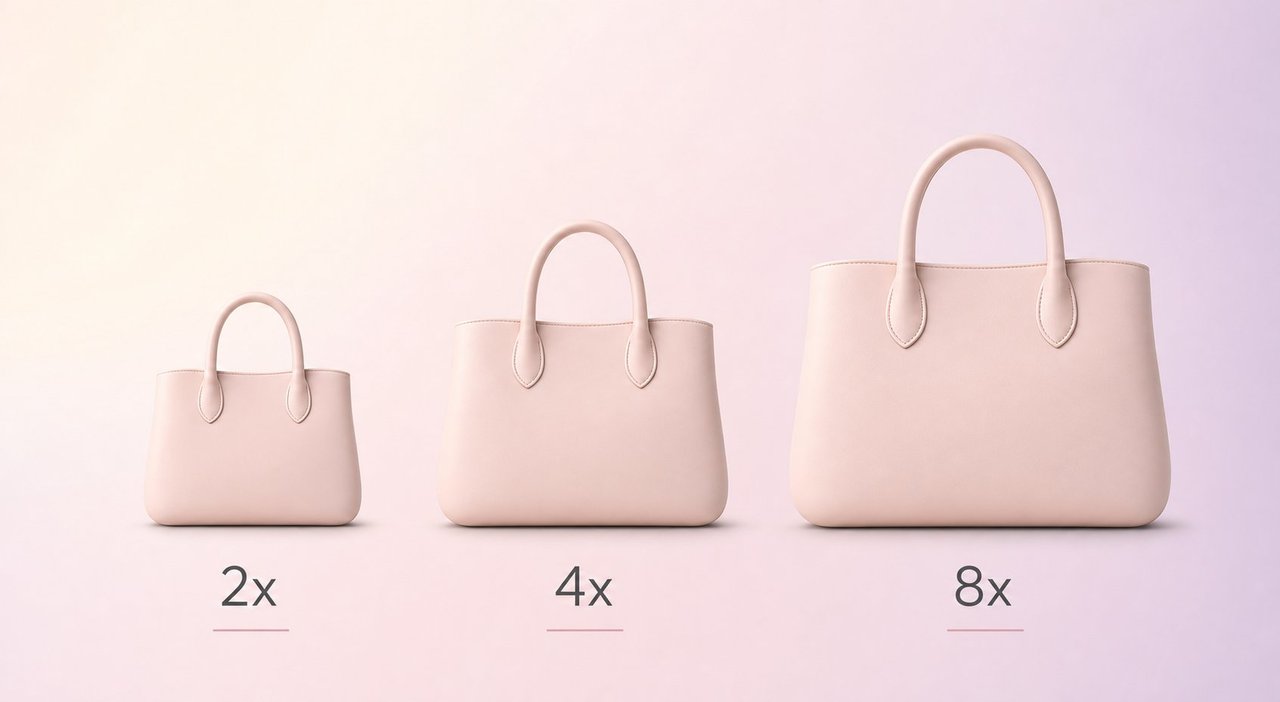
That is why the same product photo can look flawless at 2x and faintly "painted" at 4x. Zipper teeth, fabric labels, and small hardware hold their integrity when the model has real reference pixels nearby; push past that and the inventions start to show. Two practical rules keep you out of trouble. First, reserve anything beyond 4x for sources that are already sharp and clean — a strong original survives heavy enlargement, a weak one falls apart at 2x. Second, when you sit between two options, take the lower one: a 2x result you crop or lightly stretch to target almost always reads better than a 4x result that hits the pixel count but smooths the whole surface. For the rare case where you genuinely need extreme enlargement on a hero image, a staged approach — two 2x passes with a review in between — outperforms one big jump, and a desktop tool like a free Topaz Gigapixel alternative is built for exactly that controlled, fidelity-first workflow.
The Hidden Variable: What the Product Is Made Of
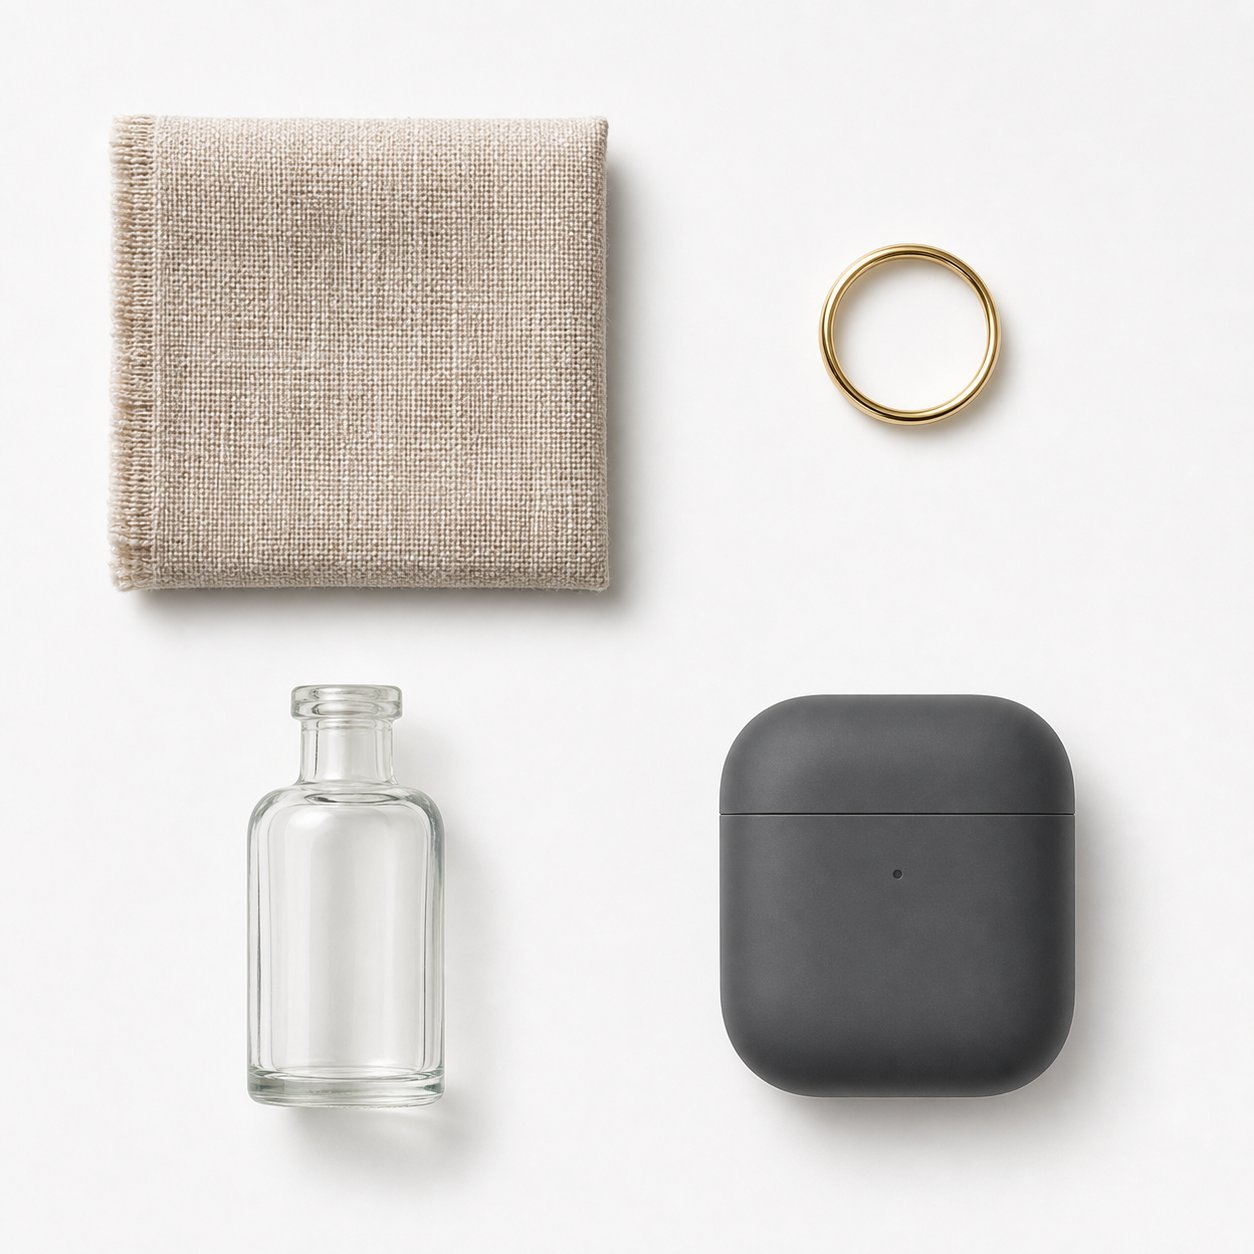
Resolution and lighting decide whether you should upscale at all. Material decides how well it will turn out. A cotton hoodie and a diamond ring sitting at the same 600 pixels produce wildly different results through the same upscaler, because the model's accuracy depends on how closely its training matches the textures and surfaces in your shot. This is the part the generic "increase your resolution" guides skip, and it is where most published artifacts come from.
| Material group | Upscale reliability | What to watch |
|---|---|---|
| Apparel, knits, denim, soft goods | Excellent | Best case. Training sets are saturated with textiles, so weave and grain rebuild naturally. |
| Matte electronics, plastics, painted metal | Excellent | Uniform surfaces and predictable light align well with AI predictions. |
| Ceramics, wood, leather goods | Good | Smooth or lightly textured surfaces upscale cleanly; inspect metal closures at 4x. |
| Printed text: supplements, packaging, labels | Risky | The model reshapes letterforms and distorts logo geometry; verify at 100% zoom. |
| Jewelry, watches, fine metalwork | Risky | Gemstone facets and dial text often show hallucinated or smoothed detail. |
| Glass and transparent or mirrored surfaces | Risky | Edges fringe, and the model can invent reflections that were never there. |
The pattern is consistent: texture the model has seen a million times reconstructs beautifully, while precise geometry it has to reason about — a serial number, a clasp, the boundary where glass meets background — is where it stumbles. The practical takeaway is not "avoid these categories," it is "treat them differently." For fabric and matte goods, batch and trust the output. For text, jewelry, and glass, slow down: inspect every readable word and every reflective edge at full zoom, and keep a vector type overlay or a reshoot in reserve for the labels that absolutely must be legible.
When Reshooting Is the Better Investment
Upscaling enhances resolution. It does not perform photography. When a source fails on something other than pixel count, no model recovers it, because the AI is predicting from what is visible — and when what is visible is a dark, smeared, artifact-ridden mess, the predictions collapse into guesswork. The honest framing is that these tools can make a small photo larger; they cannot recover information that was never captured in the first place.
So reshoot when the problem is at capture, not at size. Motion blur is the clearest case: the crisp edges are simply gone, and the model can only invent something soft or oddly textured in their place. Bad lighting is the next: a yellow-cast or underexposed frame becomes a larger yellow-cast, underexposed frame. Heavy compression is the third: those 8x8 blocking grids get amplified into sharpened noise and ringing halos around every edge. And anything under 200 pixels rarely justifies the attempt. The good news for sellers is that "reshoot" is also the rarer verdict — for most catalogs, the bulk of problem images are well-shot photos that simply predate today's resolution requirements, which is precisely the territory where upscaling shines.
Applying the Decision Across a Whole Catalog
One photo is an easy judgment call. Eight hundred are a workflow. When a platform migration or a mid-cycle resolution bump suddenly leaves your entire library below spec, you cannot eyeball each file — you need to triage. Sort your SKUs into three buckets: clear upscale candidates (sharp, well-lit, 500px+), inspect-then-upscale (the 200–500px middle), and reshoot-or-replace (the broken sources). Run the first bucket as a batch, queue the second for a quick visual pass, and route the third to a camera or your supplier.
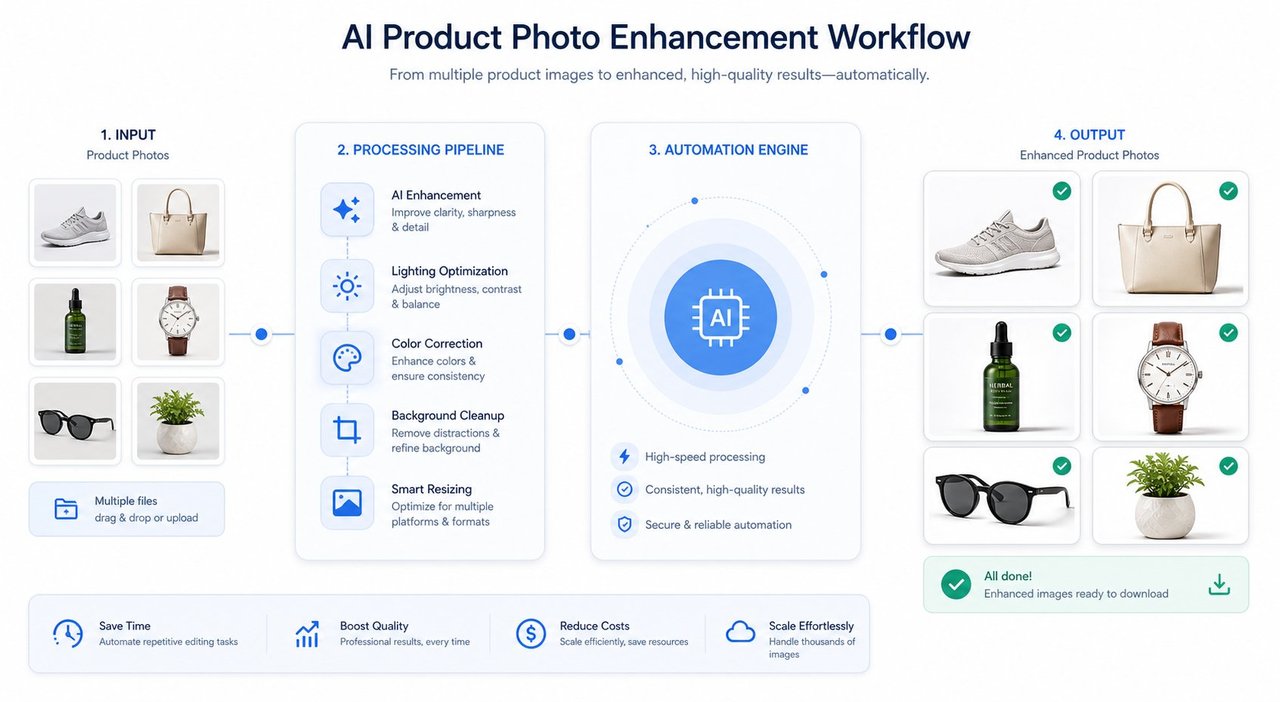
A small habit makes the batch lane far more reliable: prep the source before you enlarge it. Crop tight to the product so the AI spends its prediction budget on the item rather than empty background, correct any color cast first since upscaling only magnifies it, and feed the cleanest file format you have rather than a JPEG that has been re-saved a dozen times. Then let the upscaler handle the rest in one run. If you are choosing a tool for that daily lane, weigh the contenders in our roundup of the best free AI image upscaler for ecommerce, and when the job is a few hundred SKUs at once, the mechanics of how to batch-upscale a whole catalog without babysitting every file are worth setting up properly before you start.
A 30-Second Decision Cheat Sheet
When you are staring at a borderline photo and need to move, this is the short version:
- Upscale if the source is 500px+, in focus, and evenly lit — especially fabric, knits, denim, or matte products.
- Upscale, then inspect at 100% for anything 200–500px, or for any product with fine text, jewelry, or glass.
- Reshoot or re-source if the photo has motion blur, bad lighting, a color cast, heavy JPEG blocking, or sits under 200px.
- Stay at 2x by default; only push to 4x on already-clean sources, and never expect 8x to rescue a weak file.
Match the tool to the verdict and you stop wasting reshoot hours on fixable photos — and stop publishing upscaled images that were doomed from the source.
Try the Snappyit Free Product Photo Upscaler →
Frequently Asked Questions
Should I upscale a product photo or reshoot it?
Start with the source. If the original is at least 500 pixels on the long edge, sharp, and evenly lit, upscaling will almost always be faster and cheaper than a reshoot, and the result is hard to tell apart from a native high-resolution shot. Reshoot when the source is under 200 pixels, motion-blurred, badly lit, or riddled with JPEG compression blocks, because upscaling adds pixels but cannot invent focus, light, or detail that was never captured.
Why does an AI upscaler look better than enlarging an image in Photoshop's standard resize?
A standard resize uses interpolation, which averages the pixels you already have to fill the gaps, so edges soften and fine detail smears. An AI upscaler was trained on millions of high- and low-resolution image pairs, so instead of averaging it predicts and reconstructs plausible detail, like thread texture on fabric or a clean edge on a zipper pull. The difference is most obvious exactly where shoppers zoom in.
What is the smallest source image that is still worth upscaling?
Roughly 500 pixels on the longest side is the practical floor for a clean 2x result, assuming the photo is in focus and well lit. Between 200 and 500 pixels you can sometimes get a usable web image at 2x, but inspect it closely. Below 200 pixels there is too little real information for the model to build on, and the output tends to look synthetic, so a reshoot is the better call.
Which product types upscale reliably, and which are risky?
Fabric, knits, denim, and matte surfaces like plastic housings or painted metal upscale reliably, because their texture is something AI models have seen endlessly in training. The risky group is anything with fine printed text, intricate jewelry, or glass and other transparent or mirror-like surfaces. On those, the model can reshape letters, smooth machined edges, or invent reflections, so always check them at 100 percent zoom before publishing.
Can a product photo upscaler fix a blurry or badly lit supplier photo?
No. Upscaling raises resolution; it does not relight a scene, correct white balance, or undo motion blur. A dark, yellow-tinted, or shaky photo just becomes a larger version of the same problem. If the only issue is that a well-shot photo is too small, upscaling fixes it; if the photo has a lighting or focus problem, you need to reshoot or replace the source rather than enlarge it.
Is the Snappyit Product Photo Upscaler free, and do I need to log in?
Yes — it is 100% free with no login or signup required. Upload a low-resolution product photo in your browser and download the upscaled result; there is no account, no watermark, and no credit card needed. That makes it practical to upscale entire catalogs of supplier or legacy images without paying per photo or creating a login.
Upscale the Photos That Deserve It — Free
Most of the small images in your catalog are good photos that simply need more pixels, not a reshoot. Run them through the Snappyit Free Product Photo Upscaler — ecommerce-trained AI that reconstructs detail instead of stretching it — and keep the camera for the handful of shots that truly need one. It is 100% free with no login or signup required — upload a photo in your browser and download the upscaled result.
Open the Snappyit Free Product Photo Upscaler — 100% free, no login →