At a glance
Ghost mannequin AI removes the mannequin and rebuilds a hollow 3D garment from one photo in seconds. See how it works, which clothes it handles, and its
| Need | What to do |
|---|---|
| Get oriented | Read the short summary, then use the checklist below. |
| Create a test image | Try Ghost Mannequin Free |
What ghost mannequin AI does
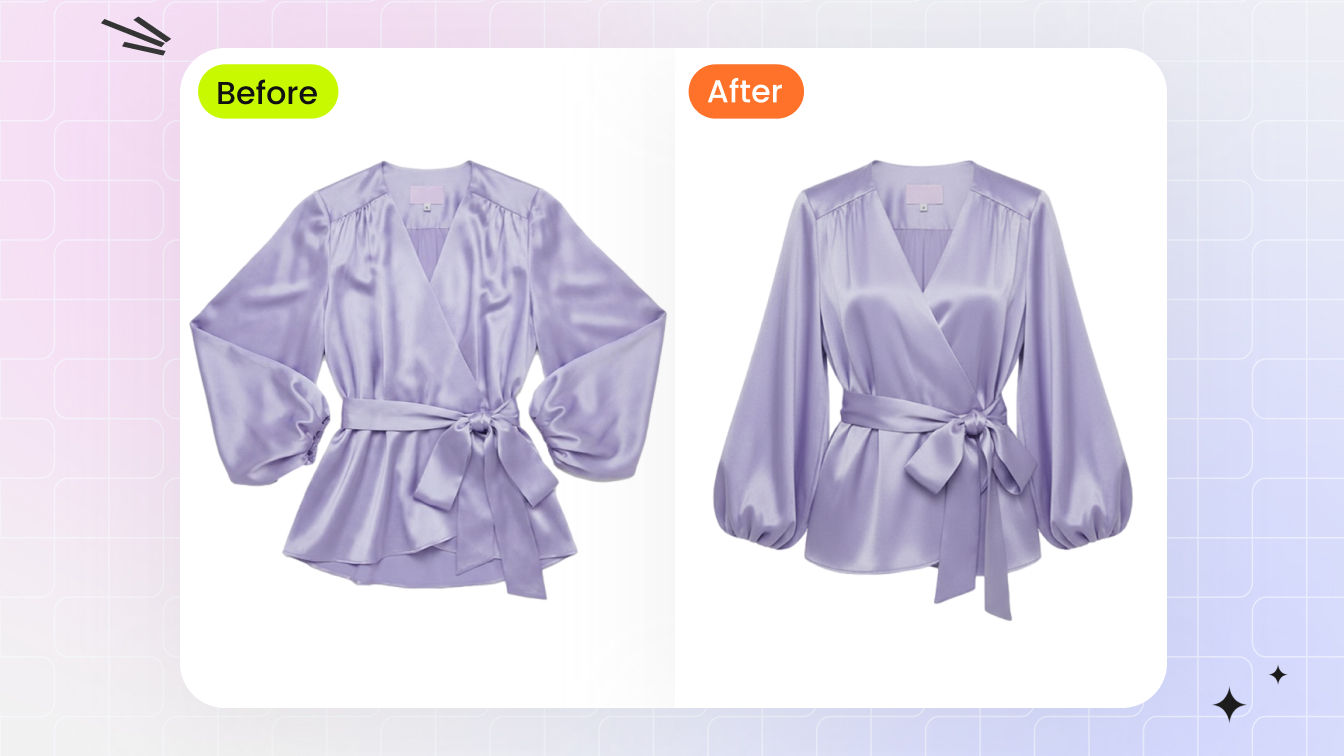
Ghost mannequin AI takes a photo of a garment, deletes the mannequin, and rebuilds the clothing as a hollow, three-dimensional shape that looks like it's worn by an invisible body. You upload one image and get a clean product shot in seconds, with no second interior photo and no manual masking.
The ghost mannequin effect (also called the invisible mannequin or "hollow man" effect) shows a garment holding its shape and interior construction with no visible support, so shoppers can see how it drapes and fits.
A flat lay shows color and fabric but not fit; a model shot adds personality but pulls attention to the person. The ghost mannequin reads as "someone is wearing this" while keeping every seam, collar, and waistband in focus. Since online shoppers can't try anything on, that structured silhouette does much of the work a fitting room would, and it keeps a catalog consistent.
Getting there used to be slow. You shot each garment at least twice, once on the mannequin and once for the inside neckline, then composited the layers in Photoshop by hand, which meant weeks of editing for hundreds of SKUs. Ghost mannequin AI replaces that with segmentation and shape inference: it removes the mannequin, fills in the hidden interior, and outputs a finished image. A solo seller with a phone and a subscription can now do what used to need a photographer, a special mannequin, and a retoucher.
The traditional workflow it replaces
Seeing the manual process shows where AI cuts the work. Every invisible mannequin photography image was built in two stages, and one photo was never enough:
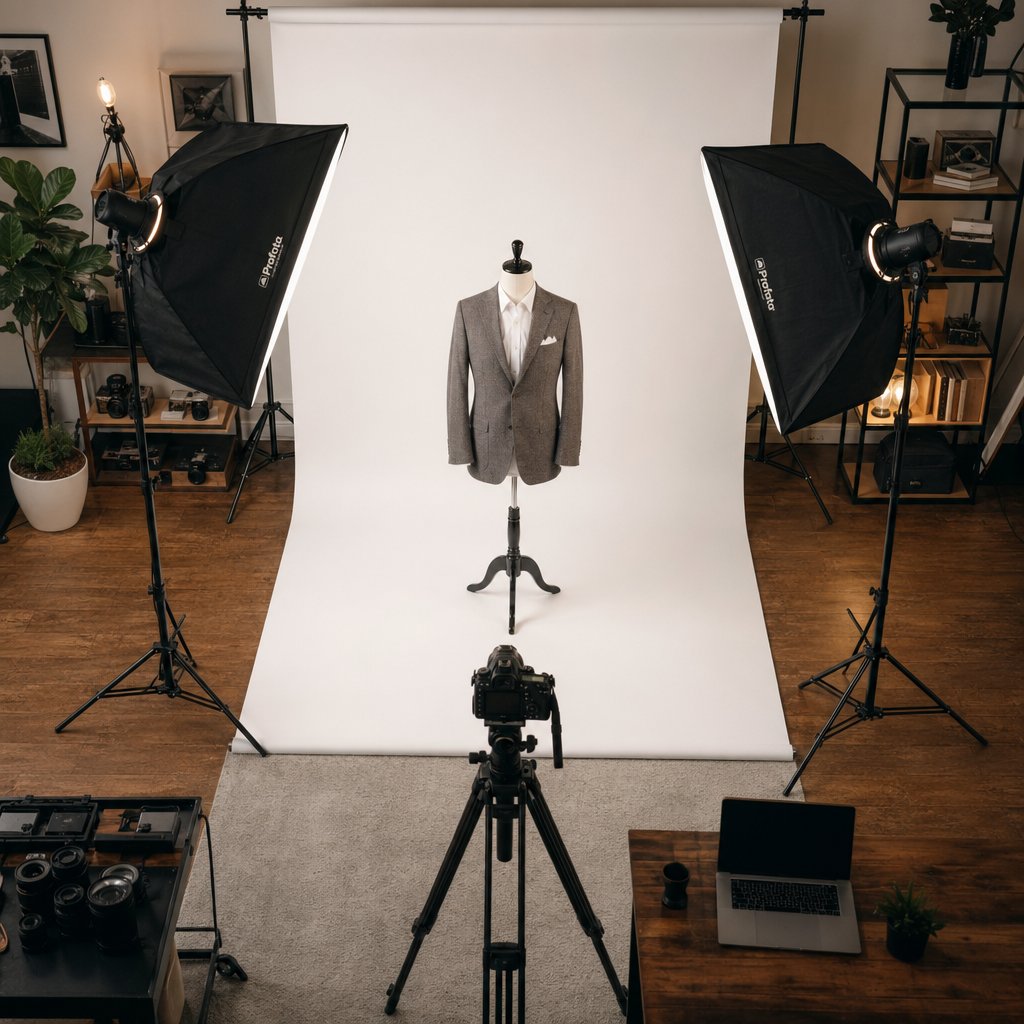
- Prep and style. Steam out wrinkles, dress the mannequin, then use pins, clips, and fashion tape on the back to pull the fabric taut. Every crease you leave becomes retouching later.
- Shoot the exterior. Lock the camera on a tripod at chest height, shoot the front, rotate the mannequin 180 degrees without touching the lights, and shoot the back.
- Shoot the interior. Remove the mannequin's detachable neck or chest section to expose the inner collar, and photograph it. This fills the hollow gap once the mannequin body is gone. Skip it and the final image has a visible hole no Photoshop trick convincingly invents from nothing.
Then the retoucher opens both shots as layers in Photoshop: mask the garment away from the mannequin, slot the interior image behind the exterior to fill the neckline gap, then blend the edges and add a light drop shadow. A skilled retoucher can turn one image around in well under an hour, but across several hundred products that still adds up to weeks. You also pay twice over: for gear (a modular mannequin, camera, lighting, backdrop) and for skill (a photographer plus a retoucher fluent in masking). Small teams rarely have both, so they outsource and wait.
How the AI actually works
AI skips the second interior shot by synthesizing the hidden information instead of photographing it, through a pipeline of stages.
Segmentation
First the model decides where the garment ends and everything else begins. It classifies every pixel as garment, mannequin, background, skin, or hardware, trained on large sets of labeled clothing images so it can tell a shirt collar from a mannequin neck even when they're similar in color. Specialized clothing segmentation tools can even separate tops from bottoms in one frame. The output is a pixel-precise mask, and if it's sloppy, nothing downstream can fully fix the jagged edges or leftover pixels.
3D shape inference
A product photo is flat, but the ghost mannequin effect needs volume and drape. The model predicts the garment's three-dimensional surface from the 2D image by reading cues like shadow gradients, fold patterns, and edge contours, learned from garment images paired with 3D geometry, often built from physics-based cloth simulations. Newer models use diffusion-based shape priors to capture how fabric deforms under gravity, so the reconstruction shows realistic wrinkles instead of a stiff shell.
Neck joint reconstruction and texture
The collar and neckline are the hardest part, and the whole reason the manual process needs a second shot. The AI generates the interior view pixel by pixel, drawing on examples of how collars fold inward, then blends it behind the outer layer. It also preserves texture, matching the weave of a linen shirt or the alignment of a plaid across reconstructed seams. How well all of this works depends heavily on the garment.
Skip the mannequin entirely. Snappyit turns a flat apparel photo into a polished ghost mannequin image in seconds. Try Snappyit free →
Which garments work best
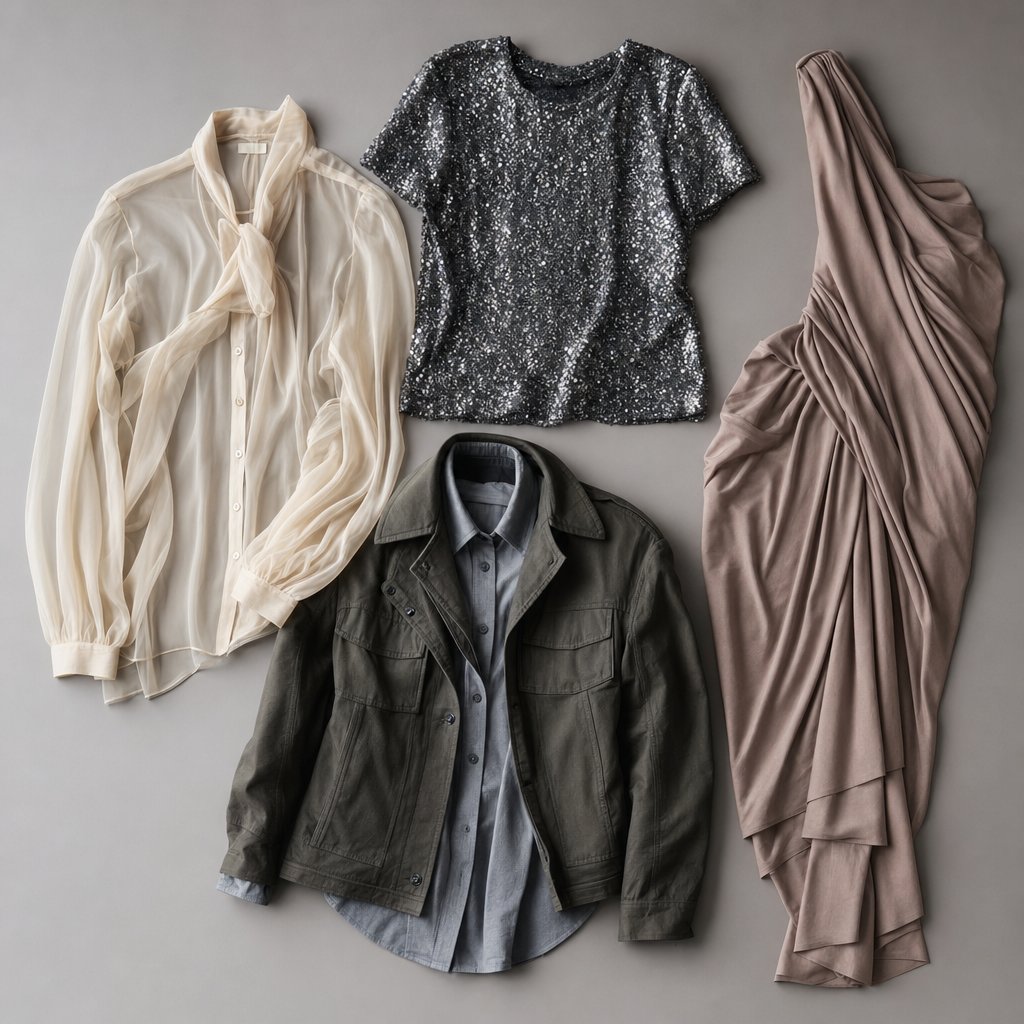
Structured clothing gives the cleanest results; sheer, layered, and non-body-shaped items give the AI the most trouble. A button-down shirt or a fitted blazer holds a consistent shape, so seams are well-defined and collars sit at expected angles, giving the model clear cues and little to guess at. Blazers, dress shirts, denim jackets, tailored trousers, stiff-collar polos, and structured dresses come out clean across almost every tool. Knitwear, jersey, and soft cotton tees are in between: they don't hold a rigid shape, but a quick review catches the occasional drape inconsistency, and the output is usually marketplace-ready.
The genuinely hard cases share one trait: the AI has to invent information it can't see. Sheer fabrics like chiffon and mesh break segmentation because the AI can see through them and can't tell where the garment ends. Heavily layered outfits create overlapping edges that confuse shape inference, so layers merge or lose definition. Heavy hardware (chains, buckles, sequins) reads as high-contrast detail that segmentation misjudges, especially near the neckline. Asymmetric or dramatically oversized cuts fall outside what most models trained on. And accessories like scarves, hats, and belts have no torso to infer, so the hollow effect doesn't apply at all.
| Difficulty | Garment types | Manual touch-up? |
|---|---|---|
| Ideal | Blazers, button-downs, denim jackets, tailored trousers, polos, structured dresses | Rarely |
| Moderate | Knitwear, jersey tops, cotton tees, hoodies, casual dresses, light blouses | Sometimes |
| Challenging | Sheer fabrics, layered outfits, heavy hardware, asymmetric or oversized cuts | Often |
| Not suitable | Scarves, hats, bags, belts, jewelry | Use a different photo style |
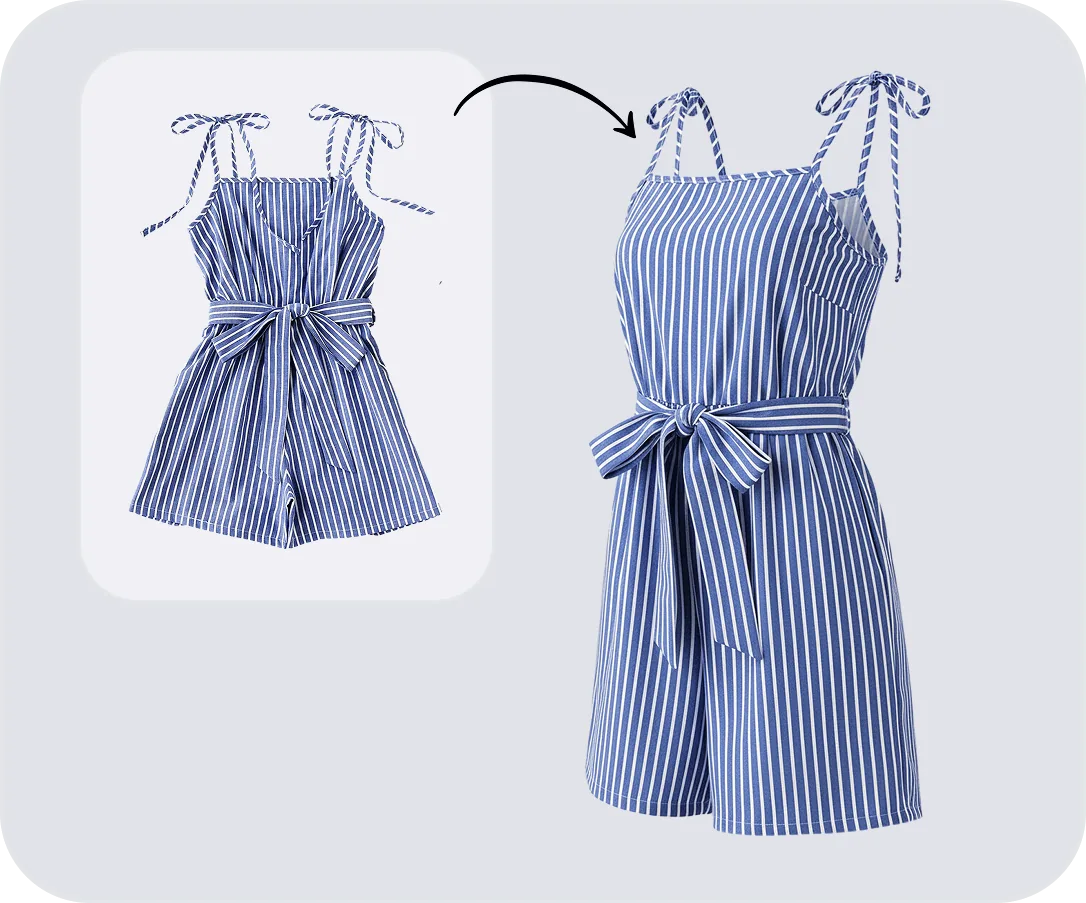
Input format matters too. On-mannequin photos give the best output because the garment is already shaped in 3D. Flat lays need no mannequin, but the AI has to infer the silhouette from a flat image, which works well for structured pieces and less so for soft fabrics. Hanger photos sit in between. Whatever the format, a clean, well-lit source beats a wrinkled garment on a cluttered background.
Preparing photos for clean results
A few minutes of prep before the shutter beats hours of fixing bad input afterward. The AI reconstructs what it sees, so wrinkles, dust, and uneven light all carry through to the output.
Lighting is the single biggest factor. Harsh directional light creates deep shadows that confuse segmentation; flat, even light lets the AI separate garment from background. Diffuse from two sides with softboxes or LED panels at about 45 degrees, lock white balance to a fixed daylight temperature so color doesn't drift across a batch, shoot against a clean white or light-grey backdrop, and fill the shadow side with a reflector. For shiny fabrics like satin, move the lights closer and add diffusion to soften the highlights that make the AI misread surface shape.
Styling shapes how the AI reads the silhouette. Steam every piece, lint-roll it (loose threads and pet hair show up clearly at high resolution), and pin or clip the back into a symmetrical, fitted shape; breast forms or sleeve stuffers add realistic volume. Center the garment with your camera's grid overlay so collars, shoulders, and hems sit level, since even a slight tilt throws off the AI's symmetry assumptions. Shoot tops at chest level, bottoms at hip level, and dresses at mid-torso.
On files: AI reads pixel data, not print DPI, so actual pixel dimensions are what matter. Shoot at full resolution (you can downsize later but can't add detail), target a large square output around 2000 x 2000 px to clear most marketplace minimums, save PNG or high-quality JPEG to avoid compression smearing fabric texture, and keep lighting, angle, and background consistent across the batch.
AI vs traditional, side by side
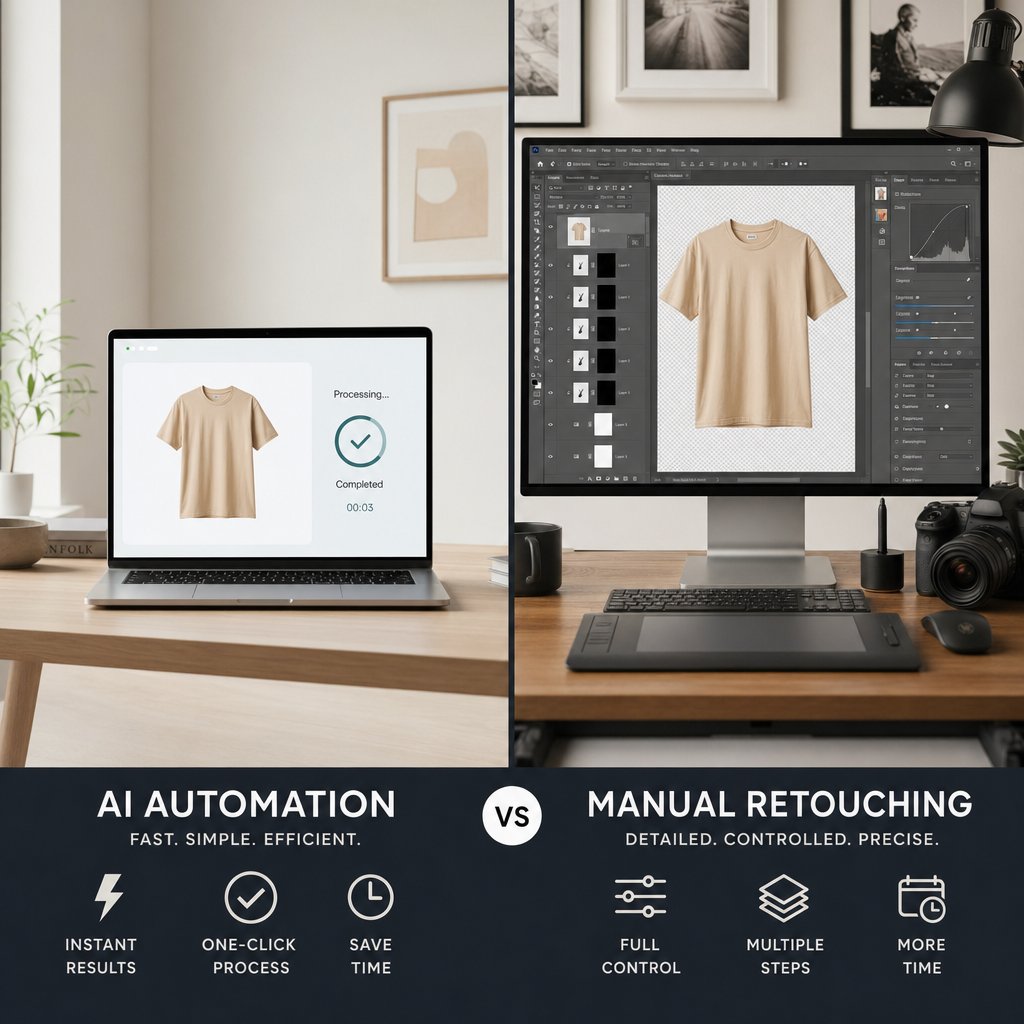
For standard apparel, AI delivers results that are hard to tell apart from manual editing, at a fraction of the time and cost. Traditional editing still wins for genuinely complex or editorial pieces.
| Dimension | AI ghost mannequin | Traditional |
|---|---|---|
| Setup cost | Software subscription; phone or basic camera | Modular mannequin, camera, lens, lighting, backdrop, studio space |
| Time per image | Seconds | Shoot plus retouch, often the better part of an hour |
| Skill required | Upload and click process | Photography, styling, Photoshop compositing, edge masking |
| Scalability | Batch hundreds with no added labor | Every image adds photographer and editor time |
The speed gap is widest at volume. A 100-SKU drop is a full work week of editing the traditional way; AI compresses that into seconds per image, and a catalog that grows to 1,000 SKUs is still the same subscription and workflow. Snappyit's Ghost Mannequin tool is built for this kind of volume. Consistency scales too: spread hundreds of images across a dozen retouchers and small differences in masking creep in, while AI applies identical parameters to every image. Manual work still earns its place on the genuinely complex pieces, where a stylist can manipulate the fabric or an art director wants pixel-level control. Many brands run a hybrid model: AI handles the bulk, a retoucher polishes the hero pieces.
Meeting marketplace image rules
A single AI image rarely passes everywhere unchanged. Amazon, Shopify, Etsy, and eBay each set their own rules on backgrounds, dimensions, and formats, and non-compliant images can get suppressed or rejected. As Pixelz notes, compliant photos tie directly to conversions, so check each platform's current published specs before a big upload.
Amazon is the strictest and enforces its rules: the main image needs a pure white background, the product filling most of the frame, no visible mannequin remnants, and enough resolution to keep zoom enabled. Two AI-specific checks: sample the background corners, because AI output often lands near white rather than exactly RGB 255,255,255, and push it there with Levels; and zoom in around the collar and armholes, where tools sometimes leave faint mannequin remnants. eBay is similar but more flexible on backgrounds, with extra image slots for your original shots.
Shopify sets no hard technical gate, so the real challenge is visual cohesion: pick one aspect ratio, batch-resize every output to it, match background tone, and export mobile-friendly formats like WebP. Whatever the platform, most AI output needs a light cleanup before it ships: correct the background color, crop to the fill rule, convert to the right format (mind each platform's file-size cap), add a faint drop shadow if it looks like it's floating, and rename files with descriptive keywords and alt text. Record the steps once as a Photoshop action and run them across the folder.
Limitations and edge cases
AI ghost mannequin tools are strong on standard apparel but have predictable blind spots, almost all rooted in the same cause: the model is guessing at information it can't directly see.
- Neck joint seams. The collar area is synthesized, so a slight color or lighting mismatch leaves a visible seam where the inner collar meets the outer fabric. This is the most frequent artifact.
- Texture distortion. Lace, sequins, embroidery, and intricate prints can smear or misalign at reconstructed seams; thin straps and lace edges are often the first to suffer.
- Sheer-fabric failures. Chiffon, organza, and mesh produce incomplete removal or background bleed-through.
- Shadow and color issues. Generated shadows can fall the wrong way, and a thin halo of the original background can persist along the outline, obvious on zoom against pure white.
- Soft reconstructed detail. Stitching and grain in synthesized areas look less crisp than the photographed parts because they're generated, not copied.
Most of these don't matter at standard listing sizes, but they show on zoom and on premium products where buyers scrutinize construction. A practical rule: trust AI on structured garments, give knitwear and casual pieces a quick review of the neck joint and hem, treat sheer, embellished, layered, and unusual items as a starting point you then retouch, and skip AI for accessories and editorial hero shots. This mirrors how many fashion brands run their pipelines, as SmartPHOTOeditors describes: AI handles routine bulk processing and humans finish the parts that need judgment.
Choosing a tool and getting started
Match the tool to your monthly image volume, budget, and selling channels. Solo sellers processing a handful of images a month want a low-cost subscription or a free tier to test quality; Snappyit's Ghost Mannequin tool fits this, turning flat apparel shots into polished images without studio overhead. Mid-size brands should weigh per-image cost, where credit-based plans scale with the catalog. High-volume retailers want predictable costs, so flat-rate plans remove the per-image math, while hybrid services that pair AI with human review trade a higher price for extra quality control. When comparing, confirm the tool handles your input format, check output quality at the neck joint and edges, make sure batch upload is supported, and calculate your real cost at your expected volume rather than the headline rate.
Don't overhaul everything on day one. Photograph 10 to 15 garments spanning your range, then process the batch and measure three things: what share comes out marketplace-ready with no touch-up, how long the capture-to-export cycle takes versus your current process, and the real per-image cost on your plan. If most of the batch comes out clean, you've found a tool that can carry the bulk of production; route the rest through the hybrid review. The sellers who gain most pick the right tool, prep their inputs, and let human judgment handle the cases that need it.
Ready to scale your catalog? Batch-process flat lays into marketplace-ready ghost mannequin shots without studio overhead. Try Snappyit free →
Frequently Asked Questions
What is ghost mannequin AI and how does it work?
Ghost mannequin AI automatically removes a mannequin from a clothing photo and rebuilds a hollow, 3D garment shape. It segments the garment from the background, infers three-dimensional shape from a single 2D image, synthesizes the interior neckline and collar that would otherwise need a second photo, and preserves the original fabric texture. This replaces shooting multiple angles and manually compositing layers in Photoshop, cutting per-image work from a lengthy manual edit to under a minute.
Can it work with flat lay photos instead of on-mannequin shots?
Yes. Many tools accept flat lays and convert them to 3D ghost mannequin images with no physical mannequin, inferring how the garment would drape from visual cues in the flat image. Results are strong for structured garments like blazers and button-downs and slightly less natural for soft, drapey fabrics, since a flat lay gives fewer shape cues. Snappyit's Ghost Mannequin (snappyit.ai/ghost-mannequin) is designed to turn flat apparel shots into polished images quickly.
Which clothing types produce the best results?
Structured garments with predictable geometry produce the cleanest output: blazers, button-downs, denim jackets, tailored trousers, and stiff-collar polos. Knitwear and soft cotton tees are good with occasional minor fixes. Sheer fabrics, layered outfits, heavy hardware, and asymmetric or oversized silhouettes are challenging, and accessories without a body structure, like scarves and hats, are not suitable for the effect.
How much does AI ghost mannequin editing cost versus traditional methods?
AI runs on a monthly software subscription with a low per-image cost, so processing a large catalog stays far cheaper than commissioning manual edits. Traditional editing carries an upfront equipment investment plus a per-image retouching fee, which scales steeply on a large catalog. Exact numbers depend on the tool and plan, but AI is dramatically cheaper at volume and delivers in seconds rather than days.
Do AI ghost mannequin images meet Amazon and marketplace requirements?
Generally yes, with a minor post-processing pass. Amazon wants a pure white background (RGB 255,255,255), the product filling most of the frame, enough resolution to keep zoom enabled, and no visible mannequin remnants. Verify the background reads exactly 255,255,255 and crop to the fill rule. Check each platform's current file-size cap and aspect-ratio rules, and on Shopify focus on consistent ratios across the catalog and mobile-optimized formats like WebP.
AI ghost mannequin output is one tool inside Snappyit's full AI product photography suite.