
On this page
Ghost mannequin photos show a garment’s volume and shape. Flat lays show its outline, print, or the pieces in a set. Choose each style according to what shoppers need to see; many listings benefit from both.
Quick answer: ghost mannequin, flat lay, or both?
Use it to explain shoulders, waist shaping, sleeves, necklines, and three-dimensional volume.
Use it for simple garments, coordinated sets, full outlines, styling concepts, and social content.
Let one image explain construction and another show styling, details, or everything included in the purchase.
Ghost mannequin vs flat lay at a glance
| Decision factor | Flat lay | Ghost mannequin |
|---|---|---|
| What shoppers see | A two-dimensional overhead view and the full arranged outline. | A garment presented with body-like volume but no visible model or mannequin. |
| Best at explaining | Color combinations, included pieces, graphics, overall shape, and styling. | Volume, silhouette, shoulder structure, neckline, sleeves, and drape. |
| Traditional setup | Surface, overhead camera position, garment styling, lighting, and cleanup. | Mannequin, front and interior photography, masking, and composite retouching. |
| Relative production effort | Usually lower, although careful styling and consistent overhead framing still take time. | Usually higher because dressing, hidden-area capture, and neck-joint editing add steps. |
| Main limitation | Can flatten a garment whose appeal depends on volume or tailoring. | Can look clinical and may not explain styling, scale, or how pieces coordinate. |
Image quality matters as much as the style. A well-lit flat lay may show a product more clearly than a poorly styled ghost mannequin photo.
What is flat lay clothing photography?
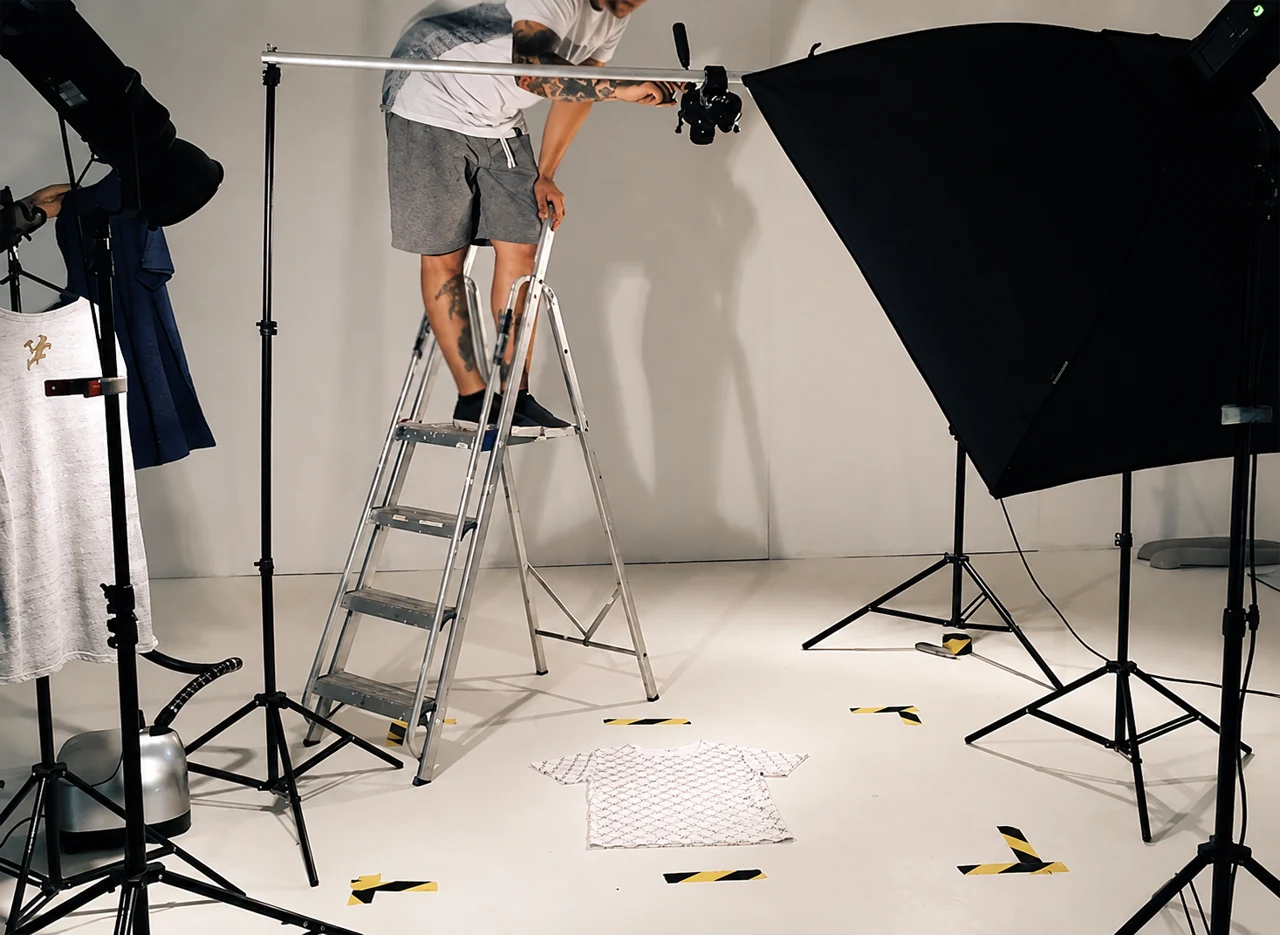
Flat lay photography shows clothing arranged on a horizontal surface and photographed from directly above. Adobe describes the format as a bird's-eye, top-down view of objects laid out on a surface.[1] The garment may be shown fully extended, softly folded, shaped with small inserts, or styled with related products. Because the viewpoint is simple, shoppers can scan color, print, proportions, and included pieces quickly.
It works best when the product reads clearly in two dimensions or several included pieces need to be shown together. For a category-specific setup, see the swimwear flat lay photography guide.
Traditional flat lay workflow and cost drivers
- Prepare the product. Steam the garment, remove lint, check labels, and confirm that every included piece is present.
- Build a repeatable set. Choose a clean surface, lock the camera height and angle, and mark the garment position for the next SKU.
- Shape and style. Straighten seams, balance sleeves, protect print geometry, and add props only when they clarify the intended use.
- Light and capture. Use soft, even light that preserves color and fabric texture without creating hard shadows.
- Edit and export. Correct color, remove dust, align the crop, and export the dimensions required by the storefront.
Flat lay is usually the less complex method. Its main cost drivers are staff or photographer time, styling, overhead camera support, lighting, surface materials, studio space, and post-production; art direction and props add further expense to campaign-style images.
What is ghost mannequin photography?
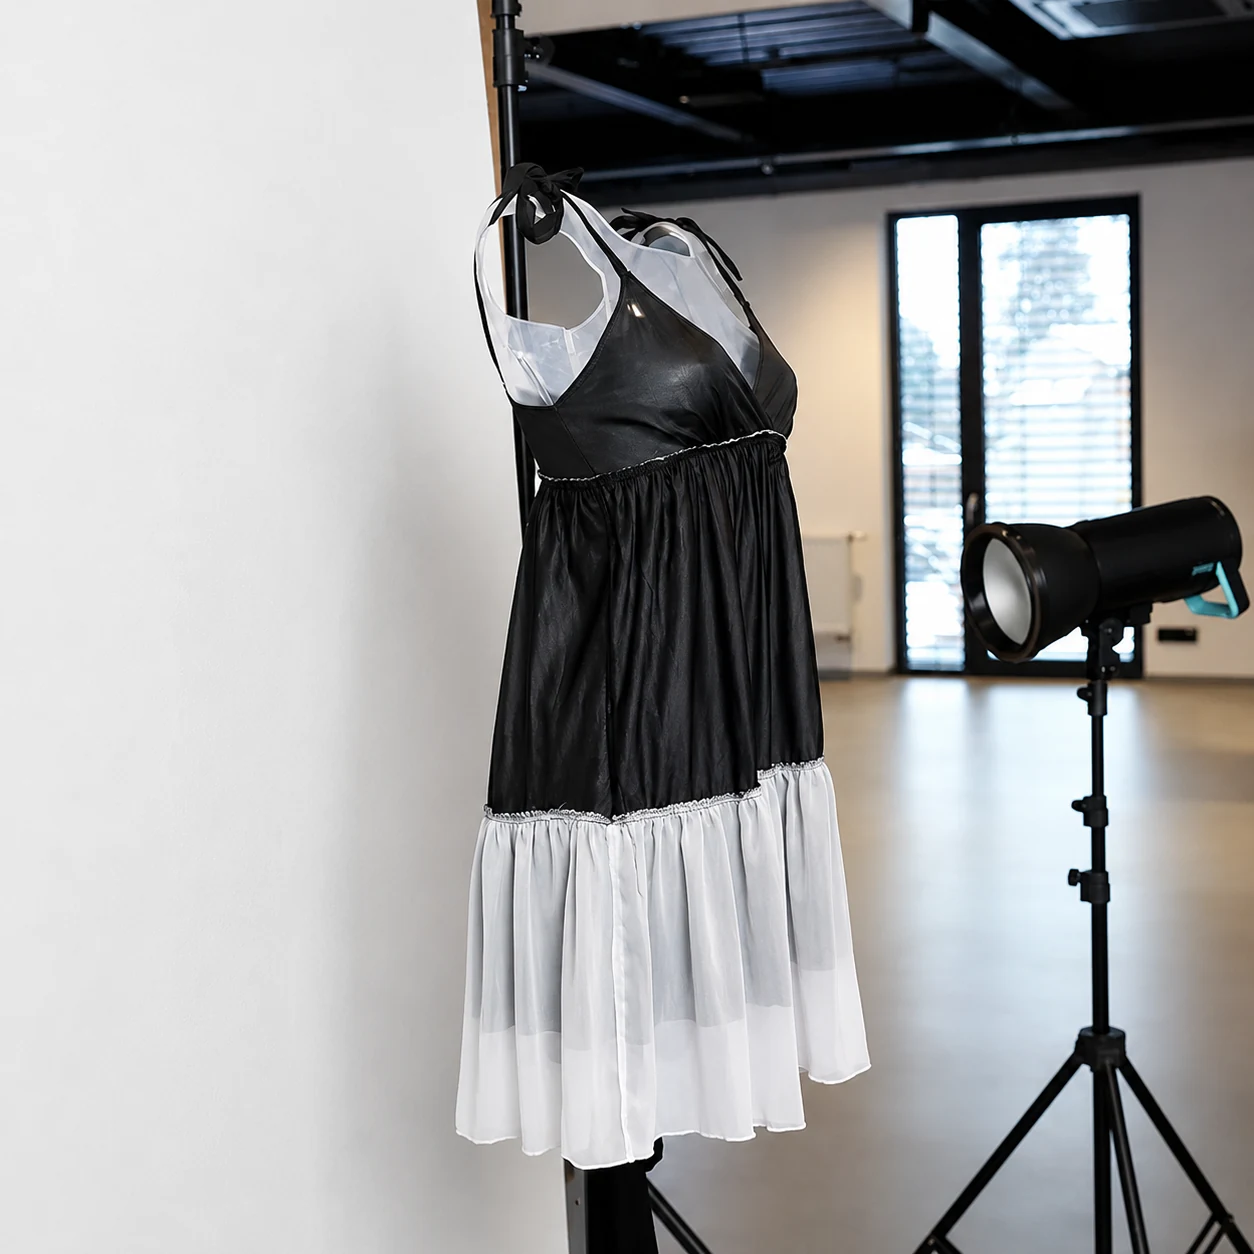
Ghost mannequin photography—also called the invisible mannequin or hollow-man effect—shows a garment with worn-looking volume while keeping the supporting mannequin out of the finished image. Traditionally, the effect is created by photographing multiple views of the product and combining them in post-production.[2] A strong result preserves the product's exterior shape and reconstructs hidden areas such as the inside collar so the clothing appears complete.
It is most useful when a garment's shoulders, waist, sleeves, neckline, or drape are difficult to understand from a flat view. The invisible mannequin effect guide explains the source views needed to reconstruct hidden areas.
Traditional ghost mannequin workflow and cost drivers
- Choose and dress the mannequin. Match the mannequin size to the garment, steam the product, and avoid pinning that makes the garment look more fitted than it is.
- Photograph the main view. Keep the camera, lighting, and garment position stable across the catalog.
- Capture hidden construction. Photograph the interior collar, label area, cuffs, or other sections that will be revealed after the mannequin is removed.
- Mask and composite. Cut out the exterior, remove visible mannequin parts, place the interior insert, and create a believable neck or sleeve joint. Follow the ghost mannequin photo editing guide for the full editing sequence.
- Review and export. Check symmetry, edges, color, seams, closures, and whether the composite still matches the physical item.
Compared with a basic flat lay, this workflow adds the cost of a suitable mannequin, extra handling and source photography, and skilled composite retouching. Whether handled in-house or outsourced, the effort rises with garment complexity and the number of hidden areas that must be rebuilt.
Compare cost per approved image
For a fair cost comparison, use the same garments, number of views, output resolution, and quality standard. Include failed attempts in the total, then divide by the number of usable images.
| Method | Include in the batch total |
|---|---|
| Traditional flat lay | Preparation, styling and capture hours × labor rate, plus studio/equipment allocation and retouching. |
| Traditional ghost mannequin | Preparation, mannequin dressing, main and interior capture hours × labor rate, plus mannequin/studio allocation and composite retouching. |
| AI presentations | Source-photo preparation, credits for every generation and retry, plus inspection and correction hours × labor rate. |
Cost per approved image = total batch cost ÷ approved images. Use your own rates and a small representative batch before budgeting a full catalog. A generation fee alone is not the cost of a finished product photo.
Choosing a style by garment type and listing slot
Start with what the product title and size chart leave unclear. If the unanswered question is “What exactly is included?” or “What does the graphic look like?”, flat lay may be enough. If the question is “How is this garment shaped?”, a ghost mannequin view shows more of its shape.
| Product type | Recommended main view | Useful secondary views | Decision reason |
|---|---|---|---|
| T-shirts | Clean flat lay or ghost mannequin | Print detail, back view, styled flat lay | Choose flat lay when the graphic is central; choose ghost mannequin when volume and sleeve shape need explanation. |
| Jackets and blazers | Ghost mannequin | Back, lining, closures, pocket details, on-model | Shoulders, lapels, waist shaping, and volume tend to disappear when the garment lies flat. |
| Dresses | Ghost mannequin | Back, fabric detail, flat outline, on-model | A dimensional view explains neckline, waist, sleeve, and drape more clearly. |
| Knitwear | Flat lay or ghost mannequin | Texture close-up, folded view, back | Flat lay protects softness and texture; ghost mannequin adds a dimensional view when silhouette matters. |
| Activewear | Ghost mannequin or on-model | Flat lay set, seams, waistband, fabric detail | Construction and body position matter, but a flat lay is useful for showing every piece in a set. |
| Accessories | Flat lay | In-use, scale reference, material detail | Most accessories do not benefit from an invisible torso, while arrangement and scale need attention. |
| Product bundles | Flat lay | Individual ghost mannequin or product views | An overhead arrangement can make the number and relationship of included items immediately clear. |
Before choosing the main image, check your marketplace’s current image requirements for that product category.
Using both styles in one product listing
Use each listing photo to show something different: the garment’s shape, its back, fabric details, or the pieces included in the purchase.
Main image
Identify the product immediately with the clearest compliant view for the channel.
Shape and construction
Use ghost mannequin, back, or side views to explain garment structure and volume.
Contents and styling
Use flat lays to show coordinated pieces, possible outfits, or everything included.
Proof and detail
Add close-ups for fabric, print, seams, fasteners, labels, and other features.
How to create flat lay and ghost mannequin images with AI
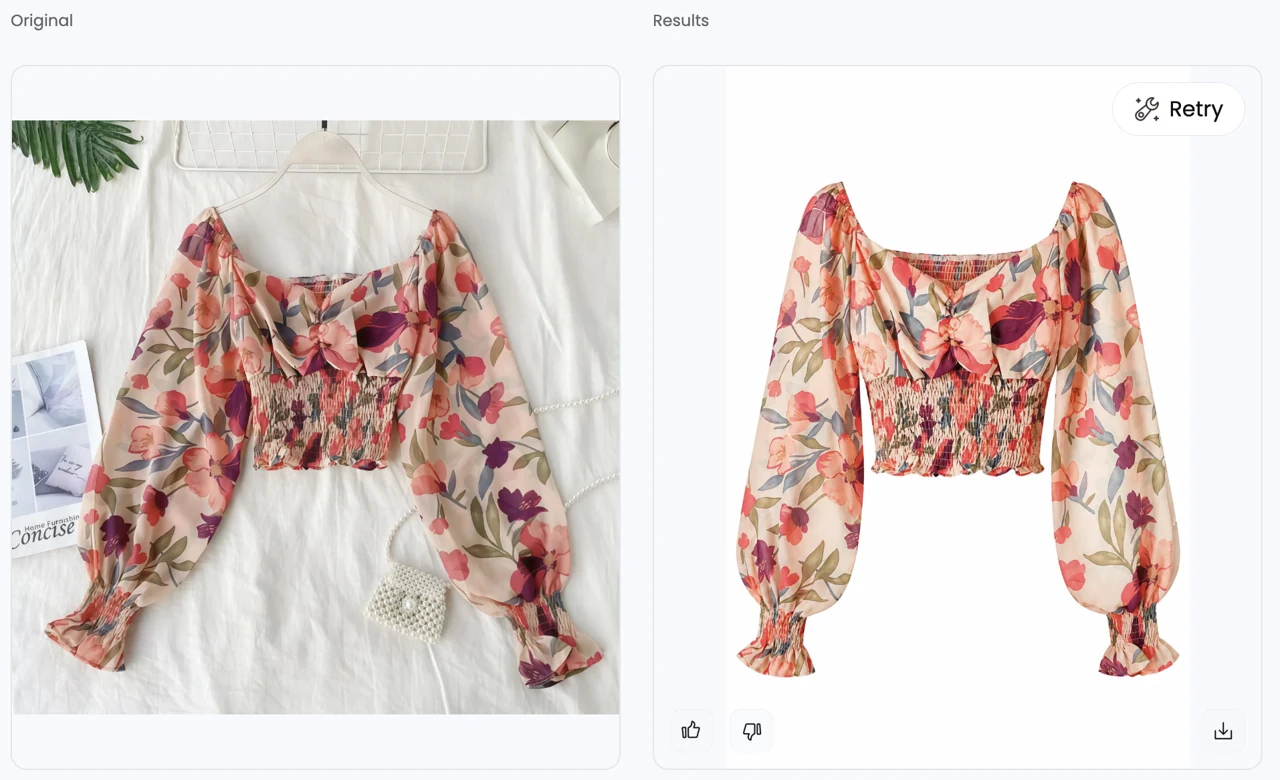
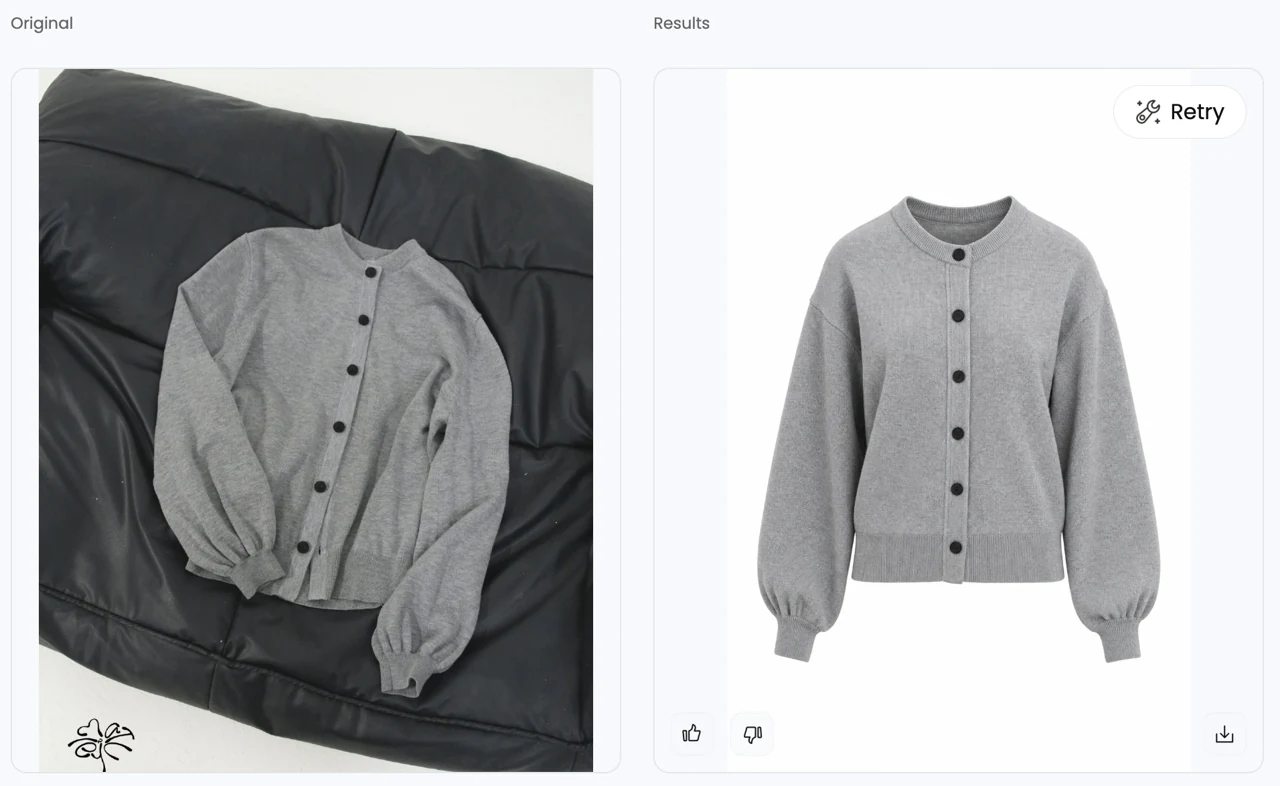
With a clear photo of the complete garment, AI tools can generate flat lay and ghost mannequin views without a separate shoot for each style.
Create either style on desktop or your phone
- Choose a photo style. Open the AI Flat Lay Generator for an overhead-style view or the AI Ghost Mannequin Generator for a dimensional view. You can use either tool in a desktop or mobile browser.
- Upload a clear source photo. Select the complete garment image from your computer or phone library. Choose the garment type if the tool asks for one.
- Generate, inspect, and save. Use the quality checklist below to review the result before downloading it.
An AI-generated shape does not show how the garment will fit a real person. Include accurate measurements and on-model photos when fit needs explaining.
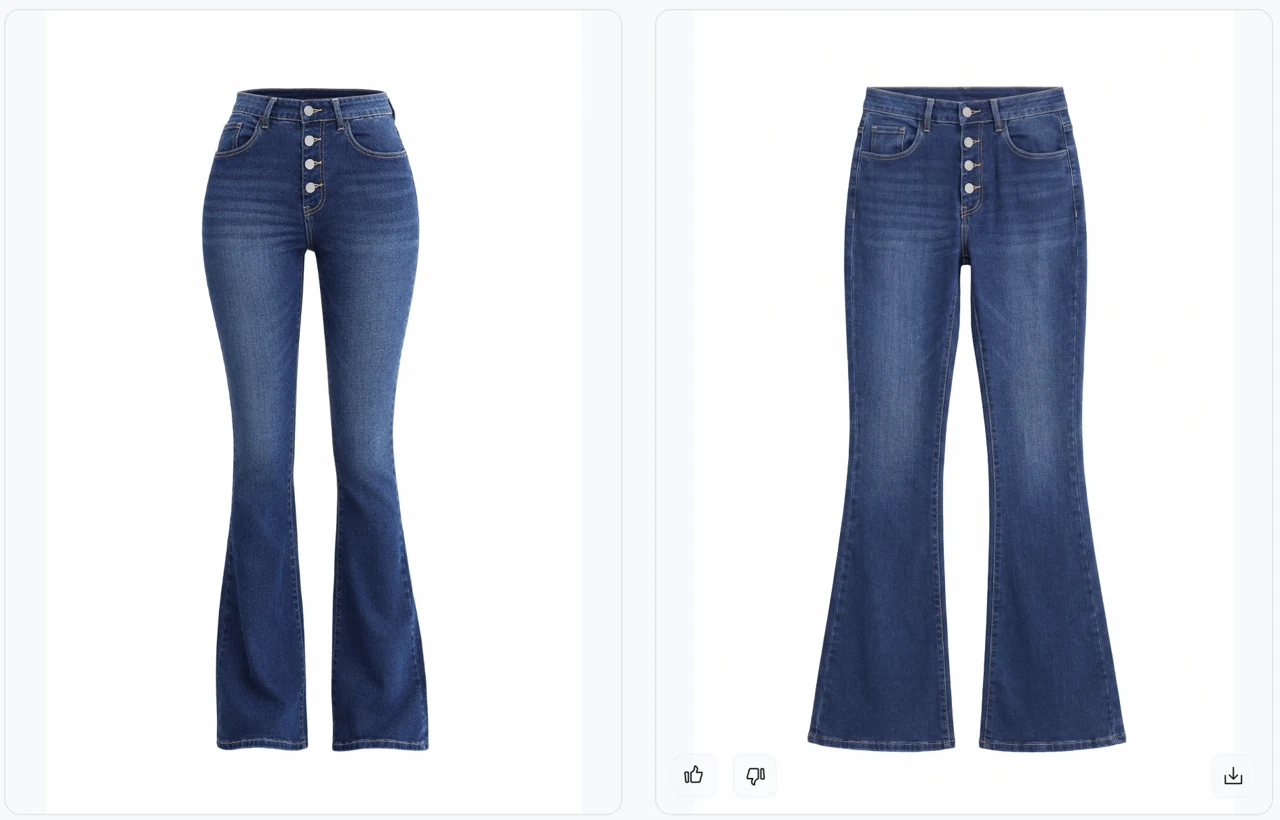
Original
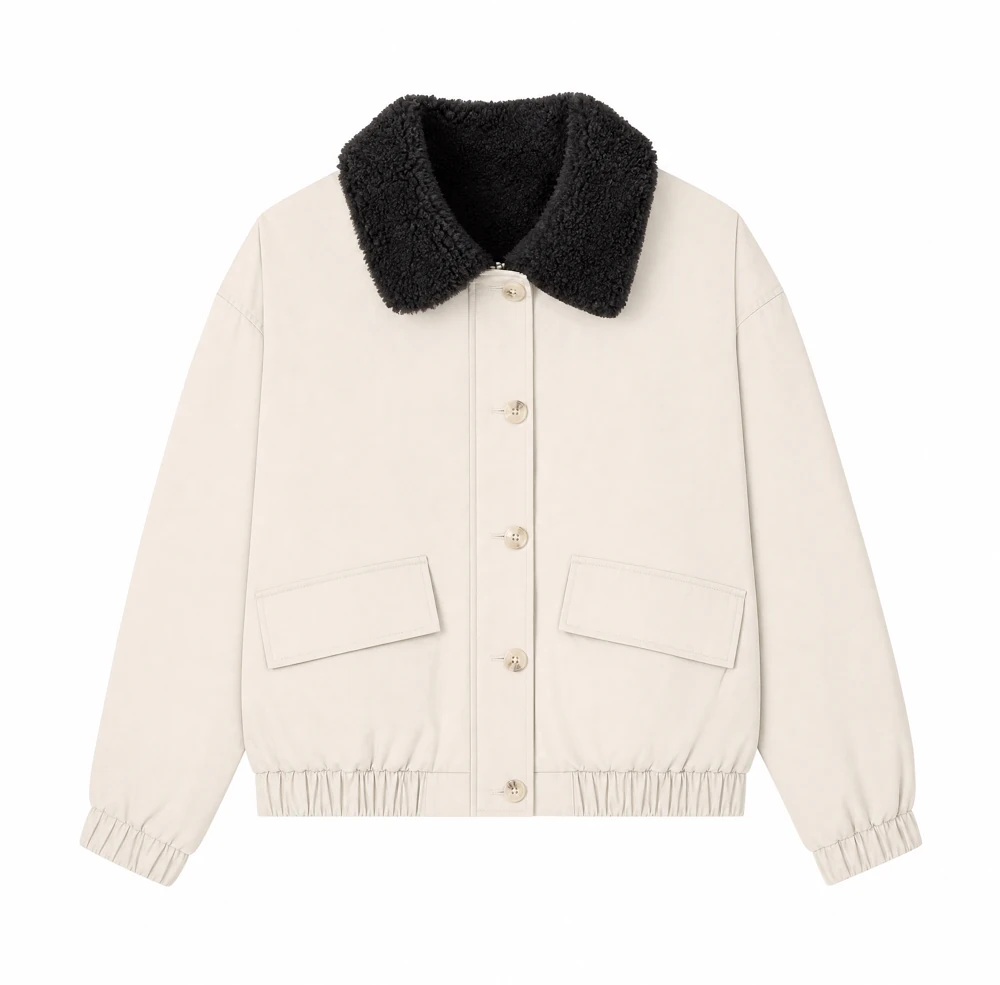
Flat Lay
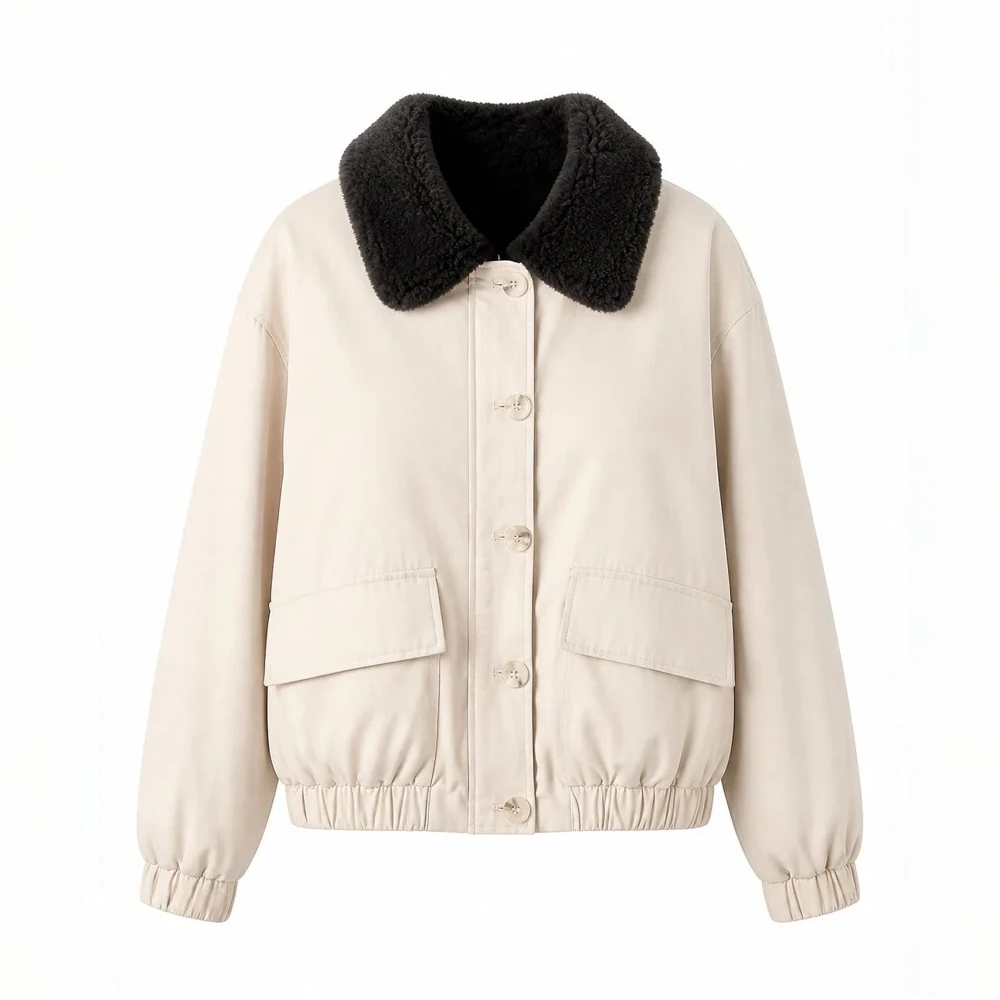
Ghost Mannequin
More AI clothing photo examples
Quality-control checklist before publishing
- Color and print: compare hue, contrast, graphic proportions, and print placement with the physical product.
- Construction: count buttons, pockets, straps, panels, fasteners, and every piece in a set.
- Shape: check the neckline, shoulders, sleeve length, waist, hem, and overall proportions.
- Fabric: zoom in for invented texture, lost ribbing, false transparency, or over-smoothed material.
- Edges and interior: inspect armholes, collar interiors, straps, gaps, and shadows for broken geometry.
- Consistency: compare the crop, canvas, background, scale, and orientation with the rest of the catalog.
Before you publish the listing
Lead with a clear product photo that meets your marketplace’s image rules. Remove duplicate views, add any missing details, and make clear which accessories or props are sold separately.
Frequently asked questions about ghost mannequin vs flat lay
Is ghost mannequin better than flat lay for clothing photos?
Neither is universally better. Use ghost mannequin when structure and volume matter; use flat lay when outline, arrangement, or included pieces matter.
Can you use flat lay as the main product image?
Yes, if the flat lay presents the complete product clearly and follows your sales channel's image rules. Choose ghost mannequin or on-model photography when shoppers need more information about fit or structure.
Is traditional ghost mannequin photography more expensive than flat lay photography?
It is usually more labor-intensive because you need a suitable mannequin, multiple source photos, masking, and composite retouching. Actual cost depends on garment complexity, production volume, location, and whether you edit in-house or outsource.
Do you need a special mannequin for ghost mannequin photography?
You need a mannequin that supports the garment accurately. A modular mannequin with removable neck or arm sections can simplify the shoot, but hidden areas may still require separate photos and post-production.
What makes a good source photo for AI ghost mannequin or AI flat lay?
Use a sharp, evenly lit image that shows the full garment, true color, print details, and clearly separated sleeves or straps. Avoid heavy folds, blocked areas, blur, and clipped edges. See the ghost mannequin photo editing workflow.
References
- Adobe — Flat Lay Photography: A Beginner's Guide. Accessed September 7, 2026.
- Pixelz — E-commerce Ghost Mannequin Services. Accessed September 7, 2026.
- Snappyit — AI Ghost Mannequin Generator. Accessed September 7, 2026.
- Snappyit — AI Flat Lay Clothes Generator. Accessed September 7, 2026.
- Snappyit — Ghost Mannequin Photo Editing. Accessed September 7, 2026.
- Snappyit — What Is the Invisible Mannequin Effect?. Accessed September 7, 2026.
- Snappyit — Swimwear Flat Lay Photography. Accessed September 7, 2026.