
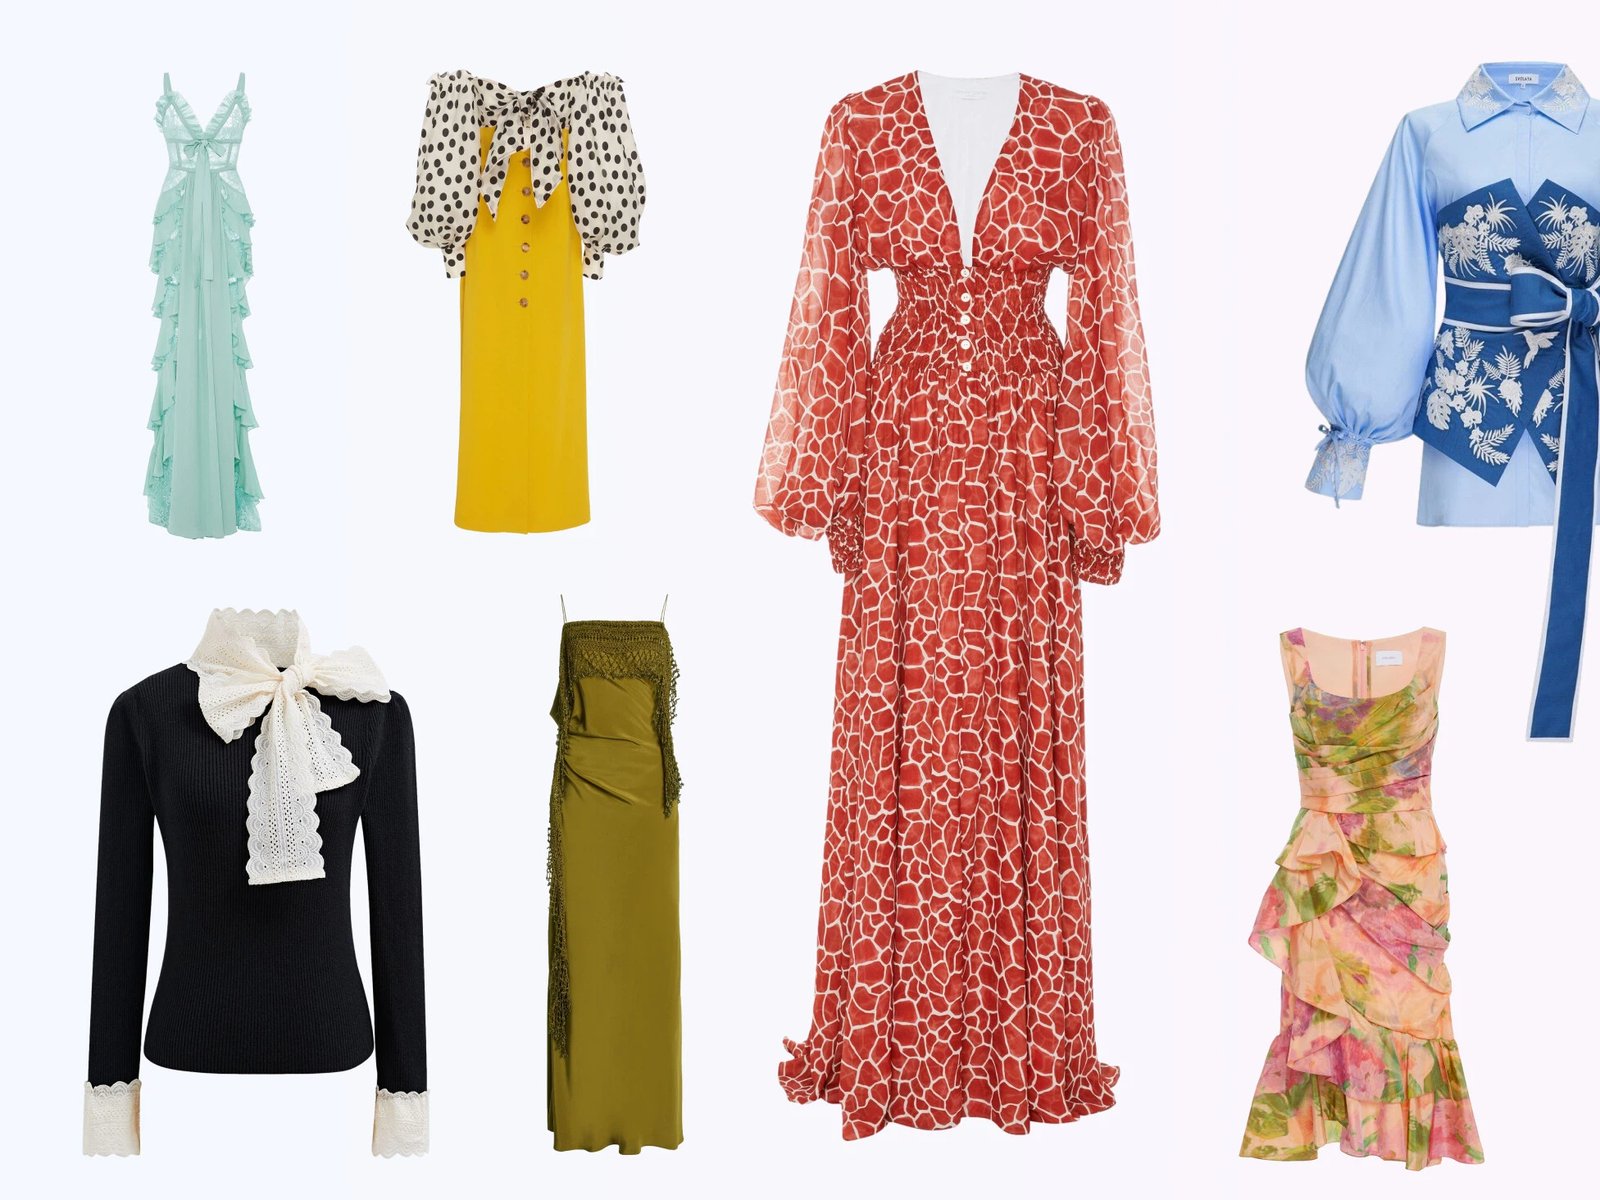

For catalog planning: Ghost mannequin photography gives apparel a worn, hollow 3D shape without showing a person or mannequin. You can produce it in-house, send photographed files to an editor, or test an AI workflow. Compare the options by cost per image your store can actually publish—including photography, subscriptions, retries, and review—not by the advertised starting price.
What Is Ghost Mannequin Photography?
Ghost mannequin photography shows the shape and drape of clothing while keeping the frame focused on the product. The shoulders, collar, sleeves, or waistband look filled, but no person or mannequin remains visible.
Ghost mannequin photography: product images where clothing holds a lifelike, hollow 3D shape with nothing visible wearing it. The name comes from the classic production method, which photographs the garment on a mannequin and removes the mannequin in editing.
How the invisible mannequin effect works
The effect is photography plus removal. The classic version shoots the garment on a mannequin, photographs the interior views (inner collar, cuffs, waistband) separately, then erases the mannequin in editing and blends those views into the gaps. The garment keeps a body's shape without a body in the shot.
The finished image looks worn but model-free, so shoppers can read the drape without another subject in the frame. When requesting quotes, check the terminology: neck joint editing fills only the neck opening, while a full ghost mannequin edit covers every visible opening. That difference changes both the source-photo list and the price.
Ghost mannequin vs other clothing photography styles
| Image style | What buyers see | How sellers are charged | Where it fits |
|---|---|---|---|
| Ghost mannequin | 3D worn shape, product only | Studio package, editing‑only fee, or AI credits | Main listing images for structured garments |
| Flat lay | Garment from above, no depth | DIY or provider quote/package | Accessories, basics, unstructured knits |
| Hanger shot | The garment on a hanger, drape flattened | DIY or provider quote/package | Secondary views, resale listings |
| On-model | Fit on a real body, styling story | Shoot package or day rate; model and styling may be separate | Lookbooks, hero banners, ads |
| Visible mannequin | Shape, with a plastic torso in frame | DIY equipment or provider quote | Secondary images when speed matters more than a clean product-only look |
For structured pieces such as blazers, button-downs, dresses, and denim, ghost mannequin images can show shape without introducing a model. Flat lays remain useful for accessories and soft basics, while on-model photos add fit and styling context. Many apparel stores use more than one style across the gallery.
Why ecommerce sellers use ghost mannequin images
Baymard's product-page UX research treats product images and image-gallery design as core parts of evaluating an item. For apparel sellers, the invisible mannequin effect adds shape cues while keeping the product isolated. A repeatable background, crop, and silhouette also makes neighboring SKUs easier to compare on collection pages.
Traditional Ghost Mannequin Photography Workflow
Understanding the studio workflow makes provider quotes easier to compare. It also shows which source photos an editor needs and where missing shots can create revisions or a reshoot.
The studio workflow, start to finish
- Prepare the garment and the mannequin. Steam or iron, button and zip, then pin and tape the piece to a mannequin with detachable neck and arm sections until it hangs straight and even.
- Shoot the exteriors. Front and back on a locked-down camera, with lighting that stays identical between frames.
- Shoot the interiors. Remove mannequin sections and photograph the inner collar, cuffs, and waistband from matching angles; these fill the openings later.
- Composite in Photoshop. Mask the garment, erase the mannequin, blend each interior view into its opening, and paint soft shadows so the hollow areas show real depth.
The exterior and interior frames must align. If the tripod, garment, or lighting shifts between shots, the editor has to correct mismatched edges and shadows. The walkthrough below shows the sequence from capture to composite:
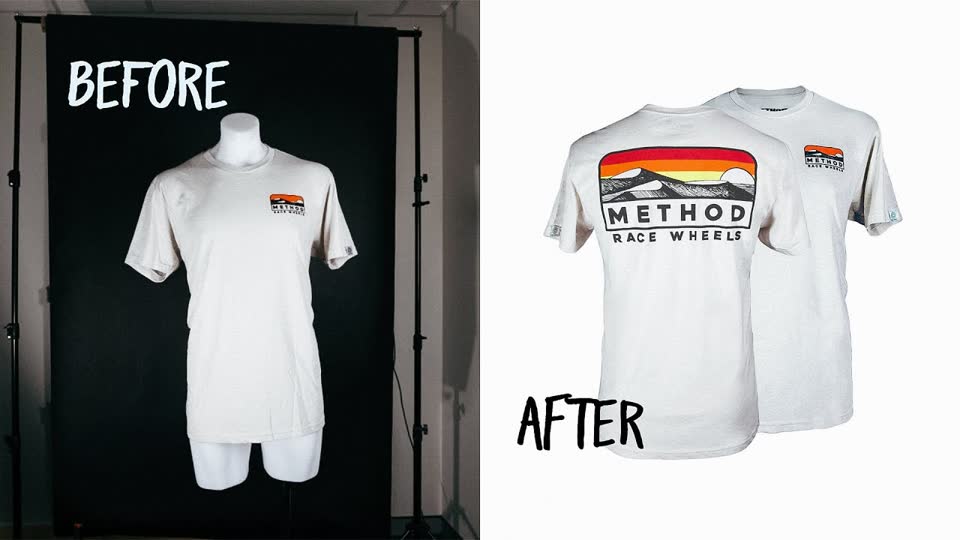
The studio route, in motion
How to SHOOT and EDIT Ghost Mannequin Photography — BidPixel
Ten minutes on the studio shoot and the Photoshop composite, in the same order as the four steps above.
Ghost mannequin photography equipment and skills
- A ghost mannequin with detachable sections. Current Mannequin Mall examples range from $297.99 for a basic torso to $1,327.99 for a premium full-body model; torso and full-body products are not equivalent.
- Lighting: two softboxes or strobes, plus stands and a white backdrop
- Camera and tripod, locked in place between frames
- Photoshop or Affinity Photo compositing skills, or an editor who has them
Budget for the workflow, not only the mannequin. Garment preparation, repeatable lighting, capture time, and compositing skill often matter more to throughput than the equipment price alone.
Why traditional ghost mannequin production is hard to scale
Quotes cover different deliverables. soona, a general US product-photography service rather than a dedicated ghost mannequin studio, publishes a $149 booking fee and $39 per selected photo, with premium edits from $9. Editing-only services assume you provide the source photos: Path lists ghost mannequin editing from $0.89 per image with a default 24-hour turnaround, while Pixelz lists a $0.50 invisible-mannequin add-on on top of its base image price and subscription. Compare included views, turnaround, revisions, and region before comparing price.
Studio, Outsourced Editing, or AI: Which Fits Your Catalog?
Start with the assets and skills you already have. The table compares scope and workflow; the prices are dated examples, not a universal rate card.
| Factor | Traditional studio | Outsourced editing | AI generation |
|---|---|---|---|
| Published USD price example | soona: $149 booking + $39 per selected product photo; styling and premium edits are separate | Path: from $0.89/image. Pixelz: $0.95-$1.45 base + $0.50 add‑on; subscriptions apply | Snappyit: plans from $8.20/month; per-output cost depends on credits used |
| Inputs you provide | Mannequin, lighting, camera, and interior views | Photographed exterior and interior views | Clear garment photo; separate source for each required view |
| Production speed | Depends on booking, shoot, and edit schedule | Path: 24-hour default; Pixelz: 48-hour standard | Varies by tool, input, and queue; review every output |
| Skills needed | Photography + compositing | Product photography + vendor QA | Clear source photography + output review |
| Image consistency | High when setup and editing stay controlled | Depends on the brief and QA process | Depends on source quality; check shape, logos, texture, and color |
| Batch suitability | Strong with a fixed setup and trained staff | Strong when the brief and QA process are stable | Fast to test; every output still needs product-detail review |
A practical starting point depends on your current team:
- Launching a store with no specialist gear: test AI before buying a dedicated torso or full-body ghost mannequin.
- A team that shoots well but doesn't edit: outsource the compositing and keep the camera work in-house.
- A brand with weekly drops, strict styling rules, and staff: a controlled studio workflow offers the most direct control.
For a deeper head-to-head between the first and last options, our traditional vs AI comparison explains the workflow tradeoffs.
Try an AI ghost mannequin workflow →
3D Ghost Mannequin Photography for Multi-Angle Product Images
In ecommerce, “3D ghost mannequin” usually describes a set of two-dimensional front, back, side, or three-quarter images that make a garment look filled and dimensional. It does not automatically mean an interactive 3D model, a 360° spin, or an augmented-reality asset. Use those labels only when the customer can actually rotate or interact with the product.
How to create a consistent 3D ghost mannequin set
- Plan the gallery before shooting. Decide which real views shoppers need—typically front and back, with side or three-quarter views only when construction or fit details justify them.
- Capture every exterior and hidden interior view. Traditional production needs matching inserts for the collar, cuffs, waistband, hood, or hem visible in each angle.
- Keep the setup fixed. Mark camera and mannequin positions, lock lighting and white balance, and keep garment scale consistent across the set.
- Composite or generate each view. For AI, provide a real source photo for every required angle unless the tool explicitly supports multi-view generation and the inferred details can be verified.
- Review the set together. Check shoulder width, garment length, color, seams, logos, pattern placement, openings, and crop from one view to the next.
Never use a generated back or side view as evidence of construction that was not visible in the source. When hidden details matter, photograph the actual angle or route the SKU to a controlled manual workflow.
Choosing a Ghost Mannequin Photography Service
A “ghost mannequin service” can mean two very different purchases: a studio that receives and photographs your garment, or an editing provider that works from files you supply. Confirm which one is being quoted before comparing per-image prices.
| Question for the provider | Why it matters |
|---|---|
| Do you photograph the product or edit supplied files? | Photography, shipping, styling, and editing are separate cost scopes. |
| Which views and interior inserts are included? | Front, back, side, neck joint, cuffs, lining, and hem may be priced separately. |
| Are color correction, background, shadow, and export included? | A low starting rate may not cover a publish-ready listing file. |
| What turnaround, revision, and rush terms apply? | Catalog launch dates depend on review and correction cycles, not first delivery alone. |
| How are difficult fabrics handled? | Lace, sheer panels, reflective fabric, dense patterns, and layered construction need more control. |
Compare providers by cost per approved image after photography, revisions, and merchant review. The dated examples in this article are scope references, not a market-wide price promise; confirm the current quote for your region, garment complexity, and order size.
How AI Ghost Mannequin Photography Works
An AI workflow changes what your team must prepare. Instead of shooting a removable mannequin plus separate interior inserts, you upload a clear garment photo and review the generated hollow view. Plan a real source photo for every front, back, or side angle the listing needs.
The production loop is short—upload, generate, compare, then approve or retry—but approval still takes human judgment. Check collars, openings, patterns, logos, texture, and color against the SKU. Judge the workflow by cost per approved image after retries and QA, not by how quickly the first preview appears.
The same source photos may also support other AI product photography workflows. When comparing AI-assisted services, test them on difficult garments from your own catalog rather than relying only on provider examples.
How to Create Ghost Mannequin Photos with Snappyit
For sellers testing Snappyit's ghost mannequin tool, the workflow is:
- Upload your clothing photo. Either flat on a table or on a hanger works; the tests below used both.
- Select ghost mannequin generation.
- Let the AI process the garment. Processing time varies with the tool, input, and queue, so plan around the number of approved outputs rather than a fixed seconds-per-image claim.
- Review against your source photo, then download.
The two-minute demo below uses a brown leather biker jacket, whose lining and inner collar make useful review points. It shows the upload, generation, final comparison, and fix panel for another pass.
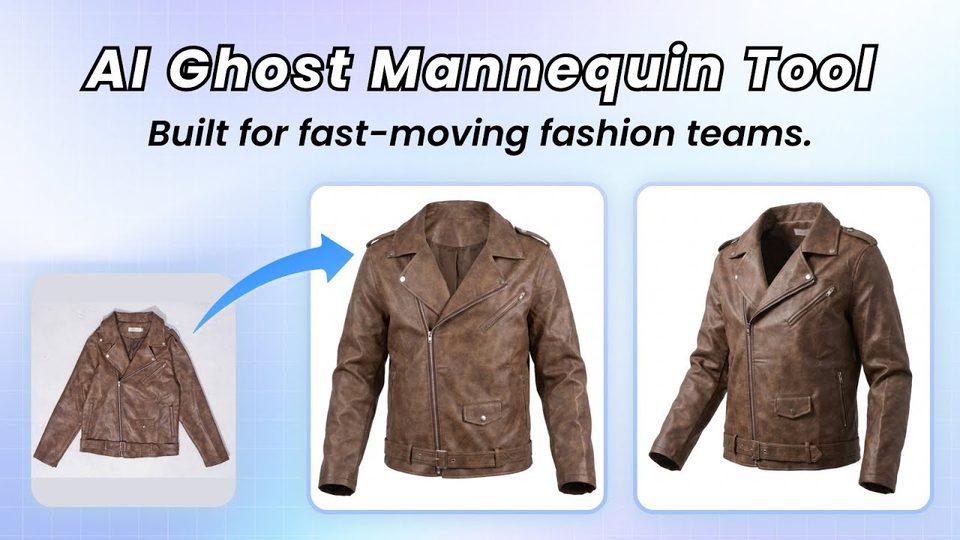
The full flow, in motion
How to Turn Flat Lay Photos into 3D Ghost Mannequin Images — Snappyit
Upload, generation, and the final comparison on a leather biker jacket, plus the fix panel for re-runs.
Real Tests: Four Garments from Phone Photos to Ghost Mannequin
We tested four garments photographed on a phone in an ordinary room, each chosen for a different failure risk. The inputs were used as photographed; afterward, the pairs were only cropped to the same 900×1000 white canvas. This is a qualitative product test, not a benchmark or a claim about pass rates across other catalogs.
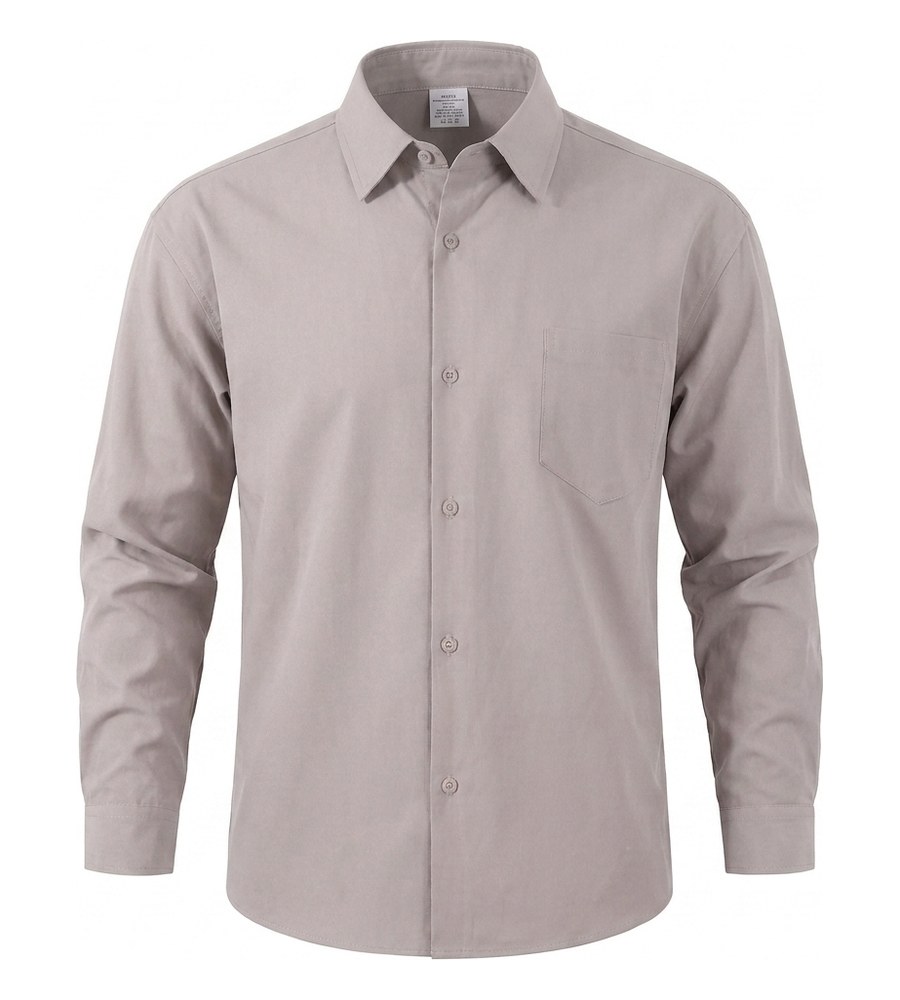
Test 1: A woven shirt, front and back
A taupe button-down provided a straightforward front-and-back test. The generated views retained the standing collar and visible pleats. For catalog planning, the important constraint is that front and back outputs require separate source photos.
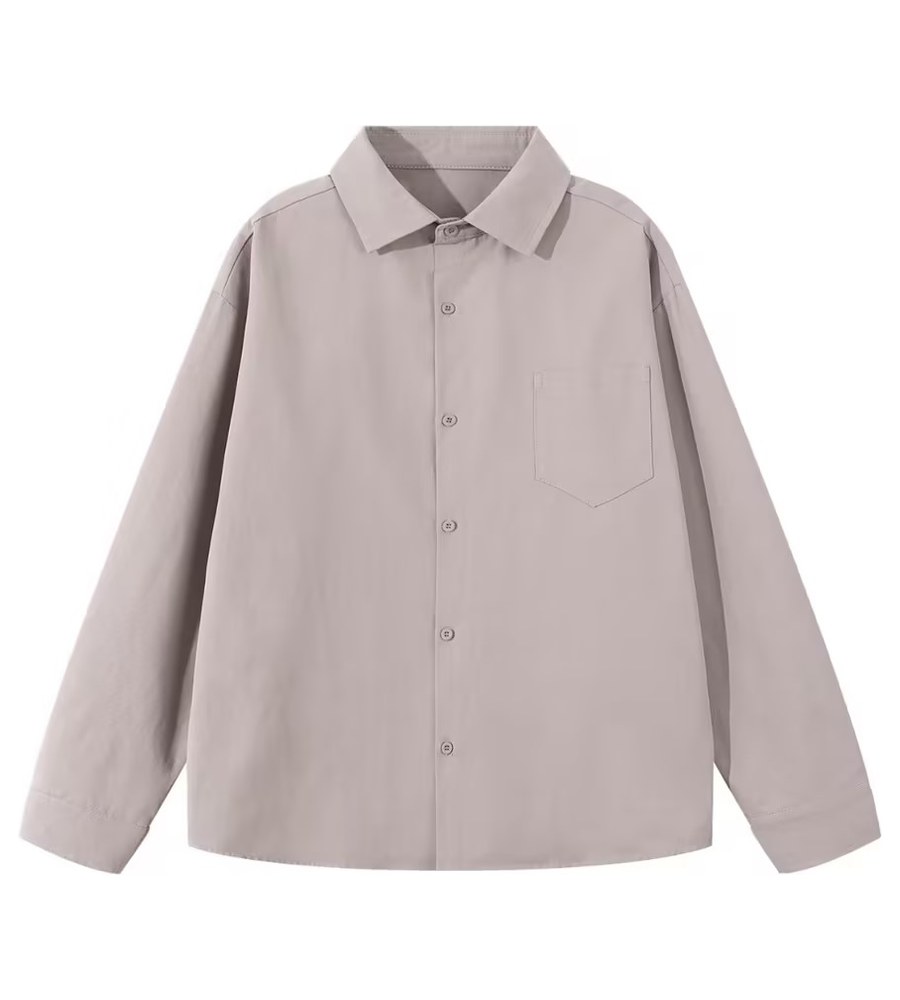
Flat photo in
Ghost mannequin out
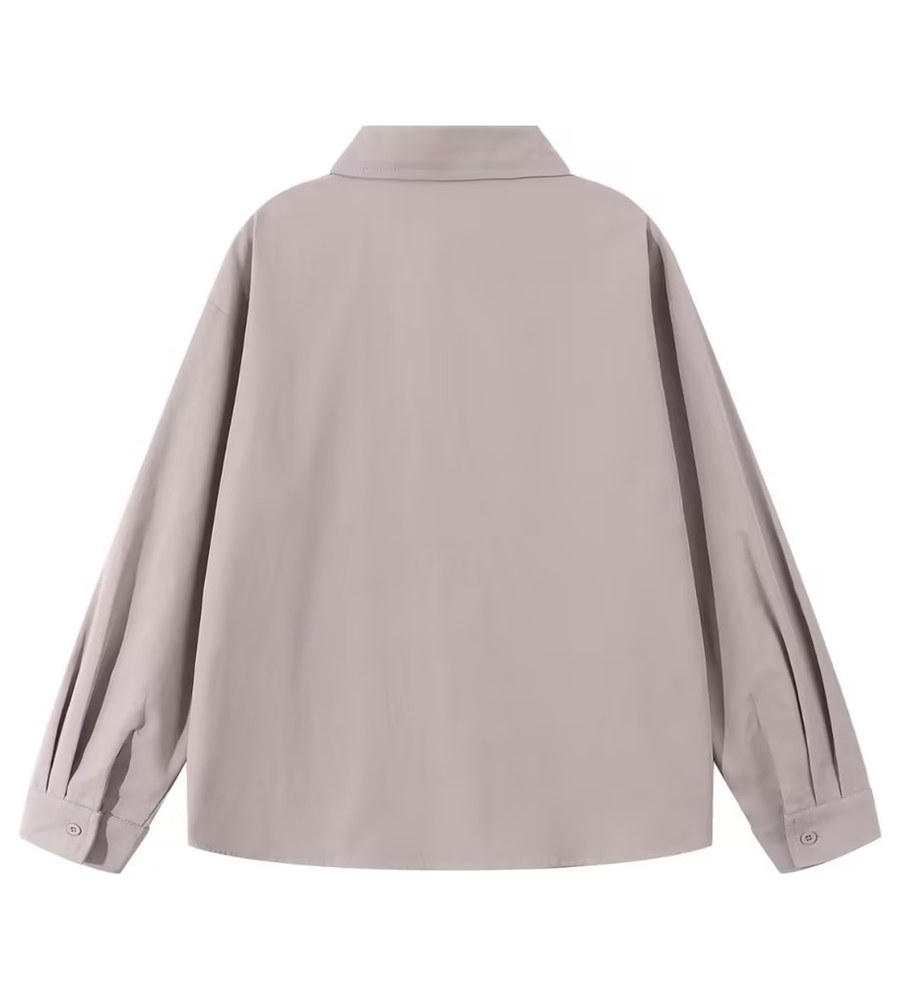
Back, flat photo
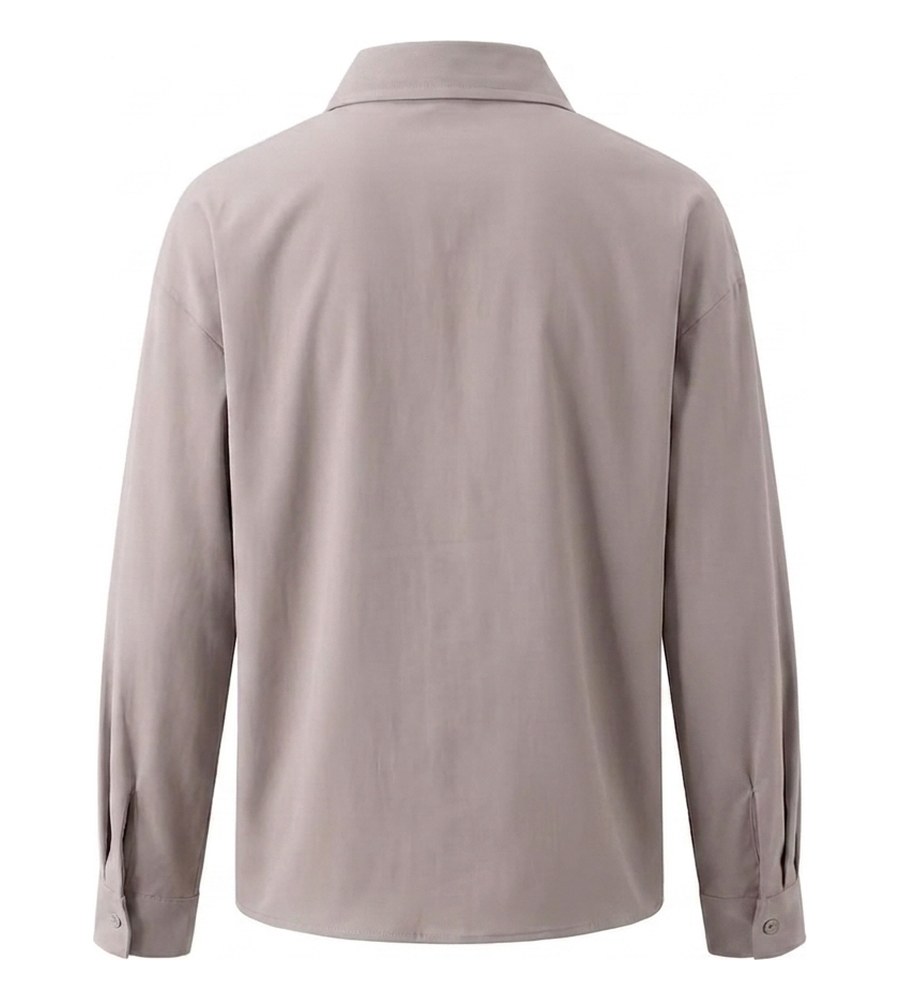
Back, composite
| What we checked | Woven shirt (Test 1) |
|---|---|
| Fabric | Crisp woven cotton |
| Detail at risk | Collar stand, cuff and yoke pleats |
| Observed result | Collar, sleeves, yoke, and cuff pleats remained visible in both views |
| Traditional composite task | Blend the separately photographed inner collar into the neck opening |
Test 2: A white cardigan on a cream chair
This phone photo combined white knit, a cream chair, and thin black ties. Those low-contrast edges and narrow details made it a useful masking test; the ties, trim, and visible knit texture remained in the output.
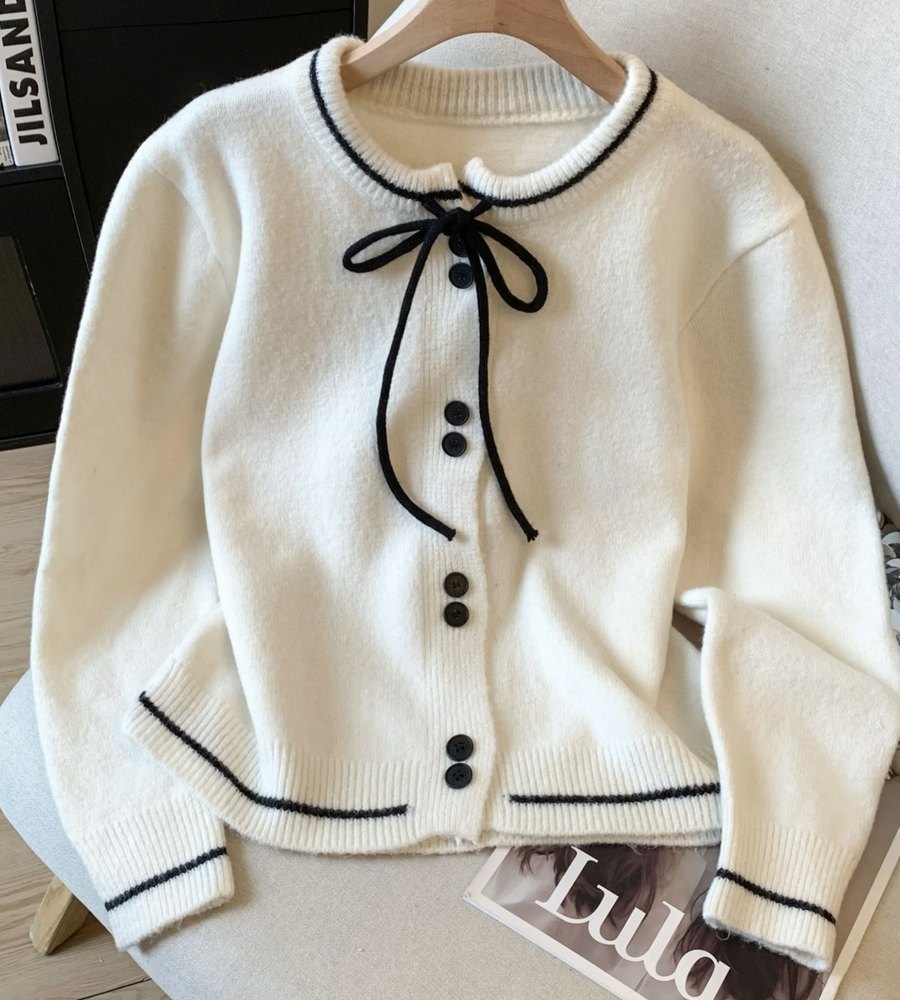
Phone shot, white on cream
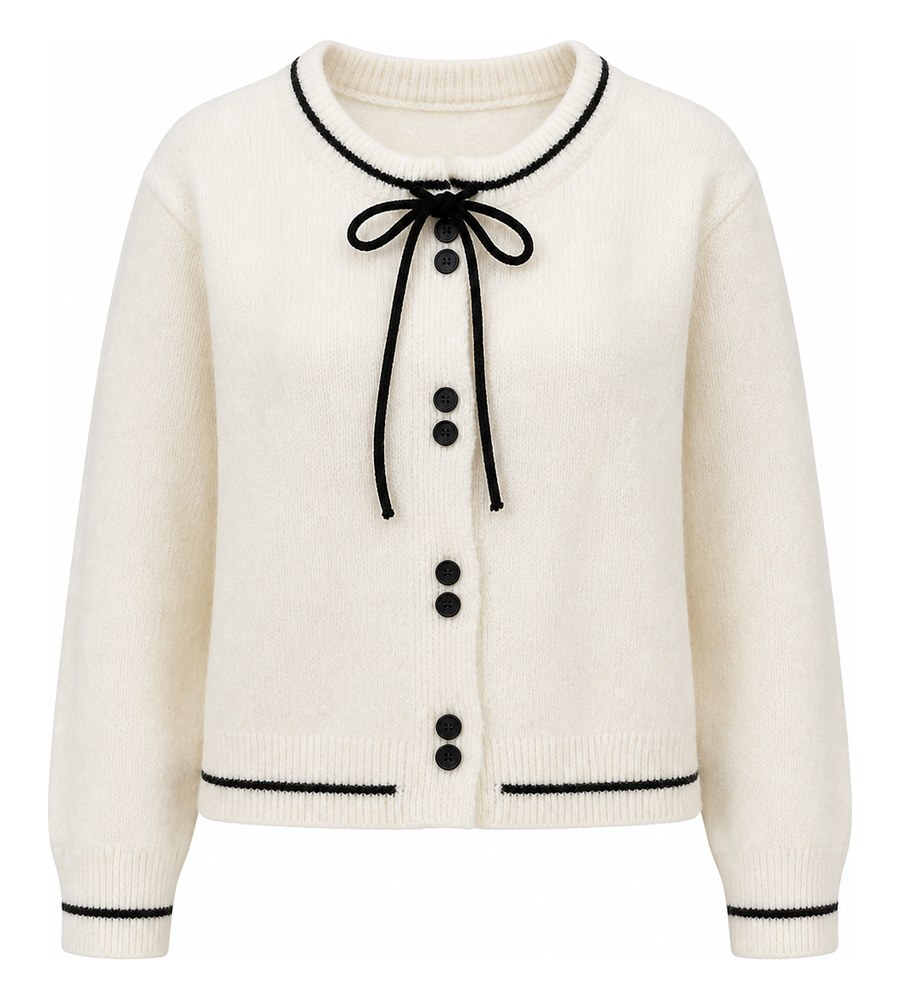
Ties and trim intact
| What we checked | White cardigan (Test 2) |
|---|---|
| Fabric | Soft white knit |
| Detail at risk | Thin black ties and trim |
| Observed result | Thin black ties, trim, and visible knit texture remained in the output |
| Traditional composite task | Mask low-contrast white‑on‑cream edges and clean the garment outline |
Test 3: Dark wide-leg jeans on a hanger
For trousers and jeans, check whether the waistband looks genuinely open and whether the wash survives. In this hanger-photo test, the generated view added waistband depth while retaining the visible wash and wide-leg outline.
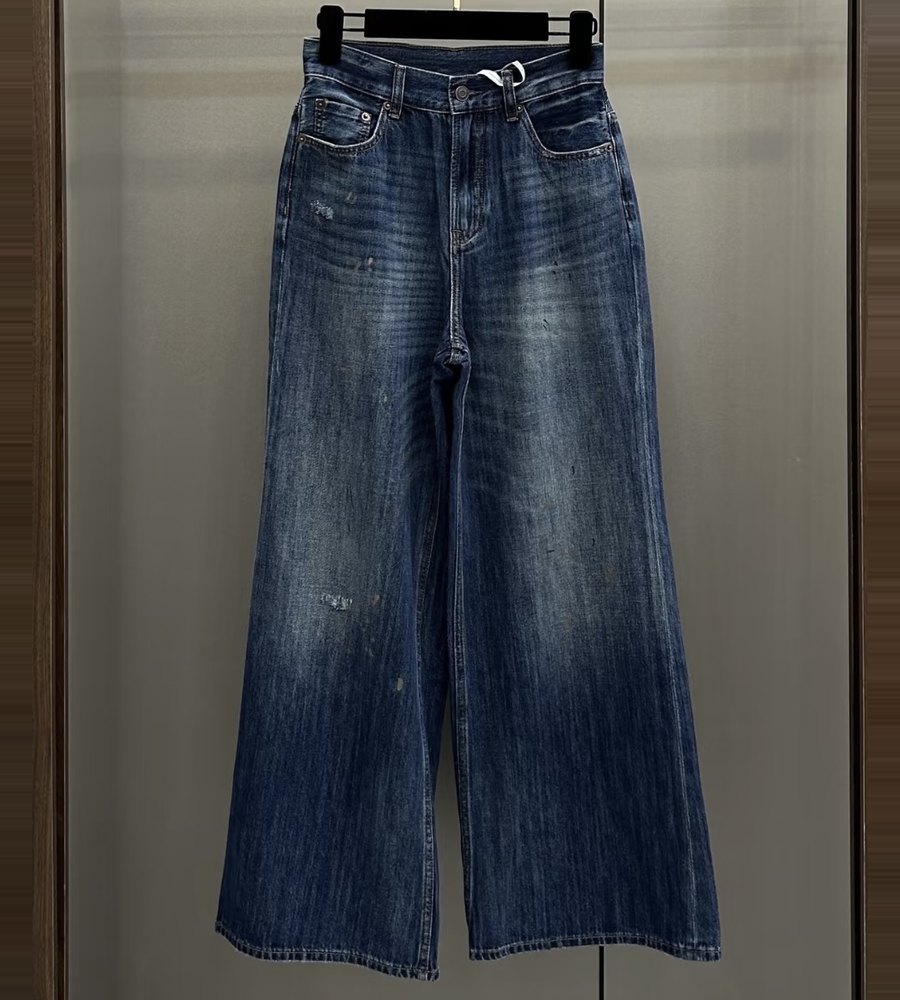
On a hanger, at home
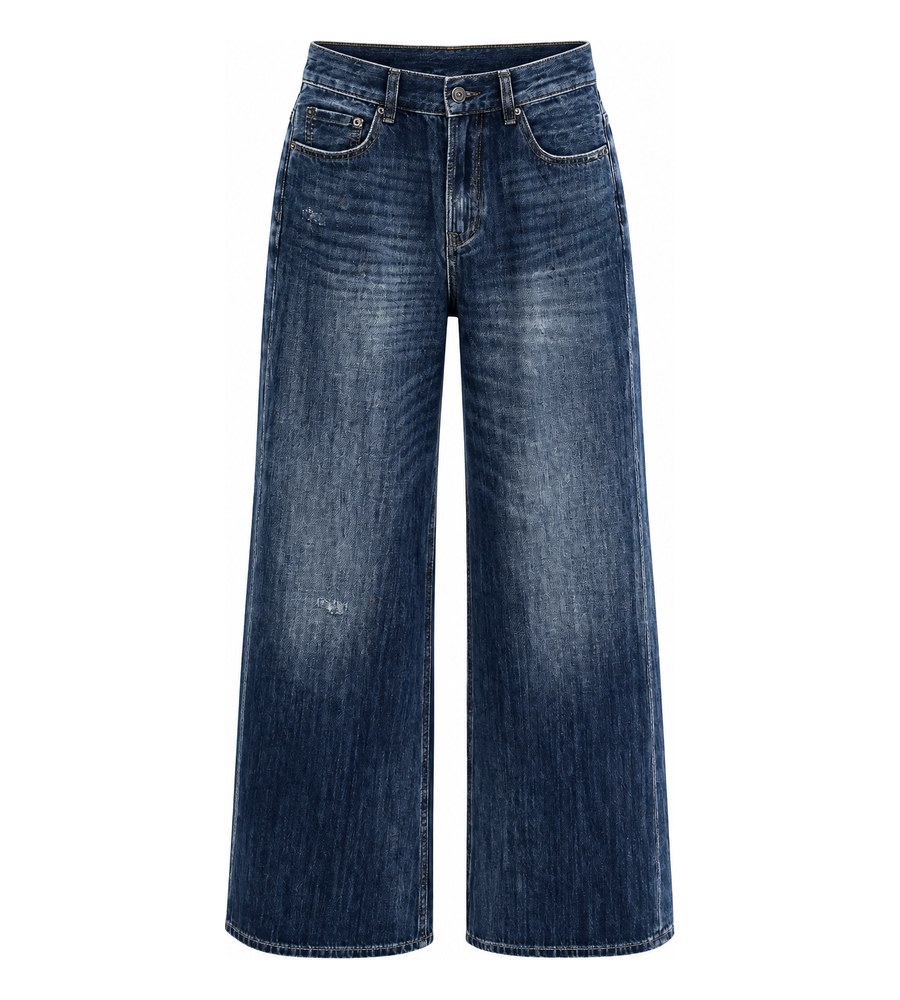
Waistband open, wash intact
| What we checked | Wide-leg jeans (Test 3) |
|---|---|
| Fabric | Dark rigid denim |
| Detail at risk | Wash streaks and distressing |
| Observed result | The waistband appeared open while the wash and wide-leg outline remained visible |
| Traditional composite task | Composite a separately photographed waistband interior |
Test 4: A striped hoodie with a printed lining
Stripes make seam changes easy to spot. This hoodie test focused on shoulder and zip alignment plus the printed hood lining. All three remained visible in the generated output, although sellers should repeat the check on every patterned SKU.
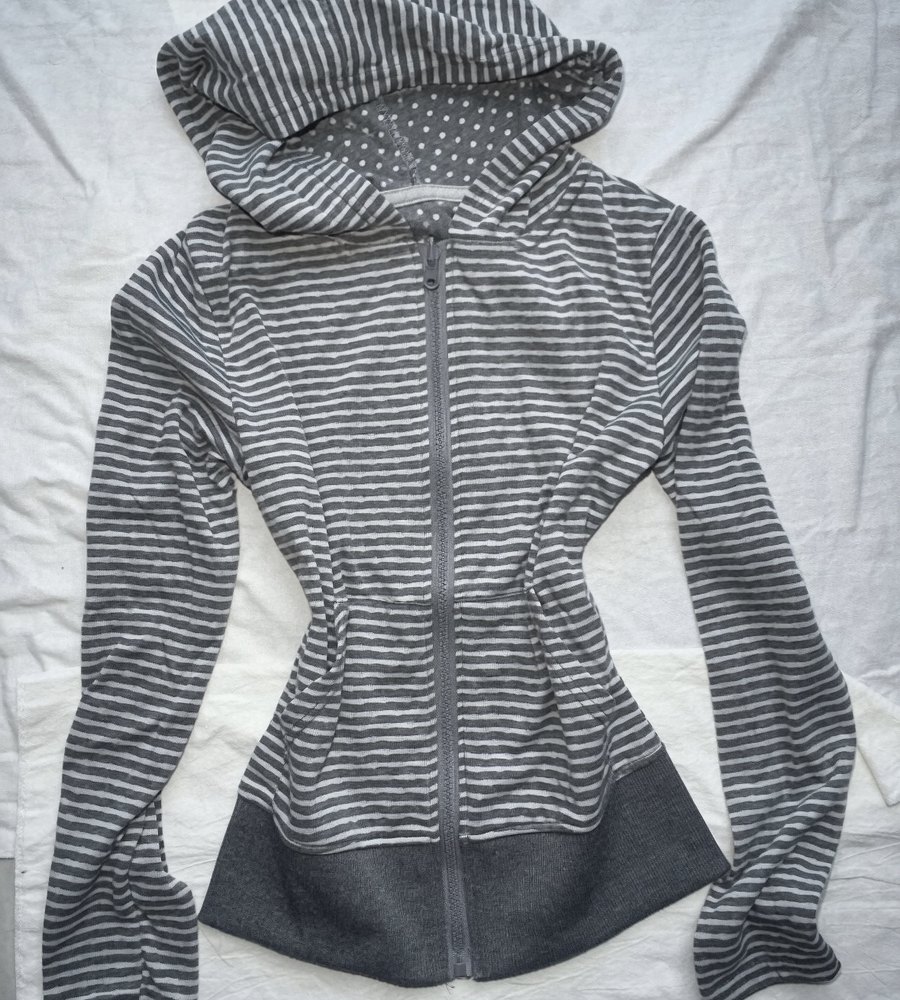
Flat on a bedsheet
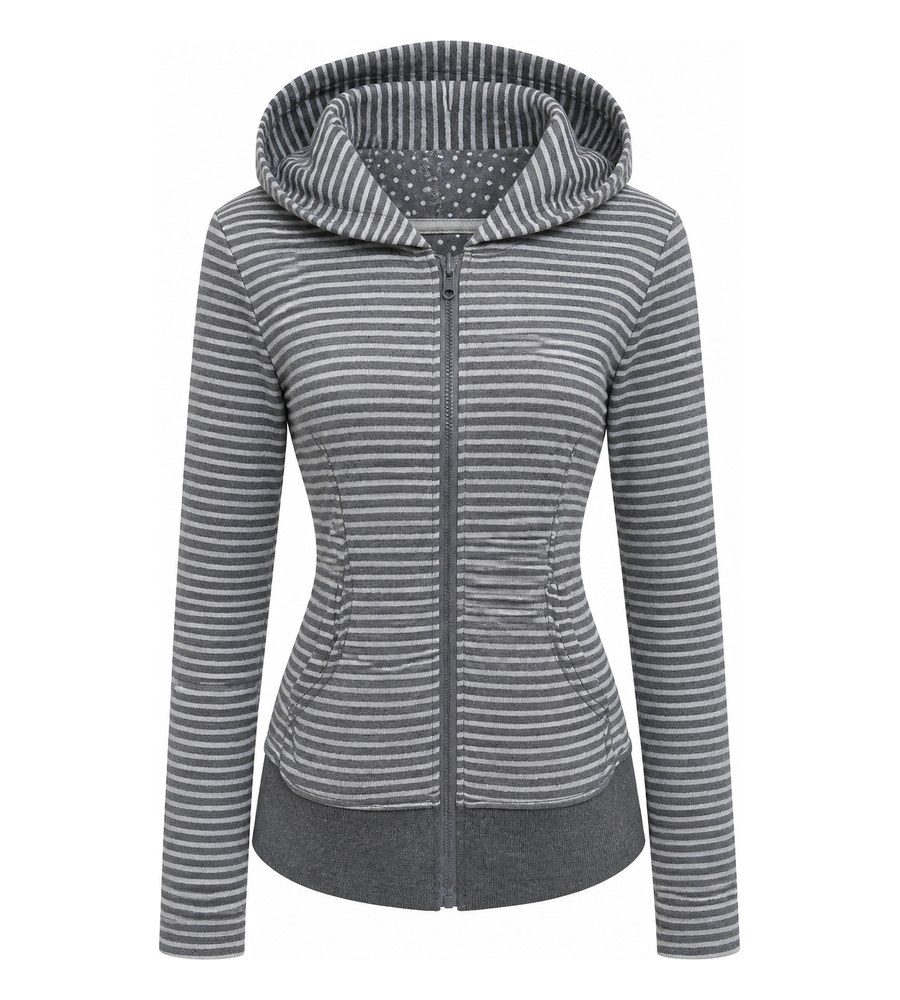
Stripes still aligned
| What we checked | Striped hoodie (Test 4) |
|---|---|
| Fabric | Striped knit jersey |
| Detail at risk | Stripe alignment, polka‑dot hood lining |
| Observed result | Stripes remained aligned at the shoulders and zip; the hood lining remained visible |
| Traditional composite task | Align patterned seams and composite the separately photographed hood lining |
Best Practices for High-Quality Ghost Mannequin Images
Everything above assumed a decent source photo. This section shows how to make one, plus the checks to run before an image goes live.
Shoot source photos for AI ghost mannequin results
Source-photo quality sets the ceiling for the generated result. Use these six habits:
- Fit the whole garment in the frame. Keep hems, sleeves, and the full outline visible so the tool has enough information to shape the garment.
- One garment per photo. Overlapping pieces confuse the tool about where one item ends and the next begins.
- Use neutral, even light. Strong color casts make accurate product-color review harder. Window light or a plain ceiling light can work when it illuminates the garment evenly.
- Shoot the back too. Each view is generated from its own source, as Test 1 shows. A front-only upload gets you a front-only listing.
- Keep countable details visible. Do not fold the garment over buttons, pockets, labels, or drawstrings. Hidden details cannot be checked against the source and may change in the output.
- Keep the background simple when possible. The tests included a chair, hanger, bedsheet, and glass door, but clear contrast around the garment reduces ambiguity. Zip, button, and smooth the item before shooting.
Quality-check every ghost mannequin product image
Compare every generated image with the physical product or source photo before publishing:
- Shape and depth: confirm that the collar, sleeves, waist, and openings match the real garment rather than merely looking plausible.
- Texture and color: compare knit, denim wash, leather grain, and color against the product. If the source is soft or poorly lit, reshoot before generating again.
- Pattern and trim: stripes aligned across shoulders and zip, thin straps and ties intact, as Tests 2 and 4 show.
- Countable details: verify buttons, pockets, zips, drawstrings, labels, and logos individually.
When a check fails, try one focused retry. If the same defect returns, improve the source photo or switch to manual editing instead of spending more credits on an unsuitable input.
Export ecommerce-ready ghost mannequin images
Set a catalog standard for background, aspect ratio, crop, product scale, and source lighting. Consistent framing helps shoppers compare neighboring SKUs and reduces rework when images move between sales channels.
Separate each marketplace's documented requirements from your own higher-resolution production standard:
| Platform | Documented rule | Practical seller workflow | Source |
|---|---|---|---|
| Amazon | Main images use a pure white background, show the product only, and fill at least 85% of the frame; 1000px or more enables zoom | Export a clean master large enough for zoom, then check the current category rules in Seller Central | Amazon Seller Central |
| Shopify | Product images can be up to 5000×5000px or 25 megapixels and up to 20MB | Keep a high-resolution master and let the storefront deliver appropriately sized variants | Shopify Help |
Keep the largest approved image as the master and derive marketplace files from it. Google's WebP study reported 25–34% smaller files than comparable JPEGs at equivalent quality, but format support and storefront delivery still depend on the platform. Use descriptive filenames such as brand-navy-wool-blazer-front-1600.jpg and write alt text that describes the garment and view without keyword stuffing.
Ghost Mannequin Photography FAQs
1. What is ghost mannequin photography?
Ghost mannequin photography shows clothing in a hollow, worn 3D shape without a visible person or mannequin. The traditional workflow removes a photographed mannequin and composites interior views; some AI tools generate a similar effect from a garment photo.
2. What is 3D ghost mannequin photography?
3D ghost mannequin photography usually means a two-dimensional product image that makes a garment look filled and three-dimensional without showing a model or mannequin. The term can also describe coordinated front, back, and angled ghost mannequin images, but those separate views are not automatically an interactive 3D model or a 360-degree spin.
3. How do you create a 3D ghost mannequin effect?
The traditional method photographs the garment on a detachable mannequin, captures matching interior areas such as the inner collar, then removes the mannequin and composites the images. With an AI ghost mannequin tool, upload a clear garment photo for the required view, generate the hollow effect, and compare the result with the product. For a multi-angle gallery, provide and review each required view unless the tool specifically supports verified multi-angle generation.
4. How many photos do you need for ghost mannequin photography?
Traditional ghost mannequin photography normally needs at least one exterior photo and one matching interior photo for each finished view. Collars, cuffs, waistbands, hoods, or other visible openings may require extra interior shots. For an AI ghost mannequin workflow, start with one clear source photo for each required front, back, or angled view; a flat-lay or hanger photo can work, and a separate interior photo is usually unnecessary unless the tool requests one. Do not assume one front photo can accurately supply hidden back or side details.
5. What camera settings work for ghost mannequin photography?
For a traditional composite, use manual exposure, a tripod, low ISO, an aperture that keeps the whole garment sharp, and fixed white balance so the exterior and interior frames match. For AI ghost mannequin input, exact camera settings matter less than a sharp, evenly lit photo that shows the complete garment without clipped sleeves or hems. When shooting multiple angles for either workflow, keep the camera height, distance, lighting, background, and garment scale consistent.
6. How do you keep multi-angle ghost mannequin images consistent?
In a traditional shoot, mark the mannequin and tripod positions, keep the lighting and styling fixed, and capture matching interior areas for every view. For AI ghost mannequin images, use clear, similarly framed source photos for the front, back, and angled views unless the tool specifically supports verified multi-angle generation. Before publishing, compare shoulder width, garment length, color, seams, patterns, logos, and interior openings across the set; if an AI output changes a real detail, reshoot that source view or use manual editing.
7. Is ghost mannequin better than flat lay?
Neither style is universally better. Ghost mannequin images add shape cues for structured garments such as jackets, shirts, dresses, and jeans. Flat lays are often sufficient for soft basics, accessories, and supporting gallery images. Many apparel listings use both.
8. How much does ghost mannequin photography cost?
Published prices depend on scope. In the examples reviewed August 11, 2026, Path listed editing-only ghost mannequin work from $0.89 per image, while Pixelz listed base image prices of $0.95 to $1.45 plus a $0.50 invisible-mannequin add-on, with subscriptions applying. Studio photography, styling, equipment, shipping, AI usage, revisions, and merchant review are separate cost items, so compare the total cost per approved listing image.
9. Can AI create realistic ghost mannequin images?
AI can produce usable ghost mannequin images, but results depend on the garment and source photo. In this article's four qualitative tests, key details remained visible; the sample is not a benchmark or a pass-rate claim. Check shape, patterns, logos, texture, and color before publishing.
10. Is AI ghost mannequin suitable for Amazon and Shopify?
AI-generated ghost mannequin images can be used when the final file accurately represents the product and meets the channel's current rules. Amazon main images require a pure white background and at least 85% product fill; 1000px or more enables zoom. Shopify has different media limits, so validate each export against the destination rather than assuming one file clears every channel.
11. Do I still need Photoshop?
You may not need Photoshop when an AI output passes product-detail review. Manual editing software is still useful for correcting edges, color, logos, patterns, or interior details, and it remains the fallback when repeated generations do not match the garment.
12. Is Snappyit's ghost mannequin tool free to try?
Yes, with no credit card required. Upload a flat photo and review your first composites before deciding anything.
Generate Your First AI Ghost Mannequin Image
Start with 5–10 representative SKUs, including difficult colors, patterns, trims, and openings. Upload each source to Snappyit's AI ghost mannequin tool, then record first-pass approval, retries, review time, and cost per approved image. If the results meet your catalog standard, document the source-photo and QA checklist before expanding the workflow.
Try the AI ghost mannequin generator →
References
- Amazon Seller Central: Product image requirements. White-background, 85% fill, and dimension rules. Reviewed August 7, 2026.
- Shopify Help Center: Product media types. Shopify's dimension and file-size caps. Reviewed August 7, 2026.
- Google Developers: WebP compression study. The 25-34% size reduction versus JPEG.
- Baymard Institute: The Current State of Ecommerce Product Page UX. Research behind the role of gallery images in purchase decisions. Updated March 18, 2026.
- Path: Photo editing pricing. Ghost mannequin editing from $0.89 per image and a default 24-hour turnaround. Reviewed August 11, 2026.
- Pixelz: Product image editing pricing. Base image prices, the $0.50 invisible-mannequin add-on, subscriptions, and turnaround tiers. Reviewed August 11, 2026.
- soona: Product photography pricing. US product-photo booking, selected-photo, and premium-edit pricing; not a dedicated ghost mannequin package. Reviewed August 11, 2026.
- Mannequin Mall: Ghost mannequins. Current torso and full-body equipment examples in USD. Reviewed August 11, 2026.
- Snappyit pricing. Subscription and credit pricing; generation cost depends on actual credit use. Reviewed August 11, 2026.