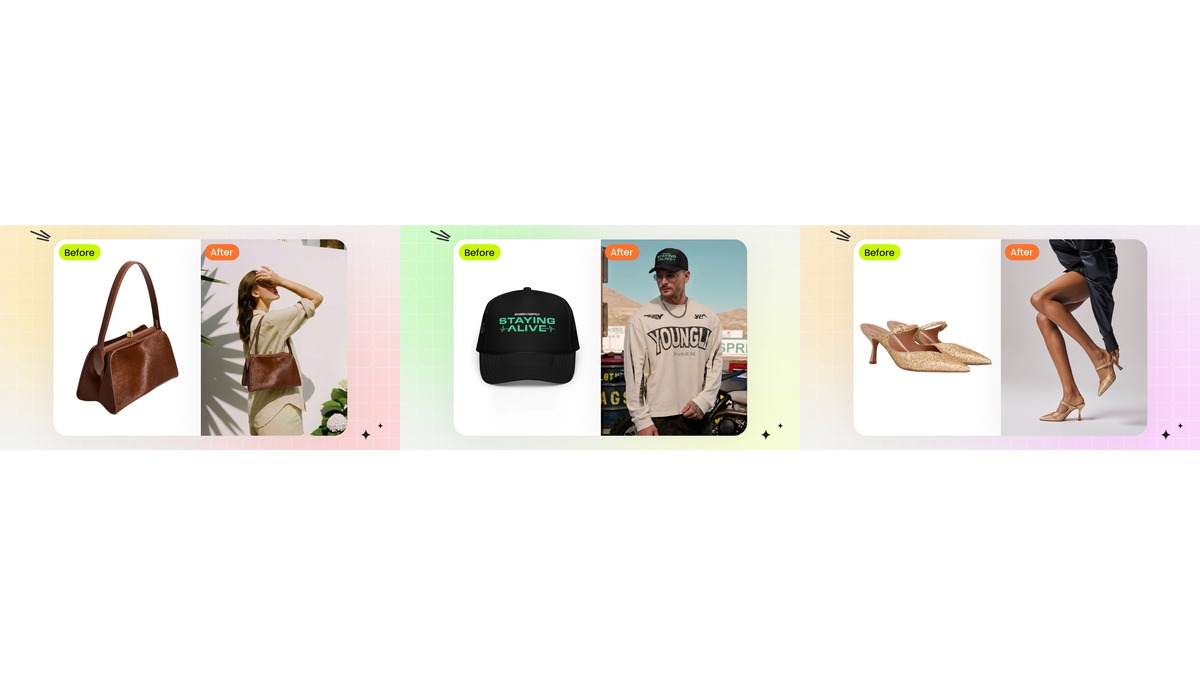
Most AI clothes changer pages focus on shirts, dresses or selfies. Real outfit work is broader. A look often includes jewelry, a handbag, shoes, sunglasses, a hat, a belt, a scarf or a styling prop. For fashion sellers and creators, those details are not decoration. They define the outfit mood, price perception and buying intent.
An AI outfit generator for clothes and accessories should let you start from the reference item: a garment, jewelry SKU, bag, shoe, hat or full outfit board. Then it should show that reference on a model or person without losing scale, material, color and placement. That makes it useful for ecommerce bundles, fashion design concepts, creator styling, OOTD ideas and personal try-on. If you are still comparing categories, the AI outfit generator tools guide explains where clothes changer, virtual try-on and product-to-model workflows split.
Rights required: upload clothing, jewelry and accessory images you own, shot yourself, licensed or have permission to use. For real people, use yourself or an authorized adult model image only.
Why accessories change the AI outfit generator job
Clothing try-on and accessory try-on are related, but they solve different visual problems. A shirt or dress must follow body shape, fabric drape, sleeve length and hem position. A necklace must sit at the right scale on the neck. A ring must sit on a finger, not float above it. A handbag strap must connect to the shoulder or hand. Shoes must match foot angle and ground contact.
That is why a generic outfit generator can look good at thumbnail size and still fail for ecommerce. Accessory errors are small but obvious: a pendant too large, an earring attached to hair, a shoe floating, a bag strap with no contact point. A useful AI outfit generator gives you enough control to catch and regenerate those details.
| Reference type | Best input | What to inspect | Best Snappyit path |
|---|---|---|---|
| Clothing | Flat-lay, hanger, mannequin or product photo | Print, buttons, hem, sleeve, fabric texture | AI Outfit Generator to Fashion Model |
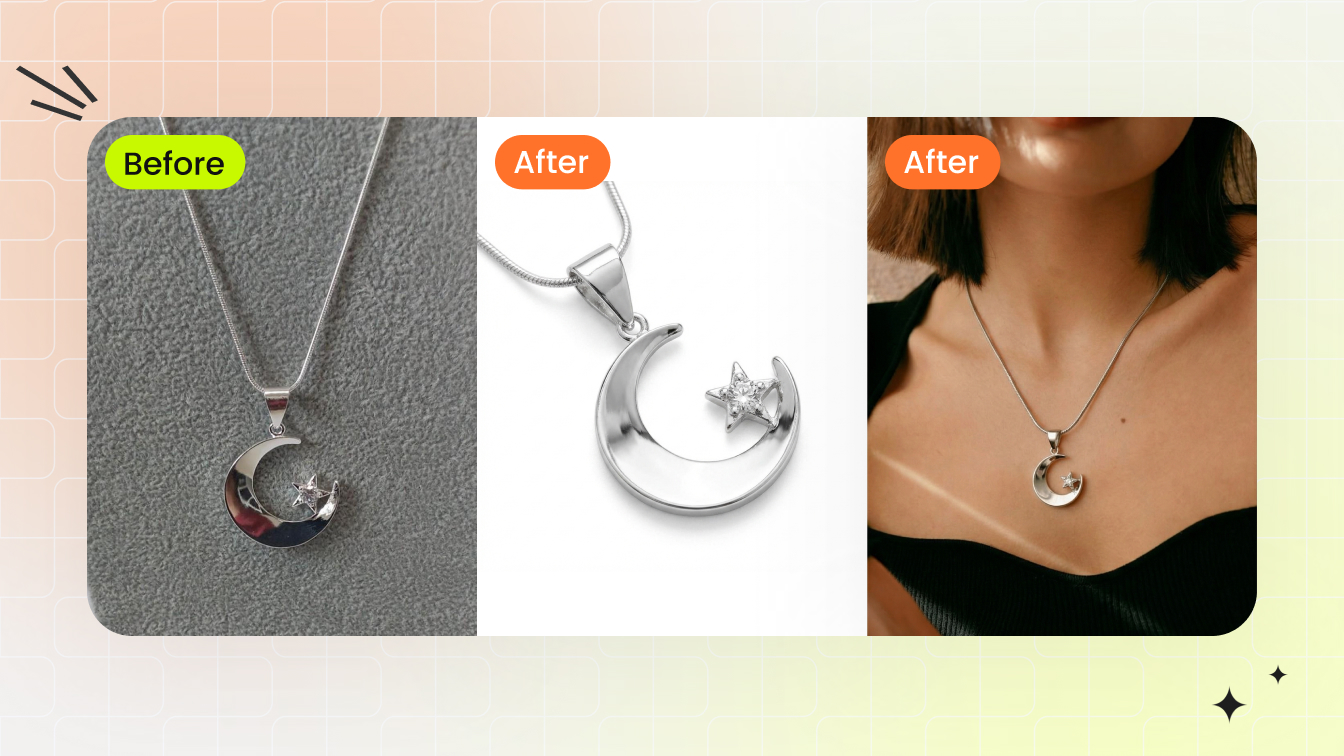
| Jewelry | Clean product image or retouched SKU | Scale, metal reflection, attachment point | Jewelry Model or AI Outfit Generator |
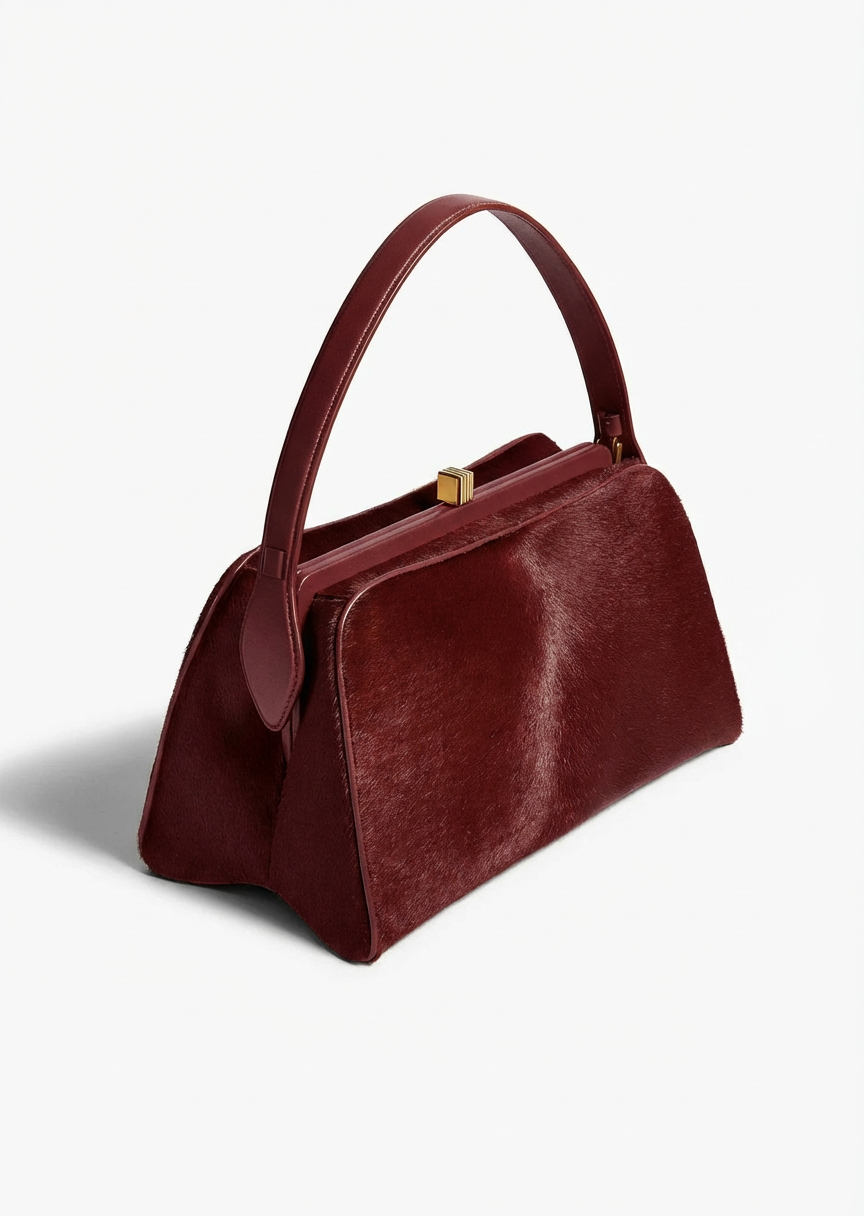
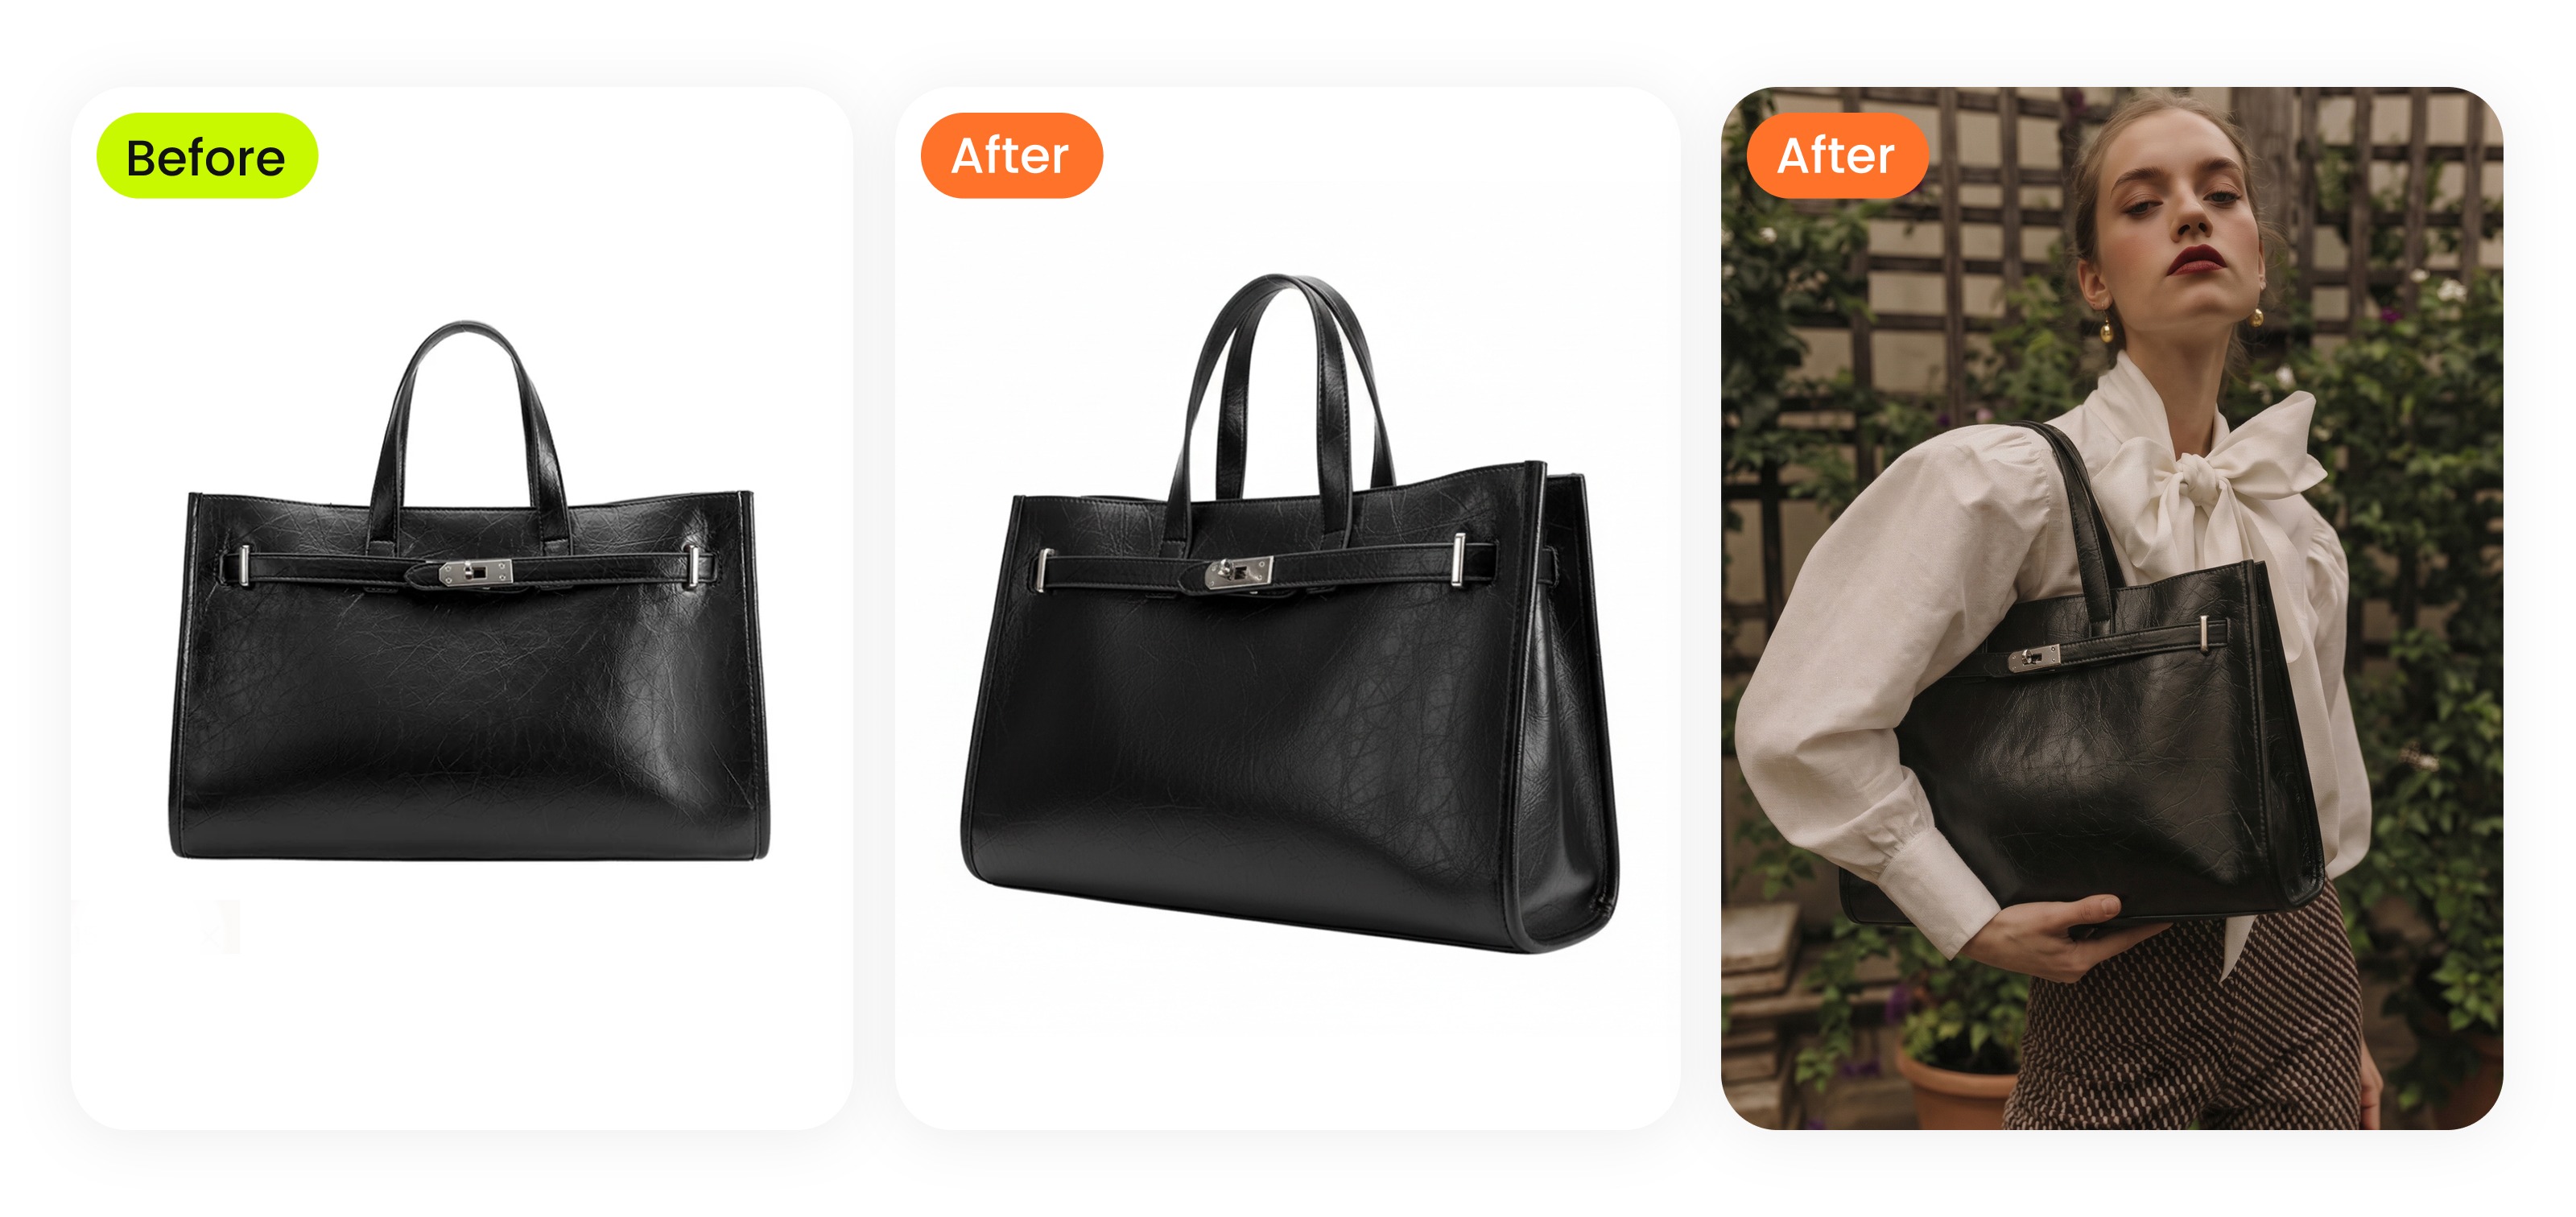
| Bags | Front or 3/4 view with full strap visible | Strap contact, size, material grain | AI Outfit Generator or Fashion Model |
| Shoes | Pair image, side view, clear sole | Foot angle, ground contact, color match | AI Outfit Generator |
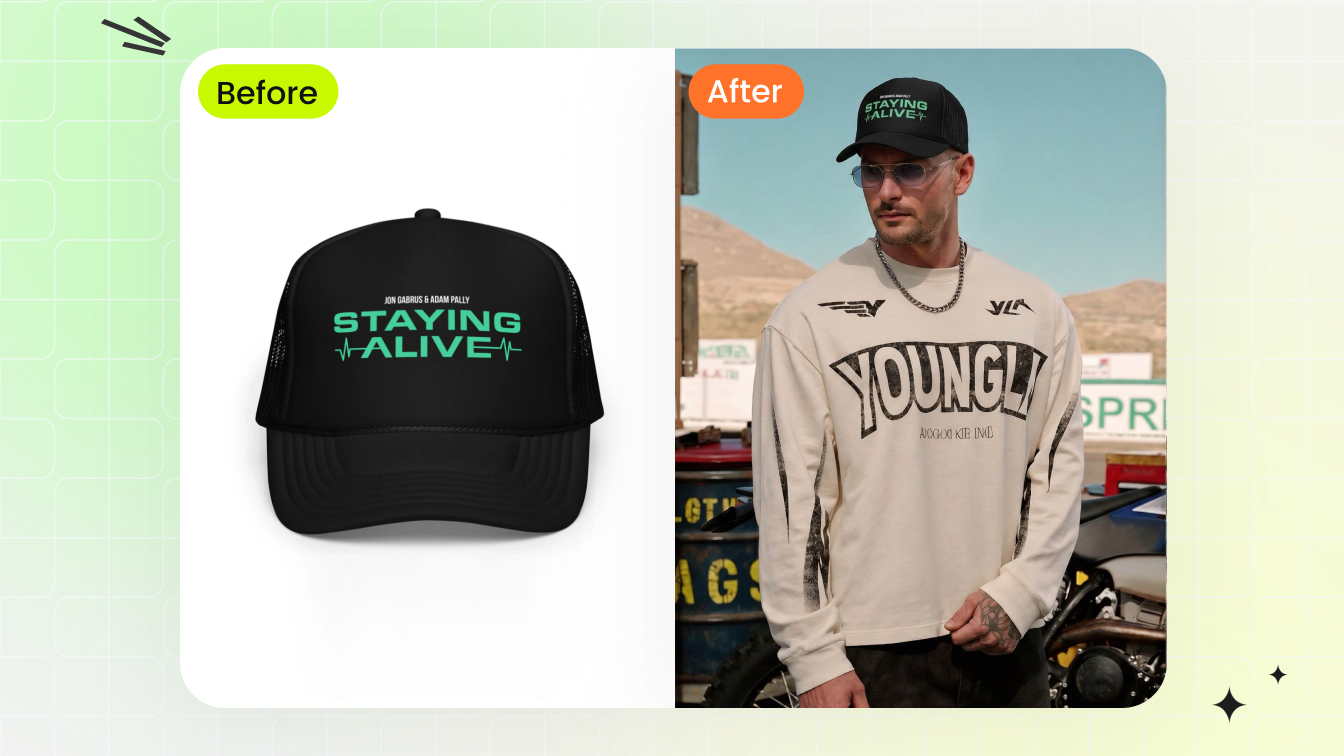
| Hats and sunglasses | Clear product shape and frontal angle | Face placement, perspective, lens reflections | AI Outfit Generator |
From clothing reference to full fashion look
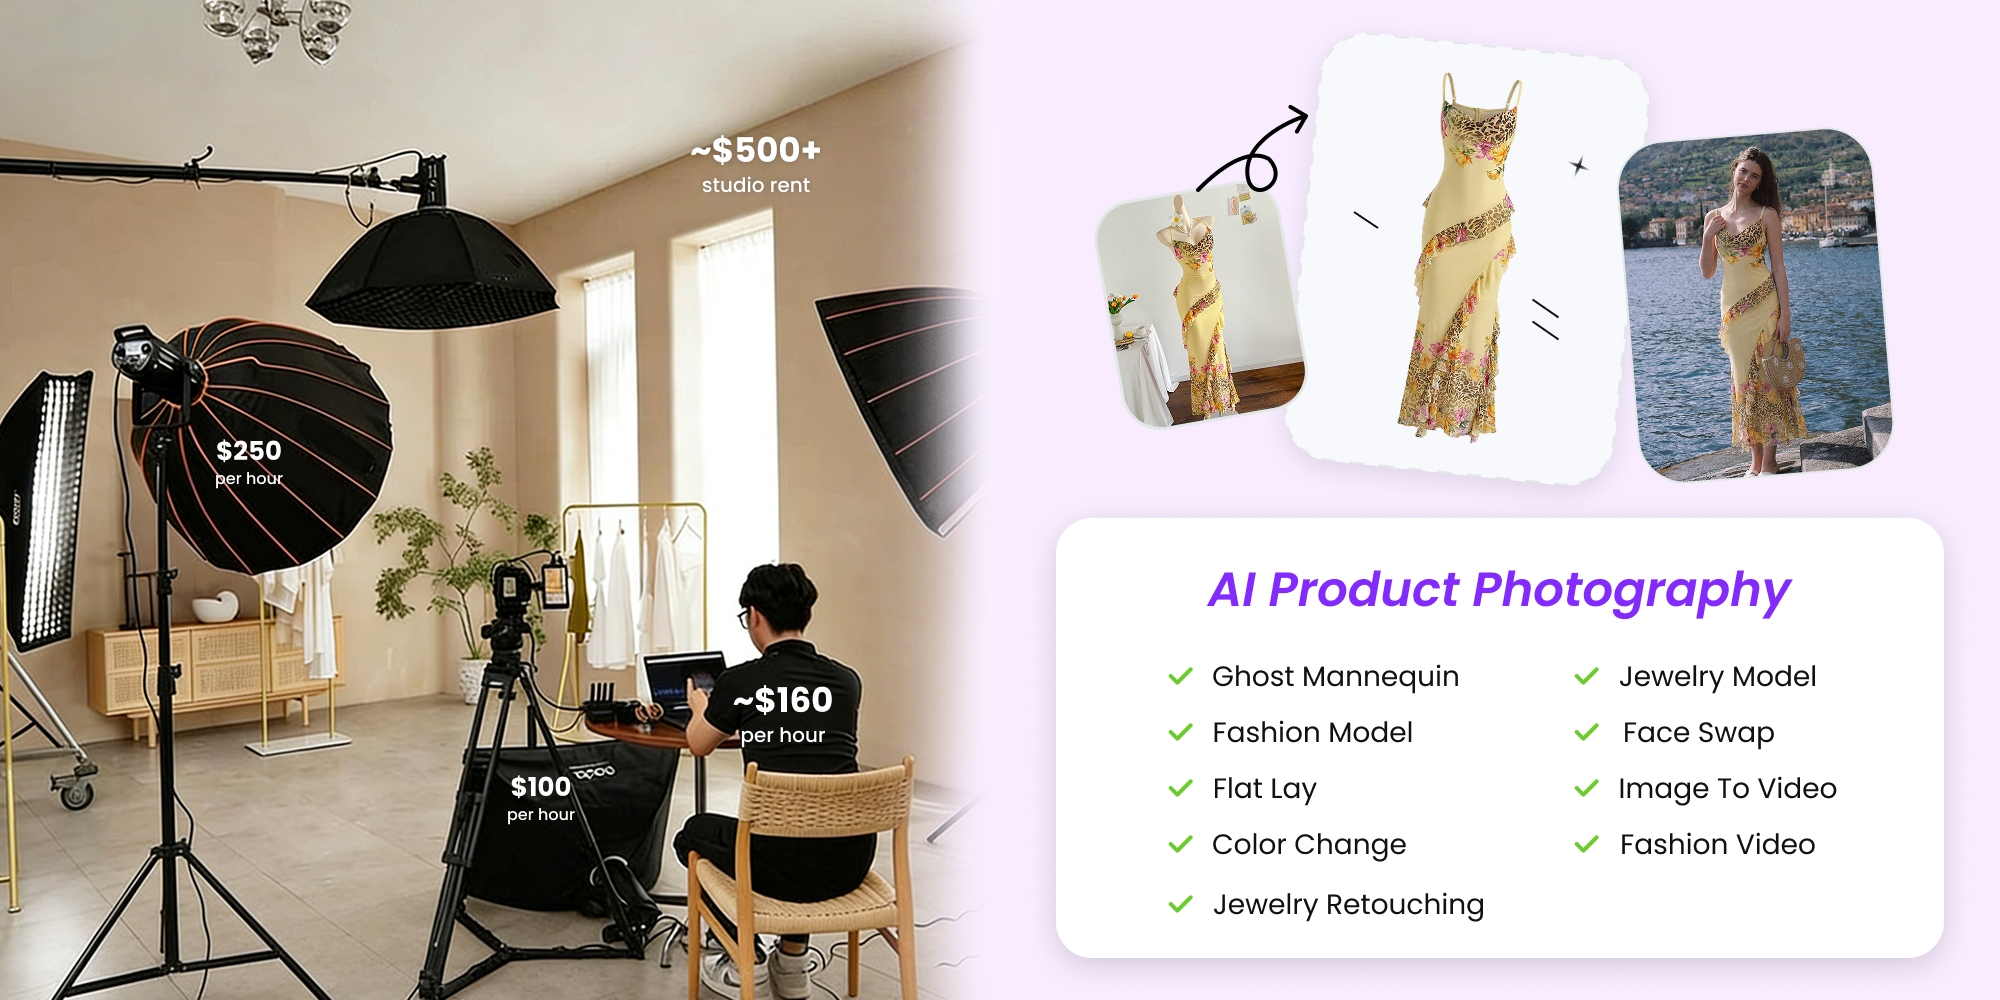
A seller may start with a dress and ask: what handbag, model type and campaign scene make this look premium? A designer may start with a jacket sample and test styling with pants, boots and jewelry before shooting a lookbook. A personal user may start with a vacation outfit and see whether the accessories create the resort mood they want. These are all AI outfit generator workflows, but the goal is not merely to change clothes. The goal is to build a complete look.
For ecommerce, that complete look can become a PDP secondary image, collection banner, social ad or email creative. It can also help decide what to photograph physically. If three AI outfit directions perform well internally, the brand can spend shoot budget on the strongest one instead of photographing every guess.
Use cases for sellers, designers, creators and shoppers
- Fashion sellers. Create product-to-model images, accessory bundles, styled campaign previews and collection images without reshooting every combination.
- Fashion designers. Test color stories, silhouettes, trim, jewelry pairings, shoe choices and model mood before sampling or art direction.
- Creators. Plan OOTD ideas, thumbnails, travel looks and styling variations before filming or shooting.
- Personal users. Preview how a clothing and accessory combination may look before buying, packing or recreating a celebrity-inspired outfit with pieces they own.
This is where AI outfit generator, AI clothes changer, accessory try-on, jewelry try-on and virtual try-on overlap. The common thread is reference control: the image you upload should shape the result instead of being replaced by a generic look.
Quality check for accessories before you publish
Accessories demand a closer review than basic clothing. Zoom in before publishing or sharing. Check whether the item sits on the correct body part, whether the scale matches reality, whether shadows follow the lighting, and whether the material still looks like the original product. For jewelry, inspect prongs, stones, chain thickness and metal tone. For bags, inspect strap connection, hardware and texture. For shoes, inspect sole shape and the contact shadow.
Snappyit workflow for clothes and accessories
Start with the item: clothing, jewelry, shoes, bag or accessory. Upload that reference in the AI outfit generator, then continue into the generator to select or upload the model. If the asset is a jewelry-only SKU and the product must be the hero, use Snappyit's Jewelry Model workflow. If the asset is part of a full fashion look, the AI outfit generator is the better starting point.
Generate clothes and accessory looks
How to build full looks from one product reference
The fastest way to use an AI outfit generator is to start with a single hero item and build outward. For example, a linen shirt can become a resort look with sandals and sunglasses, a city look with straight-leg trousers and a crossbody bag, or a campaign look with layered jewelry and a neutral studio background. The source product stays the anchor while the surrounding styling changes. For personal shopping and model-photo previews, pair this with a virtual try-on from photo workflow.
This matters for both ecommerce and design. A seller can test which styling direction makes a product look premium before producing ads. A designer can see whether a prototype belongs in a minimal, streetwear, bridal, travel or evening story before sampling the full set. A creator can turn one item into several content concepts without changing clothes in real life. A personal user can decide whether one purchase works with multiple accessory moods.
A good workflow is to generate in small groups. First, test the garment alone on a model. Second, add one accessory category, such as shoes or jewelry. Third, test a complete look. This avoids the common problem where too many requested changes make the AI lose the original product. If the tool changes the garment too much, return to the single-item reference and build again.
Route each job to the right Snappyit tool
Not every fashion image should start in the same tool. Use the AI outfit generator when the job is a complete look, a clothing reference, or a mix of garment and accessory styling. Use Fashion Model when the priority is a clean on-model product photo from a clothing reference. Use Jewelry Model when the product itself is a necklace, ring, bracelet or earring and scale accuracy matters more than a full outfit. Use Color Change when the outfit is correct but the colorway needs to change while texture and shadows stay intact.
This routing keeps the pages from becoming repetitive. AI outfit generator covers broad styling and virtual try-on. AI clothes changer covers visible outfit replacement. Jewelry try-on covers accessory placement. Product-to-model AI covers ecommerce listing images. AI wardrobe planner content covers personal planning and shopping decisions. Each page should answer a different user need instead of saying the same thing.
For users, the practical rule is simple: if the uploaded item must remain exact, choose the workflow that protects the product reference. If the uploaded item is only inspiration, an outfit generator can be more creative. If a real person appears, the image must be yours or authorized. If the output is used commercially, verify rights before publishing.
Content angles for accessory outfit generation
The same visual workflow can support several jobs: building a complete fashion look, placing jewelry on a model, turning a product photo into a styled outfit, or testing a virtual try-on before purchase. Treat each job as a separate user problem instead of forcing every phrase into one page.
Use the AI outfit generator page for complete looks, clothing references, accessories and model selection. Use a jewelry model page for jewelry-specific product accuracy. Use a color change page for colorway testing. Use fashion model content when the main job is putting a product on a model. This structure keeps each page specific and easier to trust.
For ecommerce teams, the best accessory content often comes from bundles: one dress with three bags, one necklace across several necklines, one shoe with two pant silhouettes, or one hat across travel and resort looks. For creators and personal users, the same approach works for OOTD ideas, copy celebrity outfits, copy celebrity looks and steal her style inspiration, as long as the outfit references are owned, licensed or otherwise permitted.
Frequently asked questions
Can an AI outfit generator work with accessories?
Yes, if the tool supports accessory placement. Jewelry, bags, hats, shoes, sunglasses and belts require different scale and positioning checks than clothing.
What is the difference between clothing try-on and accessory try-on?
Clothing try-on must follow body shape and fabric drape. Accessory try-on must preserve scale, attachment point, shadow and material reflection, especially for jewelry and bags.
Can I upload jewelry as the outfit reference?
Yes, for workflows that support accessory references. Use a clear product image, then review whether the necklace, ring, earring or bracelet scale remains believable on the model.
Is this useful for ecommerce bundles?
Yes. A seller can test a dress with a bag, shoes and jewelry before producing a full campaign, or create bundle visuals for ads and landing pages.
Can fashion designers use it before sampling?
Yes. Designers can test styling direction, color stories, accessories, model mood and campaign scene before committing to samples or a shoot.
Can creators use it for outfit ideas?
Yes. Creators can preview outfit and accessory combinations for posts, thumbnails, travel looks, OOTD ideas and moodboards as long as person images are permission-first.
Can I use celebrity-inspired outfit references?
Yes, if you use clothing and accessory references you have rights to use. Recreate the style direction with your own wardrobe or product images rather than uploading celebrity photos or social screenshots.
What images should I use for accessories?
Use product images with clear edges, natural lighting and visible scale cues. For jewelry, avoid heavy glare or tiny product crops that hide gemstone and metal detail.
Can it replace professional jewelry photography?
It can create on-model preview and campaign directions, but high-value jewelry still benefits from product retouching and close-up macro images.
What should sellers inspect before publishing?
Check garment accuracy, accessory scale, shadow direction, contact points, skin edges, logo distortion and whether the final look overpromises the real product.
Which Snappyit tool should I use for jewelry-only photos?
Use AI outfit generator when jewelry is part of a full look. Use Jewelry Model when the main job is placing a jewelry SKU on a model with product-specific control.