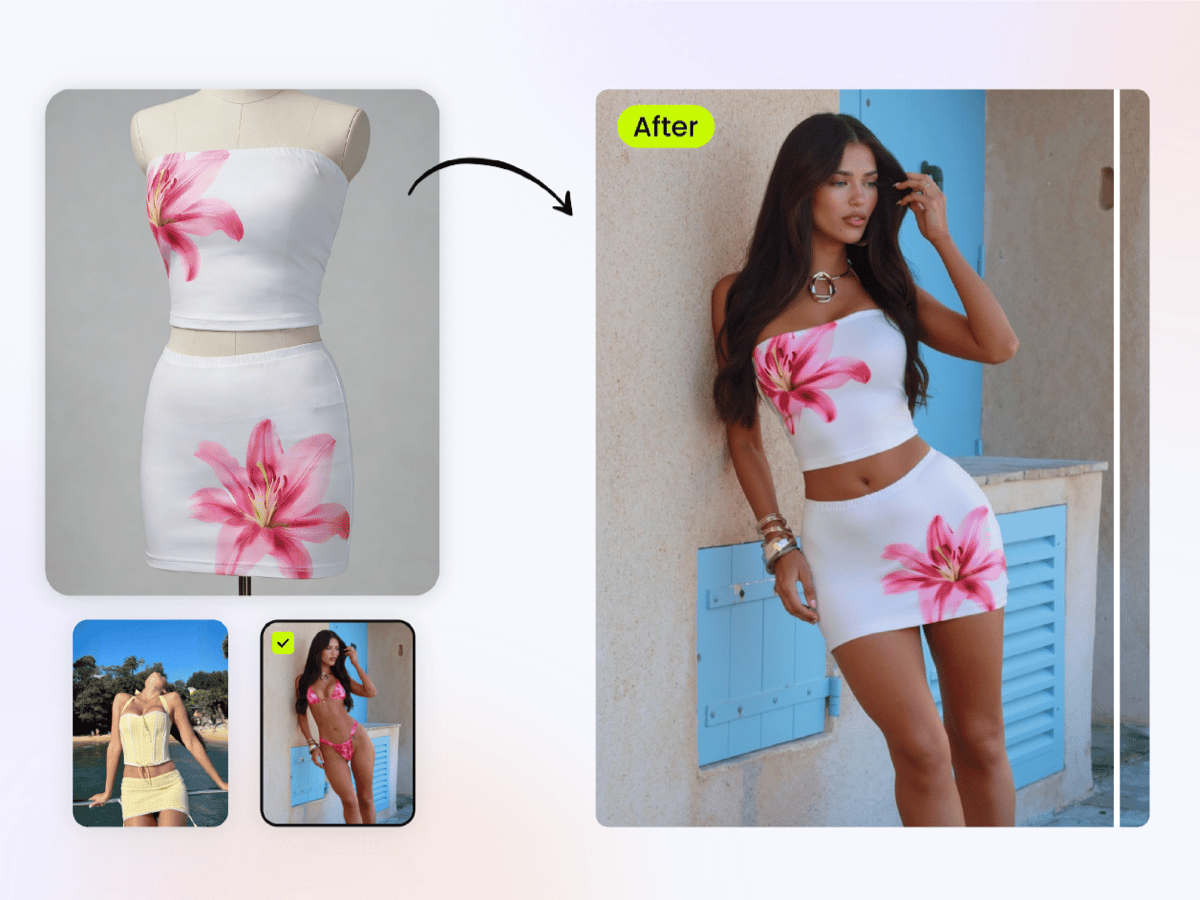

At a glance: AI fashion models vs virtual try-on
This guide tests merchant-side AI fashion model generators: upload a flat-lay, hanger, mannequin, or phone photo and receive an on-model image for a listing or ad. That differs from shopper-facing virtual try-on, which places a garment on a customer's selfie or camera feed. We tested merchant tools on the same three garments; every result shown below is an unedited export.
How to create AI fashion model images for ecommerce
A tool comparison helps you choose a platform, but the source photo and approval process determine whether the final image is safe to publish. Use the same product-first workflow whether you are preparing one Shopify listing or a seasonal catalog.
- Choose a complete product photo. Start with a flat-lay, hanger, mannequin, or supplier image that shows the full silhouette. Keep the neckline, sleeves, hem, print, logo, seams, hardware, and every item in a matching set visible. Add a back or detail photo when the front image cannot prove an important construction feature.
- Prepare the garment without redesigning it. Correct exposure, white balance, wrinkles, and background clutter, but preserve sheer areas, lace, fine straps, fringe, and open spaces. Follow the selected tool's current file and resolution requirements instead of forcing every SKU into one fixed format.
- Choose a model and a controlled scene. Select a model that fits the brand's customer and make sure the pose does not cover key product details. Generate a plain studio image first; a complex lifestyle background can hide a changed hem, missing component, or distorted print.
- Compare the result with the real SKU. Review cut, length, fit cues, logos, pattern placement, stitching, closures, and included pieces at full size. A realistic face and attractive background do not compensate for an inaccurate product.
- Fix presentation errors, not product errors. Minor background, crop, or shadow cleanup can be handled in an editor. If the tool changes the silhouette, material, print, or construction, regenerate from a better source or choose a different tool rather than retouching the mistake into the listing.
- Approve before you scale. Keep the original product photo in the gallery, create lifestyle variations only from an approved direction, and test a small batch of difficult SKUs before processing the full catalog. Calculate cost per publishable image, including retries and manual correction, rather than cost per generation.
Troubleshooting AI fashion model images
| What went wrong | Listing risk | What to do |
|---|---|---|
| Length or silhouette changed | The image shows a different product | Try a clearer source or another tool. Do not retouch the change into the listing. |
| Logo, text, or print distorted | Brand and SKU details are wrong | Use a sharper front-facing source and review the new result at full size. |
| Neckline, sleeve, or trouser leg broke | The tool could not read the garment shape | Add a complete flat-lay or another angle, then regenerate. |
| The pose hides key details | Shoppers cannot verify the construction or included pieces | Choose a pose that reveals the product before changing the scene. |
| A matching piece disappeared | The image misstates what is included | Show every piece clearly in the source and verify the piece count. |
| The scene looks good but the garment is wrong | A polished image could increase returns | Reject the result and prioritize SKU accuracy. |
| Models and backgrounds drift between SKUs | The catalog looks inconsistent | Reuse an approved model, crop, pose family, and scene for each collection. |
Four dimensions to evaluate any model image generator
Every tool claims to be the best. In practice the comparison comes down to four things.
| What to compare | What to check | Why sellers should care |
|---|---|---|
| 1. Accepted source photos | Does it accept flat-lays, hanger or mannequin photos, phone shots, and supplier images? | A tool that needs studio-ready inputs adds production work before generation. |
| 2. Model choice | Can you filter models, choose poses, and upload your own reference? | The available models determine whether the catalog fits your brand and customers. |
| 3. Product accuracy | Does it preserve texture, pattern placement, cut, and construction? | Patterned and structured garments expose errors that can mislead shoppers. |
| 4. Cost per approved image | Include credits, retries, export limits, and manual corrections. | The advertised generation price can understate the real catalog cost. |
Accepted inputs and product accuracy come from our generated images; model options and pricing come from each product workflow and its published plans.
What we ran through the tested tools
Each source photo tests a different production risk.
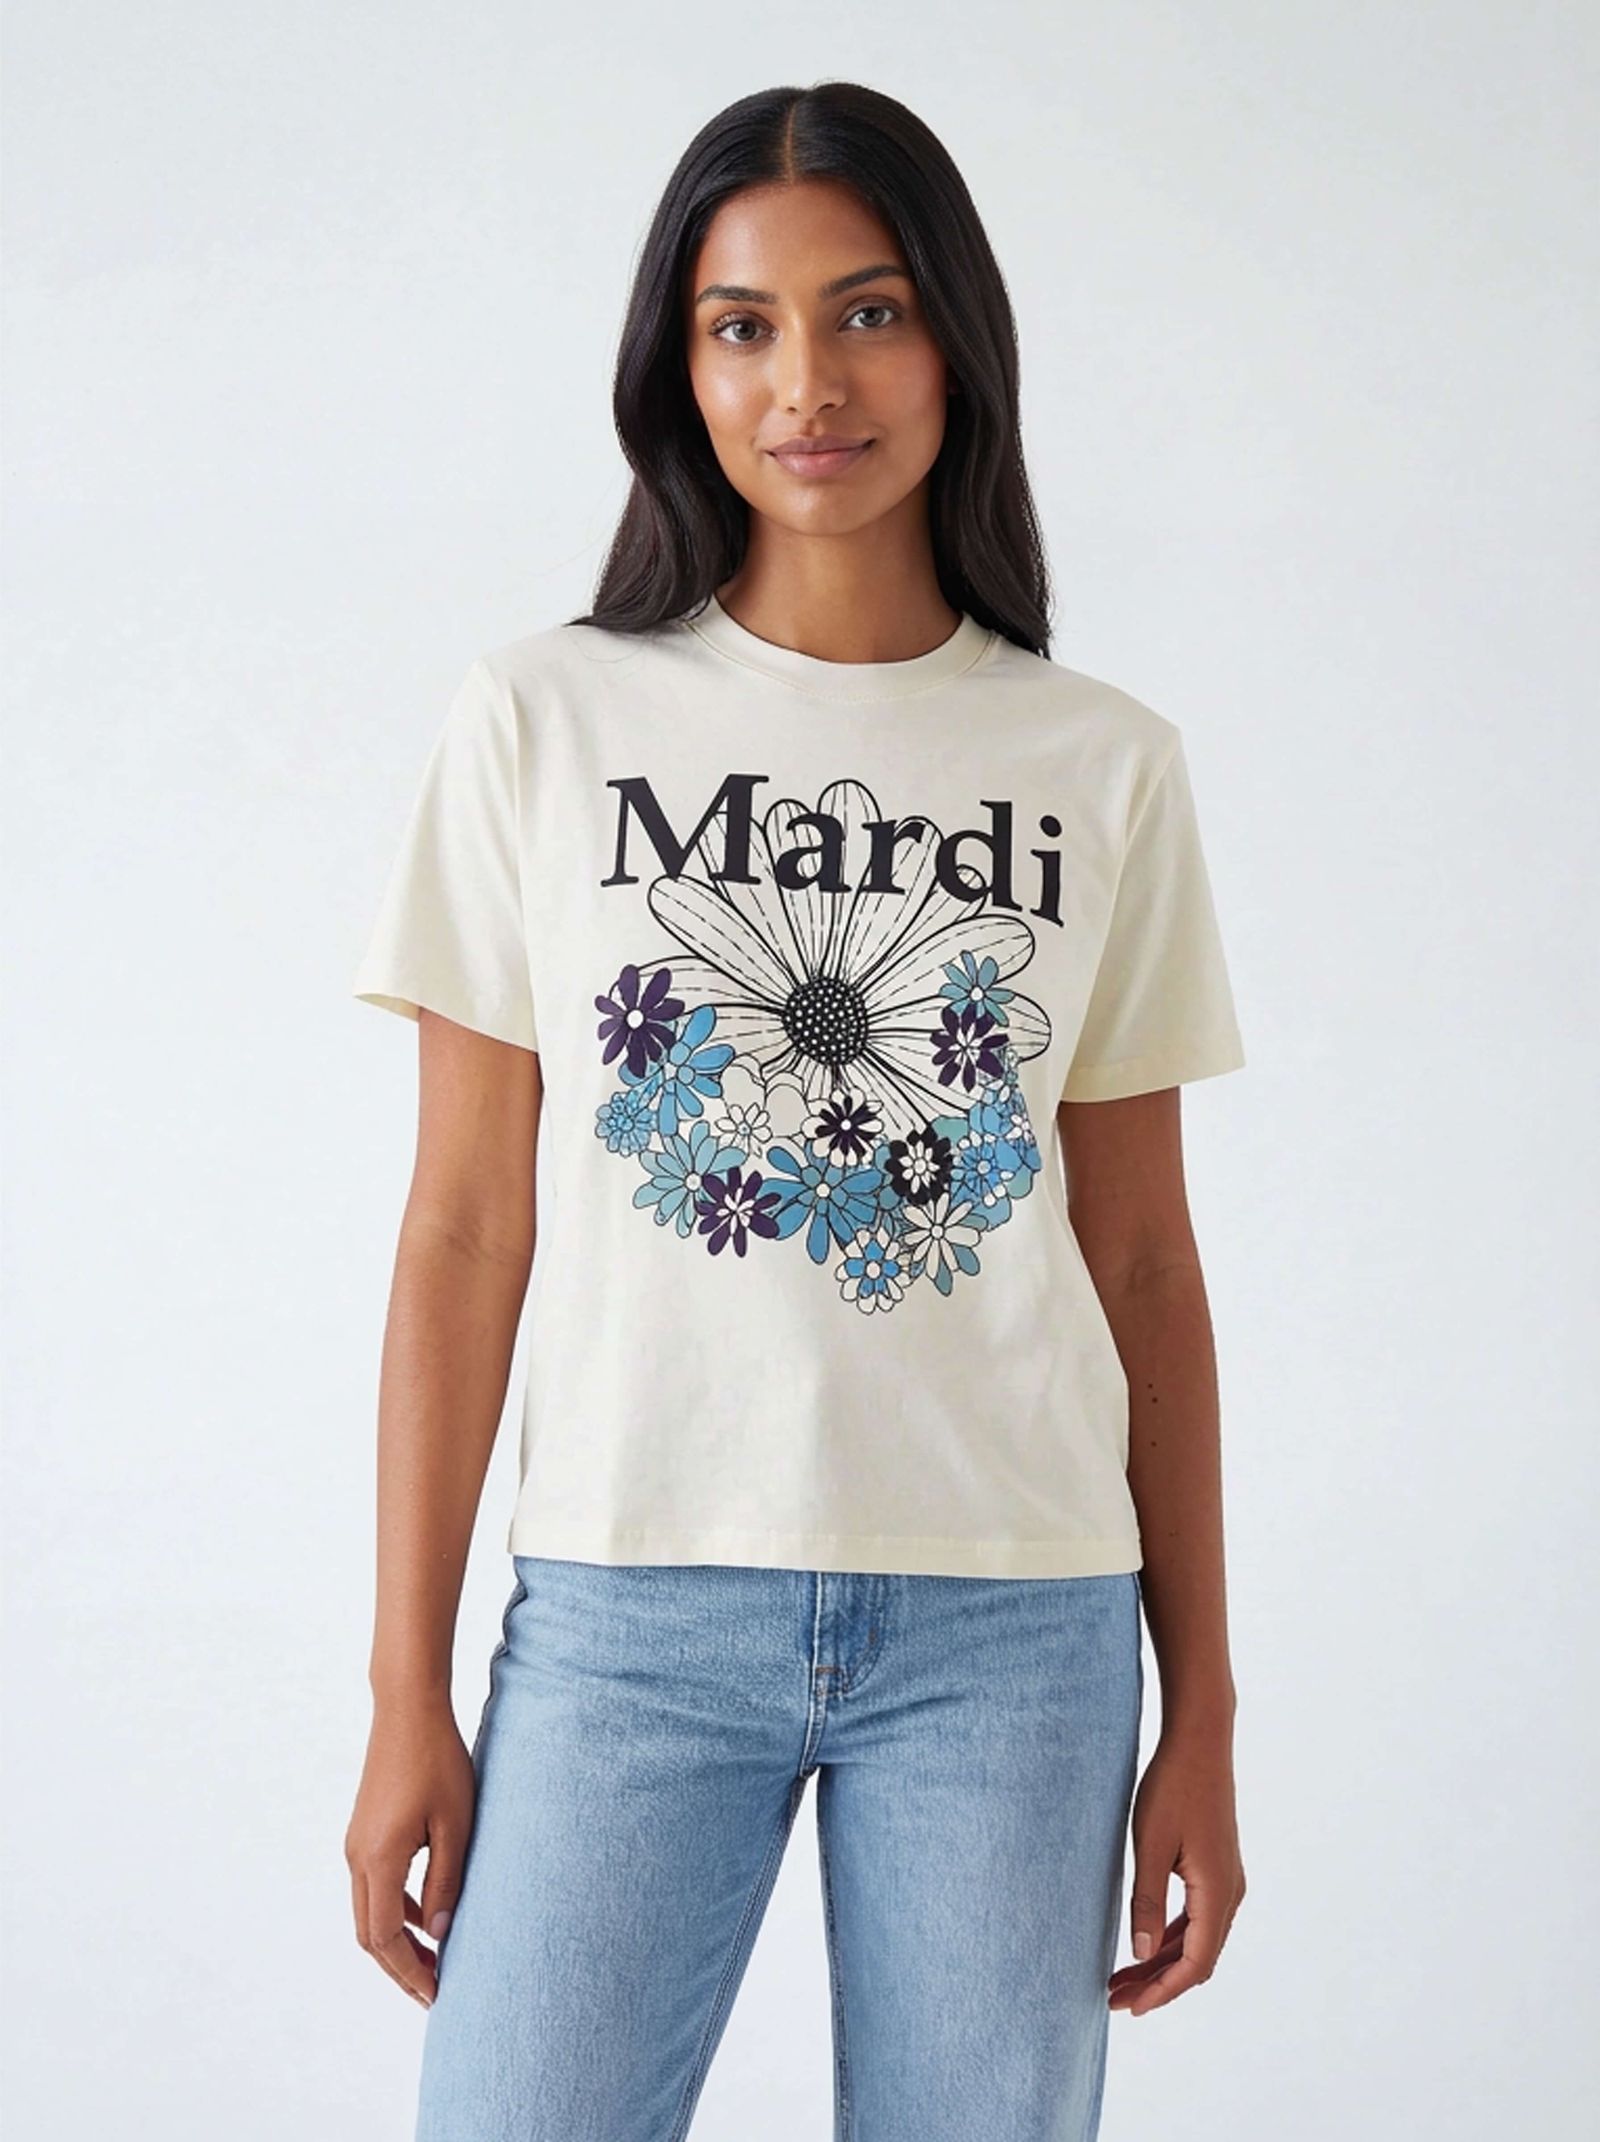
- A graphic tee, shot badly on a phone. Hangtag still attached, lying on a pile of packaging, mixed indoor light. This tests two things at once: whether the tool can read a messy seller photo, and whether the printed wordmark survives.
- A floral camp-collar shirt, clean flat-lay. Dense lilies, a notch collar and a button placket, so the print has to break where real fabric would. This is the pattern test.
- Striped wide-leg pants, clean flat-lay. A different part of the body, and a harder one: most of these tools are trained mainly on tops. Horizontal stripes show up waistline placement, leg length, and whether the lines stay parallel as the leg turns.
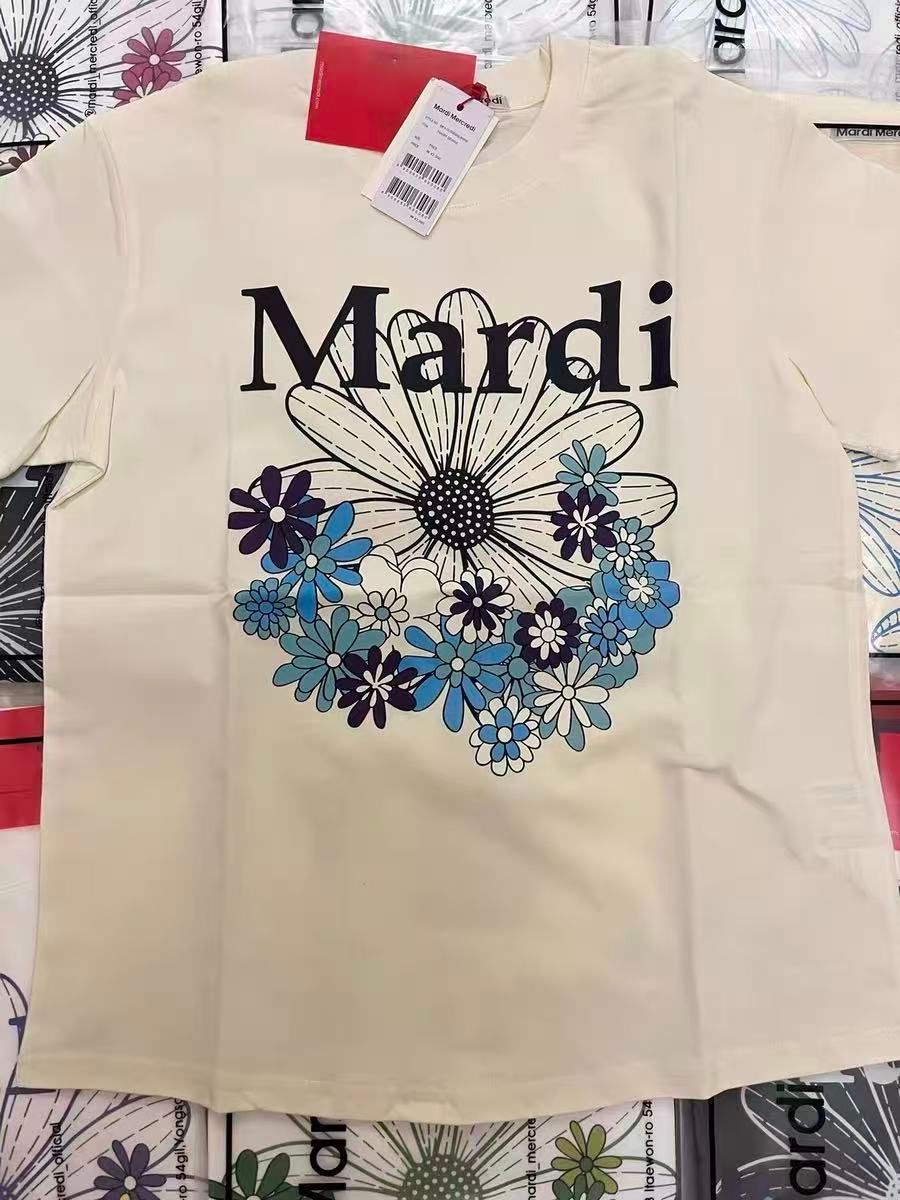
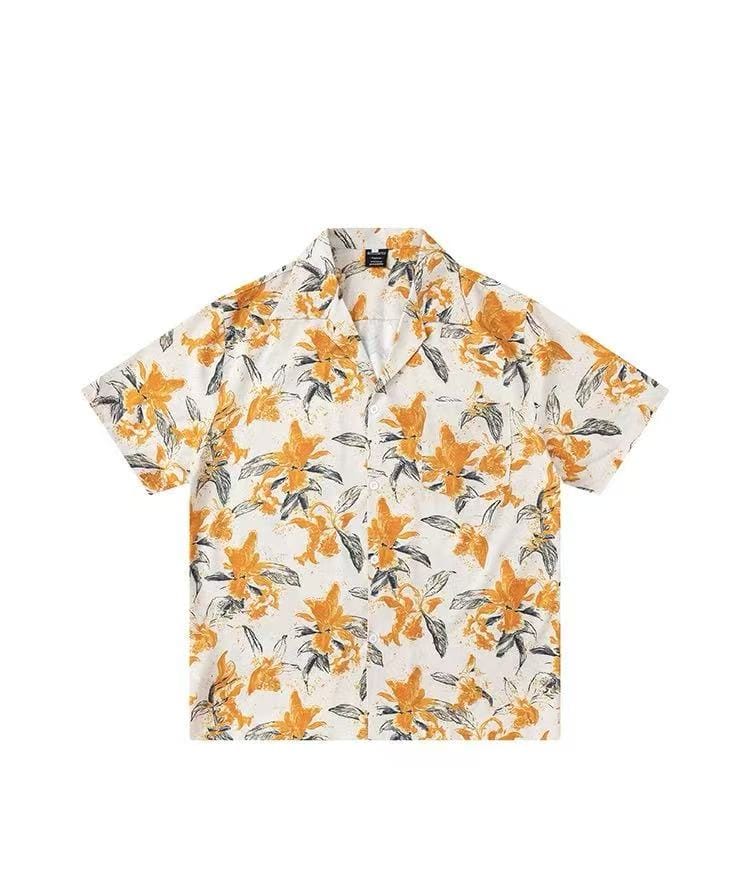
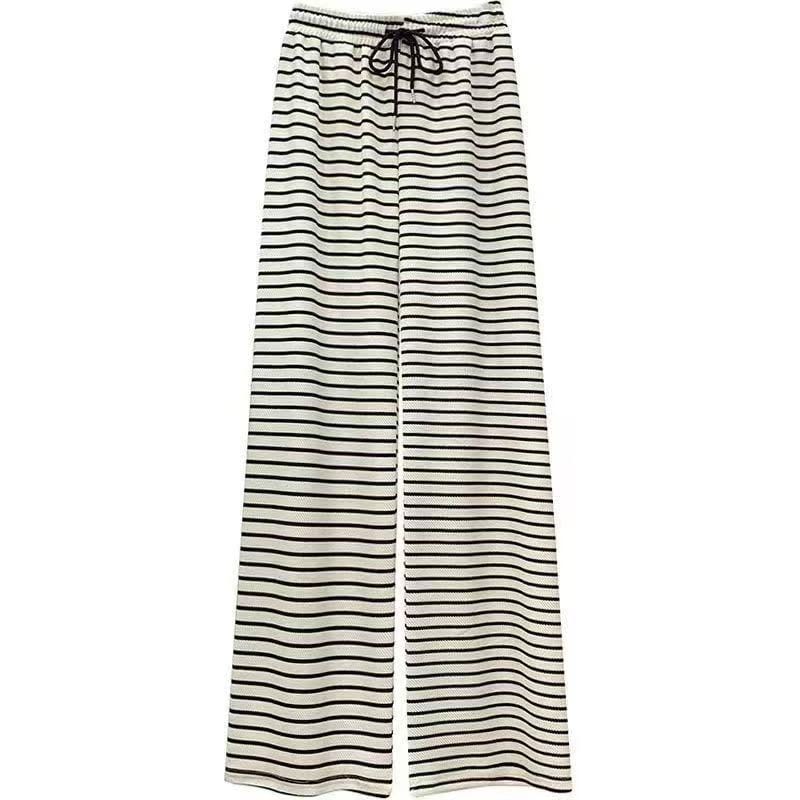
The three source files, uploaded to every tool at the same resolution with no pre-cleaning. Tested August 7, 2026.
Every run used built-in models, poses, and scenes without custom models or prompts.
1. Snappyit — AI Fashion Model, plus a dedicated jewelry mode
Snappyit AI Fashion Model takes one garment photo on a flat surface and returns an on-model image with a chosen model, pose and scene. The same upload can also produce a jewelry on-model image, so one source file covers both apparel and accessories.
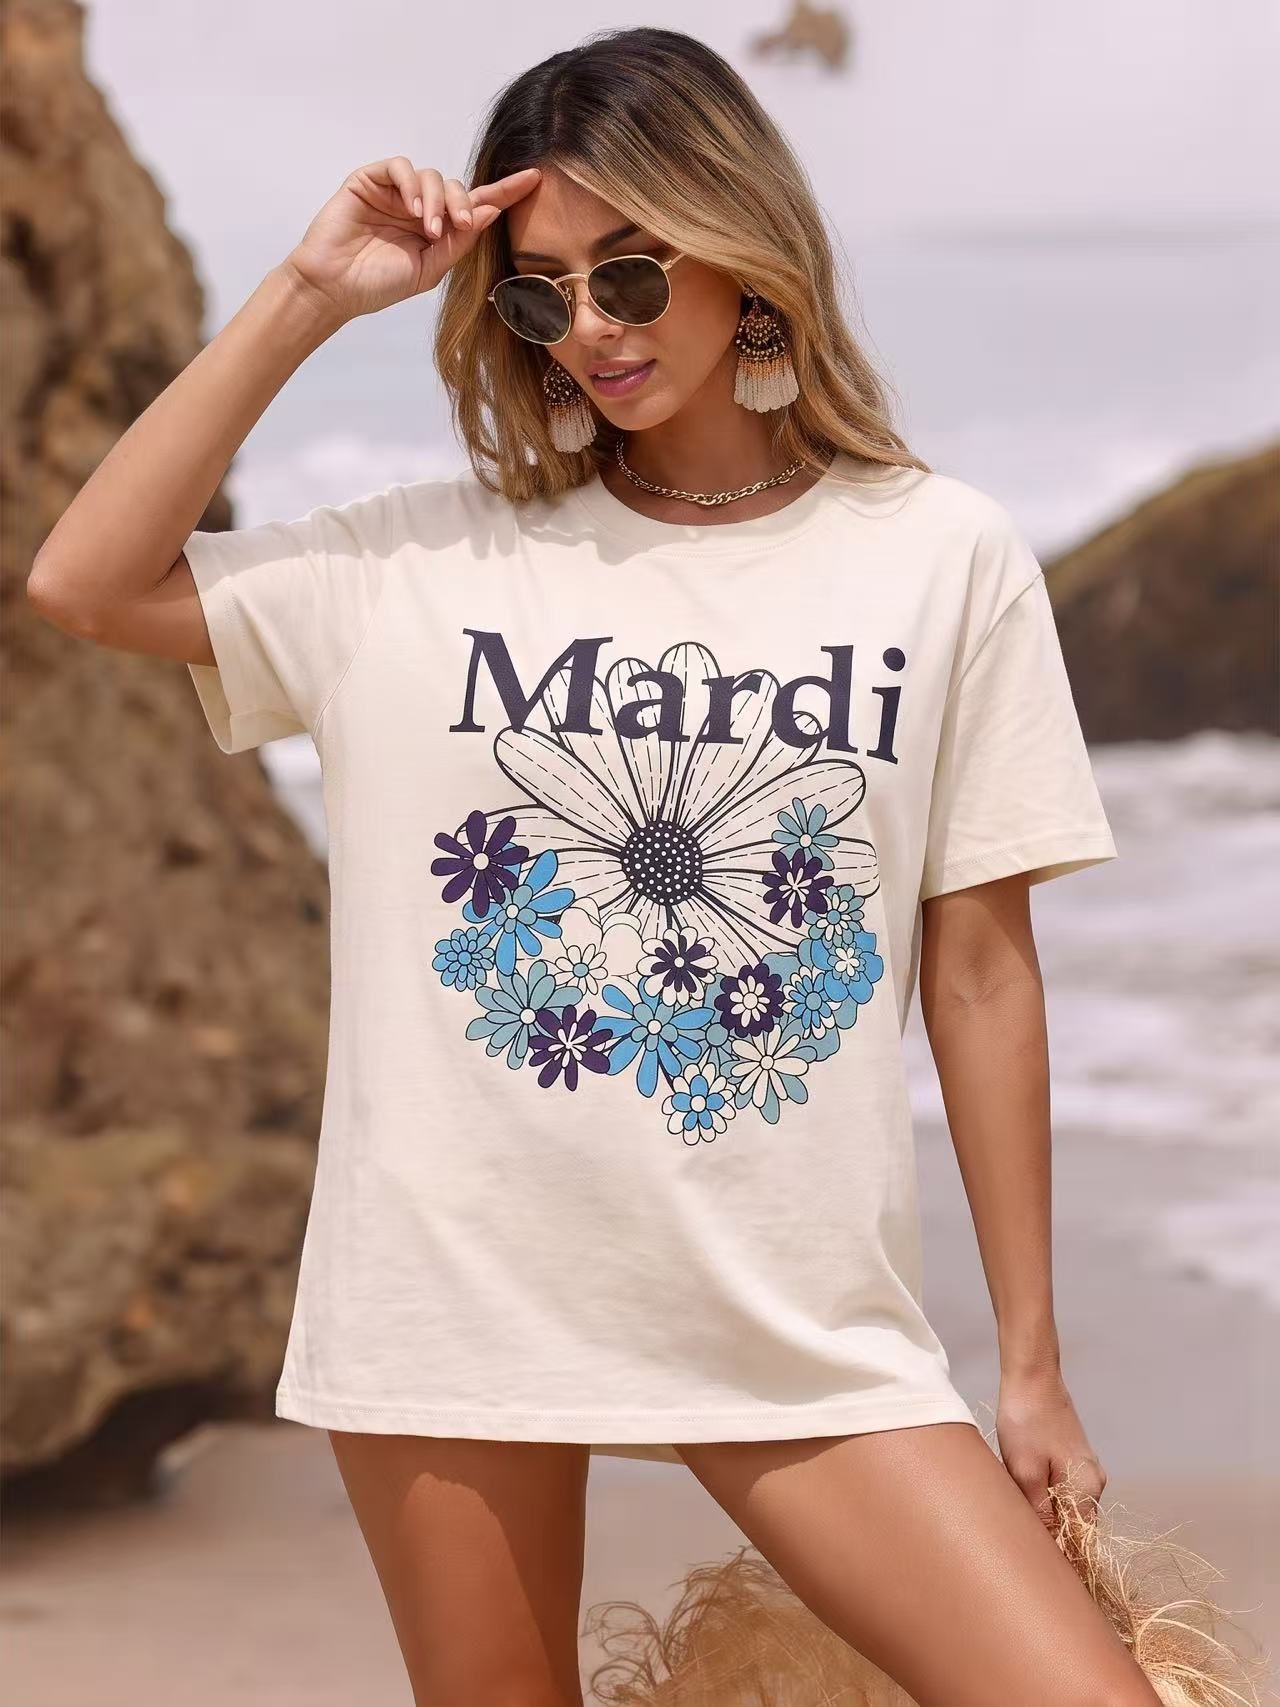
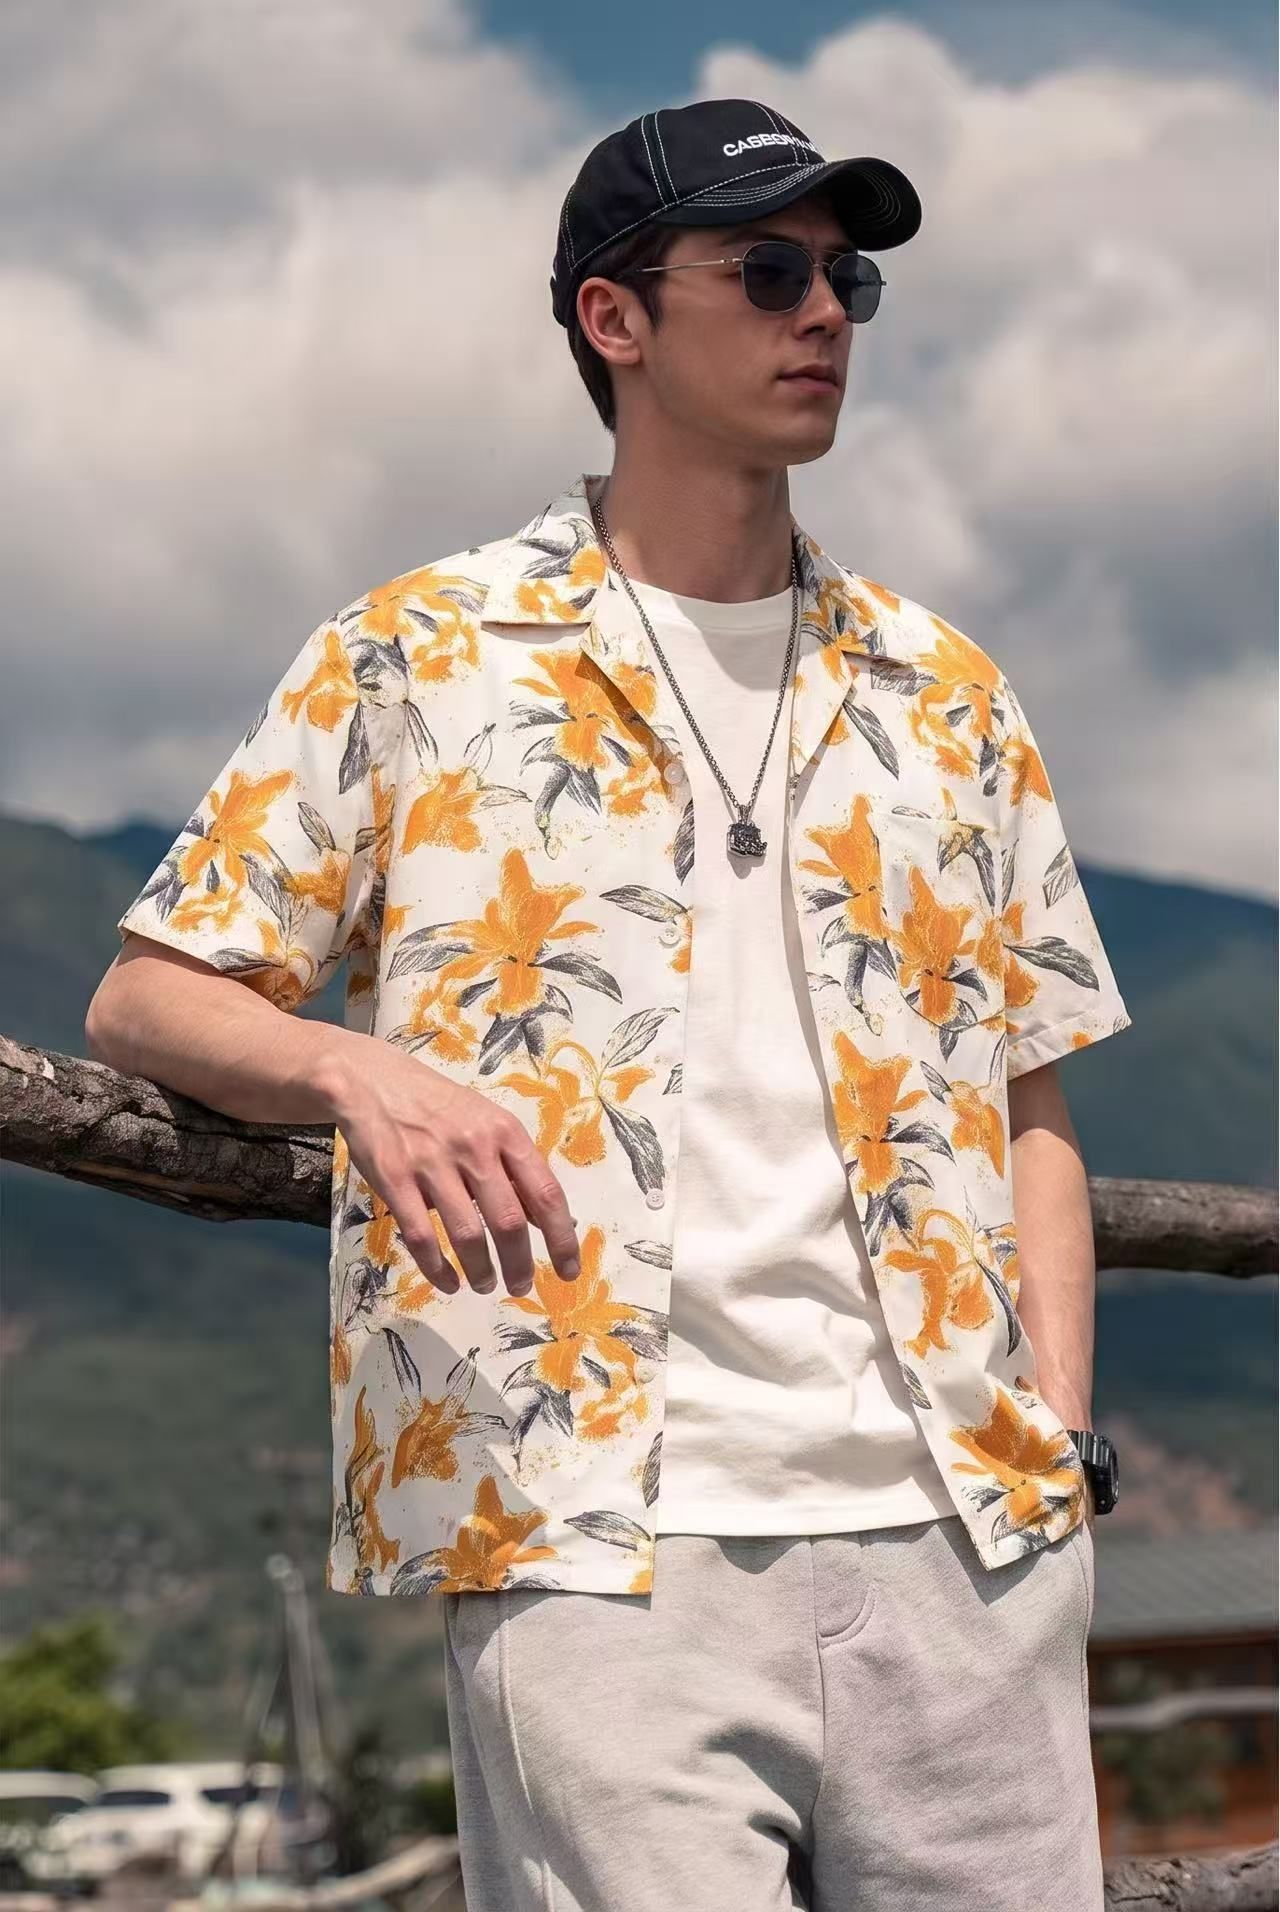
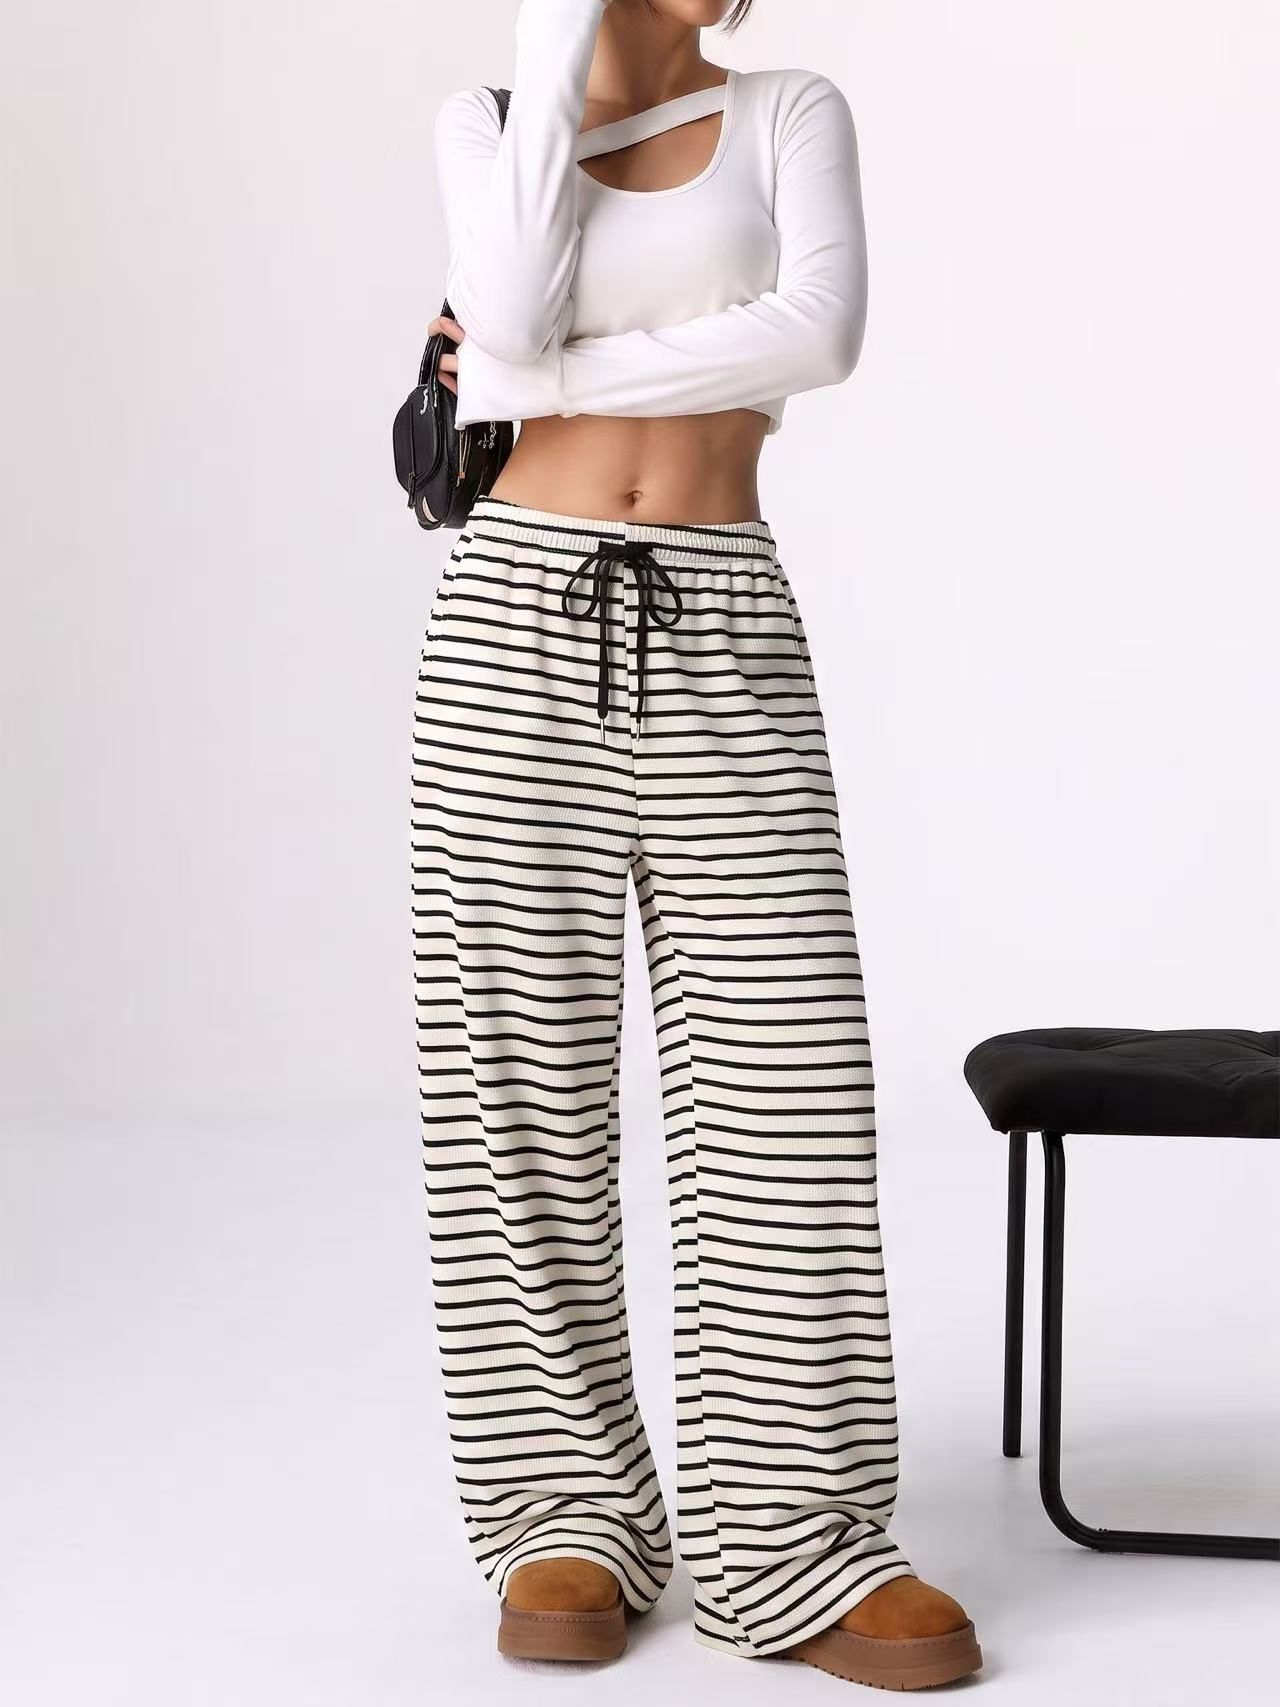
Snappyit output from the three source images above. Generated August 7, 2026.
- What worked
- All three cuts, prints, stripes, and garment lengths were preserved, including the cluttered phone source.
- Limitation
- Templates include a complete model, styling, and scene, so sellers choose a prepared look rather than adjusting every element separately.
- Cost and fit
- About $0.13–$0.21 per standard image in the plans checked. Best for apparel catalogs that want repeatable model and scene templates, especially those also selling jewelry.
2. Fashion Diffusion — High-fidelity fabric rendering and seamless model customization
Fashion Diffusion specializes in studio-grade AI fashion model generation with a heavy emphasis on realistic garment textures, complex patterns, and precise edge fitting. By uploading a flat-lay, hanger, or mannequin photo, users can seamlessly generate professional on-model images while customizing model demographics, poses, and backgrounds.
- What worked
- Exceptional retention of intricate garment details—such as sheer fabrics, subtle print textures, and dynamic silhouette alignment—making it ideal for premium apparel listings.
- Limitation
- Offers extensive granular controls for fine-tuning poses and scenes, though the intuitive layout ensures a minimal learning curve for quick onboarding.
- Cost and fit
- About $0.08–$0.12 per image depending on the plan. Best for growing fashion brands and ecommerce sellers looking for cost-effective, studio-quality catalog visual assets.
3. Claid — outfit pairing, prompted backgrounds, tight output control
Claid.ai runs a self-serve web app alongside its API. The web flow is hands-on: upload the garment, pick a top or bottom to pair it with, choose the model, set the pose. Background, scene, vibe and style are prompt fields rather than menus — you type what you want, or leave them blank.
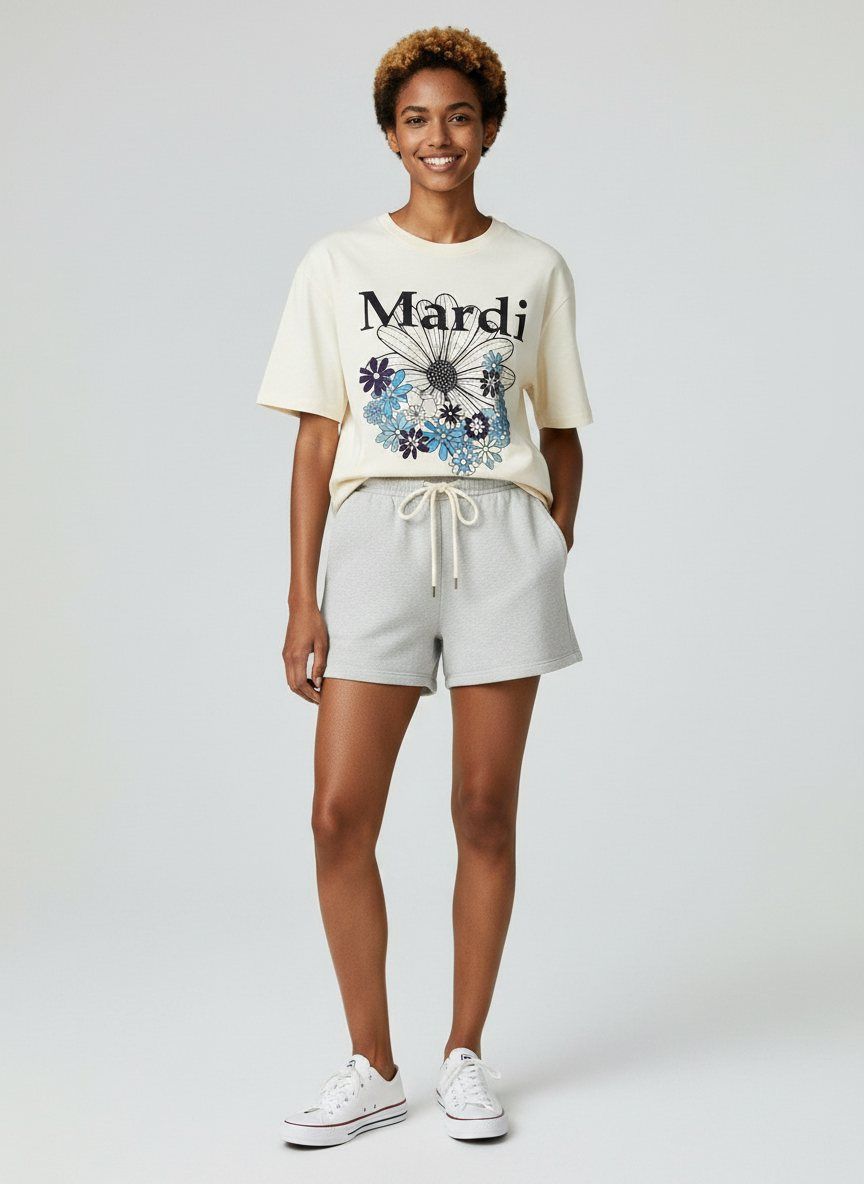
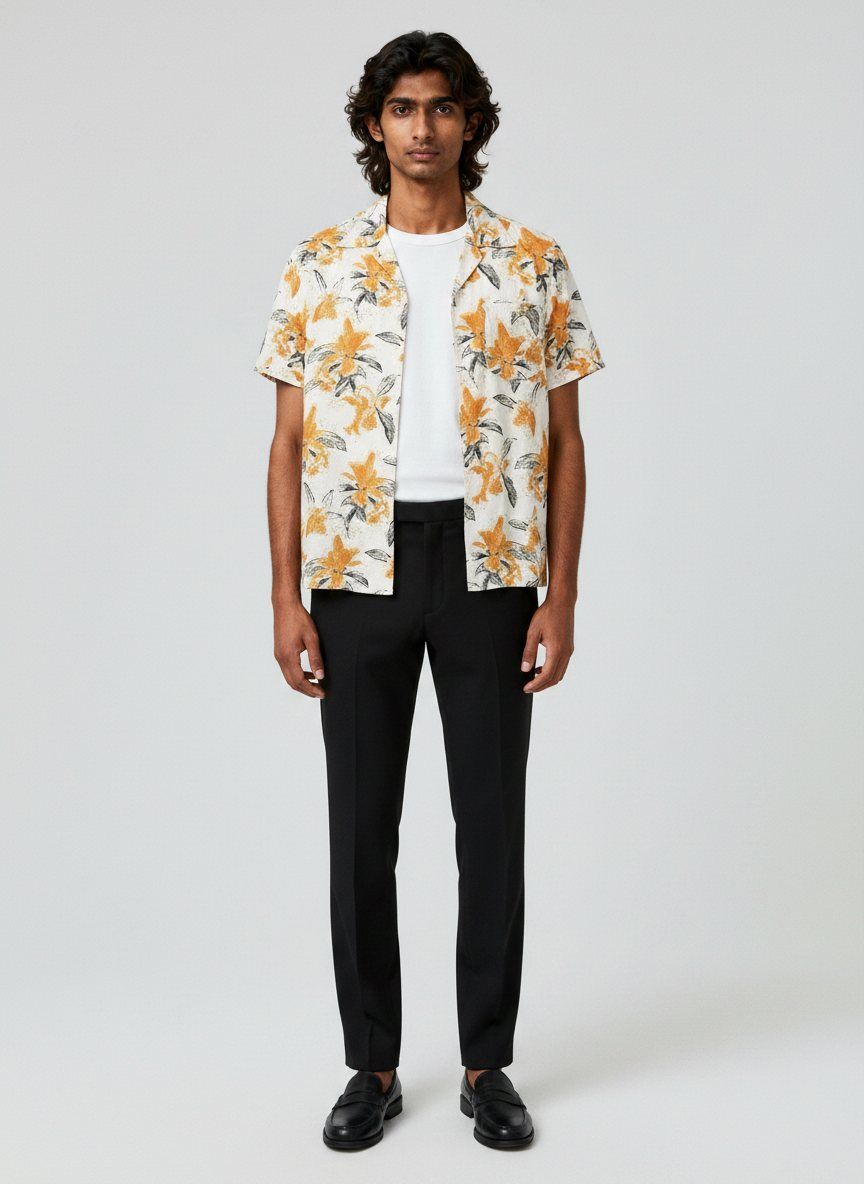
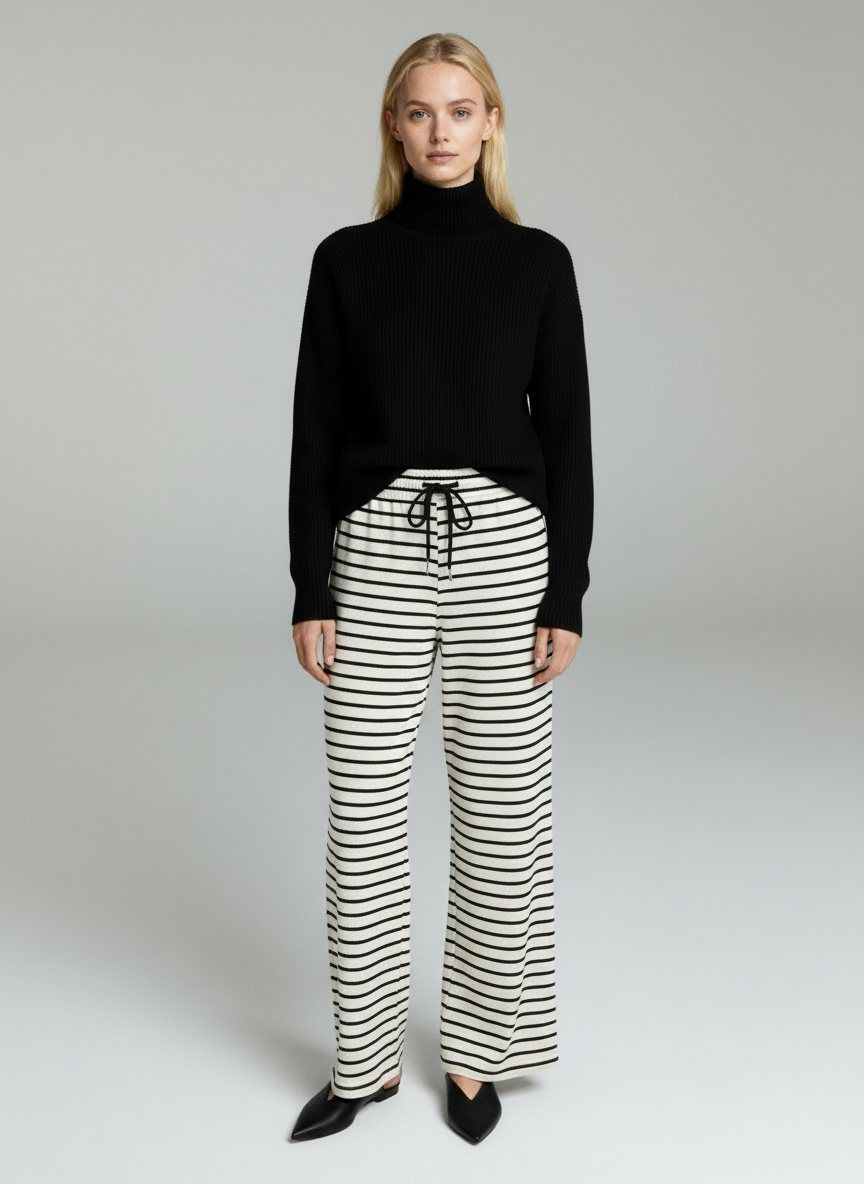
Claid output from the three source images above. Generated August 7, 2026.
- What worked
- All prints and stripes stayed accurate, and the tool accepted the messy phone source.
- Limitation
- The tee was tucked in, hiding its original cut. Scenes must be described with prompts because there is no scene library.
- Cost and fit
- About $0.10–$0.12 per image in the plans checked. Best for teams that want direct control over pairing, pose, background, ratio, and batch size.
4. Photoroom — a broad editor with a full model generator inside
Photoroom is a general-purpose AI photo editor. Model generation sits alongside background removal, product staging and batch processing rather than being the whole product. The flow is the same as the others: upload the garment, pick a model, set the pose, then choose quality, background and aspect ratio.
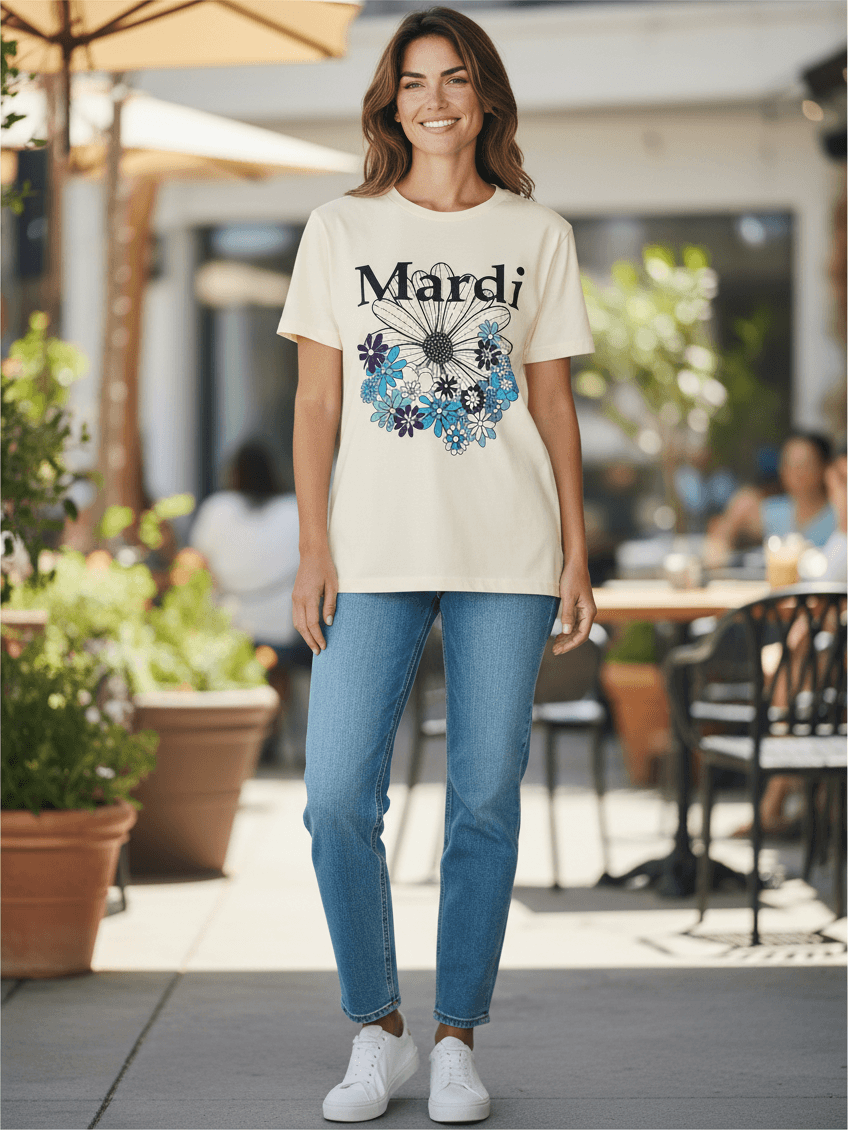
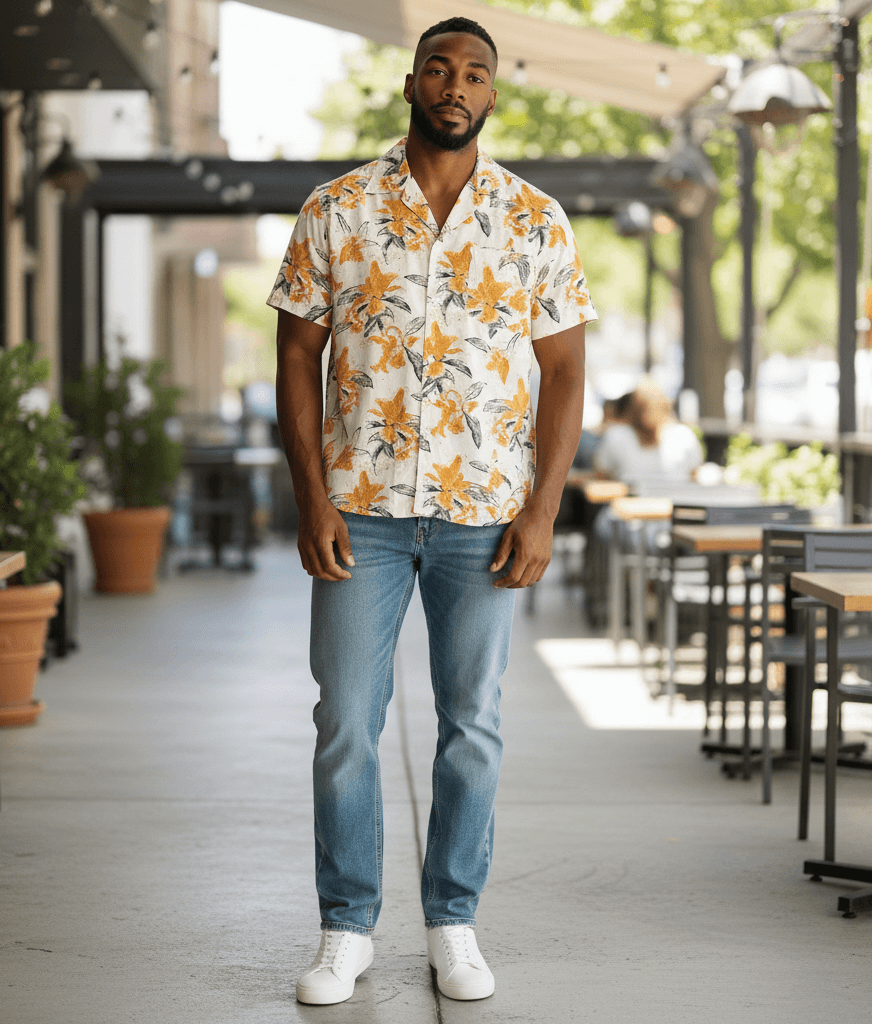
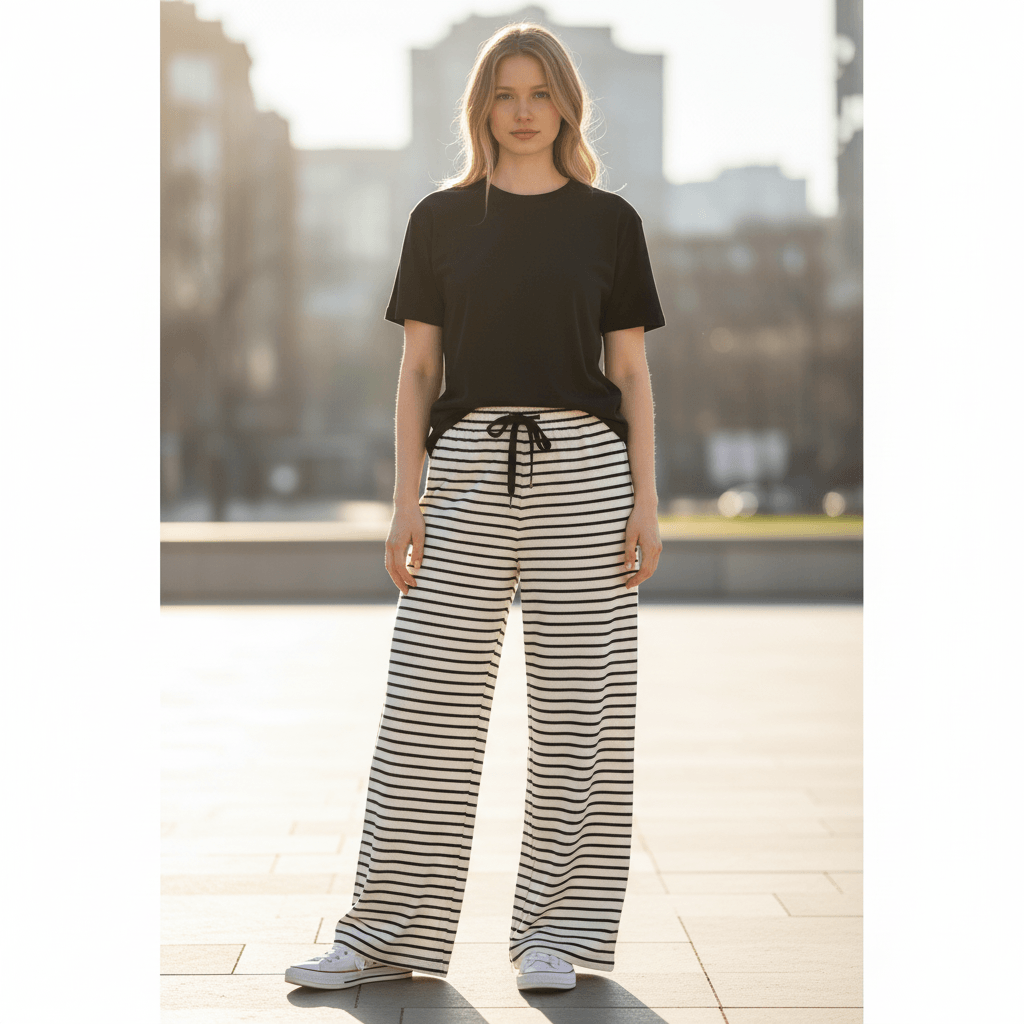
Photoroom output from the three source images above. Generated August 7, 2026.
- What worked
- All three garments kept their original cut, prints, stripes, and trouser width.
- Limitation
- The blurred backgrounds and heavily smoothed skin made the results look more generated than photographed.
- Cost and fit
- The simple Pro-plan calculation was under $0.01 per render, before export limits and retries. Best for sellers already using Photoroom for editing and batch exports.
5. Botika — outfit, footwear, model size and crop, all chosen
Botika builds the shot in steps rather than handing you a template. Upload the garment, choose a top or bottom to pair with it, choose shoes, choose the model, set the pose, then pick a background. Shoes and model sizing are steps no other tool here offers, and it costs one credit per image.
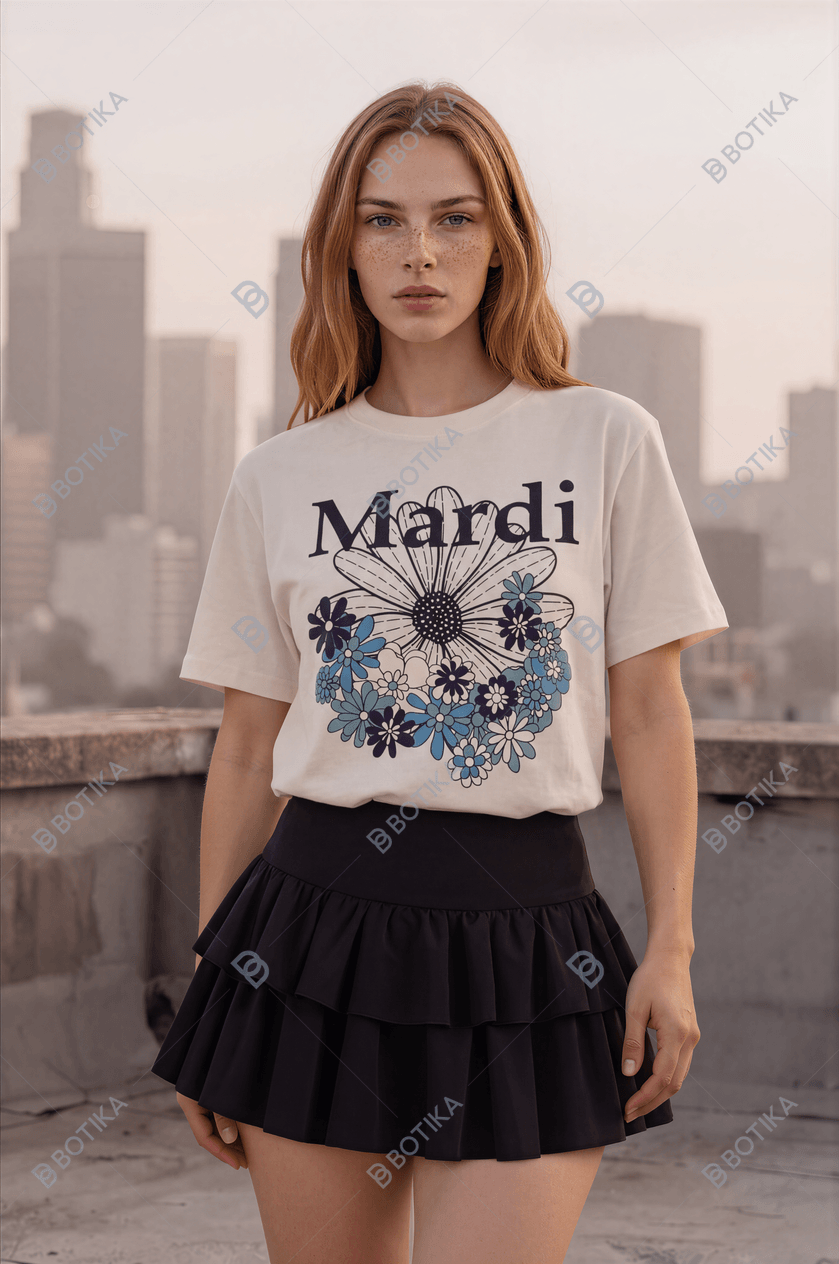
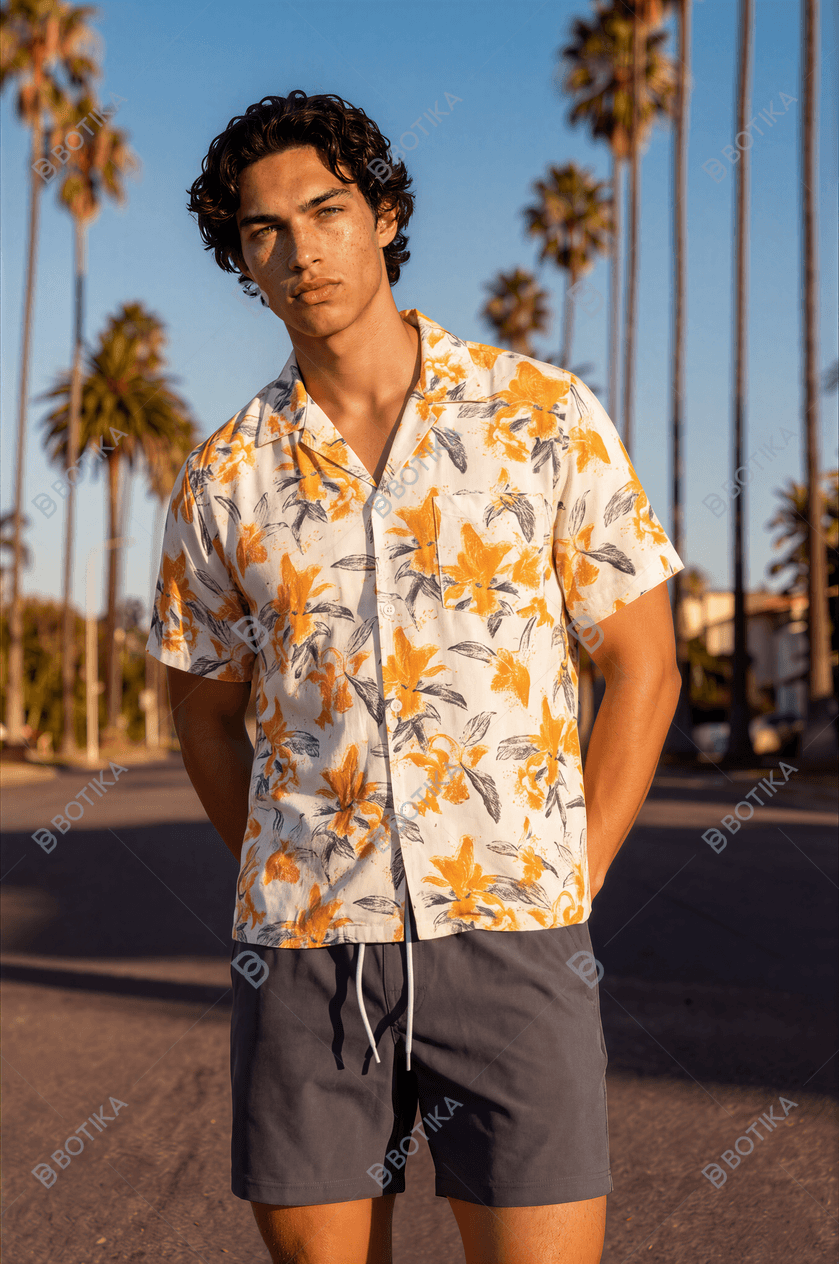
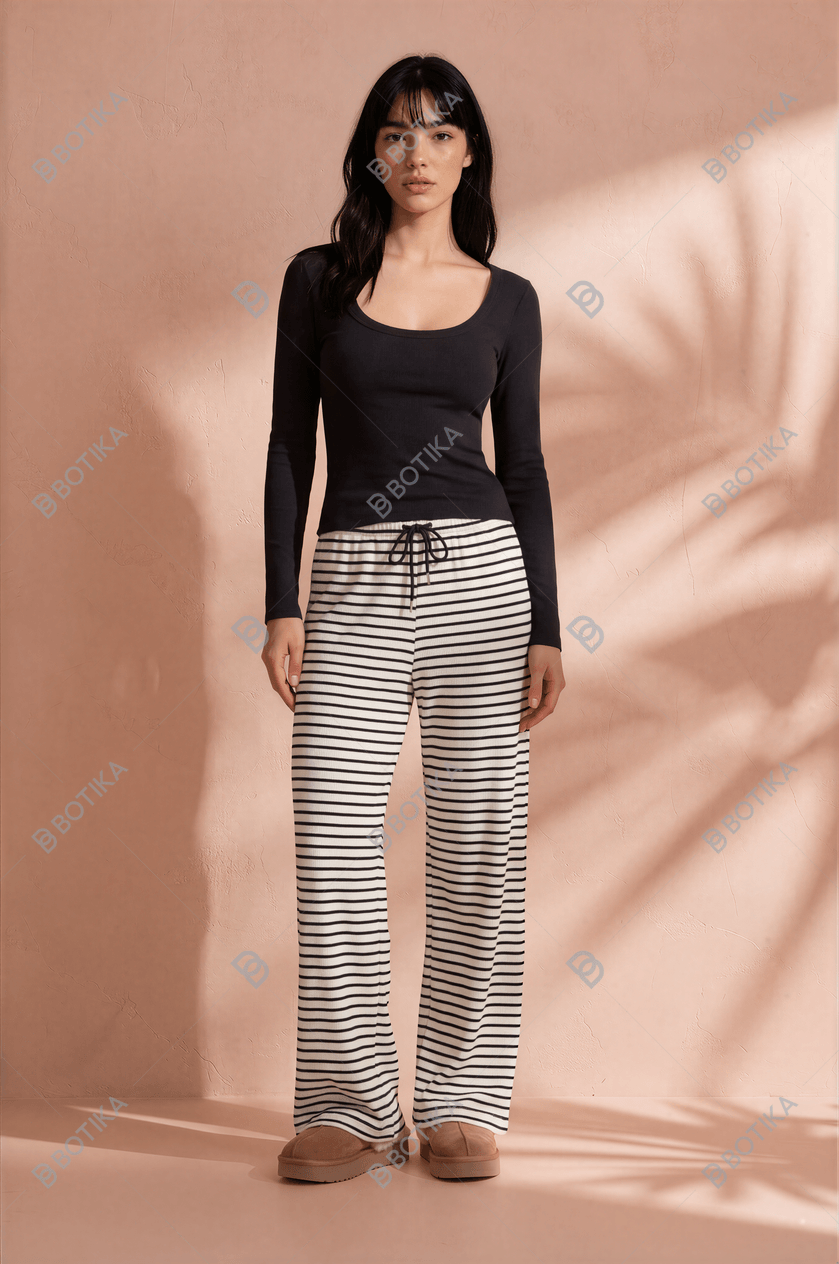
Botika output from the three source images above. Generated August 7, 2026.
- What worked
- All three garments kept their cut, print, stripes, and drawstring details. Pairing, footwear, model size, crop, and background are selected separately.
- Limitation
- Backgrounds looked visibly composited, and trial exports carried a tiled watermark.
- Cost and fit
- About $0.93–$0.97 per image in the plans checked. Best for sellers who prioritize styling controls over low unit cost.
6. Modelia — the model is assembled, not picked
Modelia takes one garment image, asks you to describe the paired top or bottom in words, then has you pick the framing — upper body, lower body or full body — from a menu. Everything after that is chosen in separate steps rather than bundled into a template.
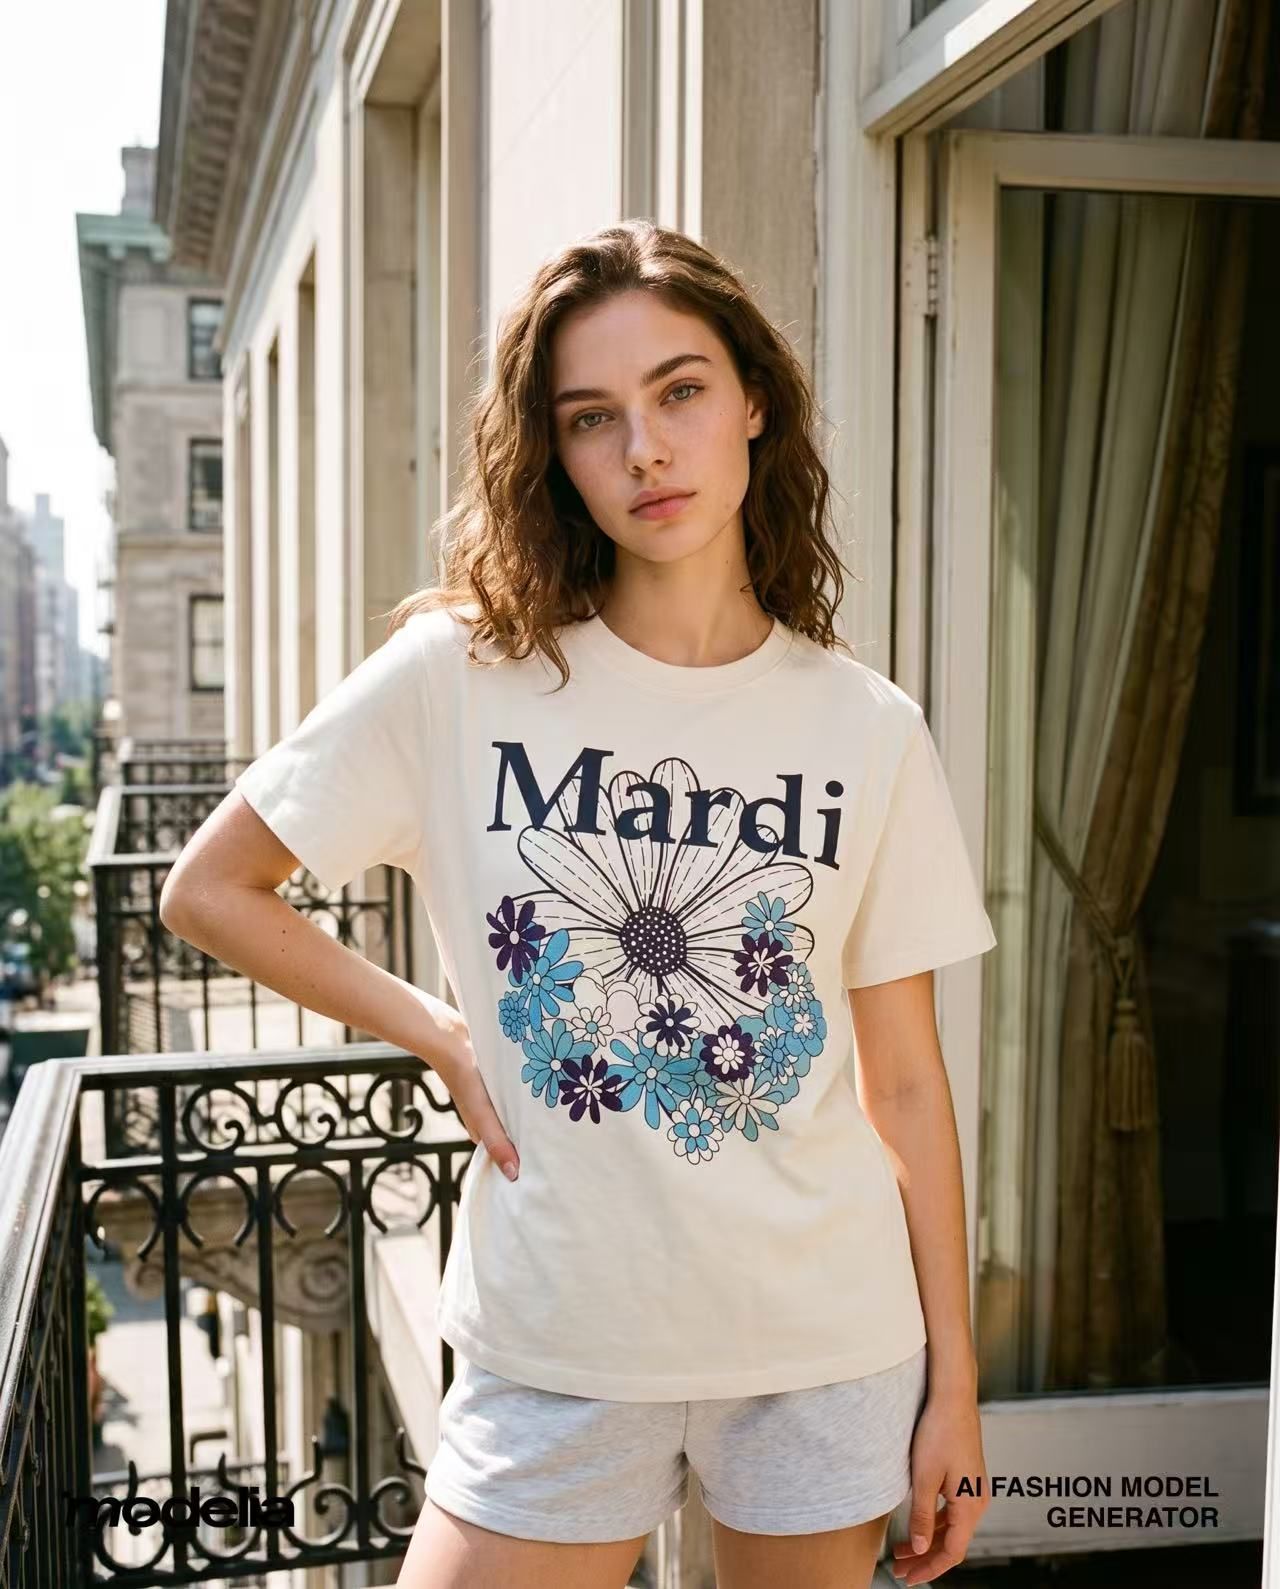
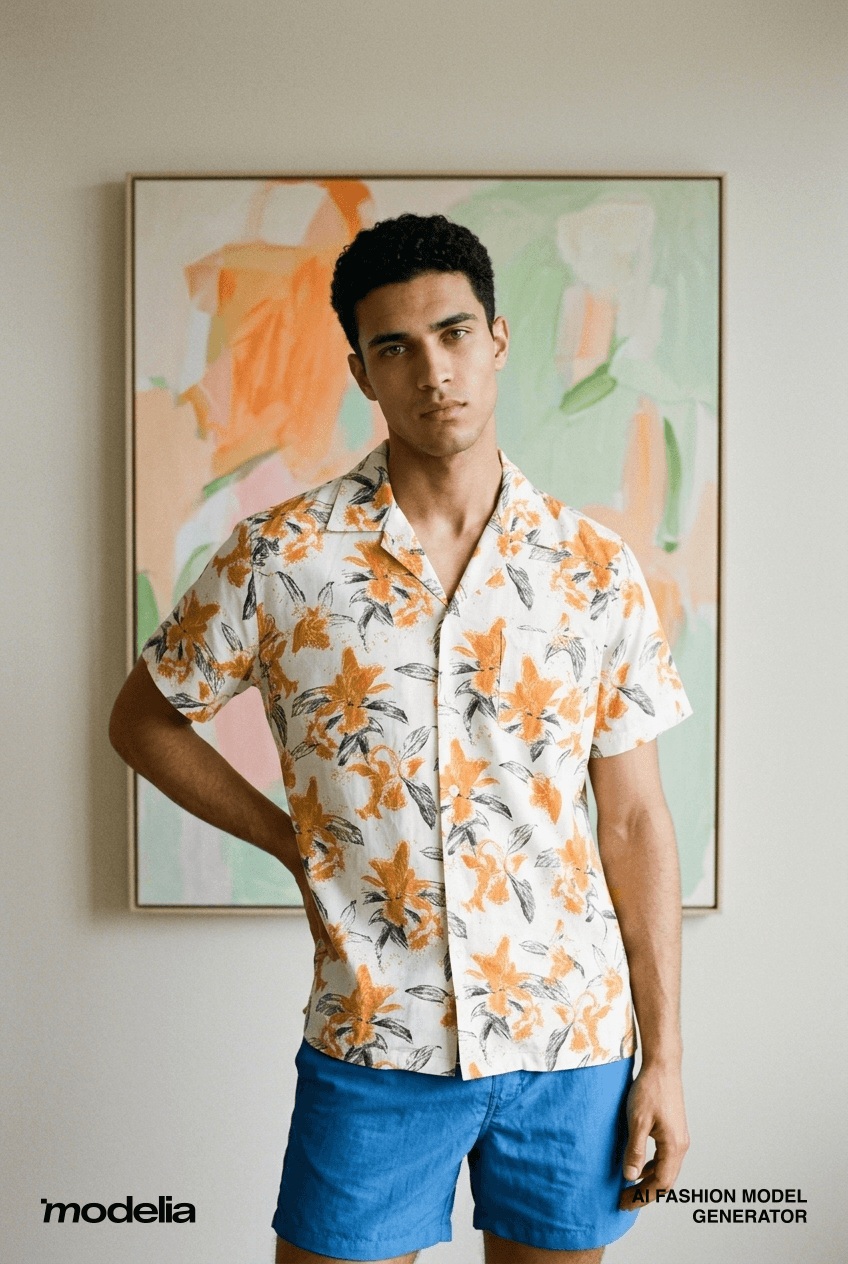
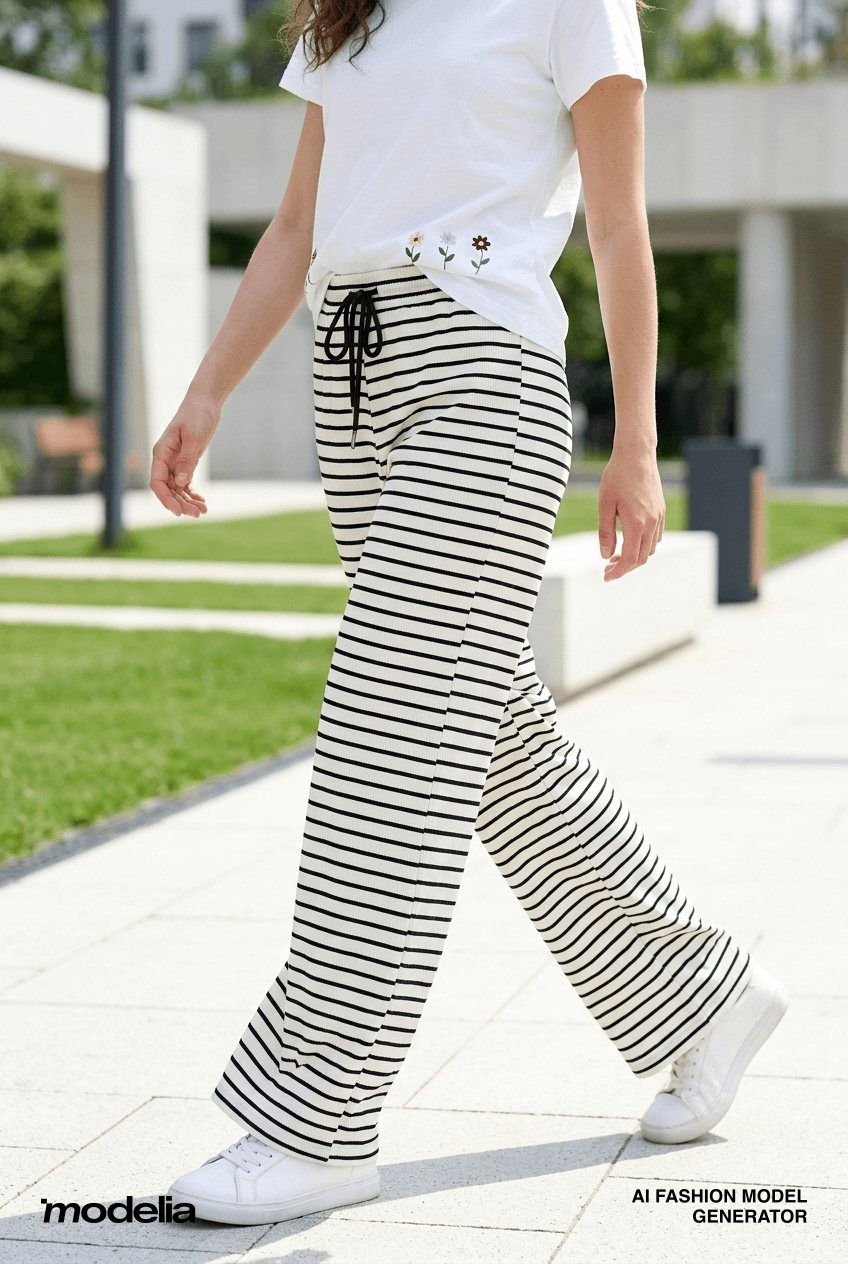
Modelia output from the three source images above. Generated August 7, 2026.
- What worked
- All three garments were preserved, and the walking trouser result kept its stripes aligned in motion.
- Limitation
- Faces looked noticeably airbrushed, and free exports carried corner watermarks.
- Cost and fit
- About $0.30–$0.42 per standard image in the plans checked. Best for brands that want separate control over face, body type, pose, and scene.
7. WearView — white-background catalog output, bring your own model
WearView keeps the flow short: upload the garment, pick a model, set the quality, aspect ratio and how many images you want. The limitation is in the model step. The built-in gallery is upper-body only, which makes custom-model upload the main way in rather than a bonus feature.
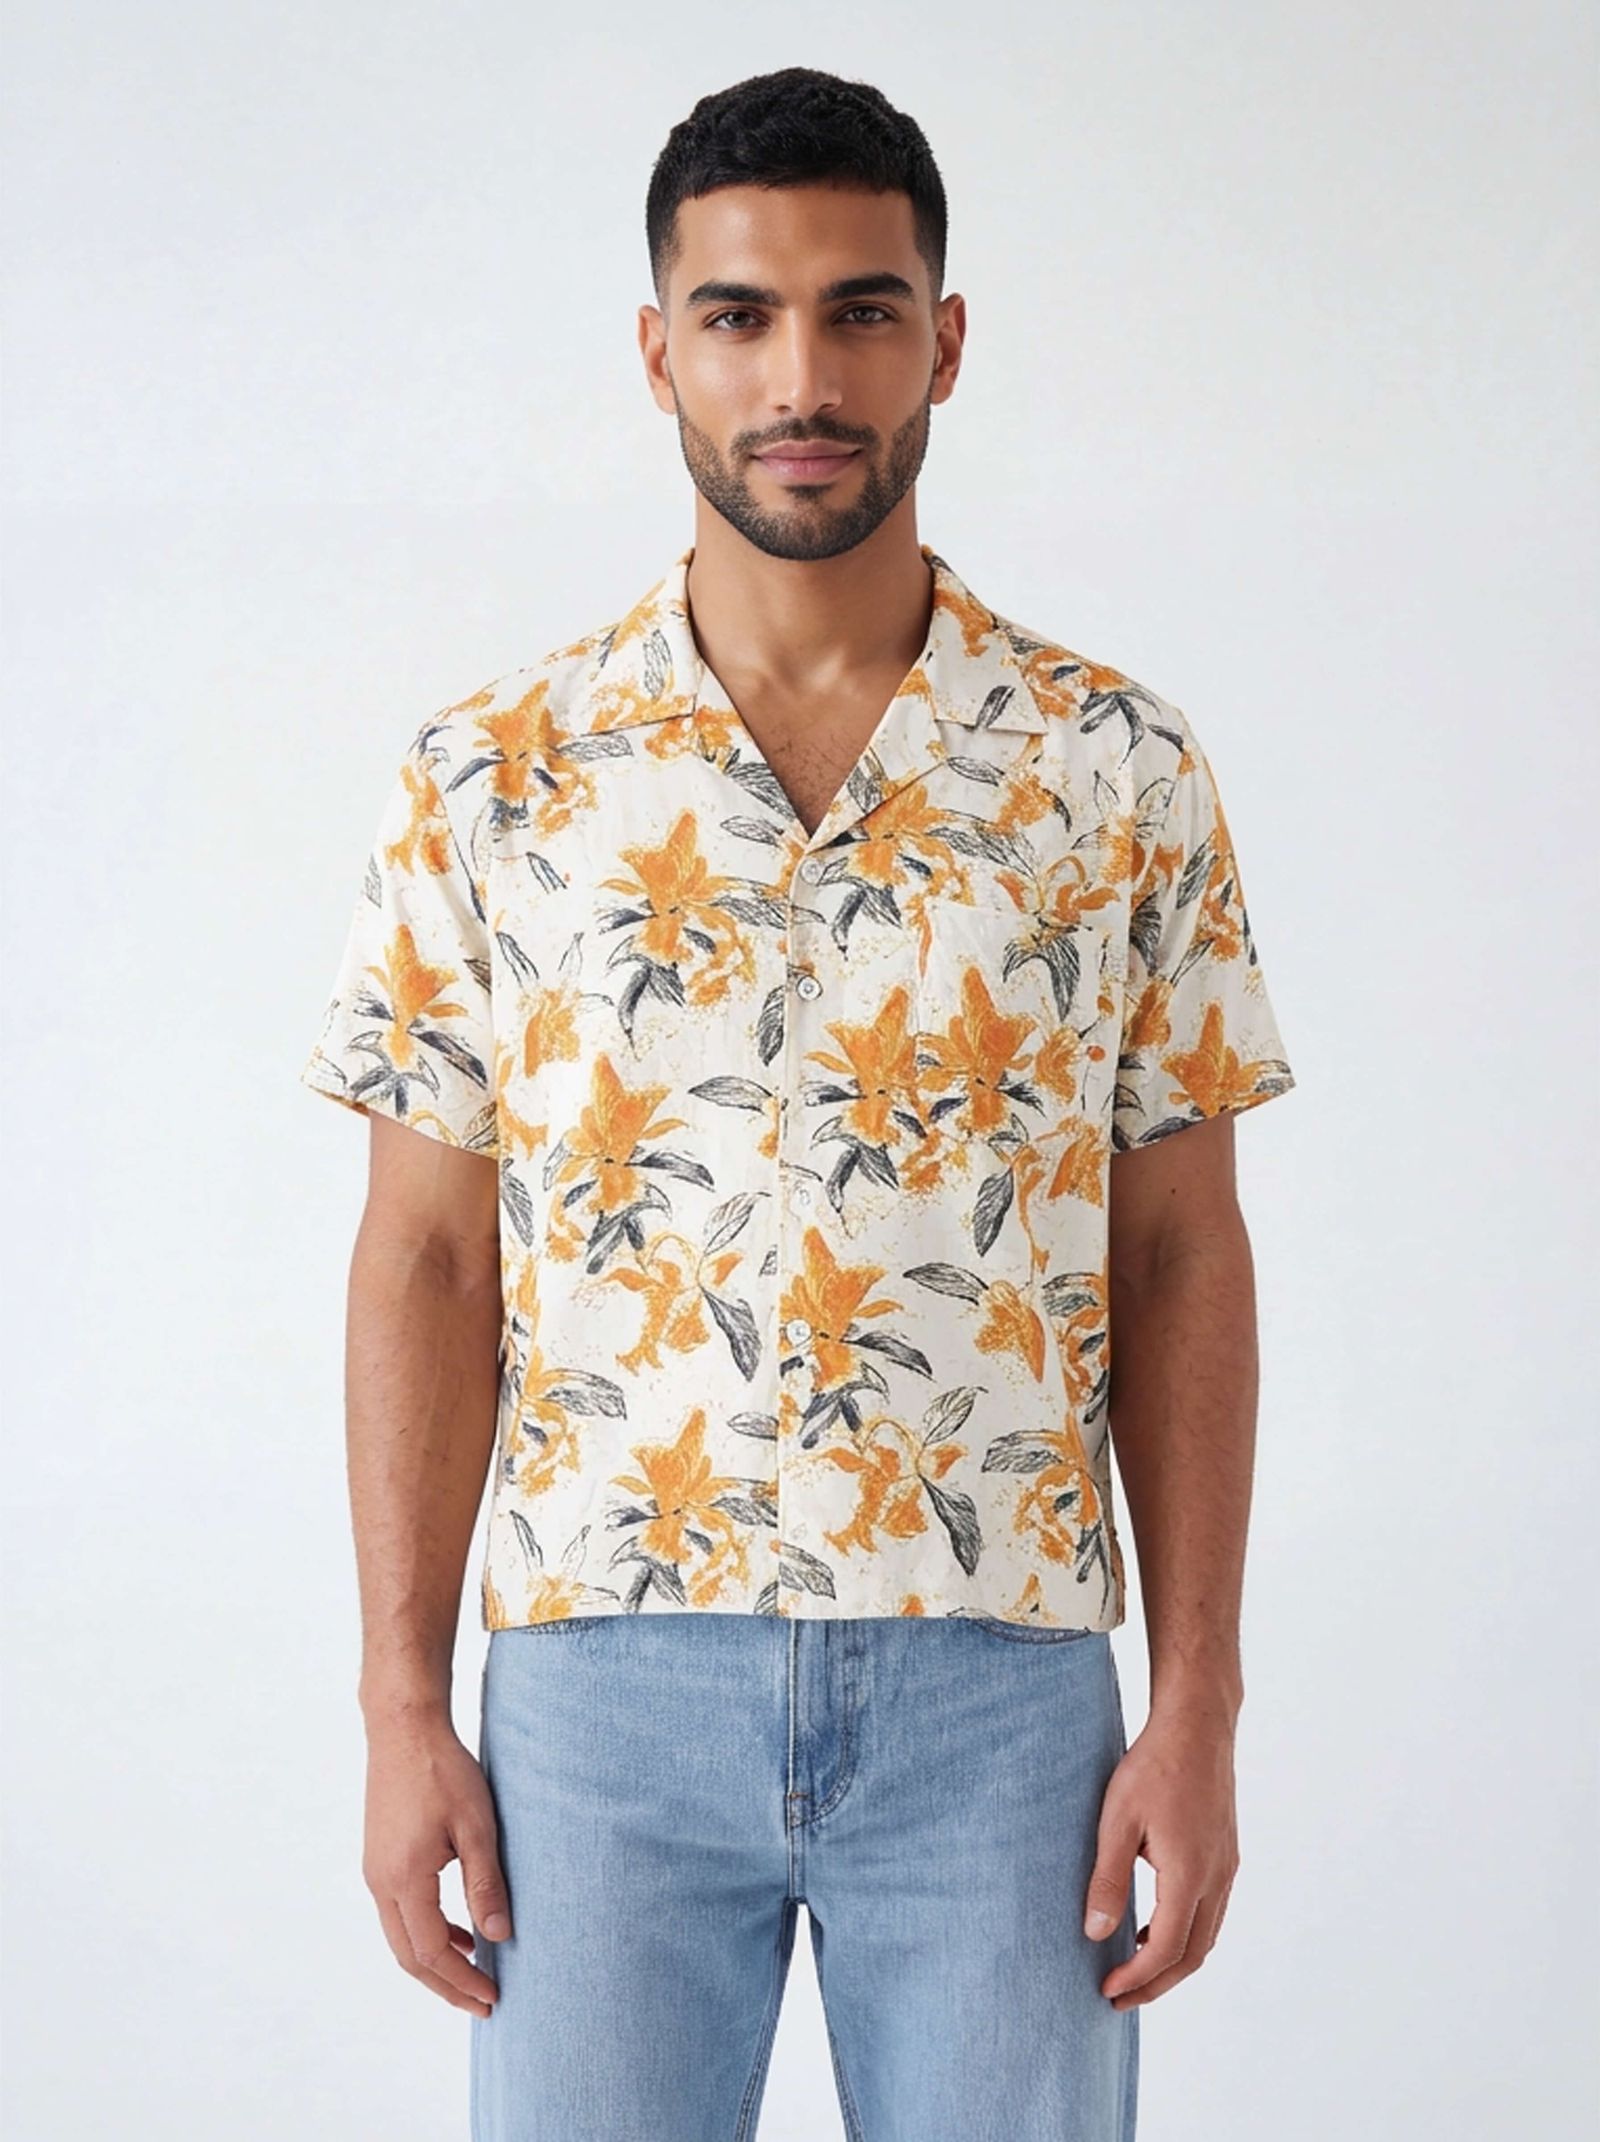
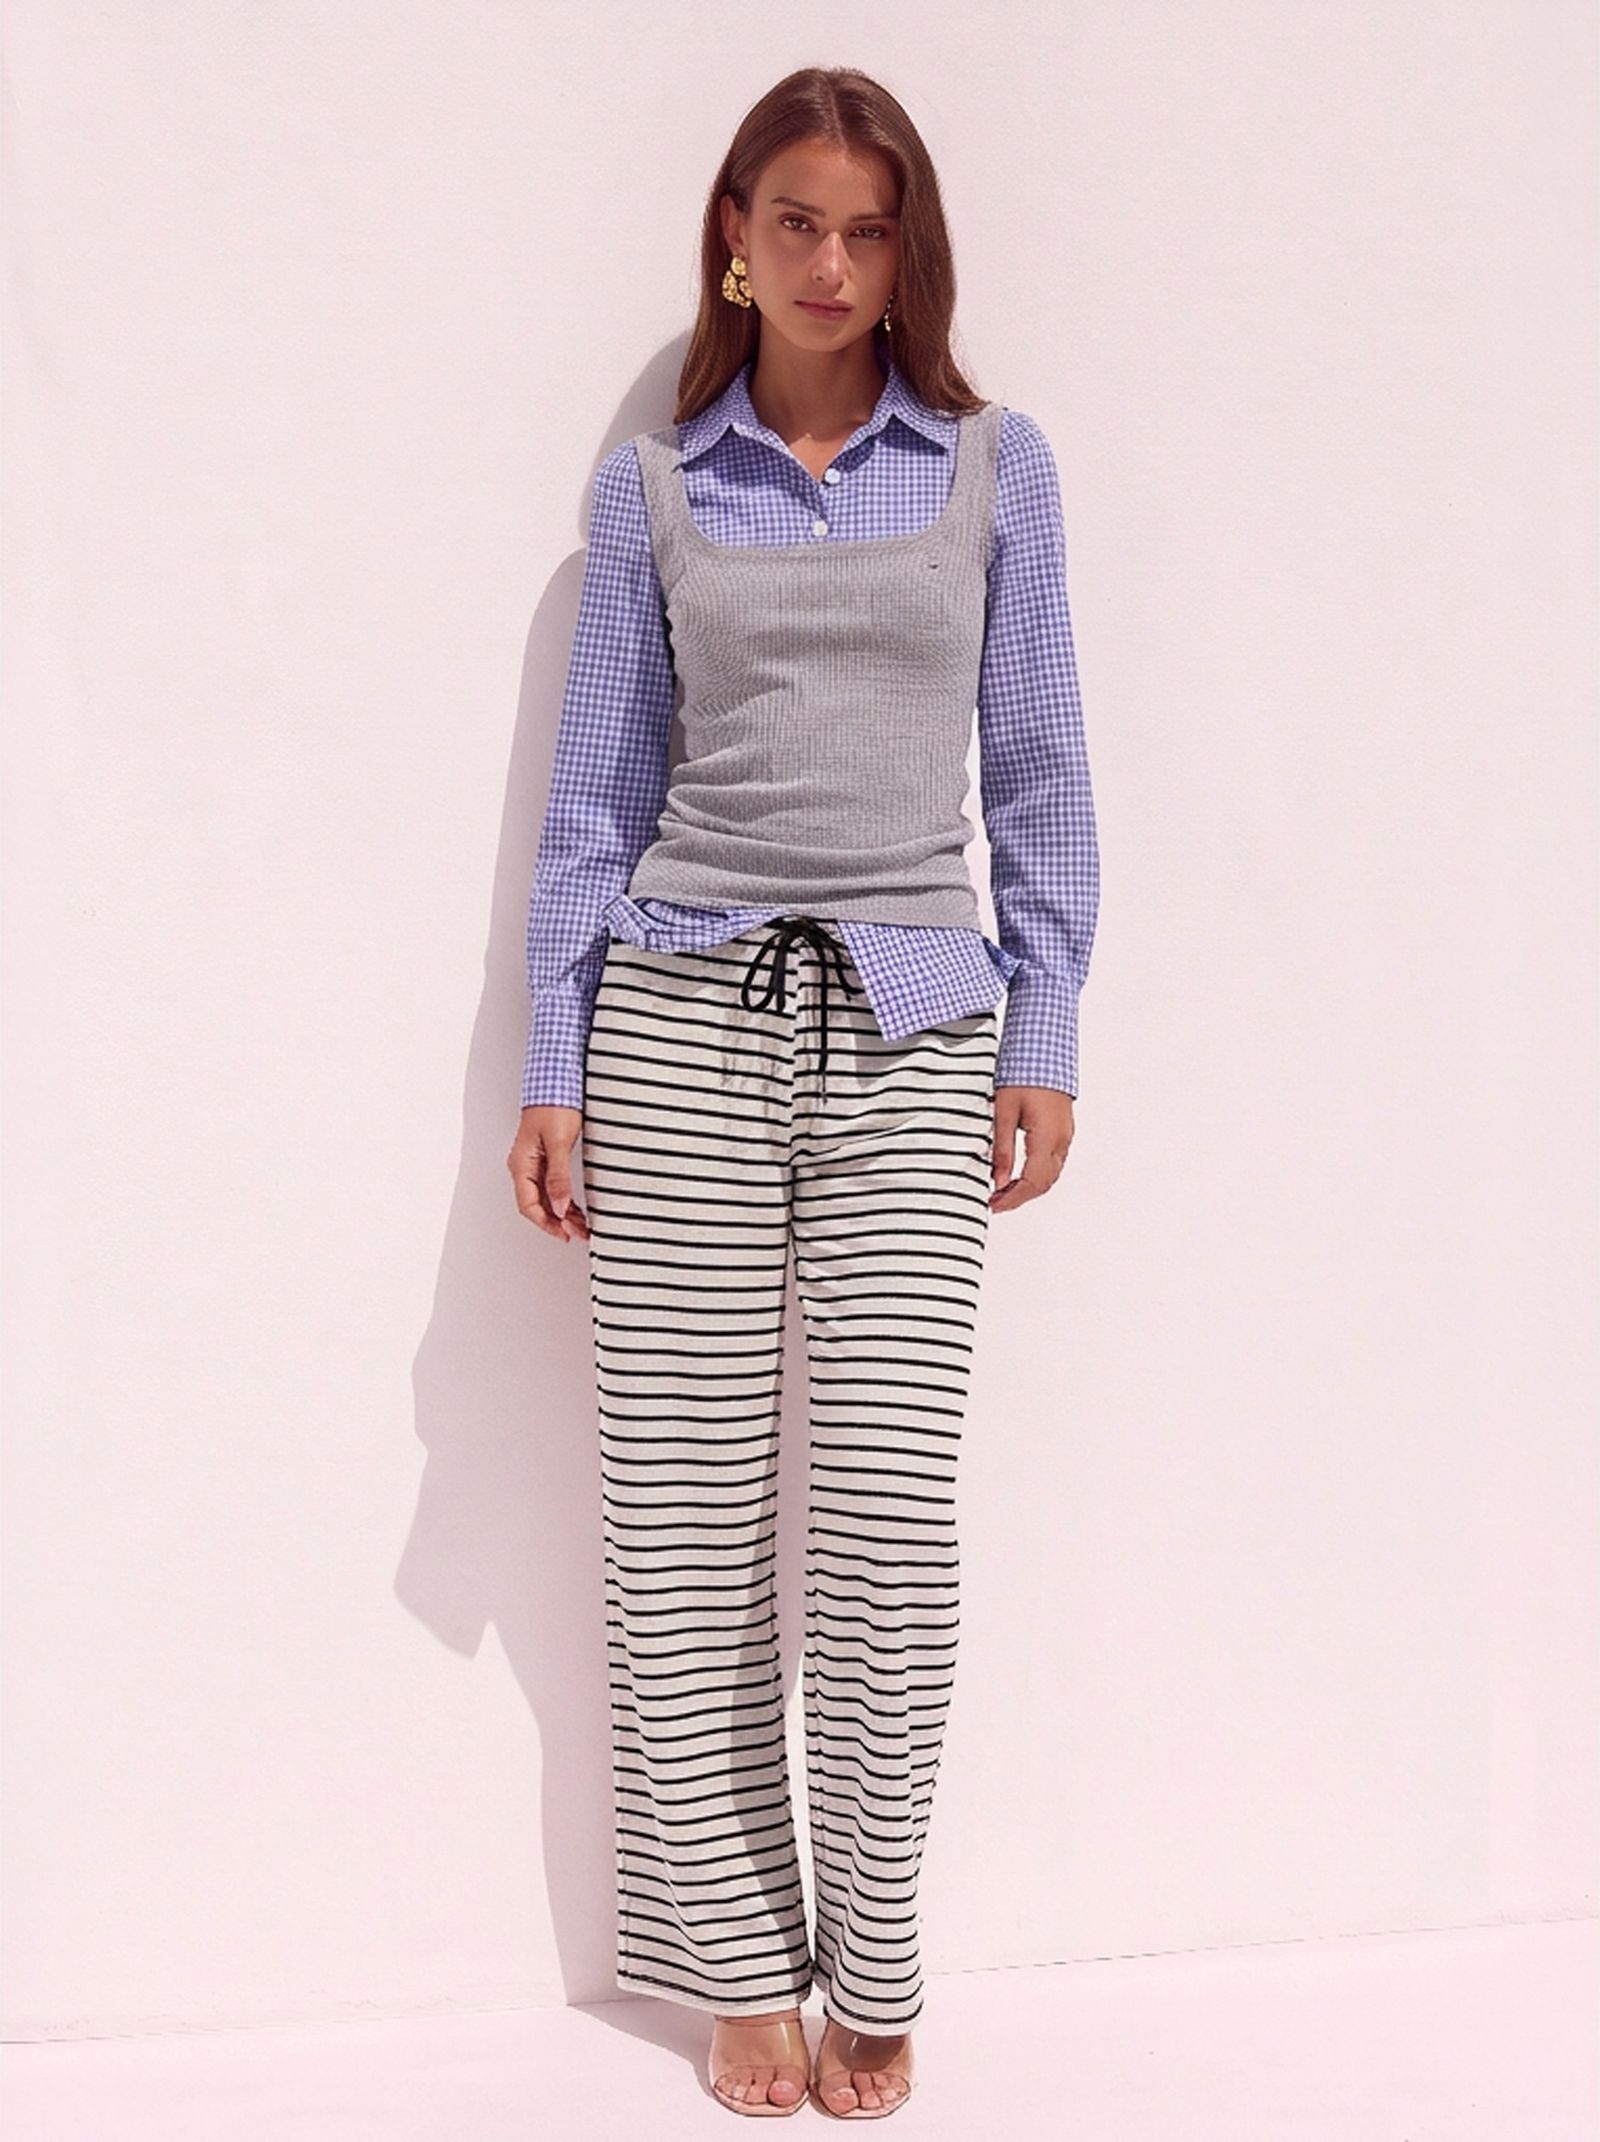
WearView output from the three source images above. Generated August 7, 2026.
- What worked
- Logos, prints, buttons, and trouser stripes remained clear.
- Limitation
- Both tops were cropped and reshaped. Stock models are upper-body only, so trousers require a custom full-length model.
- Cost and fit
- About $0.16–$0.48 per HD image in the plans checked, with higher resolutions using more credits. Best for brands that already have model references.
Side by side: tools tested on three garments
This table condenses the test results into one row per tool. The first four result columns come from our generated images; the model-options column comes from each product workflow. We omitted the messy phone source because the tested tools handled it.
Swipe to see every column →
| Tool | Print accuracy | Garment shape | Scene options | Lower-body output | Model options |
|---|---|---|---|---|---|
| Snappyit | Accurate, including stripes | Preserved | Multiple studio and lifestyle scenes | Full-length output | Gender, age, body type, style, and custom models |
| Claid | Accurate | Preserved, but the tee was tucked in | Prompted backgrounds; no scene library | Full-length output | Male or female, pose selection, and custom models |
| Photoroom | Accurate | Preserved | Multiple scenes | Full-length output | 17 model types and custom upload |
| Botika | Accurate | Preserved | Multiple scenes, but backgrounds looked composited | Full-length output | Male or female models in S, M, and L |
| Modelia | Accurate, including stripes in motion | Preserved | Built-in, uploaded, or prompted scenes | Full-length walking output | Face, body type, and pose selected separately |
| WearView | Accurate | Both tops were restyled | White studio only | Custom model required | Upper-body stock models or custom upload |
Tested August 7, 2026 on the same three source files.
AI jewelry try-on: which tools can put a necklace on a neck
Jewelry is outside the main apparel test, so this is a capability check rather than a quality ranking. We asked only whether each tool could place the same necklace on a model.
| Tool | Necklace on model |
|---|---|
| Snappyit | Yes — Jewelry Model mode |
| Claid | No |
| Photoroom | Yes — through the apparel pipeline; no dedicated jewelry mode |
| Botika | No |
| Modelia | Yes — no jewelry mode is advertised anywhere on the site, but Glasses On Model accepts a necklace and renders it |
| WearView | Yes — through the apparel pipeline; no dedicated jewelry mode |
Four tools returned a necklace-on-model image, but only Snappyit used a dedicated jewelry workflow and framed the necklace as the subject. Test jewelry separately if it is a meaningful part of your catalog. Checked August 7, 2026.
Conclusion
The tested tools preserved the sampled logo, floral print, and stripes; the meaningful differences were garment shape, model and scene control, lower-body support, visual realism, and cost per approved image. Snappyit delivered the most balanced result across the three garments. Claid offered the most prompt-led control, Photoroom fit existing editing workflows, Botika offered detailed styling controls at the highest unit cost, Modelia handled the moving trousers well, and WearView depended on custom models for full-length output.
Before committing a catalog, test several difficult SKUs and track first-pass approval, retries, corrections, and export limits. Choose the tool that produces accurate images your team would actually publish—not simply the lowest advertised generation price.
AI fashion model and virtual try-on FAQ
How do you create an AI fashion model from a clothing photo?
Start with a complete, well-lit garment photo and choose a tool that supports the product type. Generate a controlled studio image first, then compare its cut, length, logos, patterns, seams, hardware, and included pieces with the real SKU. Create lifestyle variations or process a full catalog only after that product image passes review.
What is the difference between an AI fashion model generator and shopper-facing virtual try-on?
An AI fashion model generator turns a merchant's garment photo into a static on-model image for listings, lookbooks, and ads. Shopper-facing virtual try-on places a garment on a customer's selfie or camera feed inside a storefront. This article tests the first category: merchant-side catalog image generators.
What product photo works best with an AI virtual try-on tool?
Use a sharp flat-lay, hanger, mannequin, or supplier photo that shows the complete garment, including the hem, print, seams, and hardware. Even lighting and a plain background make accuracy easier to judge. A tool may accept a cluttered phone photo, as the tested tools did in our tee test, but a cleaner source reduces uncertainty when reviewing the result.
Do AI virtual try-on tools preserve garment cut, logos, and patterns?
They can, but every SKU still needs review. The tested tools preserved the sampled logo, floral print, and stripes in this test. WearView changed the silhouette of both tops, however, and Claid tucked the tee into shorts, hiding its hem. Check cut, length, logo shapes, pattern alignment, seams, and hardware at full resolution before publishing.
Can ecommerce sellers use AI-generated model images on Etsy, Amazon, eBay, or Shopify?
There is no universal answer because platform and category rules change. Check each marketplace's current official seller policy, keep the original product photo, confirm that the generated image accurately represents the item, and disclose AI use wherever a platform or applicable law requires it. Amazon main-image requirements are category-specific; a white background alone does not make every AI on-model image eligible.
How should a merchant test a virtual try-on tool before processing a full catalog?
Start with a small set of difficult SKUs: logos, dense prints, unusual hems, reflective hardware, sheer fabric, and lower-body garments. Track how many attempts produce an accurate, publishable result, then compare accepted outputs per dollar. Also check export resolution, watermarks, model diversity, background consistency, commercial terms, and whether the workflow supports repeatable batch production.
Reference
The tools compared above — the feature each one was assessed on, and the page every price and credit figure came from.
- Snappyit, AI Fashion Model · Pricing
- Fashion Diffusion, AI fashion model
- Claid, AI fashion model generator · Pricing · How credits work
- Photoroom, Virtual Model · Pricing · Plan details · AI credit costs
- Botika, AI on-model photography · Pricing
- Modelia, AI fashion model generator · Pricing
- WearView, Virtual Model · Pricing
Prices and credit costs were read off these pages on August 10, 2026, and the per-image figures in this guide are calculated from them — plan price divided by included credits, multiplied by the credits one on-model render consumes. Plans change; check before you buy.