At a glance
What an ecommerce product photography studio really takes: styles, gear, space setup, platform specs, true DIY vs pro costs, and AI scaling for big catalogs.
| Need | What to do |
|---|---|
| Get oriented | Read the short summary, then use the checklist below. |
| Create a test image | Try Product Photo Editor Free |
What an Ecommerce Product Photography Studio Actually Does
An ecommerce product photography studio is a dedicated production environment built to create high-volume, conversion-optimized product images for online selling platforms. Unlike a portrait studio or an event photography space, everything here serves one purpose: making products look accurate, consistent, and compelling enough to sell without a customer ever touching them. The lighting rigs, backgrounds, camera positions, and post-production workflows are all configured around throughput and repeatability across hundreds or thousands of SKUs.
So what is an ecommerce shoot, exactly? It is a structured session where physical products are photographed under controlled conditions to produce marketplace-ready images, typically including a white-background hero shot, multiple angles, detail crops, and lifestyle context images. The output feeds directly into platforms like Amazon, Shopify, and Etsy, each with specific technical requirements that general commercial photography rarely accounts for.
What Makes Ecommerce Studios Different from General Photography
A portrait photographer optimizes for flattering skin tones and emotional expression. An event photographer chases candid moments in unpredictable lighting. An ecommerce product photography studio does neither. It optimizes for precision, speed, and catalog-wide consistency.
The specialization shows up in three key areas. First, white backgrounds and seamless sweeps are permanent fixtures rather than occasional setups. Second, lighting rigs stay locked in position across entire product families so that every image in a catalog shares the same visual language. Third, the workflow is built for volume. Tethered capture systems feed images directly to a review screen, batch processing handles color correction across dozens of SKUs simultaneously, and file delivery is formatted to meet platform-specific pixel requirements. A 100-SKU catalog that might take weeks with a general photographer can move through a dedicated e-commerce photography setup in two to three days with the right system in place.
This level of commerce photography discipline demands a fundamentally different mindset. Every variable, from color temperature to camera-to-product distance, is controlled intentionally so the output remains reproducible shoot after shoot.
Why Product Visuals Drive Online Purchase Decisions
Imagine browsing a product page where the images are dim, slightly blurry, and shot at inconsistent angles. Would you trust that seller with your money? Most shoppers would not. When buyers cannot pick up, feel, or try a product, the photograph becomes the entire evaluation experience.
Research from Baymard Institute shows that 56% of online shoppers explore product images as their very first action on a product page, before reading a single word of the description. And in Salsify's 2025 Consumer Research Report, 77% of shoppers rated high-quality images and videos as important when deciding what to buy. The connection between what buyers see and whether they click "add to cart" is not subtle.
Higher-quality product photos don't just increase clicks. They shape how much a buyer is willing to pay, how much they trust the seller, and whether the product gets returned after purchase.
On marketplaces where identical products compete side by side, eBay's data shows listings with better photo quality are 4.5% more likely to sell. And a Cornell study of eBay listings found that handbags with better photos were about 1.25 times more likely to sell. These are not marginal differences. They compound across every SKU in your catalog, which is exactly why ecommerce photography exists as its own discipline rather than a subset of general studio work.
The gap between "good enough" product images and genuinely conversion-optimized visuals is where most brands lose revenue without realizing it. Understanding exactly which photography styles match your products is the first step toward closing that gap.
Photography Styles Every Ecommerce Brand Should Know
Not every product photographs the same way, and not every platform rewards the same visual approach. Choosing the wrong style for your product category can quietly tank conversions even when the image quality itself is technically fine. Here is how the major styles compare and when each one earns its place in your online product photography workflow.
White Background and Lifestyle Photography Compared
White background photography isolates the product against a pure white sweep, removing all visual distractions so the buyer focuses entirely on shape, color, and detail. This is not optional for marketplace sellers. Amazon requires RGB 255,255,255 backgrounds on main images. eBay and Walmart enforce similar standards. If you sell on any major marketplace, white background shots are your baseline.
Lifestyle photography does the opposite. It places products in real-world environments, showing them being used, worn, or styled in context. Think a ceramic mug on a sunlit breakfast table or a jacket worn during a morning commute. This style builds emotional connection and helps buyers picture the product in their own lives. It performs particularly well on brand-owned storefronts, social media, and platforms like Etsy where storytelling drives purchases.
Most brands need both. White backgrounds handle the functional job of marketplace compliance and product clarity. Lifestyle images handle the persuasive job of brand building and desire creation. The question is not which to choose but how to allocate budget across both.
Flat Lay and Ghost Mannequin Techniques
Flat lay photography arranges products on a surface and shoots straight down from above. It works beautifully for accessories, cosmetics, stationery, and small goods where composition and grouping tell the story. You will notice this style dominating Instagram feeds and editorial product roundups because the bird's-eye perspective creates clean, balanced visuals that feel curated without being cluttered.
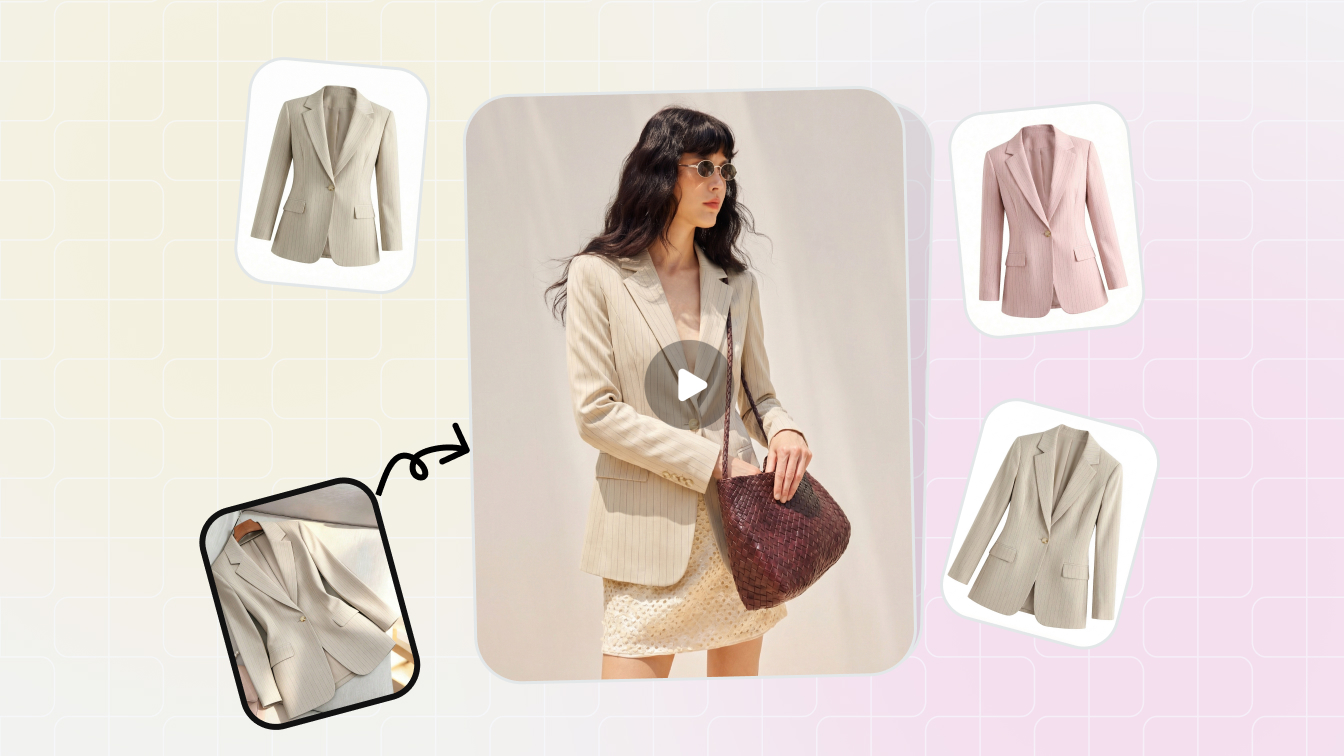
Ghost mannequin photography solves a different problem entirely. When you need to show how a garment fits and drapes without hiring a model, you dress it on a physical mannequin, shoot it from multiple angles, then remove the mannequin in post-production. The result is a floating, three-dimensional garment that communicates shape and fit. For ecommerce apparel photography, ghost mannequin is typically the most cost-effective technique when catalogs are large: the mannequin-removal work is a post-production edit that adds only a small per-image charge on top of the base shot, far cheaper than staffing every SKU with models and stylists for on-model photography.
An ecommerce fashion photography studio will typically offer both ghost mannequin and ecommerce model photography options, recommending mannequin for catalog depth and on-model shots for hero products and homepage features. The choice often comes down to volume: if you are shooting 500 SKUs per season, ghost mannequin scales where model shoots do not.
360-Degree and Interactive Product Views
Some products simply cannot be understood from a single angle. Electronics with ports on multiple sides, furniture with hidden storage compartments, tools with complex geometries. These categories benefit from 360-degree photography, where the product is captured at even intervals around its axis and stitched into an interactive viewer that lets the buyer drag to rotate.
According to Orbitvu's research, 360-degree spins reduce the gap between online shopping and the in-store experience by letting customers virtually examine shape, material, and hidden features. The tradeoff is complexity. A single-row 360 spin typically requires around 36 frames captured at 10-degree intervals (multi-row 3D captures can run to 144), specialized turntable equipment, and a dedicated viewer script on your product page. For flat or simple items like a mouse pad or a t-shirt, the added investment provides little benefit over strong still ecommerce product photos. For three-dimensional, feature-rich products, the engagement lift justifies the cost.
| Style Name | Best Product Categories | Typical Use Case | Complexity Level | Relative Cost |
|---|---|---|---|---|
| White Background | All categories (required for marketplaces) | Main listing images, catalog pages | Low | Low |
| Lifestyle | Food, home goods, beauty, fashion | Brand storytelling, social media, DTC stores | Medium | Medium |
| Flat Lay | Accessories, cosmetics, stationery, small goods | Social media, editorial, product groupings | Low to Medium | Low |
| Ghost Mannequin | Apparel (shirts, jackets, trousers, dresses) | Catalog depth, product pages, marketplace listings | Medium | Low to Medium |
| On-Model | Apparel, shoes, accessories, jewelry | Hero images, campaigns, homepage features | High | High |
| 360-Degree Spin | Electronics, furniture, tools, complex products | Product pages for feature-rich items | High | Medium to High |
A few category-specific guidelines worth committing to memory: jewelry demands macro white background shots that capture texture and sparkle at close range. Food requires styled lifestyle setups with props, surfaces, and natural light that make dishes look appetizing. Ecommerce fashion photography benefits most from combining ghost mannequin for catalog volume with on-model shots for key pieces. And electronics or furniture almost always justify the investment in 360-degree views where dimension and detail cannot be communicated in two or three flat images.
Knowing which styles fit your catalog is one thing. Having the right gear to execute them consistently is another, and that starts with understanding what equipment actually matters for product-specific results.
Essential Equipment for Your Product Photography Setup
Selecting a photography style is the creative decision. Selecting gear is the operational one. The right equipment does not just produce sharper images. It produces them consistently, quickly, and at a cost per shot that makes sense as your catalog grows. Here is what actually matters for product photography for ecommerce, broken down by function.
Camera Bodies and Lens Selection for Product Detail
You do not need the most expensive camera body on the market. What you need is manual mode control, solid resolution (24 megapixels or higher handles marketplace zoom requirements comfortably), and interchangeable lens support. Full-frame sensors deliver cleaner files at lower ISOs, but modern APS-C bodies perform well enough for most e-commerce product photography workflows.
The lens matters more than the body. A 100mm macro lens captures fine texture and detail at close range without the barrel distortion that wider lenses introduce. Think jewelry clasps, fabric weave, or PCB traces in electronics product photography. A 50mm or 60mm macro serves as a workhorse for medium-sized products, while a 24-70mm zoom handles larger items and gives you framing flexibility without swapping glass. The key principle: match focal length to product size and keep distortion out of the frame.
Lighting Rigs Built for Consistency
Lighting is where e-commerce product photography either stays consistent across 500 SKUs or quietly falls apart. You have two main choices: continuous lights and strobes.
Continuous LED panels let you see exactly how shadows and highlights fall before you press the shutter. They are beginner-friendly and pull double duty for video. Strobes deliver higher power output in short bursts, freezing any micro-movement and allowing lower ISO settings for cleaner, sharper files. Most dedicated studios lean toward strobes for still product work because of that power advantage and more consistent color temperature from shot to shot.
Whichever you choose, pair your lights with softboxes or strip banks for even diffusion. Small products like jewelry or cosmetics benefit from light tents that wrap soft illumination around the object from every angle, eliminating harsh reflections. The non-negotiable rule: maintain the same color temperature across every light in your rig. Mixed temperatures introduce color casts that multiply across a catalog and create post-production headaches.
Backgrounds and Sweep Setups
Seamless paper rolls in white, gray, or black are the default surface for photography for ecommerce products. A roll mounted to a crossbar sweeps down and forward to create a smooth, shadowless curve behind and beneath the product. For smaller items, a portable sweep table with an integrated acrylic or matte surface keeps setups compact and quick to swap. Acrylic reflection boards add a polished mirror effect beneath products like watches or glassware, creating visual depth without added props.
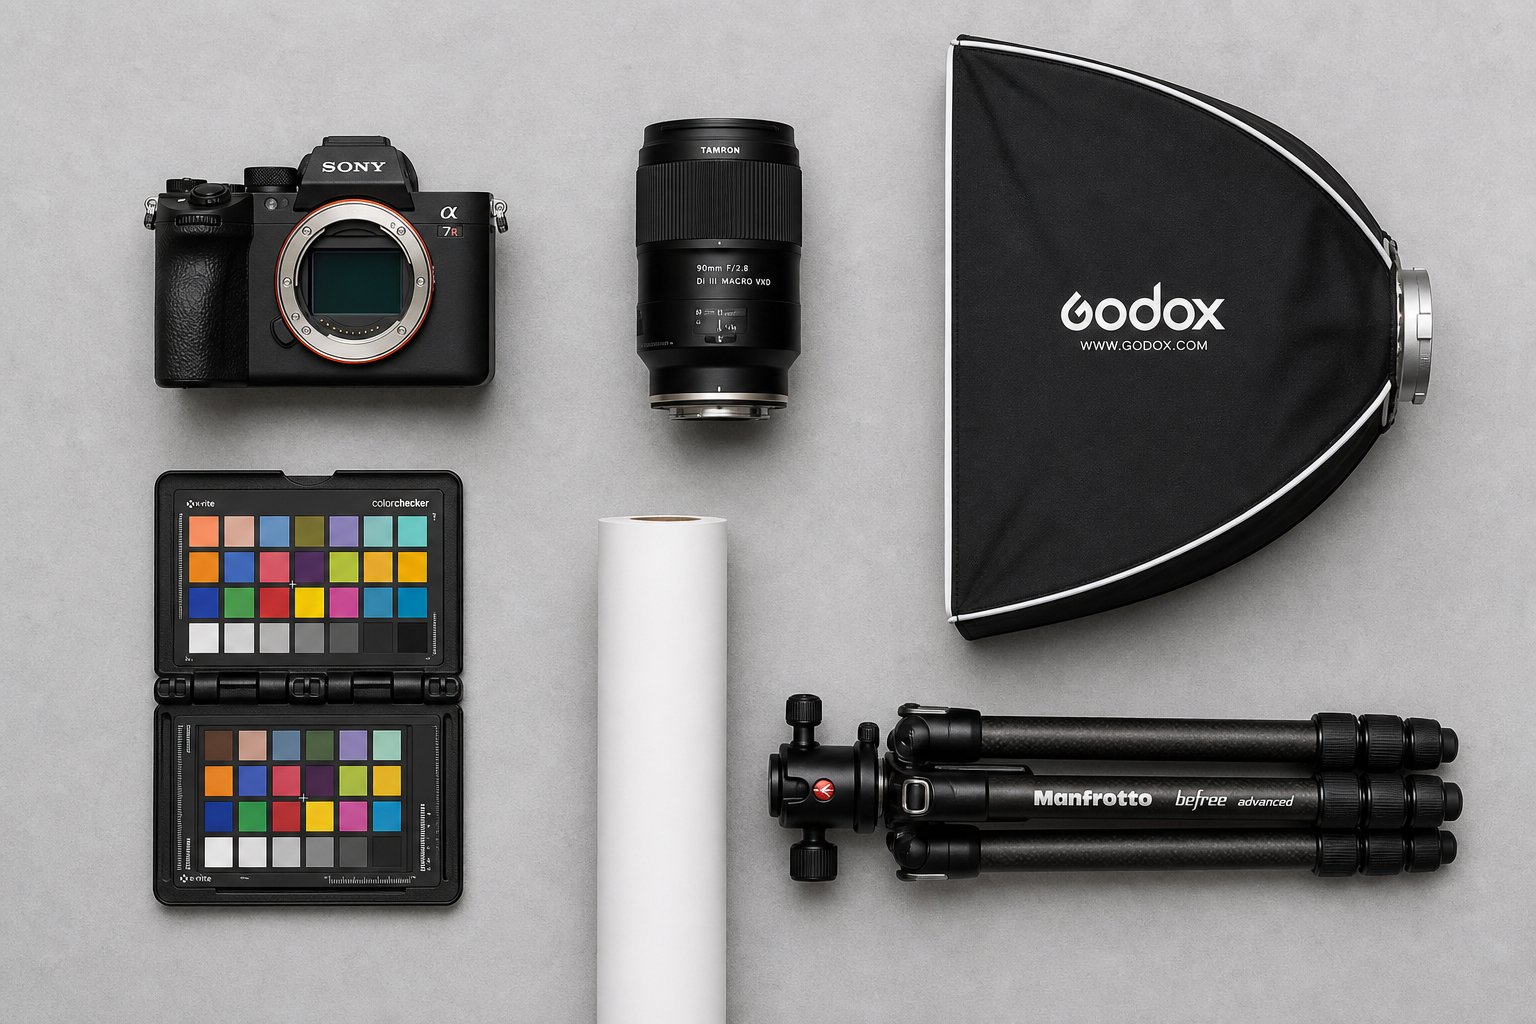
Here is the full list of essential gear categories for a functional product photography setup:
- Camera and lenses — full-frame or APS-C body with macro and mid-range zoom options
- Lighting kit — strobes or continuous LEDs with softboxes, strip banks, and light tents
- Backgrounds and surfaces — seamless paper rolls, acrylic boards, portable sweep tables
- Tripod and shooting table — sturdy column tripod for overhead angles, adjustable shooting table for small goods
- Tethering setup — USB or wireless connection from camera to computer with capture software
- Color calibration tools — gray card and monitor calibrator to maintain accurate color across the pipeline
Tethering deserves a closer look because it directly impacts shoot speed. When your camera feeds images straight into software like Capture One or Lightroom on a connected monitor, you review every frame at full resolution the moment it is captured. No squinting at a 3-inch LCD. No guessing whether focus hit the right spot. During high-volume shoots where you might photograph 50 to 100 products in a single day, this immediate feedback loop catches problems before they compound, saving hours of reshoots and post-production corrections.
Good gear removes friction. But gear alone does not create a functioning studio. The physical space, how it is laid out, powered, and organized into workflow zones, determines whether your equipment actually delivers the throughput your catalog demands.
Generate studio-quality product photos with AI →
Setting Up a Dedicated Ecommerce Photo Studio Space
You have the cameras, lights, and backgrounds. Where do you put all of it? The physical space you build around your equipment determines whether your ecommerce photography studio runs like a production line or a cluttered garage. Room dimensions, ceiling height, electrical capacity, and zone layout all influence how many products you can photograph in a day and how consistent those images look across your catalog.
Space Requirements and Layout Planning
Start with the products you sell. Small goods like jewelry, cosmetics, or accessories work comfortably in a room as compact as 8 by 10 feet. You need enough distance between the camera, product, and background to avoid lens compression and shadow spill. Medium products like bags, small appliances, or shoes push the minimum to about 10 by 12 feet. Furniture, fitness equipment, or large electronics? Plan for 15 by 20 feet or more to allow adequate camera-to-subject distance and overhead lighting placement.
Ceiling height matters more than most people realize. Overhead softboxes and boom arms need at least 9 to 10 feet of clearance to position properly without crowding the product with harsh top-down light. For larger items, 12-foot ceilings give you the flexibility to light from above without compromise.
Floor material is a practical consideration too. Smooth concrete or sealed flooring lets you roll equipment carts, shooting tables, and product staging racks without resistance. Carpet creates drag, collects dust that ends up on products, and makes repositioning heavy light stands a chore. If you are converting a spare room or garage into an e commerce photo studio, replacing carpet with vinyl plank or epoxy-coated concrete pays for itself in daily convenience.
Power and Infrastructure Essentials
Studio strobes draw significant power during rapid cycling. A pair of 500-watt strobes, a continuous fill light, a tethered computer, and a monitor can quickly overwhelm a standard 15-amp residential circuit. Dedicated 20-amp circuits for your lighting zone prevent breaker trips mid-shoot. If you are building out a larger ecommerce studio, consider a sub-panel with separate circuits for lighting, computing, and climate control.
Climate control is not a luxury. Temperature swings cause product materials to expand, sweat, or shift color. Humidity fogs reflective surfaces and warps paper backgrounds. A stable 68 to 72 degrees Fahrenheit with 40 to 50 percent relative humidity keeps conditions predictable across multi-hour sessions.
Internet bandwidth rounds out the infrastructure picture. Tethered shooting generates large RAW files that need to sync to cloud storage or transfer to remote editors. A reliable connection with at least 50 Mbps upload prevents bottlenecks when you are pushing finished files to retouchers, marketplaces, or asset management platforms.
Workflow Zones That Maximize Efficiency
The most productive ecommerce product photography studios share a common trait: they separate space into distinct zones that mirror the production sequence. Imagine three areas flowing from one to the next.
The intake and staging zone is where products arrive, get unpacked, inspected, steamed, cleaned, and organized by shoot category. Think of it as your prep kitchen. Tags get matched to SKU numbers here, and products queue in the order they will be photographed.
The shooting zone holds your backgrounds, lights, camera, and tethering station. This area stays clean and uncluttered. Only the current product and active props enter this space. Everything else waits in staging.
The post-production station sits nearby with a calibrated monitor, editing software, and file management system. In smaller setups, this can share the room with your shooting zone. In higher-volume operations, keeping it separate lets one person shoot while another edits, doubling throughput.
Batching ties these zones together. Instead of switching lighting setups between every product, group items by background type and lighting needs. Shoot all white-background small products together, then reset for lifestyle setups. This batching strategy, common in professional ecommerce studio operations, can cut changeover time substantially across a full shoot day.
Here is a step-by-step buildout sequence to take an empty room to a functioning ecommerce photo studio:
- Measure your space and confirm minimum dimensions based on your largest product category.
- Assess electrical capacity and install dedicated circuits if needed.
- Address flooring and paint walls neutral gray or white to reduce color contamination from reflected light.
- Install climate control and verify stable temperature and humidity.
- Mount background support systems: crossbars for seamless rolls, wall-mounted hooks for sweep paper.
- Position lighting stands and overhead rigging in the shooting zone.
- Set up the tethering station with computer, calibrated monitor, and capture software.
- Establish the staging zone with shelving, cleaning supplies, and a product queue system.
- Run a test shoot with representative products from each category to validate lighting, spacing, and workflow.
- Refine zone boundaries and document your setup as a repeatable standard for every future session.
A well-planned space eliminates daily decision fatigue. You walk in, products move through the pipeline, and images come out the other end formatted and ready to upload. That structural efficiency is what separates a professional ecommerce photography studio from a room that just happens to have a camera in it.
Of course, "ready to upload" means different things depending on where you sell. Amazon, Shopify, Etsy, and WooCommerce each enforce their own image specifications, and missing them can get listings suppressed or buried.
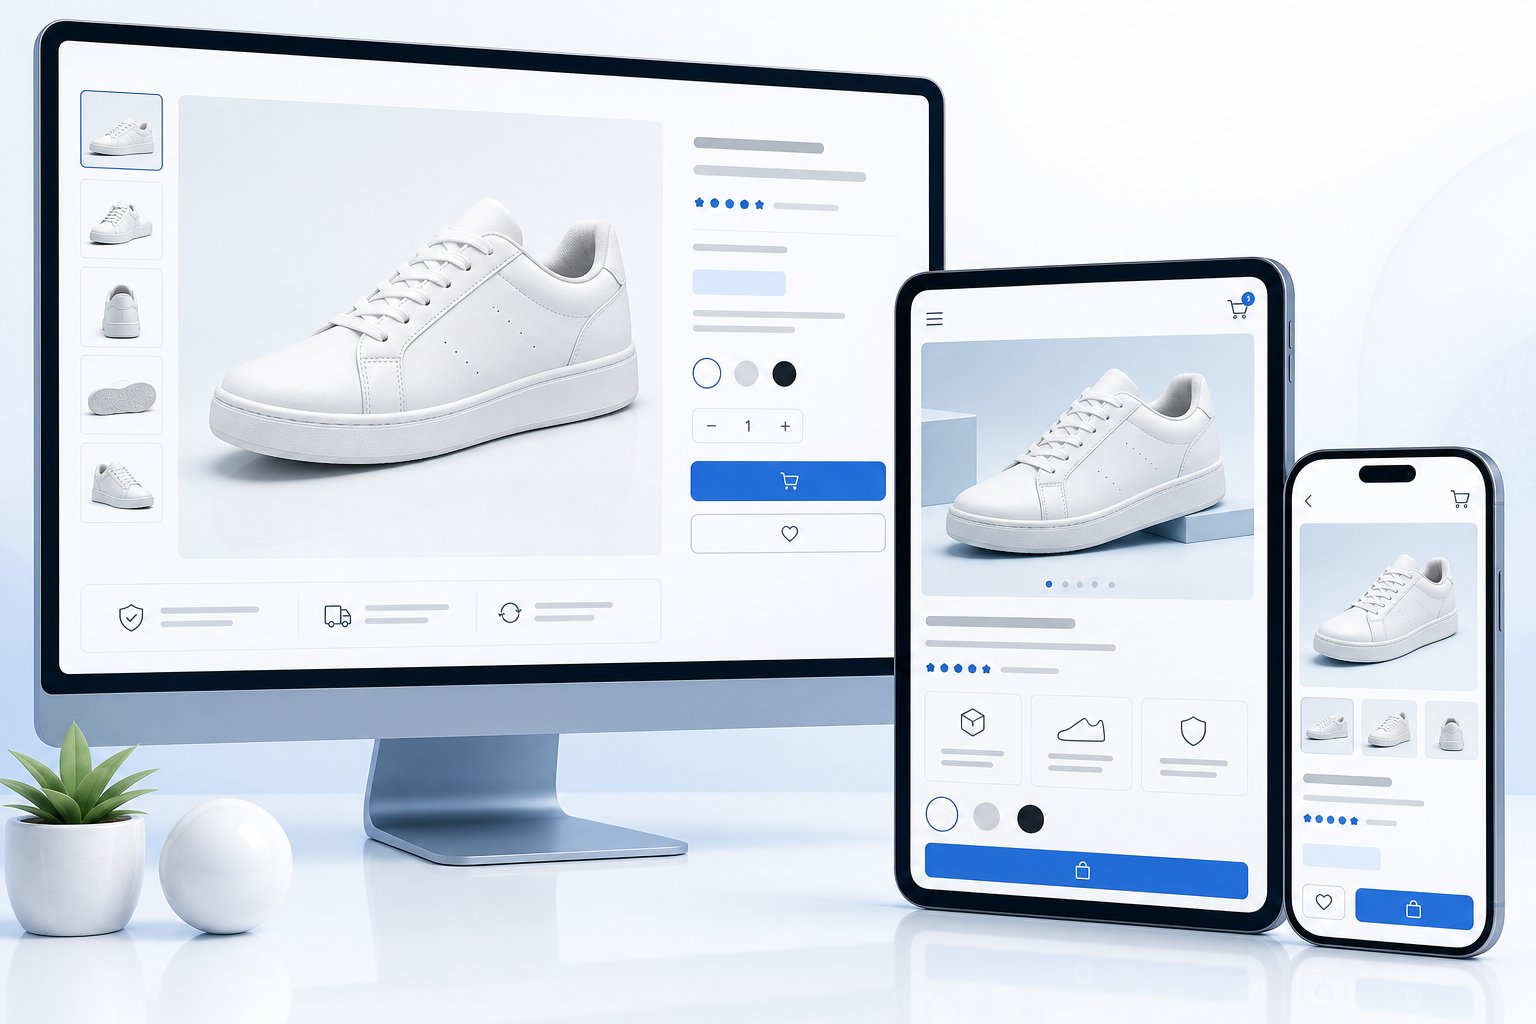
Platform-Specific Image Requirements That Drive Sales
Every marketplace and storefront platform enforces its own image standards. Upload ecommerce photos that miss these specs and your listing either gets suppressed, loses zoom functionality, or simply looks worse than the competition. Here is what each major channel actually requires so your product photography for online stores hits the mark on the first upload.
Amazon and Marketplace Image Standards
Amazon is the strictest. Your main image must have a pure white background at RGB 255, 255, 255 with no text, logos, borders, watermarks, or graphics of any kind. The product must fill approximately 85% of the image frame, and the entire item needs to appear within the boundaries without any cropping. Mannequins are not permitted in the main image, even transparent or flesh-toned ones.
On the technical side, Amazon requires a minimum of 500 pixels on the longest side but recommends at least 1000 pixels for the zoom function to activate. Listings without zoom lose a trust signal buyers rely on when evaluating texture and detail. Supported formats include JPEG (preferred), PNG, TIFF, and non-animated GIF, with a maximum of 10,000 pixels on the longest side. Amazon recommends at least six images plus one video per listing for the best conversion performance.
Other marketplaces like eBay and Walmart follow similar patterns. White or neutral backgrounds dominate main image requirements, and higher resolution consistently correlates with better search visibility.
Shopify and Direct-to-Consumer Store Optimization
Shopify gives you more creative freedom since you control the storefront, but consistency still matters. Shopify supports uploads up to 5000 x 5000 pixels with a maximum file size of 20 MB, though product images around 2048 x 2048 pixels in a square format hit the sweet spot between quality and performance. Images must exceed 800 x 800 pixels for zoom functionality to work.
Square aspect ratios deserve priority for online store product photography on Shopify. They display uniformly across category grids, look clean on mobile, and avoid awkward cropping on different screen sizes. Keep all product images at the same dimensions throughout your store. When a customer browses a category page with mixed aspect ratios and inconsistent framing, the storefront feels amateur regardless of individual image quality.
File size directly affects page speed, and page speed affects both conversions and search rankings. Aim for product images under 300 KB after compression while maintaining visual sharpness. WebP format delivers roughly 30% smaller files than JPEG at equivalent quality, making it the preferred choice for performance-focused online storefront photography.
Etsy and Handmade Marketplace Best Practices
Etsy flips the script. Unlike Amazon, there is no white background requirement. Styled, lifestyle, and contextual imagery is actively encouraged because Etsy positions itself as a marketplace where mood, craftsmanship, and character sell products. That said, your hero thumbnail still needs to communicate instantly at small sizes on mobile.
Etsy requires a minimum of 2000 pixels on the shortest side for the zoom function to remain active. The recommended resolution is 3000 x 3000 pixels, balancing sharp zoom capability with manageable file sizes under 1 MB (the platform accepts up to 10 MB, but larger files risk upload failures on slower connections). File formats accepted include JPG, PNG, GIF, and WebP.
Thumbnail cropping is where many Etsy sellers lose clicks without realizing it. The first photo becomes the listing thumbnail, and Etsy crops it differently across desktop, mobile, and in-app views. A square or landscape-oriented first image survives these crops best. Keep your product centered within the middle 70% of the frame so nothing critical gets chopped regardless of device. Listings with seven or more photos consistently convert better than those with fewer, and Etsy now allows up to 20 images per listing.
| Platform | Minimum Resolution | Recommended Aspect Ratio | Background Requirements | Max File Size | Images Allowed / Recommended |
|---|---|---|---|---|---|
| Amazon | 500px (1000px for zoom) | 1:1 (square preferred) | Pure white RGB 255,255,255 (main image) | 10,000px max side | 7 media slots (6 images + 1 video recommended) |
| Shopify | 800px for zoom | 1:1 (square) | No restriction (consistency matters) | 20 MB | Unlimited (theme dependent) |
| Etsy | 2000px shortest side | 1:1 or 4:3 landscape | No restriction (lifestyle encouraged) | 10 MB (under 1 MB recommended) | 20 images + 1 video |
| eBay | 500px (1600px for zoom) | 1:1 (square preferred) | White or neutral (main image) | 12 MB | 24 images |
| WooCommerce | Theme dependent | Theme dependent (square safest) | No restriction | Server dependent | Unlimited |
WooCommerce deserves a separate note because it behaves differently from hosted platforms. Image handling depends entirely on your WordPress theme. Some themes crop thumbnails to squares, others use landscape ratios, and switching themes mid-catalog can break your entire product grid. When you change thumbnail dimensions in WooCommerce settings, existing images do not automatically update. You need to regenerate thumbnails using a plugin or WP-CLI command, otherwise older product pages display distorted or incorrectly cropped versions of your original uploads. Test your product photography for online store display across your actual theme before bulk uploading hundreds of images.
Meeting technical specs gets your images accepted. But the real question most sellers face is whether to invest the time and money in producing these images themselves or hand the work to professionals. That decision depends on more variables than most brands initially consider.
DIY Studio vs Professional Services and What They Really Cost
The math looks simple at first. Buy a camera, a couple of lights, and a white backdrop, then shoot everything yourself for free. But ecommerce photography pricing is rarely that straightforward. The real comparison involves initial outlay, ongoing costs, time investment, quality trajectory, and what happens when your catalog outgrows your setup. Here is an honest breakdown from the buyer's side.
True Cost of a DIY Home Studio Setup
A functional DIY product photography setup breaks into two tiers. Entry-level gets you shooting. Mid-range gets you shooting well.
At the entry level, expect to spend roughly $1,100 to $1,800 on a mirrorless camera body, a standard or macro lens, two LED softbox lights, a tripod, and a white sweep background. This covers the basics for small, matte-surfaced products. A mid-range setup that handles reflective items, larger goods, and apparel pushes the investment to $2,500 to $4,000 once you add strobes, additional modifiers, a tethering system, and a color calibration tool.
Initial gear is just the visible cost. Ongoing expenses stack quietly: seamless paper rolls that crumple and stain after a few sessions ($15 to $30 per roll), editing software subscriptions ($10 to $55 per month for Lightroom or Capture One), replacement bulbs, props, and cleaning supplies. Over a year, consumables and software alone can add $500 to $1,000.
Then there is the cost competitors never mention: the learning curve. Your first 200 images will not match what a seasoned product photographer delivers on day one. Color accuracy, shadow control, and consistent framing take practice. If those early images go live on your store, they may cost you conversions while you improve. Time spent learning is time not spent running the business.
Professional Studio Pricing Models Explained
Professional ecommerce photography services price their work in several ways, and understanding the models helps you compare quotes accurately rather than fixating on a single number.
Per-image pricing is the most common model for ecommerce product photography services. You pay a flat rate for each final, edited image delivered. In 2026, verified market rates range from $12 to $75 per image for standard white-background catalog shots, $50 to $150 for styled multi-angle images, and $100 to $500 for lifestyle or editorial work. Volume discounts apply: a batch of 50 images typically costs significantly less per shot than a batch of 10.
Hourly rates range from $150 to $500 per hour for experienced product specialists. This model works when scope is unclear but creates unpredictable totals. A photographer quoting $150 per hour who takes four hours on a two-hour job ends up costing more ($600) than a specialist at $250 per hour who finishes on time ($500).
Day rates run $1,500 to $10,000 for a full session, depending on complexity. These typically cover the photographer's time and creative fee only. Studio rental, models, stylists, props, and post-production are billed on top. A realistic mid-range lifestyle shoot day lands between $3,000 and $8,000 all-in before retouching.
Retainer agreements and product photography packages serve brands with recurring needs. Monthly or quarterly commitments often unlock meaningful savings versus one-off bookings, plus priority scheduling and faster turnaround. If you launch new SKUs every month, a retainer keeps ecommerce photography pricing predictable.
What drives the price up? Reflective surfaces, apparel requiring ghost mannequin compositing, complex post-production, rush delivery (adds 25 to 50 percent), and extended usage licensing. Always request an itemized quote that separates shooting, editing, and delivery so you can compare apples to apples.
A Framework for Deciding What Fits Your Business Stage
The right choice depends on where your business sits today, not where it might be in two years. Three variables matter most: monthly SKU volume, revenue level, and product complexity.
If you are launching under 25 SKUs with simple, matte products and tight cash flow, DIY recovers its setup cost quickly and gives you hands-on control. If your catalog exceeds 50 SKUs, you are running paid traffic, or your products are technically demanding (jewelry, glass, electronics), the consistency and speed of professional ecommerce photography services usually delivers better return than the hours you would sink into doing it yourself.
Searching for product photography services near me makes sense when you need lifestyle shots requiring local locations or on-model work. For standard catalog photography, remote studios that accept shipped products often deliver more consistent results at lower per-image costs regardless of your geography.
| Factor | DIY Studio | Professional Studio |
|---|---|---|
| Initial Cost | $1,100 to $4,000 (one-time gear investment) | $0 (pay per project) |
| Per-Image Cost | Near $0 marginal cost (time excluded) | $12 to $75 per image for catalog work, with volume discounts at 50+ images |
| Quality Consistency | Variable, improves with experience | High from day one, standardized process |
| Scalability | Limited by your time and skill ceiling | Scales with budget, no bottleneck on you |
| Time Investment | 15 to 25 images per hour once experienced | Your time limited to briefing and review |
| Learning Curve | Significant (months to reach consistent quality) | None (expertise is what you are paying for) |
| Turnaround for New SKUs | Immediate (if setup is ready) | 1 to 3 weeks standard |
When a business owner spending 10 hours per week on product photography values their time at even $50 per hour, the hidden cost reaches $2,000 per month. At that rate, outsourcing 100 images monthly to a professional studio at $20 per image costs the same in dollars but returns those hours to revenue-generating work.
The hybrid path is often the smartest move for growing brands. Use professional shoots for hero images, marketplace listings, and campaign assets where quality directly drives revenue. Keep DIY for social content, test listings, and behind-the-scenes material where speed and authenticity matter more than polish. This divided workflow lets you invest in professional ecommerce photography where it counts without trying to solve every visual need through a single expensive production day.
Budget allocation and pricing models give you the financial picture. But money spent poorly still produces poor results. Knowing where brands most commonly waste their photography investment, and how to avoid those traps, protects the return on whichever path you choose.
Common Mistakes Ecommerce Brands Make with Product Photos
Spending money on photography for ecommerce does not guarantee good results. Brands routinely invest in gear or studio partnerships, then undermine that investment through avoidable process failures. These mistakes rarely announce themselves. They bleed conversions quietly, product by product, across a growing catalog until someone finally audits the numbers and realizes the images are the problem.
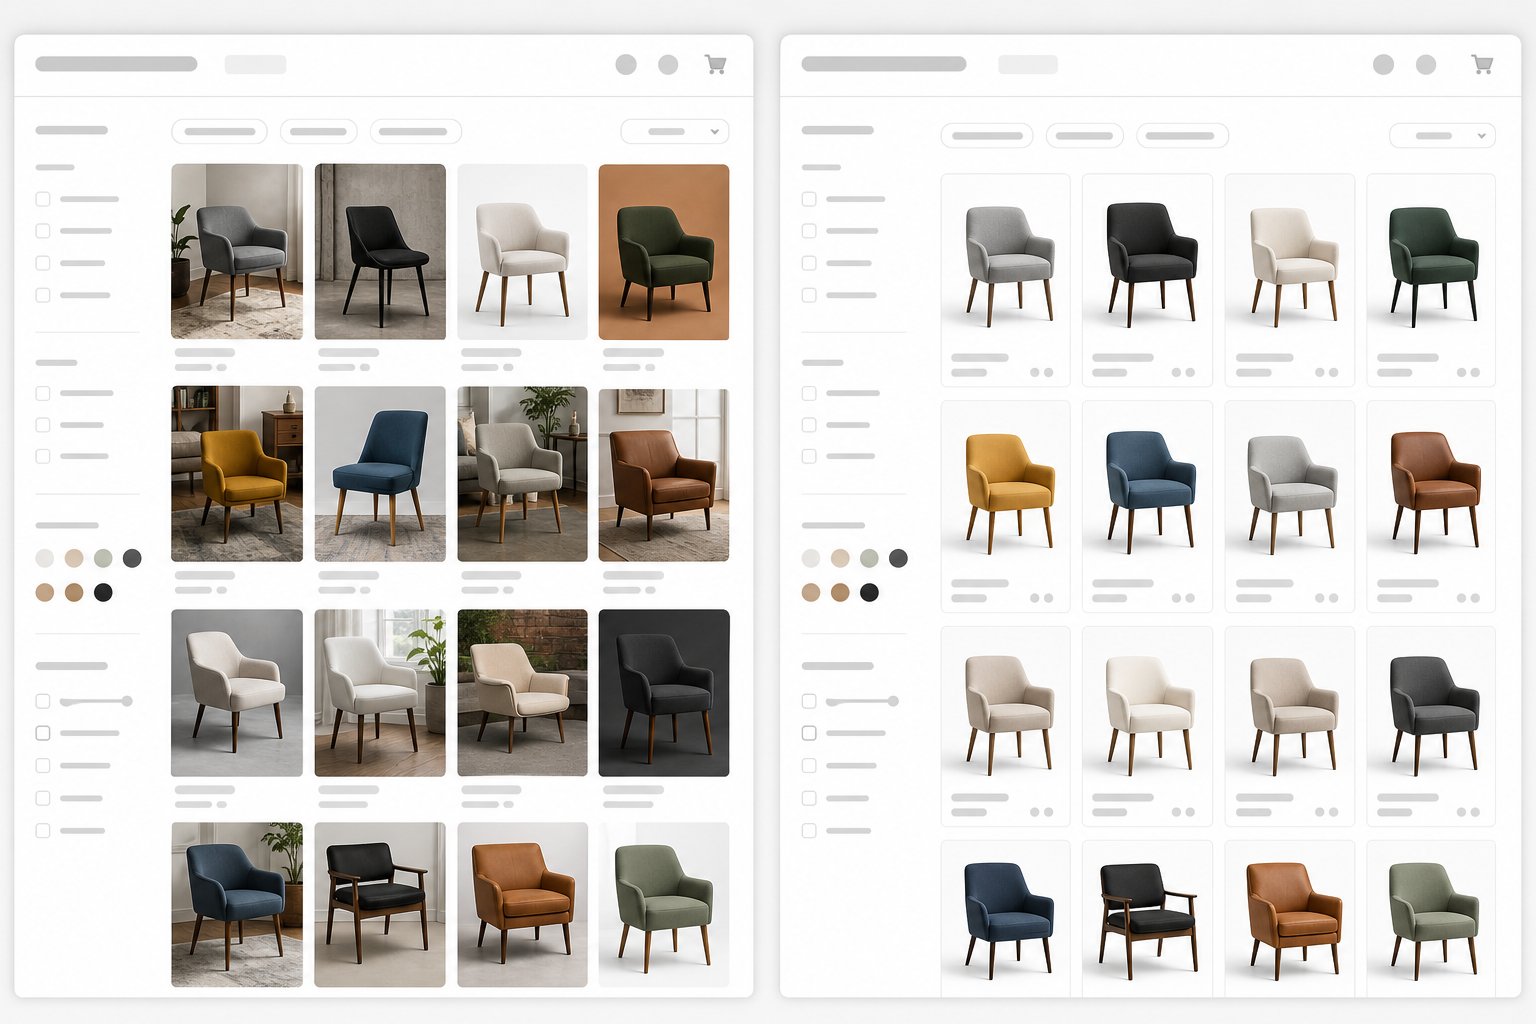
Inconsistency Across Product Catalogs
Browse a category page where some products are shot with warm tungsten light, others under cool daylight, and a few against slightly gray backgrounds while the rest sit on pure white. What does that tell the buyer? It signals a disorganized brand that does not pay attention to details. When a shopper scrolls through a product grid, visual inconsistency creates cognitive friction. The eye catches mismatched shadows, color temperature shifts, and angle variations before the conscious mind even registers why the page feels off.
As image-quality specialists note, consistency across a catalog signals professionalism and builds brand trust. Shoppers notice when some images look polished and others look like an afterthought. Mixed standards across a single ecommerce photoshoot session, or worse, across sessions months apart without a documented style guide, create exactly this problem. The fix is straightforward: lock your lighting setup, camera height, and background standard into a written protocol, then enforce it for every single SKU regardless of who is behind the camera.
Neglecting Post-Production Standards
Shooting ecommerce products is only half the job. What happens after the shutter clicks determines whether those images actually perform. Skipping color correction is one of the most expensive oversights because it directly drives returns. Salsify's 2025 Consumer Research found that 71% of consumers have returned products because the item did not match the description. When a navy shirt looks blue on screen because white balance was never corrected, the customer blames you, not their monitor.
Background removal quality matters equally. Amazon suppresses listings where the background is not pure white on main images. Sloppy cutouts with visible halos or jagged edges around a product signal amateur production. And image optimization, compressing files for web performance without destroying visual quality, affects page speed, which affects both search ranking and whether a mobile shopper waits for your page to load or bounces to a competitor.
Underestimating Volume and Turnaround Needs
Most brands plan their product photography ecommerce workflow around the initial launch. Fifty SKUs photographed, edited, uploaded, done. What they forget: seasonal additions, color and size variants, content refreshes for underperforming listings, new marketplace expansions that require reformatted images, and A/B testing that demands alternate angles or lifestyle context.
A catalog is not static. It grows. Choosing a studio partner based solely on per-image price without evaluating turnaround speed, revision policies, and file delivery formats creates bottlenecks the moment you need 30 new images by Friday for a flash sale. The cheapest provider who delivers in three weeks is more expensive than a moderately priced one who delivers in three days when timing determines whether your inventory sits idle or sells.
Here are the top preventable errors that cost ecommerce brands the most:
- Inconsistent lighting and color temperature — creates a patchwork catalog that erodes brand trust on category pages.
- No documented style guide — makes it impossible to maintain visual standards across sessions, photographers, or seasons.
- Skipping color correction — produces images where product colors do not match reality, driving up return rates.
- Poor background removal — results in marketplace non-compliance and unprofessional-looking listings.
- Unoptimized file sizes — slows page load times, hurting both conversions and search rankings on mobile.
- No plan for ongoing volume — leaves brands scrambling when new SKUs, variants, or seasonal refreshes arrive.
- Choosing on price alone — ignores turnaround, revision policies, and delivery format compatibility that affect real-world usability.
- Shooting too few angles — forces buyers to guess about features they cannot see, increasing product fit uncertainty and returns.
Every one of these mistakes compounds over time. A 200-SKU catalog with inconsistent lighting and uncorrected color across half its images is not twice as broken as a 100-SKU catalog with the same problems. It is exponentially harder to fix because retroactive reshoots cost more than getting it right the first time. The brands that avoid these traps are the ones that treat photography as an ongoing operational system rather than a one-time project, and they build workflows that scale with the catalog instead of breaking under its weight.
Scaling Your Photography from Single Products to Full Catalogs
Avoiding common mistakes keeps your existing images working. But what happens when your catalog doubles? Triples? Scales from 50 SKUs to 500? The photography workflow that handled your first product launch will buckle under the weight of a growing operation unless you evolve it deliberately. Scaling ecommerce photography service operations is not about doing the same thing faster. It is about changing what you do at each stage of growth.
From First Products to Growing Catalog
A brand with 30 SKUs can handle an e commerce photoshoot over a weekend. One person, one camera, one lighting setup, and a few hours of editing. That approach stops working somewhere between 100 and 200 active products. The math gets punishing: every additional SKU needs front, back, detail, and lifestyle angles. A single product might require six to ten final images. Multiply that across a growing catalog, and the production timeline and budget roughly double with each expansion because traditional photography has hard physical constraints.
The transition point announces itself through familiar symptoms. Your product launches get delayed waiting on images. Seasonal additions pile up in a backlog. Your per-image cost stays flat or rises instead of dropping with volume. When two or more of these signals appear, it is time to systematize.
Batch processing becomes essential. Group products by background type, lighting setup, and size category so you minimize changeover time. Template-based shooting, where camera position, light placement, and post-production settings stay locked for entire product families, turns commercial ecommerce photography from a creative exercise into a repeatable production system. This is how studios achieve 100-plus products per shoot day at the capture stage, before editing, instead of 15.
AI-Powered Photography as a Scaling Accelerator
Even systematized traditional shoots hit a ceiling. A studio can only accommodate one setup at a time. A retoucher can only process so many files per day. When your catalog grows faster than your production capacity, the bottleneck actively limits revenue. Products sit in the warehouse, listings wait unpublished, and selling windows shrink.
AI-powered photography tools eliminate these physical constraints entirely. Instead of booking studios, coordinating models, and managing multi-week production timelines, you upload a source image and generate professional product visuals on demand. No scheduling conflicts. No linear cost scaling. The economics actually improve as volume increases because the marginal cost per additional image drops to near zero.
Platforms like Snappyit's AI Product Photography represent this shift for ecommerce sellers and small online brands. Rather than choosing between expensive studio sessions or inconsistent DIY results, merchants create marketplace-ready images without physical setups or agency dependencies. It is a natural evolution for brands that have outgrown shooting everything themselves but want more control and faster turnaround than traditional ecommerce product photography service providers typically offer.
The per-image cost comparison is stark: traditional photography runs $75 to $150 all-in per finished image when you include retouching, studio rental, and coordination. AI tools deliver equivalent catalog imagery at a fraction of that, with turnaround measured in minutes rather than weeks. For a 200-SKU brand needing six images per product, the difference can reach tens of thousands of dollars per season.
Building a Hybrid Photography Workflow
The most effective ecom photography strategy in 2026 is not purely traditional or purely AI. It is a structured hybrid where each approach handles what it does best.
Traditional shoots still earn their place for campaign hero shots, editorial content, and lifestyle imagery where brand identity and art direction demand a human creative team. These are the images that lead your homepage, power your paid social, and define your visual brand. Most established brands reserve traditional production for these high-impact, low-volume needs.
AI handles everything else: catalog-depth PDP images, marketplace variants, seasonal background swaps, A/B test variations, and rapid content for new SKUs that arrive mid-season. This split lets you invest creative budget where it generates the highest brand return while maintaining ecomm photography volume without proportional cost increases.
Here is the scaling progression as a roadmap:
- Startup stage (1 to 50 SKUs) — DIY shooting with basic equipment. Focus on learning fundamentals and building a consistent style guide. Invest time over money.
- Growth stage (50 to 200 SKUs) — Systematize with batch processing and templates. Introduce AI tools like Snappyit for catalog-scale image generation to keep pace with product additions without multiplying costs.
- Scaling stage (200 to 1,000+ SKUs) — Hybrid workflow with AI handling volume catalog imagery and traditional shoots reserved for campaign and editorial work. Automate file delivery to marketplaces.
- Established brand stage (1,000+ SKUs, multi-channel) — Full production pipeline with AI generating marketplace-specific variants, traditional shoots for brand storytelling, and integrated asset management feeding all channels simultaneously.
Each stage builds on the previous one rather than replacing it. The flat-lay or ghost mannequin source images you capture at the growth stage become the inputs for AI generation at scale. The style guide you document early becomes the consistency standard your AI outputs must match. Nothing is wasted.
Knowing where your business sits on this progression tells you what to invest in next. But choosing the right partner, whether that is a traditional studio, an agency, or an AI platform, requires evaluating options against criteria that go beyond price per image.
Catalog growing faster than your studio can shoot? Snappyit turns one source photo into marketplace-ready images in minutes, no lights or backdrop required. Try Snappyit free →
How to Evaluate and Choose the Right Photography Partner
Scaling your photography operation is one decision. Choosing who handles it is another entirely. Whether you are vetting ecommerce photographers in your city, comparing a product photography agency against a solo specialist, or evaluating AI platforms, the evaluation criteria remain surprisingly consistent. What changes is how each solution type delivers against those criteria. Here is how to ask the right questions, spot the warning signs, and match your business to the option that actually fits.
Questions to Ask Before Signing with Any Studio
A polished portfolio gets you in the door. These questions determine whether the relationship survives the first real project:
Turnaround guarantees. What is the standard delivery timeline for a batch of 50 images? 100? Does the contract include a defined SLA, or is "as soon as possible" the best you will get? Brands that run paid traffic cannot afford ambiguous delivery windows when new products sit unlisted.
Revision policies. How many rounds of edits are included? What qualifies as a revision versus a reshoot? A documented reshoot or correction policy covering quality concerns protects you from paying twice for errors that are not yours.
File ownership and licensing. Do you own full commercial rights to use, modify, and repurpose the images across every channel without additional fees? Restrictive licensing clauses that limit platform use or impose time-limited rights create legal headaches as you expand into new marketplaces.
Platform-specific formatting. Can your e-commerce photographer deliver files already sized and formatted for Amazon, Shopify, and Etsy requirements? Or are you responsible for resizing and reformatting every image yourself after delivery?
Sample quality at volume. Ask to see 50 consecutive images from a single project, not five curated portfolio highlights. Consistency across a full batch reveals the real standard far better than cherry-picked examples. A reliable product photography company maintains uniform quality whether it is image number 3 or image number 300.
Red Flags That Signal a Poor Studio Fit
Some problems announce themselves during the sales conversation if you know what to listen for. These warning signs apply whether you are evaluating a local studio through an ecommerce photography near me search or reviewing a remote agency:
- No volume pricing structure — if every project is quoted from scratch with no scale benefits, the provider is not built for ecommerce volume.
- Inability to show consistent quality across large batches — a portfolio of 20 stunning images means nothing if they cannot replicate that standard across 200.
- Outdated portfolio — work from three or more years ago without recent updates suggests stagnant capability or declining client flow.
- No clear post-production workflow — if they cannot explain how images move from raw capture to final delivery, expect delays and inconsistencies.
- Resistance to test shoots — a confident ecommerce product photographer welcomes a small paid trial. Reluctance to prove quality at your product category before a full commitment is a serious concern.
- Vague contracts with undefined deliverables — if file formats, image counts, delivery timelines, and revision limits are not documented, disputes are inevitable.
- Slow communication during the inquiry phase — as photography professionals note, response energy during the sales process mirrors what you will experience during production.
Matching Your Needs to the Right Photography Solution
Not every brand needs the same partner. The right match depends on your catalog size, budget structure, turnaround requirements, and how much creative direction you need to provide. Here is how the three main solution types compare for ecommerce sellers evaluating their options:
| Solution Type | Best For | Typical Turnaround | Cost Structure | Scalability |
|---|---|---|---|---|
| AI-Powered Platforms (e.g., Snappyit) | Marketplace merchants and small brands needing speed, consistency, and cost efficiency without physical studio dependencies | Minutes to hours | Subscription or per-image at low cost | High — volume increases without proportional cost increases |
| Traditional Studios | Brands needing custom creative direction, hero shots, and tactile product handling | 1 to 3 weeks | Per-image, day rate, or retainer | Moderate — limited by physical capacity and scheduling |
| Full-Service Agencies | Multi-channel brands needing end-to-end creative, styling, and campaign management | 2 to 6 weeks | Project-based or retainer (highest cost) | Moderate to high — scales with budget but cost rises proportionally |
For ecommerce sellers and small online brands managing growing catalogs, AI platforms like Snappyit solve the core tension between quality and affordability. You get marketplace-ready images without booking studios, coordinating schedules, or waiting weeks for delivery. The platform handles the production that would otherwise require an ecommerce photography agency relationship, but with faster turnaround and predictable costs that do not spike with volume.
Traditional studios remain valuable when your product demands physical handling, such as garments that need exact draping, food that needs real steam and texture, or luxury goods where tactile detail requires macro photography under controlled conditions. A strong local ecommerce product photographer earns their rate for these high-touch, lower-volume needs.
Full-service agencies make sense at the enterprise level where a product photography agency manages everything from creative strategy through multi-channel asset delivery. The overhead is justified when you need coordinated campaigns across retail, digital, and print simultaneously.
Most growing brands land on a hybrid approach: AI for catalog depth and marketplace compliance imagery, traditional shoots for brand-defining hero content. The key is matching each need to the solution that delivers fastest at the quality level required, rather than forcing a single provider to handle every visual challenge in your pipeline.
Frequently Asked Questions About Ecommerce Product Photography Studios
How much does ecommerce product photography cost per image?
Professional ecommerce product photography typically costs between $12 and $75 per image for standard white-background catalog shots in 2026. Styled multi-angle images range from $50 to $150, while lifestyle or editorial work runs $100 to $500 per image. Volume discounts apply at higher quantities. AI-powered platforms like Snappyit offer significantly lower per-image costs with faster turnaround, making them a practical alternative for marketplace merchants and growing brands that need consistent catalog imagery without traditional studio overhead.
What equipment do I need to start a product photography studio for ecommerce?
A functional DIY ecommerce product photography setup requires a camera body with at least 24 megapixels and manual controls, a 50mm or 100mm macro lens, two LED softbox lights or strobes, a sturdy tripod, seamless white paper rolls or a sweep table, a tethering cable with capture software, and a color calibration tool. Entry-level setups cost $1,100 to $1,800, while mid-range configurations that handle reflective products and apparel run $2,500 to $4,000. Ongoing costs for consumables and software add $500 to $1,000 annually.
What are Amazon's product image requirements?
Amazon requires main product images to have a pure white background at RGB 255,255,255 with no text, logos, watermarks, or borders. The product must fill approximately 85% of the frame and appear fully within the image boundaries. Minimum resolution is 500 pixels on the longest side, but 1000 pixels or more is needed to activate the zoom function. Supported formats include JPEG, PNG, TIFF, and non-animated GIF. Amazon recommends at least six images plus one video per listing for optimal conversion performance. Mannequins are not permitted in main images.
Should I build a DIY photo studio or hire a professional ecommerce photographer?
The decision depends on three factors: monthly SKU volume, revenue level, and product complexity. DIY works well for brands launching under 25 simple, matte-surfaced products with limited budgets. Once your catalog exceeds 50 SKUs or your products are technically demanding like jewelry or electronics, professional services typically deliver better ROI. Many growing brands use a hybrid approach: AI platforms like Snappyit handle catalog-depth marketplace imagery at low cost, while traditional studios produce hero shots and campaign content where custom creative direction matters most.
What is the difference between white background and lifestyle product photography?
White background photography isolates products against a pure white sweep for marketplace compliance and maximum product clarity. It is required by Amazon, eBay, and Walmart for main listing images. Lifestyle photography places products in real-world environments to build emotional connection and help buyers visualize ownership. It performs best on brand-owned storefronts, social media, and platforms like Etsy where storytelling drives purchases. Most ecommerce brands need both styles: white backgrounds for functional marketplace listings and lifestyle images for brand building and desire creation on owned channels.
Whether you build a studio or skip one entirely, the goal is the same: a catalog that converts — and Snappyit's AI product photography workflow gets you there without the gear.