At a glance
The ghost mannequin effect shoots clothing on a mannequin, then removes it digitally to create a hollow 3D image. Here's the full shoot-and-edit workflow.
| Need | What to do |
|---|---|
| Get oriented | Read the short summary, then use the checklist below. |
| Create a test image | Try Ghost Mannequin Free |
What the Ghost Mannequin Effect Is
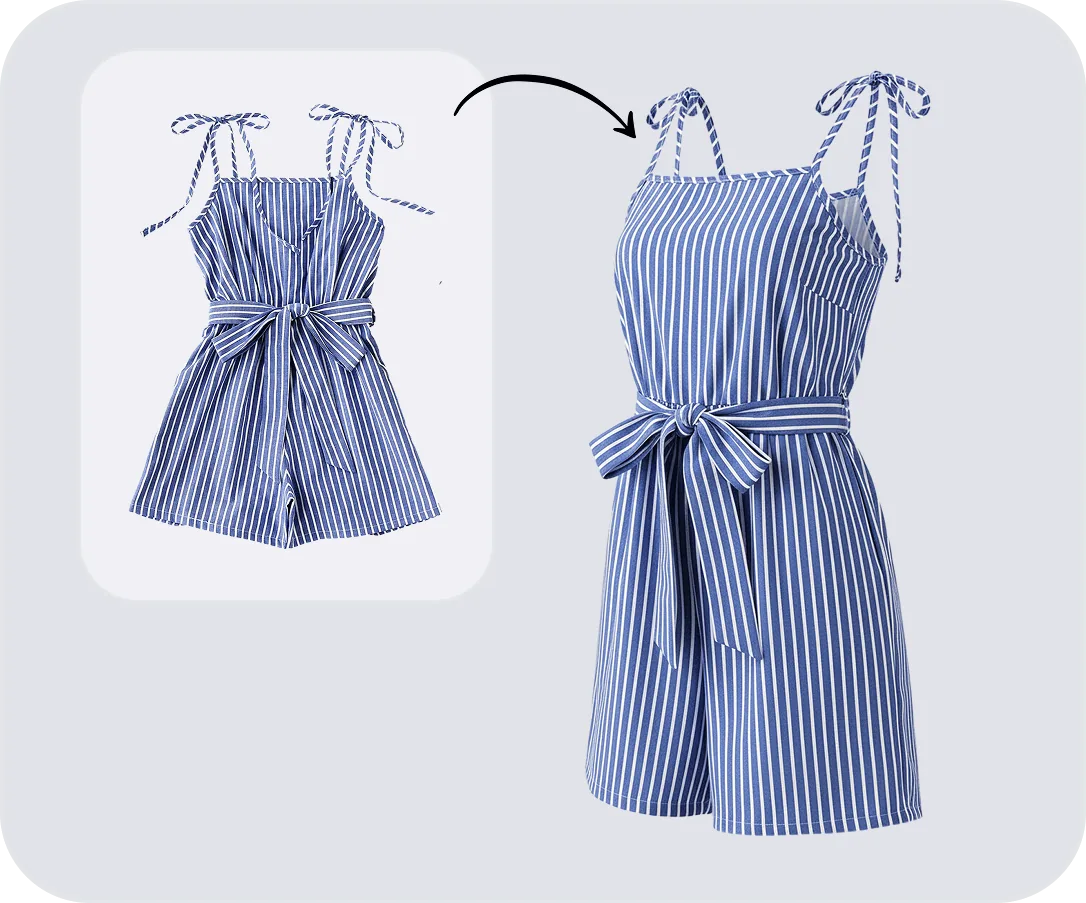
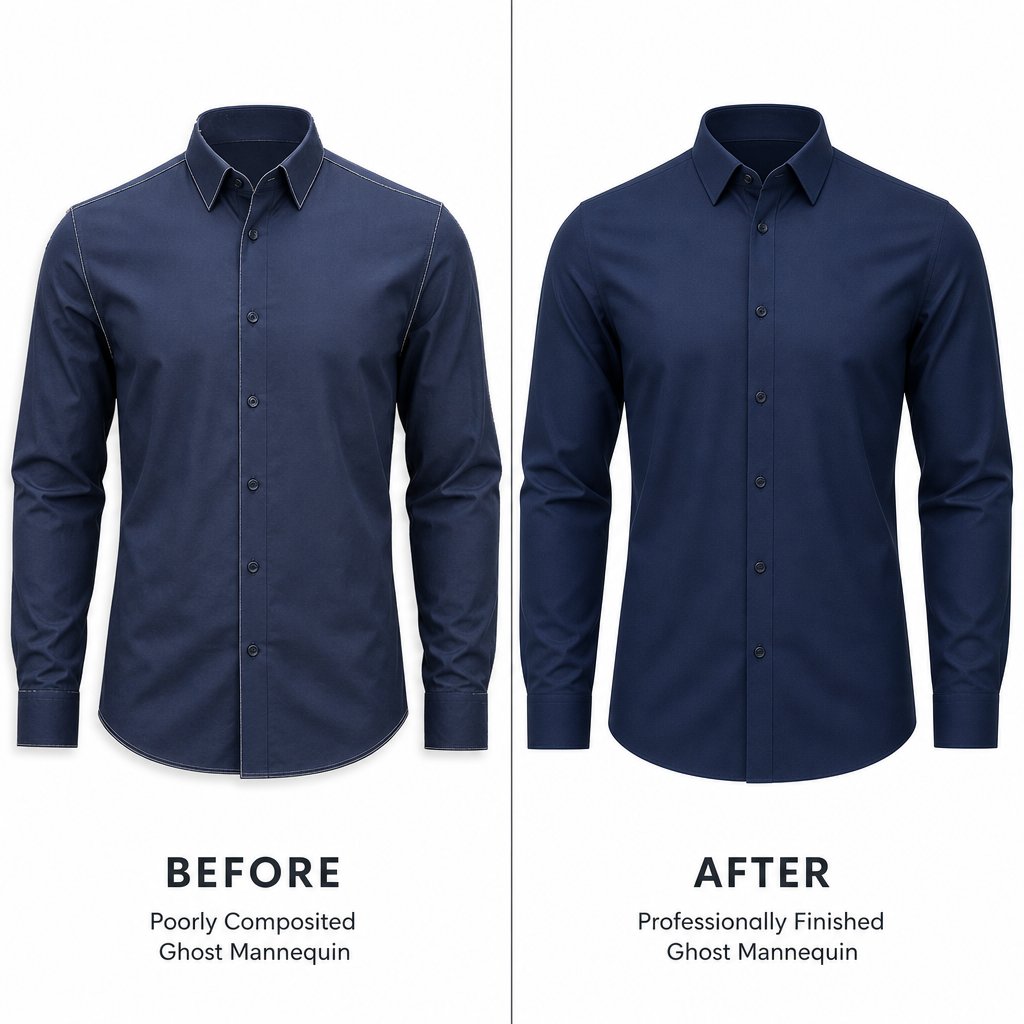
The ghost mannequin effect (also called the hollow-man or invisible mannequin look) is a post-production technique. You photograph a garment on a physical mannequin, then remove the mannequin in editing to reveal the clothing's shape, neckline, and interior seams. The piece appears to float in three dimensions, worn by a body that isn't there.
It usually takes more than one exposure. At minimum you shoot the garment on the form, then shoot the interior collar or waistband separately, and composite the two into a single image. That second frame is what fills the hollow once the mannequin disappears. You can see the full before-and-after in our walkthrough of the ghost mannequin effect.
Brands lean on this because it scales. When you're listing hundreds of SKUs, live models introduce variables you can't control: posture, expression, scheduling, cost. A mannequin gives you the same framing every time, so your product grid looks deliberate instead of patchwork. ASOS, Zara, and H&M all use it across large catalogs for exactly that reason. It also keeps the focus on the clothing, with no face or pose competing for attention.
The rest of this guide is the working version of the technique: choosing a form, prepping garments, shooting, editing, and deciding when to stop doing it yourself.
Choosing the Right Mannequin
The form you shoot on decides how much editing you face afterward. A photography-grade mannequin with detachable parts can cut your retouch time roughly in half compared to a generic display form. So this choice matters more than any camera setting.
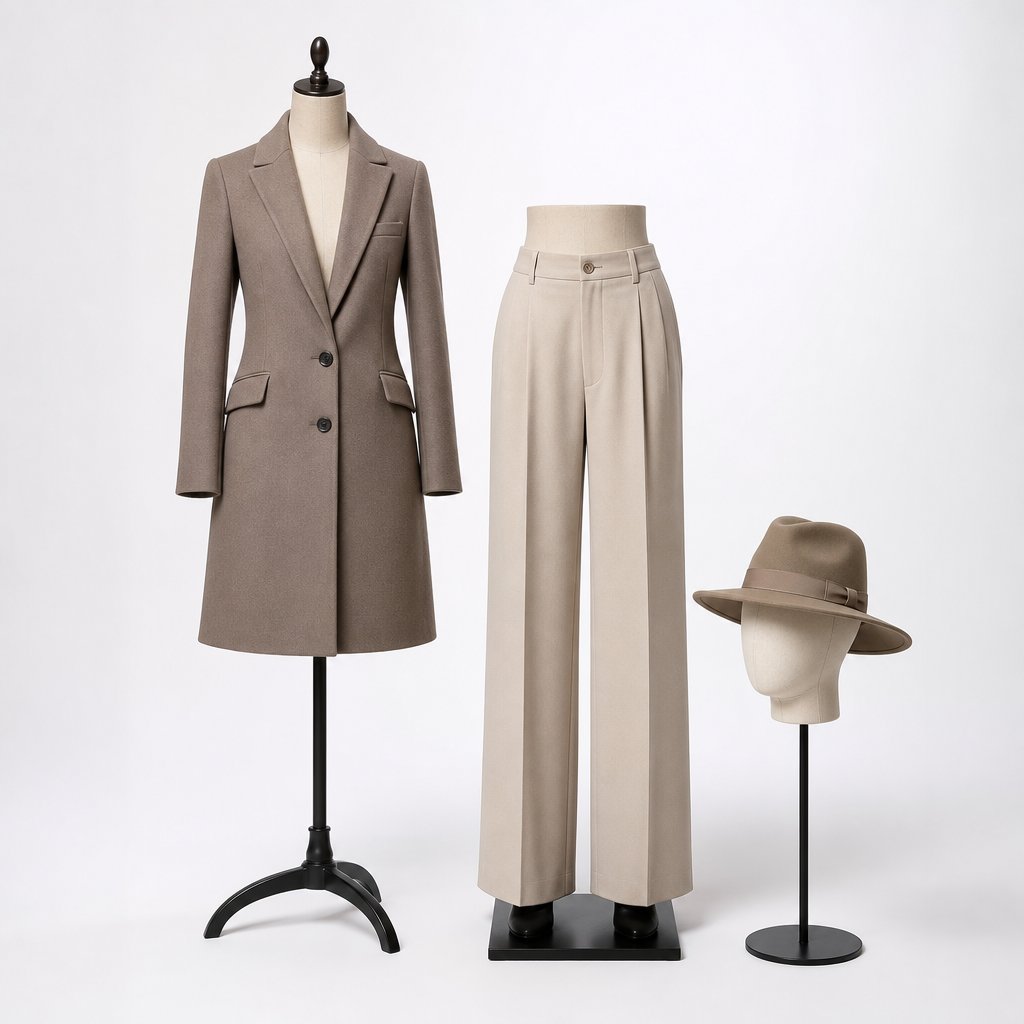
Match the form to your catalog. Torso forms (neck to waist or hip) are the workhorse for tops, blouses, jackets, and sweaters, and they handle the widest range of upper-body garments. Full-body forms make sense if you sell dresses, jumpsuits, or coordinated looks that need a full silhouette. Lower-body forms are essential once pants and skirts make up a real share of your listings. Specialty forms (hand, head, child) only earn their keep if you sell gloves, hats, or kids' apparel.
If most of your SKUs are tops and jackets, a quality torso form covers you. Add a lower-body form and you're close to complete coverage without buying a warehouse of mannequins.
Features that save editing time
Detachable limbs and neck pieces are the single most important feature. Removable arms and neck sections let you photograph the interior, the collar lining, inner neckline, waistband, without wrestling the garment off the form. Skip this and the interior shot becomes a clumsy job of flipping garments inside out on a flat surface.
A matte finish stops the mannequin from reflecting studio lights and casting color onto lighter fabrics, which means cleaner edges to mask. Adjustable sizing lets you fit garments snugly with fewer pins, and fewer pins means fewer marks to clone out later. On material, fiberglass holds its shape over years of use and is the standard for high-volume studios; foam is lighter and cheaper but compresses over time. A solid foam torso still produces good results for occasional shoots.
When you're browsing forms for sale, look for ones marketed for product photography rather than retail window display. Photography-grade mannequins prioritize detachable sections and neutral finishes, while display forms add poses and realistic skin texture that only make editing harder.
| Type | Best for | Post-production load |
|---|---|---|
| Upper torso | Tops, jackets, blouses, sweaters | Low to moderate |
| Full-body (detachable) | Dresses, jumpsuits, outfits | Moderate to high |
| Lower-body form | Pants, skirts, shorts | Moderate (waistband compositing) |
| Specialty (hands, head) | Gloves, hats, scarves | Low |
Preparing Garments for a Clean Shoot
Garment prep is the biggest time-saver in the whole workflow, and it's the step most people rush. You can't Photoshop natural volume into a flat, dead sleeve, so the work you do before the shutter fires directly shrinks the work you do after. The mannequin gives the garment structure; prep gives it life.
The prep sequence
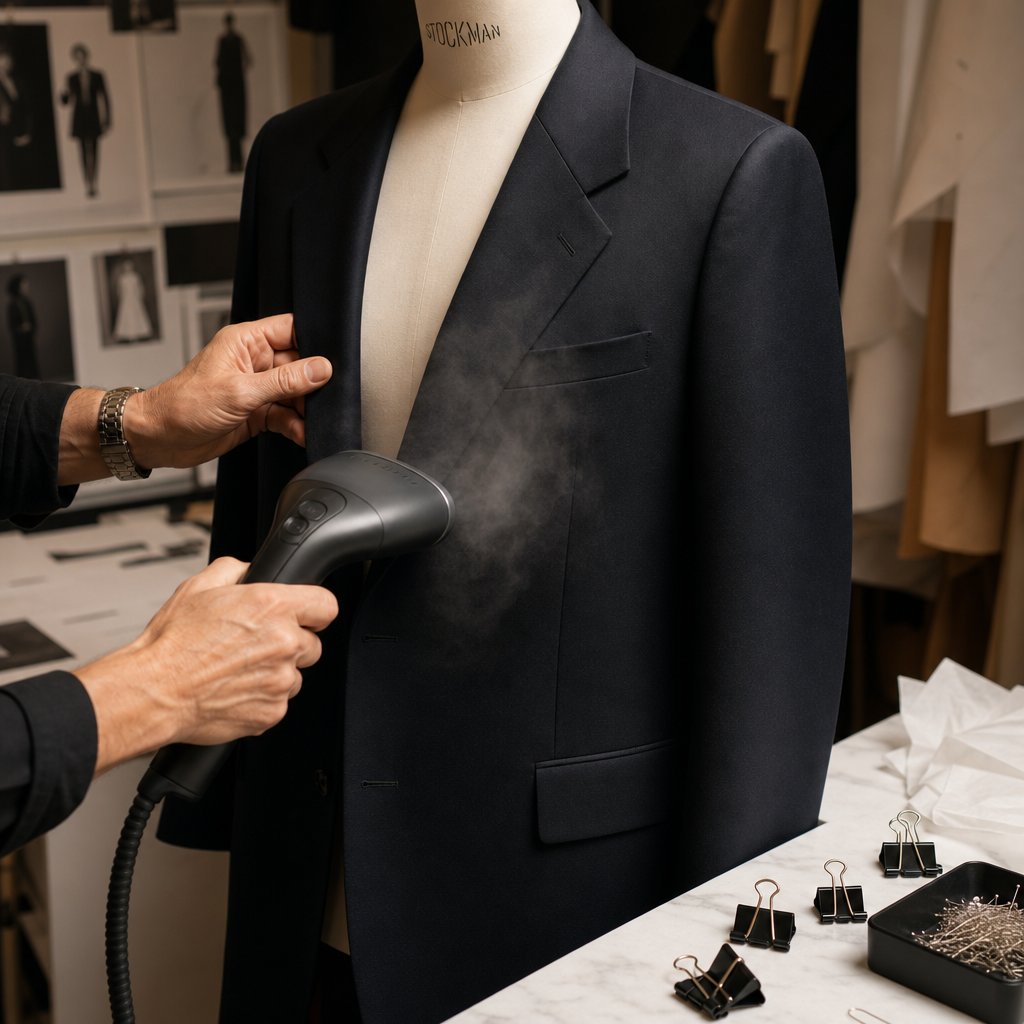
Steam first. A handheld garment steamer pulls out wrinkles and shipping creases better than an iron for most fabrics, and it works without a flat surface. Hold the nozzle a few inches off the fabric and pay extra attention to collars, cuffs, and hems, where creases set deepest.
Lint-roll everything. Dust, loose threads, and pet hair are invisible to your eye but sharp in high-resolution images. Dark fabrics need this most, since they take higher exposure that reveals every speck.
Dress and pin for fit. Put the garment on the form, step back to your camera position, and use pins and clips on the back, out of frame, to pull excess fabric taut. Pin vertically along the spine so you don't create horizontal tension lines that read as unnatural.
Stuff for volume. Sleeves, collars, and hoods collapse without a body inside them. Gently stuff sleeve openings with tissue paper for a rounded shape, and tuck a small roll behind a collar band to keep it standing. Aim for subtle volume, not an overstuffed look.
Tape down interior labels. Care labels flip forward and peek out in photos. A scrap of double-sided tape holds them flat and saves you from cloning out stray tags in every single image.
Good prep doesn't just look better, it pays back. A well-prepped piece needs minimal cleanup, while a sloppy one drags you into long sessions reshaping collapsed areas and removing visible pins.
Adjusting by fabric type
Lightweight and sheer fabrics like chiffon and silk cling to the form and shift with any air movement. Use styling clips on the back to pull them taut without puckering, and an anti-static spray before dressing helps them hang naturally.
Structured jackets and blazers need shoulder support. If the form's shoulders are narrow, pad them with thin foam or folded tissue, button or zip the piece to its natural position, and style the lapels symmetrically so each side mirrors the other.
Knitwear and stretch fabrics follow the form easily but settle unevenly. Dress the mannequin, wait a minute for the fabric to relax, then make final adjustments. Avoid over-pinning, since pin holes can stay visible in the weave.
Hardware needs a consistent treatment across your catalog: zip pulls facing the same way, shirts buttoned to a uniform point. Metal can catch your key light and create hot spots, so angle the garment to minimize direct reflections.
Keep a styling station within arm's reach: steamer, lint roller, bulldog and crocodile clips, tissue paper, double-sided tape, straight and safety pins, fashion scissors, fishing line, measuring tape, and anti-static spray. Working from one organized station keeps prep and shooting in a continuous rhythm.
Lighting and Shooting
Lighting and a locked camera position determine whether your raw files are easy to composite or fight you at every step. The setup itself is simple, and a consistent, repeatable configuration matters far more than expensive gear. Once your lights and camera are dialed in, you can run through dozens of garments without touching anything but the clothing.
Lighting and background
A reliable layout flanks the mannequin with two softboxes, each angled about 45 degrees from the form, sitting slightly above its midpoint and tilted down a little to spread light from collar to hem. Softboxes spread light over a large area, which softens shadows and keeps fabric texture from going harsh, the kind of hard-edged shadow a bare strobe creates and that makes masking harder. Continuous LED panels work the same way and let you see the light before you shoot.
A third light aimed at the backdrop removes any shadow the form casts on the background, giving you a cleaner sweep with less cleanup. It's optional if your backdrop already catches enough spill, but worth it for high-volume work.
White seamless paper is the standard background. It simplifies background removal and meets marketplace rules like Amazon's pure-white requirement (RGB 255, 255, 255). A 9-foot roll swept onto the floor gives you an infinity curve with no visible horizon. Gray seamless works too if you plan to composite onto white later and want to avoid blowing out white-fabric edges.
Mount the camera on a tripod at chest height for upper-body garments, which keeps the lens perpendicular to the garment's center and avoids perspective distortion. Drop to waist height for full-length pieces. Mark the tripod's floor position with tape so you can replicate it across sessions.
Camera settings and the two-shot capture
Lock these and don't touch them between shots:
- Aperture f/8 to f/11 for enough depth of field to keep the whole piece crisp, without the softening that creeps in past f/16.
- ISO 100 or 200 to minimize noise; studio light gives you all the exposure control you need.
- Manual white balance set from a gray card at the start of each session. Auto white balance shifts between frames and makes compositing obvious.
- Shutter speed to match your aperture and lights; strobe sync (around 1/125 to 1/200) is fine.
The technique diverges from normal product photography here: one exposure isn't enough. You need the outer view on the mannequin and an interior view to fill the hollow once the form is gone. The critical rule is that you do not move the camera or lights between them. Any shift creates misalignment you'll pay for in editing.
The basic capture sequence:
- Front outer shot. Photograph the dressed garment straight on, with consistent margins.
- Back outer shot. Spin the form a half-turn, leave camera and lights where they are, re-pin if needed, shoot with identical settings.
- Interior shot. Remove the mannequin's neck section to expose the inner collar and neckline, keeping the garment on the lower form so it holds position. No detachable parts? Carefully remove the garment, turn it partly inside out, and shoot the interior on a flat surface under the same light and white balance.
- Extra interior details. For open sleeves, deep V-necks, or visible waistbands, shoot each area that will be exposed in the final composite.
Shoot tethered to a laptop or tablet running Capture One or Lightroom. At full screen you catch a shifted collar, a visible pin, or an uneven shadow before you move on, problems that look fine on a 3-inch camera LCD. The common mistake is nailing the front view and then grabbing a rushed, badly lit interior frame. That interior becomes the visible inner structure of your final image, so give it the same care as the hero shot.
Editing the Composite in Photoshop
Your raw files hold everything you need; the editing is where a polished image separates from an obvious cut-and-paste. It comes down to three things done well: precise masking, seamless layer alignment, and realistic shadows.
Masking and removal, step by step
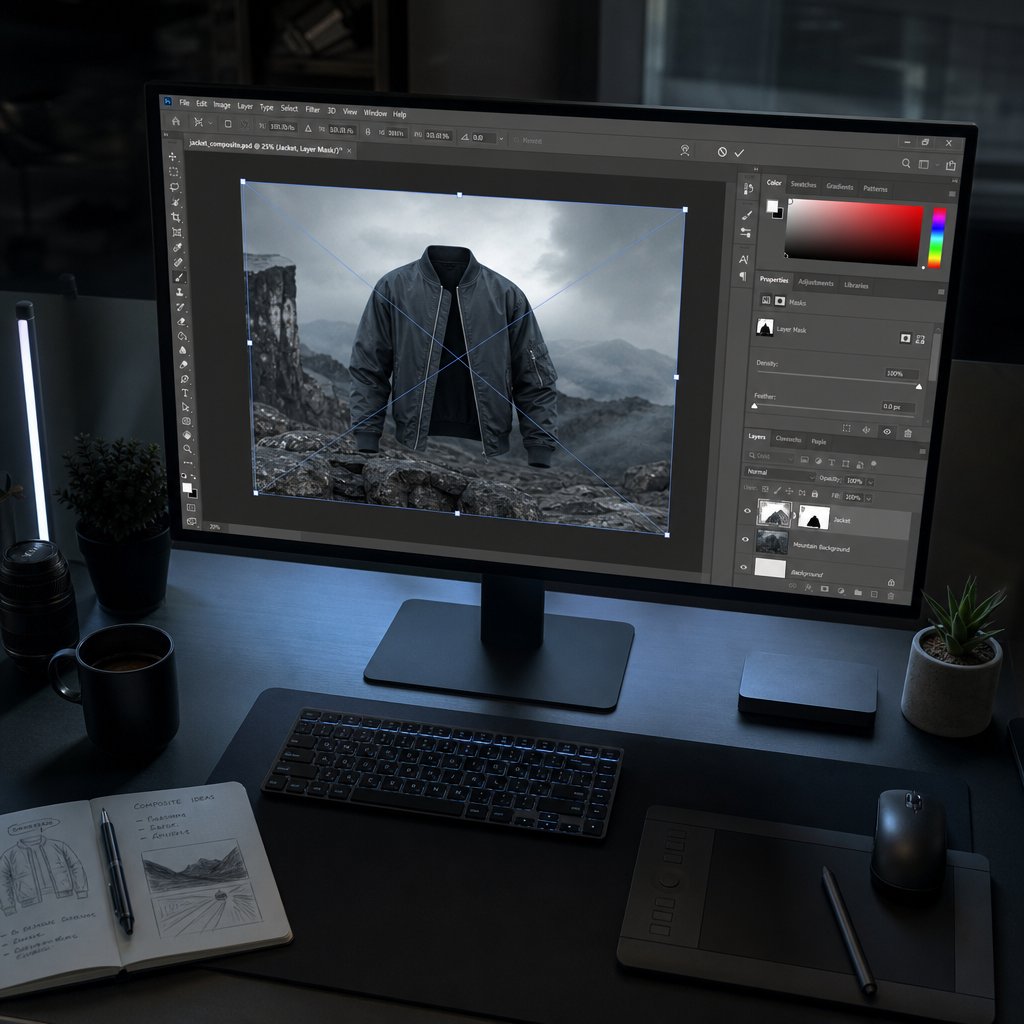
- Import and organize. Open the front shot and the interior shot in Photoshop, placing the interior as a layer beneath the main product layer. Name layers clearly ("Front", "Neck Insert") so you can navigate large batches.
- Trace with the Pen Tool. Path around the garment edge on the front layer, clicking for straight runs and dragging for curves at shoulders, armholes, and hems. The Pen Tool makes vector paths that stay crisp at any zoom, which is why it beats quick-selection tools here.
- Convert path to a layer mask. Press Ctrl/Cmd+Enter to turn the path into a selection, then add a layer mask. The mannequin disappears and the interior layer shows through. Because it's a mask, every edit stays reversible.
- Align the interior layer. Use Free Transform (Ctrl/Cmd+T) to fit the neck insert inside the collar opening. Zoom to 200% and match grain, stitching, and seams between layers; even a couple of pixels off reads as wrong.
- Refine the edges. Raw mask edges look cut out with scissors. In Select and Mask, apply a small feather (around 0.5 to 1 pixel) and contract by 1 pixel to hide any mannequin color fringe. Where armholes and necklines meet, switch to a soft brush at 80-90% opacity and hand-paint the mask, toggling it on and off to check.
- Color-match the layers. Slight exposure or white-balance differences create tone shifts where layers overlap. Clip Curves or Levels to the interior layer to match brightness and temperature, and use Hue/Saturation if color drifts.
- Clean up. Use the Clone Stamp or Healing Brush to remove pin holes, dust, and stray threads, scanning the surface methodically at 100%.
- Crop and export. Standardize canvas size across products, save the layered PSD as your master, then export a flattened JPEG or PNG at your platform's required dimensions.
Shadows sell the illusion
A garment with no shadow looks like a sticker on a white page; a heavy hard-edged drop shadow looks like a dated filter. The goal is subtlety, built up gradually.
For the cast shadow, paint a soft, diffused shadow beneath the hem and slightly behind it on a Multiply layer, keep it low-opacity, and blur it with a Gaussian Blur so it grounds the garment without drawing the eye. For interior depth, add darker tones inside the collar opening and armholes with a soft brush at low opacity, building in small strokes so the cavity reads as three-dimensional rather than flat.
For a full catalog, build adjustment-layer presets that standardize white balance, exposure, and saturation, and apply them last so every image shares the same tone. When you're editing dozens at a time, record Photoshop Actions for the repetitive steps, canvas sizing, cleanup, export, so your manual effort goes only into masking and shadow work. Teams running large weekly volumes often build category templates (a blazer template with set canvas, layer structure, and shadow guides) so each new image slots into an established framework.
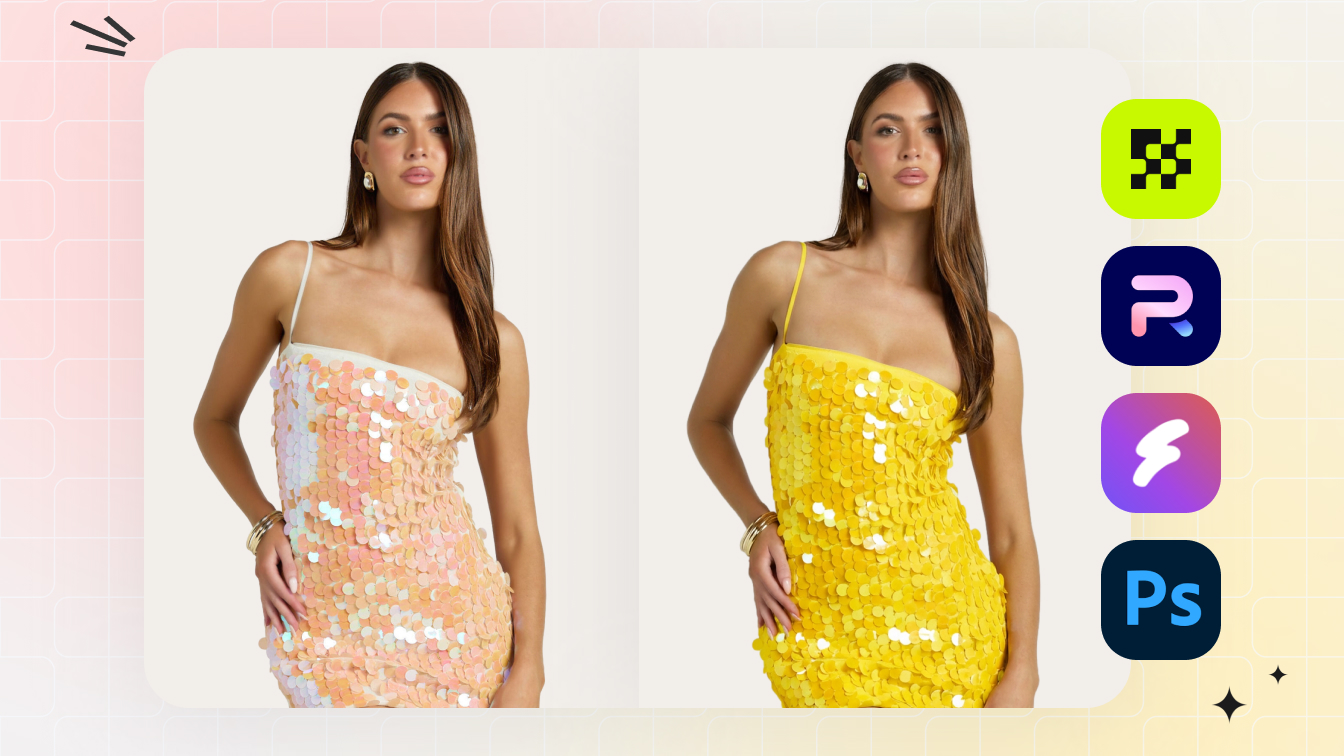
Software and AI Alternatives
Photoshop is the default, but not the only route. If you want hands-on control without Adobe's subscription, GIMP is the free, open-source option with the layer masks, paths, and clone tools you need; the trade-off is a clunkier interface and a steeper learning curve. Affinity Photo is a one-time purchase with professional layer management, PSD compatibility, and clean edge-refinement tools, though its batch automation isn't as strong as Photoshop Actions. Both can produce the same final result; the difference is speed at scale.
The bigger shift is AI services that handle the compositing for you. You upload your shots, the system removes the mannequin, blends the layers, reconstructs the interior collar, and adds shadows, and you download finished files. For standard catalog imagery, the quality is increasingly there.
- Snappyit is a purpose-built ghost mannequin tool for fashion brands and sellers, producing clean hollow-man images without manual compositing or Photoshop skill.
- AutoRetouch blends front and interior shots automatically; very intricate garments may still need a manual touch-up.
- Photta uses generative AI to turn flat-lay photos into 3D ghost mannequin images, skipping the second interior shot.
- Photoroom is a broader product-photo tool with AI background removal that handles basic mannequin removal, though it isn't specialized for ghost mannequin compositing.
The real question is where your garments fall on the complexity spectrum. Crew-neck tees and basic button-downs process cleanly through automation. Sheer fabrics, heavy layering, or unusual construction may still benefit from a hybrid approach: let AI do the bulk work, then have a retoucher polish the edge cases.
Techniques by Product Category
The torso-form workflow doesn't translate directly to pants, outerwear, swimwear, or accessories. The core principle holds, shoot on a form, capture the interior, composite, but the support, the way you build shape, and the interior areas you expose all change.
Pants, skirts, and lower-body garments
Trousers don't hang naturally on a form the way a shirt sits on a torso. A lower-body mannequin gives the basic silhouette, but the legs look stiff. Stuff the thigh and knee areas with tissue or foam to push the fabric out at natural flex points; slim-fit pants need less, while wide-leg styles often need the inseam pinned at the back so the legs don't splay.
When a form doesn't give enough shape, or you're shooting a skirt that needs flow, suspend the garment on thin fishing line from an overhead bar. The monofilament is nearly invisible on white and clones out in seconds. The waistband interior needs its own exposure, just like a collar: slide the garment partly off the form to capture the inner waistband, label, and closure under the same lighting.
Thin materials like chiffon or linen lack the weight to hold shape. Clips at the back plus a low-powered fan off-camera can give the fabric a gentle, natural drape, which works well for flowy skirts where you want the hem to suggest movement.
Outerwear, swimwear, and accessories
Structured outerwear holds its shape well, so the work is in the details. Use fashion tape on the interior to keep collar points in position, stuff a hood with tissue for volume, and pin lapels symmetrically from behind. The interior shot usually needs the inner collar and the lining at the chest opening.
Swimwear is the opposite problem: minimal fabric, maximum mannequin exposure. The form shows through thin material and bleeds its color onto the garment. Use a form that matches the garment's color (white for light pieces, dark for black), pin excess fabric tight at the back, and mask carefully, since thin fabric leaves little margin for error.
Accessories need custom support. A head form handles hats and beanies, scarves drape over a neck form or hang on fishing line, and gloves go on hand forms posed with a natural curl rather than flat. Most accessories have no hollow interior to reveal, so skip the interior step and shoot multiple angles that show construction and detail instead.
| Category | Form needed | Key technique |
|---|---|---|
| Pants and jeans | Lower-body form | Tissue stuffing at knees; pin inseam at back |
| Skirts | Lower-body form or fishing line | Monofilament suspension; low fan for drape |
| Coats and jackets | Torso with detachable neck/arms | Fashion tape for collar; tissue-stuffed hood |
| Swimwear | Color-matched bust or torso form | Tight back pinning; careful edge masking |
| Hats and scarves | Head or neck form | Natural wearing angle; mask form in post |
| Gloves | Hand form | Pose fingers in a natural curl; shoot at an angle |
The common thread is to shoot what the customer needs to decide. For pants that's leg shape and waistband; for outerwear, collar structure and lining; for swimwear, fit and coverage. Match the shot to the purchase decision and your images answer questions before they're asked.
Cost, Platform Specs, and Mistakes to Avoid
At some point the math matters more than the method. A brand shooting 15 SKUs a quarter faces a different equation than one launching 200 styles a month, and the honest comparison includes your time, not just gear.
DIY vs outsourcing
An entry-level in-house setup, foam torso, two LED softboxes, white seamless paper, a tripod, and styling tools, plus free GIMP or a one-time Affinity license, gets you marketplace-ready results if you already own a camera. A mid-range setup with a fiberglass form, strobes, and Photoshop is the sweet spot for brands shooting regularly. A full multi-category studio only pays off when your volume clearly justifies it.
Equipment is the easy number. The harder one is your time: manual editing runs roughly 15 to 30 minutes per straightforward garment for a skilled retoucher, and longer while you're learning. Across a full season that's real labor, and it's the cost that pushes many brands toward outsourcing.
The outsourcing landscape has three tiers. Traditional retouching studios composite by hand with skilled editors; quality is high and control is exact, but turnaround is measured in days, not hours. AI services like Snappyit generate clean hollow-man images in seconds at a fraction of the per-image cost, which makes them practical for large or fast-moving catalogs, with less granular control over individual shadow placement on complex pieces. Freelance photographers handle shooting and editing as a package, good if you don't want to own equipment, though scheduling and order minimums limit flexibility.
Many brands settle on a hybrid: run simple, high-volume pieces through an AI service where speed and cost matter, and reserve manual editing for hero products and complex garments where every fold needs to be perfect. That captures the cost efficiency at scale while protecting quality where it most affects how the brand is perceived.
Platform image specs
Specs change, so verify against current documentation before a major upload. As a baseline:
| Platform | Background | Resolution / notes |
|---|---|---|
| Amazon | Pure white (RGB 255,255,255) | 1000x1000 minimum, 1600x1600+ ideal; product fills ~85% of frame; no text or logos |
| Shopify | Flexible (white best for apparel) | 2048x2048 recommended; 1:1 square; keep files under 3MB |
| eBay | Flexible on secondary images | 500x500 minimum; aim for 1600px on the long side; up to 12 images |
| Google Shopping | White or neutral only | 250x250 minimum; 800x800+ recommended; no transparent backgrounds |
| Instagram / Pinterest | Clean white or light gray | 1080x1080 square for IG; 1000x1500 vertical for Pinterest |
A single export size rarely works everywhere. Build export presets per channel and batch-resize from your high-resolution master rather than re-editing each composite. Preview on mobile before publishing, since most shoppers are on phones.
Common mistakes
- Visible seam lines at the join. The classic composite giveaway. Feather the mask edge slightly, contract by 1 pixel to hide fringe, and hand-brush the transition at 200% zoom until it disappears.
- Unnatural or missing shadows. No shadow looks like a sticker; a hard drop shadow looks dated. Use soft, low-opacity shadows with Gaussian blur, plus interior depth inside collars and armholes.
- Lighting or color mismatch between shots. If you moved a light or used auto white balance, the inner collar reads darker or cooler. Lock your settings; if it's already happened, clip Curves and Hue/Saturation to the interior layer to match.
- Proportion distortion from misaligned layers. A collar opening too wide or a neckline too high breaks the illusion. Align at 200% using seams as registration marks and toggle layers to check before flattening.
- Inconsistent cropping across the catalog. Build a canvas template with placement guides and apply it to every image before export.
- Leftover pins, clips, and tape. Scan at 100% top to bottom and clone them out before exporting.
Most of these trace back to the shoot, not Photoshop. Compare your raw files side by side before compositing; if lighting, color, and exposure already match between the outer and inner frames, most problems never appear. Fix the capture and post-production gets dramatically simpler. A two-minute QA pass per image, checking background purity, edges, shadows, color, and dimensions, catches the errors that cause rejected listings and lost trust.
Frequently Asked Questions
What is the ghost mannequin effect in product photography?
It's a composite technique where clothing is photographed on a physical mannequin, then the mannequin is digitally removed in post-production. The result is a hollow, 3D image showing the garment's shape, fit, and interior construction as if worn by an invisible body. It typically needs at least two shots, an outer view on the form and an interior shot of the neckline or waistband, which are composited together in editing software.
What type of mannequin is best for ghost mannequin photography?
A fiberglass torso form with detachable neck and arm sections is the most versatile choice for most apparel brands. Look for removable limbs so you can capture interior shots, a matte finish to prevent reflections, and adjustable sizing for different fits. Full-body forms suit dresses and jumpsuits, lower-body forms handle pants and skirts, and specialty forms cover accessories.
Can I create ghost mannequin images without Photoshop?
Yes. GIMP offers free layer masking and path tools that handle the compositing workflow, with a steeper learning curve. Affinity Photo is a one-time-purchase alternative with professional selection tools and PSD compatibility. Beyond desktop software, AI services like Snappyit automate the whole process, removing the mannequin, compositing the layers, and adding shadows without manual editing skill.
How many shots do I need for the ghost mannequin effect?
At least two: the outer garment on the mannequin and an interior shot of the neckline or waistband that fills the hollow once the form is removed. Some garments need three or four, for open sleeves, deep V-necks, or visible waistband interiors. Keep the camera and lights locked in the same position across every frame so the layers align cleanly.
Which ghost mannequin editing mistakes show up most often?
Visible seam lines where layers meet, unnatural or missing shadows that flatten the garment, color shifts between the outer and interior shots from inconsistent white balance, and proportion distortion from misaligned layers. Most of these start during the shoot, not in editing. Locking camera settings, keeping lighting consistent between exposures, and setting manual white balance from a gray card prevents the majority of them.
Ghost mannequin work is one piece of a stronger catalog — it sits inside Snappyit's wider AI product photography workflow.