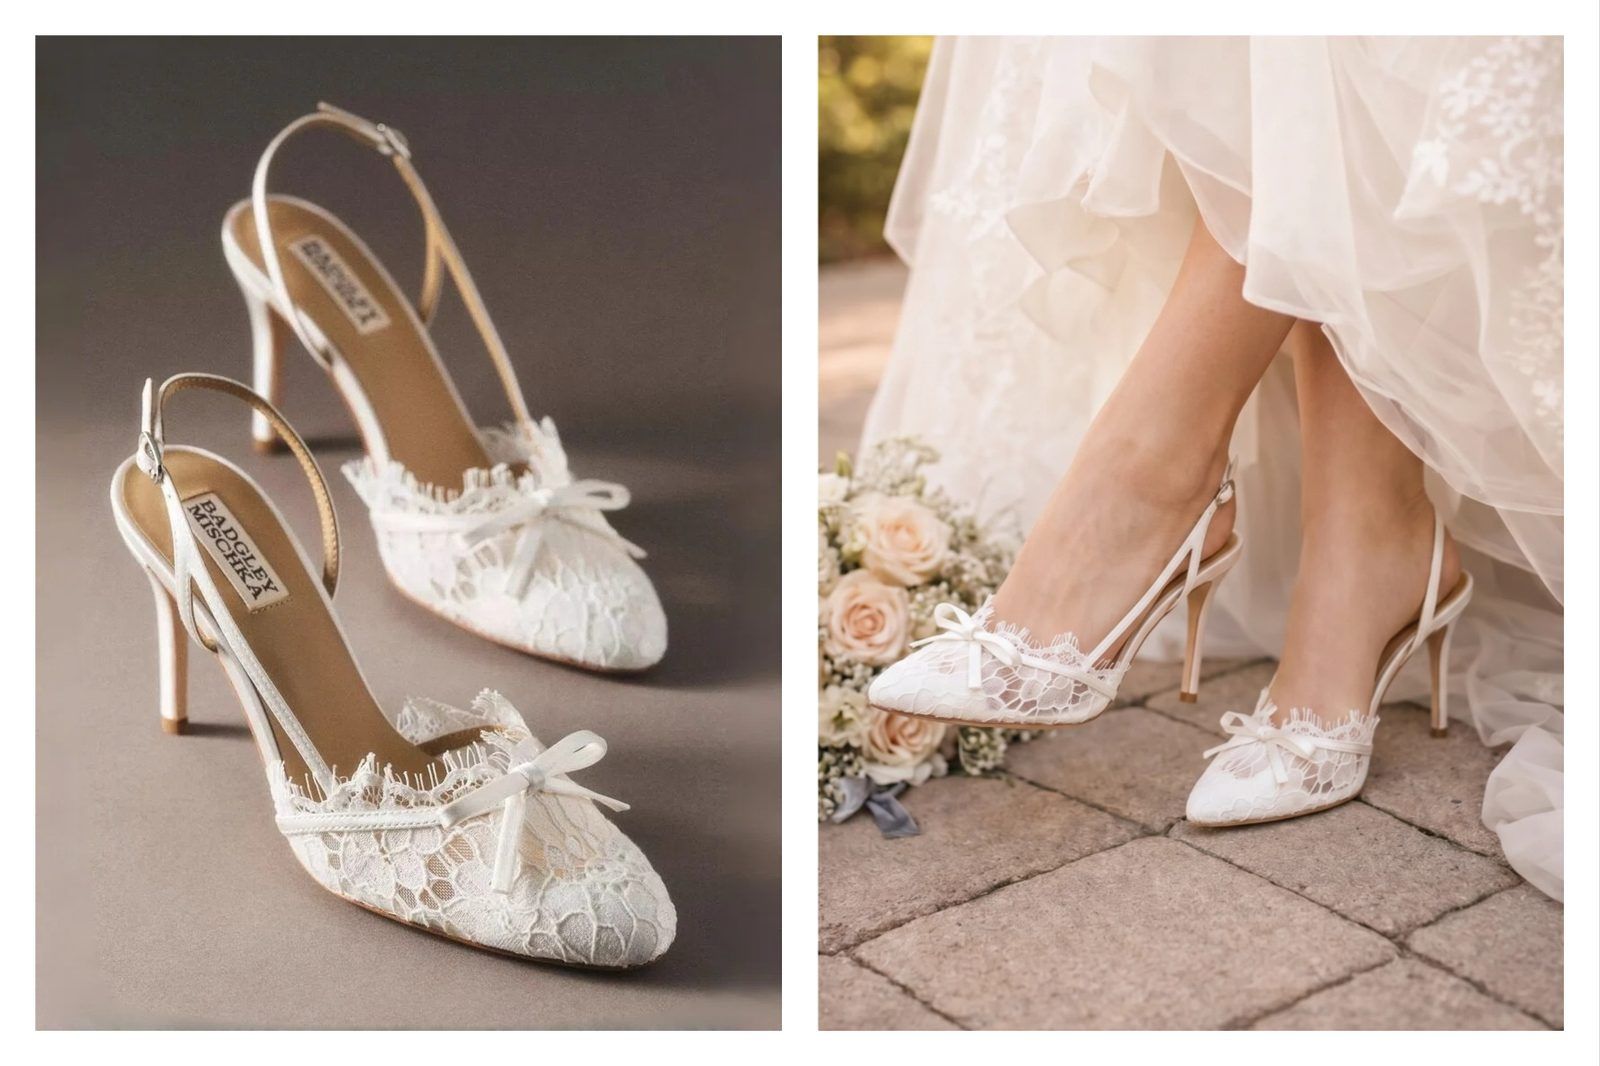

Virtual Shoe Try-On for Ecommerce: AI Images vs Live AR
For footwear sellers, “virtual shoe try-on” describes two different workflows. AI on-foot image tools turn a product photo into listing or campaign images before publication. Live AR try-on runs on the storefront and lets shoppers view a digital shoe on their own feet through a compatible phone camera.
- Choosing an image tool? Go to the five-app test and comparison.
- Need a cleaner input? Use the ecommerce shoe-photography checklist first.
- Deciding between AI and AR? Compare the shopper experience, asset work and implementation questions.
- Ready to publish? Follow the Shopify product-page workflow and measure a small SKU test.
We tested five AI image tools with the same sneaker and heel source photos. For apparel rather than footwear, see our tested virtual try-on tools guide.
How to Photograph Shoes for Virtual Try-On and Ecommerce
Start with an accurate packshot. It gives the generator more product information and gives your team a reliable reference for approval. Use generated on-foot or lifestyle images as supporting creative, not as the only record of what the buyer will receive.
Start With a Source Photo the Tool Can Read
- Keep the full toe, heel, opening and outsole edge inside the frame.
- Use soft, even light so dark materials, stitching and surface texture remain visible.
- Make logos, printed text, laces, straps and decorative hardware sharp enough to inspect.
- Use a simple background with enough contrast to separate the shoe edge.
- Avoid motion blur, clipped highlights, strong reflections and extreme wide-angle distortion.
- Retain the highest-resolution original as the approval reference.
A plain background is helpful for edge review, but it is not a guarantee of a faithful result. Branded trainers, intricate sandals, reflective leather and unusual heels should be included in any catalog test because they expose different failure modes.
Shoe Photos You Should Still Capture
Keep real photographs for details that prove what the customer is buying: the main or three-quarter packshot, side silhouette, toe and heel, outsole and tread, logo or printed text, material and stitching close-ups, and any size, care or compliance label. AI on-foot images can add styling and worn context, but they should not replace evidence images when exact shape, material, construction or labeling matters.
A Practical Ecommerce Shoe Image Order
- Accurate main product image.
- Side or three-quarter product view.
- Approved on-foot image for scale and styling context.
- Outsole, logo, material and construction details.
- Second lifestyle image where it adds a different use context.
- Short product video if it reveals information not already clear in the stills.
This is a merchandising sequence, not a claim that every marketplace requires the same slots. Check the current rules of each channel before publishing.
Best Virtual Try-On Apps for Shoes: Five AI Tools Tested
For footwear, an attractive scene is not enough. A changed toe, heel, outsole or logo can turn the image into a picture of a different SKU, while a distant crop can hide the very detail a product page needs. We scored product accuracy separately from how clearly the shoe appeared in the frame. Apparel sellers can see our virtual try-on comparison for apparel.
How We Tested the Virtual Shoe Try-On Apps
We used two contrasting source products: a chunky FILA trainer with visible side branding, layered panels and a gum outsole; and a polka-dot mule with an open square toe, bow and sculpted chrome heel. These details make shape, branding, pair consistency and foot-to-shoe contact easier to inspect.
Each tool received the same shoe photos. We used its standard workflow and built-in choices, made no manual retouching, and kept the first usable output when a run returned several images. Koozee also required a model photo. For Snappyit, we entered a close-up-of-the-feet instruction because its default Fashion Model composition is wider.
We checked product shape, visible details and branding, left-right consistency, and the join between foot and shoe. The findings apply to the ten images shown here; a different source photo, setting or model version may produce a different result.
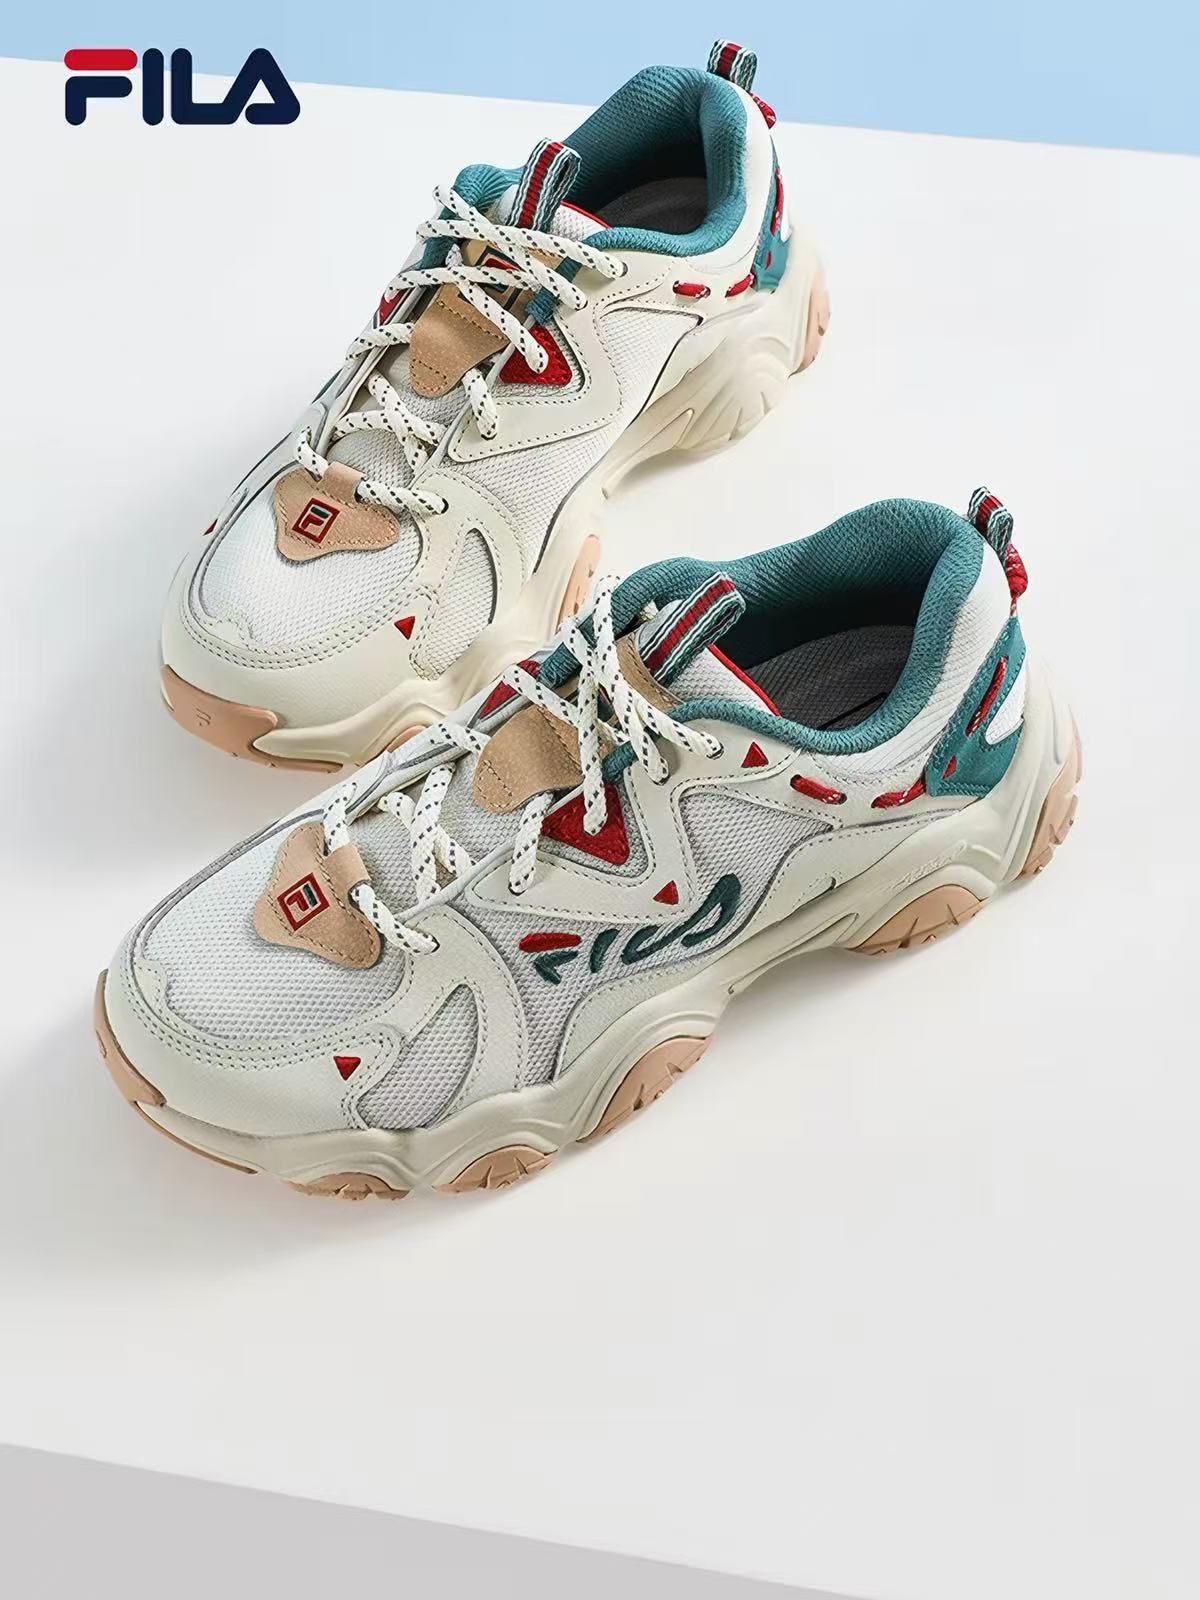
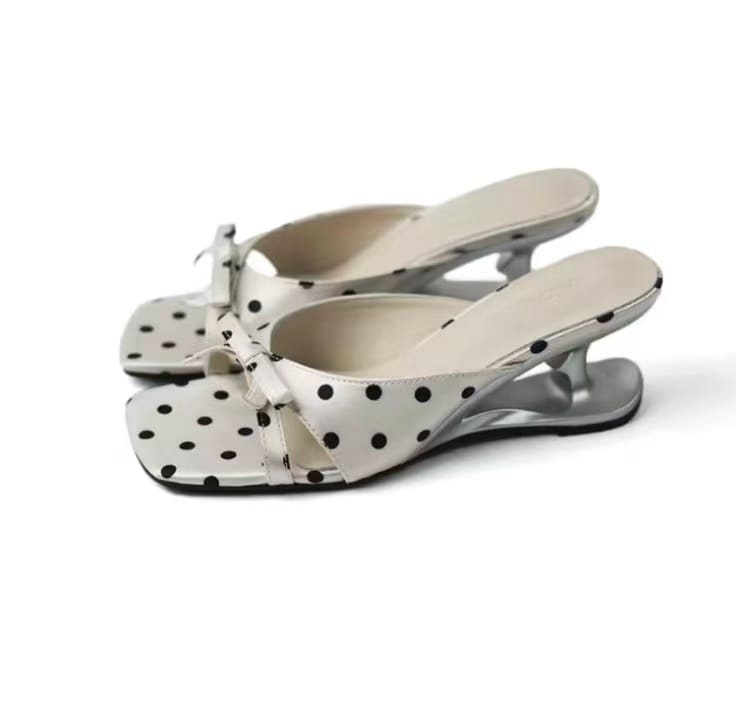
The two source photos every tool received. Updated August 12, 2026.
Start with the sharpest packshot available: these tools cannot reliably recover product information that is not visible in the source. For capture guidance, see our shoe photography for ecommerce guide.
1. Snappyit AI Shoe Try-On
Snappyit handles footwear through its Virtual Try-On Shoes workflow. Sellers upload a shoe photo, choose a model and scene, and can use Additional Info to request tighter footwear framing.
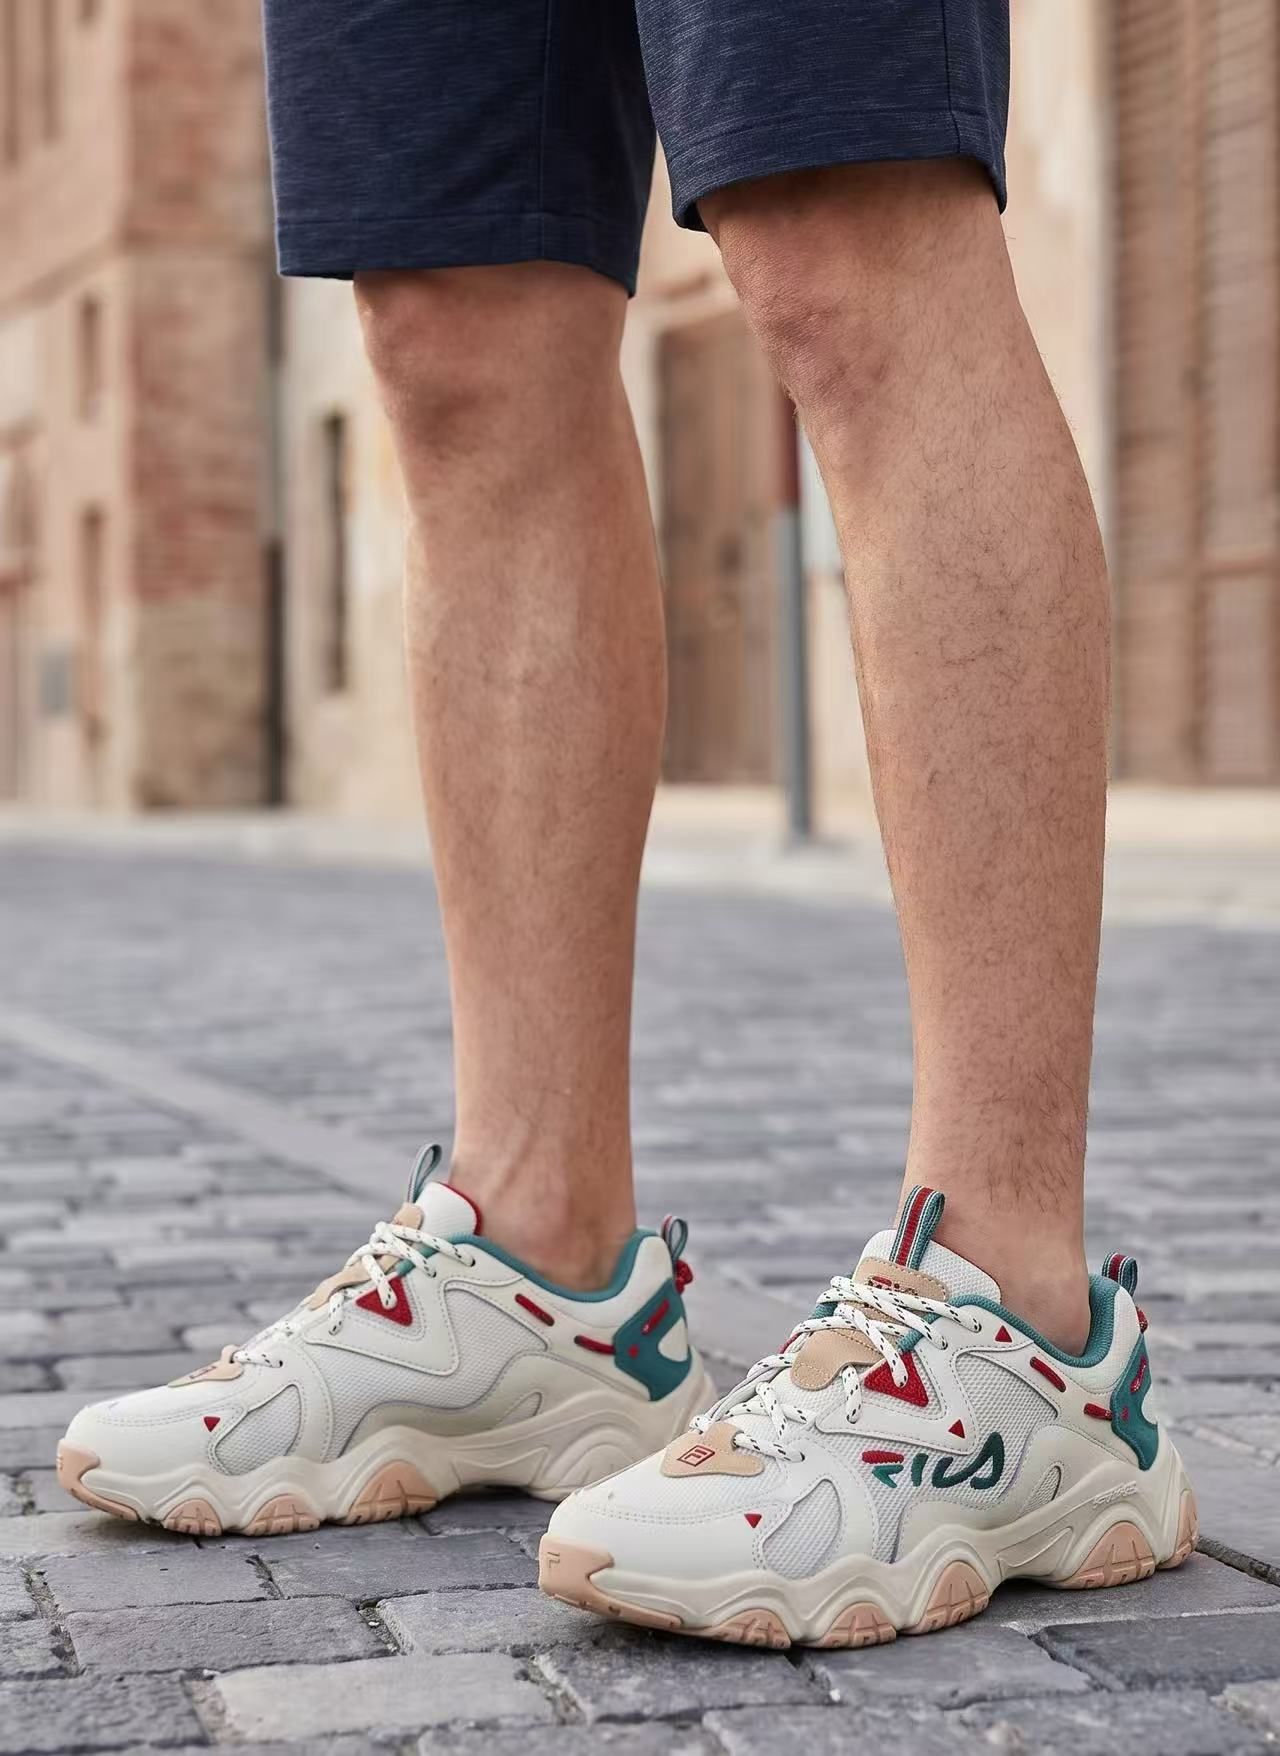
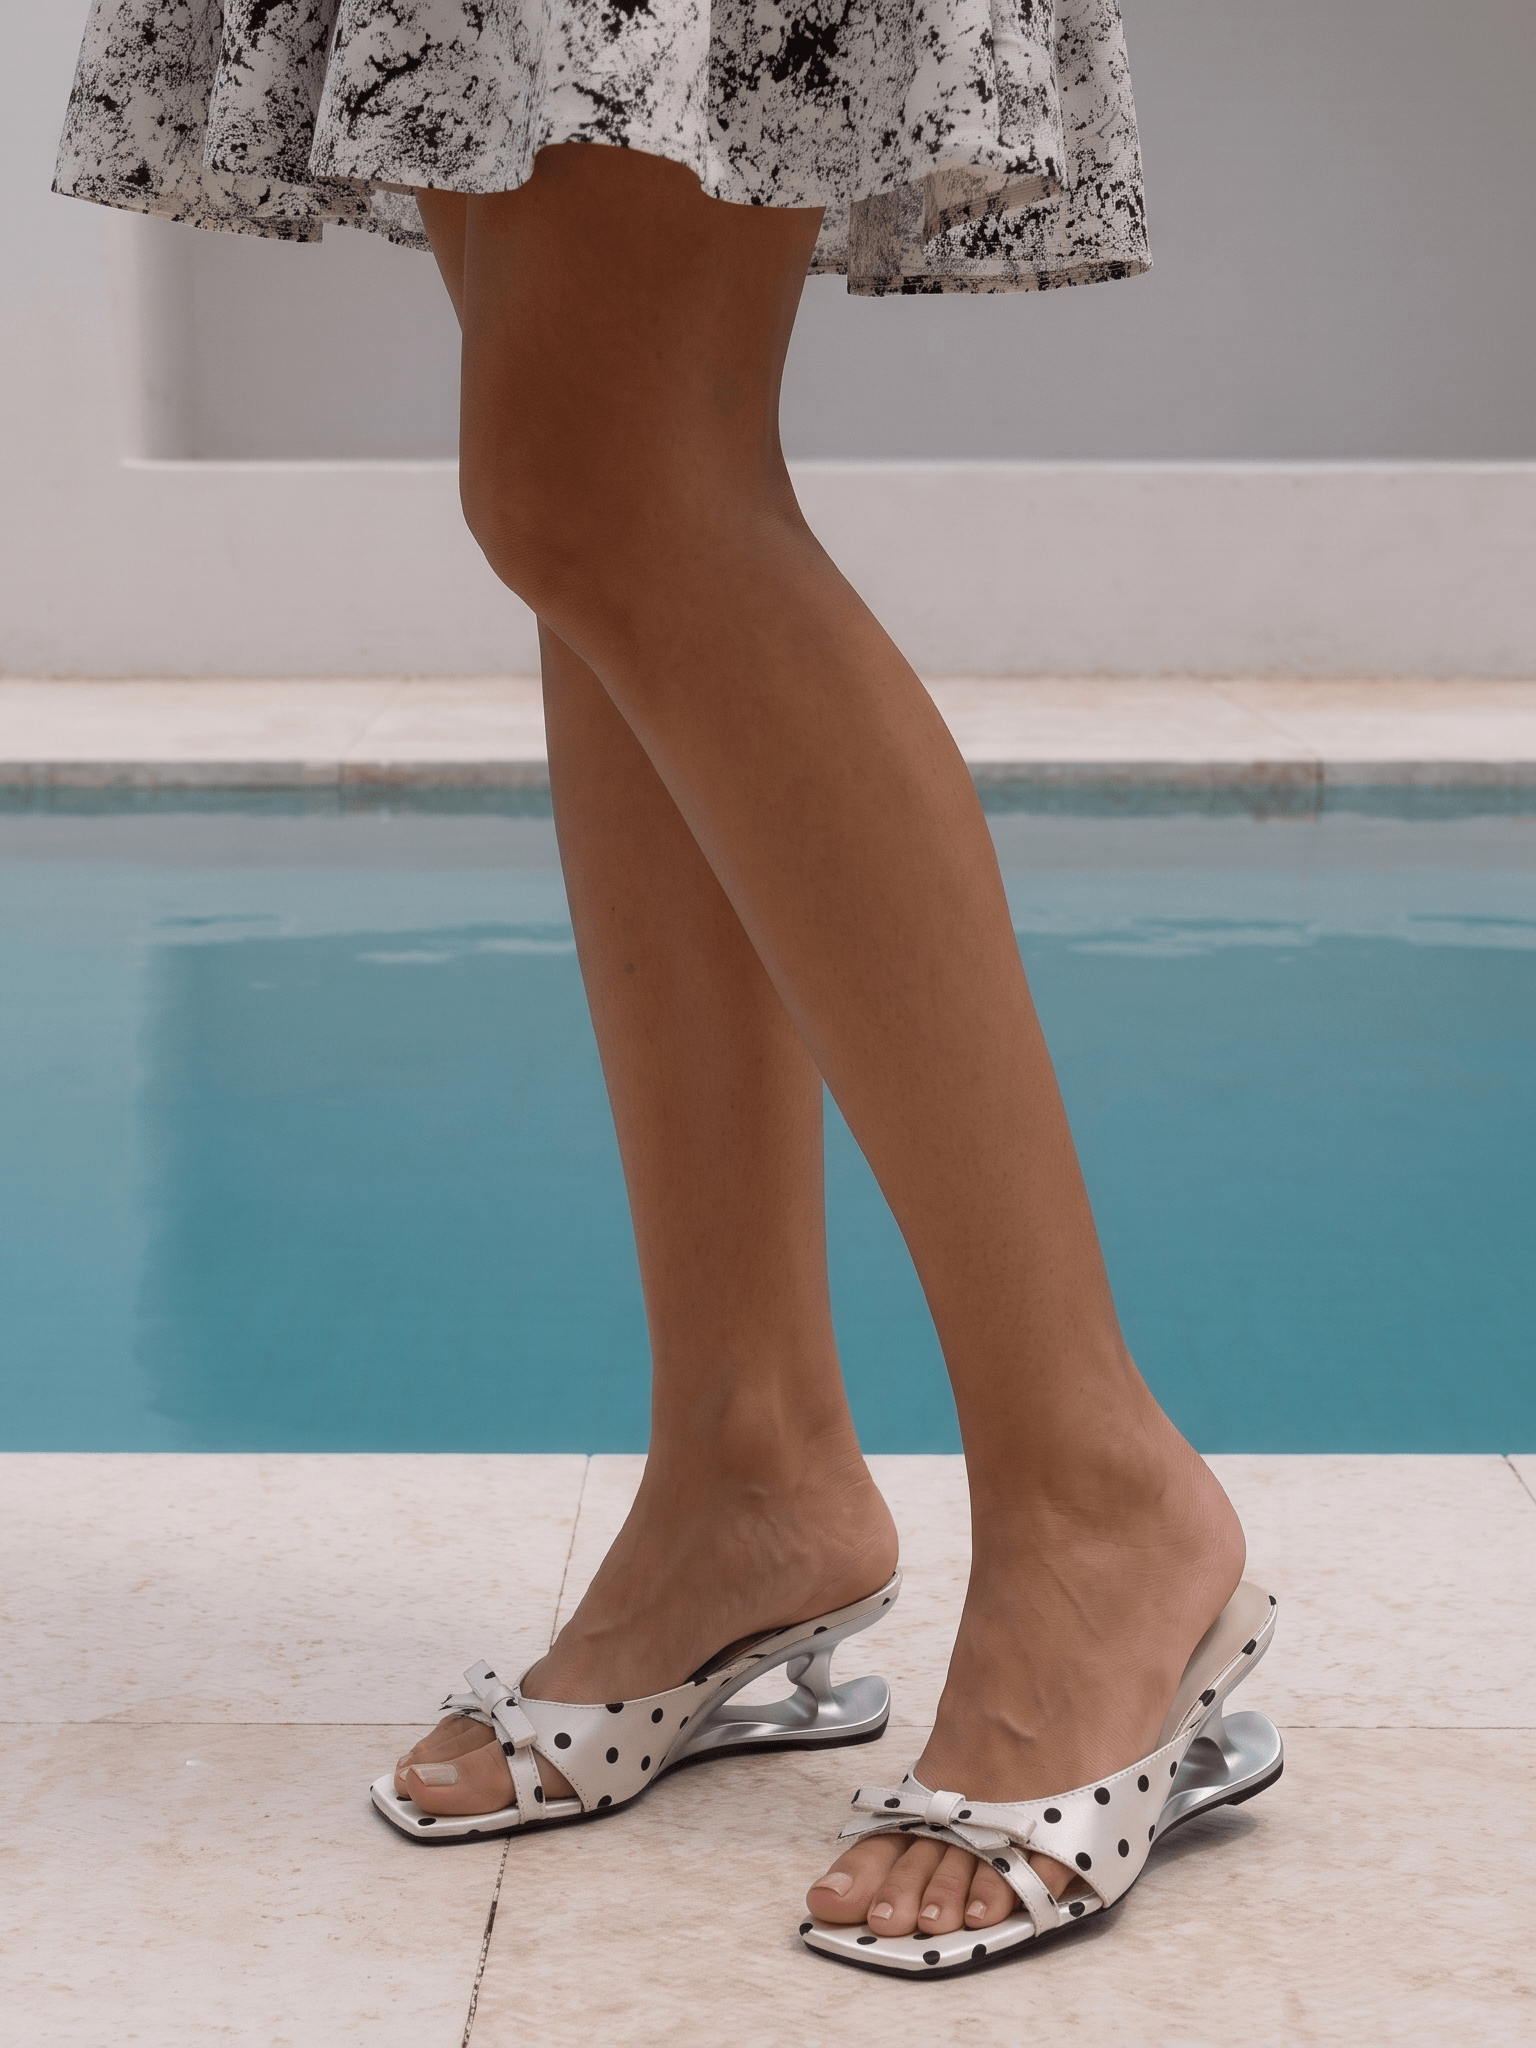
Snappyit results using one run per shoe and an Additional Info request for close footwear framing.
The trainer kept its chunky midsole, gum outsole and readable side mark. The mule kept its square toe, dots, bow and sculpted heel. Left and right matched within each pair, with no obvious overlap where the ankle or toes met the shoe.
Snappyit is practical when you do not already have a model photo. Its default composition can favor the whole model, so ask for a close view of the feet when product detail matters.
2. Pic Copilot Virtual Try-On Shoes
Pic Copilot provides a shoe-specific try-on tool with model looks organized by footwear style.
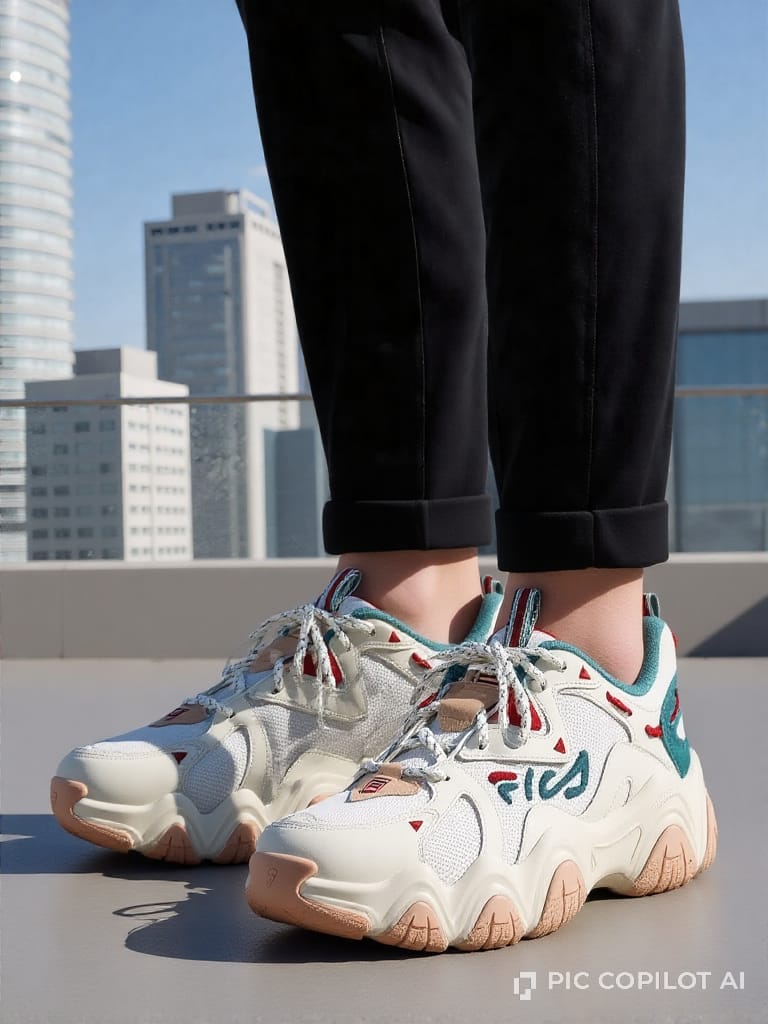
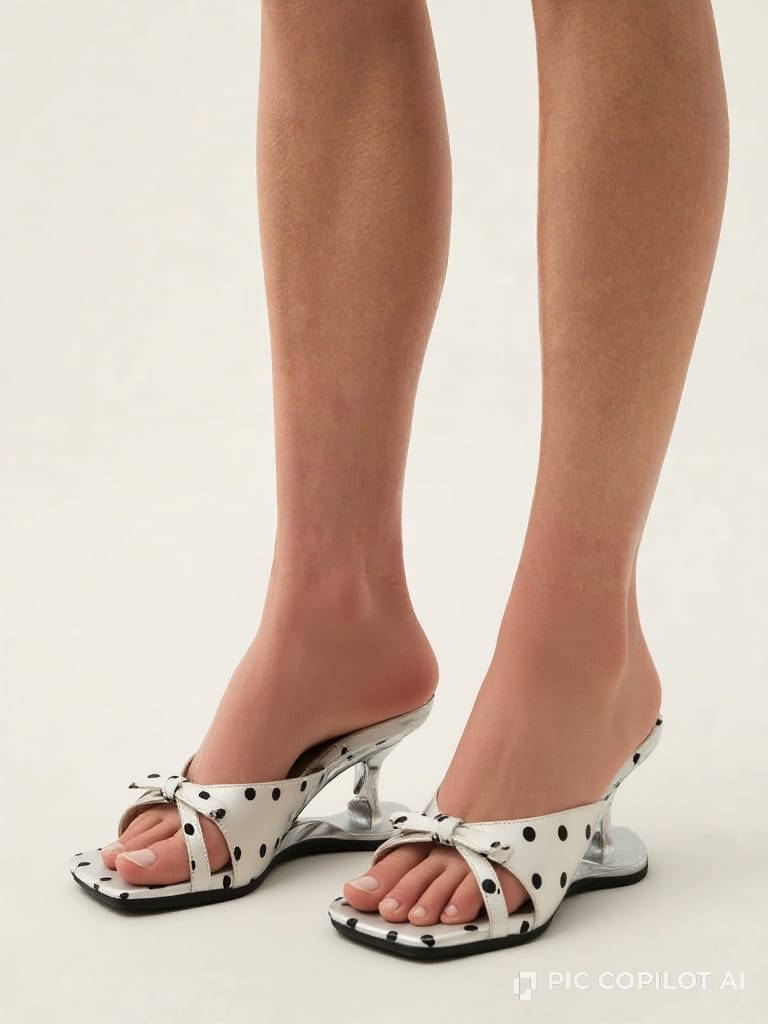
Pic Copilot results using the model looks available for each shoe style.
Both results arrived with the shoes large in the frame. The main shape, color blocking and decorative details stayed close to the sources, and the pairs and foot contact looked consistent. In these two images, however, the generated skin and lighting were noticeably artificial.
Pic Copilot suits sellers who want a shoe-focused crop without writing a framing instruction. Check the finished image at full listing size, where artificial-looking skin and lighting are easier to spot.
3. Claid AI Fashion for Shoe Images
Claid's linked workflow is its broader AI Fashion studio, not a dedicated shoe try-on page.
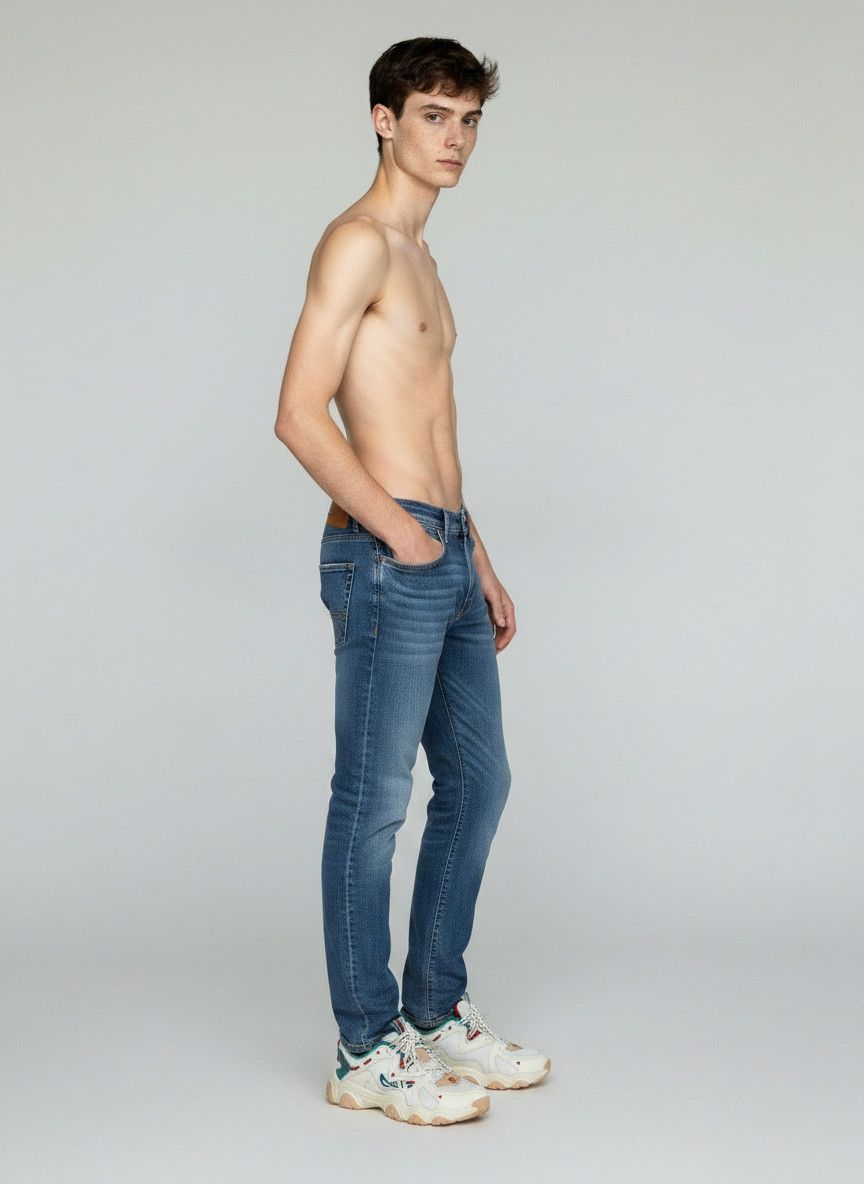
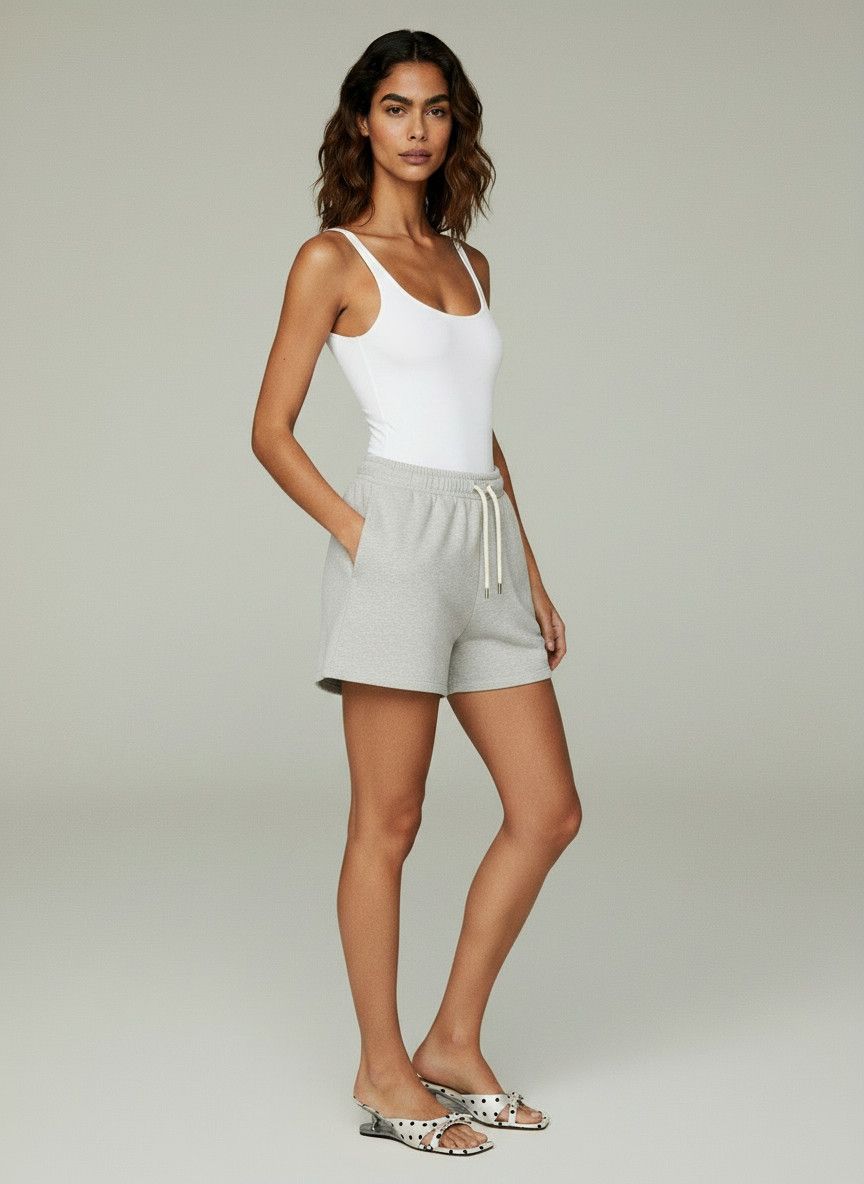
Claid results from its AI Fashion studio.
Claid produced complete fashion images, but the shoes were too small in the frame for a confident detail check. It also changed the trainer’s side graphic and panel pattern. The pairs and foot contact appeared plausible, although the distant crop made close inspection difficult.
In this test, Claid worked better for a full fashion scene than for footwear detail. Before publishing, make sure the chosen composition shows the SKU large enough to compare with the packshot.
4. Koozee AI Shoe Try-On
Koozee's AI Shoe Try-On uses two inputs: the product shoe and a model photo supplied by the seller.
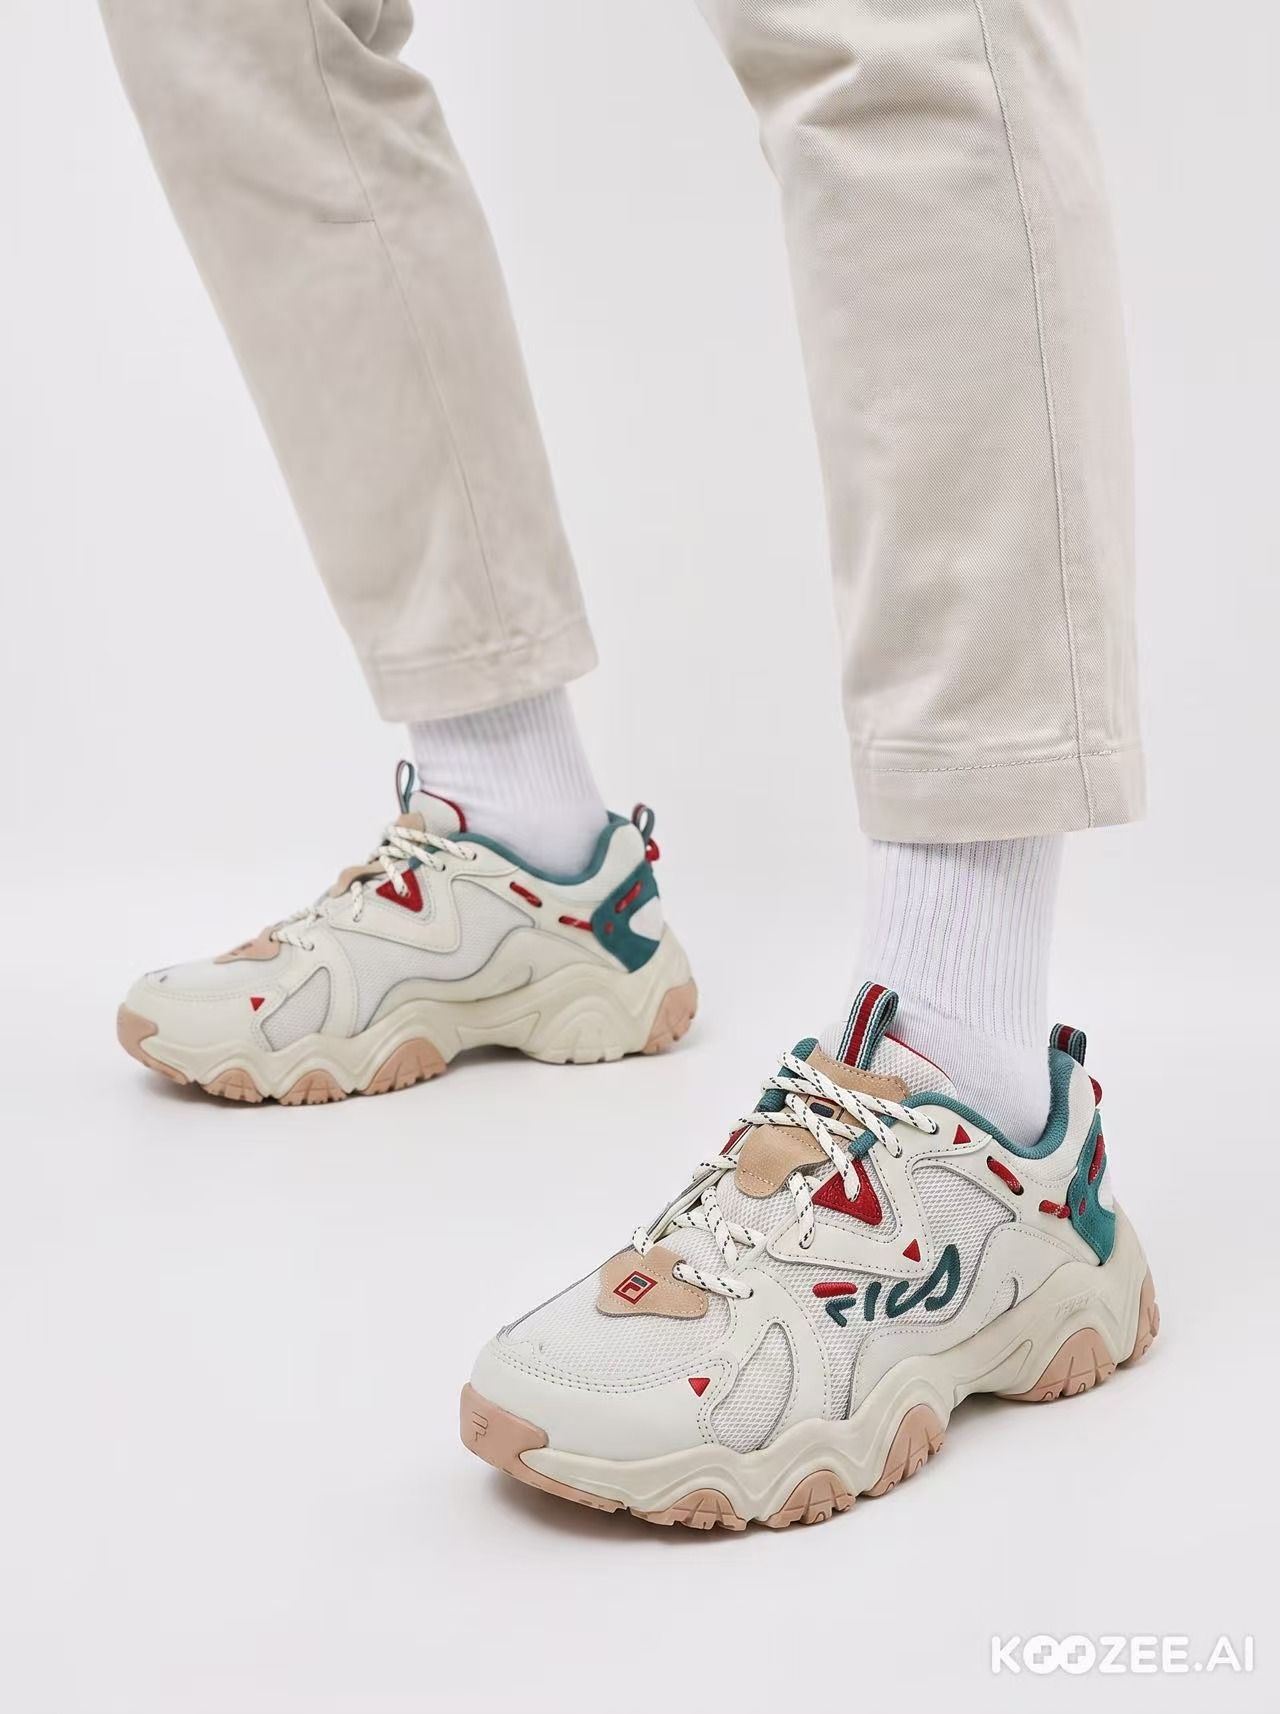
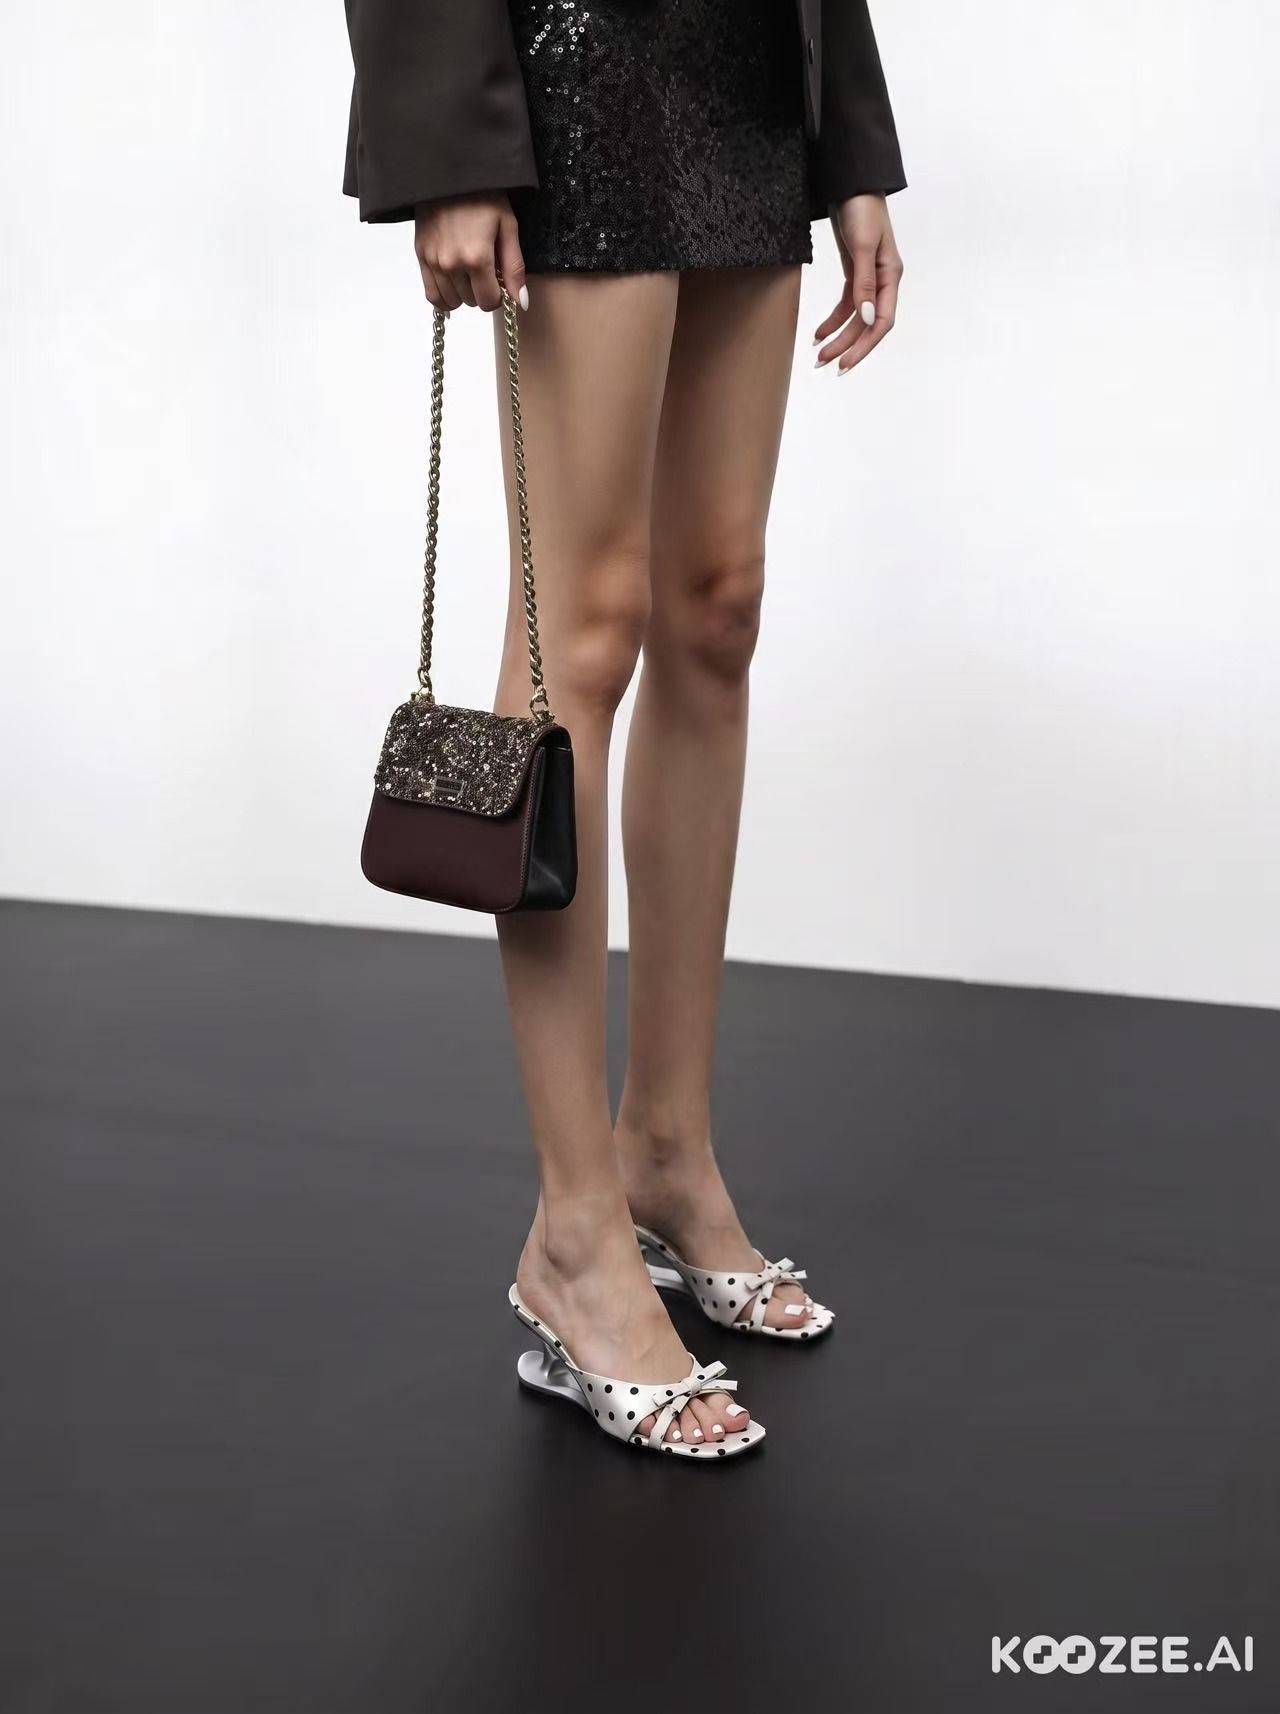
Koozee results matched to model photos supplied for the test.
Koozee gave us the closest crops. The trainer retained the tongue badge and outsole tread; the mule retained its dots, bow, square toe and heel shape. Both pairs matched left to right, and the joins around the foot looked clean.
It preserved the finest product details in this sample, but it also required a model photo. That extra input takes preparation and gives you direct control over the person and pose.
5. Zawa Virtual Try-On Shoes
Zawa offers a Virtual Try-On Shoes workflow with pose and shoe-type choices.
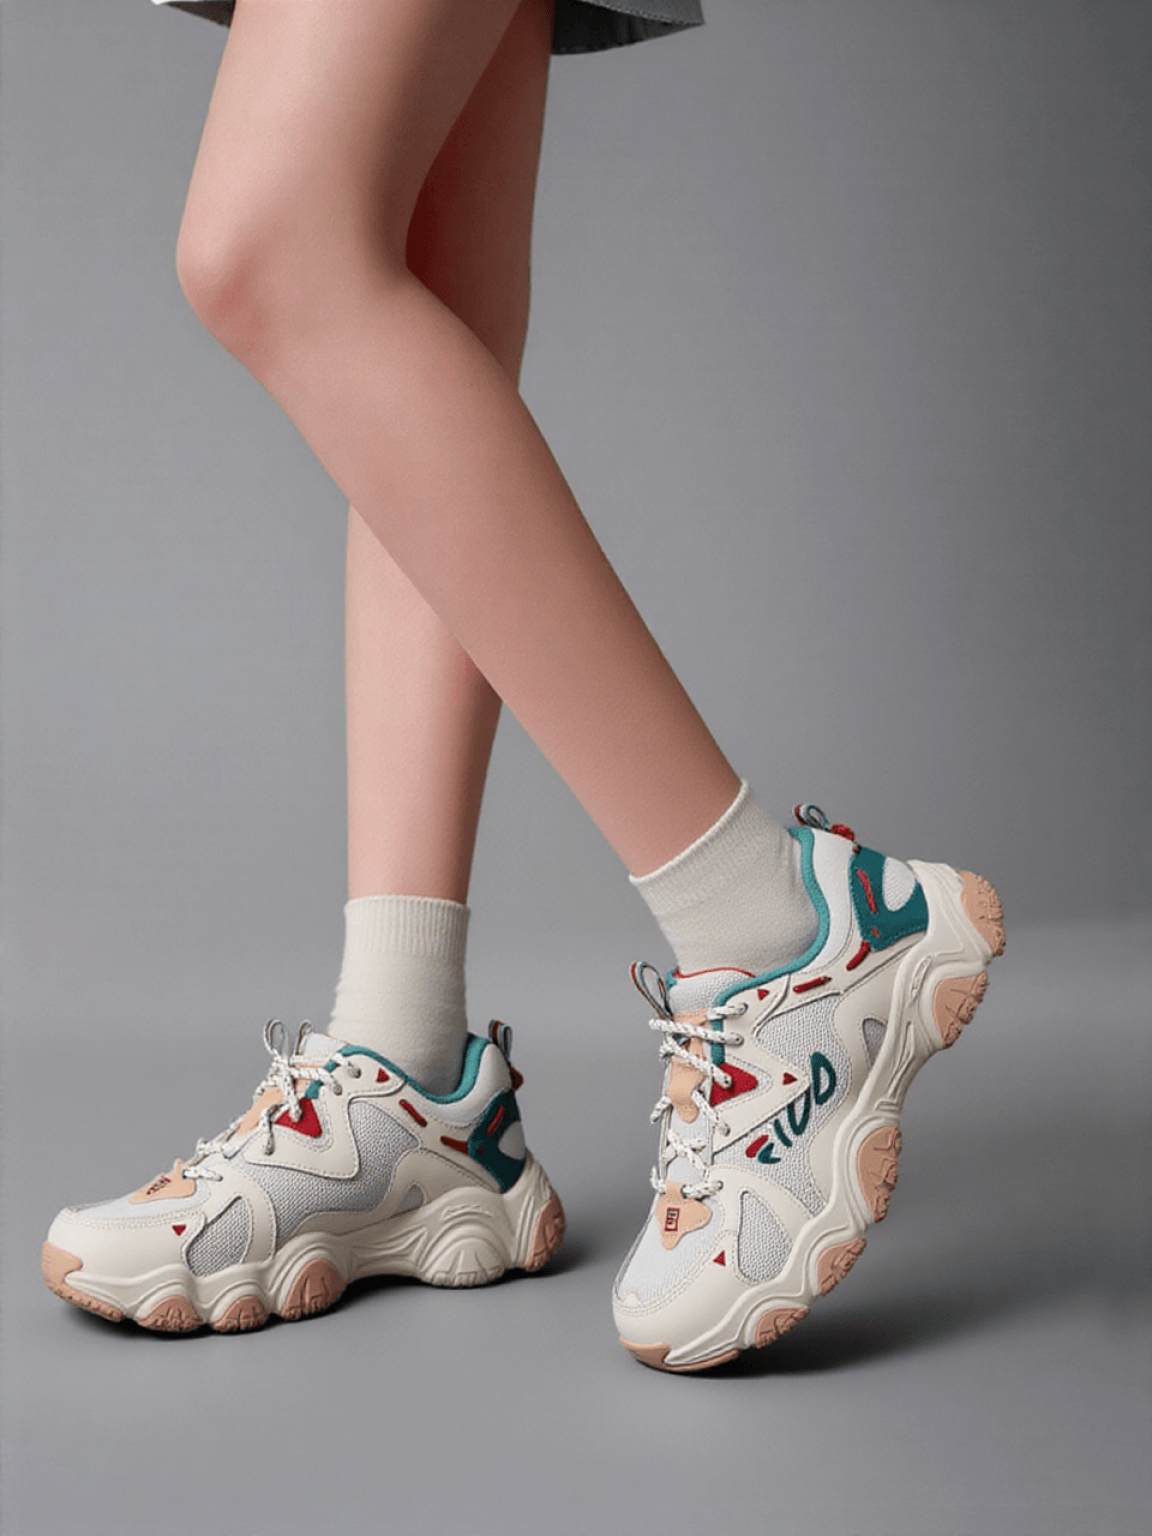
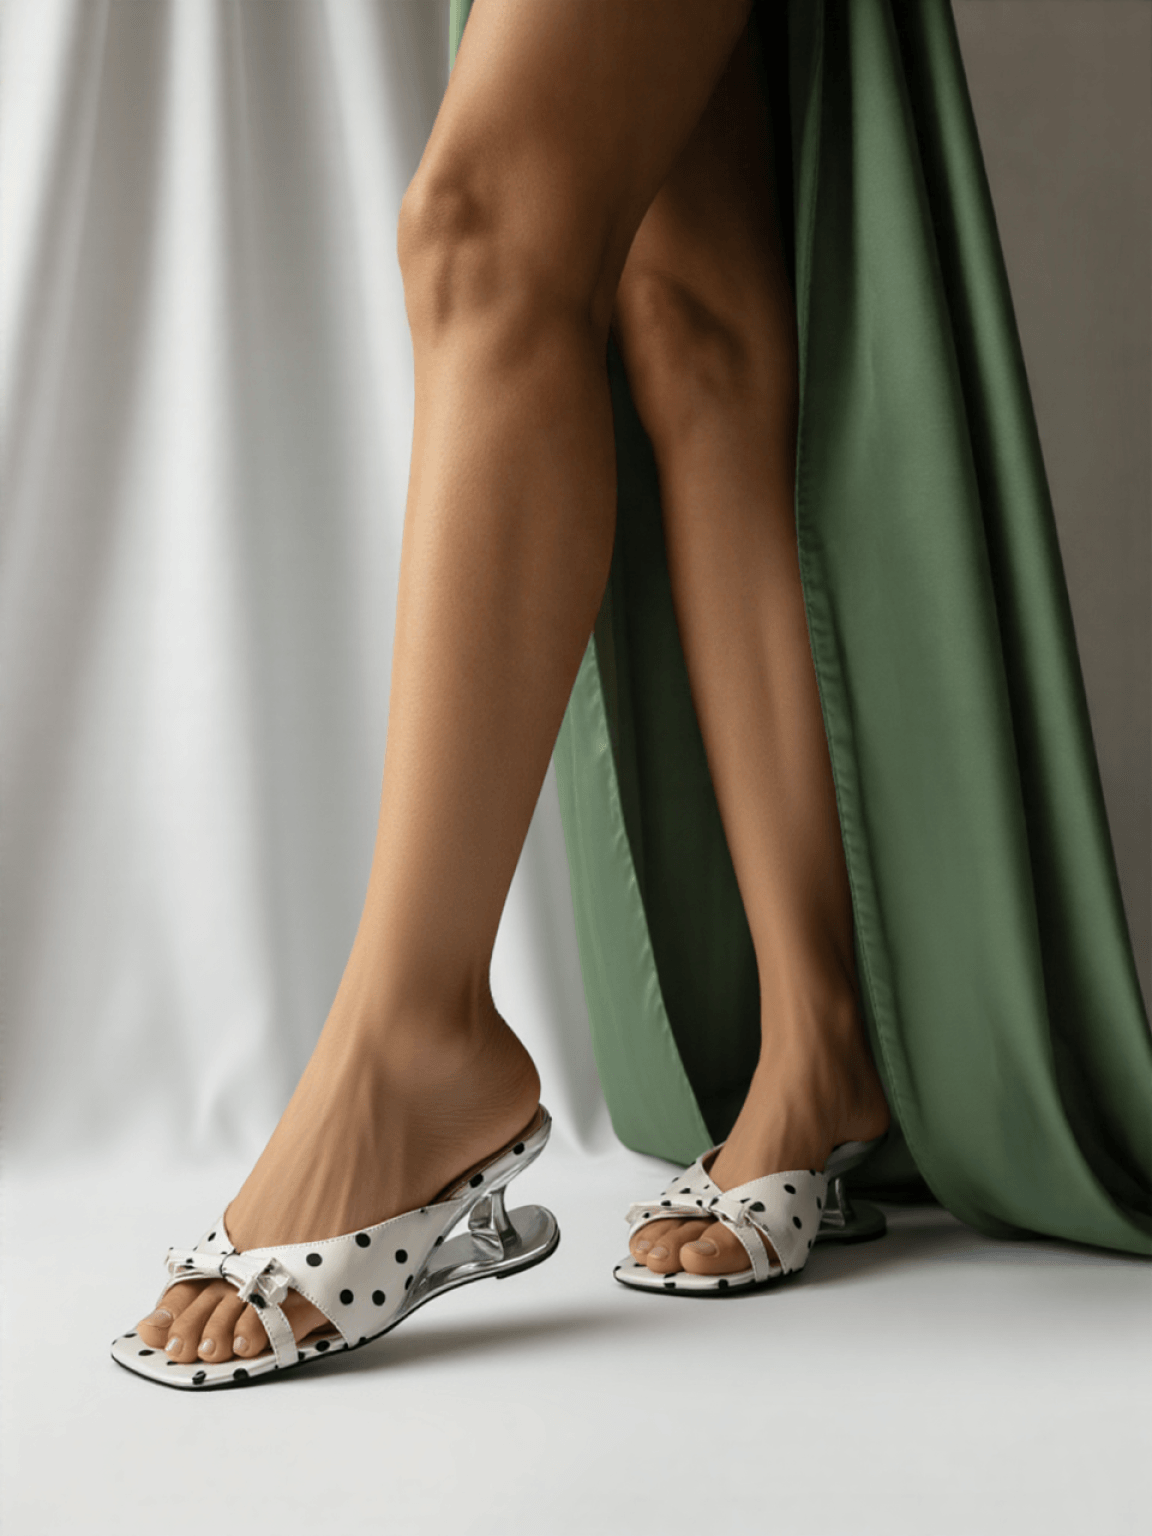
Zawa results using its footwear model and pose choices.
Both products kept their overall shape, pair consistency and clean foot contact. The mule retained its unusual heel and surface details. On the trainer, the side mark stayed in roughly the right place and color, but the lettering changed—an error that is easy to miss in a thumbnail.
Zawa offers a straightforward menu for shoe type and pose. Check the detected shoe type before generating, then zoom in on logos and text before approval.
Virtual Shoe Try-On App Comparison for Sellers
Use the table to match each tool to the inputs and level of framing control you already have.
| Tool | Inputs | Footwear framing | Best fit | Observed caution |
|---|---|---|---|---|
| Snappyit | Shoe photo; model and scene choices | Close when requested | On-foot images without a separate model photo | Request a close-up; the default composition can be wider |
| Pic Copilot | Shoe photo; footwear-style model look | Close automatically | Fast shoe-focused composition | Generated skin and lighting looked artificial in both results |
| Claid | Shoe photo through AI Fashion | Distant in this test | Wider fashion context | Trainer graphics changed and shoe detail was hard to inspect |
| Koozee | Shoe photo plus model photo | Closest in this test | Detail control when model photography is available | Requires a suitable model image before generation |
| Zawa | Shoe photo; shoe type and pose choices | Close | Menu-driven footwear scenes | Trainer lettering changed despite similar placement and color |
Editorial observations from the ten outputs shown above; tested August 12, 2026.
Ecommerce Shoe Image QA Checklist
Compare every generated asset with the packshot before it reaches a product page or ad.
- Are both shoes the same shoe? Compare toe shape, heel height and logo placement, left against right.
- Is the heel the height you actually sell? Measure it against the source photo rather than judging by eye.
- Is the toe box the right shape? Pointed, square and round toes are different products. Hold the render next to the packshot.
- Is the logo there, and is it right? Branding is how a buyer identifies the model, so a wrong logo is worse than none.
- Does the ankle look like an ankle? Look at the join between foot and shoe opening, and any sock that shows.
In this sample, logo review caught more problems than heel shape or left-right consistency: three tools retained the trainer mark well enough to recognize, while Claid altered the graphic and Zawa altered the lettering. Treat any changed product identifier as a regeneration or retouching trigger, not a minor cosmetic issue.
Generate on-foot shoe images →
AR Shoe Try-On vs AI Shoe Images for Ecommerce
Both approaches help a shopper understand how footwear looks when worn, but neither automatically determines size or fit. Their outputs, implementation and review responsibilities are different.
How AI On-Foot Shoe Images Work
The seller uploads a shoe photo, generates a styled image, checks it against the packshot and publishes the approved asset. Every shopper sees the same seller-controlled image. It can show scale, styling and context, but it is not the shopper's own foot and it does not verify comfort, width or correct size.
How Live AR Shoe Try-On Works
A shopper opens a camera experience on a compatible device and sees a digital shoe positioned on their feet as they move. The exact product inputs, tracking method, browser support and storefront integration vary by vendor. Visual placement alone is not a fit recommendation unless the provider supplies a separate, validated sizing capability.
AI Shoe Images vs Live AR: Seller Comparison
| Decision factor | AI on-foot image tool | Live AR shoe try-on |
|---|---|---|
| Primary job | Create listing, ad and social images | Let shoppers interact with a shoe on the storefront |
| Where it runs | Seller workflow before publication | Shopper's compatible device on or from the product page |
| Product input | Typically starts from a shoe photo; workflow varies by tool | Vendor-specific source-image or digital-asset requirements |
| Implementation | Generate, review, export and publish each asset | Confirm asset production, catalog updates, browser support and store integration |
| Fit or size guidance | Does not determine fit | Visual placement alone does not guarantee fit |
| Commercial check | Credits, subscription, output rights and resolution | Onboarding, asset creation, platform usage and maintenance terms |
AR Shoe Try-On Platforms to Evaluate
Wanna presents mobile AR shoe try-on for brands and retailers. Camweara positions footwear inside a broader multi-category virtual-try-on platform. Kivisense promotes real-time try-on across shoes, clothing and accessories alongside AR and 3D commerce capabilities. These are official capability descriptions, not results from a live-store deployment test.
What to Confirm Before Adding AR Shoe Try-On
Ask what product inputs the platform accepts, who prepares any digital assets, how colorways and catalog updates are handled, which browsers and devices are supported, what theme or storefront work is required, whether analytics are available, and how onboarding and ongoing usage are priced. Get those answers for your actual catalog before treating a feature demo as an implementation plan.
Which Virtual Shoe Try-On Approach Fits Your Store?
If the immediate problem is weak product-page imagery, begin with a small AI image test and keep accurate packshots and detail views beside the generated images. Consider live AR when shoppers specifically need an interactive view and the vendor has clarified device coverage, product assets, integration work and commercial terms.
How to Add AI Shoe Try-On Images to Shopify
AI on-foot images can be added to Shopify as ordinary product media; they do not require a live camera widget. Test them on a few products before changing the whole catalog. Merchants who prefer to work inside Shopify can also review the Snappyit Product Photo Editor on the Shopify App Store.
1. Choose a Small SKU Test
Choose a small group that represents the catalog: for example, a high-traffic product with weak on-foot content, a new launch, and one or two difficult products with visible logos, unusual heels, open toes or reflective materials. Compare the result with the product’s previous period or a similar control, rather than crediting every change to the new image.
2. Generate and Approve the Product Media
- Start from a sharp, accurate packshot.
- Generate several on-foot candidates rather than approving the first attractive result.
- Compare toe shape, heel, outsole, color, logo, text and left-right consistency with the source.
- Keep one or two images that add useful context without replacing evidence photos.
- Export at a consistent aspect ratio and compress the file without making product details hard to inspect.
- Write alt text that describes the visible shoe and view instead of repeating keywords.
3. Add the Images to the Shopify Product Page
In the product's media area, upload the approved files and keep the accurate packshot first. Place the strongest on-foot image early enough to be seen, followed by outsole and detail evidence. Associate color-specific media with the correct variant where the current theme and catalog workflow support it. Preview the published product page on desktop and mobile to check crop, zoom, sharpness and loading behavior. Shopify interface labels can change, so confirm the current steps in Shopify's official product documentation before training a team.
4. Measure Before Expanding the Workflow
Track the measures already tied to the product page: add-to-cart rate, conversion, media interaction, page performance and return reasons such as “not as pictured.” Compare the test with its earlier performance or a reasonable control before expanding the workflow.
When a Shopify Shoe Store Should Evaluate Live AR
Consider live AR when shoppers have a clear reason to use it, the provider supports your storefront and target devices, and your team can maintain assets for new styles and colorways. Define a separate success measure for AR interaction; it solves a different job from product-page images.
Virtual Shoe Try-On FAQ for Ecommerce Sellers
Which virtual shoe try-on app performed best in this test?
Koozee retained the finest product details in our two-shoe sample, but it required a separate model photo. Snappyit was the stronger fit when starting with the shoe photo and built-in model choices, provided we requested close footwear framing. There was no winner for every workflow, so test the products most likely to expose errors before choosing.
What photo should I upload to an AI shoe try-on app?
Use a sharp, high-resolution image that keeps the full toe, heel, opening and outsole edge in frame. Light the shoe evenly, make logos and small construction details visible, and use a simple background with enough contrast around the edge. Avoid motion blur, clipped highlights, strong reflections and extreme perspective. Keep the original file as the approval reference.
Can AI shoe images replace real ecommerce product photography?
Not completely. AI on-foot images can add worn context, styling and campaign options, but sellers should retain accurate real photos for the main product view, outsole, material, stitching, logo, printed text, labels and other details that prove what the buyer will receive. If a generated image changes product shape, color or identification, regenerate it or do not publish it.
Do AR shoe try-on platforms require a 3D asset for every SKU?
Requirements vary by platform. Some AR workflows use a prepared digital shoe asset for each activated style or colorway, while vendors differ in the source files they accept and who builds the asset. Ask the vendor to document product inputs, colorway handling, catalog updates, supported devices, integration work and all asset or onboarding fees for your catalog.
How do I add virtual shoe try-on images to Shopify?
Generate several on-foot images from an accurate packshot, compare each result with the source, and export only the approved files. Upload them to the product media area, keep the real packshot first, place an on-foot image among the early supporting views, and associate color-specific media with the correct variant when supported. Preview desktop and mobile crop, zoom, sharpness and page performance before publishing.
Does virtual shoe try-on show whether a shoe will fit?
No. AI on-foot images show the product on the same generated model for every shopper. Live AR can place a digital shoe on the shopper’s feet visually, but that alone does not establish width, comfort or correct size. Treat fit recommendation as a separate capability and verify the vendor’s evidence before making that claim.
Sources and Virtual Shoe Try-On Test Methodology
Product capabilities and workflow descriptions were checked against the official pages below on August 12, 2026. The image-quality observations are Snappyit editorial analysis of the ten displayed outputs. The photography, Shopify and selection guidance is an editorial workflow; platform interfaces and vendor requirements should be rechecked before implementation.
- Wanna, AR Shoe Try-On
- Camweara, Virtual Shoes Try-On
- Kivisense, Virtual Try-On, AR and 3D Solutions
- Pic Copilot, Virtual Try On Shoes
- Koozee, AI Shoe Try-On
- Zawa, Virtual Try-On Shoes
- Claid, AI Fashion Studio
- Snappyit, Virtual Try-On Shoes
- Shopify Help Center, Products documentation
- Shopify App Store, Snappyit Product Photo Editor
Interfaces, models, pricing and implementation terms can change. Recheck the current vendor documentation and run representative branded, textured, open-toe and unusual-heel SKUs before committing a catalog workflow.