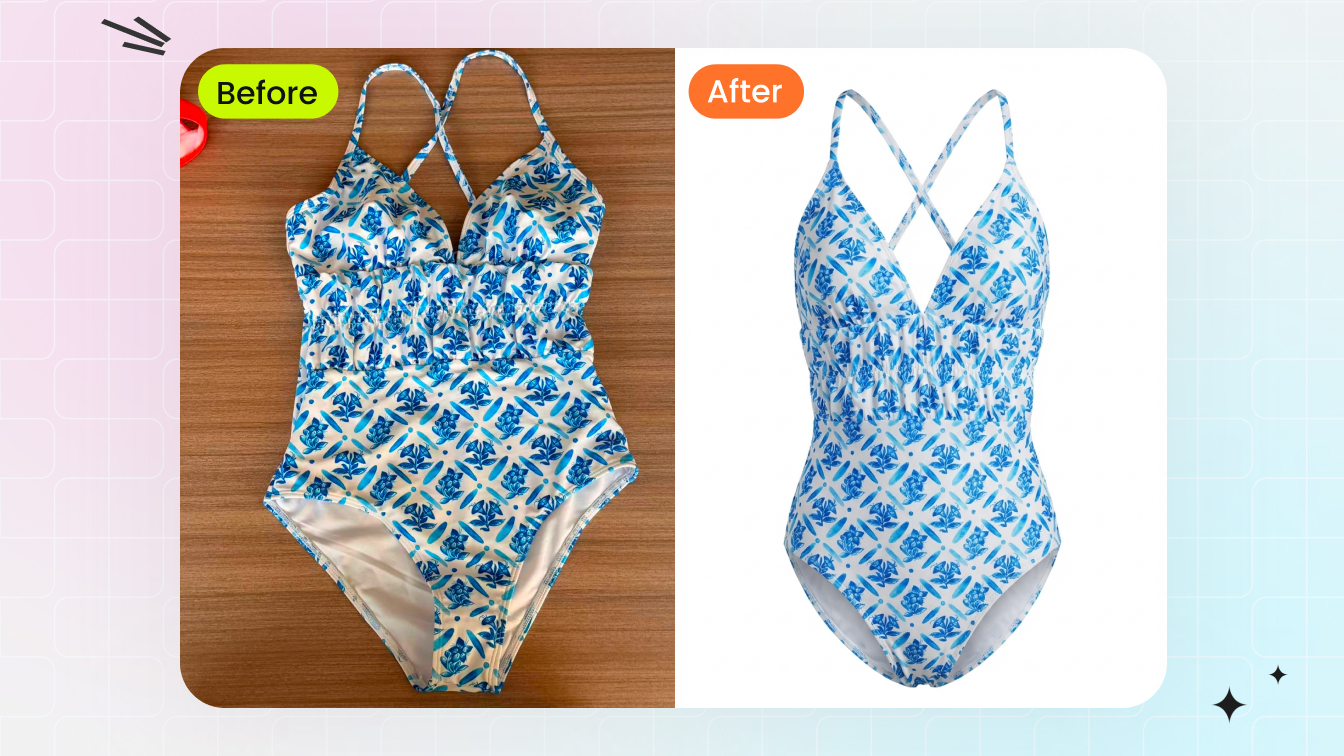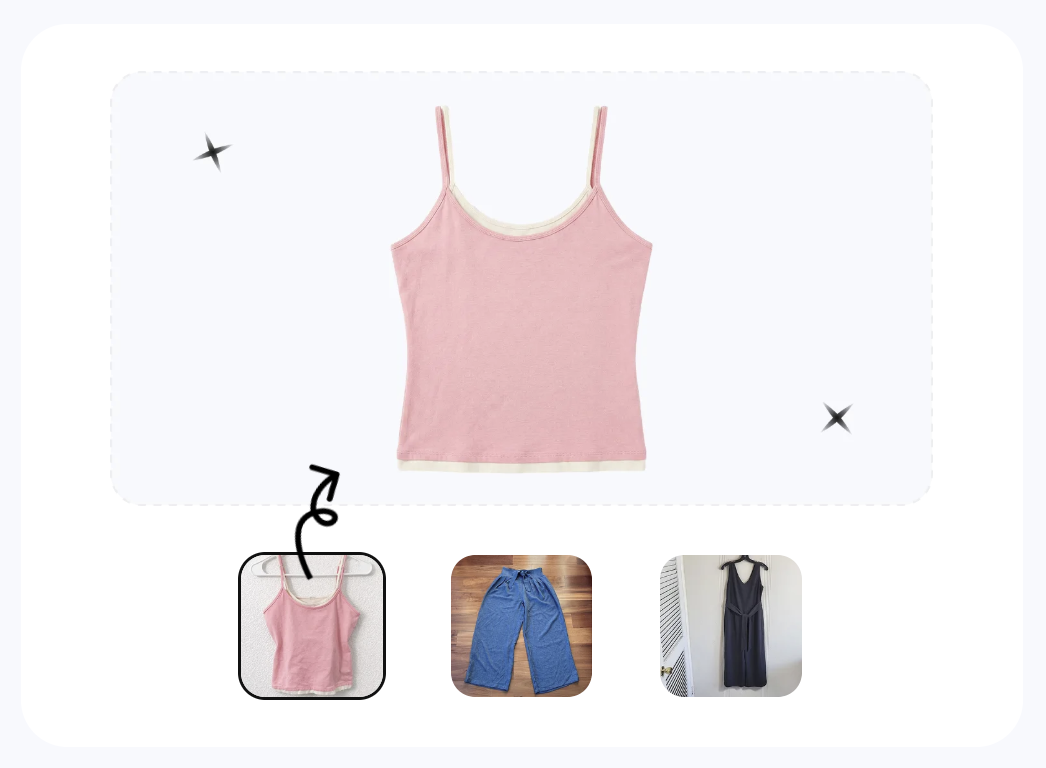

At a glance
Flat lay photography for e-commerce: master overhead gear, lighting, composition, and garment styling — plus the AI tools that now replace the studio.
| Need | What to do |
|---|---|
| Get oriented | Read the short summary, then use the checklist below. |
| Create a test image | Try Flat Lay Photo Free |
What flat lay photography is
A flat lay is an overhead, bird's-eye photograph of a product styled flat on a horizontal surface, with the camera lens pointed straight down at 90 degrees so the optical axis is perpendicular to the product plane. That perpendicular alignment is the whole game: it eliminates keystone distortion, so a rectangular garment reads as a true rectangle and proportions stay honest. The moment the camera leans in from the side — even a few degrees — squares turn into trapezoids and the shot stops being a real flat lay and starts being a casual angled snapshot.
Because nothing in the scene moves and the rig stays locked, flat lay is the workhorse of marketplace catalogs. No model to cast, no mannequin to dress, no fitting — just garment after garment fed through an identical overhead setup. That repeatability is exactly what large SKU counts and seasonal refreshes demand, and the visual consistency it produces is what shoppers and marketplaces reward.
It also pulls real weight in the listing image stack. A clean white-background flat lay can serve as the compliant main image for soft goods — and on Amazon, Kids & Baby clothing main images are actually required to be shot flat, off-model. For structured apparel, where fit drives the purchase, a ghost mannequin or on-model shot often wins the hero slot, and the flat lay carries the secondary stack: detail and texture close-ups, the "what's in the set" kit composition, color and variant overviews, and styled lifestyle scenes.
When to use flat lay (and when not to)
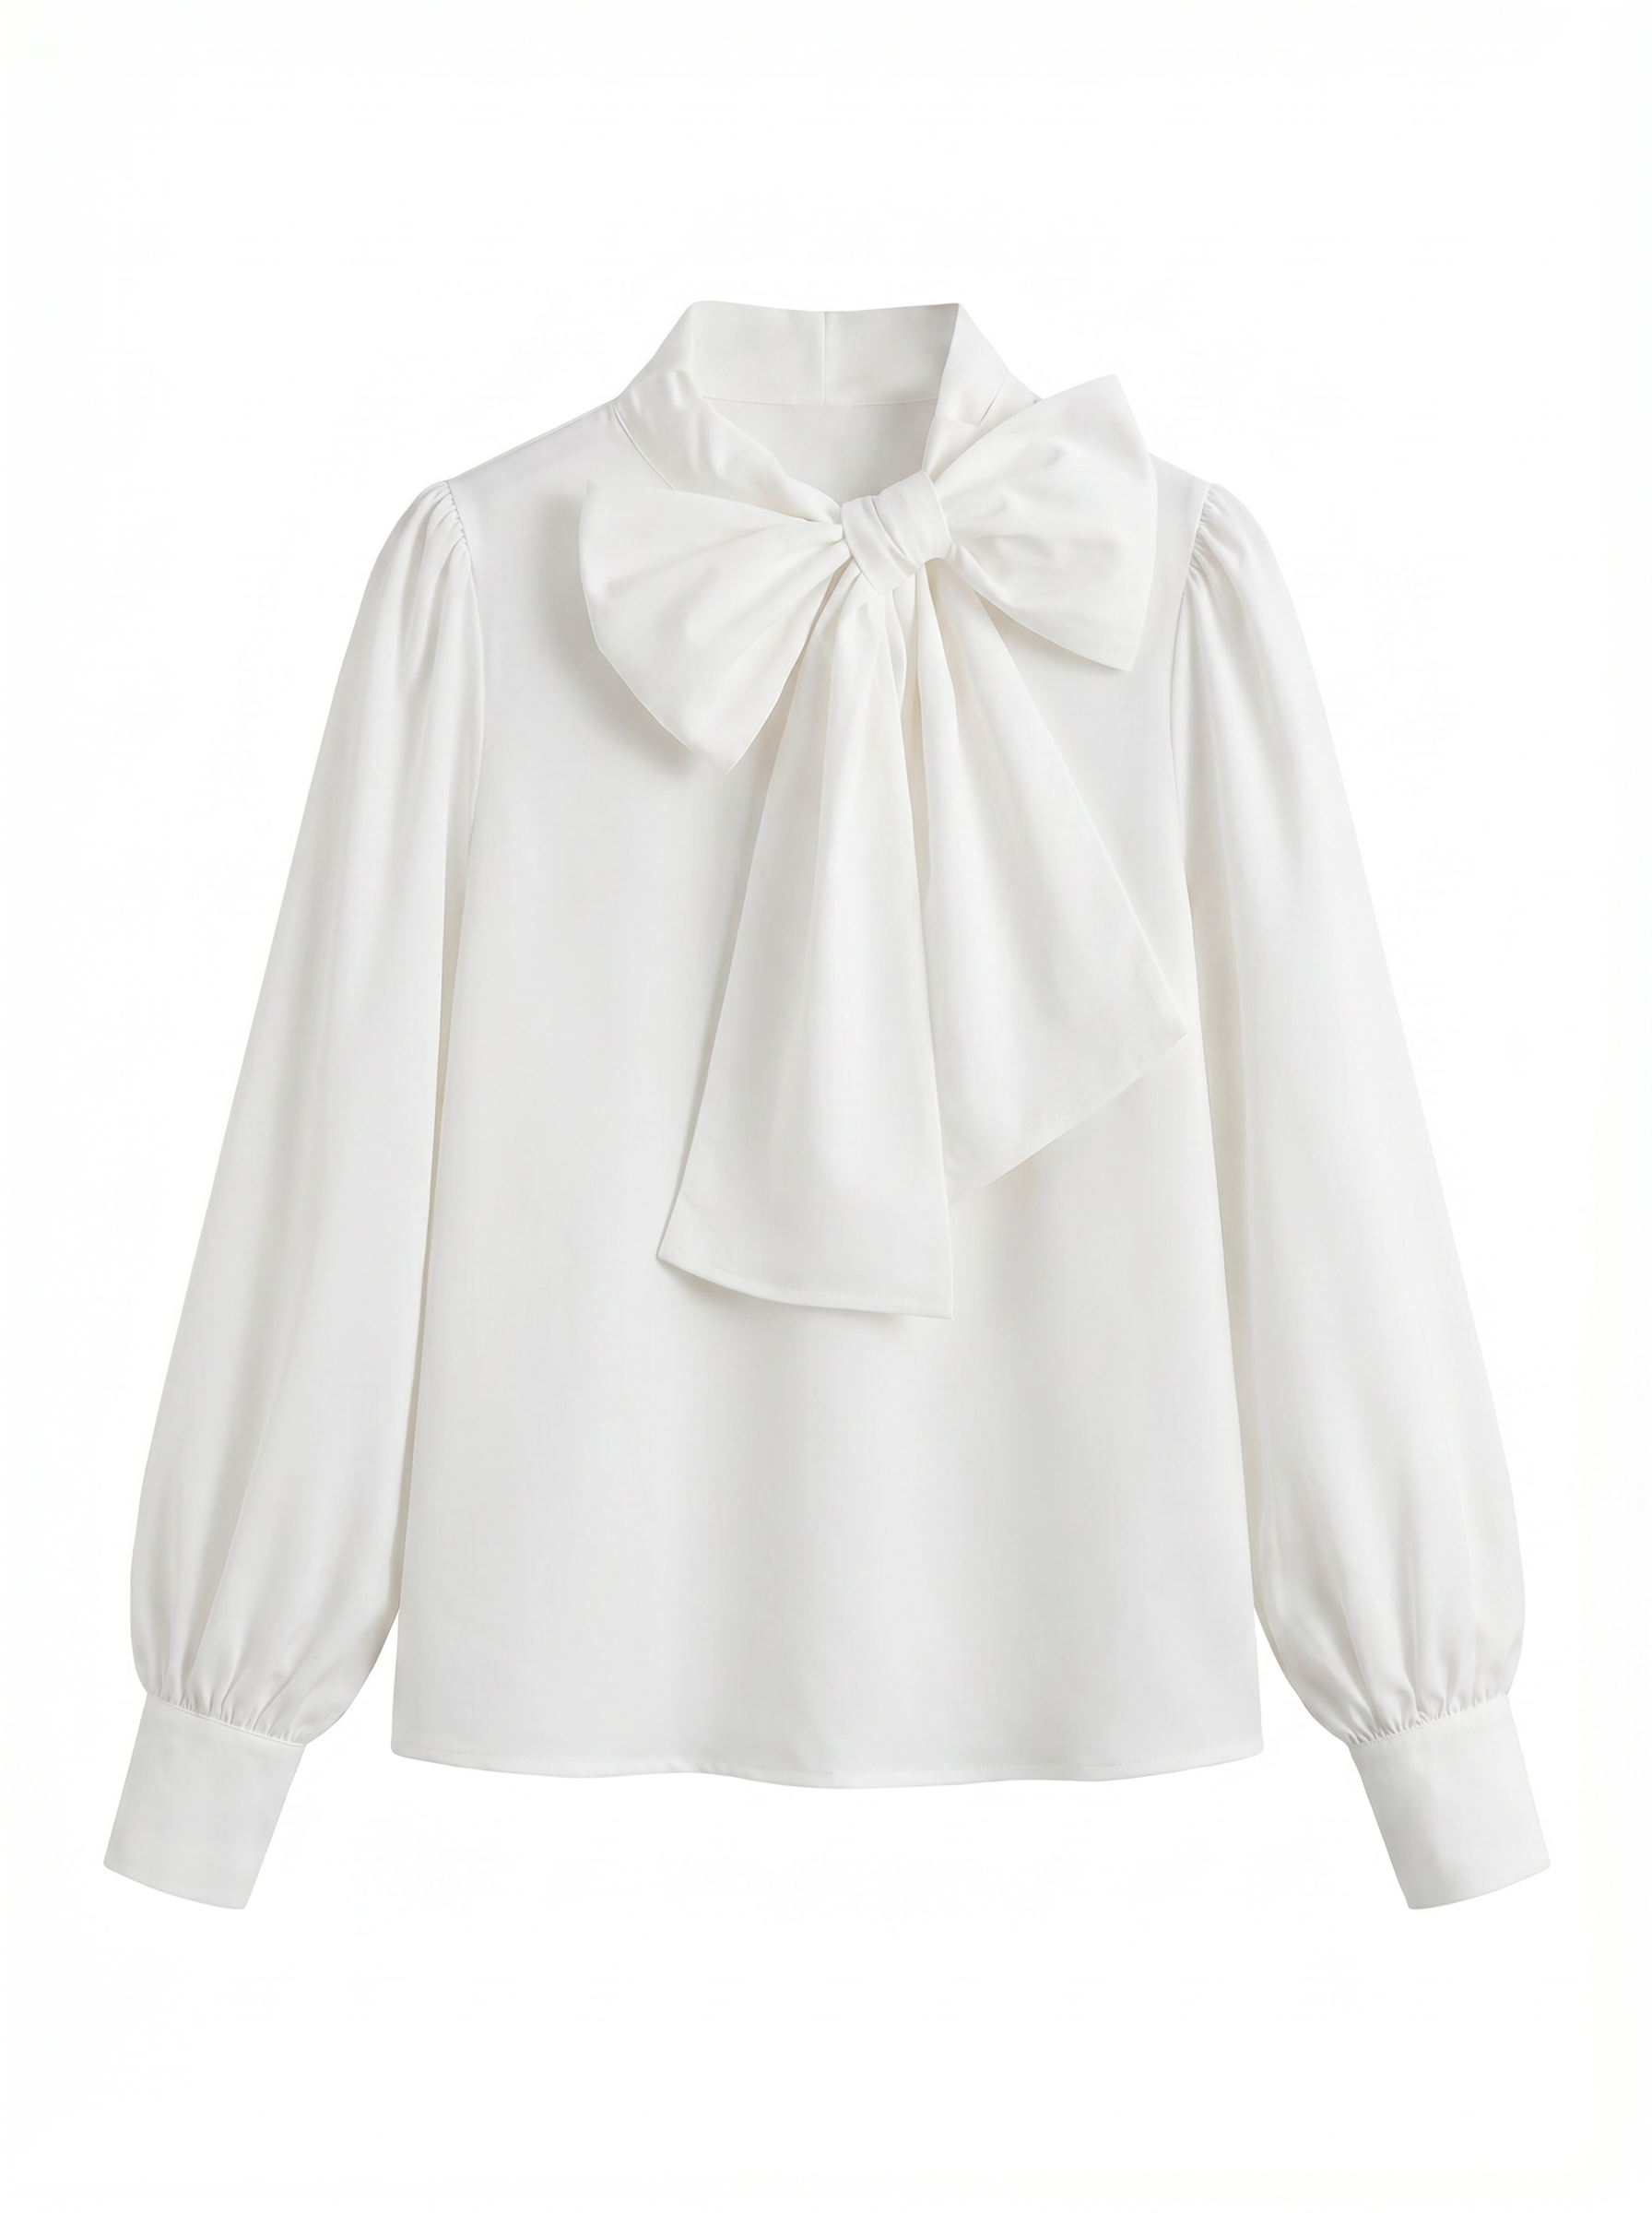
Flat lay is strongest for items that are inherently flat or that look natural lying down: soft apparel (t-shirts, knitwear, leggings, baby clothes), accessories (scarves, belts, ties, socks), jewelry, cosmetics and beauty packaging, flat-pack tech, stationery, and food. It is also the default for "kit" or collection shots where several SKUs or a full outfit need to share one frame, and for Instagram and Pinterest grids where creative top-down layouts drive engagement. The common thread: when the purchase decision is about color, print, texture, or the set of components — not drape — everything the buyer needs reads perfectly from directly above.
Its weakness is the flip side of its strength. Flattening a three-dimensional object means it cannot show how a structured garment fits or drapes on a body, so tailored blazers, dresses, jackets, and hoodies are hard to judge — and a poorly aligned flat lay can distort scale, making a piece look wider or shorter than it is, which drives returns. Necklaces are the single hardest flat-lay subject: chains tangle, fill the frame, and lose all their hanging behavior when laid flat (pros fake depth by overlapping strands and varying the curve radius).
| Method | Best for | Cost & speed | Shows fit? |
|---|---|---|---|
| Flat lay | Soft apparel, accessories, jewelry, beauty, kit shots, social | Cheapest / fastest at volume | No — flattens form |
| Ghost mannequin | Structured apparel hero & detail pages | Mid — needs a mannequin + edit | Yes — 3D worn shape |
| On-model | Lifestyle, lookbooks, fit on a body | Most expensive / slowest | Yes — best for fit & scale |
| Hanger / hanging | Quick reseller listings | Cheapest of all | Partial — least premium |
The practical rule: choose flat lay for affordable, high-volume, consistent imagery of soft goods, accessories, kit shots, and social — then pair it with ghost mannequin or on-model when you need to tell the structured-fit story. If you want a deeper head-to-head, see our breakdown of flat lay photography: traditional vs AI.
Gear & overhead setup
The defining piece of kit is the thing that gets the camera directly above the set. A standard tripod points the camera forward, so to shoot straight down you need a lateral side-arm that cantilevers the camera out past the legs — otherwise the legs and column land in the frame. The budget go-to is a lateral arm like the Manfrotto 131D (about 600mm / 24 in long, ~2.65 lb, mounts on a 3/8" center column with dual 1/4"-20 and 3/8" screws); hang a sandbag or weight plate on the opposite leg so the offset load doesn't tip the rig. For bigger layouts a C-stand with a grip arm reaches farther and keeps legs out of frame; a copy stand is the most rock-steady and perfectly perpendicular option but is heavy and limited by its baseboard; a wall-mounted bracket is the cheapest fixed solution but locks you to one height.
Whatever the rig, the one technical rule that matters most is keeping the camera's sensor plane parallel to the table. Any tilt converts a rectangle into a trapezoid (keystone) and bends square backdrops — even a 2-degree lean shows up in a top-down shot. Use two small bubble levels (one on the hot shoe, one on the surface) and get as close to perfectly parallel as you can; pros aim within about half a degree. Residual keystone can be fixed later with perspective correction, but nailing it in camera preserves resolution and avoids stretched edges.
Focal length is the other distortion lever. The sweet spot is 50-100mm full-frame equivalent: a 50mm prime gives a natural, near-distortion-free perspective, while an 85-105mm short telephoto (or a 100mm macro) renders with essentially zero distortion and lets you mount the rig higher. Avoid anything wider than 35mm — wide-angle lenses bow straight edges near the corners and force the camera so close it casts its own shadow. On an APS-C body remember the ~1.5x crop, so a 35mm lens behaves like ~52mm; on a phone, shoot with the main or 2x telephoto lens, never the ultra-wide. Set f/8-f/11 (most lenses' sharpest range) at ISO 100-200 in manual mode so exposure never drifts between frames — on a flat plane, depth of field isn't the limiter, lens sharpness is.
Phone or "real" camera?
For marketplace listings and social, a recent phone is genuinely enough — it clears the 1,600px-plus that platforms want and is faster to operate. Move up to a mirrorless or DSLR when you need large files for heavy cropping and retouching, cleaner shadow detail, tethered batch capture, or interchangeable 50mm/macro glass. Note that most full-frame and APS-C bodies sit around 24MP (40MP-plus is the specialty high-resolution tier), but their much larger sensors gather more light than a higher-megapixel phone — so this is about output size, retouching depth, and batch consistency, not the megapixel number.
Surfaces & a sub-$100 home studio
For clean marketplace shots, white seamless paper (for example Savage 53"-wide, 145 GSM, fine-tooth non-reflective) gives an even, shadow-controllable backdrop you trim and re-roll when scuffed. For styled flat lays, peel-and-stick contact paper or vinyl in marble, wood-grain, or concrete — mounted on foam board, or a rigid board like Replica Surfaces or a flexible Club Backdrops sheet — delivers a pro look for a few dollars. Keep neutral white or grey for catalog and Amazon main images; reach for texture only when it reinforces the brand and doesn't compete with the product. A complete DIY rig costs under $100: a north-facing window as the soft key light, a sheer curtain as a diffuser, a white foam board opposite as fill, and a phone on a wall bracket or tripod arm overhead. (For a full build, see our reseller home studio setup guide.)
Lighting a flat lay
A north-facing window (in the northern hemisphere) is the best free light there is: it never gets direct sun, so it behaves like one enormous diffused softbox with gentle shadows and the truest color. The catch is consistency — intensity and color temperature drift all day, so a 9 a.m. shot won't match a 2 p.m. one, and light falls off across a large layout. It's lovely for a handful of heroes and wrong for a 200-SKU catalog that has to color-match across days. Avoid east- and west-facing windows, which throw harsh direct sun.
For repeatable work, artificial light wins because you can lock intensity, angle, and color temperature shot to shot. Continuous LED panels are popular because they're what-you-see-is-what-you-get and dimmable; strobes in softboxes give more raw power. Either way, remember that the modifier — not the bulb — makes the light soft. Softness is governed by the apparent size of the source relative to the product: a bigger source placed closer wraps light around edges and gives soft shadow transitions, while a small or distant source gives hard-edged shadows. Large diffusion is the single most important variable in the whole setup.
The minimal reliable rig is one large softbox as a key at 45 degrees plus a white reflector at the opposite 45 degrees to lift the shadow side without adding a second hard light; a two-light key-plus-fill is the workhorse upgrade. To deepen a shadow on one side, move that source away or dim it; to kill shadows entirely, bring two large sources in close on both sides, or shoot on a shadowless under-lit acrylic base panel that lights from beneath. For shiny products — jewelry, metal, glossy packaging — push diffusion right up close, and when that isn't enough use cross-polarization: a polarizing film over the light and a polarizer on the lens, rotated until the specular glare extinguishes (expect to lose roughly 1.5 to 3 stops of light).
Get color right in camera. Wrong color is a top driver of returns, so don't trust Auto white balance. Set a manual Kelvin value or shoot a custom white balance off an 18% gray card (under $15), capture in RAW, and use high-CRI lights (95+ CRI; good panels hit CRI/TLCI 97+, daylight ~5600K or bi-color 3200-5600K). The silent killer is mixing light sources: if a warm room lamp spills onto a daylight-balanced set, one part of the garment goes yellow and the other stays neutral, and no single white-balance setting can rescue a frame with two color temperatures in it. Turn off the second source so every photon hitting the set is one temperature.
Skip the lighting rig entirely? If your source photo already exists, AI relighting can even out exposure and push the background to clean white. Try Snappyit AI Flat Lay free →
Composition techniques
Most flat lays resolve into four repeatable archetypes, and you should pick one before you place anything. Grid arranges objects in even rows and columns for a graphic, catalog feel. Scattered distributes elements with intentional irregularity for an editorial look. Gathered clusters items loosely so it reads organic and personal. Minimal sets one or two objects in generous space for confident, premium editorial. Grid demands precision; gathered and scattered tolerate casual placement.
- Knolling is the most structured style — every object squared off at 90 degrees, parallel or perpendicular to its neighbors and the frame. It's ideal for showing a full product kit where each item should read on its own, but the eye expects perfection, so even a 2-3 degree rotation looks like a mistake.
- Rule of thirds: divide the frame into nine parts and place your hero on a line or, better, at one of the four intersection "power points" rather than dead center. Put the negative space in the direction the product faces or leads — moving off-center in the wrong direction cramps the shot rather than improving it.
- Negative space is an active element, not waste. Tune the object-to-surface ratio to the channel: roughly 50/50 for social feeds, 40/60 for editorial, and 20/80 to 30/70 for a single hero shot. More empty space telegraphs premium.
- Balance, not symmetry. Distribute visual weight so the frame doesn't feel like it will tip. Dark, saturated, and heavily textured items carry more weight than light, muted, smooth ones, and warm colors pull the eye harder than cool ones. Group in odd numbers — threes and fives read as more dynamic than fours.
- Lead the eye. Use a belt, ribbon, strap, or the implied line between objects as a leading line, arrange clusters into implied triangles for stability, and avoid tangents — objects that almost-but-not-quite touch create awkward tension. Design the flow to match the upper-left-to-lower-right way most people read.
For diagonal energy, rotate a key element 15-20 degrees and let a line cut across the frame; diagonal arrangements consistently feel more alive than perfectly horizontal or vertical ones.
Styling the garment
Styling is where amateur and professional flat lays separate, and it starts before the garment touches the surface. Steam or iron out every wrinkle and crease — high-resolution sensors magnify them mercilessly — and lint-roll dust and stray fibers to cut your editing time. Then build dimension so the piece doesn't look dead-flat: ball up acid-free tissue paper and gently stuff the shoulders of a shirt, the torso of a dress, or the hips of jeans to create realistic "phantom body" volume. Tuck the sleeve armpits in under the body and hide the rear hem so the silhouette reads clean, and keep everything even and symmetrical. Any pins, tape, clips, or stuffing must stay out of the camera's view — supporting materials get removed in retouching.
Never lay sleeves or pant legs perfectly straight; bend them into a soft S-curve to add movement, and tuck the top of the sleeve slightly inward for a natural drape. Use hidden pins or clips to tame stubborn folds. For a catalog, fold every garment identically — same fold lines, same sleeve angle, same crop — so the collection reads as one cohesive set.
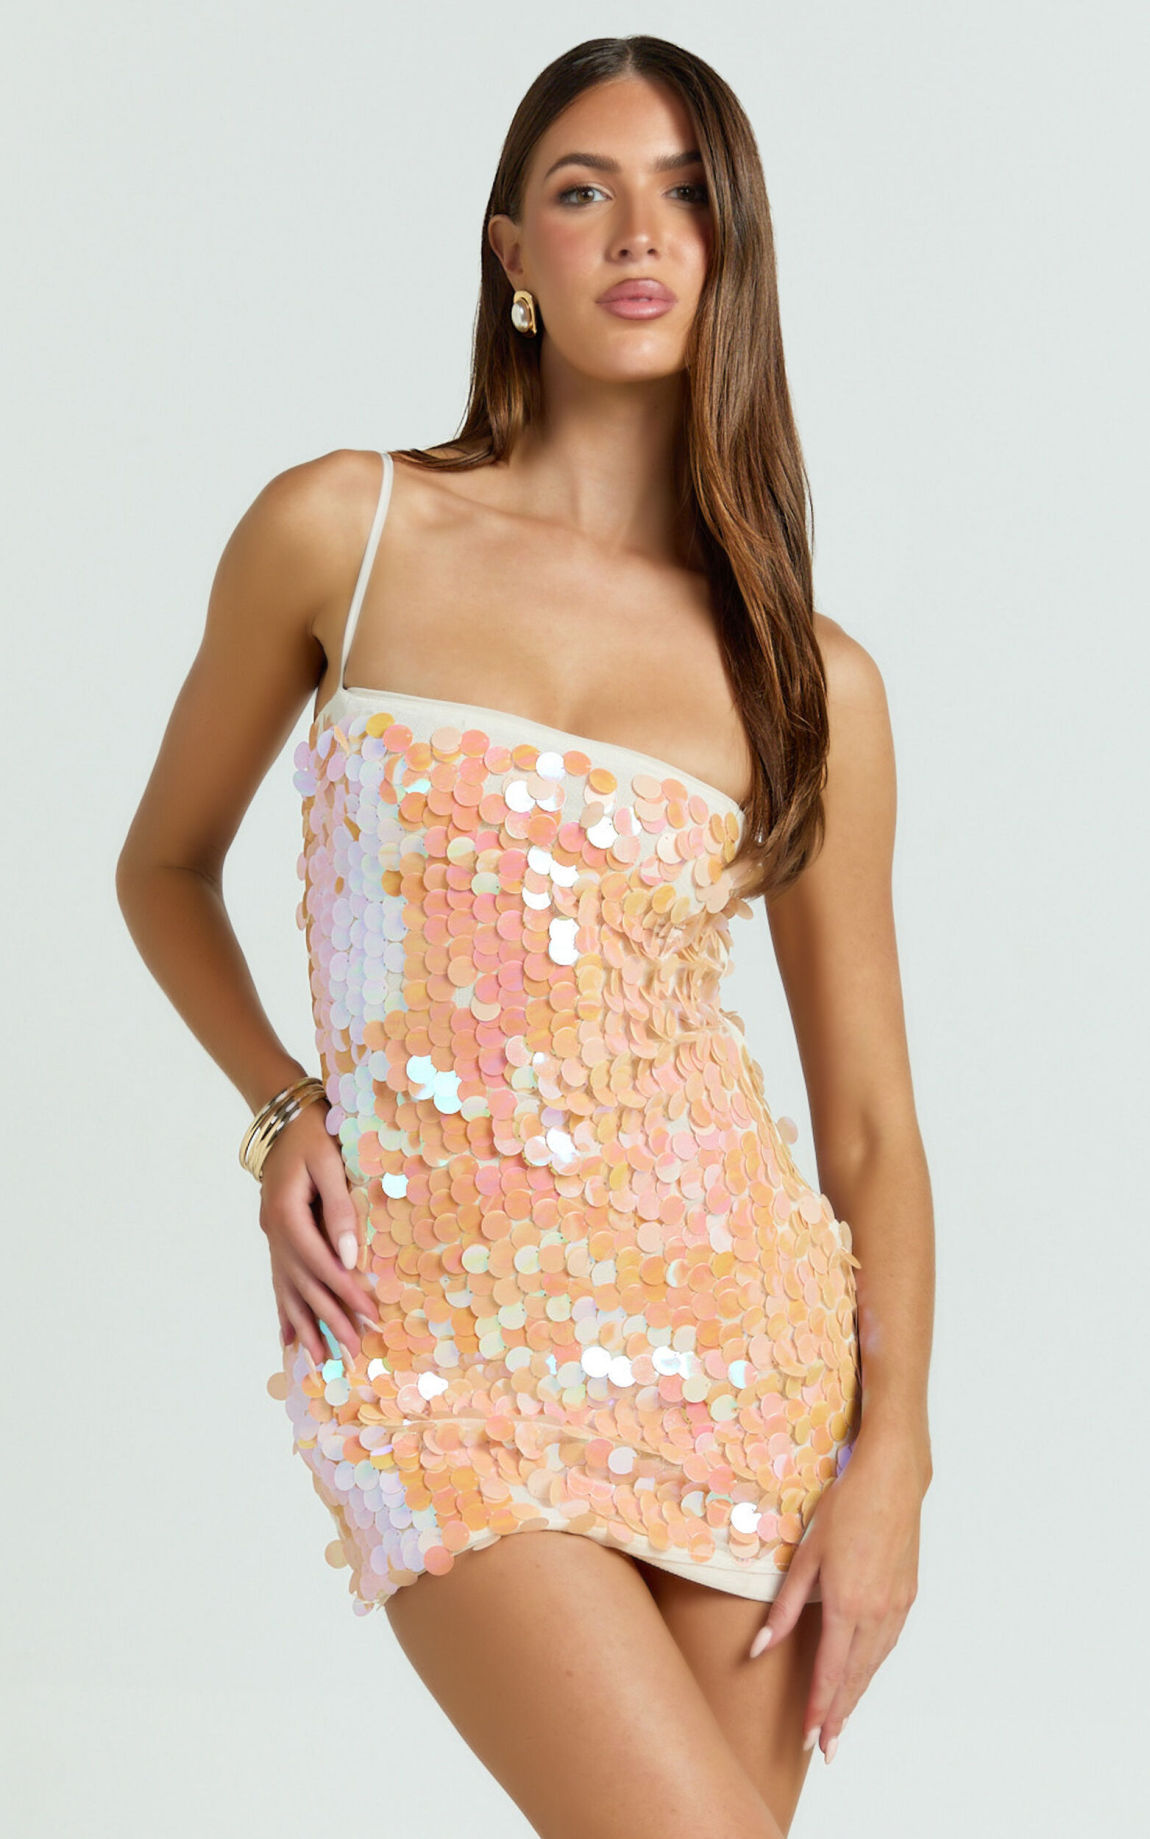
Finally, decide which brief you're shooting, because the two have opposite rules. A clean catalog flat lay uses a pure-white or very-light-gray background, a single garment, minimal-to-no props, symmetry, and even light — maximum clarity for product pages and marketplaces, with the garment styled to suggest a body. A lifestyle flat lay adds story props, textured or colored surfaces, a gathered or scattered layout, and a narrative mood for social and editorial. The catalog version sells the literal product; the lifestyle version sells the aspiration. Style for one or the other — not a muddle of both.
Shoot & edit workflow
Run every shoot the same way so the catalog stays consistent:
- Prep the garment — steam out wrinkles, lint-roll, remove dust and fingerprints.
- Build the set — lay a clean, seamless, non-reflective surface (white paper or matte board for catalog work).
- Mount the camera dead-level overhead at a true 90 degrees on a C-stand or copy stand, weighted with a sandbag.
- Set the lights — large diffused key plus a fill reflector; lock intensity and color temperature.
- Style the garment square to the frame, with the phantom-body shaping done.
- Tether and turn on grid lines so you review on a big screen and verify level on every frame.
- Shoot slightly wide — extra margin gives room to straighten and crop, and one wide frame can yield several crops.
- Check focus and exposure at 100% before you tear down the set.
Do the prep and styling well and almost nothing needs fixing afterward. In post, work in a fixed order so the whole catalog matches: (1) white balance and color first, neutralizing the background and getting true garment color; (2) perspective and keystone correction plus straightening (Lightroom's Transform > Upright), then a straight crop; (3) push the background to pure white (RGB 255,255,255); (4) retouch dust, lint, and any remaining wrinkles; (5) save the settings as a preset and sync it across the entire set. A consistent preset is far faster than editing each frame and is what enforces uniformity. If wrinkles are the recurring problem, an AI pass can handle them — see how to remove wrinkles from product photos with AI.
Match the export to each marketplace
Frame and crop to the destination platform so you never re-shoot. Export a master file, then web-optimized sRGB JPEGs per channel.
| Platform | Background | Minimum size | Recommended |
|---|---|---|---|
| Amazon (main) | Pure white RGB 255,255,255; product fills 85%+; no text/logos | 500px to appear; 1,000px to enable zoom | 1,600px+ for optimal zoom (2,000-3,000px sweet spot); max 10,000px / 10MB; 1:1 |
| Etsy | White or neutral for clean listings | At least 2,000px on the shortest side | 3,000 × 2,250 (4:3) optimal; square displays consistently |
| Shopify | Consistent across all main images | More than 800 × 800px for built-in zoom | 2,048 × 2,048 (1:1); ~100-300KB file size |
One nuance worth knowing for apparel: on Amazon, Women's and Men's clothing main images must be on a human model, while Kids & Baby clothing main images must be shot flat — so flat lay isn't just allowed there, it's the rule. (Full specs live in Amazon Seller Central's image guidelines.)
Generate a marketplace-ready flat lay →
Common flat lay mistakes (and the fix)
- Keystone distortion — camera not at a true 90 degrees, or a wide lens. Fix: level against a grid and shoot 50-100mm.
- Harsh shadows — undiffused light. Fix: enlarge and diffuse the source, add a fill reflector.
- Wrinkles and creases — magnified by the sensor. Fix: steam before shooting, not after.
- Inconsistent white balance — whites read warm in one frame and gray in the next. Fix: lock WB off a gray card and batch-correct.
- Cluttered or pointless props — they steal attention from the product. Fix: keep props minimal and intentional.
- Off-center, tilted, or badly cropped layouts. Fix: grid alignment and one consistent crop across the set.
- Low resolution — files below the marketplace minimum lose zoom and look soft. Fix: shoot and export above each platform's threshold.
- Over-editing — excess contrast or saturation makes the item look different from reality and drives returns. Fix: edit for accuracy, not punch.
AI alternatives to the flat lay studio
The overhead rig, the softboxes, the model, and the hours of retouching are now optional for a large share of catalog work. A new generation of AI tools takes a quick phone snapshot and outputs the same assets a studio would — in seconds rather than days. There are four jobs worth knowing.
AI flat lay / packshot cleanup
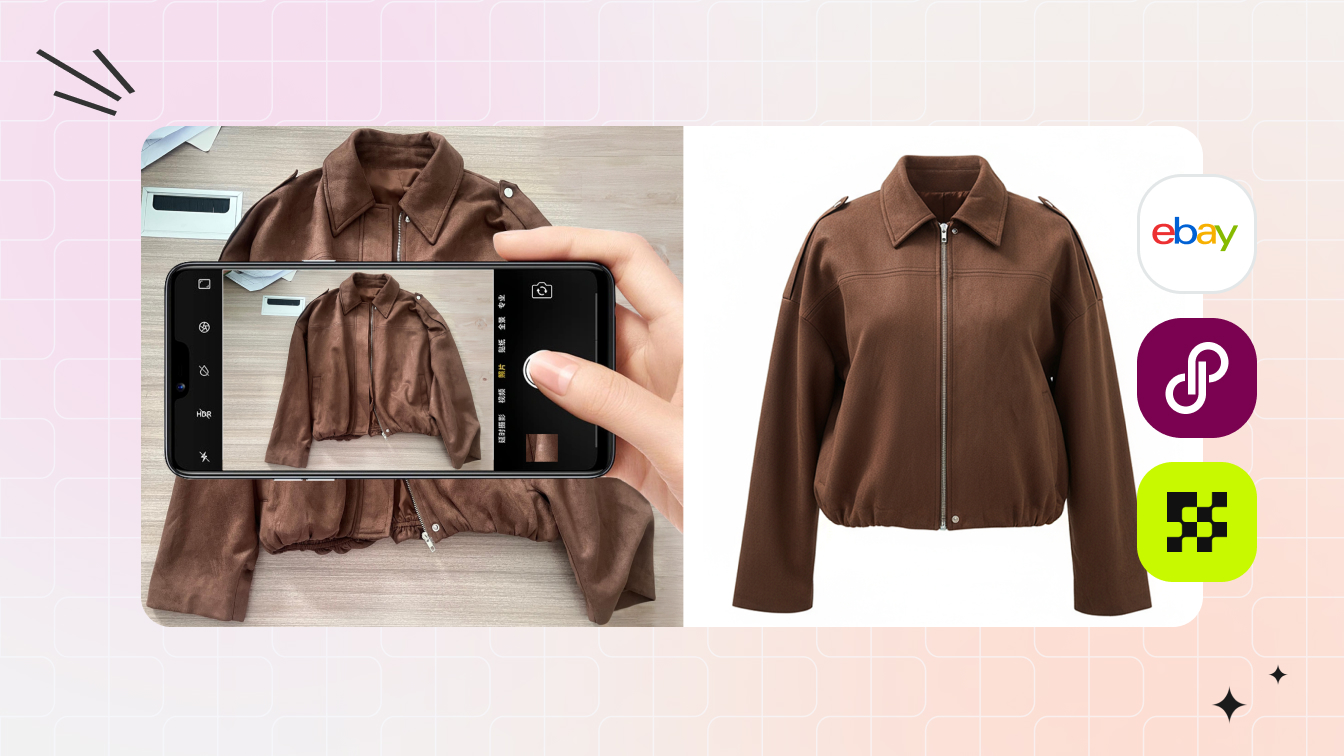
This is the lowest-risk, highest-fidelity use because it edits the real garment's pixels instead of inventing them. You shoot a wrinkled hanger or floor shot on a phone, and the tool runs a chained pipeline: it segments the subject, smooths wrinkles, replaces the background with pure white, relights to even studio diffusion, and can recolor to generate every colorway from one capture. Because the actual fabric is preserved, color and texture drift is far smaller than in fully synthetic images — and a clean flat lay is also the best input for every later step, so cleanup is effectively step one of the workflow. Snappyit's AI Flat Lay and AI Color Change cover this stage.
AI ghost / invisible mannequin
Traditional ghost mannequin means shooting the garment on a mannequin plus a separate inside-collar shot, then compositing a neck-joint in Photoshop from two or three photographs. AI collapses that to a single upload: the model reads the drape, puffs a flat garment into a body-shaped silhouette with filled shoulders, an open collar, and naturally falling sleeves, and renders a photorealistic inner lining where the collar would be hollow. It's the cleanest fit between AI and a legitimate catalog need — it shows fit and proportion without a model. See our roundup of the best invisible mannequin tools, or try Snappyit AI Ghost Mannequin.
AI on-model / virtual try-on
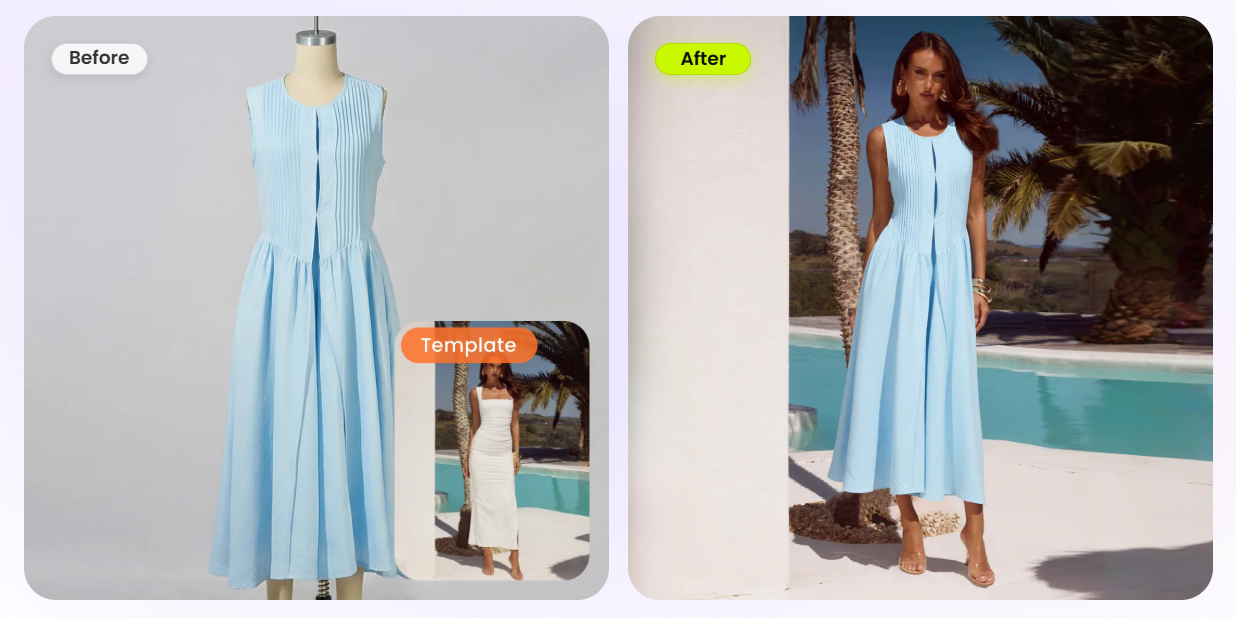
This replaces the photographer-plus-model shoot entirely: feed in a flat lay, hanger, or ghost-mannequin image and the tool warps the garment onto a synthetic human, reading the pose to adjust the garment's angle, typically in 15-30 seconds. Model libraries span skin tones, body types, and poses, and most tools let you reuse one model for brand continuity. It's the most powerful option and the most risk-prone — it's required for Amazon Men's and Women's clothing main images, but it's also where fit and texture can be misrepresented, so always check the result against the physical item before publishing. Snappyit's AI Fashion Model handles this.
AI image-to-video
Finally, image-to-video turns a packshot or flat lay into a short motion clip — a slow product push-in or an animated background — for TikTok Shop, Amazon's video slot, and Reels, without filming anything. Clips are short (commonly 4-15 seconds) and per-clip cost is a tiny fraction of a video crew. Snappyit's Image to Video covers it.
The cost and speed math
A traditional shoot day runs roughly $1,000-$5,000-plus and yields about 30-60 finished images; per-image, that's around $25-$75 for white-background packshots and $100-$500-plus for lifestyle or on-model work. AI runs roughly $0.20-$0.80 per image, often well under $0.10 once you amortize a ~$19/month subscription. The structural difference is that AI cost stays nearly flat as your SKU count grows while studio cost scales linearly — a 500-SKU brand can face $125,000-$250,000 a year of traditional photography versus a few hundred to a couple thousand dollars a year of AI for the same catalog, with speed-to-listing dropping from days to minutes.
Where AI still falls short. Generative tools drift most on true color fidelity, fine texture (knit, lace, sheer), fabric drape physics, and transparent or specular materials like glass and metallic trim — and the downstream cost is returns. Roughly 62% of shoppers return items that differ from the website photo, ASOS measured about 18% higher returns on AI-model listings, and one benchmark put conversion at 4.2% for professional photography versus 2.8% for AI imagery. Treat AI as ideal for standardized accessories and items under about $50, and keep a real capture — or at least AI cleanup of a real photo rather than full synthesis — for brand hero shots, luxury and $100-plus items, footwear, and jewelry.
Disclosure is now a hard rule. Amazon requires sellers to disclose substantially AI-generated or AI-enhanced images (minor retouching is generally exempt), and the seller stays liable for accuracy regardless of the tool. Google Shopping began requiring AI-image disclosure labels in 2026, with the FTC and several EU markets scrutinizing synthetic-imagery labeling. That's the strongest argument for the safest pattern: AI cleanup or ghost-mannequin of the real garment, which is accurate and usually disclosure-light, over a fully synthetic hero image.
The pragmatic workflow. Shoot a quick phone flat lay, clean it to a pure-white packshot and recolor each variant, generate a ghost-mannequin "worn shape" gallery image, add an on-model shot where the category requires it, spin up a short video clip, then export at each marketplace's specs. Explore the full Snappyit toolkit free →
Frequently asked questions
What is flat lay photography?
Flat lay photography is an overhead, top-down photograph of a product styled flat on a horizontal surface, with the camera pointed straight down so the lens axis is perpendicular to the surface. That perpendicular alignment is what separates a true flat lay from a casual angled overhead snap: it keeps a rectangular garment reading as a true rectangle with no keystone distortion. It is the cheapest, fastest, most scalable way to photograph soft goods, accessories, jewelry, and beauty products for an online catalog.
What camera and lens are best for flat lay photography?
A modern phone is enough for marketplace and social images as long as you use its main or 2x telephoto lens (never the ultra-wide, which distorts) and clear the platform resolution minimums. Step up to a mirrorless or DSLR camera when you need very large files for deep retouching, tethered batch capture, or macro glass. Whatever you shoot on, stay in the 50-100mm full-frame-equivalent range, avoid anything wider than 35mm, and shoot around f/8-f/11 at ISO 100-200 in manual mode for clean, edge-to-edge sharpness.
How do I light a flat lay to avoid harsh shadows?
Use one large, diffused source — a softbox, a diffusion scrim, or a north-facing window — and add a white reflector on the opposite side to lift the shadows. Softness depends on the apparent size of the light relative to the product, so a bigger source placed closer gives softer shadow edges, while a small or distant source gives hard ones. To kill shadows entirely, bring two large sources in close on both sides or shoot on a shadowless under-lit base panel, and always remove any second light of a different color temperature so your color stays accurate.
What background should I use for e-commerce flat lays?
For catalog and marketplace main images use a pure white seamless background — Amazon requires the main image background to be pure white at RGB 255,255,255, and white reads cleanest across listing pages. Seamless white paper or a matte white board is the reliable choice. Save textured surfaces such as marble, wood, or fabric vinyl for lifestyle and social flat lays where the texture reinforces the brand story, and keep them out of compliant marketplace hero shots.
Can AI replace flat lay photography?
AI now handles a large share of the work. From one phone snapshot, AI tools can remove wrinkles and the background, relight the garment, and output a clean pure-white packshot in seconds; they can also puff a flat garment into a 3D ghost-mannequin shape or place it on a generated model. The lowest-risk approach is AI cleanup of a real photo, because it edits the actual fabric pixels rather than inventing them. Keep traditional capture for color-critical, fine-texture, jewelry, footwear, and premium hero shots, and disclose AI-generated imagery where the marketplace requires it.
What are the most common flat lay mistakes?
The usual culprits are keystone distortion from a tilted camera or a wide lens, harsh shadows from undiffused light, visible wrinkles that the sensor magnifies, inconsistent white balance that makes whites read warm in one shot and gray in the next, cluttered or pointless props, off-center or badly cropped layouts, files below the marketplace resolution minimum, and over-editing that makes the product look different from reality. Most are solved by leveling the camera against a grid, diffusing the light, steaming the garment before shooting, locking white balance, and batch-editing the whole set with one preset.
Turn one phone photo into a catalog-ready flat lay
You don't need an overhead rig, a softbox, or a retouching subscription to ship clean listings. Upload a single phone snapshot and let Snappyit handle the white background, wrinkles, lighting, colorways, ghost-mannequin shape, on-model render, and video — all at marketplace specs.
Try Snappyit AI Flat Lay free →