At a glance
Turn one photo into a video using AI generation, the Ken Burns effect, parallax, or cinemagraph loops. A practical step-by-step guide to motion, prompts,
| Need | What to do |
|---|---|
| Get oriented | Read the short summary, then use the checklist below. |
| Create a test image | Try Image to Video Free |
Four Ways to Turn One Image Into Video
You can animate a single photo in roughly four ways, and which one you pick depends on the kind of movement you want and how much control you need.
- AI-generated motion. An AI model reads your image and invents new movement from it: hair lifts in the wind, water flows, clouds drift. It creates frames that never existed in the original. This is the fastest route to dramatic, recorded-looking motion, and most tools run in a browser.
- Ken Burns (pan and zoom). The classic documentary move. You set a start frame and an end frame, and the software glides between them. Subtle, cinematic, and good for steering the viewer's eye across a scene.
- Parallax / 2.5D. Your image is split into foreground and background layers that move at different speeds, faking depth as if a camera were sliding past.
- Cinemagraph loops. Most of the frame stays frozen while one element moves in a seamless loop, like steam off a coffee cup or leaves stirring in a breeze.
AI generation and Ken Burns are beginner-friendly. Parallax and cinemagraphs take more setup but give you handcrafted results. None of them needs a camera crew or a footage library; one good photo is the only raw material required.
E-commerce sellers turn flat product shots into ads, travel creators give landscape photos a slow cinematic drift, and presenters add life to slides that would otherwise sit still. The rest of this guide walks through preparing your image, choosing a method, generating with AI, applying manual effects, writing prompts, adding audio, and exporting for each platform.
Step 1: Prepare Your Source Image
Your final video can only be as sharp as the image you start with. A blurry, low-resolution photo produces a blurry video no matter how good the tool is, so a few minutes of prep up front pays off.
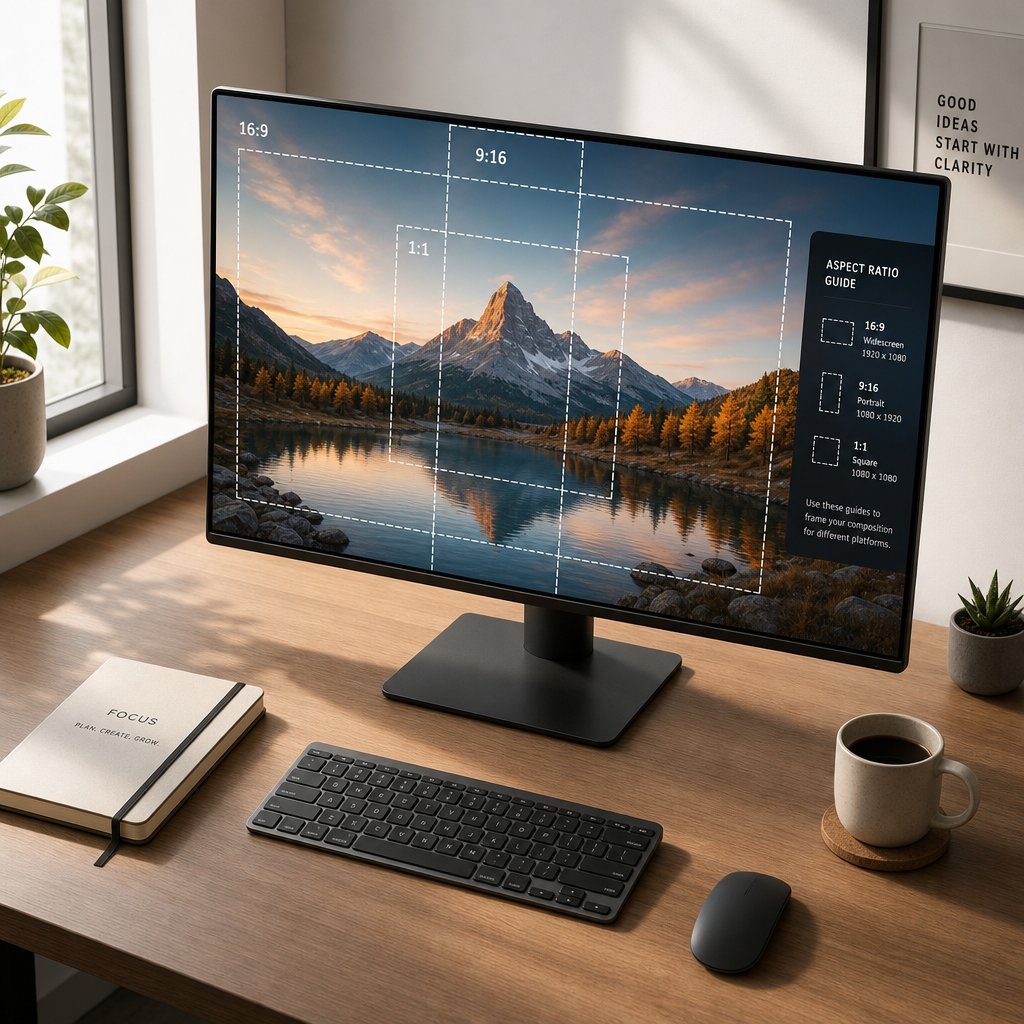
Resolution and aspect ratio
Aim for at least 1920 x 1080 pixels (Full HD). For 4K output or room to crop and zoom, start at 3840 x 2160 or higher. More pixels give AI tools more to work with and keep the result from going soft.
Aspect ratio decides how the video fits the screen. As Synthesia's aspect ratio guide notes, the wrong ratio gets you black bars or an awkward crop. Pick yours based on where the video will live:
- 16:9 (widescreen) for YouTube, desktop, and presentations.
- 9:16 (vertical) for Instagram Reels, TikTok, and YouTube Shorts.
- 1:1 (square) for Instagram feed posts and Facebook ads.
- 4:5 (tall) for Instagram in-feed video that grabs more screen height without going fully vertical.
If your photo doesn't match the target ratio, crop it yourself before converting so you choose what stays in frame instead of letting the tool guess.
Composition that animates well
Some photos move better than others, and it depends on your method. For parallax, you need clear separation between foreground and background, like a subject in front of a blurred cityscape. Flat scenes where everything sits on one plane produce weak depth.
For AI motion, choose images with implied movement already in them: ocean waves, flowing hair, drifting clouds, a busy street. The AI reads those as cues for what should move. A brick wall or a flat graphic gives it nothing to animate.
For Ken Burns, wide shots with detail across the frame work best, since the whole point is guiding the eye from one area of interest to another.
File format and a quick checklist
PNG is lossless and ideal when you want maximum detail for AI processing. JPEG is smaller and faster but loses a little quality each time you re-save it, so work from the original file rather than a copy of a copy.
On iPhone, if you need broader compatibility, switch the camera from HEIF to JPEG under Settings > Camera > Formats, or just share the photo, which converts it automatically. Many image-to-video tools accept HEIF directly, but JPEG and PNG are the most widely supported.
If your source is low-res, run it through an AI upscaler before converting. As QuestStudio's upscaling guide points out, good upscaling rebuilds detail rather than just enlarging. Keep enhancement light: aggressive sharpening creates halos and hard edges that look worse once the image starts moving.
- Resolution: 1920 x 1080 minimum, 3840 x 2160 for 4K.
- Aspect ratio: crop to your destination before converting.
- Format: PNG for quality, JPEG for smaller uploads.
- Compression: don't re-save JPEGs repeatedly.
- Color: sRGB for web and social.
Step 2: Choose the Right Method
Match the method to your goal. AI generation and cinemagraph loops grab attention fast, which suits social content and ads. AI motion and parallax add depth and a premium feel to product images, and parallax gives artistic projects a handcrafted, cinematic quality. For slideshows and presentations, Ken Burns pan-and-zoom keeps things moving without overwhelming the viewer.
Here's how the four approaches compare on the practical details:
| Method | Best for | Difficulty | Typical length | Tools |
|---|---|---|---|---|
| AI generation | Social ads, product marketing, creative content | Beginner | 2-10 sec | Browser AI platforms (free and paid) |
| Ken Burns (pan & zoom) | Presentations, documentaries, memorial videos | Beginner | 5-30 sec | iMovie, CapCut, DaVinci Resolve, Canva |
| Parallax / 2.5D | Artistic projects, cinematic intros, storytelling | Intermediate-advanced | 3-15 sec | After Effects, Photoshop + editor, parallax apps |
| Slideshow with transitions | Photo compilations, event recaps, memories | Beginner | 30 sec+ | Canva, Animoto, any slideshow maker |
AI generation vs. traditional effects
The real difference is whether the tool invents new visual information or just repositions what's already there. AI generation analyzes the image, infers depth and object edges, and synthesizes new frames, so water ripples and fabric sways like recorded footage. Ken Burns and parallax move existing pixels: a start keyframe, an end keyframe, and the software fills the gap, with parallax adding the depth-layer trick on top.
AI gives you an impressive result with little effort but less control over exactly how things move. Traditional effects give you frame-accurate control but require manual setup and produce subtler motion. Plenty of creators do both, generating base motion with AI and adding a gentle Ken Burns drift for polish.
If you're starting out and want zero cost, CapCut and Canva have one-click Ken Burns and simple AI motion built in, and several browser generators turn a photo into a short clip in under a minute. Paid tiers unlock longer durations, higher resolution, and watermark-free exports, worth it once you're producing regularly. For serious parallax, After Effects with depth-mapping plugins is the professional route. Pick the method that fits your goal and skill level now; you can level up later.
Step 3: Create Your Video With AI Tools
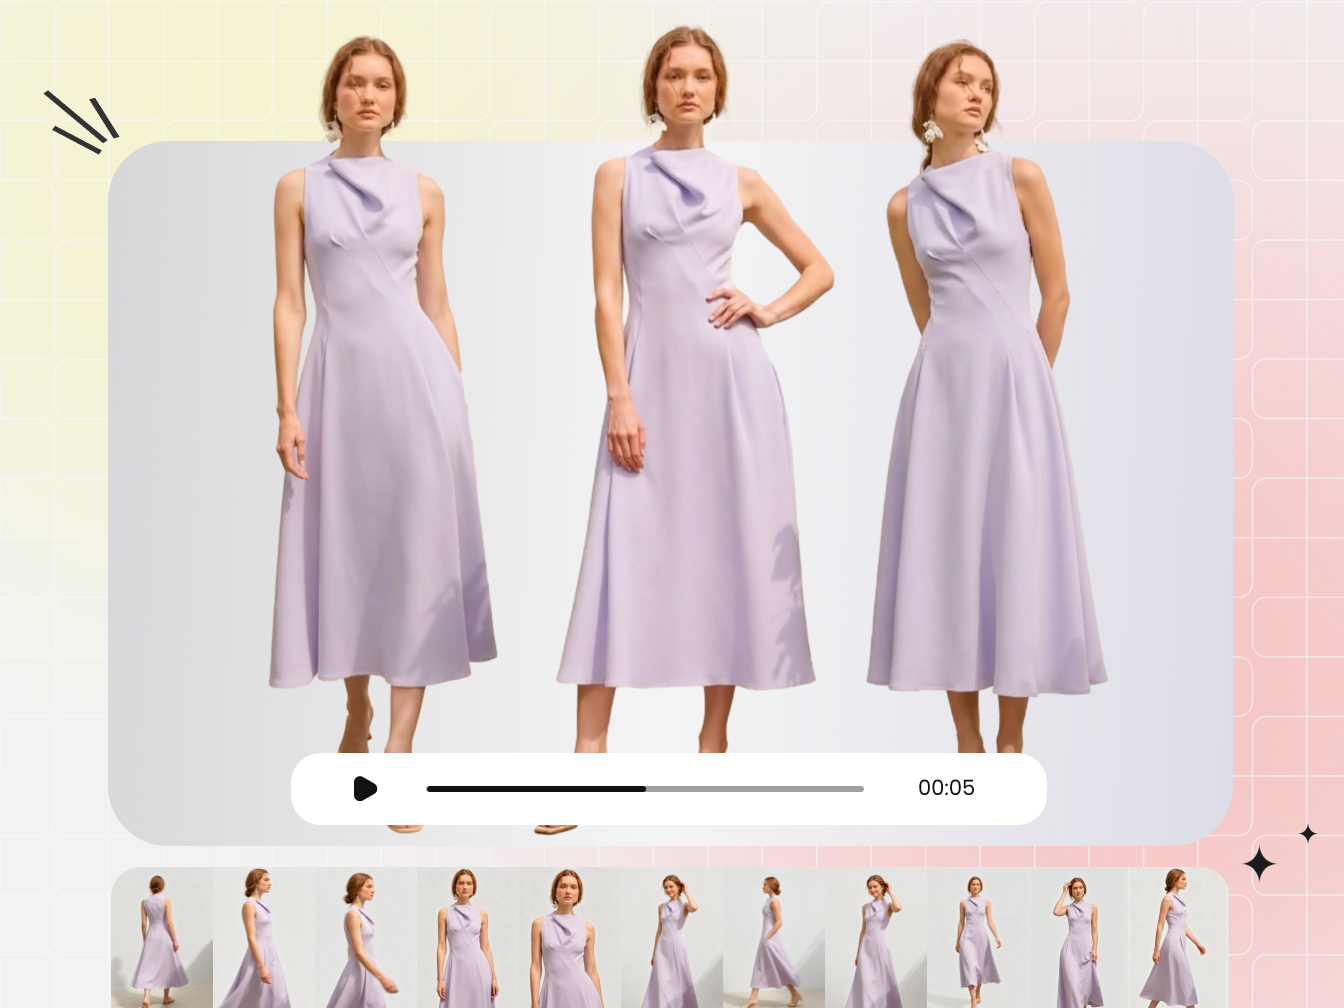
To make a video from a single image with AI, upload the photo, describe the motion you want (or let the tool auto-detect it), set your duration and aspect ratio, and generate. For a simple scene the whole thing takes a few minutes.
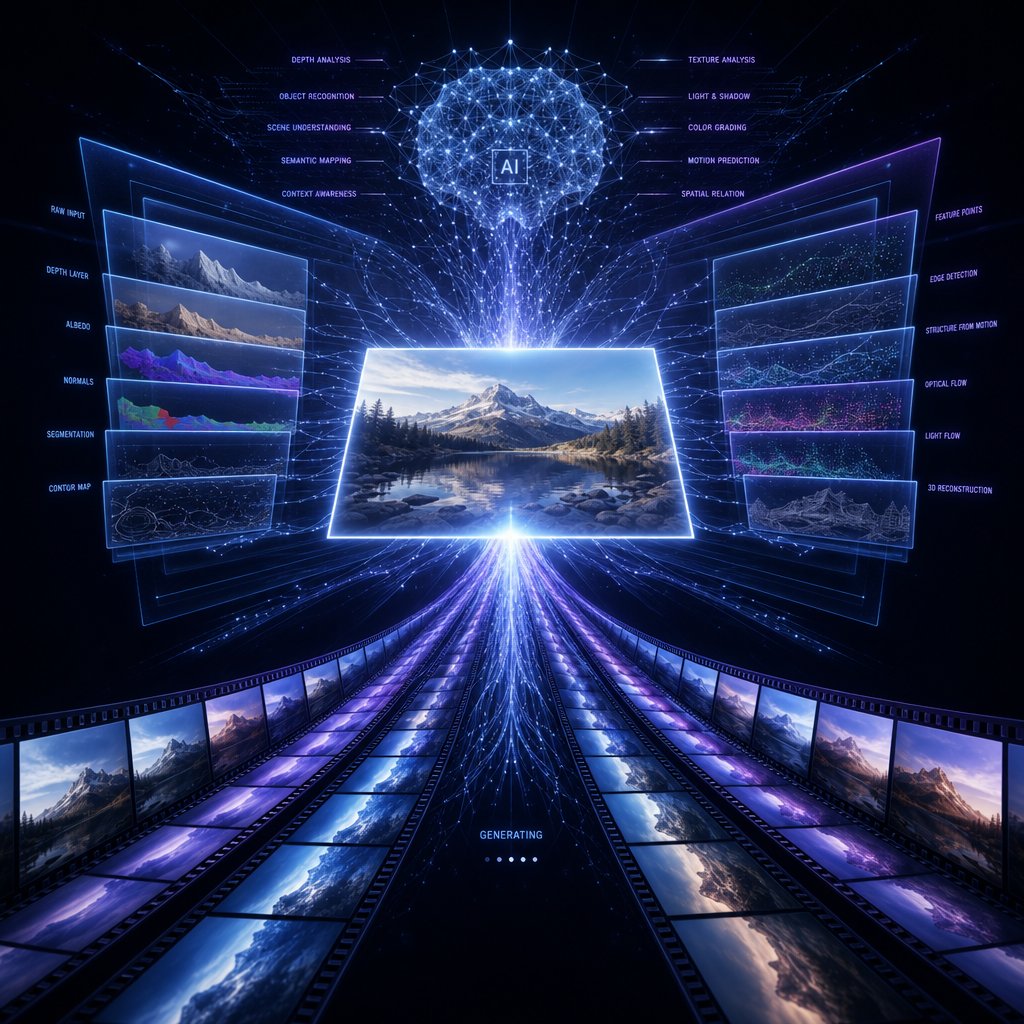
How AI reads motion from a still
When you upload an image, the model first estimates a depth map, working out which elements sit near the viewer and which recede. A person in front gets tagged "near," the sky behind them "far." Then it identifies object boundaries and content it recognizes, such as water, hair, fabric, and clouds, all things with predictable real-world motion. From that, it generates new frames showing plausible movement.
Because it's creating new pixel data rather than nudging existing pixels, the output can look genuinely recorded. It's also why it sometimes warps: complex scenes with overlapping objects or odd perspectives can confuse the depth estimate, producing unnatural motion in a corner of the frame.
The generation workflow
The platforms differ, but the steps are nearly identical:
- Upload your image. A high-resolution PNG or JPEG that meets the prep standards above. Most tools take a drag-and-drop in the browser.
- Write a motion prompt, or use auto-detect. Type something like "camera slowly pushes in while wind moves through the trees," or let the tool decide. Prompts give you control; auto-detect is faster but less predictable.
- Set duration and aspect ratio. Most tools generate 2-10 second clips. Shorter clips tend to come back cleaner with fewer artifacts.
- Choose motion intensity. Low produces subtle drift; high produces dramatic movement but raises the risk of glitches.
- Generate. Processing runs from under a minute to a few minutes depending on the platform and resolution.
- Review and iterate. If the motion looks off, adjust the prompt and run it again. Generating a few variations with slightly different prompts gives you options to compare.
Browser-based tools
You no longer need installed software or a powerful GPU; browser platforms do the processing on their servers, so you can work from a laptop, tablet, or phone. For product marketers and online sellers who need to turn static product shots into ad and storefront assets, Snappyit's Image to Video tool is built for that workflow, with quick turnaround and no installation. Other tools lean different ways: some specialize in stylized artistic transformations, others in photorealistic portrait and landscape motion, and a few integrate soundtrack generation so you describe a mood and get matching ambient audio.
Whatever you try, test it with your own content, not a sample photo. Free tiers cap resolution or duration or add a watermark, but they're enough to judge whether a tool's motion style fits before you pay.
Step 4: Apply Ken Burns and Parallax Effects
AI motion is impressive but hard to steer. Traditional techniques put you in charge: you decide where the camera starts and ends, how fast it moves, and which elements shift relative to each other. That frame-level control is why professionals still reach for them. Three techniques dominate: Ken Burns, parallax, and cinemagraph loops.
Ken Burns pan and zoom
The Ken Burns effect glides across or zooms into a still over time, using just two keyframes. Here's the workflow in popular editors:
- Place the image on the timeline. Drag it into iMovie, CapCut, or DaVinci Resolve and set the clip to your target length, usually 5-15 seconds for a single shot.
- Open the transform controls. In iMovie, click crop and pick the Ken Burns option. In CapCut, use scale and position in the Basic tab. In DaVinci Resolve, keyframe Transform properties in the Inspector.
- Set the start keyframe. Frame where the eye begins, whether that's the full scene for a zoom-in or a detail for a pan.
- Set the end keyframe. Move the playhead to the clip's end and adjust scale and position. A zoom from 100% to 110% over 5 seconds reads as a gentle push-in.
- Preview and refine. If the motion feels rushed, lengthen the clip. If it feels static, widen the gap between start and end.
Keep it restrained. Even a 5% zoom adds enough energy to hold attention without pulling focus from the content.
Parallax 2.5D with layer separation
Parallax fakes depth by separating the image into layers and moving them at different speeds, so the foreground travels faster than the background. It takes more setup than Ken Burns, but the result feels three-dimensional even though every layer is flat.
- Separate into depth layers. In Photoshop, isolate the foreground subject onto its own layer (Quick Selection, Subject Select, or the Pen tool), then duplicate the background and use Content-Aware Fill to rebuild the area hidden behind the subject. You want at least two clean layers, plus a midground for complex scenes.
- Generate a depth map (optional). An AI depth-estimation tool produces a grayscale map (white = near, black = far) that helps you decide where to split layers and how much each should move.
- Import layers into your editor. After Effects is the standard, but DaVinci Resolve's Fusion page and even CapCut can handle basic parallax. Stack each layer in depth order.
- Apply differential movement. In After Effects, push the background further from the camera in Z-space. In simpler editors, keyframe the background to move a few pixels while the foreground moves more, in the same direction.
- Add a subtle camera move. A lateral drift or slow push of around 2-3% of the frame width over 5 seconds activates the parallax without exposing edge gaps where your layer reconstruction ends.
- Polish. A slight Gaussian blur on the background simulates shallow depth of field; a faint dust or light-leak overlay between layers reinforces the space.
The classic mistake is overdoing the movement. Subtle shifts look cinematic; aggressive ones expose the seams and break the illusion. Aim for an almost subconscious sense of depth.
Cinemagraph loops
Cinemagraphs freeze most of the frame while one element loops seamlessly, like steam off a mug or a flag rippling. The contrast between stillness and motion holds attention longer than either a photo or a full video.
- Get motion for one element. Start with a few seconds of real footage, or if you only have a still, generate a short AI clip with motion in your target area (water, smoke, hair) and bring that in.
- Find the loop point. Trim to a segment where the motion cycles naturally; water and smoke loop more easily than human gestures, usually 2-4 seconds.
- Freeze the static areas. Put the original still on a layer above the clip and mask in only the area where motion should show through.
- Feather the mask. A 5-15 pixel feather blends the moving area into the frozen surroundings, especially where motion meets stillness, like water against a rock.
- Make it seamless. Cross-dissolve the last 10-15 frames into the first to hide the jump, then export as a looping video or GIF.
Cinemagraphs work best when the moving element is something viewers expect to see in motion, and when that area stays small relative to the frame. Too much movement and you just have a video; none and you have a photo.
Step 5: Write Better Prompts for AI Motion
With AI generation, the quality of your output depends almost entirely on the prompt. "Make it move" gives you generic, lifeless results; a prompt that names the camera behavior, the subject motion, and the mood gives you movement that looks directed. Treat the prompt as creative direction for a cinematographer.
The four parts of a good prompt
- Camera movement. Use terms the model knows: slow dolly push-in, gentle orbit, smooth pan left, locked-off shot, crane up, pull-back reveal. "Interesting angle" gives it nothing to act on.
- Subject motion. Name what moves and how. "Hair sways gently in the breeze" beats "add some movement."
- Speed and intensity. Words like gentle, slow, and gradual produce calm drift; rapid, dramatic, and dynamic push harder. Match it to the mood.
- Style. An aesthetic anchor like cinematic depth of field, documentary realism, or commercial product aesthetic taps conventions the model learned in training.
Lead with the subject, add the action, then the camera, then the atmosphere. That order helps the model prioritize instead of weighing every detail equally.
Templates to start from
Adapt the bracketed parts to your image:
Product: "Close-up of [product] on [surface], slow 360-degree orbit, soft diffused lighting from left, clean commercial aesthetic, subtle reflections shifting on surface"
Portrait: "[Subject] with gentle breeze moving hair, shallow depth of field, slow dolly push-in toward eyes, warm golden-hour lighting, cinematic mood"
Landscape: "[Scene], clouds drifting slowly across sky, water rippling naturally, camera pans right revealing the full vista, peaceful atmosphere"
For old or faded photos, tell the AI what to leave alone. Adding "maintain original color palette, preserve facial features, no morphing" stops it from over-interpreting and distorting the source while still adding natural motion.
What produces awkward motion
- Contradictory instructions. "Fast-paced action" and "slow contemplative mood" in one prompt confuse the model. Pick one energy and commit.
- Impossible physics. Asking a solid object to flow like liquid produces warping. Keep motion grounded in the real world.
- Too many subjects. Five elements moving five ways overwhelms the model. Stick to one or two primary motions per clip; for complex choreography, generate several short clips and edit them together.
- No motion cues. A purely descriptive prompt with no movement words gives you flat output. Always say how something moves.
- Cramming a short clip. A 4-second clip can't hold a pan, a zoom, a walk, and an atmospheric shift. Keep the prompt proportional to the length.
Start with a basic prompt, generate, then change one variable at a time. That way you learn which words deliver the motion you want and build a vocabulary you can reuse.
Step 6: Add Audio and Export
Even a two-second clip gains weight with the right sound, and once the audio is locked in, your export settings decide whether the result lands on-platform crisp or gets crushed by compression.
Choosing and syncing audio
You have four main sources. Royalty-free libraries like Artlist, Epidemic Sound, and Pixabay let you search by mood or tempo for commercially cleared tracks. AI tools like Suno and AIVA generate a custom track from a text description, sized to your clip with no licensing to chase. Ambient effects (waves, wind, rain) add atmosphere when a full track would be too much. And a voiceover turns a single animated frame into a complete explainer or product piece.
Work audio-first. Import your track, then trim the visual to match its natural phrasing, which gives cleaner edit points than forcing music onto a fixed-length clip after the fact. For a longer slideshow, pick the song before arranging images and map each transition to a beat so the cuts feel intentional.
Export settings by use case
The right configuration depends on where the video is going. Wrong settings leave it soft after compression or too big to upload.
| Use case | Format | Resolution | Frame rate | Bitrate (VBR) |
|---|---|---|---|---|
| Social (Reels, TikTok, Shorts) | MP4 (H.264) | 1080x1920 | 30fps | 5-8 Mbps |
| YouTube standard | MP4 (H.264) | 1920x1080 | 24-30fps | 8-12 Mbps |
| Website embed | MP4 (H.264) | 1280x720 or 1920x1080 | 24-30fps | 5-8 Mbps |
| Paid advertising | MP4 (H.264) | 1080x1920 or 1920x1080 | 30fps | 10-15 Mbps |
| Short loop (web/email) | GIF or MP4 | 480x480 to 720x720 | 15-24fps | 3-5 Mbps (MP4) |
| High-end portfolio | MOV (H.265) or MP4 | 3840x2160 | 24fps | 35-45 Mbps |
Use Variable Bitrate (VBR) rather than constant. It gives complex motion frames more data and static ones less, optimizing size without losing quality where it matters.
On frame rate, match the motion you created. Use 24fps for a cinematic feel with natural blur, ideal for Ken Burns, parallax, and slow AI clips. Use 30fps as the social and general-web standard. Reserve 60fps for genuinely fast motion, since it roughly doubles file size. For codecs, H.264 plays everywhere and is the safe default; H.265 (HEVC) hits similar quality at smaller sizes but support is patchy on older devices, so save it for archival or Apple-ecosystem delivery.
One last rule: export at the resolution you prepared for. Pushing a 1080p source out at 4K adds no real detail, and exporting a 4K source at 1080p throws away information you already have.
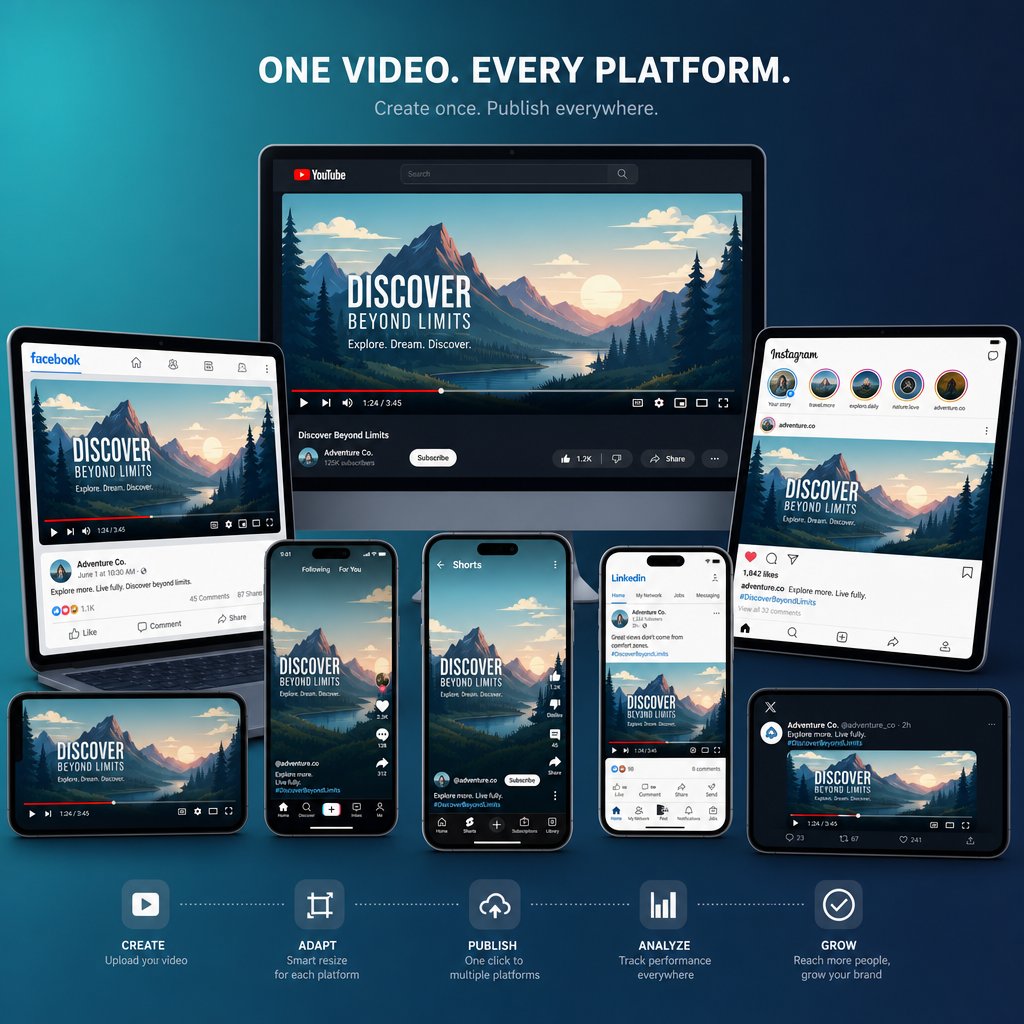
Step 7: Optimize and Publish to Each Platform
Uploading the same file everywhere is why videos show up cropped on TikTok, letterboxed on LinkedIn, or blurry on Instagram. Each platform has its own specs, so tailor your output to each destination.
Platform specs
Upload outside these boundaries and you'll get automatic compression, cropping, or rejection. The figures below draw on RecurPost's social video guide:
| Platform | Aspect ratio | Resolution | Max duration | Max file size |
|---|---|---|---|---|
| Instagram Reels | 9:16 | 1080x1920 | 15 min | 4GB |
| YouTube Shorts | 9:16 | 1080x1920 | 3 min | 15GB |
| TikTok | 9:16 | 1080x1920 | 10 min (organic) | 500MB |
| LinkedIn feed | 16:9, 1:1, or 9:16 | up to 4096x2304 | 10 min | 5GB |
| Facebook feed | 16:9 to 9:16 | 1280x720 to 720x1280 | 240 min | 10GB |
| Twitter/X | 16:9, 9:16, 1:1 | 1280x720 / 720x1280 | 140 sec | 512MB |
A few things to know: TikTok prioritizes native 9:16 and letterboxes anything else, which hurts reach. LinkedIn crops vertical video to square in the feed by default, so 16:9 or 1:1 displays more predictably there. Export one high-quality master, then crop and trim platform-specific versions from it rather than re-rendering each time.
Fixing common output problems
- Soft after upload. Platforms compress everything, and a low-res source makes it worse. Start at 1080p or higher, and for Instagram and TikTok push the bitrate to 8-10 Mbps so the encoder has more to work with.
- Cropping from a ratio mismatch. Exporting 16:9 to Reels cuts off the top and bottom. Match the export ratio to the platform before rendering, and keep critical elements within the center of the frame.
- File too big. TikTok's 500MB cap is the tightest. For TikTok, export 1080x1920 at 5-8 Mbps, which stays well under the limit for clips under a minute.
- Dark or color-shifted. Export in Rec. 709 with an sRGB profile. Skip HDR or wide-gamut unless the platform clearly supports it.
- Audio drift on longer clips. Make sure your timeline frame rate matches your export frame rate. A 24fps timeline exported at 30fps introduces timing shifts that compound over the clip.
Also mind the safe zones. Instagram Reels reserves space at the top and bottom for UI, and TikTok has similar overlays, so any text or logo placed there gets obscured during playback.
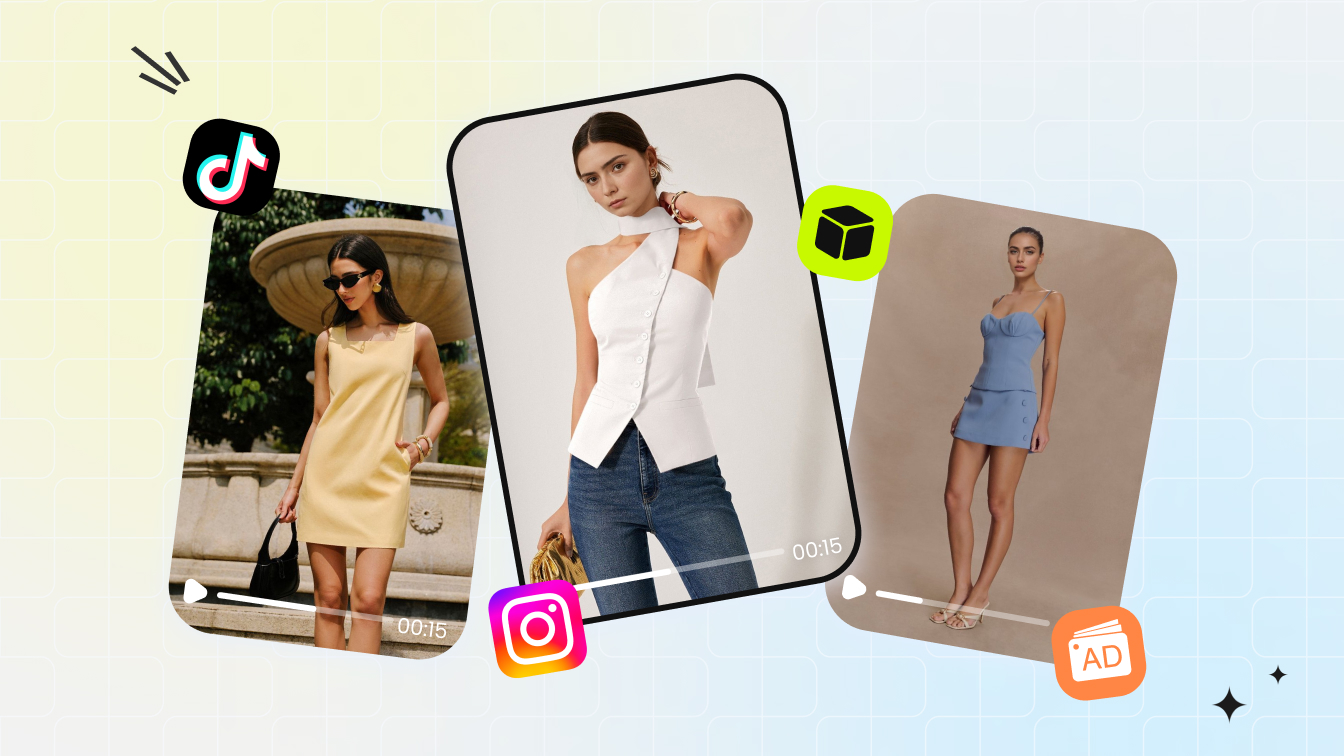
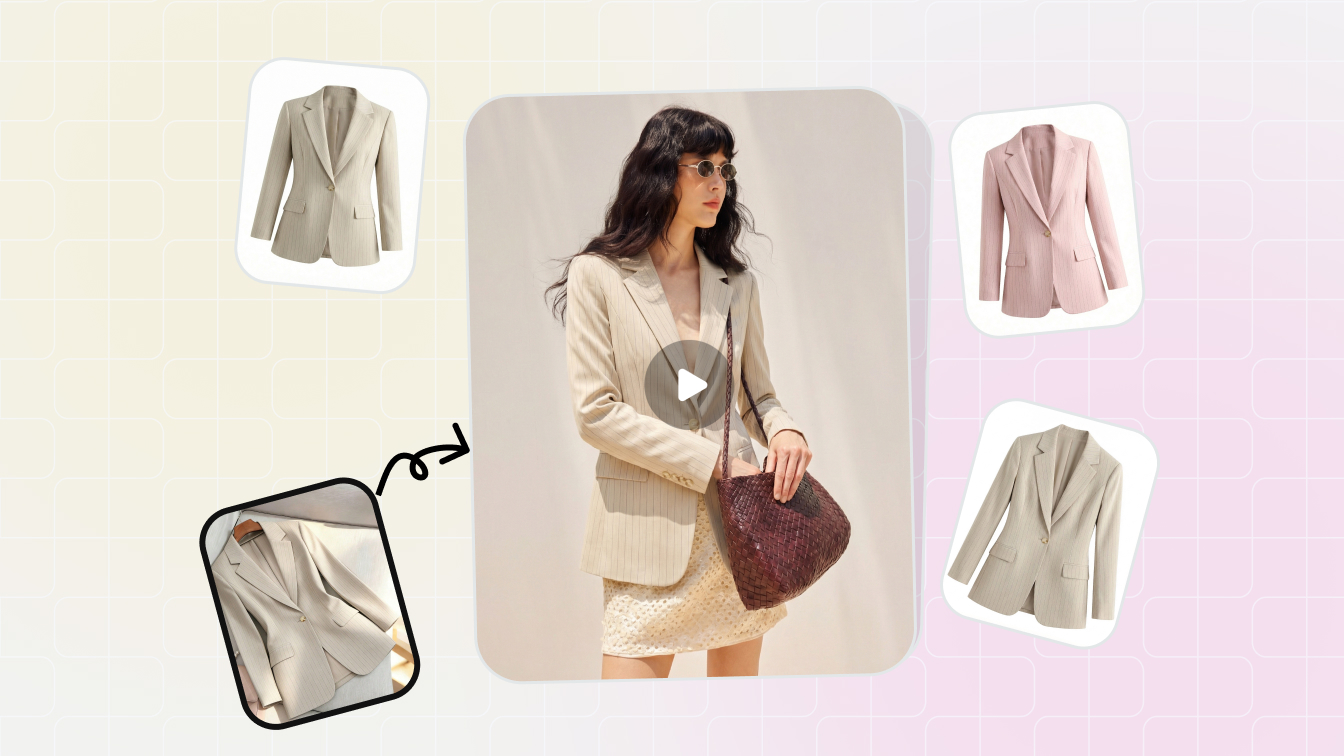
A faster workflow for product marketers
Sellers often have hundreds of static product shots that need to become video ads across platforms on tight deadlines, and applying Ken Burns or parallax to each one by hand doesn't scale. A streamlined version looks like this:
- Batch-prep your images. All at least 1080p, on clean backgrounds with good lighting, with distracting elements removed.
- Generate motion with a dedicated tool. Snappyit's Image to Video tool is built for this: upload a product shot, let the AI add motion suited to product content, and download the clip, all in the browser.
- Create platform versions. Reframe to 9:16 for Reels, TikTok, and Shorts; 1:1 for feed posts and LinkedIn; 16:9 for YouTube and website embeds, cropping from your master rather than re-rendering.
- Add captions and CTAs. Most social video is watched on mute, so overlay your value proposition visually: product name, key benefit, price, or call to action.
- Make the first frame the hook. The opening frame doubles as the thumbnail on most platforms. Lead with your most compelling visual, not a fade-in or a title card.
For length, short-form platforms reward completion rate, so keep product clips tight: roughly 9-15 seconds on TikTok, 15-30 on Instagram Reels and LinkedIn, and under 30 on YouTube Shorts. Since TikTok and Shorts auto-pick a cover frame, design your video so at least one clean frame in the first third works as a standalone image, with the product fully visible and unobstructed. With a good source image, the right tool, and platform-specific tweaks, a single photo becomes a content asset that works everywhere your audience is.
Frequently Asked Questions
Can I make a video from just one photo for free?
Yes. Several browser-based AI tools have free tiers that turn one image into a short clip, typically 2-5 seconds at 720p or 1080p, sometimes with a watermark. CapCut and Canva also offer free Ken Burns and basic animation that work with any still. For longer, higher-quality, watermark-free output, you'll usually need a paid plan.
What image resolution is best for making a video from a photo?
Start with at least 1920x1080 pixels (Full HD). If you plan to make 4K video or want room to zoom and crop, use a source at 3840x2160 or higher. More resolution gives AI tools more to work with and avoids the soft look that comes from upscaling. If your photo is below 1080p, run it through an AI upscaler before converting.
How long can an AI-generated video from a single image be?
Most AI image-to-video tools produce 2-10 second clips per generation. Some let you chain generations together to reach 15-30 seconds. For anything longer, combine AI clips with Ken Burns or parallax segments in an editor, or build a slideshow-style sequence using several animated versions of the same image with different motion directions.
What's the difference between the Ken Burns effect and AI video generation?
The Ken Burns effect moves existing pixels by panning or zooming across your image; no new visual information is created. AI generation analyzes the image, estimates depth and object boundaries, then synthesizes new frames showing plausible motion like flowing water or blowing hair. Ken Burns gives precise, predictable camera control, while AI produces more dramatic, realistic motion with less frame-level precision.
Which aspect ratio should I use for social media videos made from images?
Use 9:16 vertical for Instagram Reels, TikTok, and YouTube Shorts, since those platforms prioritize native vertical content and crop or letterbox everything else. Use 1:1 square for Instagram feed posts and Facebook ads, and 16:9 widescreen for standard YouTube, LinkedIn feed content, and website embeds. Crop your source image to the target ratio before converting rather than letting the tool handle it.
Animating a still is one move among many in Snappyit's broader AI product photography stack.