What "clearer" actually means — and can a blurry photo be fixed?
When sellers say a product photo "isn't clear," they usually mean one of three different problems wearing the same costume: the image is too small (it pixelates the moment a buyer zooms), it is soft (focus or depth-of-field missed the product), or it is noisy/blocky (high-ISO grain or stacked JPEG compression). Each has a different cause and a different fix, so the first job is diagnosis, not reaching straight for a filter.
The honest short answer to "can a blurry photo be made clear?" is: partly, and it depends entirely on why it is blurry. AI clarity tools genuinely rebuild plausible sharpness and texture — but super-resolution is what researchers call an ill-posed problem, meaning one low-resolution input maps to many possible sharp outputs (see the framing in Blau & Michaeli's "Perception-Distortion Tradeoff," CVPR 2018). The model has to guess the missing detail. That guess can look superb, but it is a reconstruction, not a recovery of detail your camera never recorded.
So the realistic goal is not magic. It is to take a photo that is fundamentally intact but small or slightly soft and carry it up to a sharp, marketplace-grade image — then to know which problems no software can solve, so you fix those at the shoot instead. That is the arc of this guide.
Why product photos look blurry, soft, or low-res
Unclear product photos come from two families of problems. The first is baked in at capture; the second is destroyed in handling after a perfectly good photo existed.
Capture-stage causes:
- Motion blur from hand shake during the exposure — the single most common reason phone product shots look "blurry."
- Missed focus or too-shallow depth of field — the product looks soft even though nothing moved, because focus landed on the wrong plane or a wide aperture left part of the item out of focus.
- High-ISO noise — shooting in low light forces a high ISO, which amplifies grain that reads as cheap and "low quality."
Handling/pipeline causes (the photo was fine, then a workflow wrecked it):
- Tiny supplier thumbnails. AliExpress/Alibaba listing thumbnails are downscaled, recompressed copies — not the real source file.
- JPEG generation loss. Every time a JPEG is opened and re-saved it is recompressed; per Wikipedia's "Generation loss" entry, copying a file is lossless but re-encoding adds cumulative blocking and blur, and non-aligned crops/rotations degrade it further.
- Screenshots and chat apps. Messaging apps silently recompress and cap resolution — WhatsApp recompresses and caps most photos around 1280 px at low JPEG quality, which is especially destructive to sharp edges and small text.
Knowing which bucket you are in matters, because the next two sections fix opposite ends of the chain: capture habits stop the damage at the source, and only after that does an AI upscaler get a clean starting point to finish the job.
Fix it at the source first: capture-stage habits that beat any filter
The better your original file, the more trustworthy any later AI clarity step becomes — so spend five minutes here before touching software.
Kill motion blur
Most "blurry" handheld shots are camera shake. Per Photography Life's reciprocal-rule guide, your handheld shutter speed should be at least the reciprocal of the focal length (a 50mm lens needs ~1/50s, a 200mm needs ~1/200s), with a practical floor around 1/50s no matter the lens. High-resolution sensors expose shake more, so doubling the denominator is a safe habit. The real fix for studio work is a cheap tripod plus a 2-second timer — independent tests find tripod sharpness far surpasses in-body stabilization, and you should turn stabilization off on a tripod because it can introduce its own vibration.
Get the whole product sharp
Soft (not blurry) usually means missed focus or too-shallow depth of field. Per the principles of depth of field, a smaller aperture (larger f-number) deepens focus — most lenses are sharpest around f/8–f/11. Lock focus on the product (tap-to-focus on phones, single-point AF on cameras). For tiny items like jewelry, use focus stacking. But don't overdo it: stopping down past ~f/16–f/22 triggers diffraction, which makes the image softer again, so there's an optimal middle aperture rather than "smaller is always better."
Clean up noise with light, not ISO
Grainy, speckled photos are high-ISO noise. Raising ISO amplifies the signal and the read noise together, dropping the signal-to-noise ratio — and small phone sensors start at a disadvantage. The fix is at capture: add light (a window, a cheap LED panel, or a light tent) so the camera stays at low/base ISO, or put it on a tripod and use a slower shutter at low ISO instead of cranking the gain. A clean low-ISO capture beats rescuing a dark, noisy one every time.
Hunt down the largest original
Before you ever upscale, find the biggest real file. On AliExpress/Alibaba, right-click and "open image in new tab" to see the true pixel size, use the main listing image (not a thumbnail crop), and ask the supplier for their high-resolution image pack. A 2000px supplier original beats AI-upscaling a 300px thumbnail, because the thumbnail already threw the detail away. And never source your listing image from a screenshot or a chat-app forward — get the original transferred losslessly.
What AI clarity actually does (and why it beats plain resizing)
Here is the technical distinction that matters most for sellers. When you "enlarge" a photo in Preview or a plain Photoshop resize, the software uses bicubic interpolation — it averages neighbouring pixels to fill in new ones. As HTX S&S COE's writeup on interpolation vs. deep learning puts it, interpolation is information-preserving at best and information-destroying at worst — it can never be information-creating. So you just get a bigger, smoother, blurry photo.
AI super-resolution works differently. Instead of averaging, it reconstructs high-frequency detail — edges, fabric weave, stitching, text on labels — by drawing on patterns learned from millions of training images. That is what lets it sharpen, deblur, denoise, and remove JPEG blocking in one pass rather than just spreading existing softness across more pixels.
This is the engine behind Snappyit's free Product Photo Upscaler: it upscales toward 4K while sharpening, deblurring, and denoising, with no login, no watermark, single images or batches, and it flags which marketplace each result clears. Crucially it is clarity-only — it does not relight or recolor your shot, so your true colors and lighting are left alone (more on why that's a feature, not a gap, in the limits section). For the full picture of where AI fits into a seller's image workflow, see the AI product photography hub.
Try the free Product Photo Upscaler →
The honest limits: what AI clarity cannot do
An upscaler is a rescue-and-finishing tool, not a do-over. Selling it honestly to yourself saves you from publishing a result that looks crisp but wrong.
It cannot recover detail the camera never captured. Per a comprehensive review of deep-learning image restoration on ScienceDirect, once degradation exceeds a certain threshold, proper restoration becomes impossible — no model can hint at features that were never recorded. The practitioner version is blunter: feed it garbage and you get high-resolution garbage; feed it quality work that just happens to be small and you unlock real potential.
There are diminishing returns past ~4×. Super-resolution research shows strong results at 2× and 4×, but quality degrades sharply at 8× and beyond, where shimmering, fake edges, and obvious artifacts appear (one face-SR benchmark drops from 29.78 dB at 4× to 21.82 dB at 8×). That's why the realistic win is moderate upscaling of a decent source — and why the honest fix for an extreme jump is reshooting, not pushing the slider.
Sharp does not equal accurate. Because the problem is ill-posed, a generative model can output an image that is sharp and detailed yet completely incorrect — a redrawn logo that's crisp but wrong, or facial features that aren't quite the original. So always eyeball the output on logos, fine print, and patterns before publishing.
It is clarity-only — not lighting or color. Upscaling and denoising sharpen and clean while keeping your true colors and lighting intact; they will not fix a dim shot or correct a color cast. Those are capture-stage fixes (good light, white balance, and exporting in sRGB so colors don't render washed-out online), not something a clarity tool should pretend to do.
Hit the marketplace size and clarity specs
Hitting the resolution spec is the floor — it's what enables zoom, the feature shoppers use to inspect detail, and what keeps your listing from being rejected or held "unpublished." Here are the current thresholds (always re-verify against each platform's live docs, since they revise these):
| Marketplace | Minimum to publish | Zoom / recommended target |
|---|---|---|
| Amazon | 500 px longest side | 1,000 px enables zoom; 1,600 px+ recommended; max 10,000 px, JPEG preferred |
| Etsy | — | ≥2,000 px on the shortest side, 72 PPI |
| eBay | 500 px longest side | 1,600 px+ unlocks zoom/enlarge; eBay downsizes uploads over 1,600 px on the longest side |
| Shopify | — | Zoom above ~800×800 px; 2,048×2,048 px standard; max 5,000×5,000 |
| Walmart | 500×500 px (auto-unpublished below) | 1,500×1,500 px for zoom; 2,200×2,200 px recommended; newer 3:4 aspect rule for fashion |
The Amazon thresholds are corroborated across current seller guides such as Jungle Scout's image-requirements guide (confirm the canonical figures on Amazon Seller Central); Etsy's spec is keyed to the shortest side per Etsy's image requirements help; and Shopify's standard is documented in Shopify's image size guidelines.
One safe target clears almost everyone: export your main image at ~2,048–2,200 px on every side, square (1:1). That single file satisfies Amazon's recommended zoom, Etsy's shortest-side rule, eBay's zoom threshold, Walmart's recommendation, and Shopify's standard. The Product Photo Upscaler flags which marketplace each output meets, so you can confirm before listing — then crop to your required aspect ratio or pixel count before publishing.
Why clarity quietly drives clicks, trust, and conversion
"Big enough" is not the same as "sharp." A 2,000 px file that's soft, noisy, or motion-blurred still looks cheap the moment a buyer zooms — and that gap is exactly where clarity work pays off.
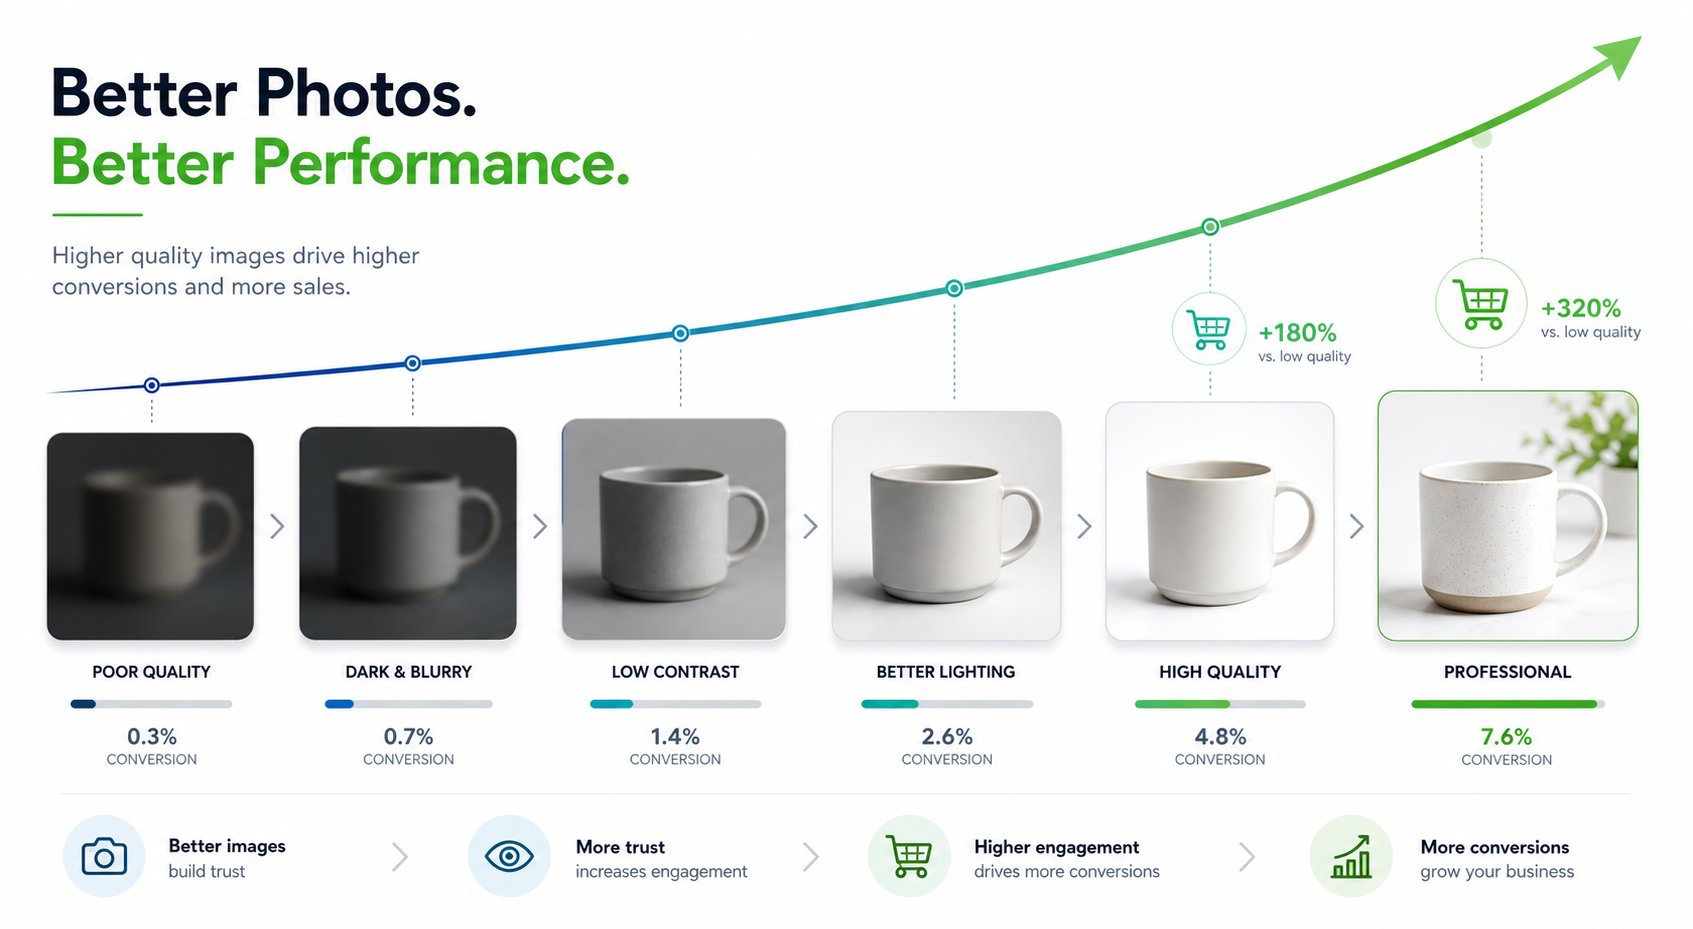
The most defensible evidence here is behavioral. Large-scale e-commerce UX testing from the Baymard Institute found that 56% of users' first action on a product page is to explore the images, yet 25% of sites still ship insufficient image resolution or zoom even for popular products. Test participants reacted to low-res images with comments like "this picture just sucks, I don't even know what that is" — and then extended that disappointment to the whole brand, judging the site as unprofessional and switching to a competitor.
So the mechanism is concrete and verifiable: shoppers look at images first, zoom is gated behind a hard pixel threshold, and unclear images measurably increase abandonment. (You'll see round-number stats online like "94% higher conversion for high-quality photos" — treat those as marketing folklore, since they lack a traceable primary source. The Baymard behavior and the platform zoom mechanics are the claims that actually hold up.) Low-res is also a visibility problem, not just a conversion one: below-minimum images get rejected or held on Amazon and Walmart, and sub-threshold files silently lose zoom on eBay and Amazon with no error message — just a quietly worse listing.

What "clear enough" means for clothing, jewelry, cosmetics and graphics
"Clear enough" is not one bar — it is whatever a buyer leans in to inspect before they trust the item, and that differs by category. Upscaling pays off most when it rebuilds the exact detail a category shops on:
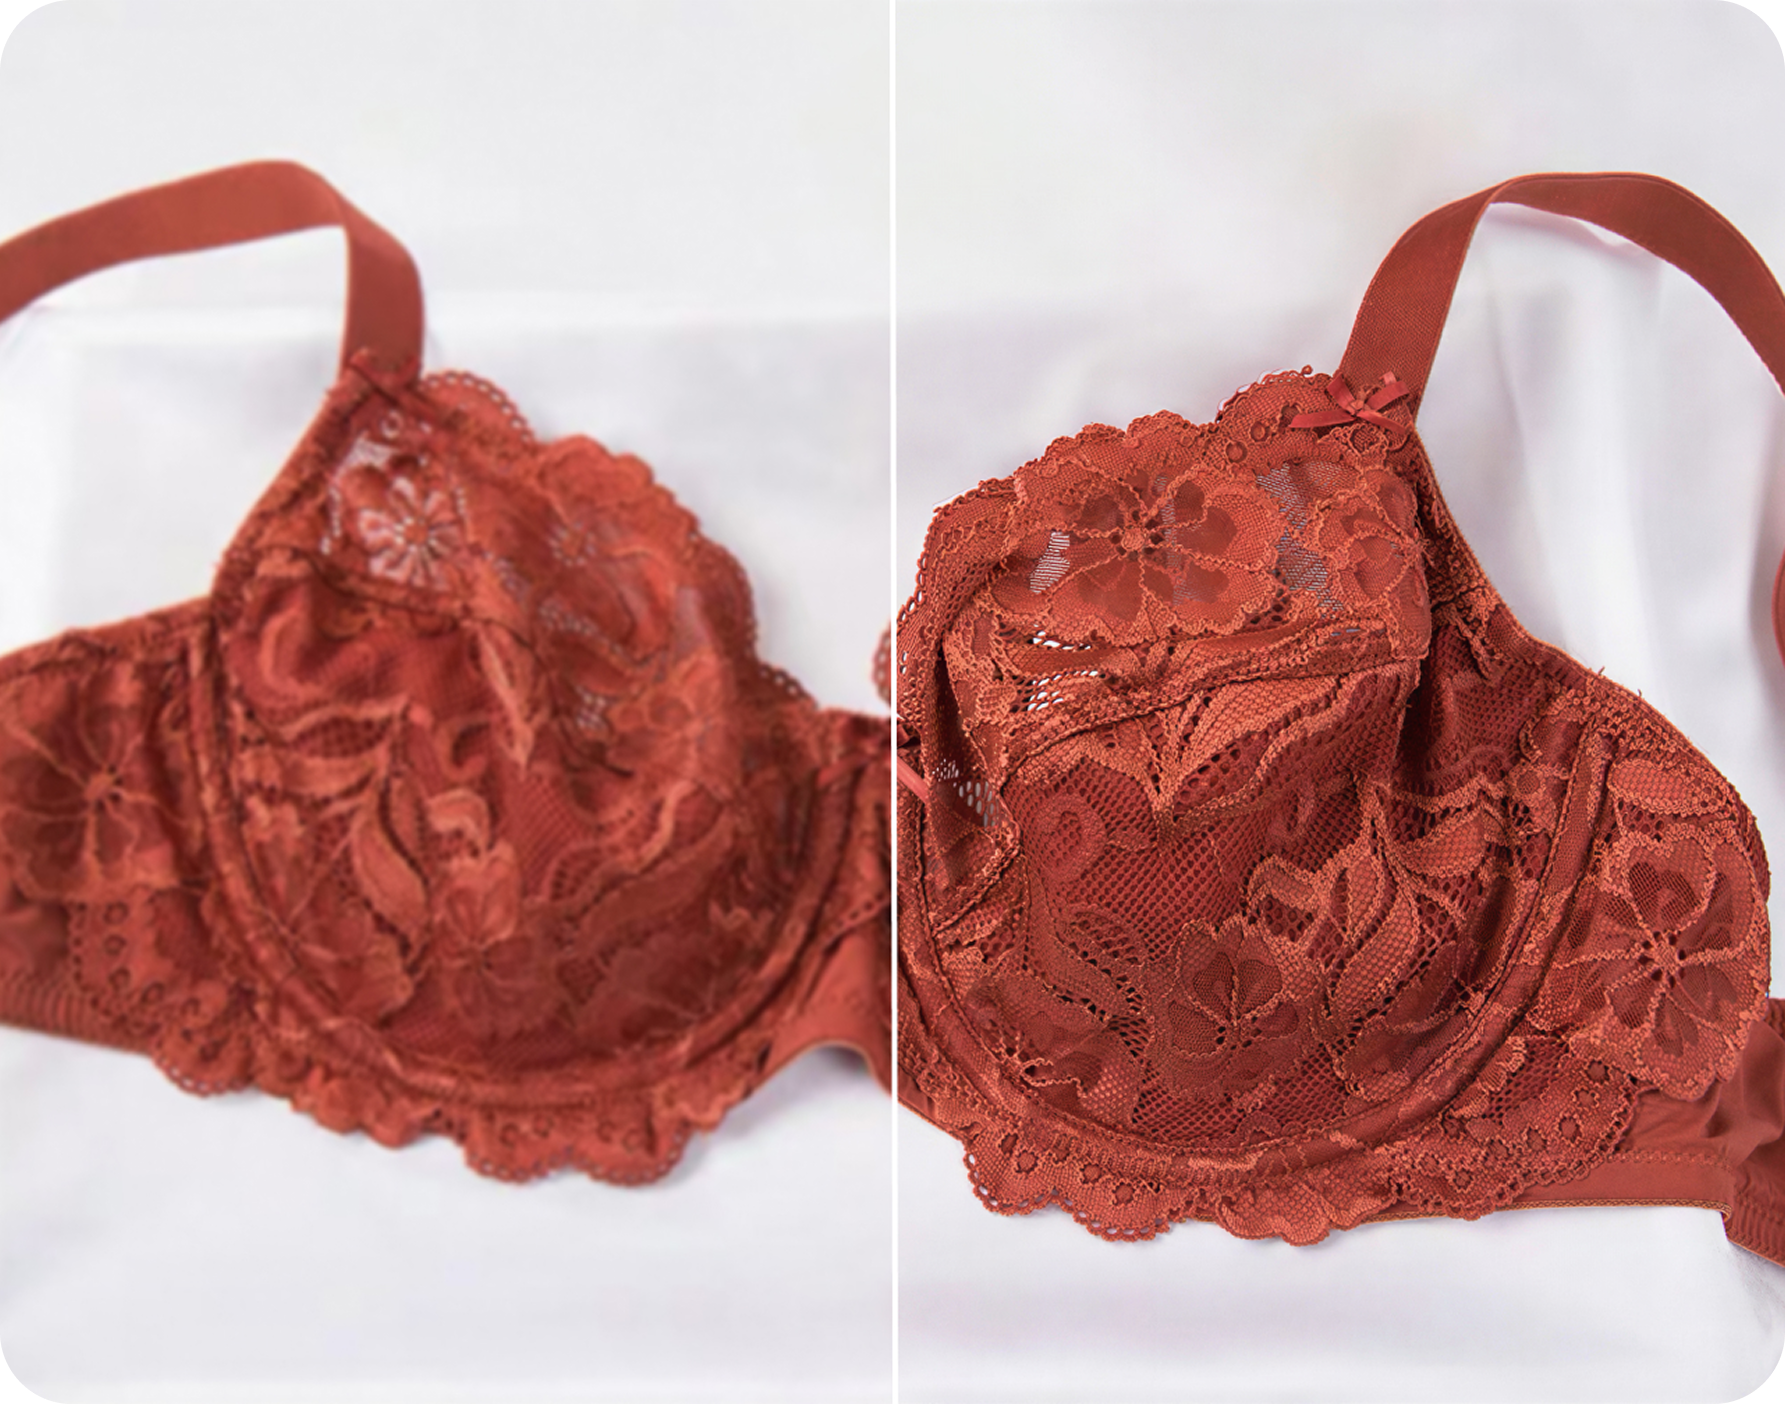
- Apparel. Buyers read fabric weave, knit gauge, stitching and seam finish to judge quality. Softness flattens texture into a vague blur, so a sharper, higher-res shot is what makes a garment look well-made instead of cheap.
- Jewelry. Tiny high-contrast detail — facets, prong settings, hallmark stamps, plated-versus-solid edges — only resolves at full resolution with clean edges. It is the category where hover-zoom matters most and where a soft photo quietly kills trust.
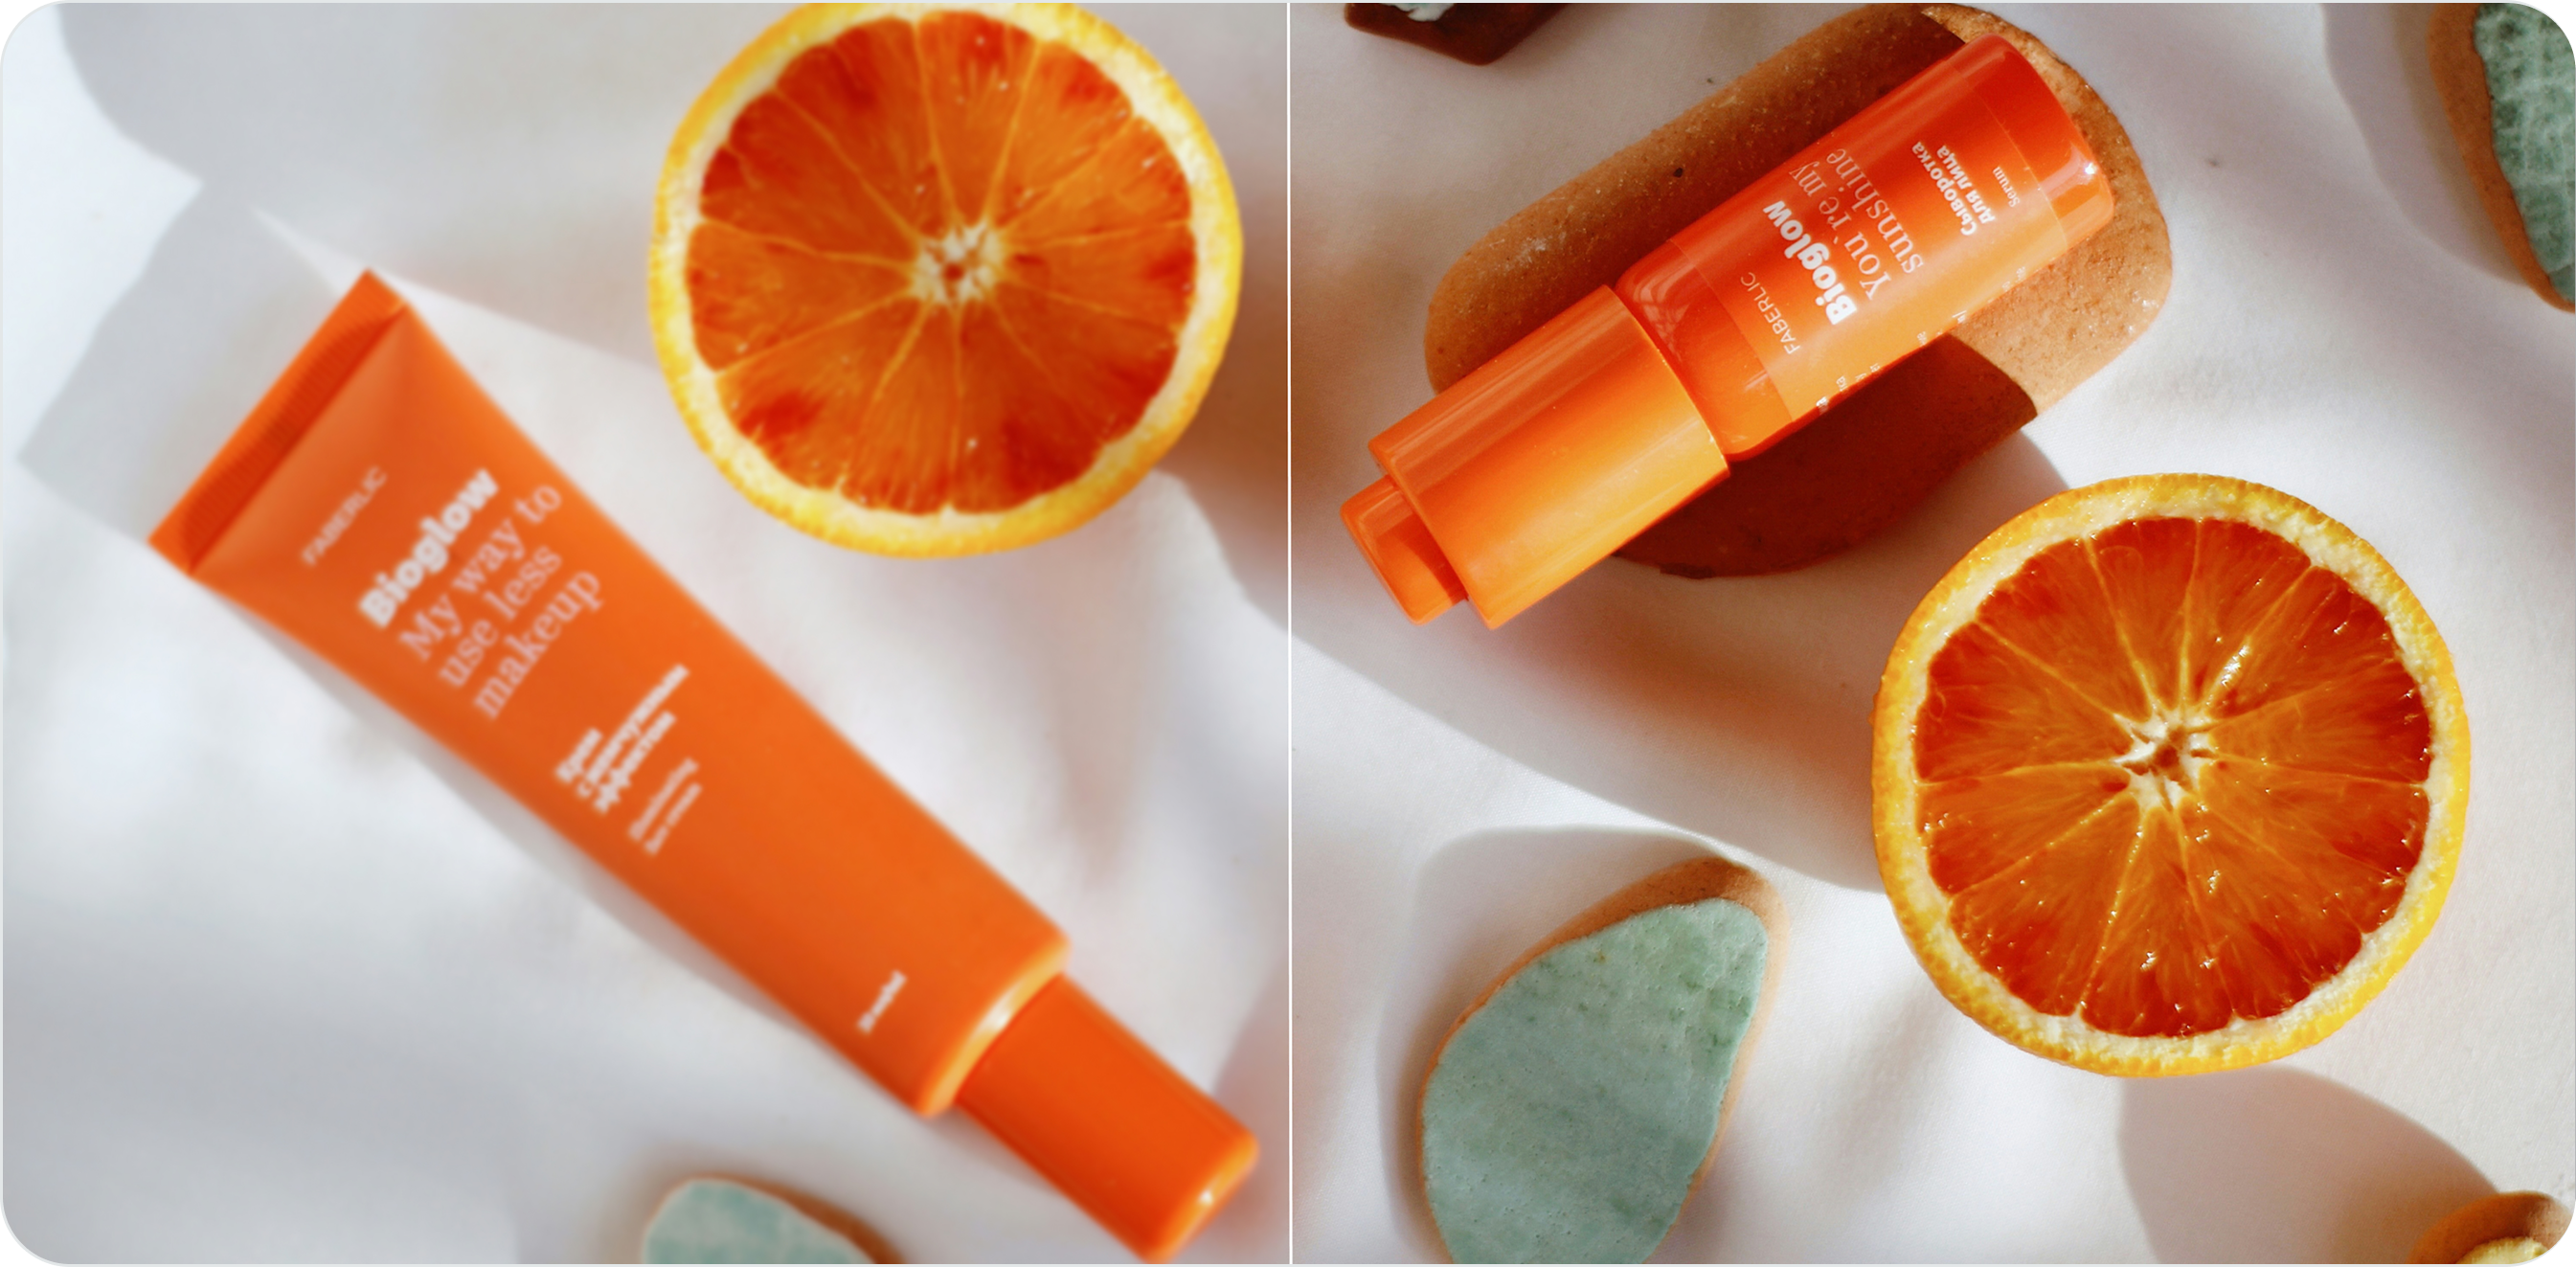
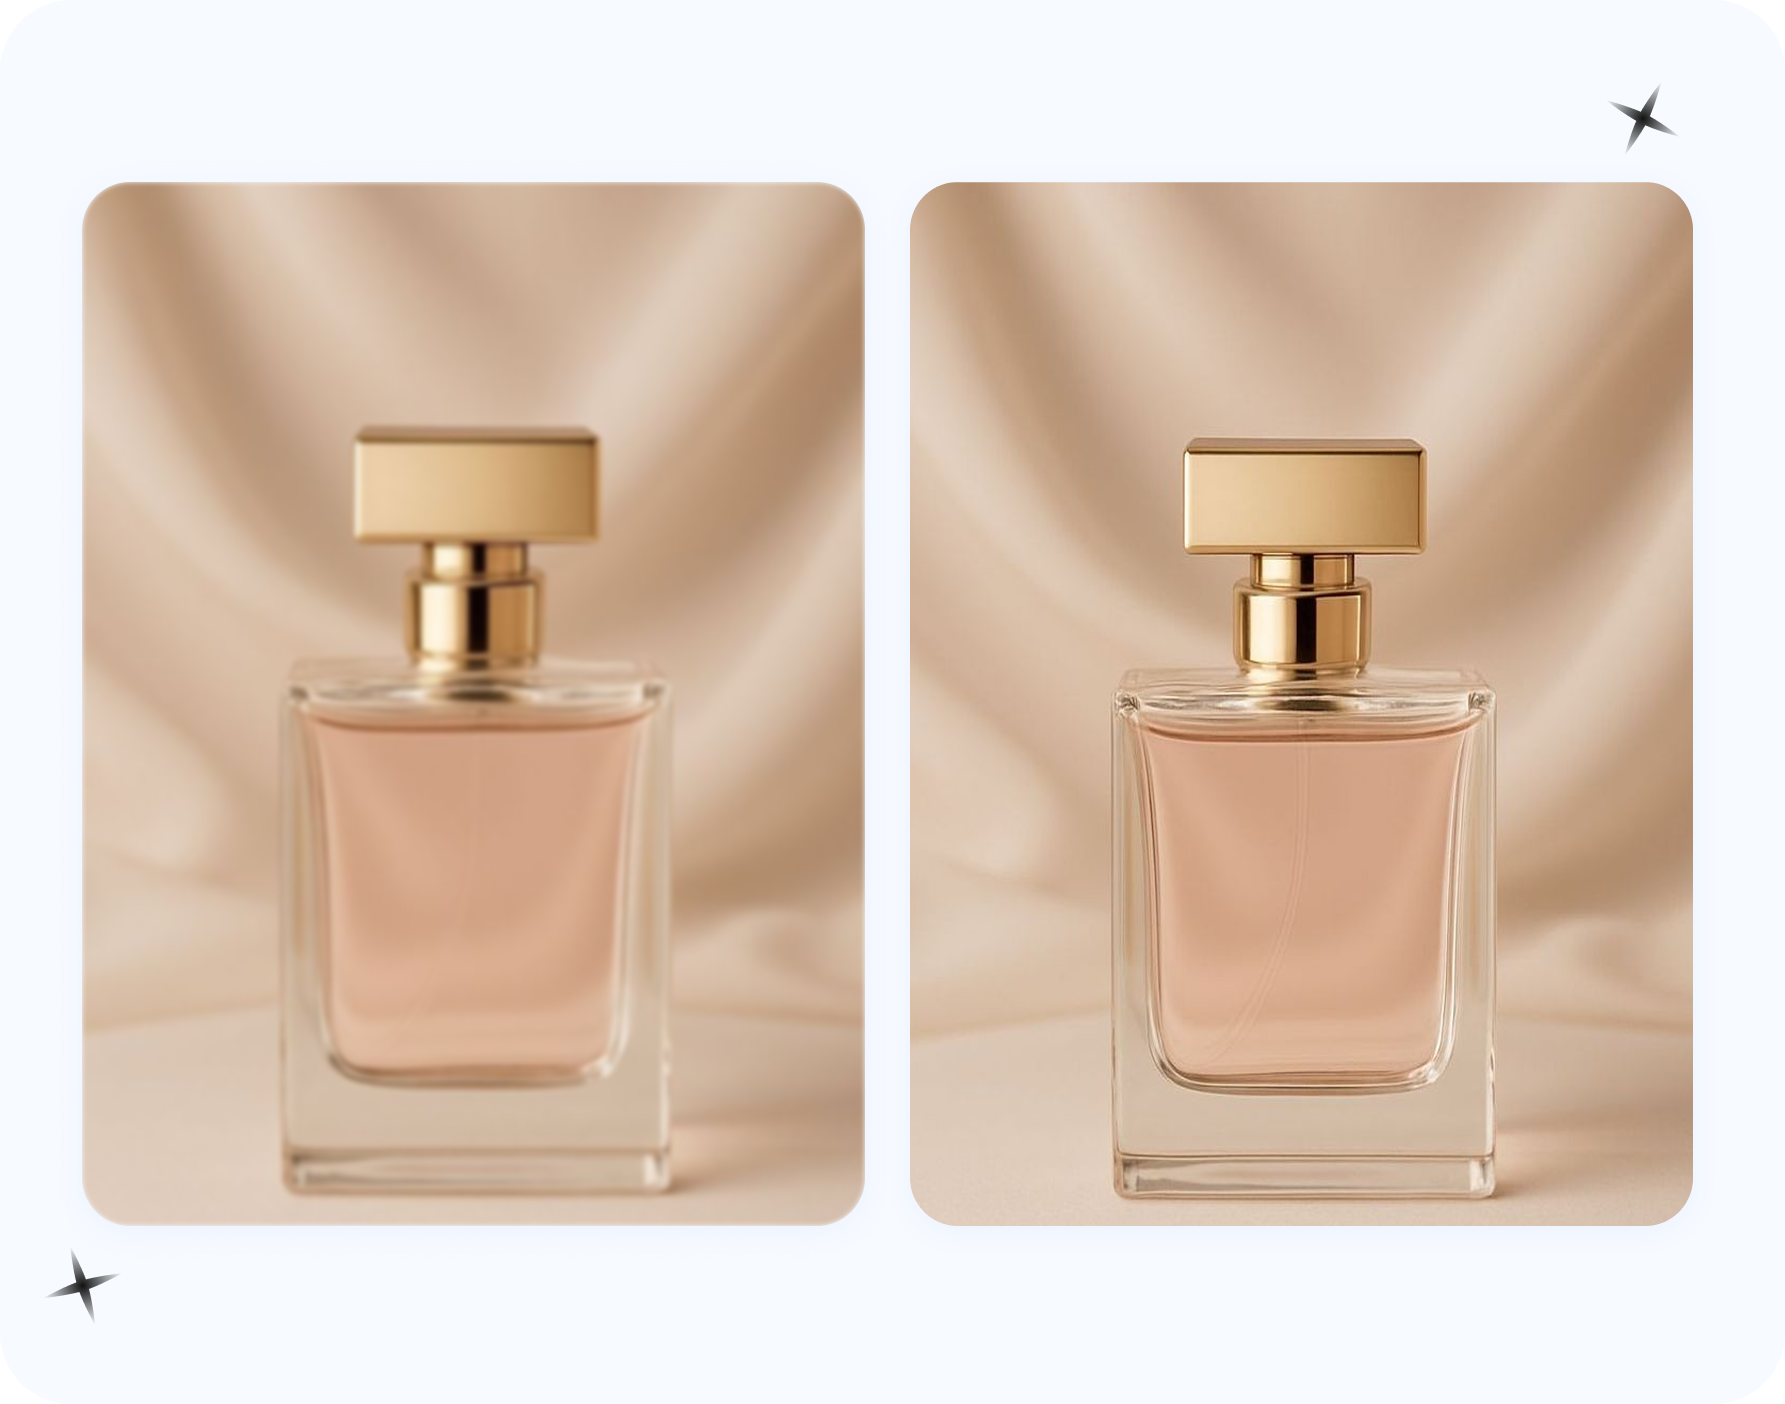
- Cosmetics and packaged goods. The selling detail is usually the label: ingredients, volume, claims, brand. When compression smears type into mush a product can read as counterfeit, so de-blocking and sharpening to restore legible text is the whole game.
- Graphics, prints and flat art. Hard edges and clean type are unforgiving — any softness or jaggedness shows instantly — so these gain from upscaling that holds crisp lines rather than re-blurring them.
The common thread: clarity is not vanity, it is the proxy a shopper uses for product quality. Snappyit's free Product Photo Upscaler is tuned for these exact surfaces — weave, sparkle, label text and clean edges — which is what separates a product-trained upscaler from a generic one. If you would rather weigh the free options side by side first, see our roundup of the best free AI image upscalers for ecommerce.
Step by step: how to make a single product photo clearer
Here's the workflow that gives you the best result with the least risk of fake-looking detail:
- Find the best original. Track down the largest, least-compressed version you have — the supplier's high-res pack, the original camera file, not a screenshot or chat-app copy. The bigger and cleaner the input, the more trustworthy the output.
- Diagnose the problem. Is it small (pixelates on zoom), soft (focus missed), or noisy (grainy)? If detail is genuinely missing — heavy motion blur, an out-of-focus label — accept that no tool will invent it correctly, and reshoot if that detail is load-bearing for the sale.
- Upscale, deblur, and denoise. Run the file through the free Product Photo Upscaler — no login, no watermark. Aim for a moderate jump toward 4K; stay near ~4× rather than forcing 8×+.
- Eyeball the result. Zoom into logos, text, stitching, and fine patterns. If the AI invented something wrong, that's where it shows — back off the magnification or reshoot rather than publishing a crisp-but-false detail.
- Check the marketplace flag and crop. Confirm the output clears your platform's zoom threshold; if you need a specific aspect ratio, crop to it before publishing.
- Export once, in sRGB. Save to JPEG a single time at the end so you don't restart the generation-loss cycle, and use sRGB so colors look right in browsers.
If you also need to drop the product onto a clean white background, do the background step after upscaling and check it doesn't shrink your file — see how to remove a background without losing quality.
Make a product photo clearer now →
Clearing a whole catalog at once
Fixing one photo is easy; the real pain is a catalog of hundreds of soft supplier images. The Product Photo Upscaler runs in batch, so you can drop in a folder of low-res or soft shots and sharpen them in one pass rather than one at a time — still free, still no watermark, with each result flagged for the marketplaces it clears.
A few honest cautions for bulk work. First, batch upscaling doesn't change the per-image limits: a tiny, heavily compressed thumbnail in the batch will still hit the same ceiling as it would alone, so don't assume volume rescues quality. Second, spot-check a representative sample for hallucinated detail on logos and text before mass-publishing — the failure modes don't disappear at scale. Third, if you're listing on Shopify, compress the sharpened outputs to roughly 100–300 KB each so you trade nothing for page speed; on marketplaces, keep the main image free of borders, added text, and watermarks to stay compliant — which a clarity-only tool does by design.
For sellers who also need backgrounds stripped across a catalog, pair this with Snappyit's free background remover — and read why full-resolution, watermark-free output matters so the cutout step doesn't quietly undo the clarity you just gained.
Frequently Asked Questions
Can AI actually make a blurry product photo clear?
Partly, and it depends on why it's blurry. AI super-resolution rebuilds plausible sharpness, edges, and texture by drawing on learned patterns, which genuinely rescues photos that are small or slightly soft but otherwise intact. It cannot recover detail your camera never captured, so heavy motion blur or a badly out-of-focus label has a hard limit — for those, reshooting beats any tool.
Will the upscaled photo look fake?
It can if you push it too hard. Quality stays believable at 2x to 4x but degrades sharply past 8x, where shimmering and fake edges appear. Because super-resolution is mathematically ill-posed, a result can look sharp yet be subtly wrong — so always zoom into logos, fine print, and patterns before publishing. Starting from a larger, cleaner original keeps the output trustworthy.
What resolution does Amazon need for product images?
Amazon requires at least 500 px on the longest side to publish, but zoom only activates at 1,000 px and Amazon recommends 1,600 px or larger for the best zoom experience, up to a 10,000 px maximum with JPEG preferred. Pros typically shoot 2,000 to 3,000 px. Confirm the canonical numbers on Amazon Seller Central, since the policy is periodically revised.
Is there one image size that works across Amazon, Etsy, eBay and Shopify?
Yes — export your main image at roughly 2,048 to 2,200 px on every side, square (1:1). That single file clears Amazon's recommended zoom, Etsy's 2,000 px shortest-side rule, eBay's 1,600 px zoom threshold, Walmart's 2,200 px recommendation, and Shopify's 2,048 px standard. The Product Photo Upscaler flags which marketplaces each output meets so you can verify before listing.
How is AI upscaling different from just enlarging the photo in Photoshop?
Plain enlarging uses interpolation, which only averages existing pixels and produces a bigger, softer, blurry image — it can never create new detail. AI super-resolution instead reconstructs high-frequency detail like fabric weave, stitching, and label text from learned patterns. That's the difference between a larger blurry photo and a genuinely sharper one.
Can I clear up my whole catalog at once?
Yes. The free Product Photo Upscaler runs in batch, so you can drop in a folder of soft or low-res images and sharpen them in one pass, with no login or watermark. Just note that batch doesn't change per-image limits — a tiny compressed thumbnail still hits its ceiling — so spot-check a sample for hallucinated detail before mass-publishing.
Will the upscaler change my product's colors or lighting?
No. Snappyit's Product Photo Upscaler is clarity-only: it sharpens, deblurs, denoises, and increases resolution while keeping your true colors and lighting intact. It will not fix a dim shot or correct a color cast — those are capture-stage fixes like better lighting, white balance, and exporting in sRGB, not something a clarity tool should pretend to do.
Should I fix the photo at the shoot or just upscale it later?
Fix it at the shoot first whenever you can. A tripod with a 2-second timer kills motion blur, shooting around f/8 to f/11 keeps the whole product sharp, and adding light lets you stay at low ISO to avoid grain. The cleaner the original, the more accurate and believable any later upscaling will be — capture habits come first, then the upscaler finishes the job.