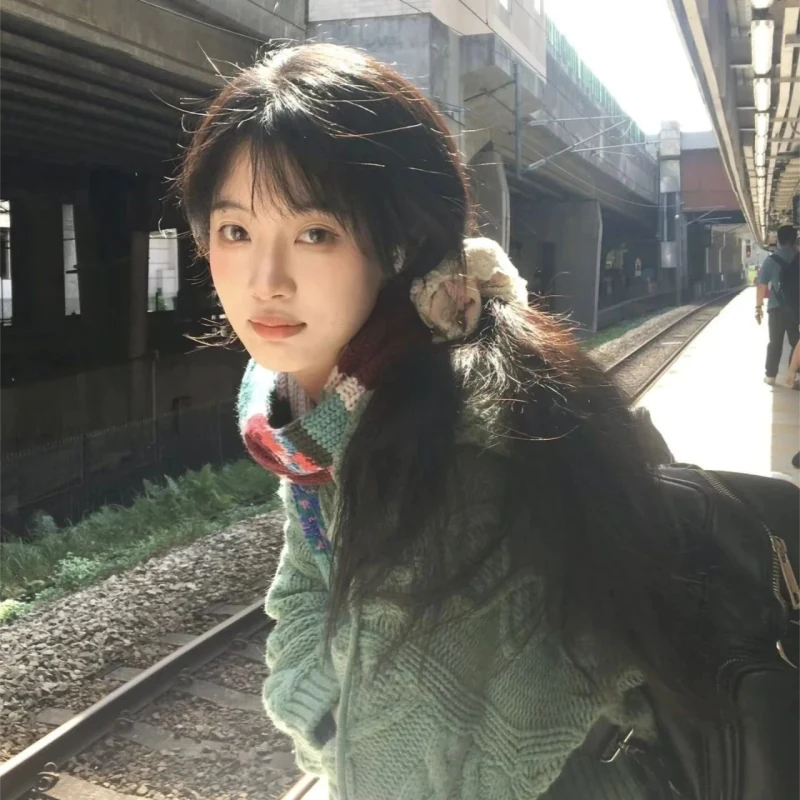
A useful clothing model photoshoot answers specific product questions: what is the shape, where does the hem fall, and which details are easy to miss? Build a clear catalog set first, then choose extra poses for the garment and sales channel.
The Essential Model Photoshoot Shot List
Plan the views needed to explain each garment, then add styling images if they serve a clear purpose. Your shot list should record the product, image requirements and intended use, as well as the pose.[4] [5]
| Priority | Shot | What to capture |
|---|---|---|
| Core | Front / product hero | The full garment and a clear silhouette. Reuse the front image as the hero if its framing suits the placement. |
| Core | Three-quarter front | Front details together with the garment’s depth. |
| Core | Side profile | The side seam, profile and complete hem. |
| Core | Full back | Back shape, neckline, closures, print or pockets. |
| Detail | Close-ups | Texture, stitching, buttons or other features the overall views do not explain. |
| As needed | Seated or moving | A relevant real-wear position, when it helps explain the garment. Verify physical behavior on a real wearer. |
| Optional | Lifestyle | Styling or intended use for a secondary listing image, campaign or social post. |
Before the Shoot: Prepare the Garment, Model and Setup
Agree on the look and the required images before shooting. A short moodboard and a test frame help the model, stylist and photographer work toward the same result.[4] [6]
- List the products and destinations. Record each SKU, color and sample size. Check the crop and image requirements for the specific product page, marketplace or ad placement.
- Prepare the clothing. Steam the garment, remove lint and check fastenings. Decide whether it should be tucked, untucked, open or closed; record any styling that changes its visible shape.
- Brief the model. Share the reference images and planned poses. Record their height and worn size accurately, explain each movement and allow a comfortable position.
- Test the setup. Check focus, exposure and color with the garment in place. Keep camera height, distance, lighting and crop consistent across the catalog views.
- Approve and log as you go. Check one complete product set before repeating the setup. Mark captured shots by SKU so missing views are caught before the garment changes.
12 Model Photoshoot Poses for Clothing Brands
These poses adapt common fashion-photography ideas for product visibility.[1] [2] [3] Start with the four basic views, then choose relevant additions. The gallery uses different garments to illustrate the options; it is not one complete product set.
About these images: All 12 gallery images were generated with Snappyit. They illustrate poses and composition. Physical fit, stretch, comfort, fabric movement and unseen garment details require real product references or real try-on checks.
Start here · Four basic views
1. Straight-On Front
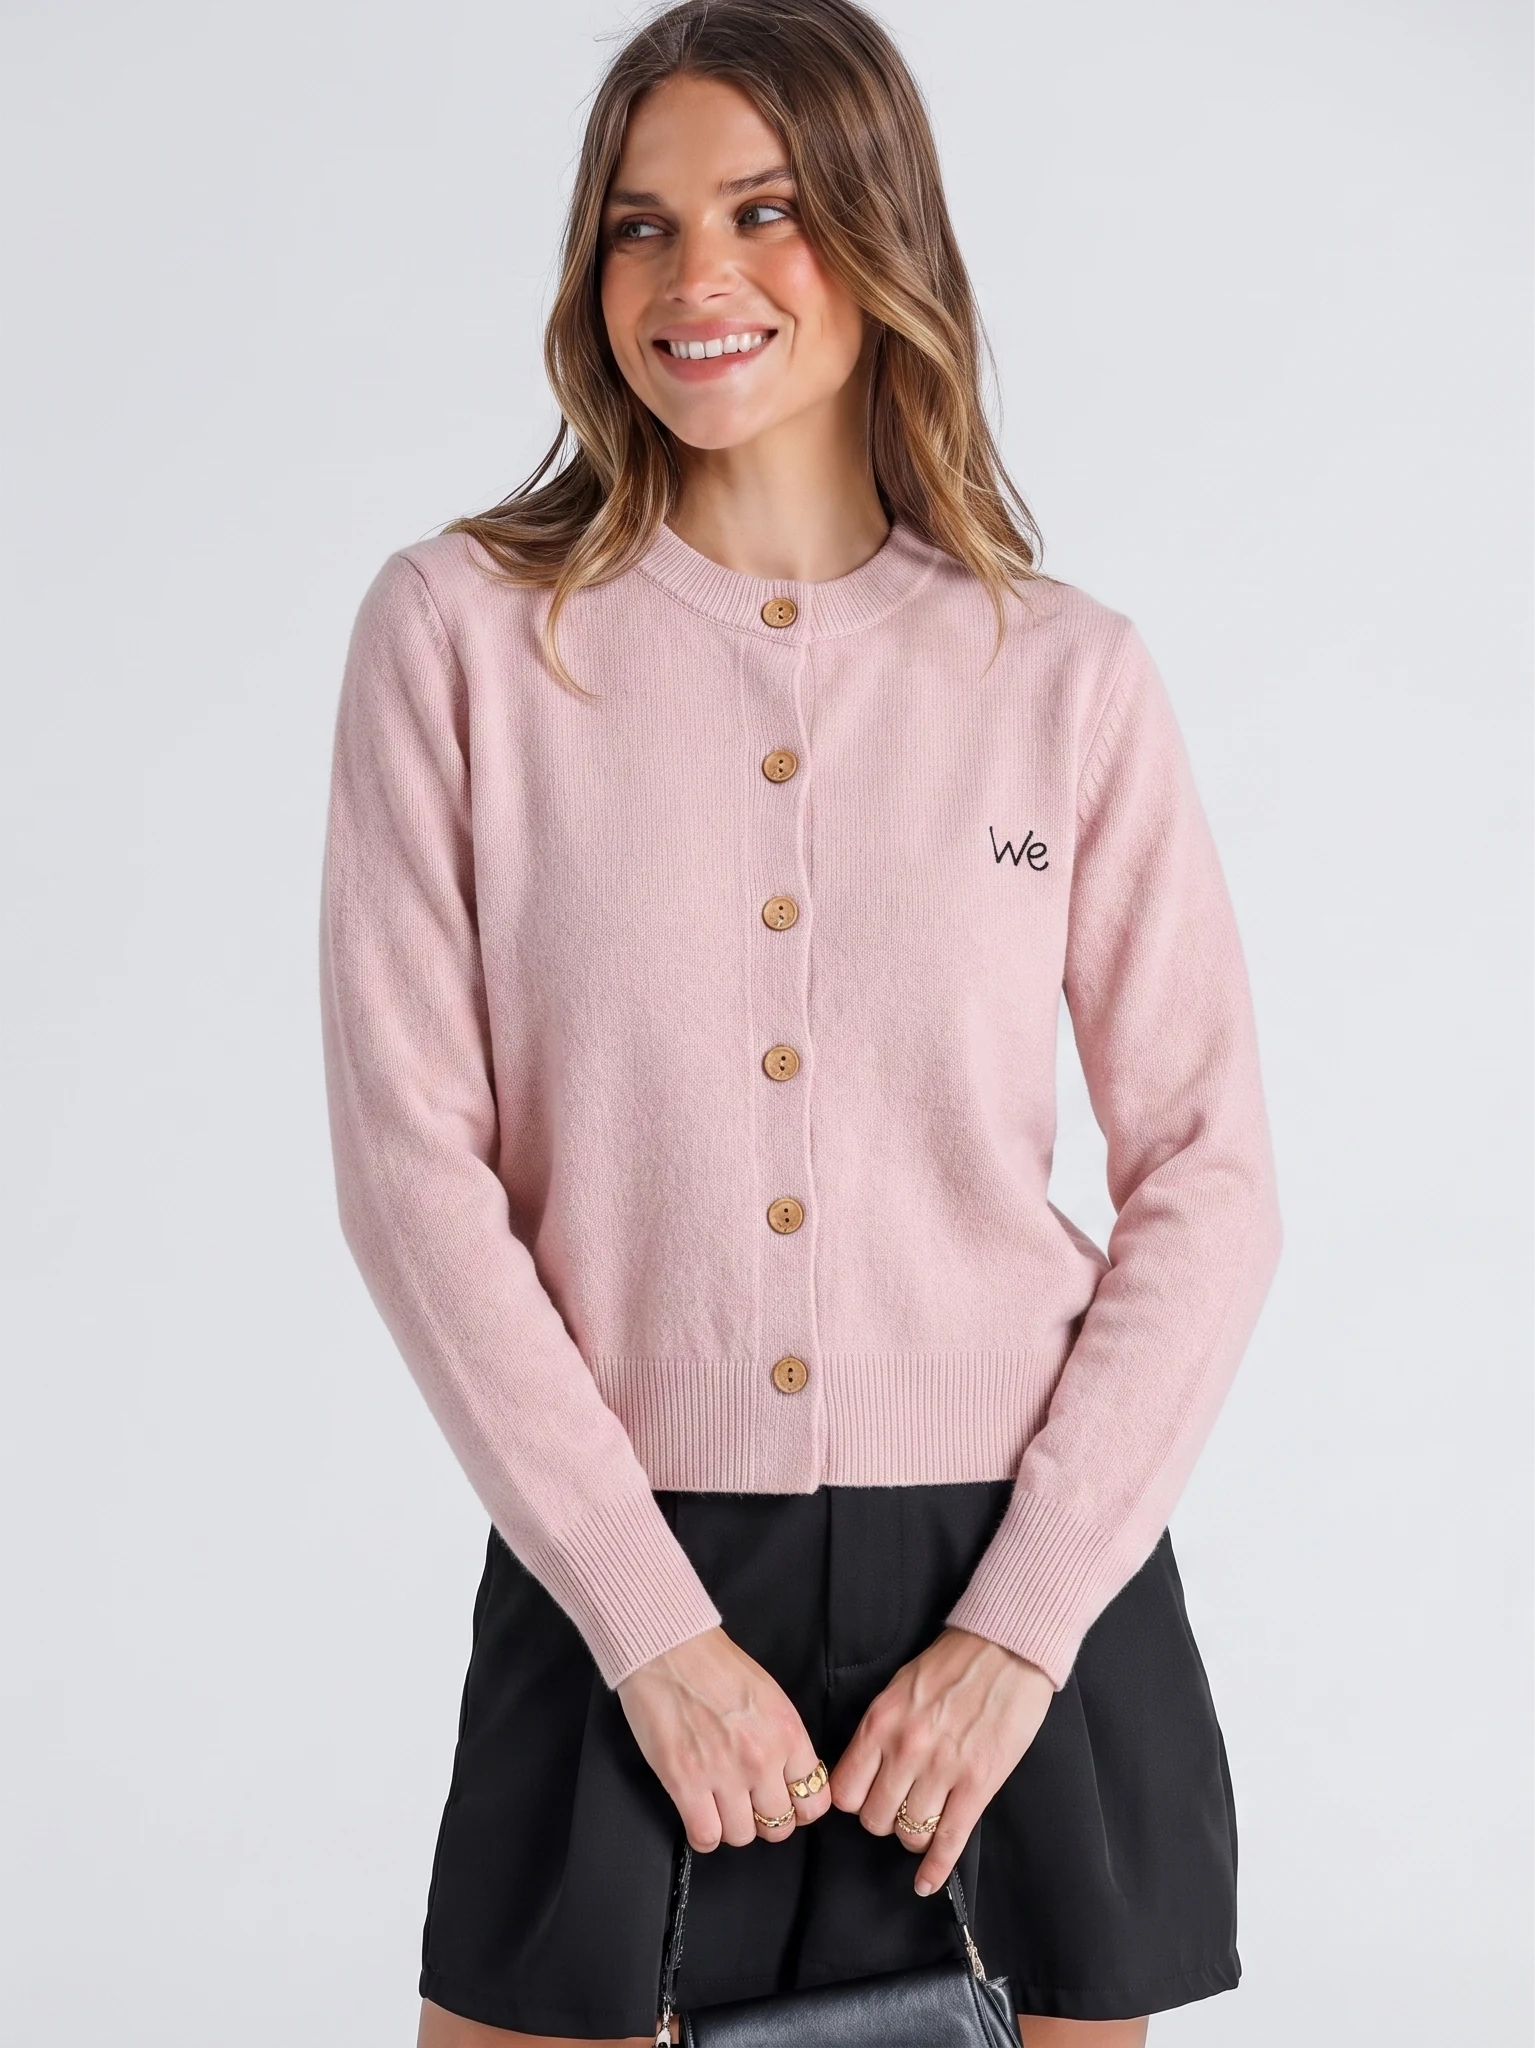
Best for: Tops, dresses, trousers and outerwear.
Direction: Stand facing the camera with shoulders level and weight balanced. Let the arms rest slightly away from the garment; keep hands below the details you need to show.
Check: Include the full garment, from neckline or waistband to hem. This view can also be your product hero image.
Avoid: Pulling fabric tight, hiding the waist with a bag, or cropping the hem.
2. Three-Quarter Front
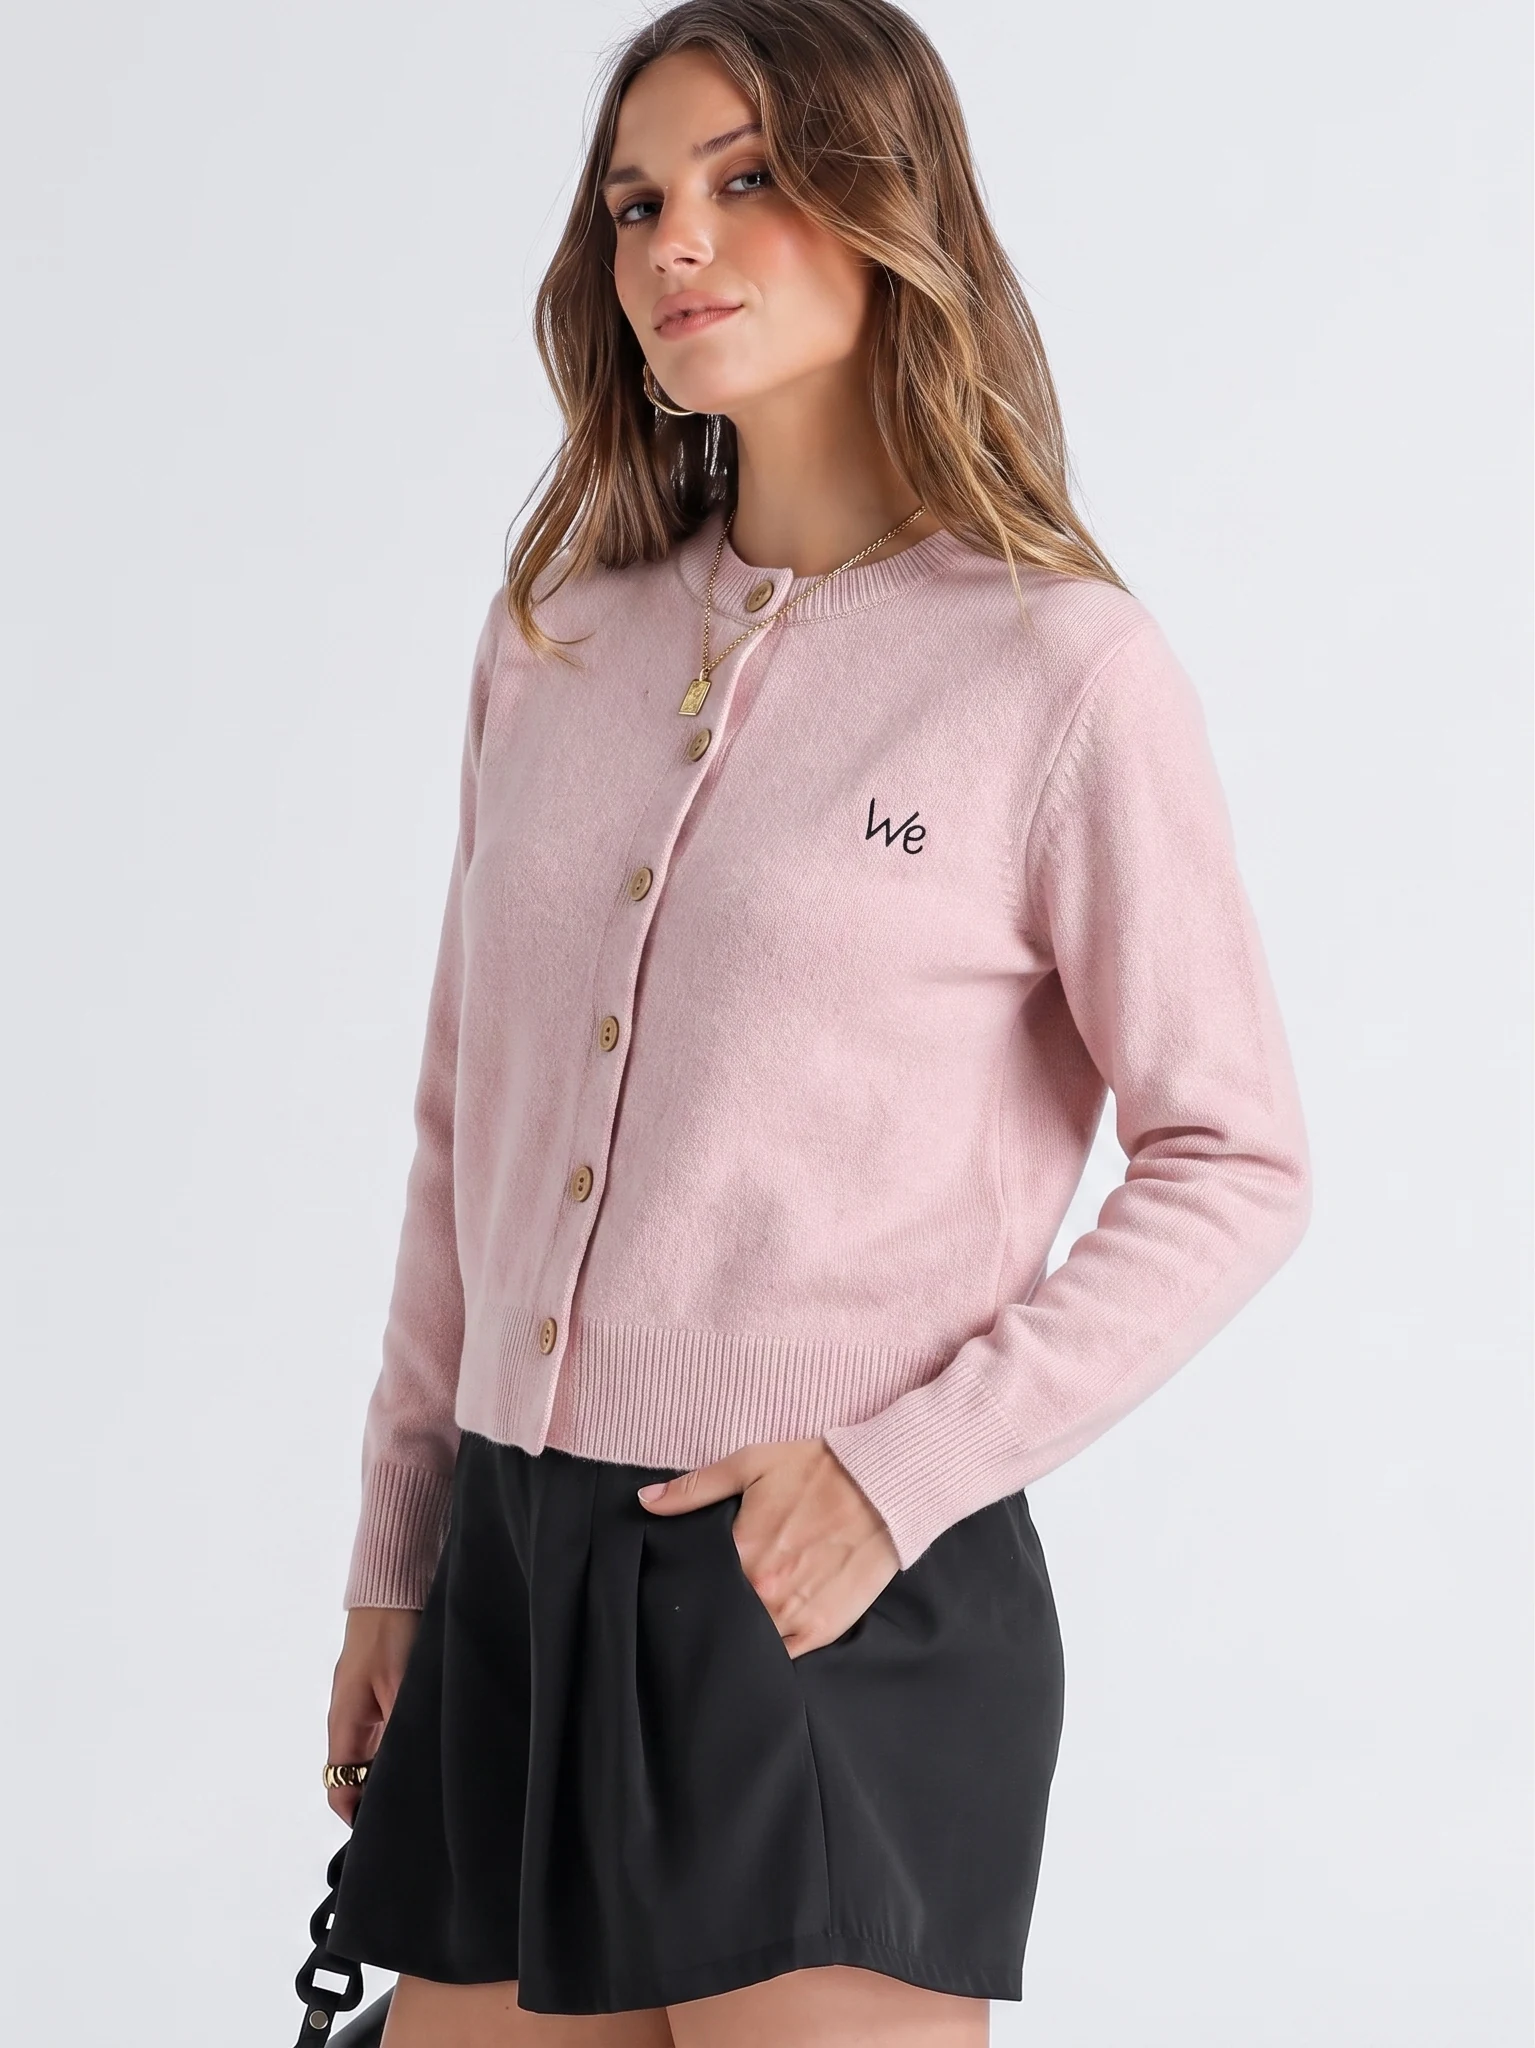
Best for: Structured tops, jackets and garments with volume.
Direction: Turn the feet and torso together to an angle between front and side. Keep the posture relaxed and avoid twisting the waist independently.
Check: Show the front opening and one side of the silhouette at the same time.
Avoid: A strong hip shift that changes the apparent fit.
3. Side Profile
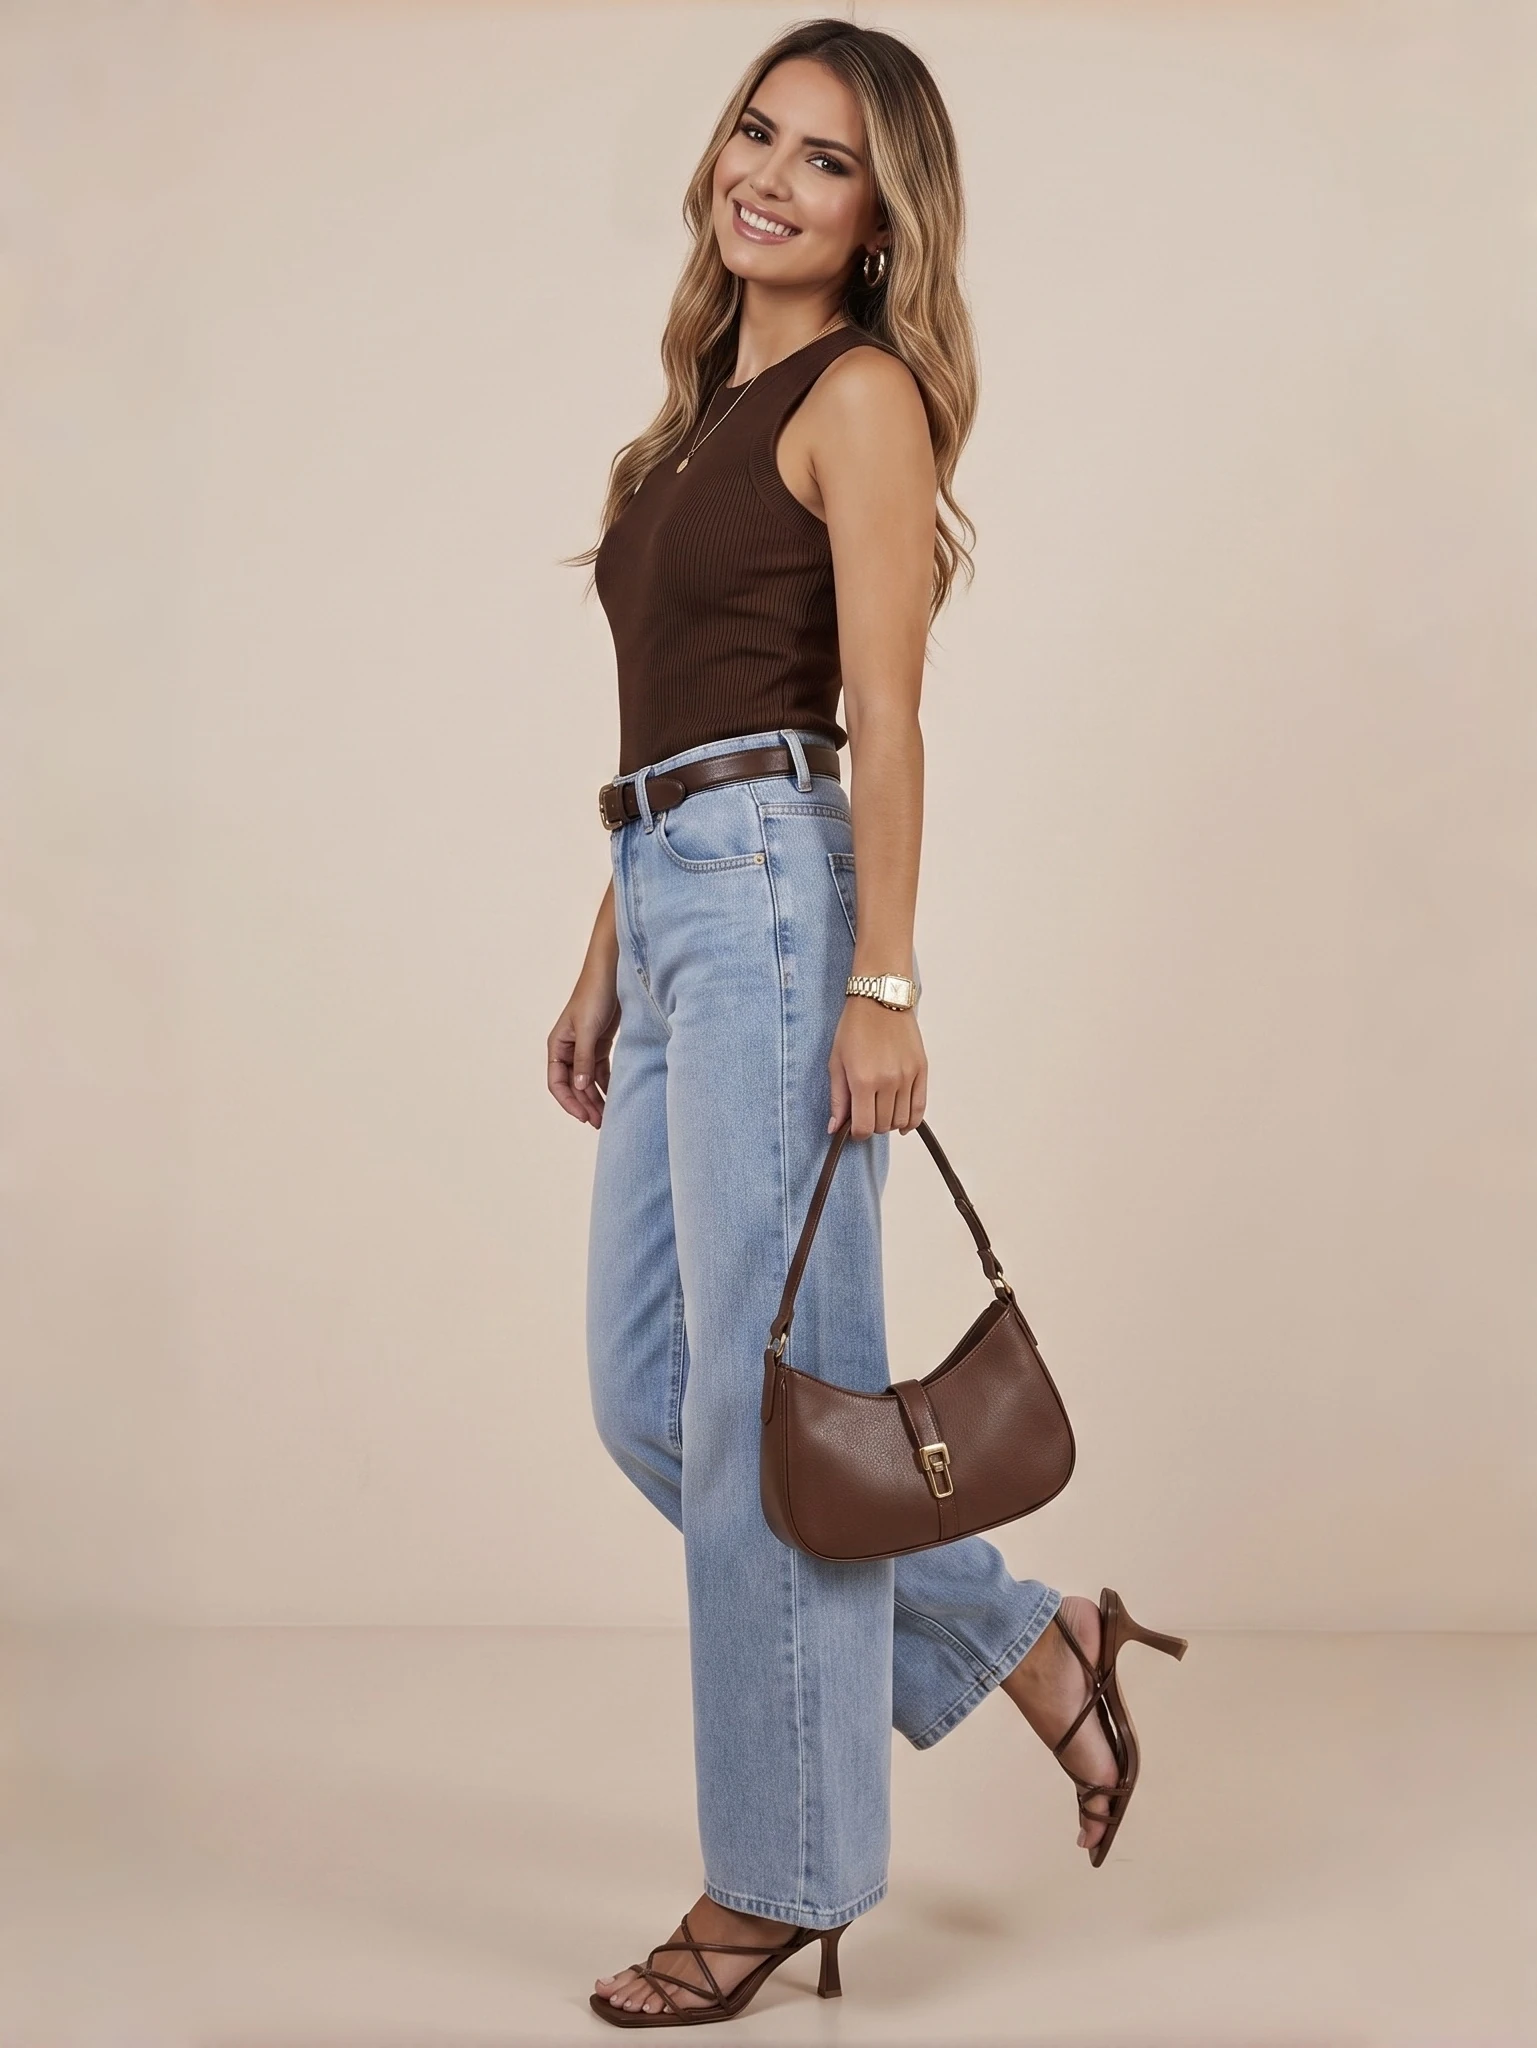
Best for: Dresses, trousers and outerwear.
Direction: Turn the body side-on to the camera. Move the near arm slightly away from the side seam, keeping the shoulders and hips aligned.
Check: Keep the side seam and entire hem visible. Compare the side shape with the neutral front view.
Avoid: Presenting another three-quarter view as a true side view.
4. Full Back View
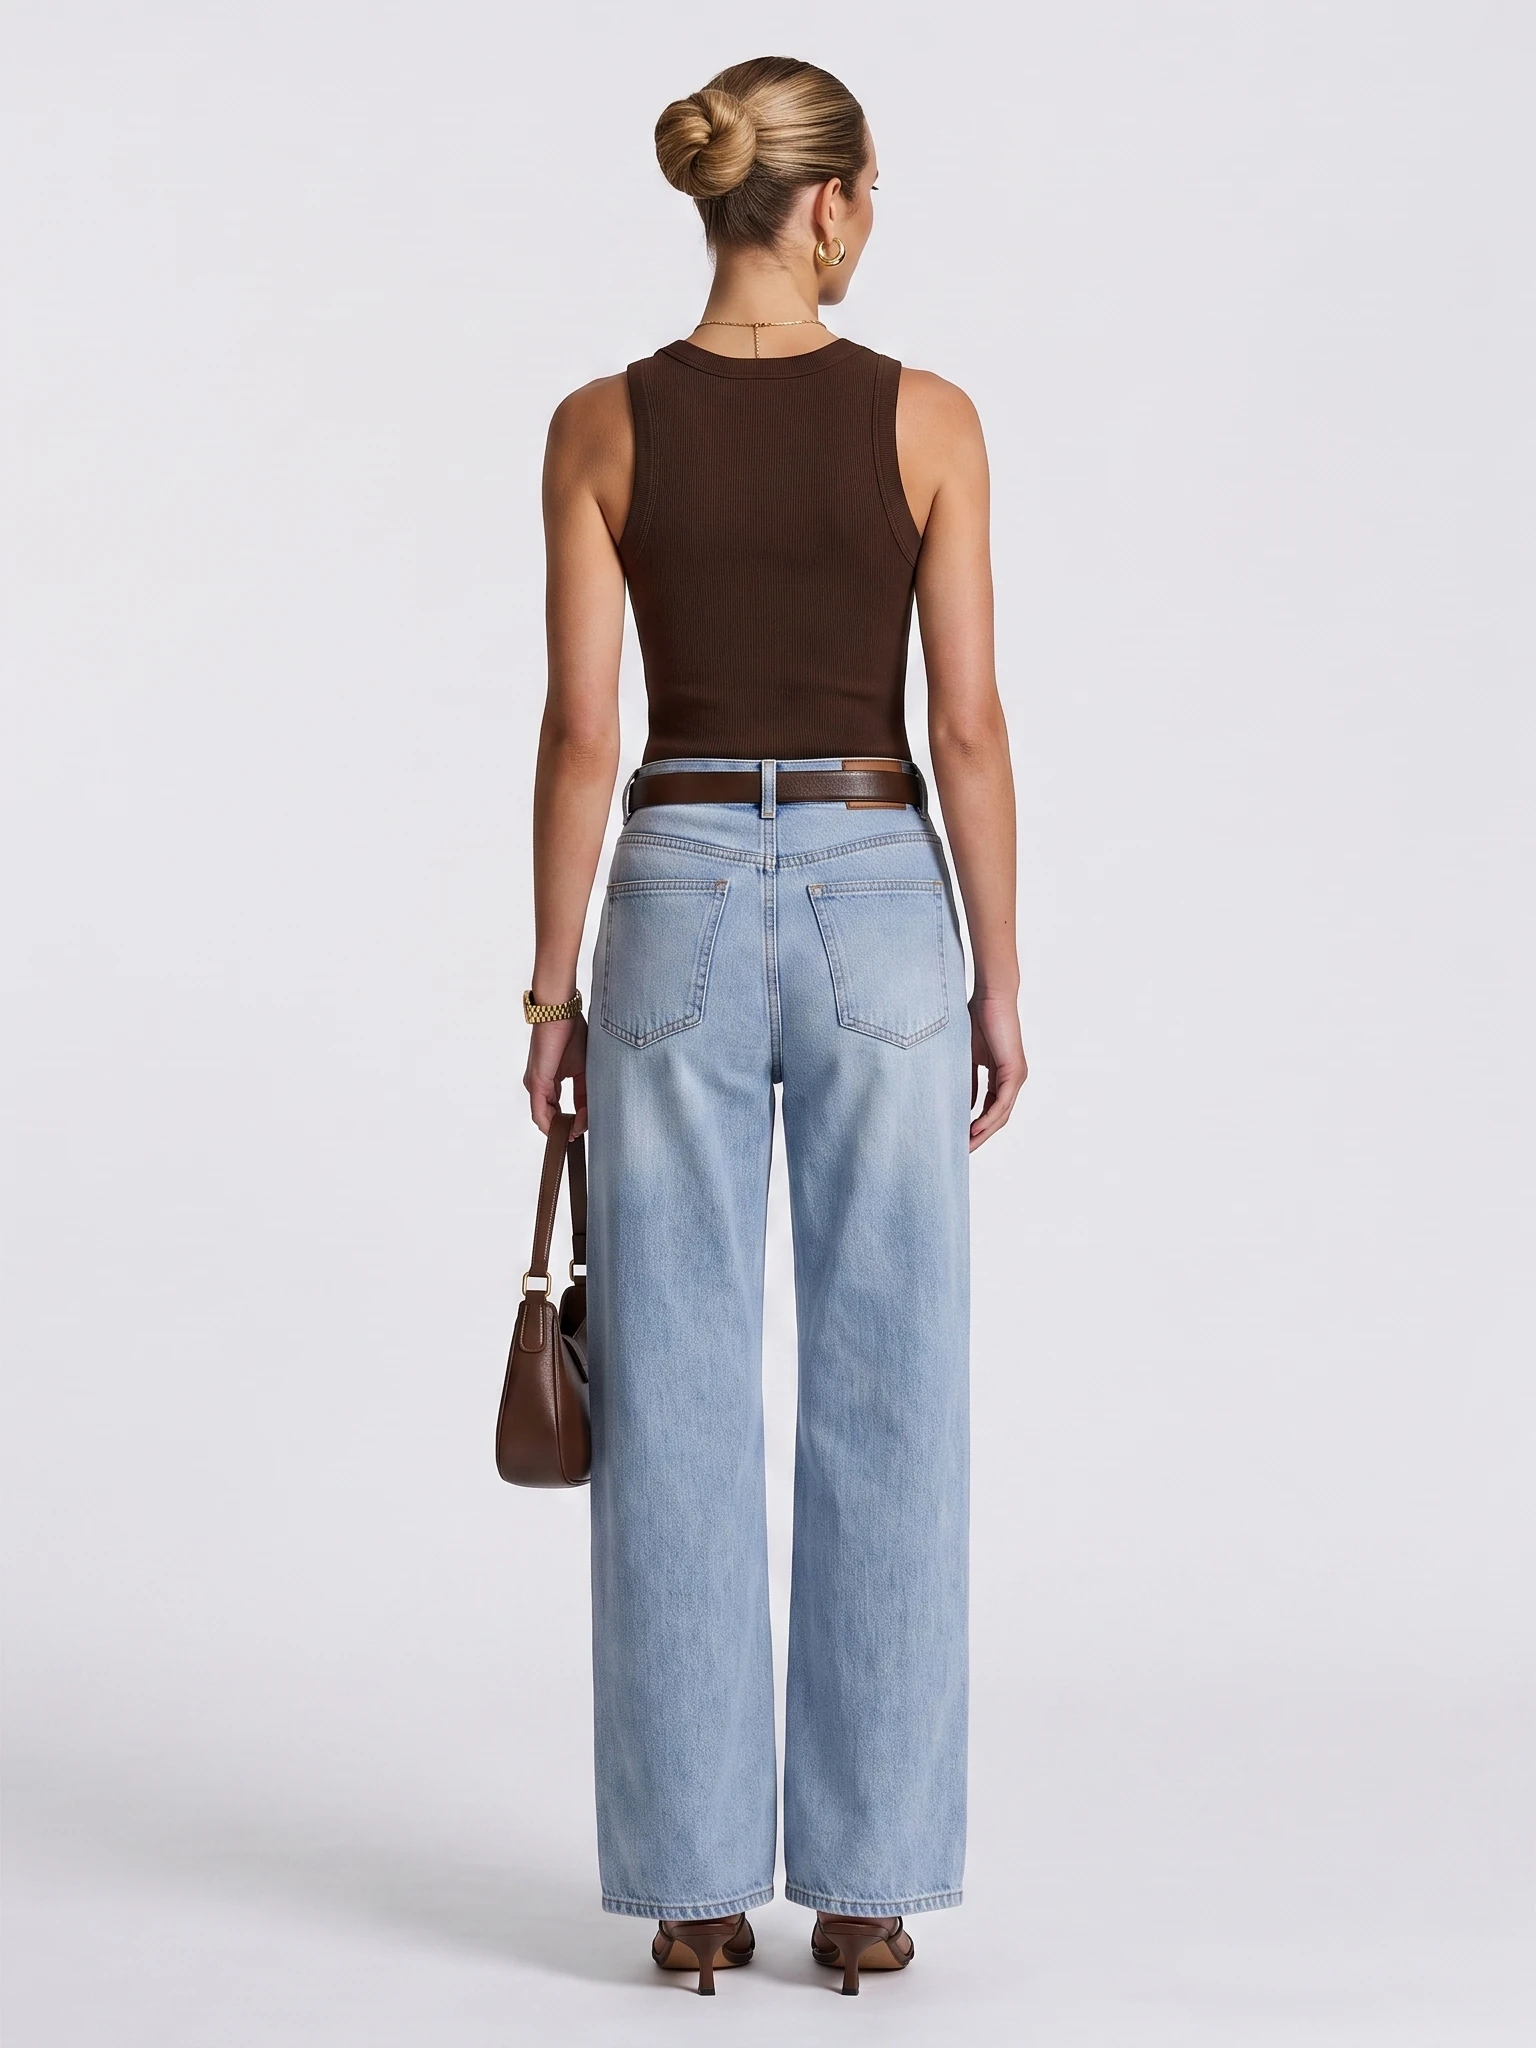
Best for: Any garment with a distinct back cut, fastening, print or pockets.
Direction: Face away from the camera with shoulders balanced. Move long hair clear of the neckline and let the arms sit away from important back details.
Check: Include the entire garment and use a real back reference to verify seams and closures.
Avoid: Cropping the lower hem or assuming the front image proves the back construction.
Add as needed · Product details and styling
5. Clear-Torso Product Pose
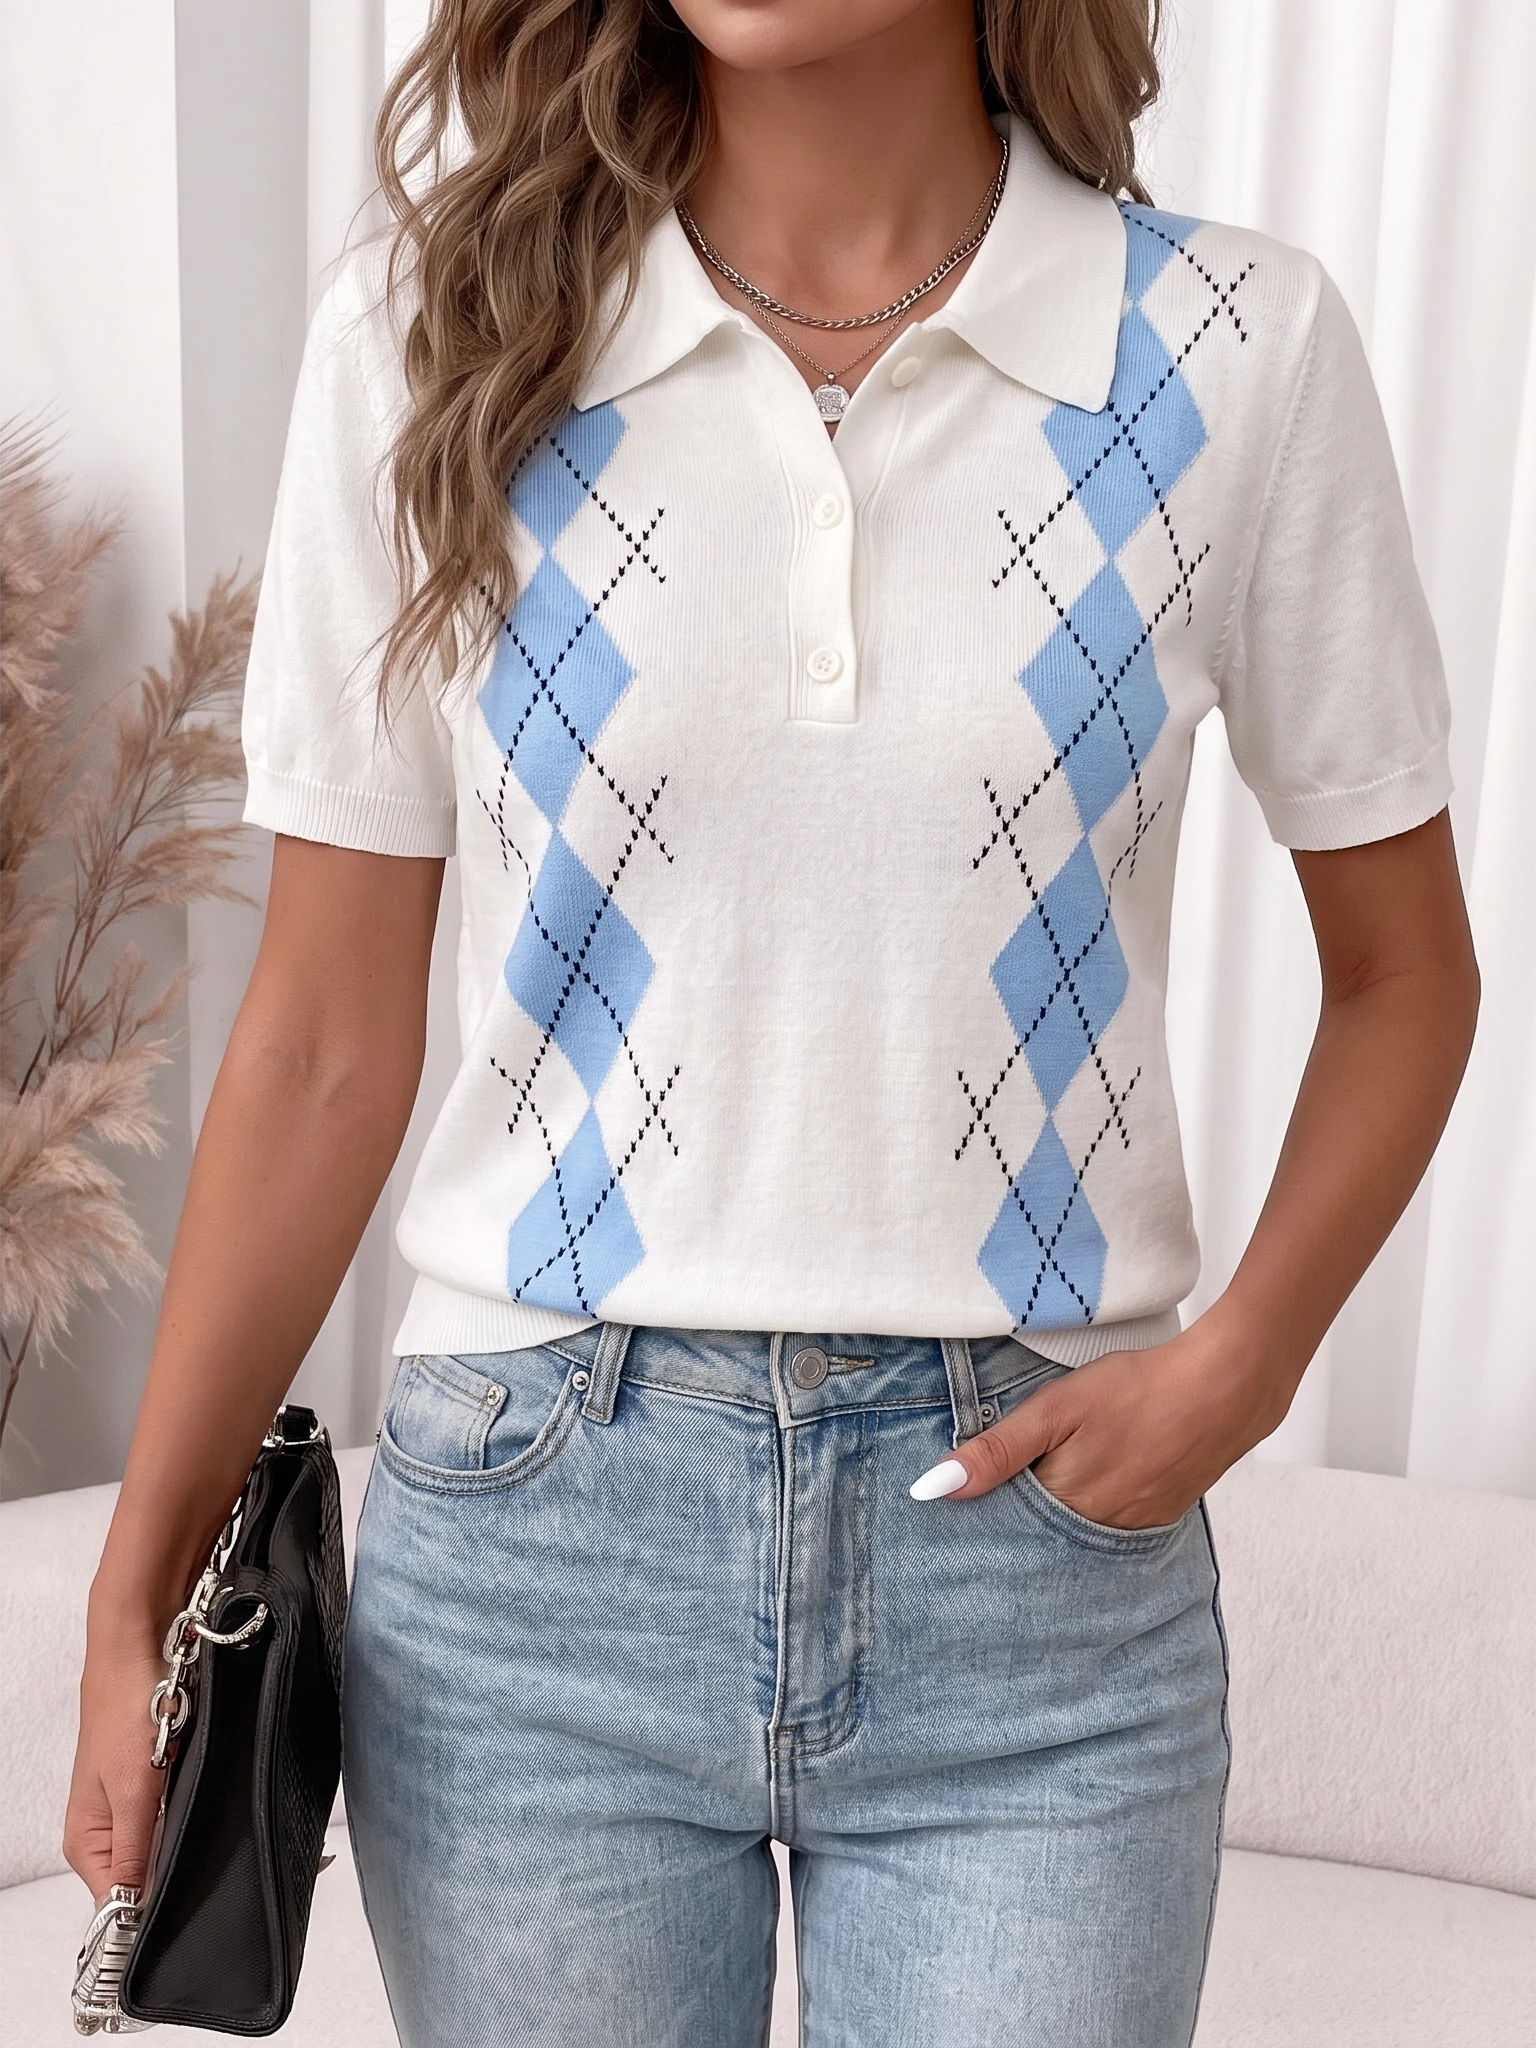
Best for: Printed tops, knitwear and garments with front details.
Direction: Keep one arm separated from the torso and the other hand low. Leave the neckline, main pattern and waist unobstructed.
Check: Make the product detail the first thing a shopper can inspect. Add a separate untucked view if the hem length matters.
Avoid: Covering the print with hair or using a tucked-in pose as the only length reference.
6. Natural Weight Shift
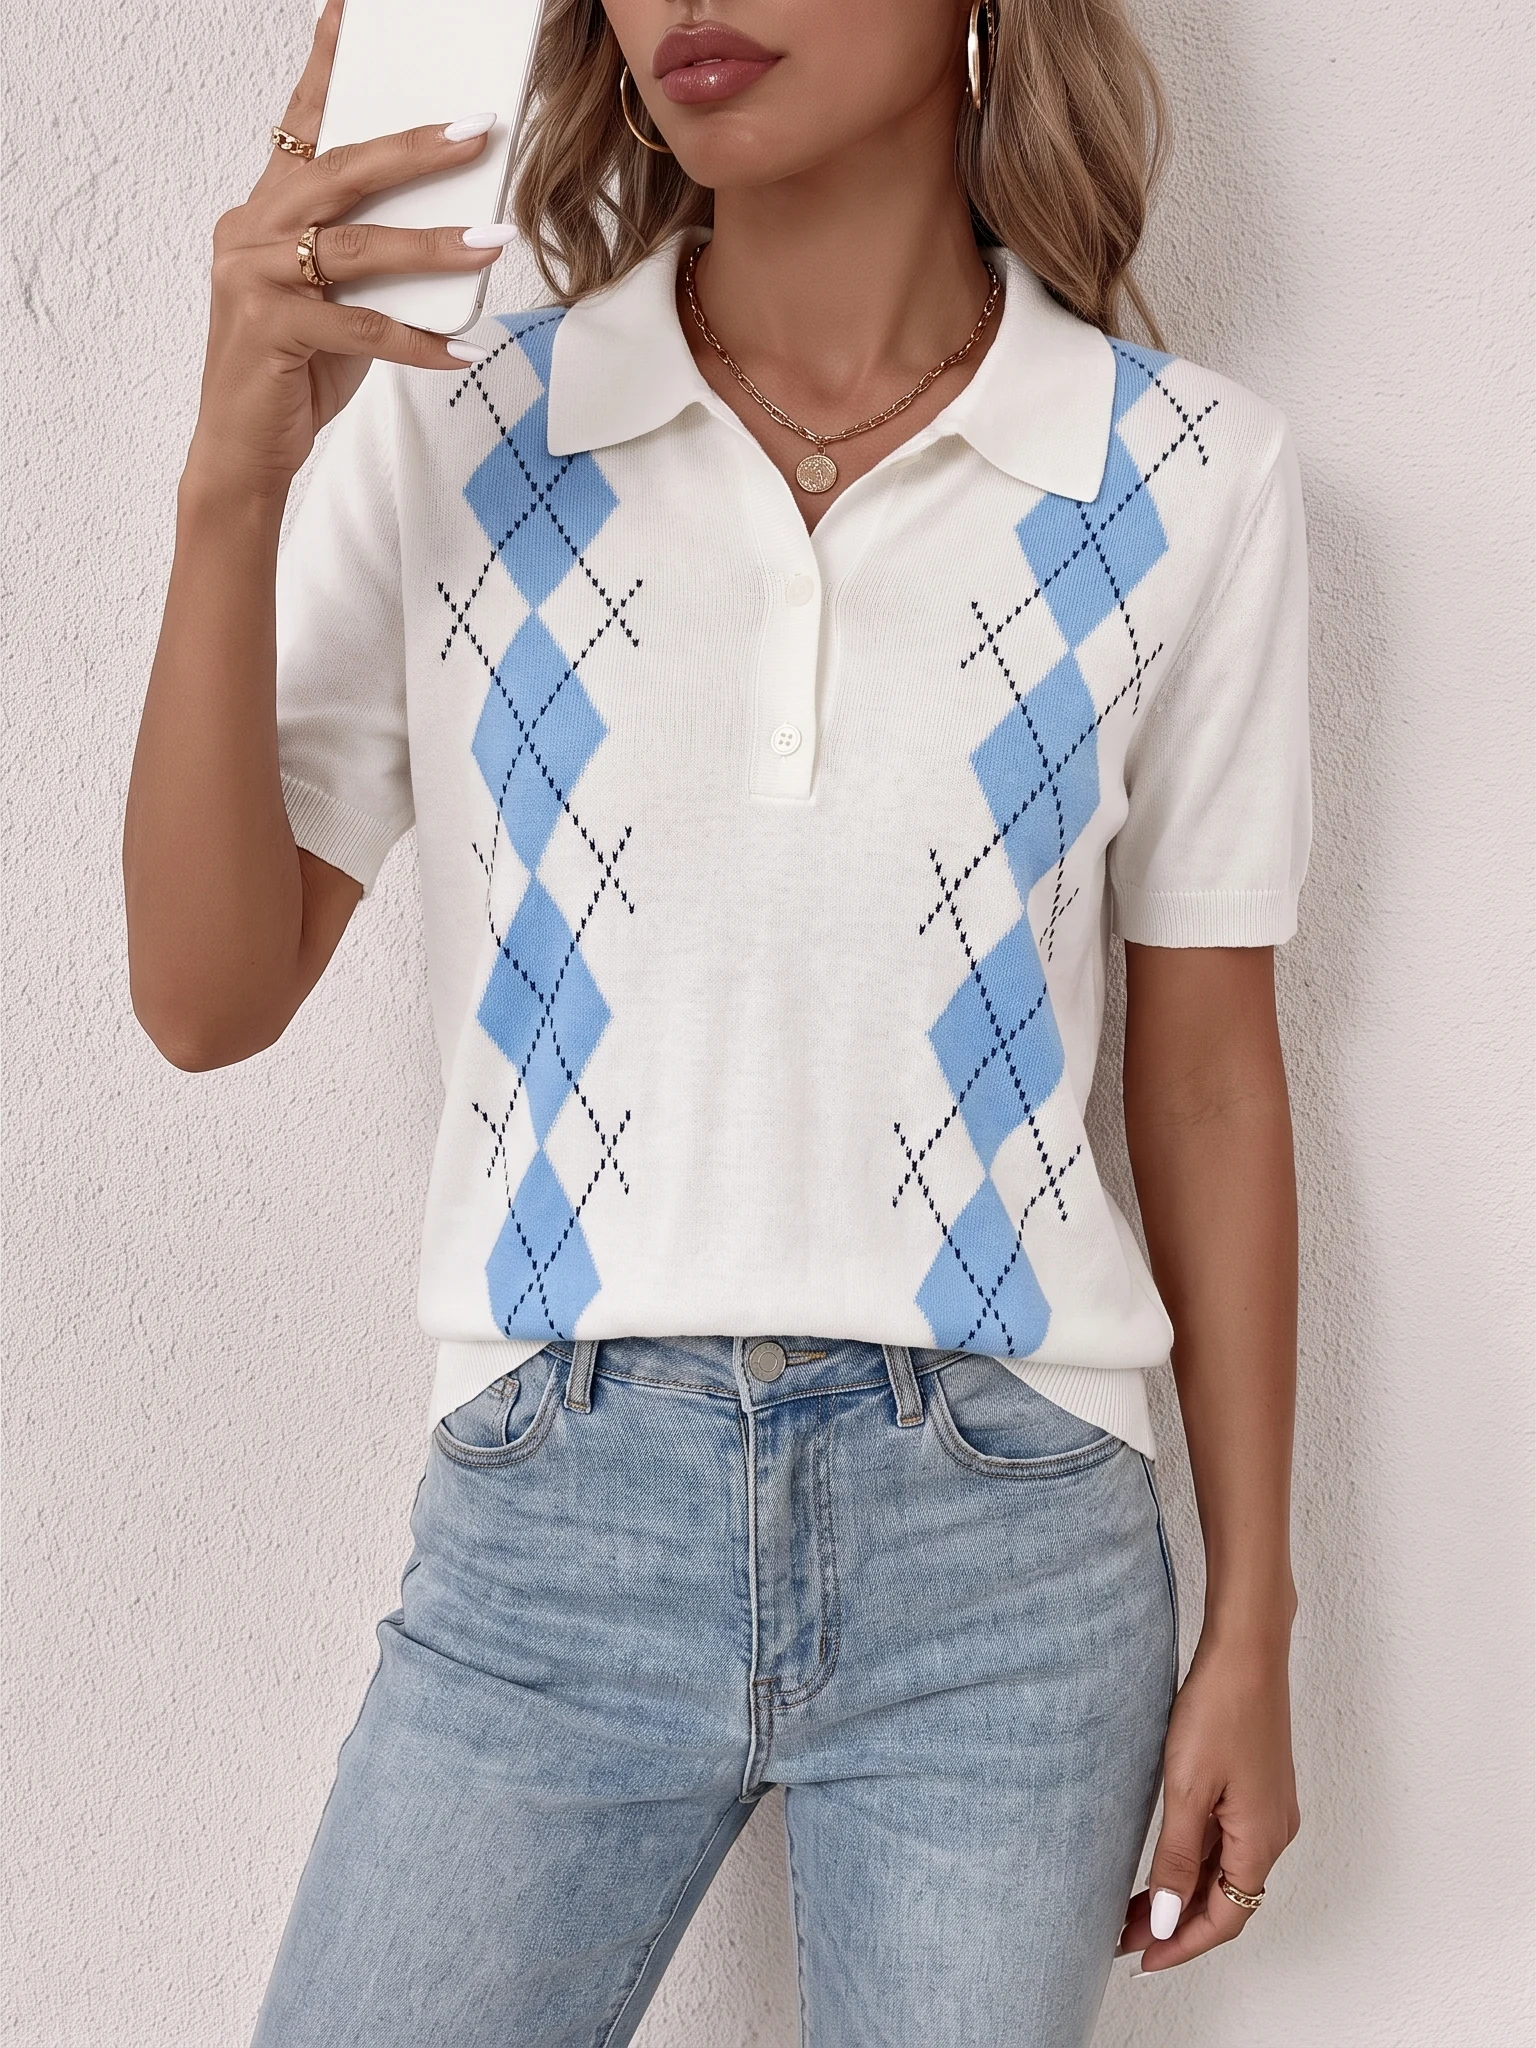
Best for: Secondary product images and relaxed lifestyle variations.
Direction: Shift a little weight onto one leg and soften the opposite knee. Keep the torso nearly neutral and hands away from the product.
Check: Retain a readable waist and silhouette. A prop is optional and should not become the focus.
Avoid: Using a large hip shift as the main fit reference.
7. Hand-in-Pocket Pose
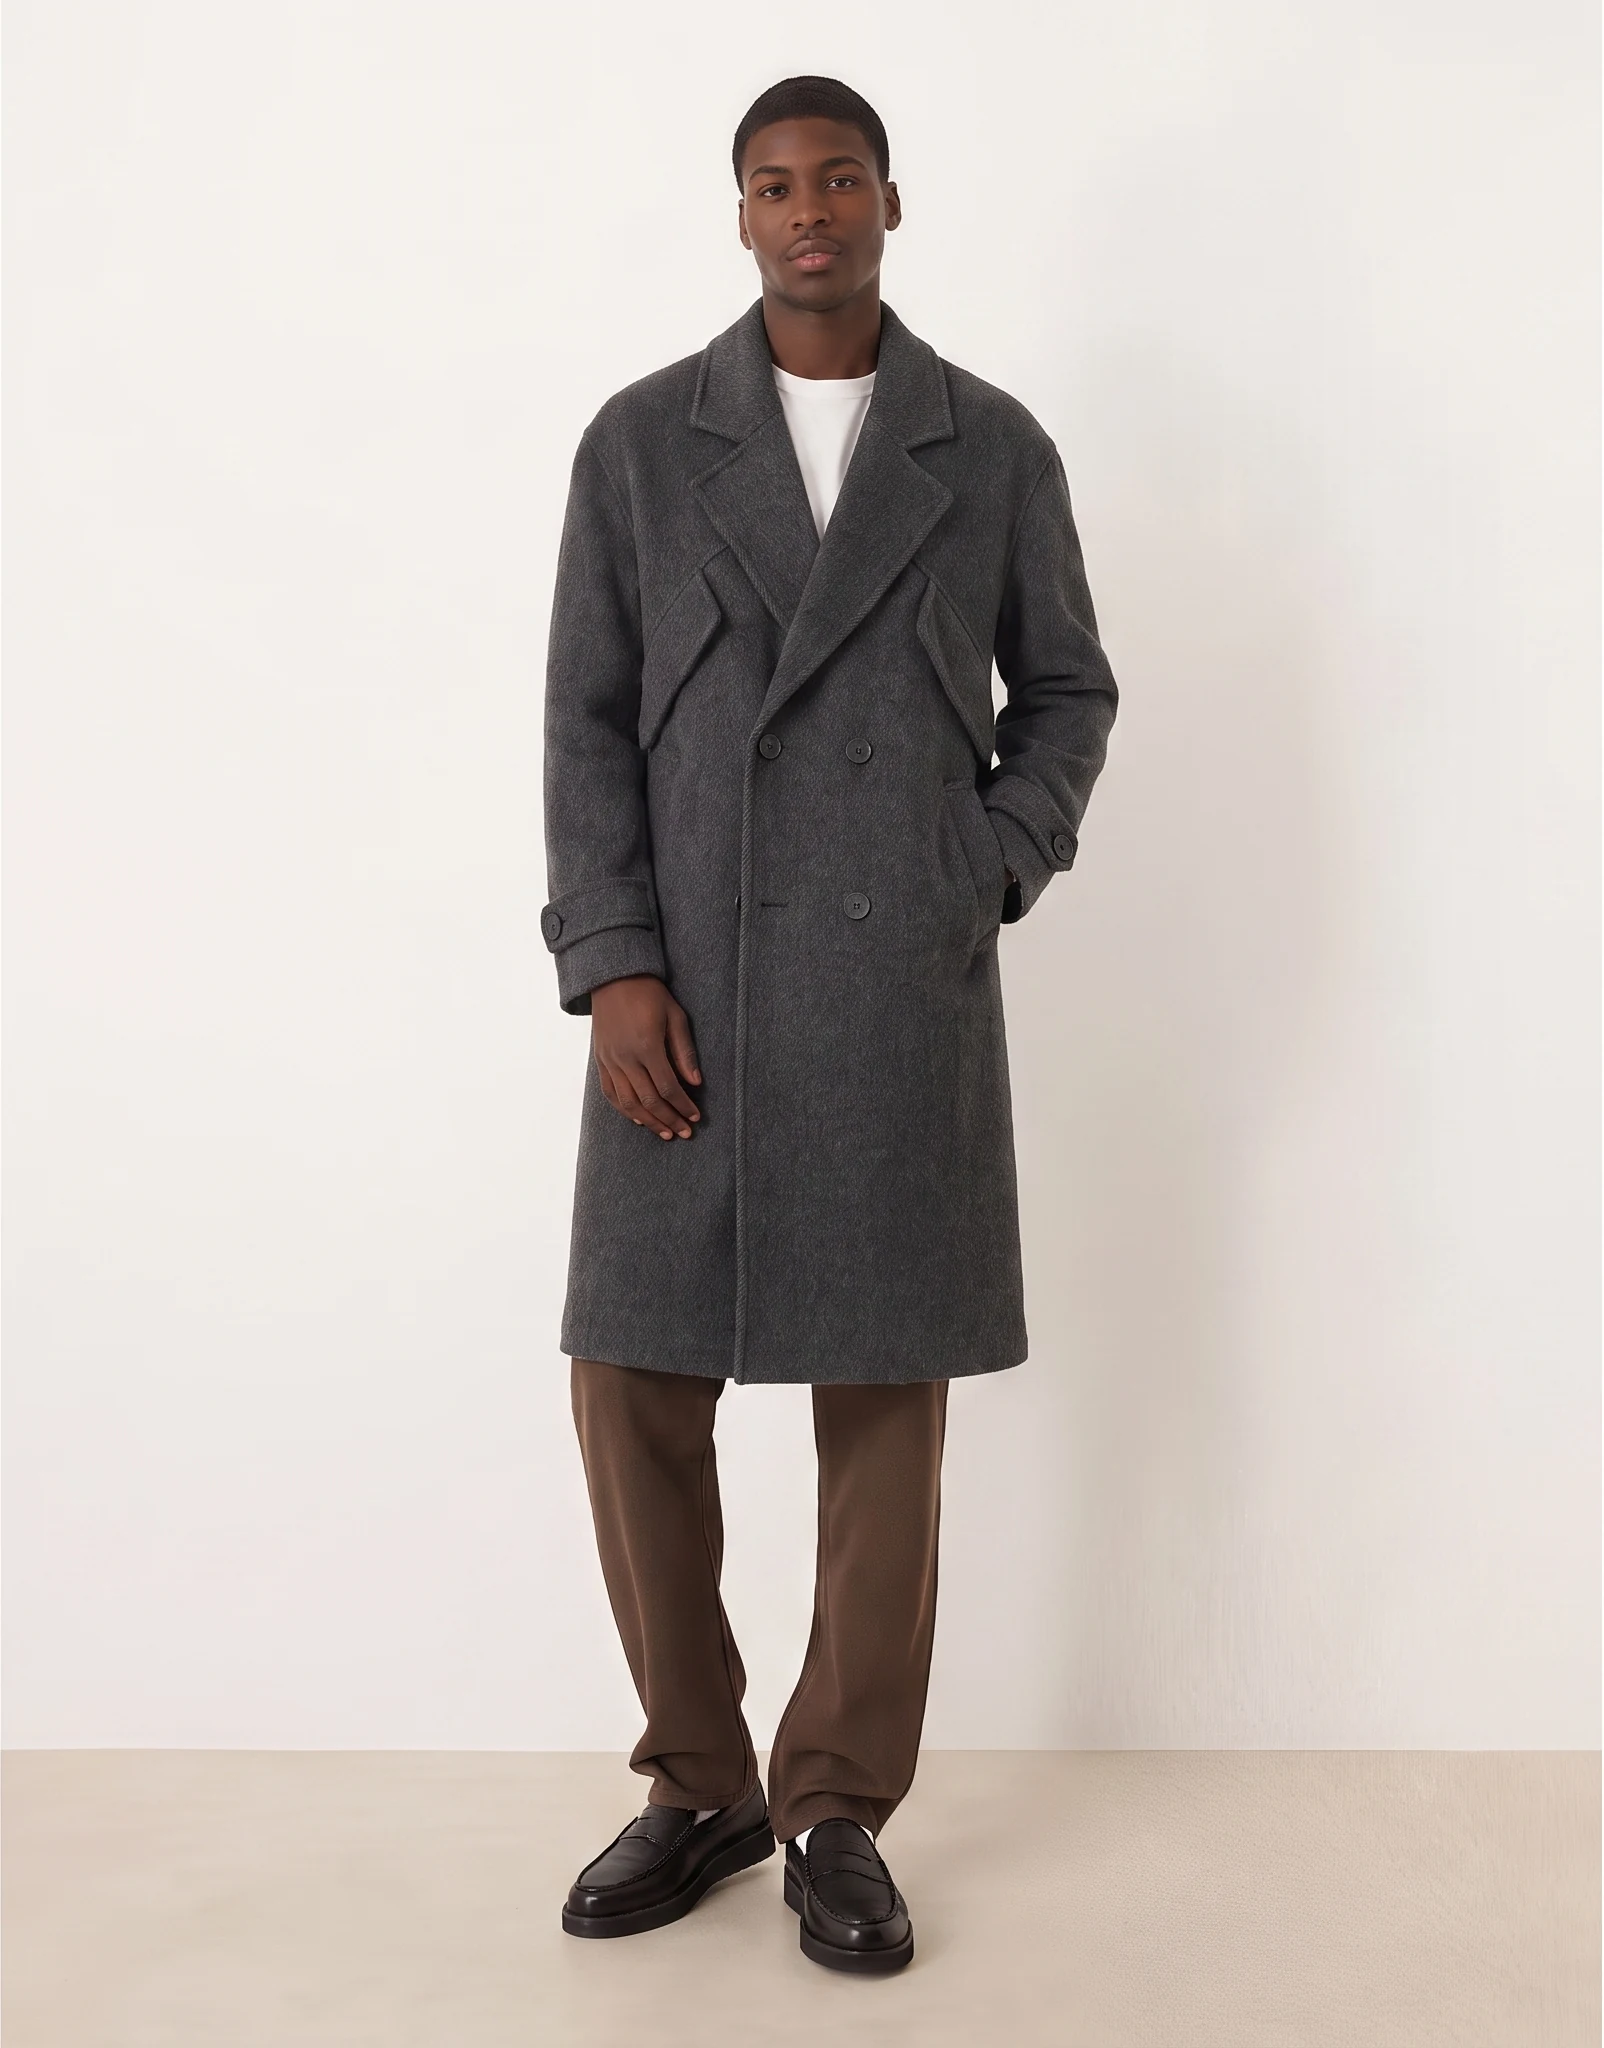
Best for: Trousers, jeans and coats with functional pockets.
Direction: Rest one hand lightly in the pocket without pushing the fabric outward. Keep the other arm relaxed.
Check: Show where the pocket sits and how the garment looks in this position.
Avoid: Pulling the waistband down or stretching the pocket opening.
8. Open-Front Layer Pose
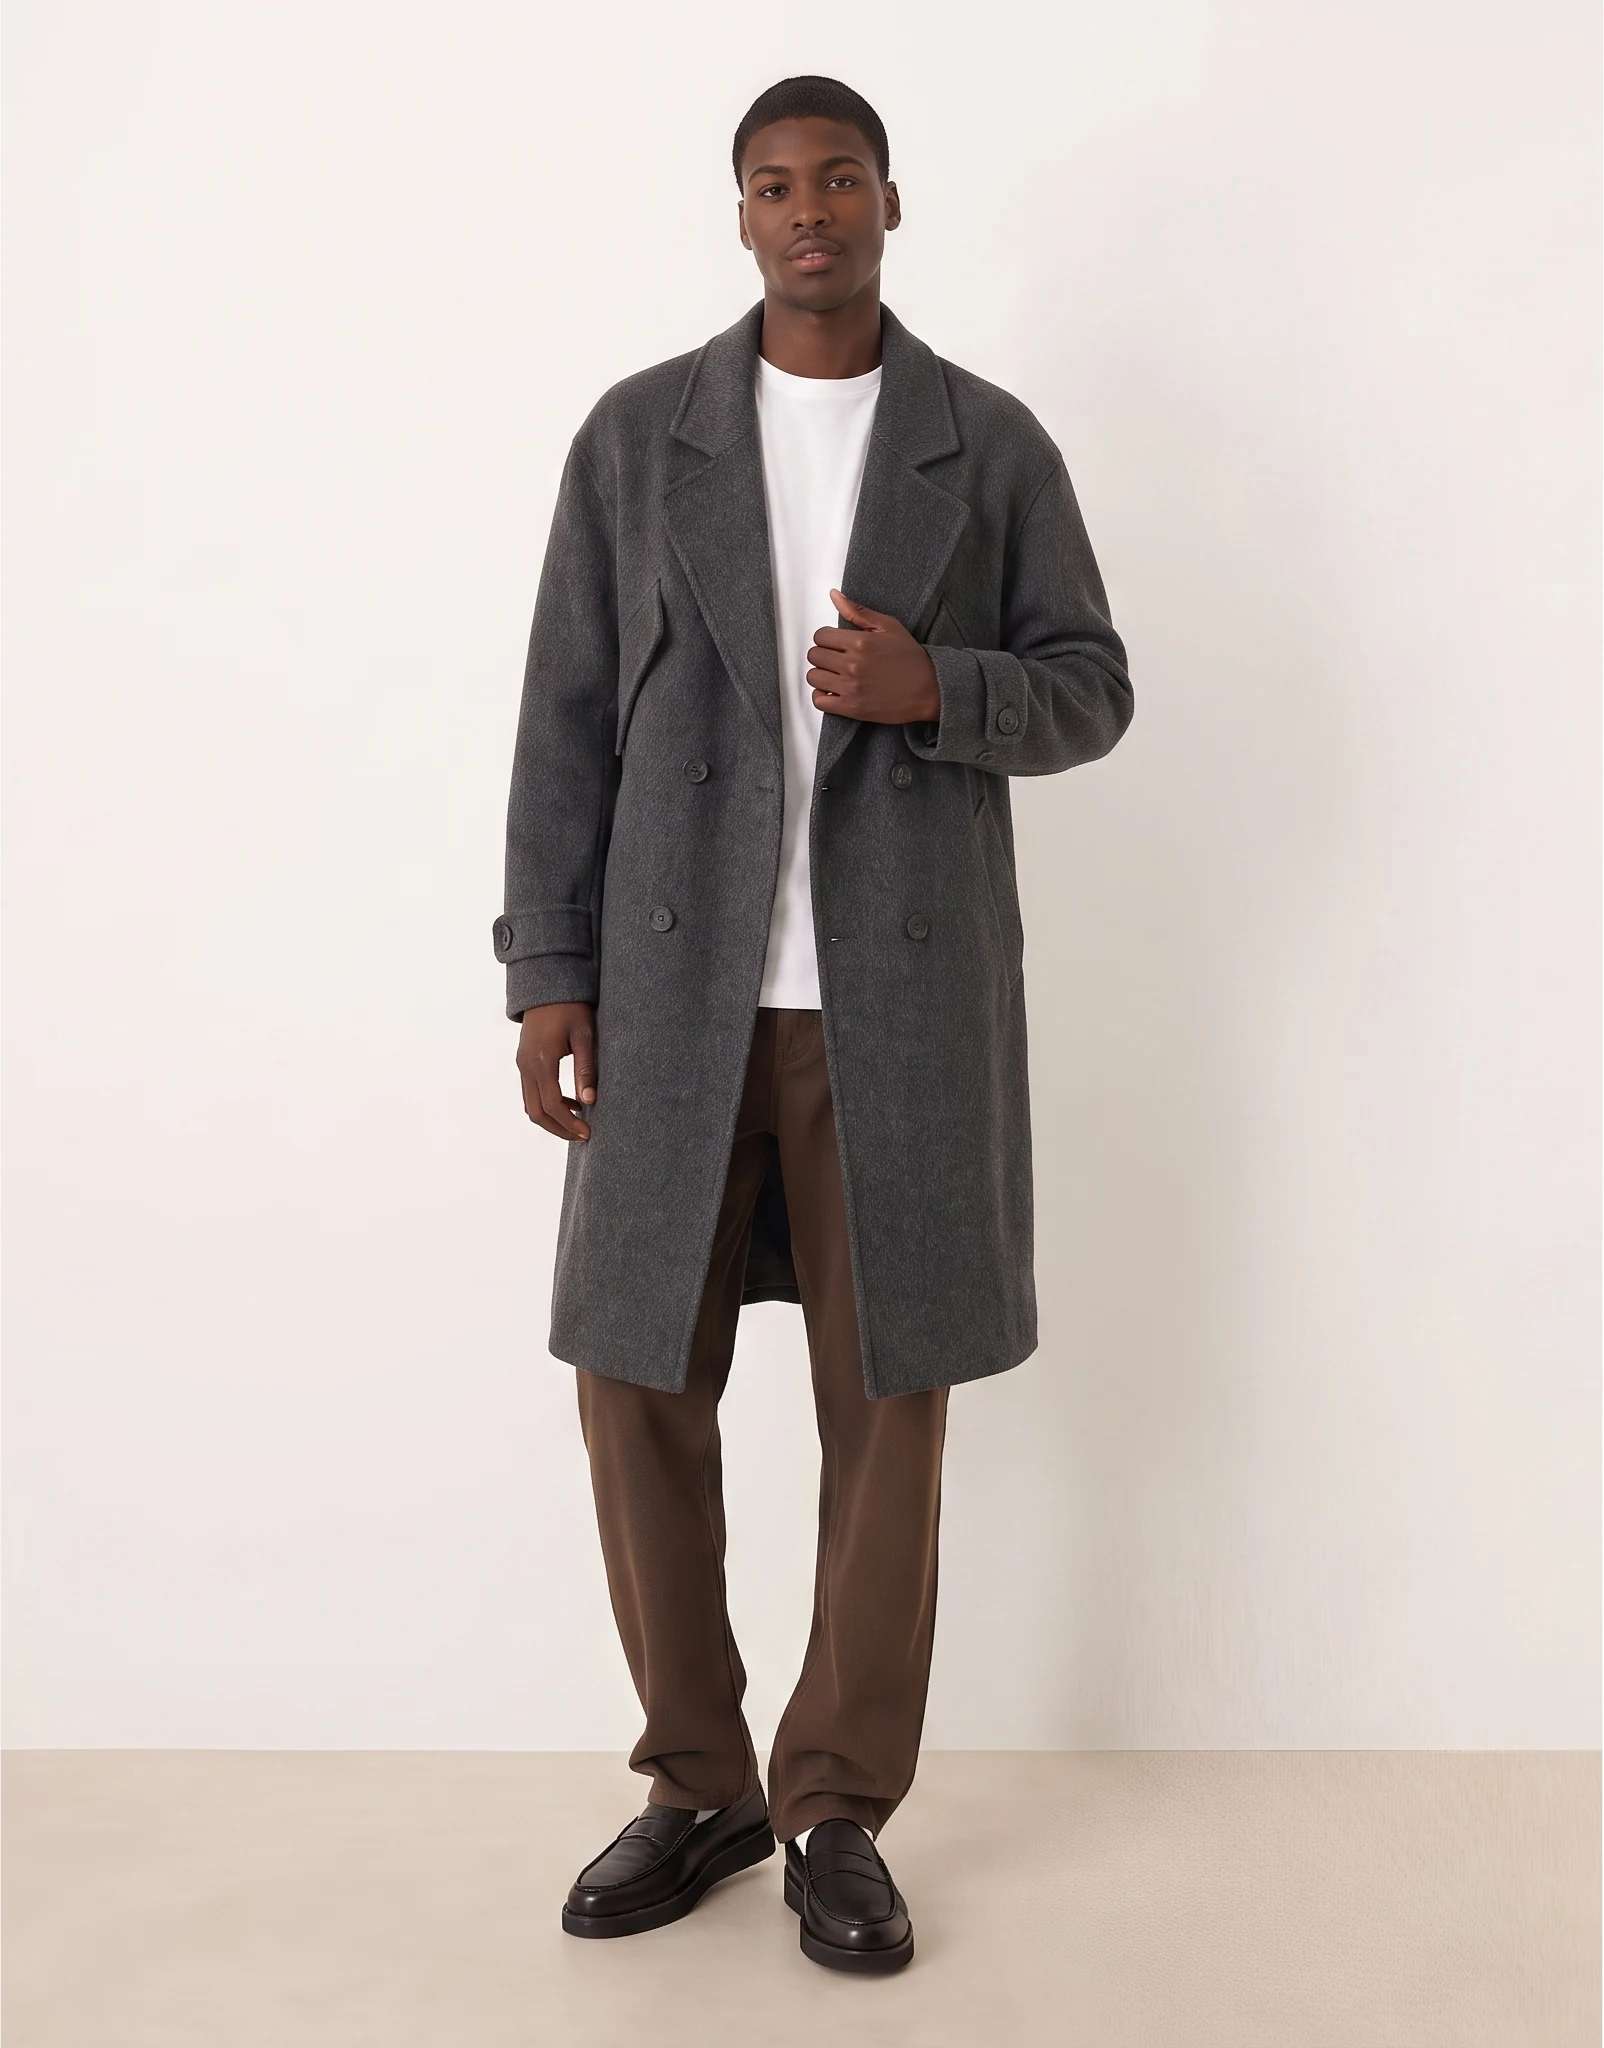
Best for: Coats, jackets and open-front shirts.
Direction: Leave the front open and hold an edge lightly if needed. Keep the shoulders level and make the inner layer easy to distinguish.
Check: Pair this with a closed-front view when the fastening or outer shape matters. Photograph the lining separately if it is not visible.
Avoid: Claiming an image shows inner construction when it only shows a shirt underneath.
Optional · Lifestyle and category-specific poses
9. Upright Seated Pose
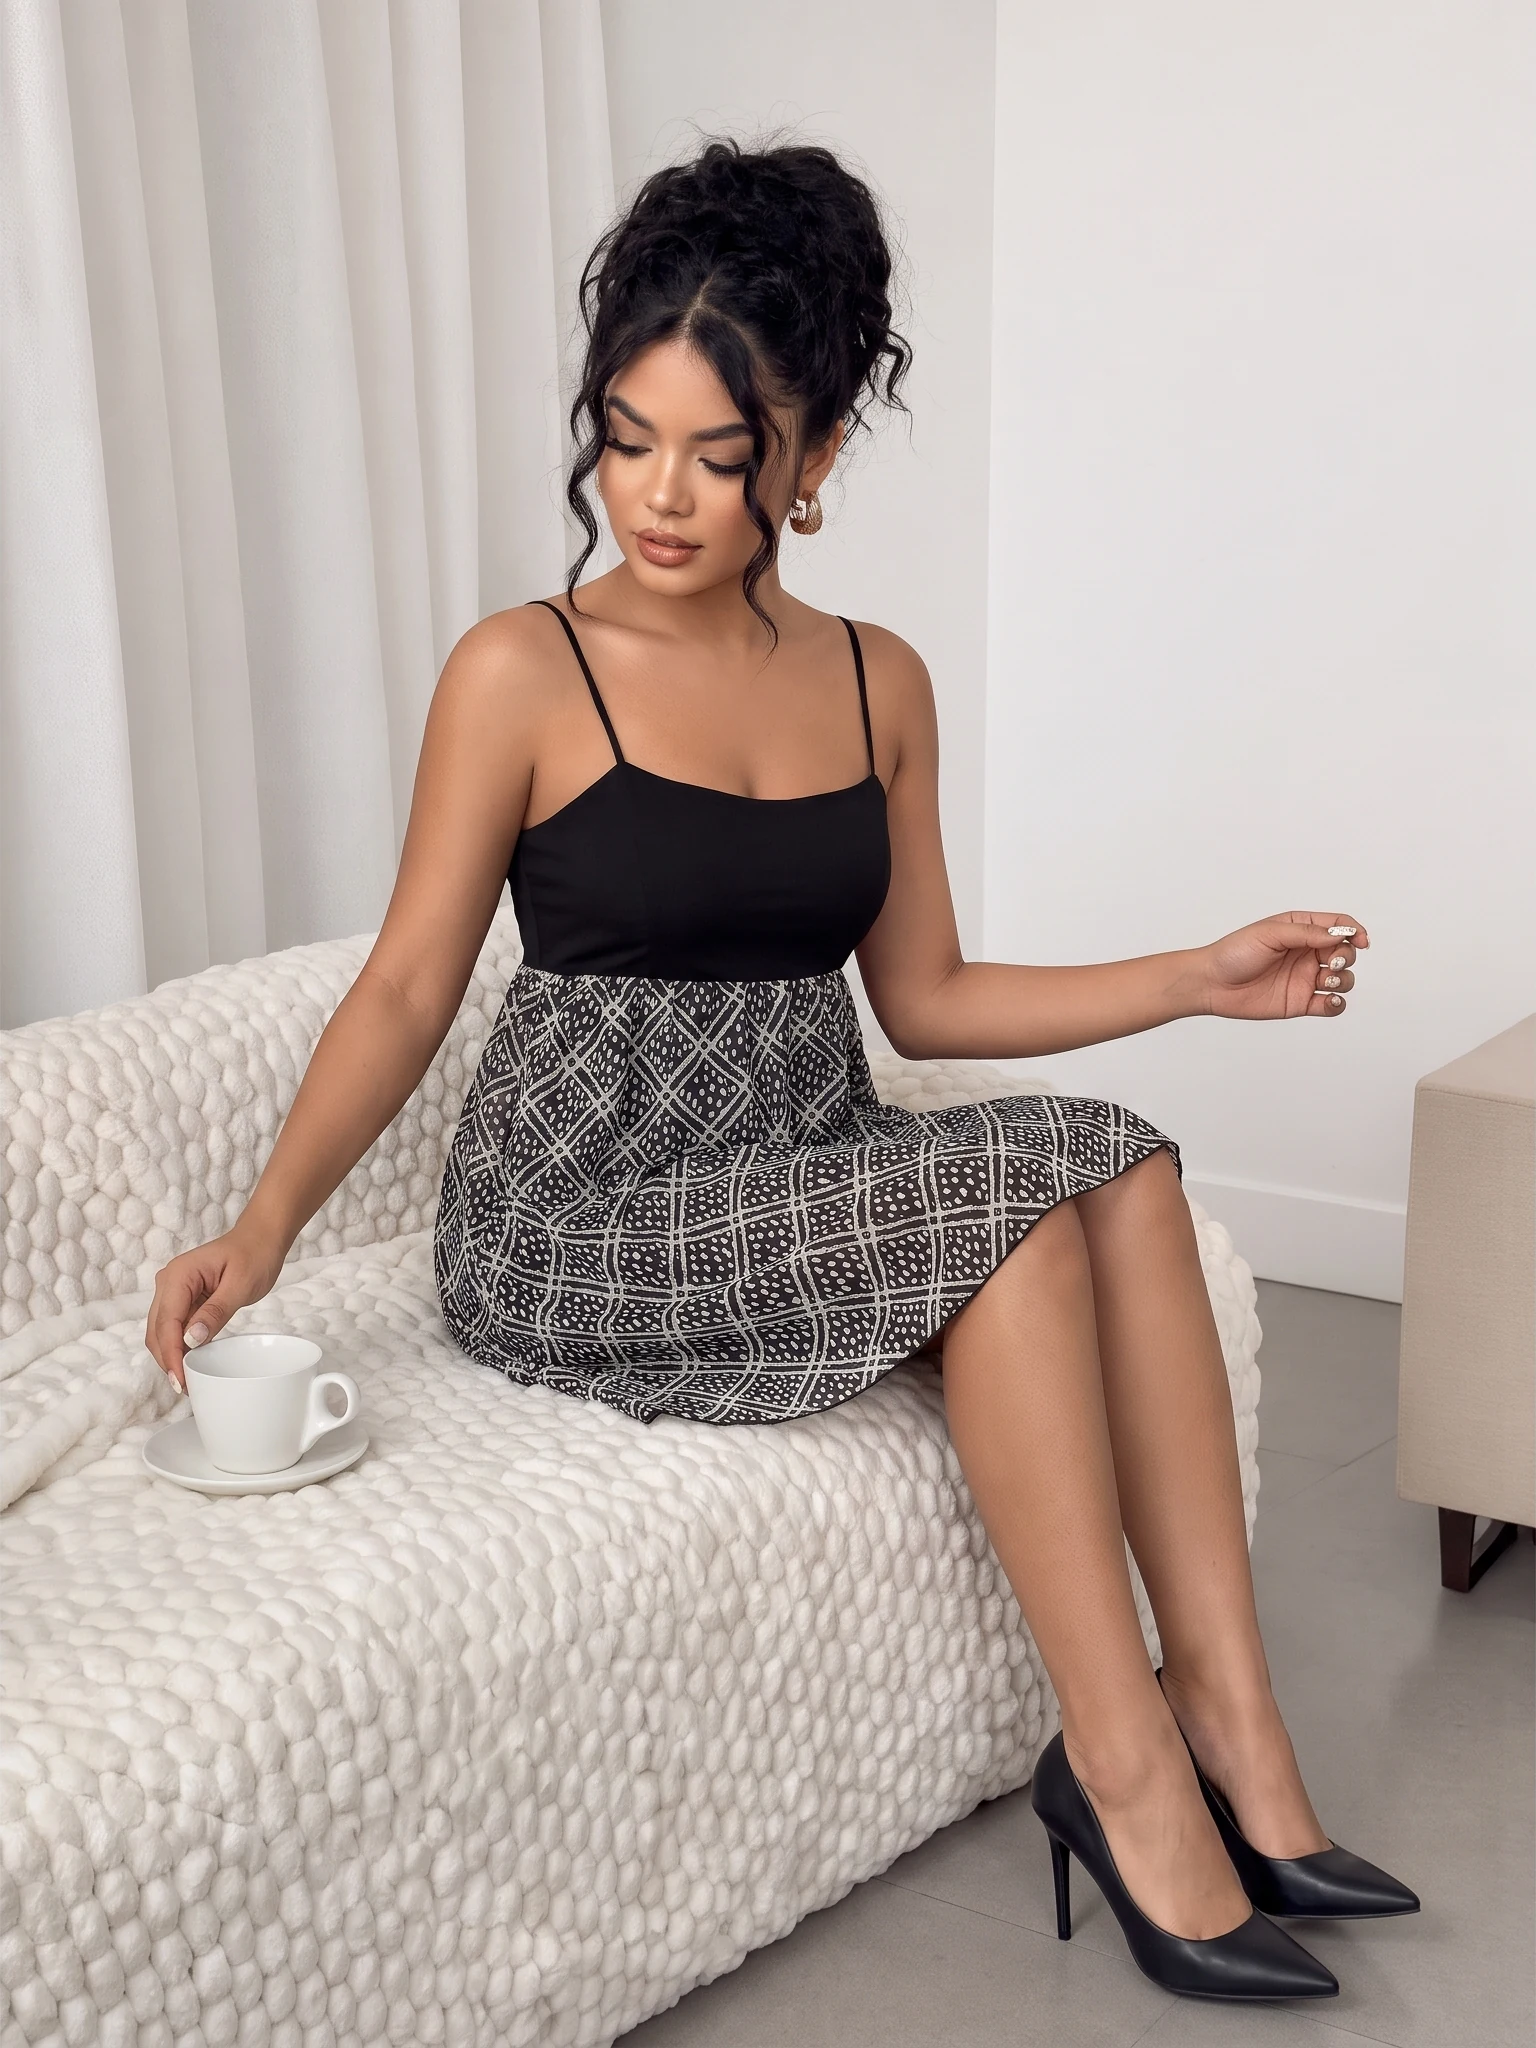
Best for: Trousers, skirts and garments intended for everyday seated wear.
Direction: Use a steady seat and sit upright without leaning across the product. Keep hands clear of the waistband and lap.
Check: During a real fitting, inspect folds, waistband pressure and hem position. The AI image here illustrates the composition only.
Avoid: Inferring real comfort or ride-up from an AI-generated image.
10. Crossed-Leg Standing Pose
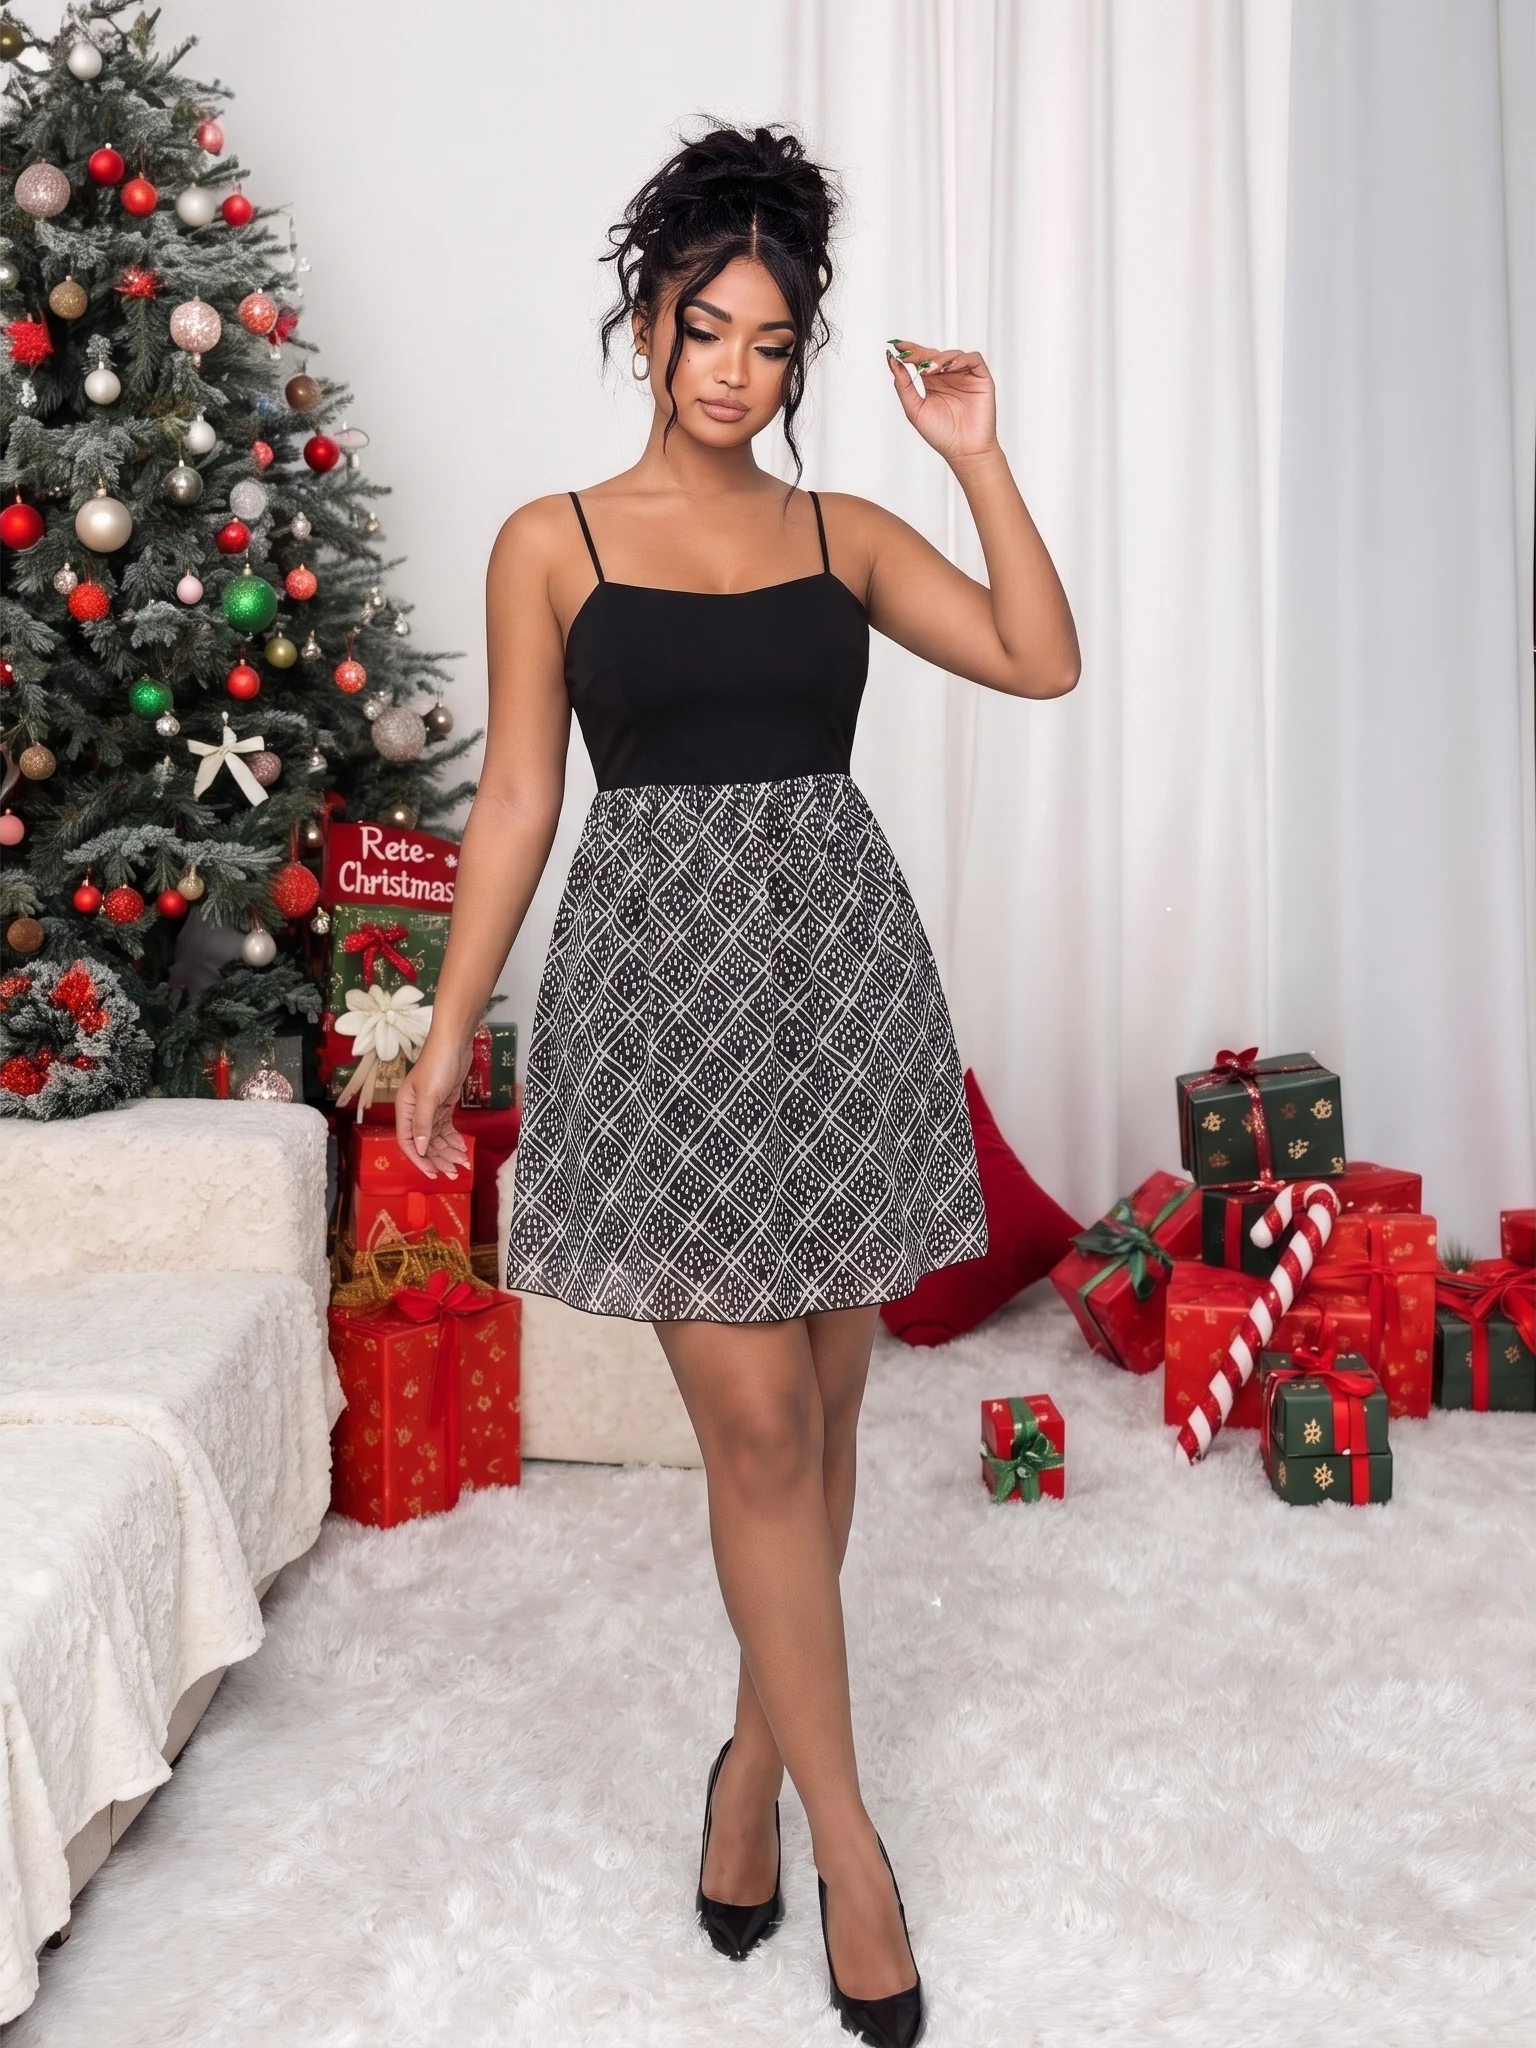
Best for: Optional lifestyle images for skirts, dresses and tailored looks.
Direction: Cross one leg lightly in front of the other. Keep the waist readable and leave the garment hanging without pulling on it.
Check: Use it as a styling variation after the neutral front and back views.
Avoid: Treating the altered leg position as a neutral fit comparison.
11. Controlled Skirt-Volume Pose
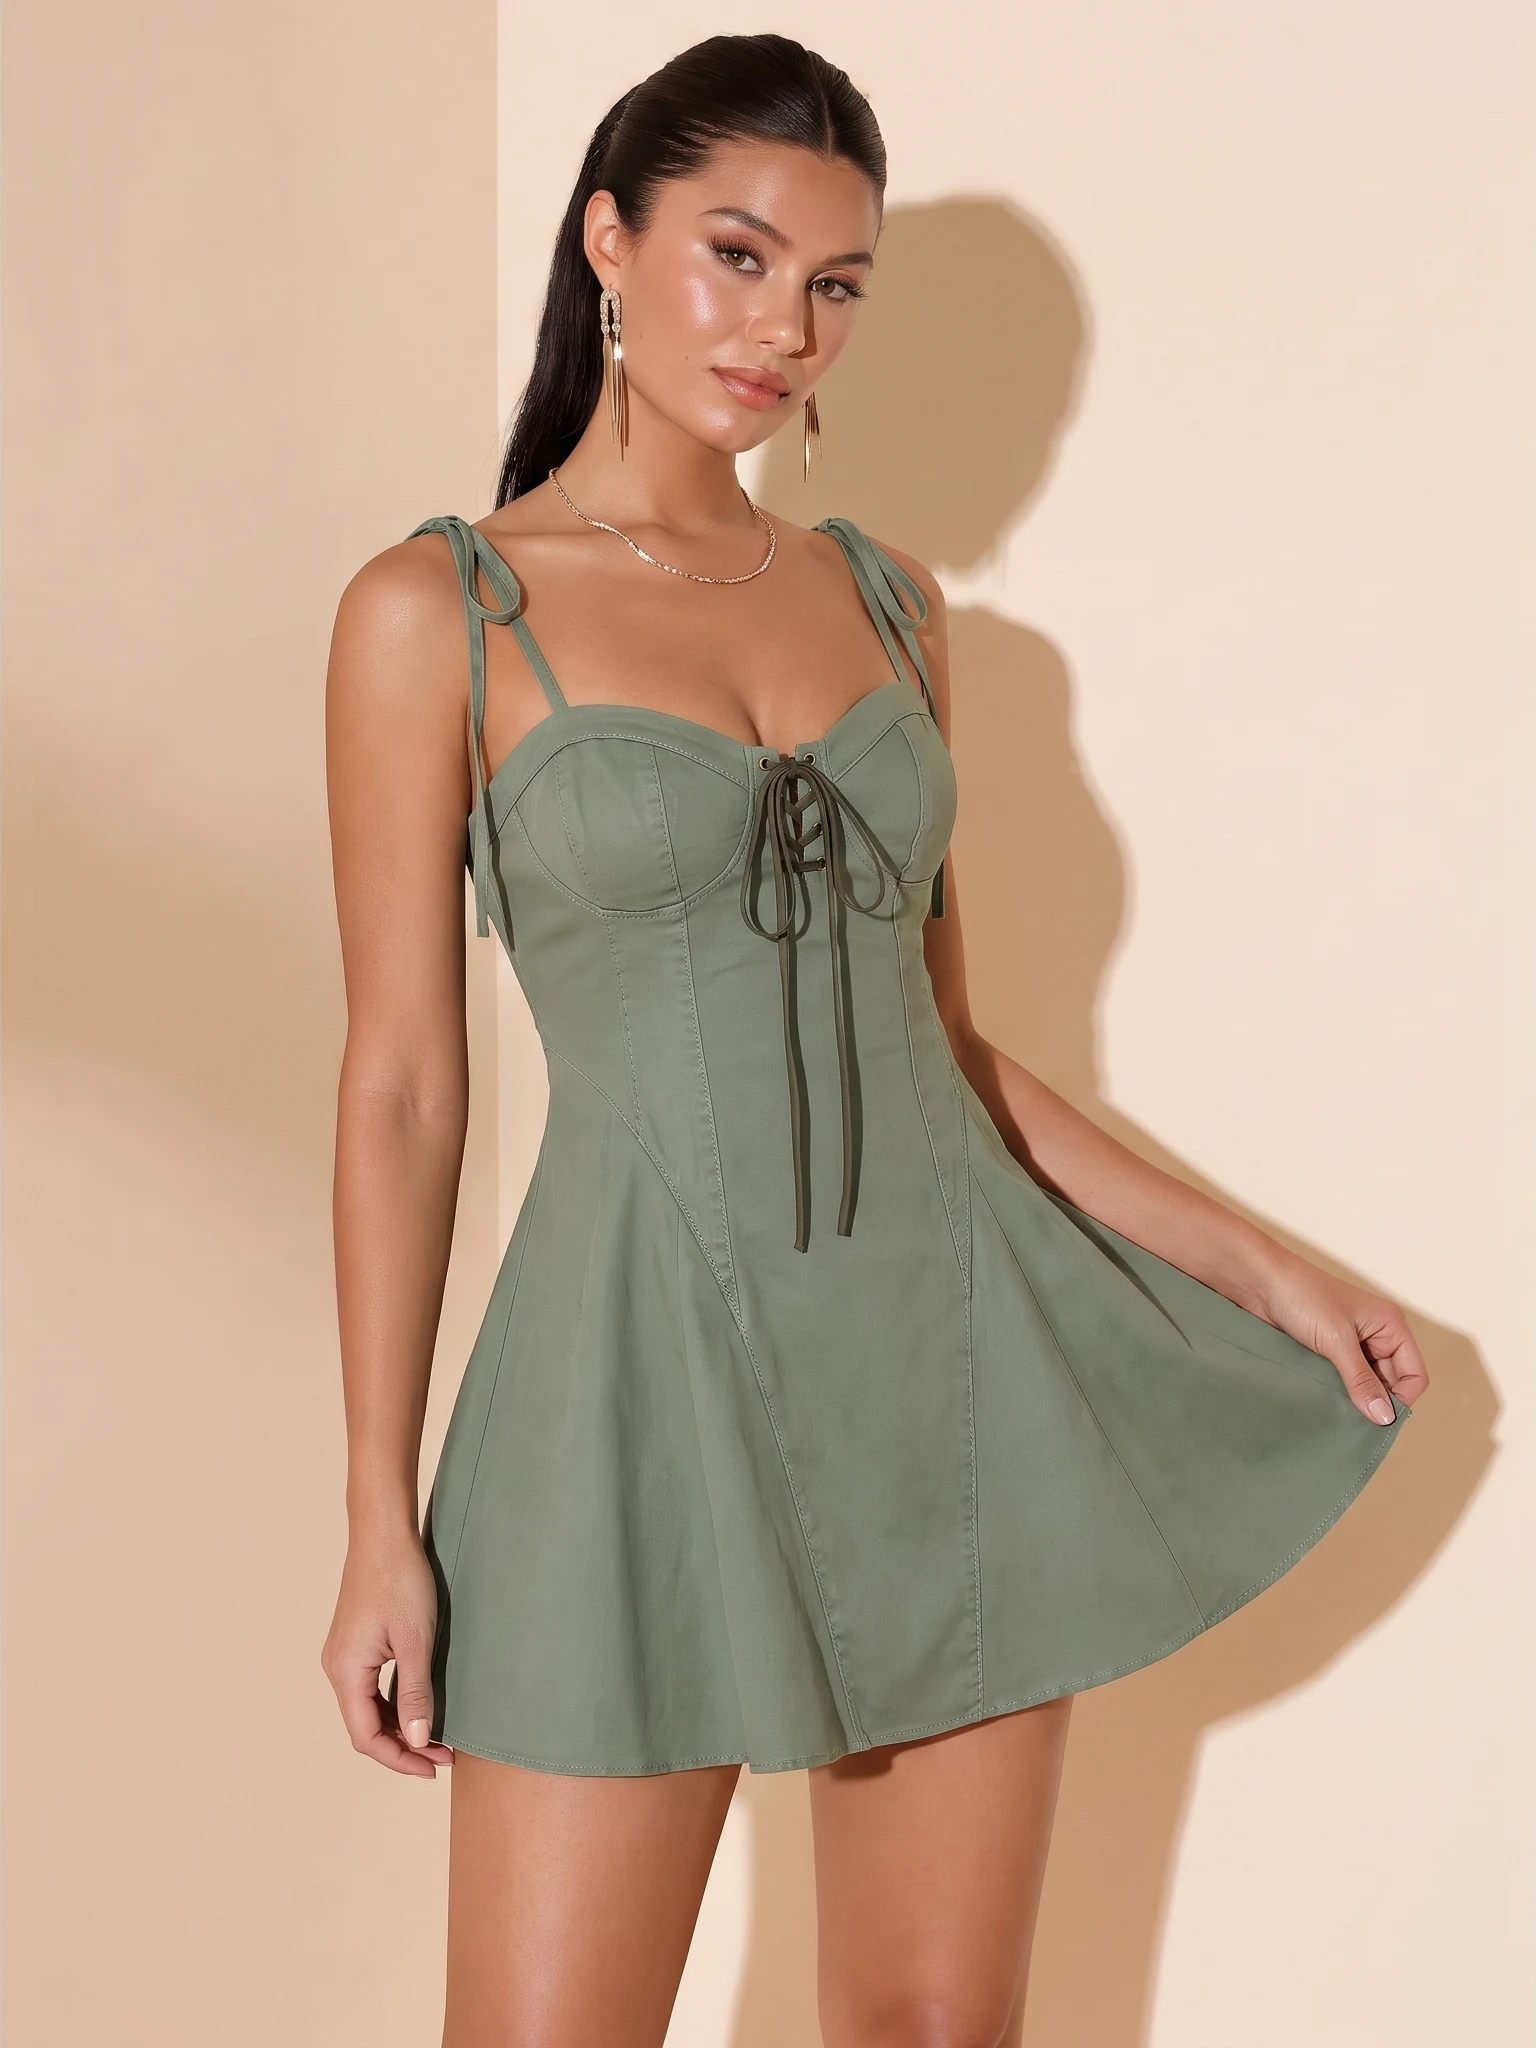
Best for: Skirts and dresses with enough fabric to hold gently away from the body.
Direction: Lift a small part of the hem lightly, without stretching the fabric. Also photograph the skirt released in its natural position.
Check: Use this pose to display the skirt shape. Capture a real walking sequence if you need evidence of movement and drape.
Avoid: Calling a held-out hem proof of natural fabric movement.
12. Angled-Leg Activewear Pose
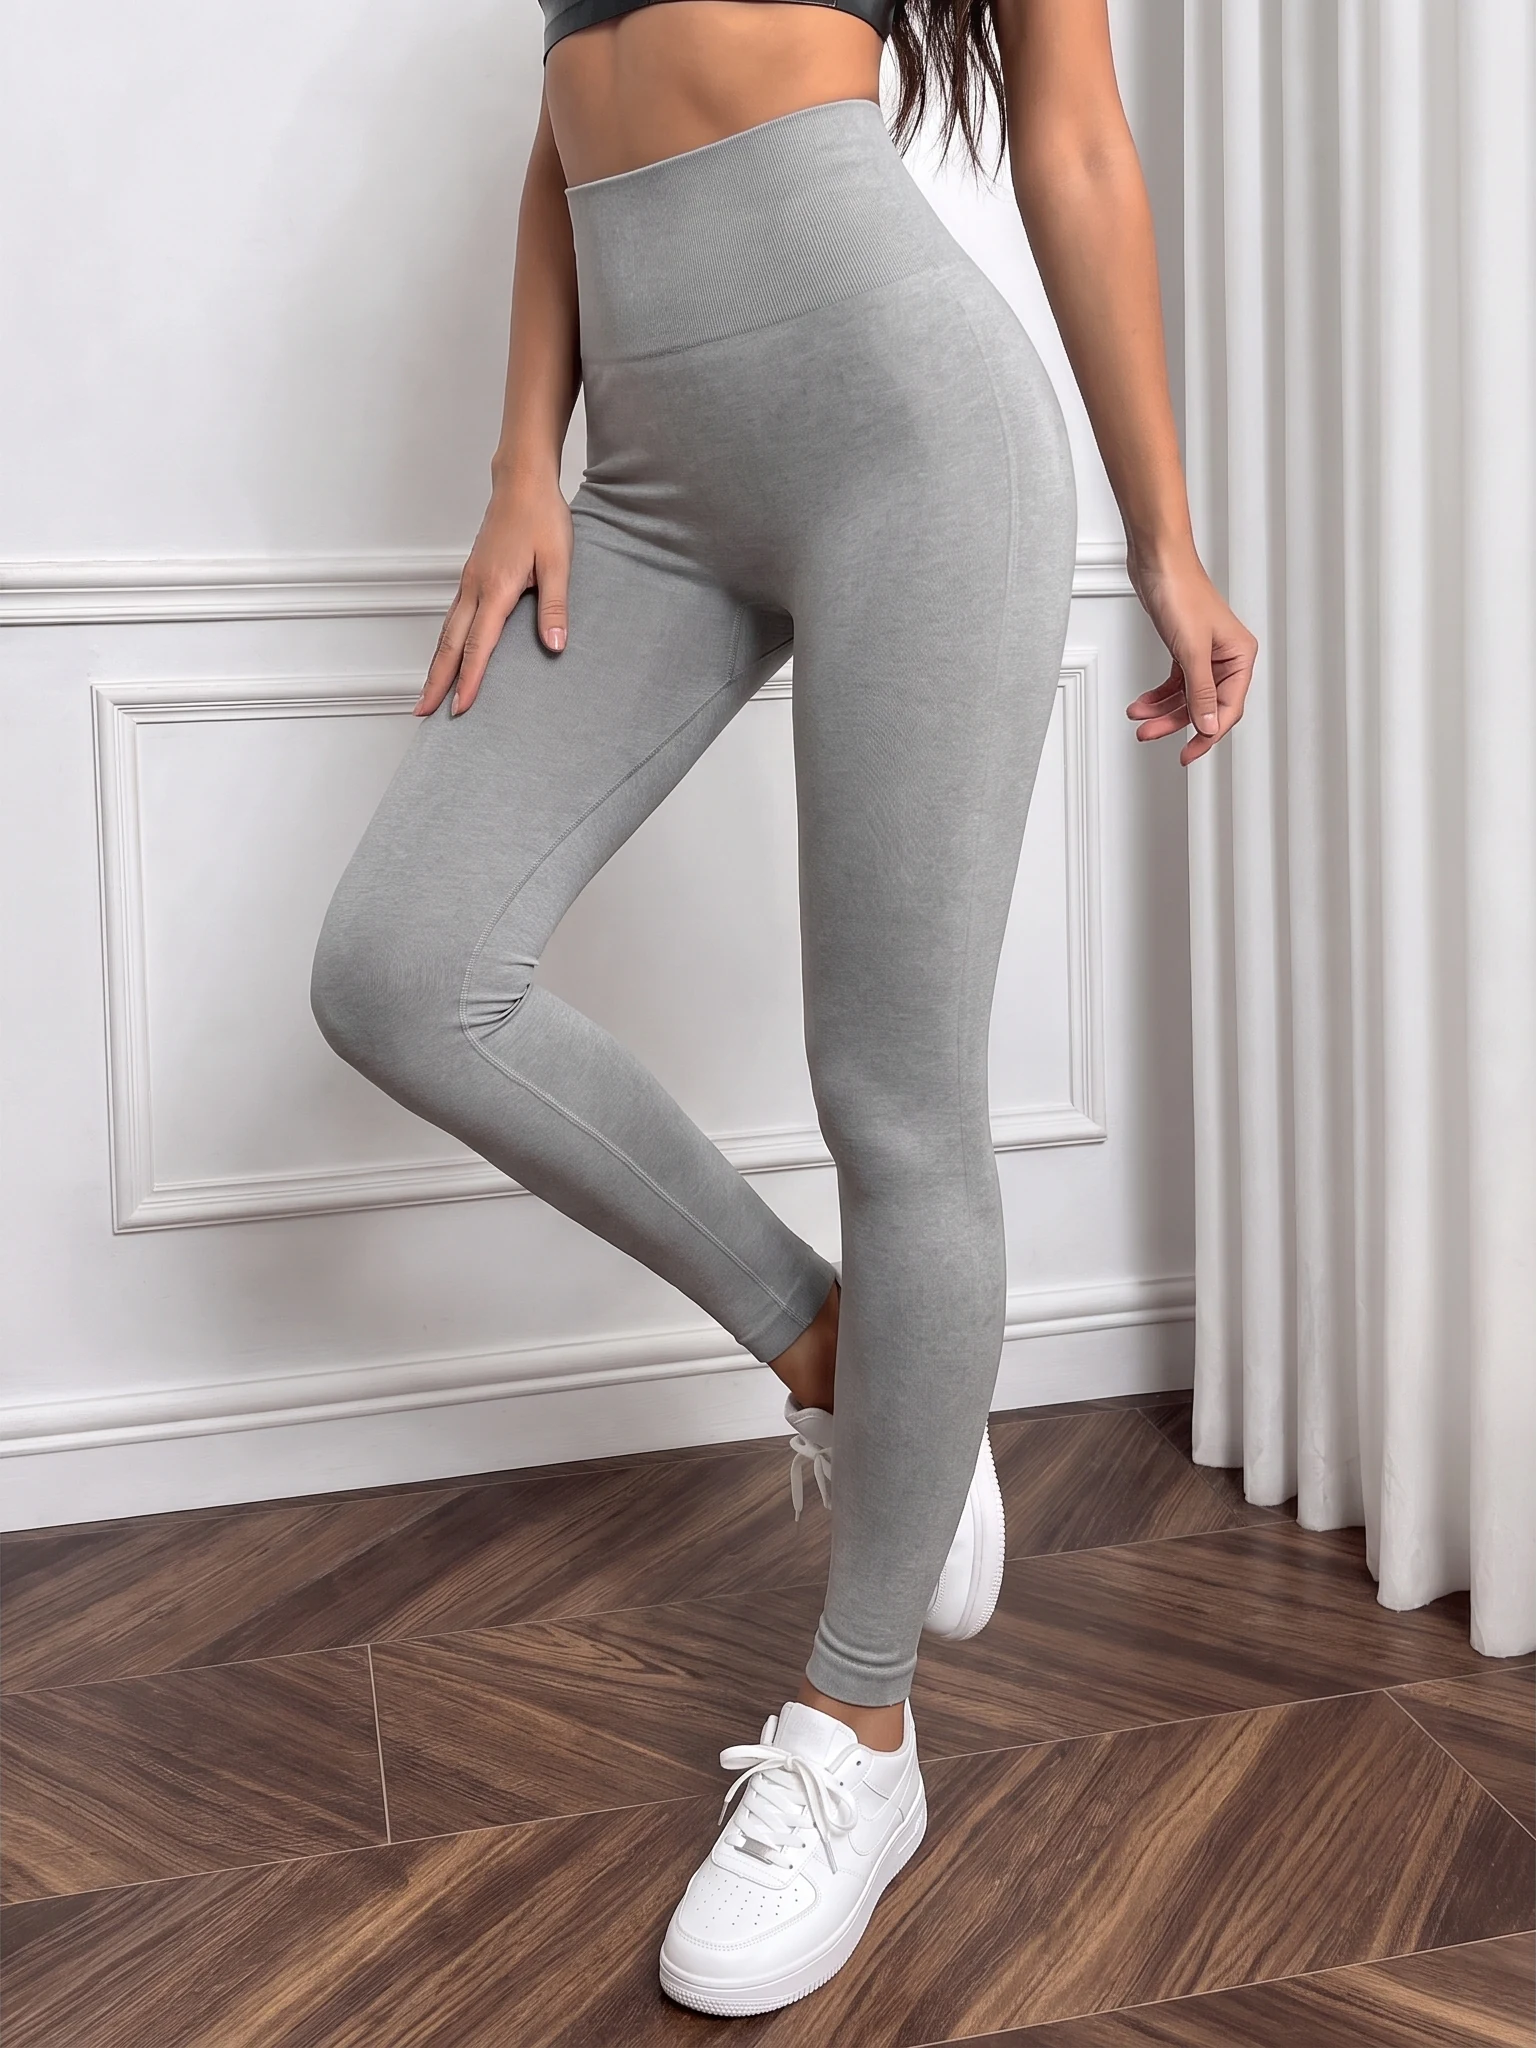
Best for: Secondary images of leggings and activewear.
Direction: Bend one knee gently while keeping the waistband visible. Keep hands off the seams you want the shopper to inspect.
Check: Show the leg line and visible seam placement. Check stretch, coverage and mobility on a real wearer through the intended movement.
Avoid: Using a single AI pose to claim stretch, comfort or opacity.
Choose the Right Poses for Each Clothing Type
Use these additions after the basic front, three-quarter, side and back coverage. Choose them for the question they answer, rather than to reach a fixed image count.
| Clothing type | Useful additions | What to check |
|---|---|---|
| Tops and shirts | Clear torso; untucked hem; neckline or cuff close-up | Shoulder line, sleeve length, print and torso length |
| Dresses and skirts | Controlled volume; real walking or seated view where relevant | Waist position, complete hem, real drape and any back fastening |
| Pants and jeans | Pocket detail; neutral seated position | Rise, waistband, hip and leg shape; actual seated wear |
| Jackets and outerwear | Open and closed front; lining close-up | Structure, closure, layer separation and lining details |
| Activewear | Angled-leg styling; real movement test when needed | Seams and waistband in the image; stretch and coverage on a real wearer |
Check the Final Images Before Publishing
Review the set as a product record, not just as a collection of attractive poses.
- Product accuracy: compare color, print, logo, neckline, sleeves, seams, fastenings and hem with the real garment. Use back and detail references for areas the front photo cannot show.
- Visibility: move hands, hair or props away from key details. Include complete garment boundaries in the overall views, with intentional close-ups kept separate.
- Shape: reject strong twists, pulling or styling that changes the apparent garment without making that styling clear.
- Set consistency: check that the same SKU and color remain consistent across angles. Explain intentional open/closed or tucked/untucked variations.
- Physical claims: use measurements and real wear tests for fit, mobility, stretch or coverage. A generated image does not provide that evidence.
- Delivery: confirm the required crop, dimensions and format, inspect at useful viewing size, and log the final file against its shot ID.
Use Snappyit to Match a Model Pose and Scene
Snappyit AI Fashion Model uses a template to set the pose and scene, then puts the garment from your product photo on that model. This lets you choose the composition for each shot before generating it.
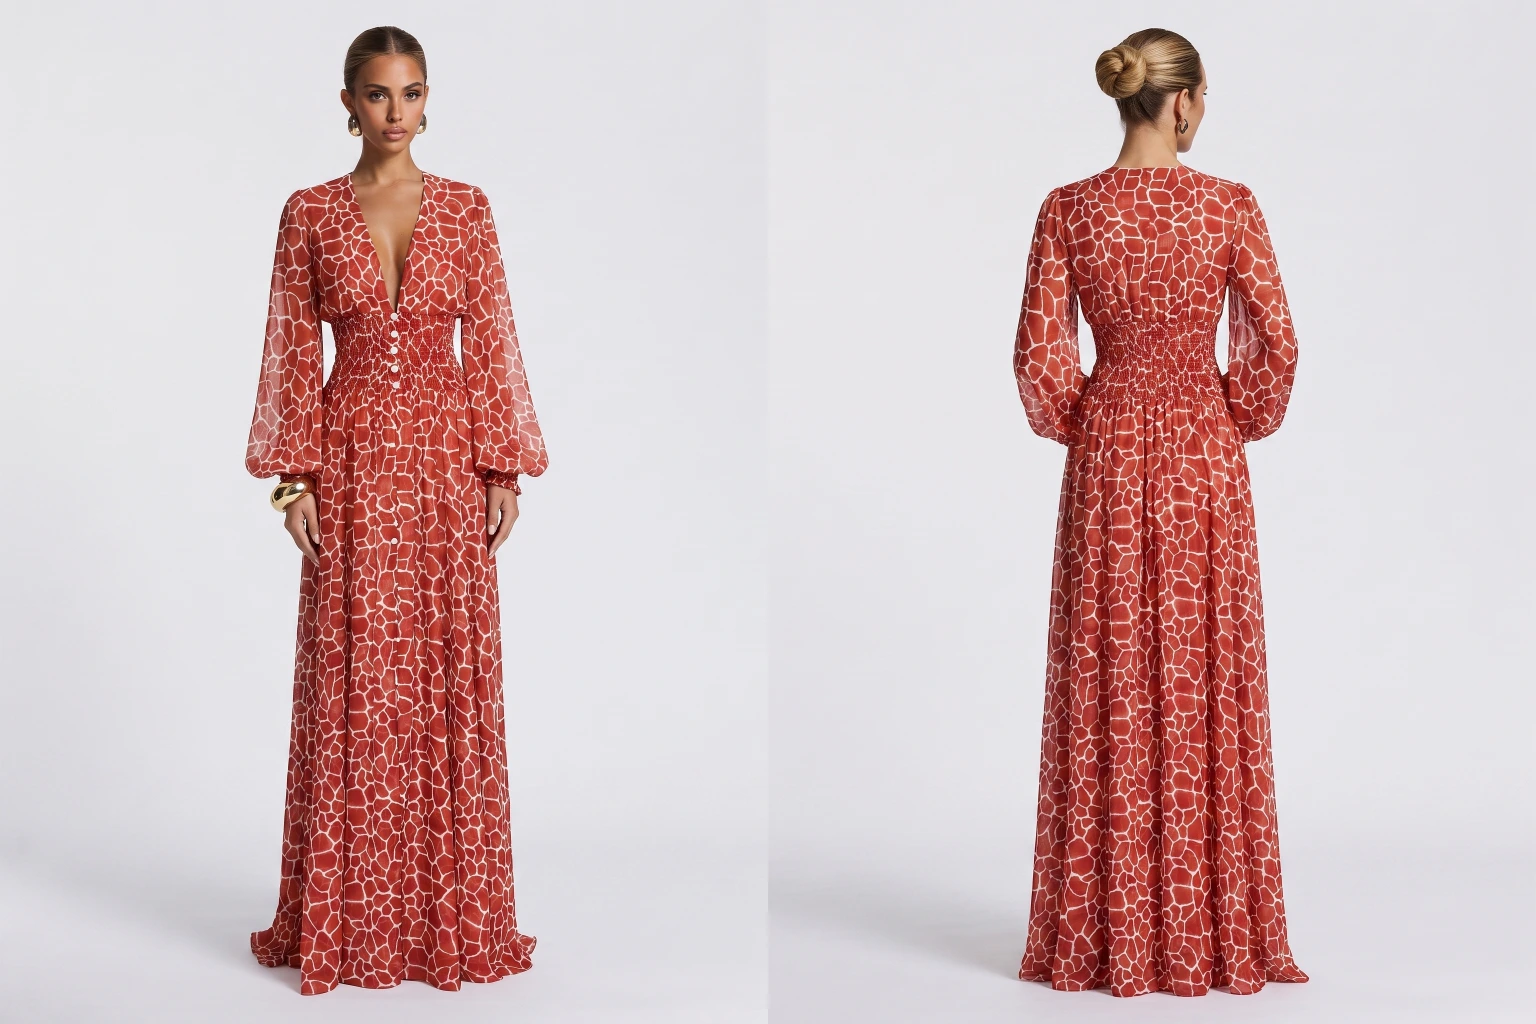
One red dress image is paired with three templates for the full-length front, back and closer views shown below.
- Upload a clear garment image. Start with a flat lay, mannequin or other product photo showing the full garment. Here, the source shows the dress from the front, including its V-neck, buttons, gathered waist and printed fabric.
- Choose a library or custom template. Select a model pose from the built-in library, or upload your own image with the pose and scene you want to recreate. Match the template’s framing to the shot you need, then generate the model wearing your garment.
- Compare each result with the product references. Check the neckline, button placement, waist, sleeves, print and hem. Use separate real back and detail photos to check features the front source does not show.
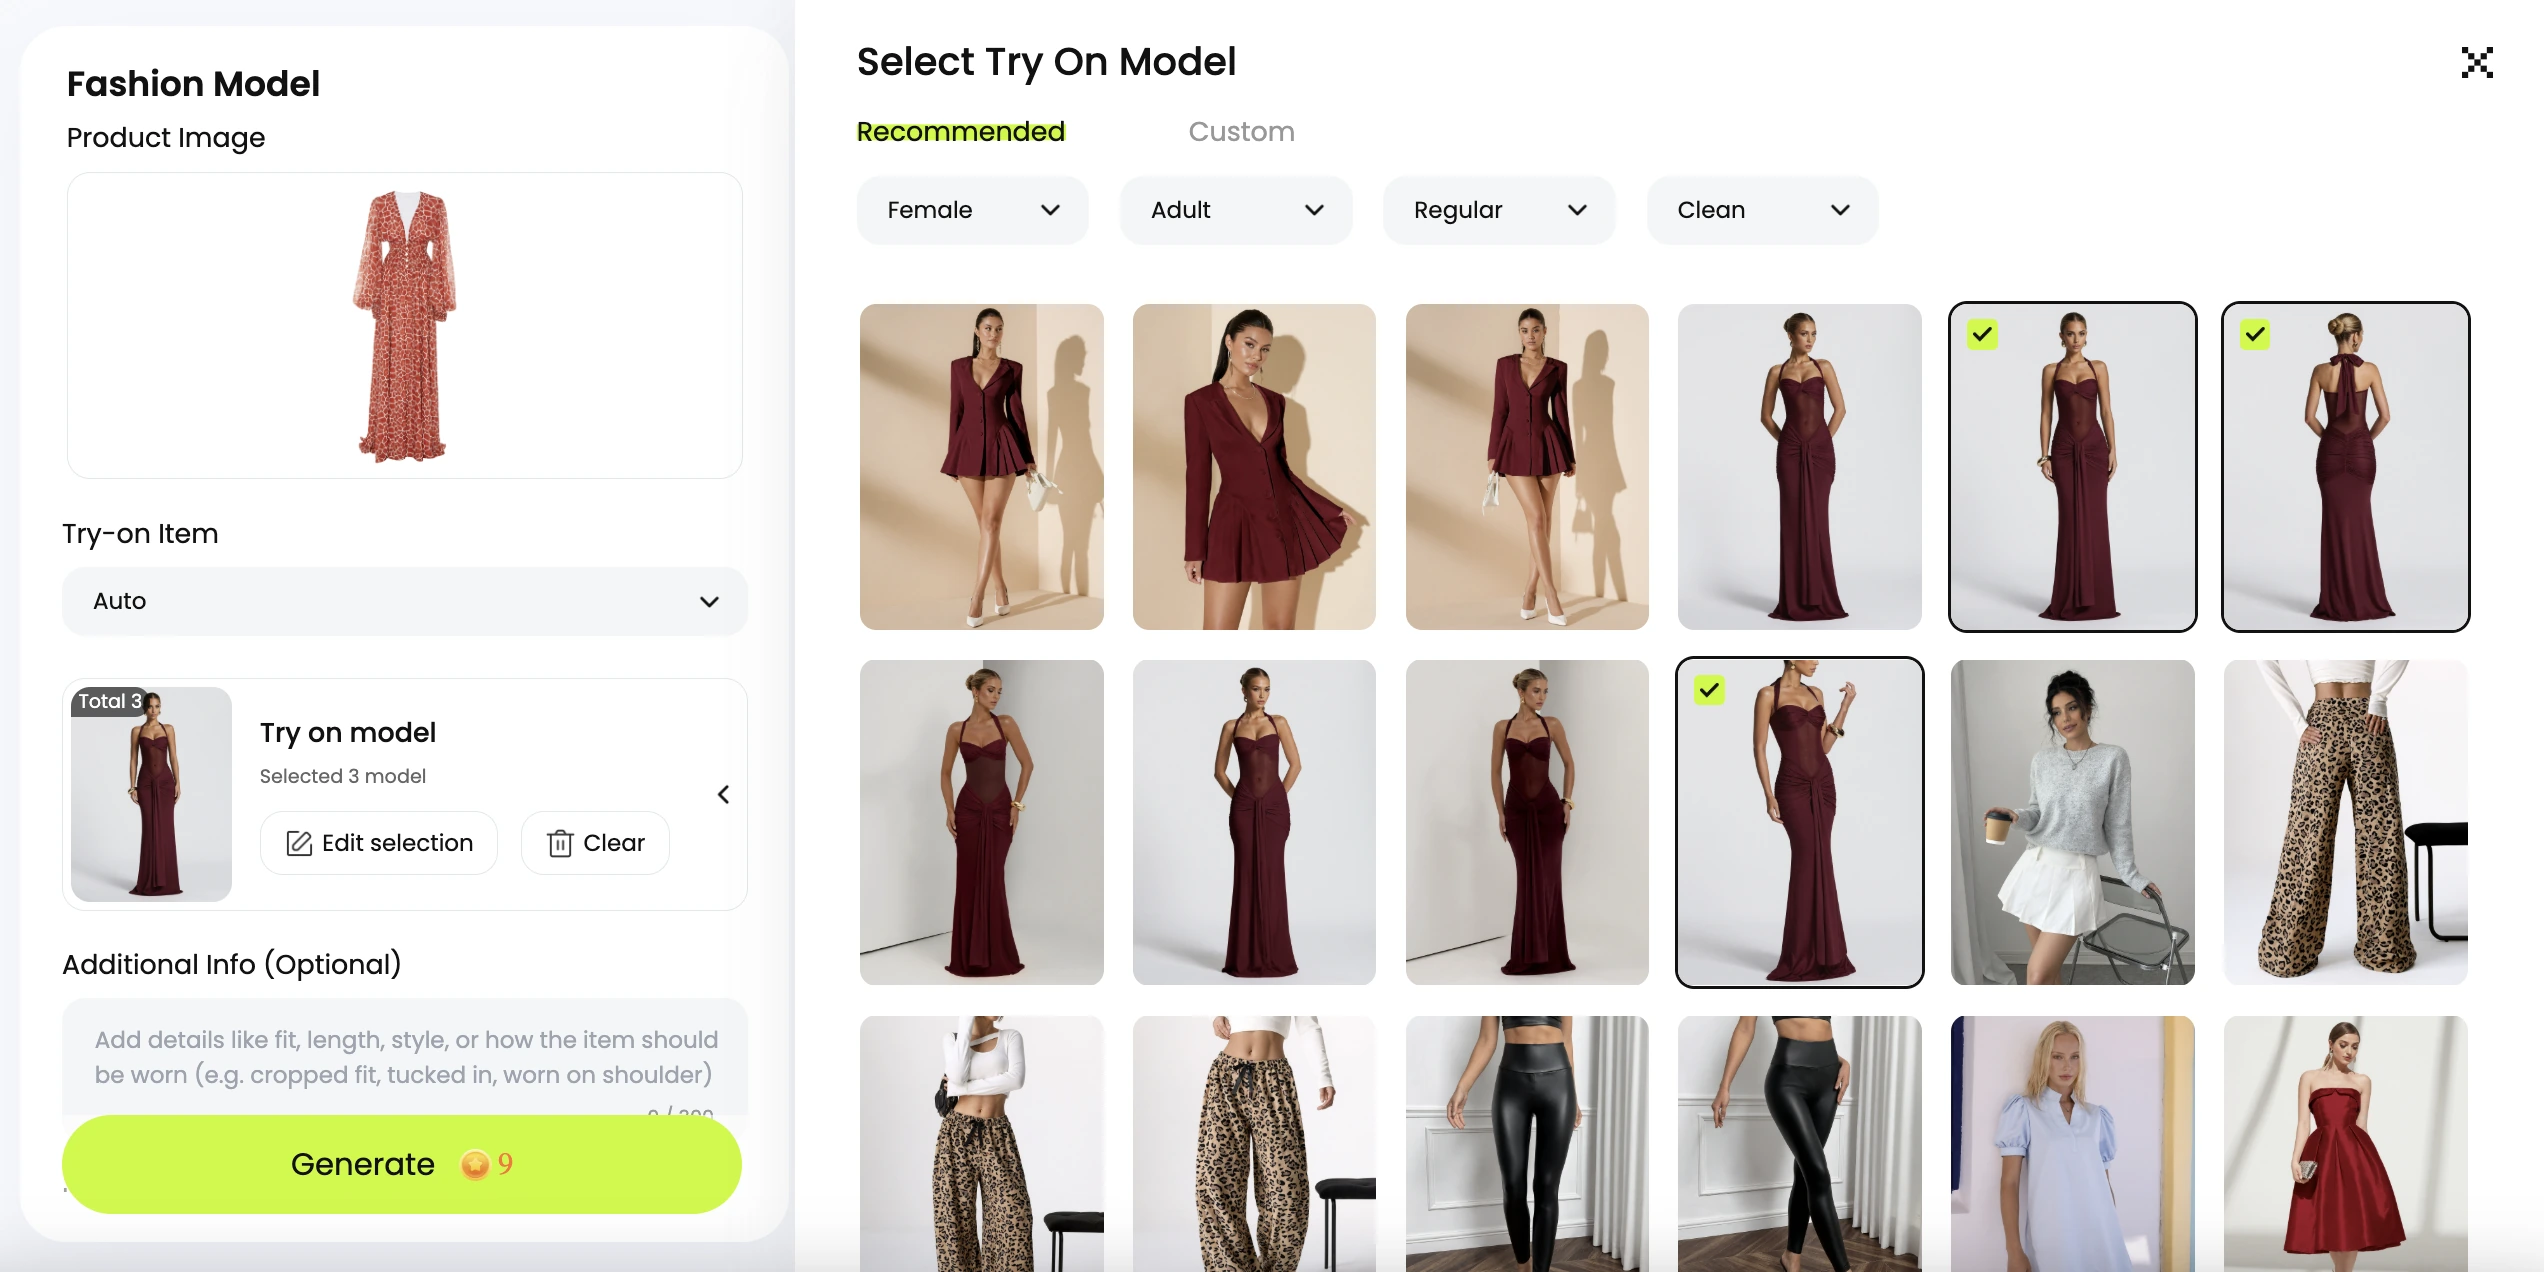
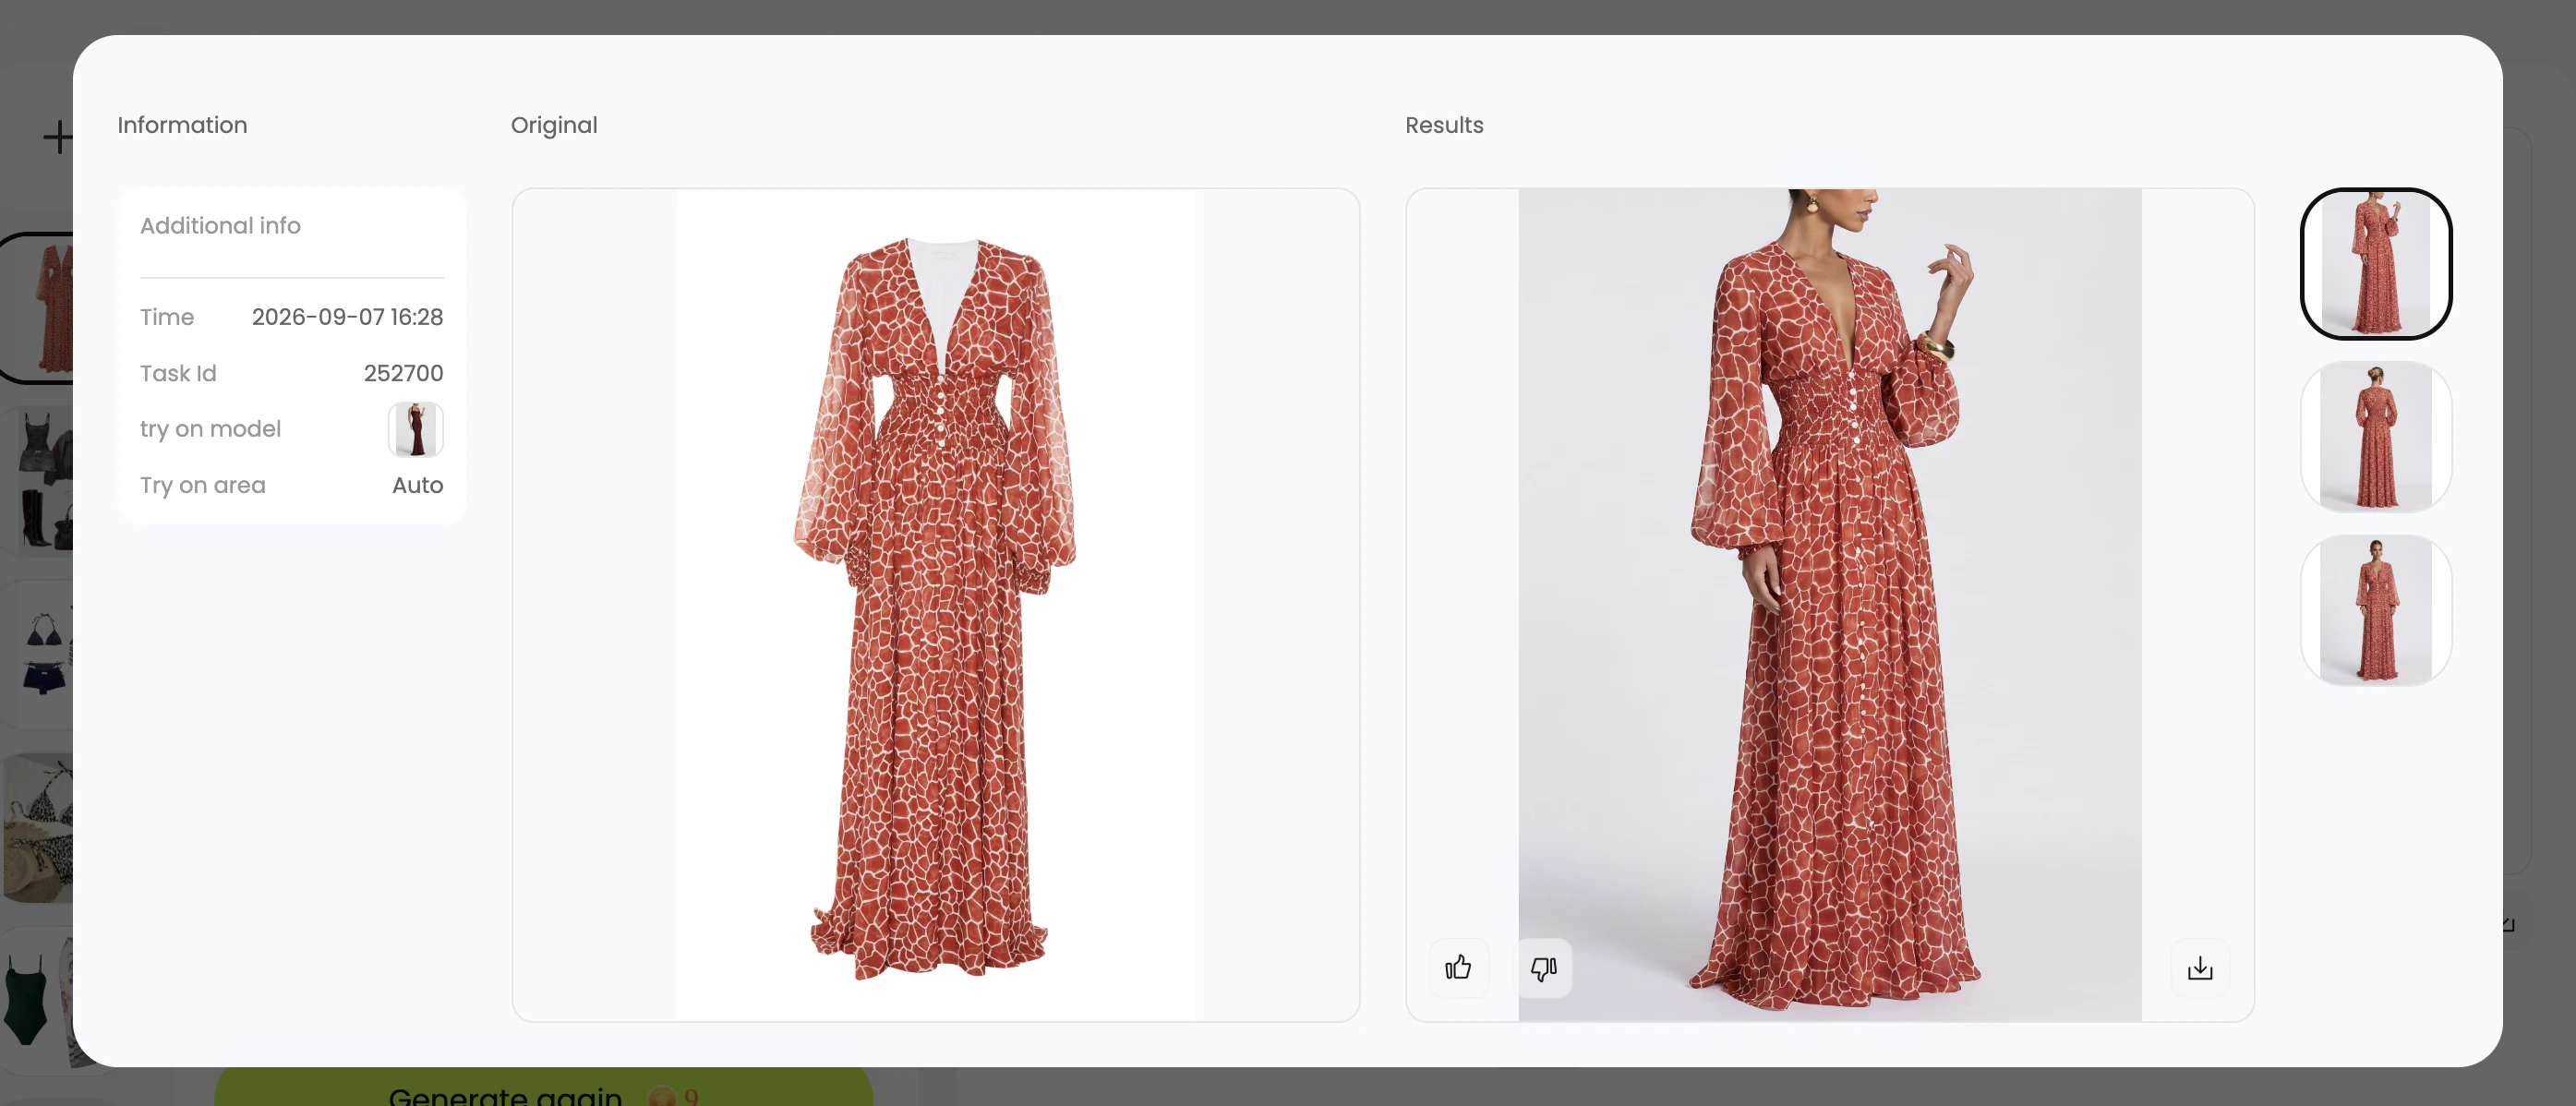
Generated model images
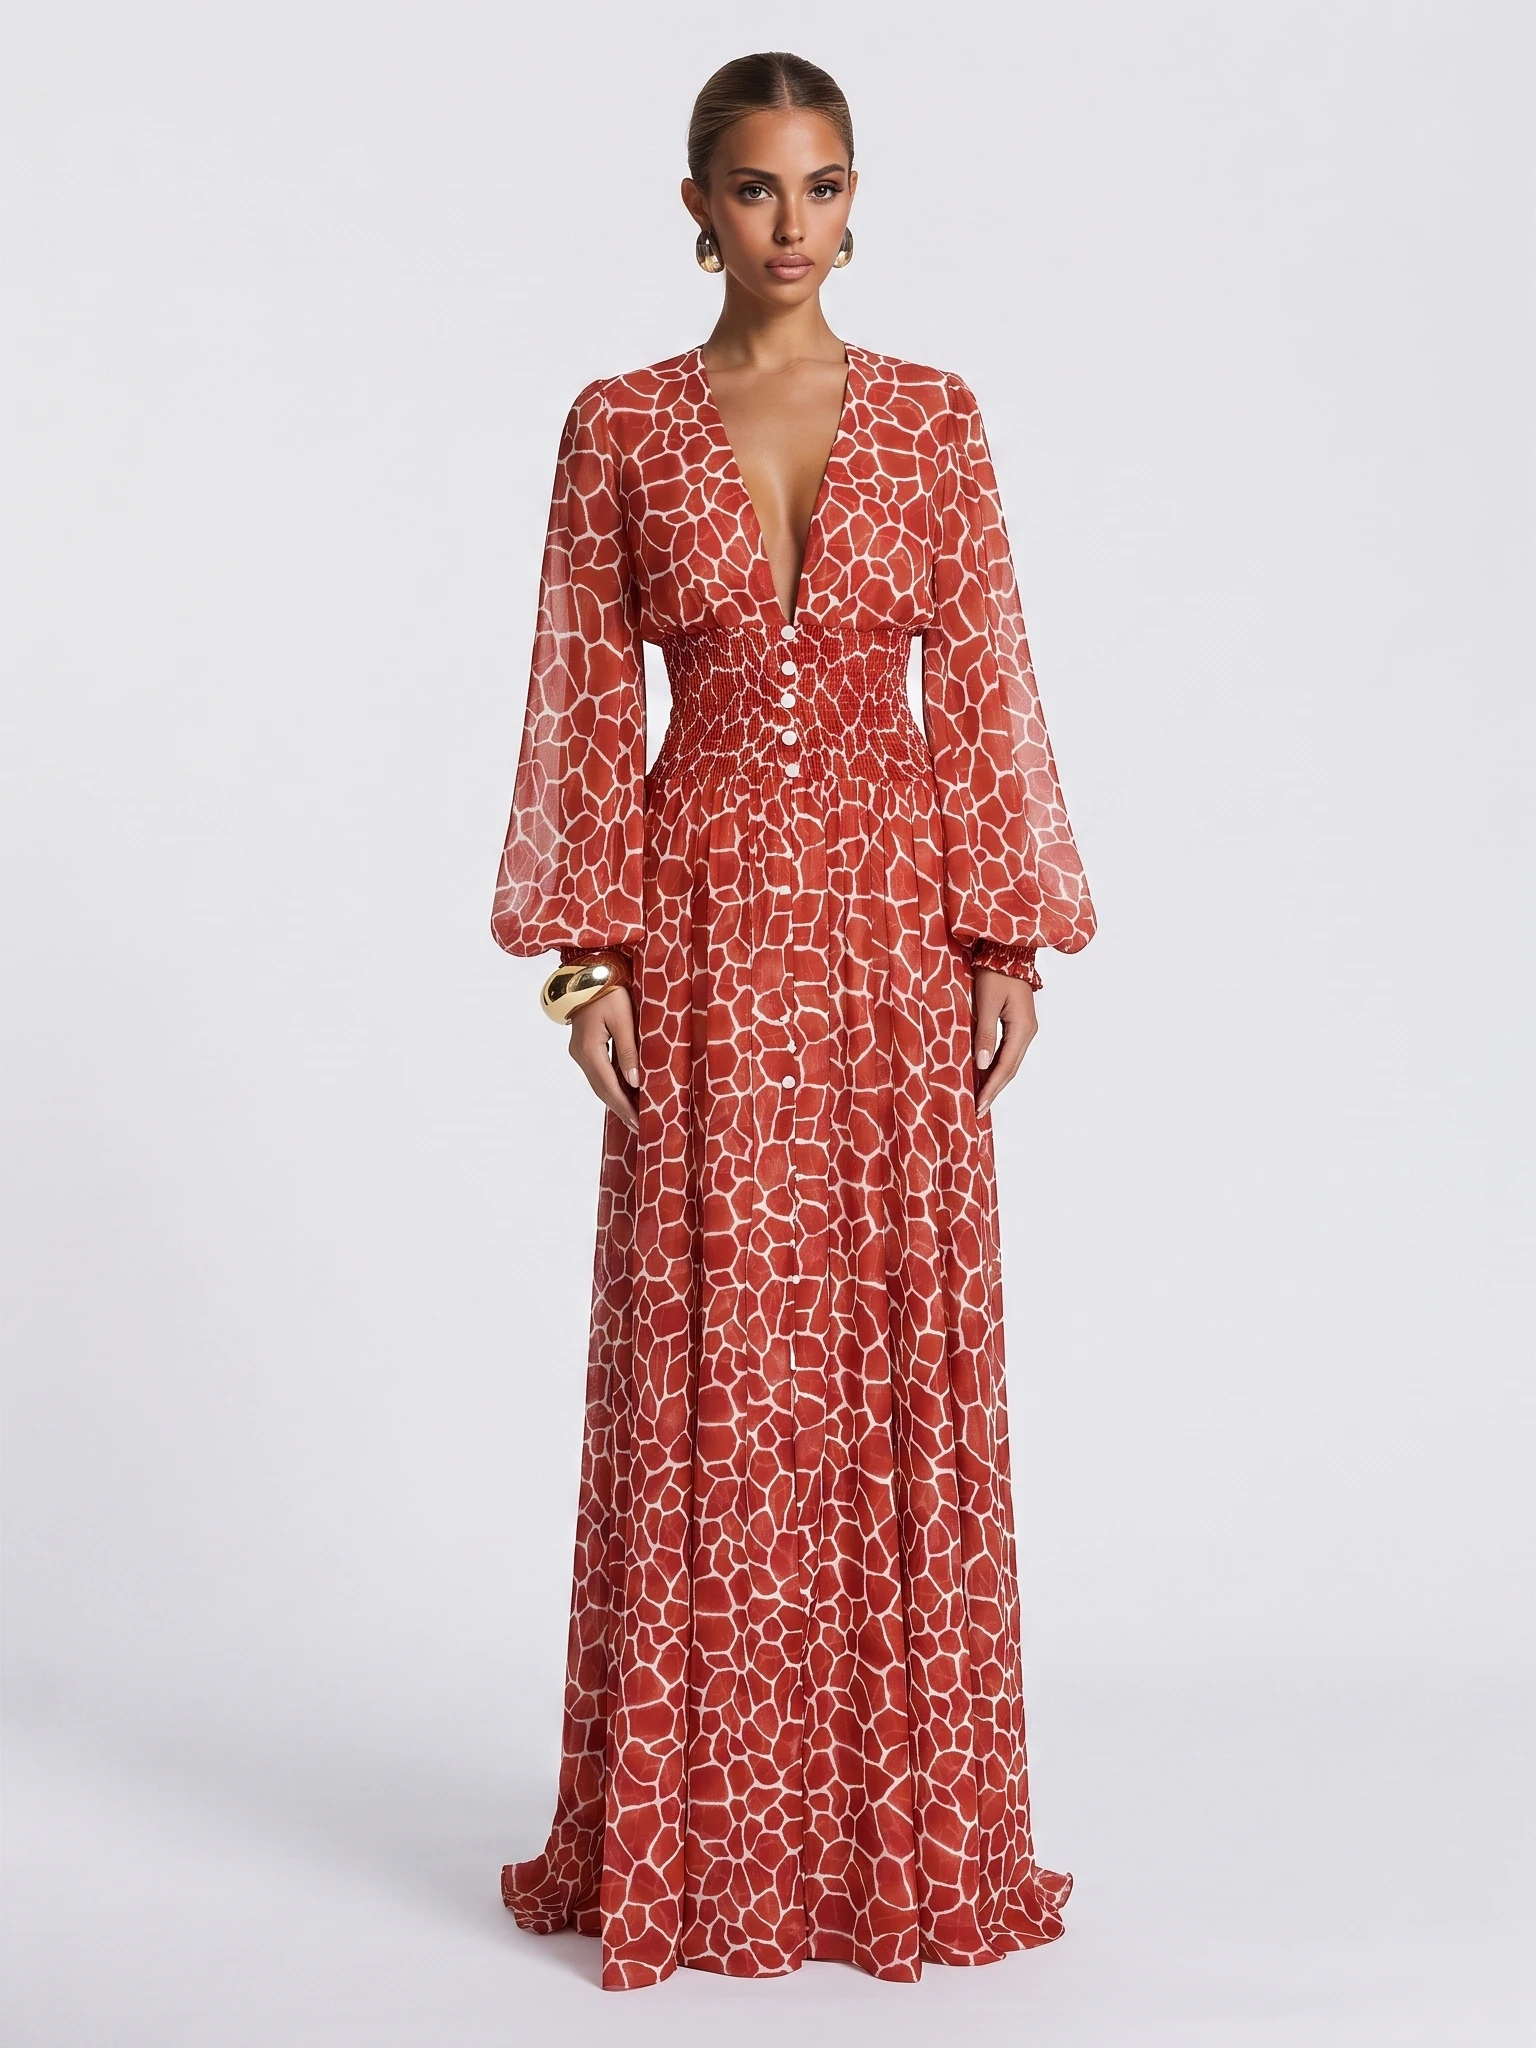
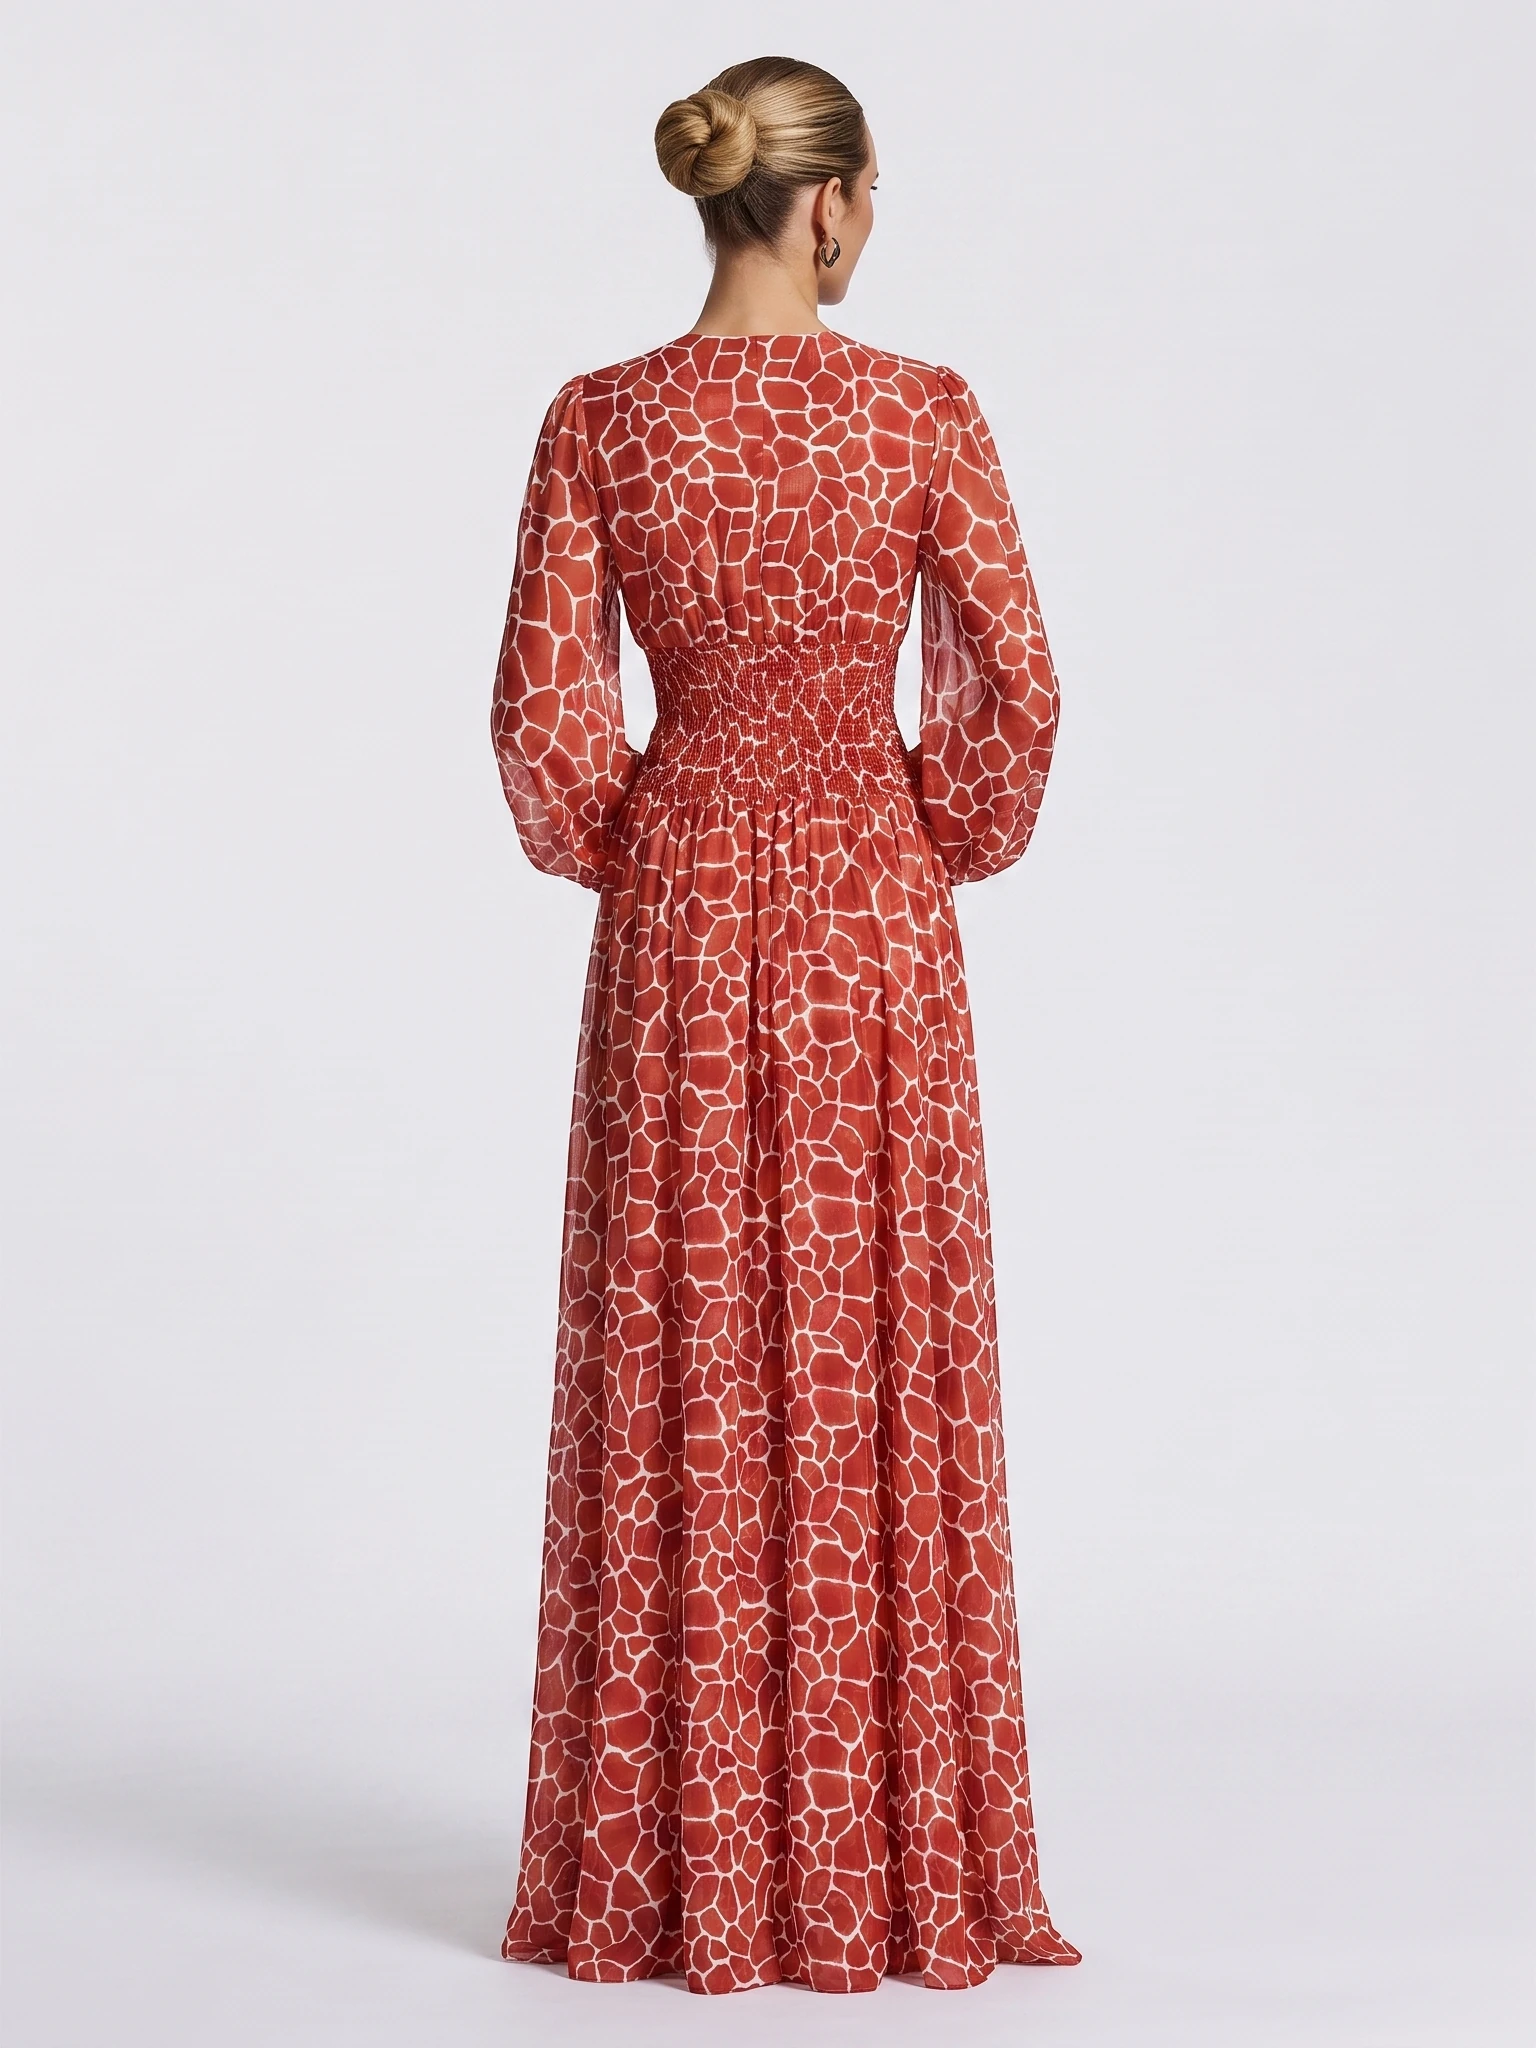
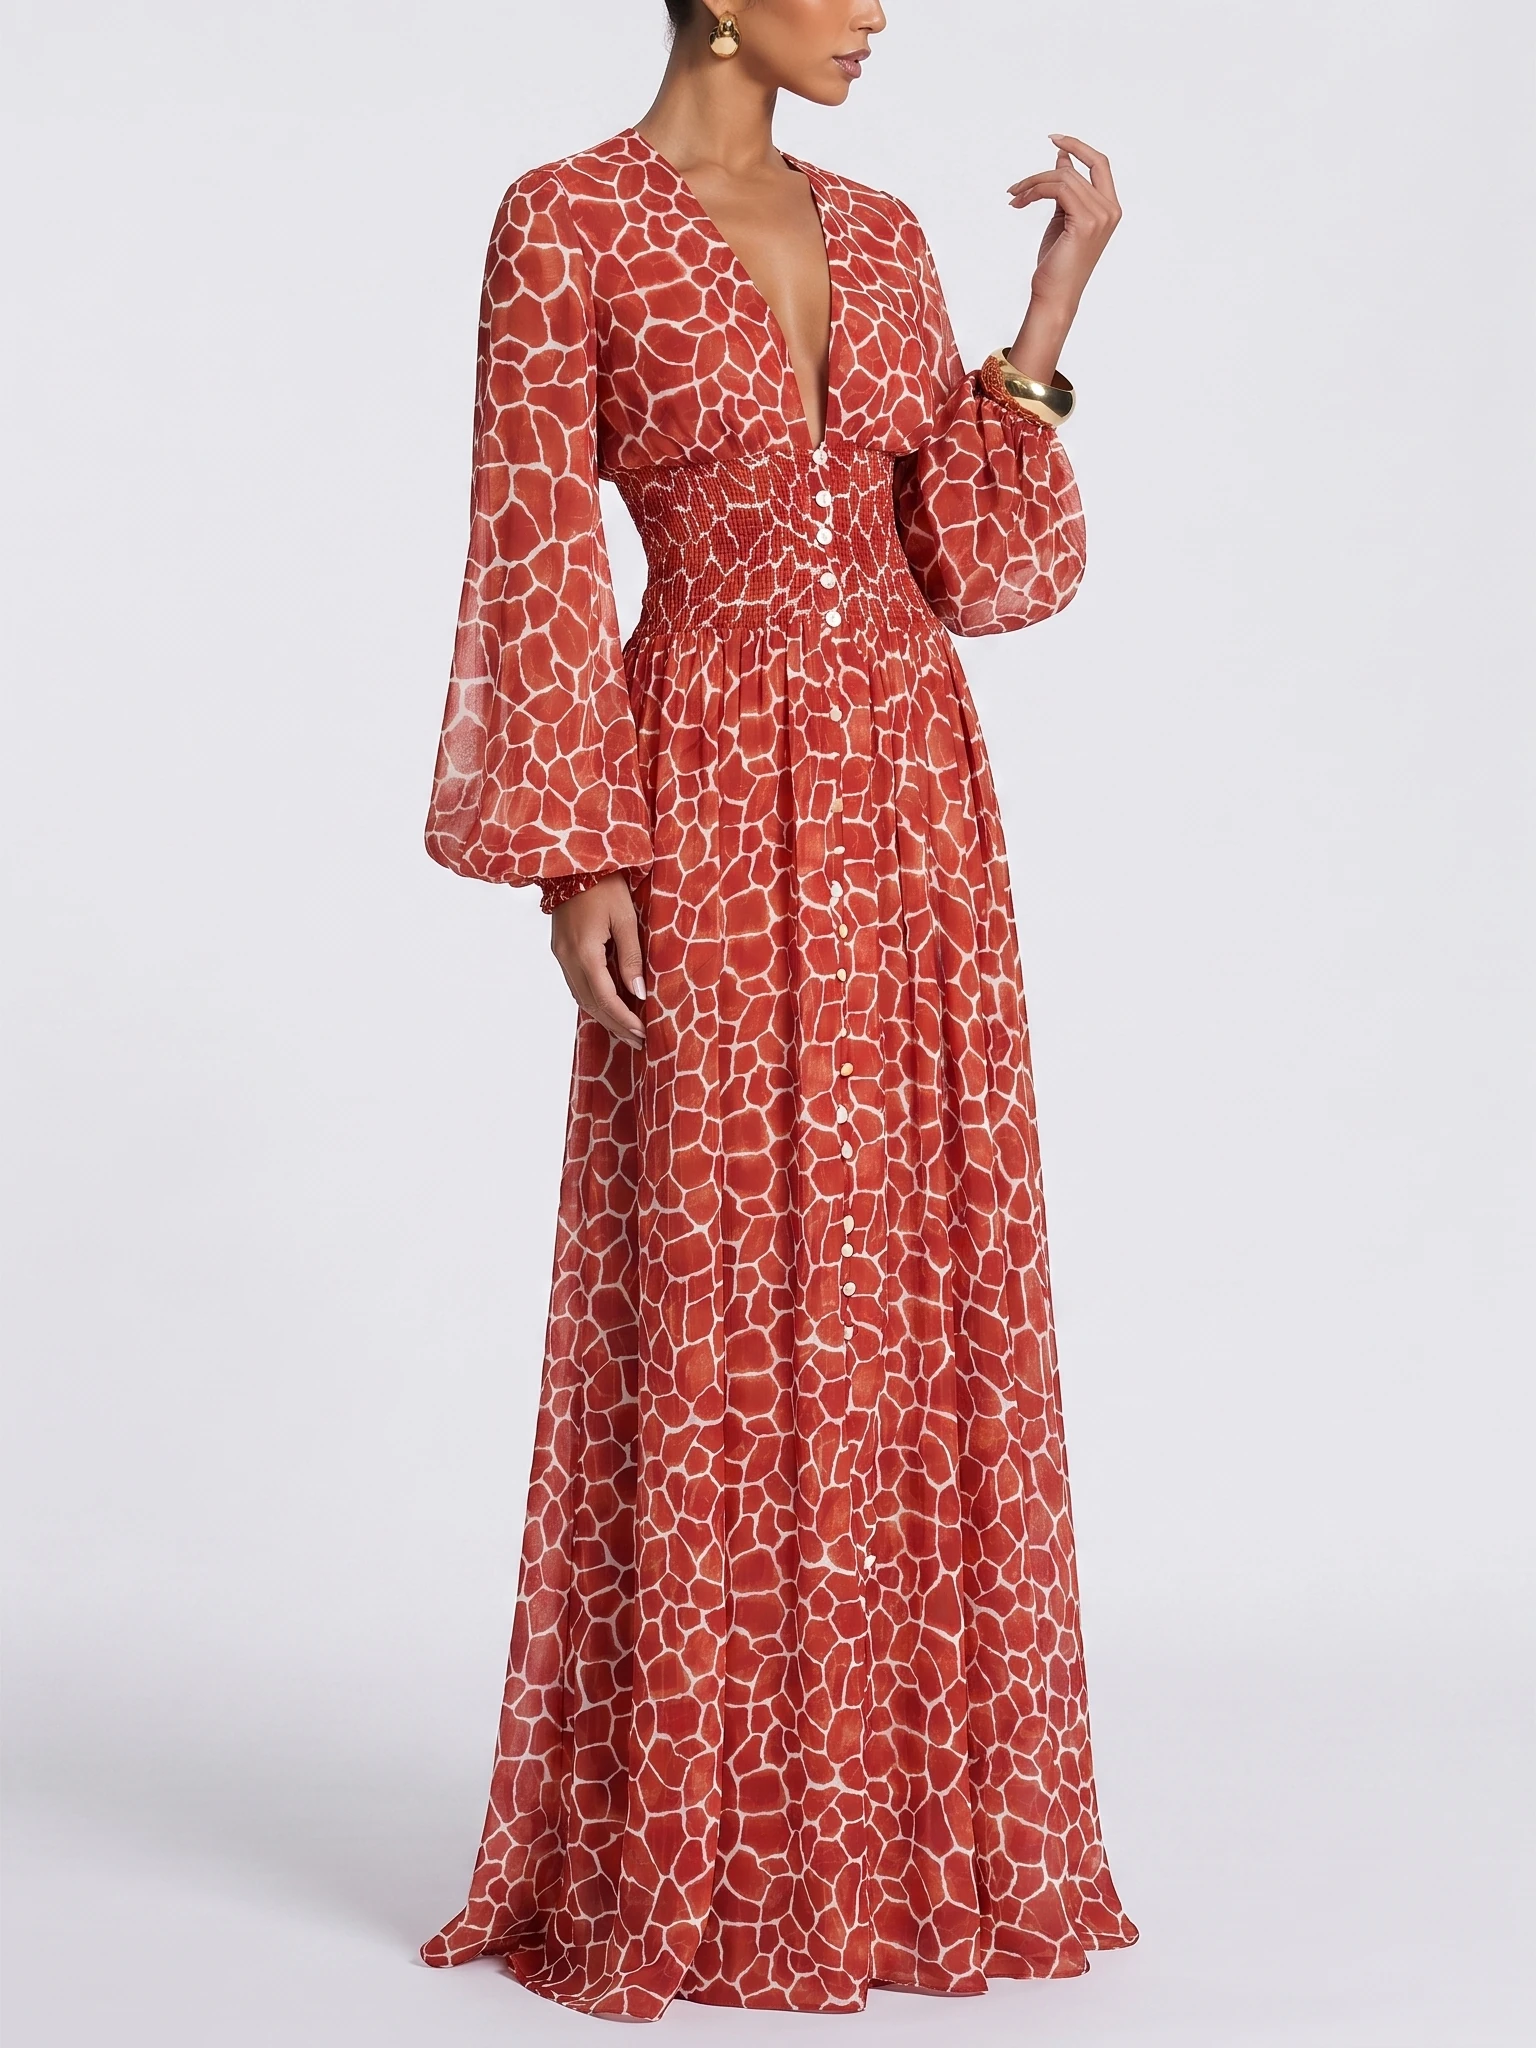
Before approving this set: verify the generated back neckline, seams and any fastening against a real back photo. The front-only source cannot confirm those features. Use measurements and real wear tests for physical fit, stretch and comfort.
You can also complete these steps in the Snappyit app: upload your garment, choose a model template and generate your photos.
Frequently Asked Questions
What is the difference between a shot and a pose?
A shot describes the image you need, including its angle, framing and purpose. A pose describes the model’s body position. One neutral front pose can supply both a product hero image and a closer crop, provided each crop shows the required details.
Does every clothing product need all 12 poses?
No. These 12 poses are a selection library. Start with clear front, three-quarter, side and back views, then add detail or category-specific images where they answer a useful product question. Lifestyle images are optional additions.
How many model photos does a clothing product need?
There is no fixed number for every store. Plan coverage of the garment’s front, sides, back and important details, allowing a front image to serve as the hero when appropriate. Add more images for construction, styling or use cases that the basic views do not explain.
How can I keep the same garment consistent across images?
Record the SKU, color and sample size, plus the model’s height and worn size, in the shoot notes. Keep the camera setup, lighting, background and framing consistent across the catalog views. Compare the neckline, seams, print and hem with the same product references before approving the set.
Which poses show clothing fit most clearly?
Neutral front, three-quarter, side and full back views help show the garment’s appearance on a real wearer. Avoid large twists or fabric pulling. Measurements and real try-on observations are still needed when judging size, comfort or movement.
Can AI create additional model photoshoot images?
Yes. Snappyit’s AI fashion model generator puts your garment on the model in a chosen template, recreating its pose and scene. Choose a pose from the built-in library or upload your own image as a custom template. Check the clothing details against real product photos before using the results.
What should I check before publishing the final set?
Check color, print, logo, seams, closures, neckline, cuffs and hem against the real garment. Remove images with obstructed details, misleading distortion or inconsistent product features. Confirm the required crop, size and format for the specific destination before marking the shot approved.
References
- Shotkit — 21 Fashion Poses, Ideas & Tips for Photographing Models
- Wedio — Fashion Poses: Experiment With These 33 Model Poses
- David Genik Photography — The Ultimate Guide to Model Poses for Clothing E-Commerce Studio Photography
- Shopify — Clothing Photography
- soona — How to Build a Product Photography Shot List
- Adobe — Fashion photography tips for beginners