



 Cheese Yuan
What is an AI Product Studio?
An AI Product Studio uses an existing product photo to generate studio-style images with new backgrounds, lighting, or compositions. Your photo provides the reference for the item you sell.
For your store, a useful result should show what customers will receive. Choose the image’s purpose before generating: a clear product view, a collection image, or a scene for a campaign.
Use scene instructions to describe the setting, surface, or lighting you want. Before publishing, compare the product’s labels, shape, and small parts with the original.
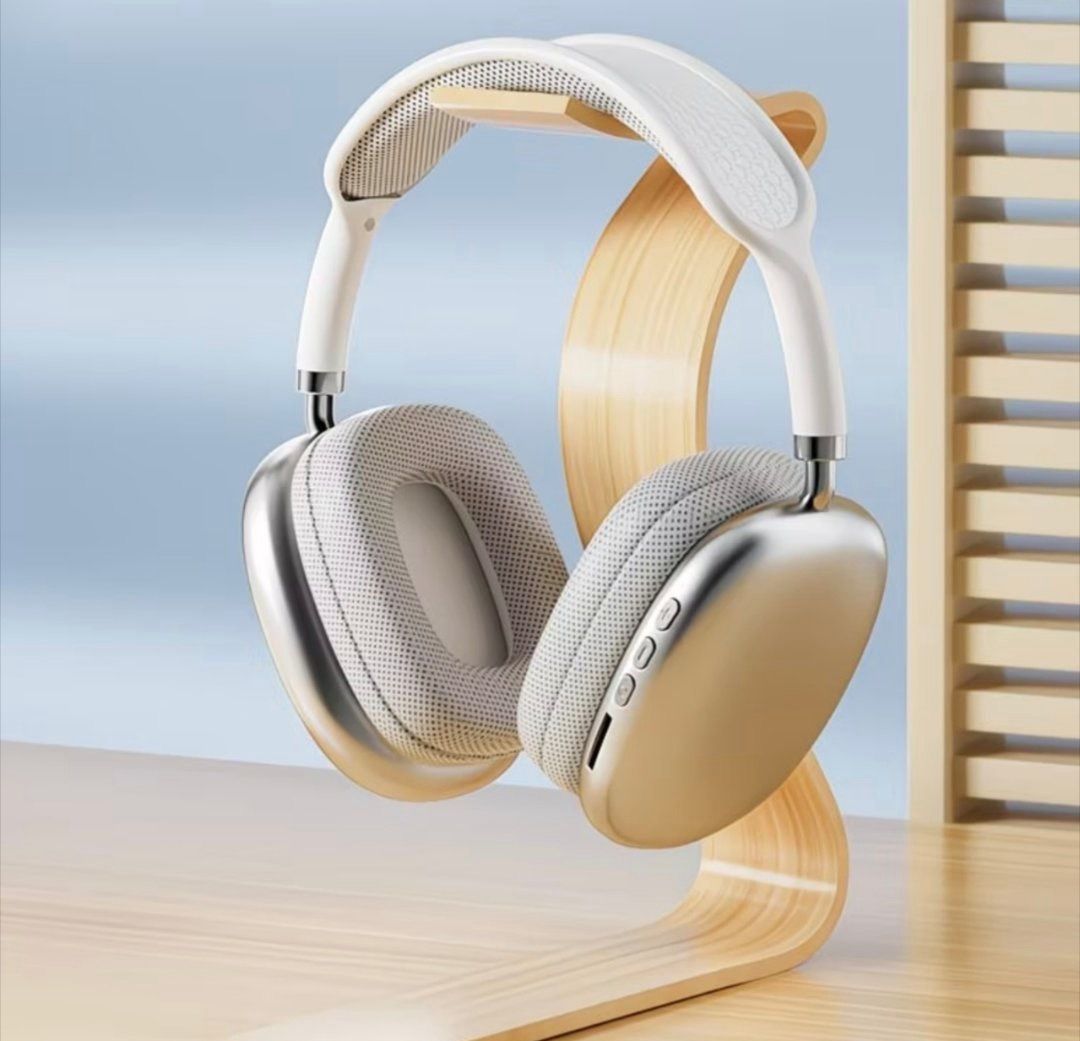 Original photo
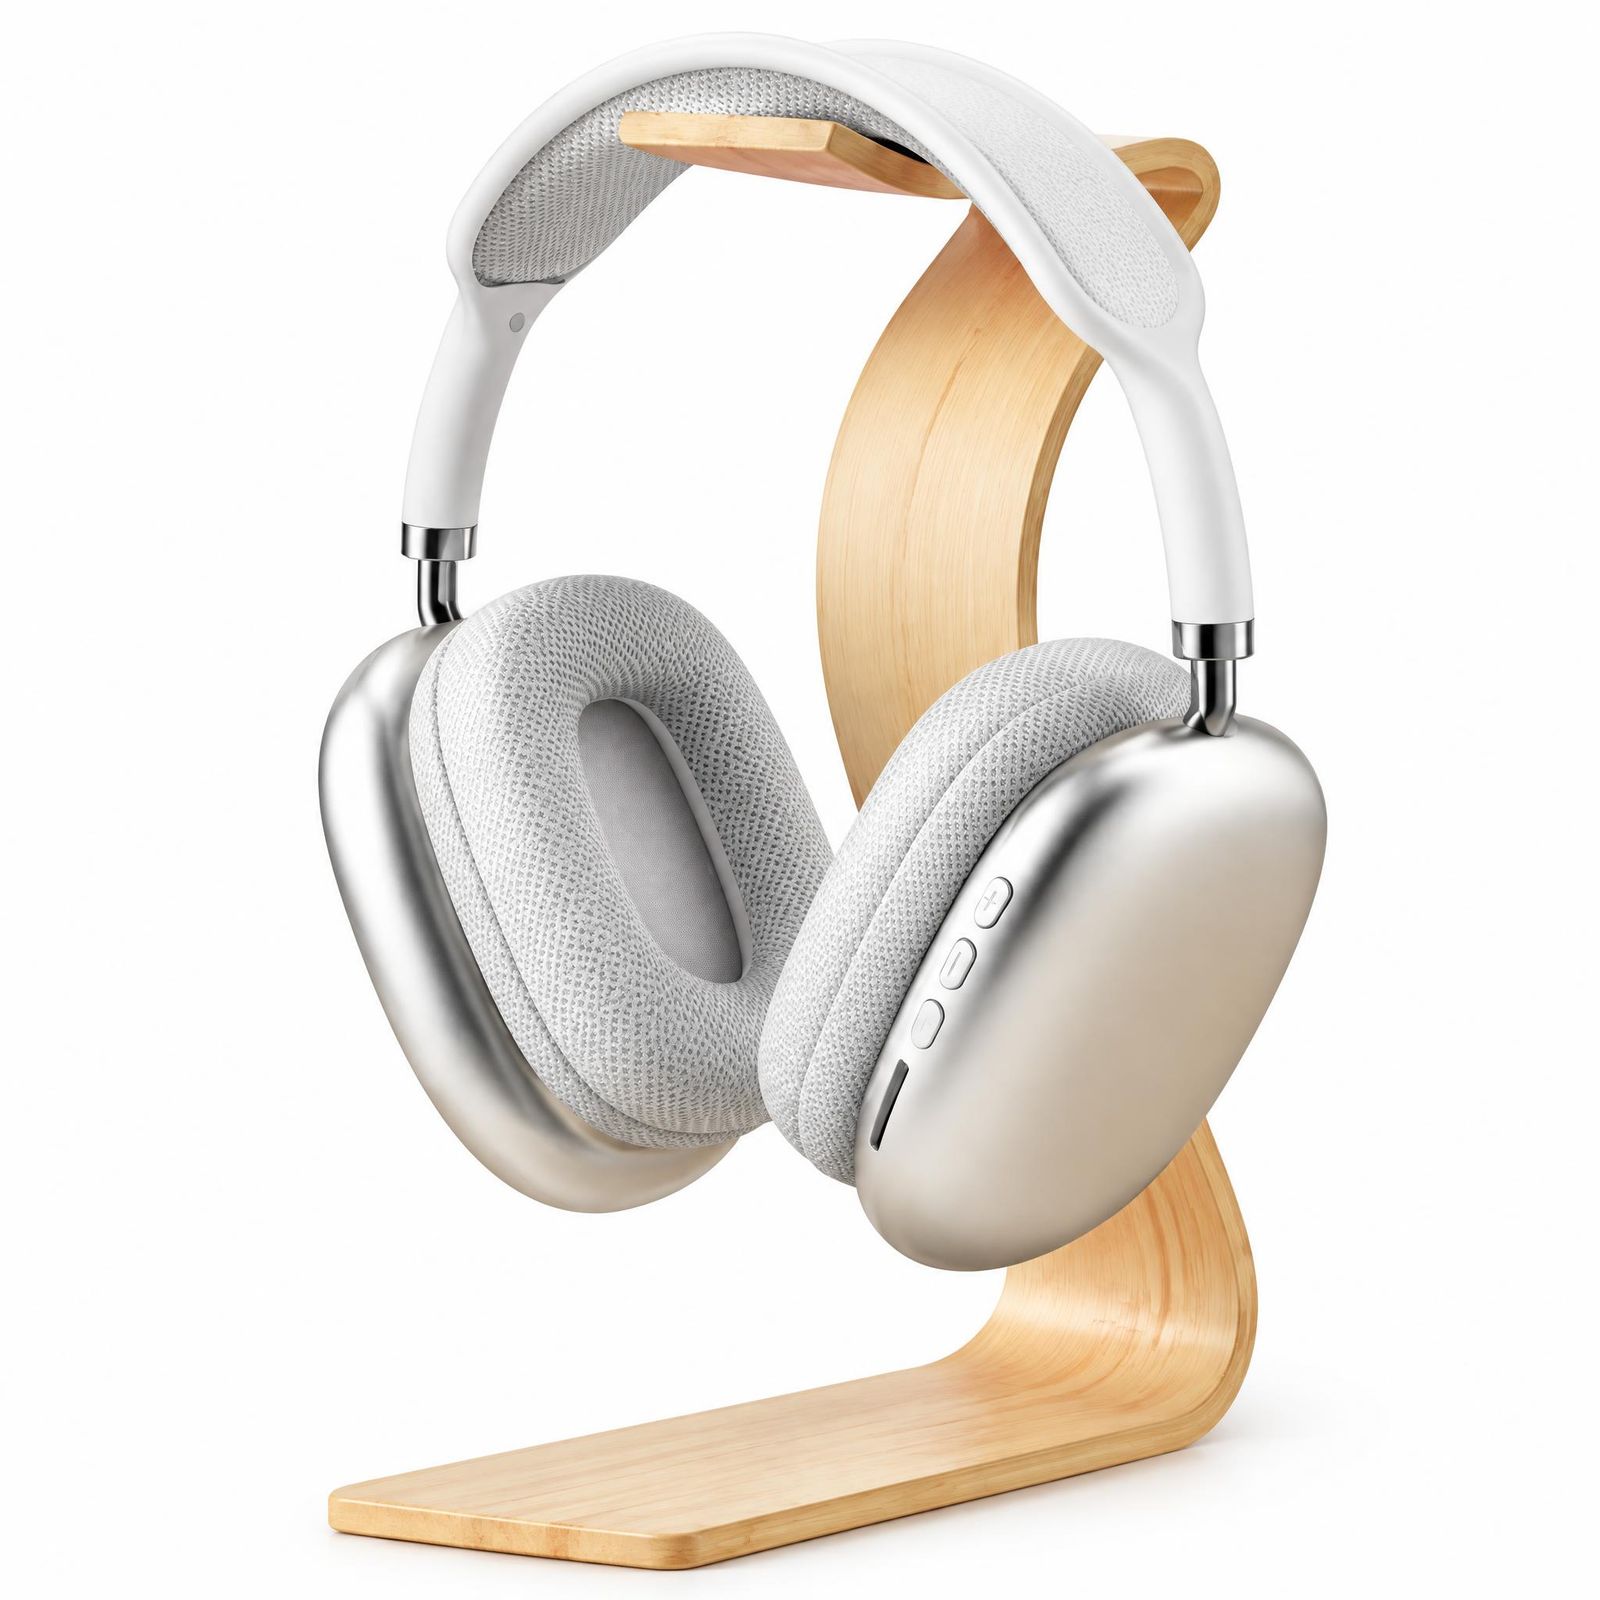 White-background result
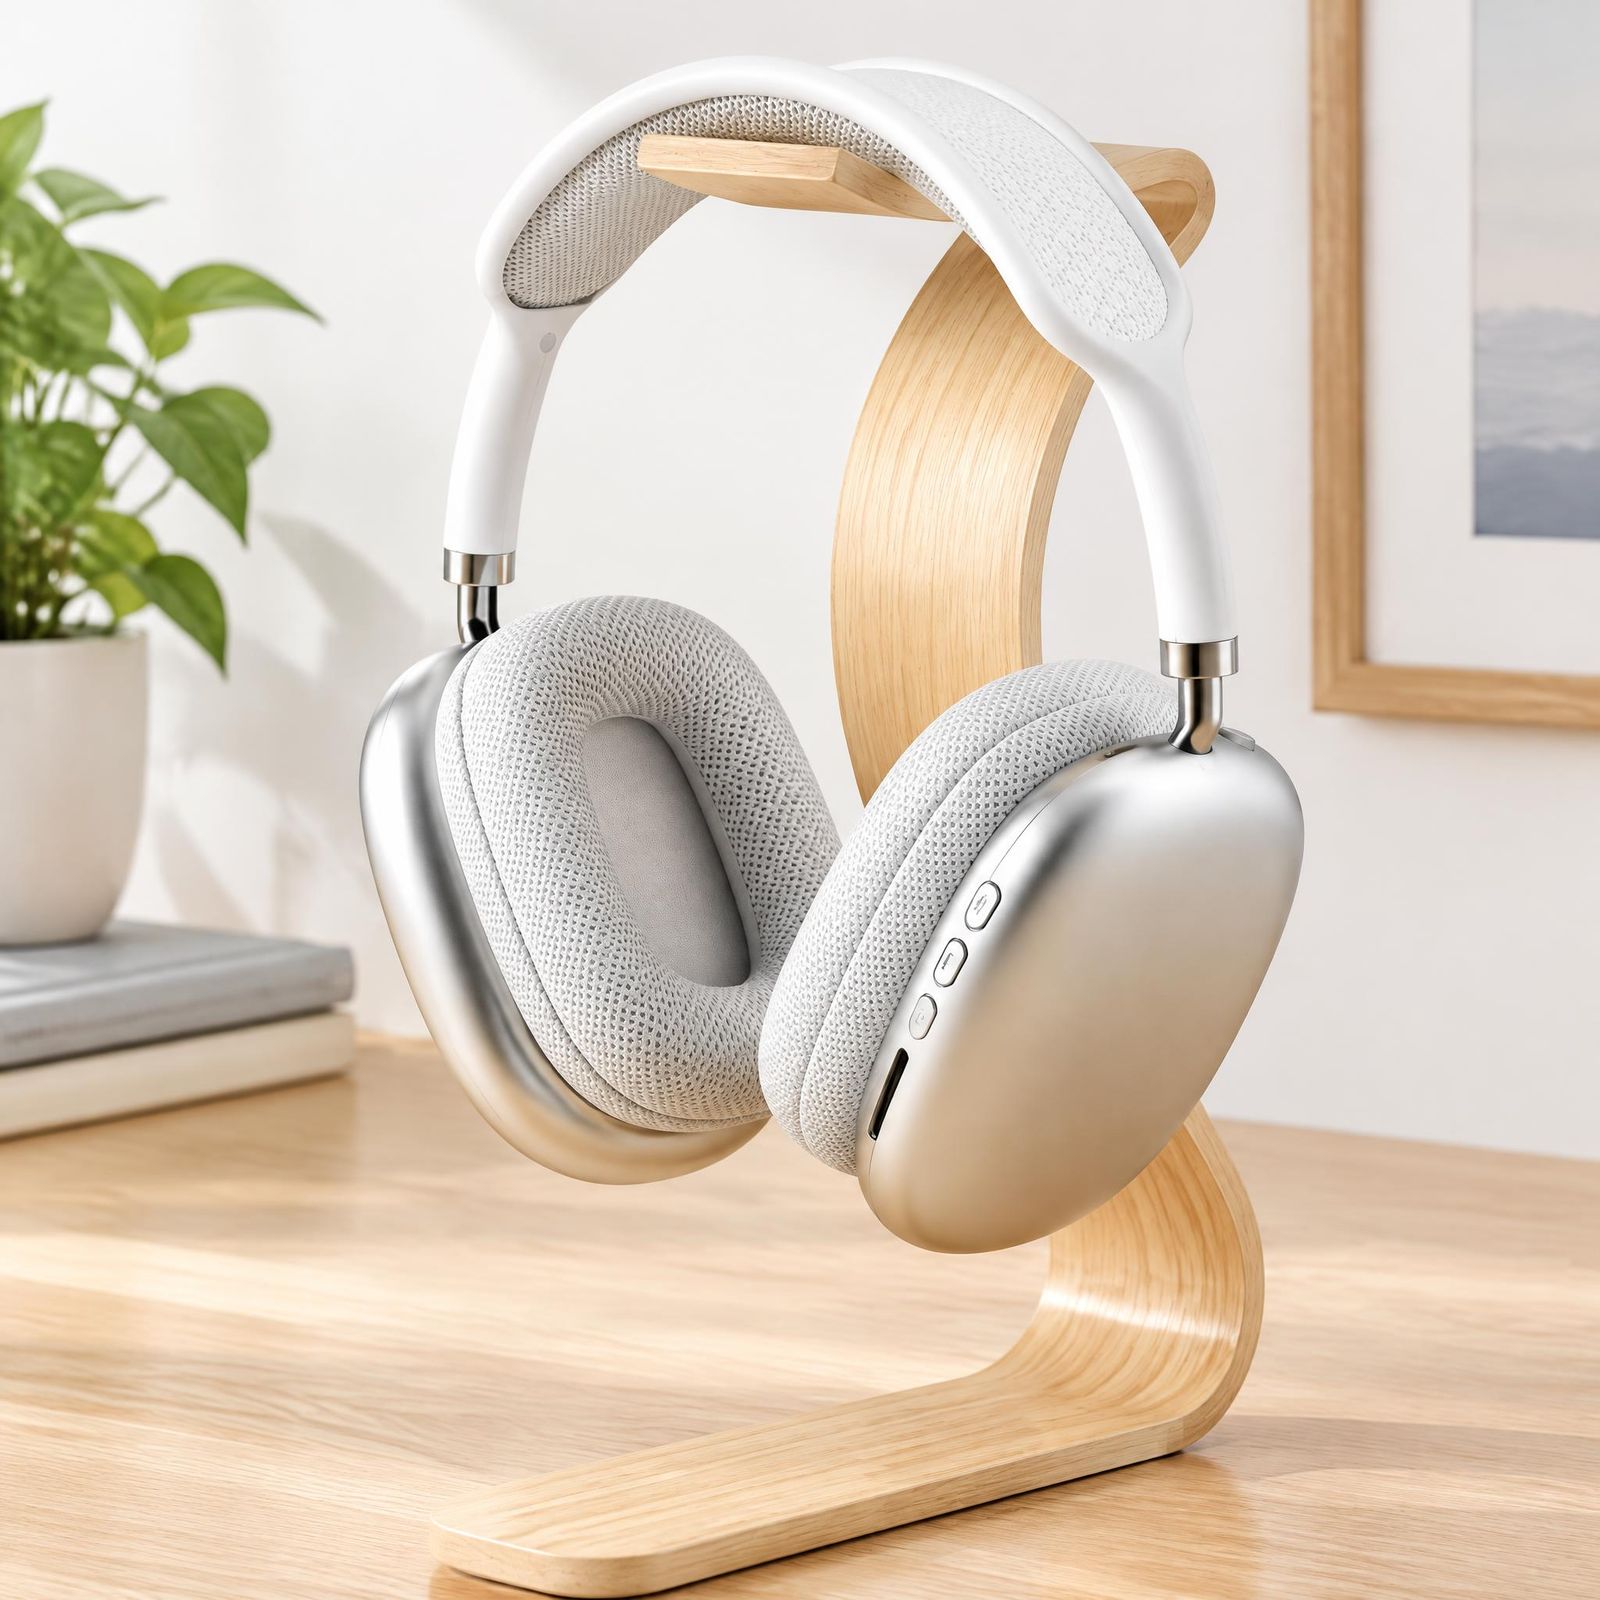 With a scene prompt
AI Product Studio vs. a traditional photography studio
A physical shoot lets you arrange the product, camera, lighting, and set yourself. An AI studio lets you try a different presentation from an existing photo without setting up another shoot.
| Workflow question | Traditional studio | AI Product Studio |
|---|---|---|
| What is the starting point? | The physical product in a prepared shooting space. | A clear photo of the existing product. |
| How is the image created? | Camera capture followed by retouching and export. | Upload, select available options, generate, review, and download. |
| How are variations explored? | Adjust the set, lighting, camera, styling, or postproduction. | Adjust the scene instructions and generate another result. |
| Where does accuracy come from? | The physical product is present during capture. | The source photo is the reference, but the generated output must be checked. |
| When is it useful? | Original capture, exact physical control, complex or high-stakes shoots. | Creating new presentations from existing product photos. |
You can use both: photograph the product to capture its details, then use AI to explore new settings. Keep the original shot when exact detail matters more than a change of scene.
How Product Studio works
Upload
Choose a clear image with the complete product visible and important details in focus.
Describe the result
In Snappyit, choose your Output Size and optionally describe the background or lighting in Additional Information.
Generate
Generate an image, then open the result at full size.
Verify
Compare the chosen result with the real product before downloading or publishing.
For a specific look, name the surface, background color, and light source—for example, a light oak desk with soft window light.
What product categories can an AI Product Studio support?
Bottles, shoes, bags, and furniture each need a different kind of attention. These are some of the product categories you can work with.
Beauty and skincare
Pump bottles, tubes, jars, cosmetics, fragrance, and personal-care packaging.
Footwear
Sneakers, dress shoes, boots, sandals, and slippers with layered construction.
Bags and accessories
Handbags, backpacks, wallets, belts, eyewear, and small leather goods.
Consumer electronics
Headphones, speakers, keyboards, mice, mobile accessories, and compact devices.
Home and kitchen
Lamps, mugs, tableware, cookware, organizers, candles, and decorative objects.
Packaged food and drinks
Bottles, cans, coffee bags, snack packs, supplement jars, and boxed products.
Furniture and home decor
Accent chairs, small tables, lamps, shelves, cushions, and statement pieces.
Examples: applying the workflow in Snappyit Product Studio
These Snappyit Product Studio examples pair the original photo with a white-background version and a scene. The headphones example uses this scene prompt:
Example scene prompt: Place the product in a suitable, realistic scene and generate a complete background around it.
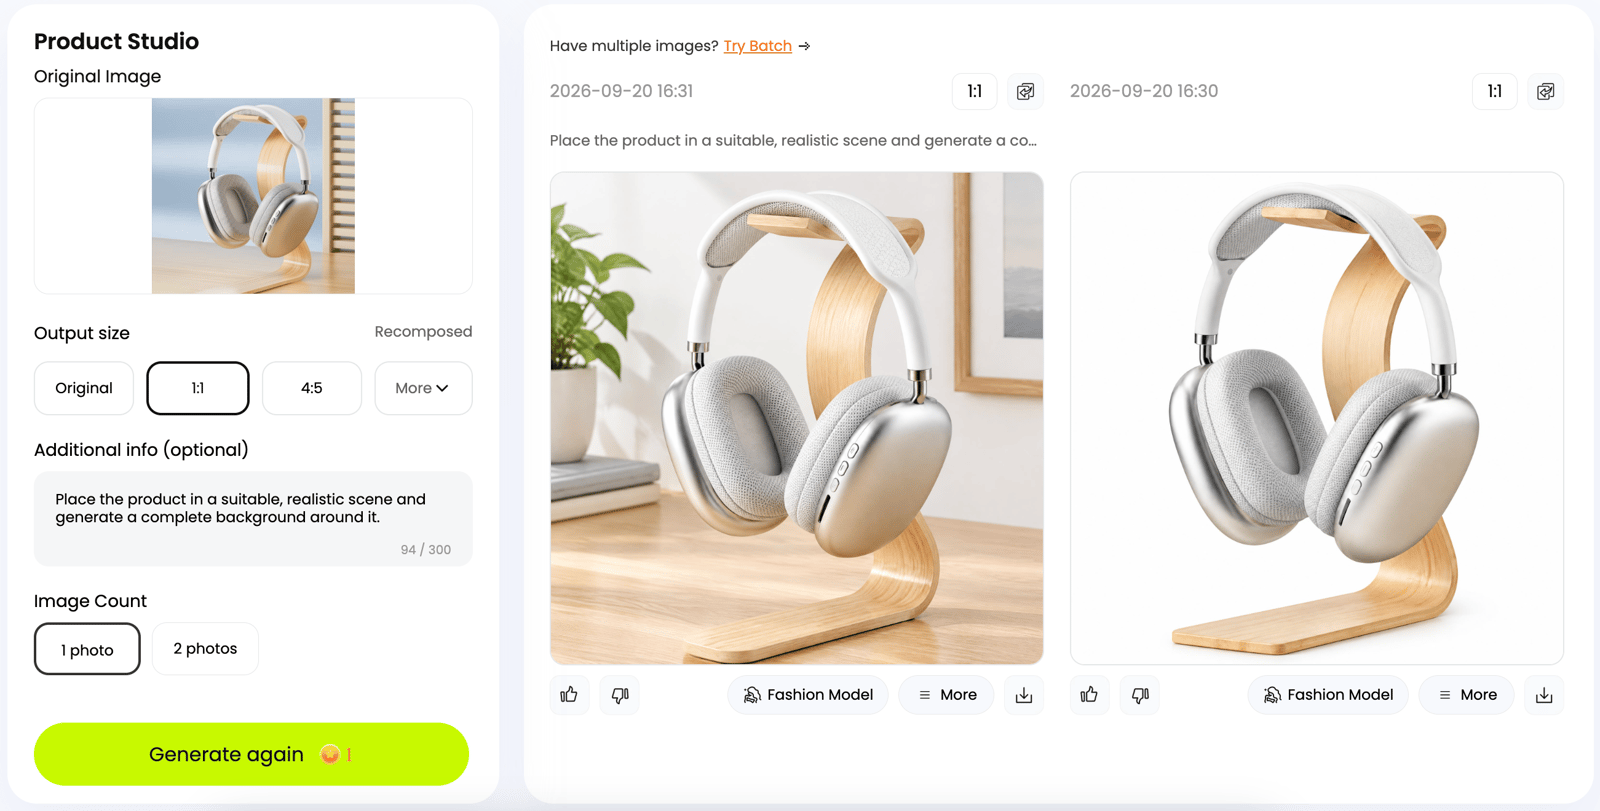
For your own store, replace “suitable, realistic scene” with a setting that fits your brand. Keep the description focused so props do not distract from the product.
Beauty: label accuracy and surface finish
For skincare, shoppers need to recognize the product name and packaging. Check the label and lid shape closely. The white-background result here still includes the hand; start with a product-only photo if you need the jar shown by itself.
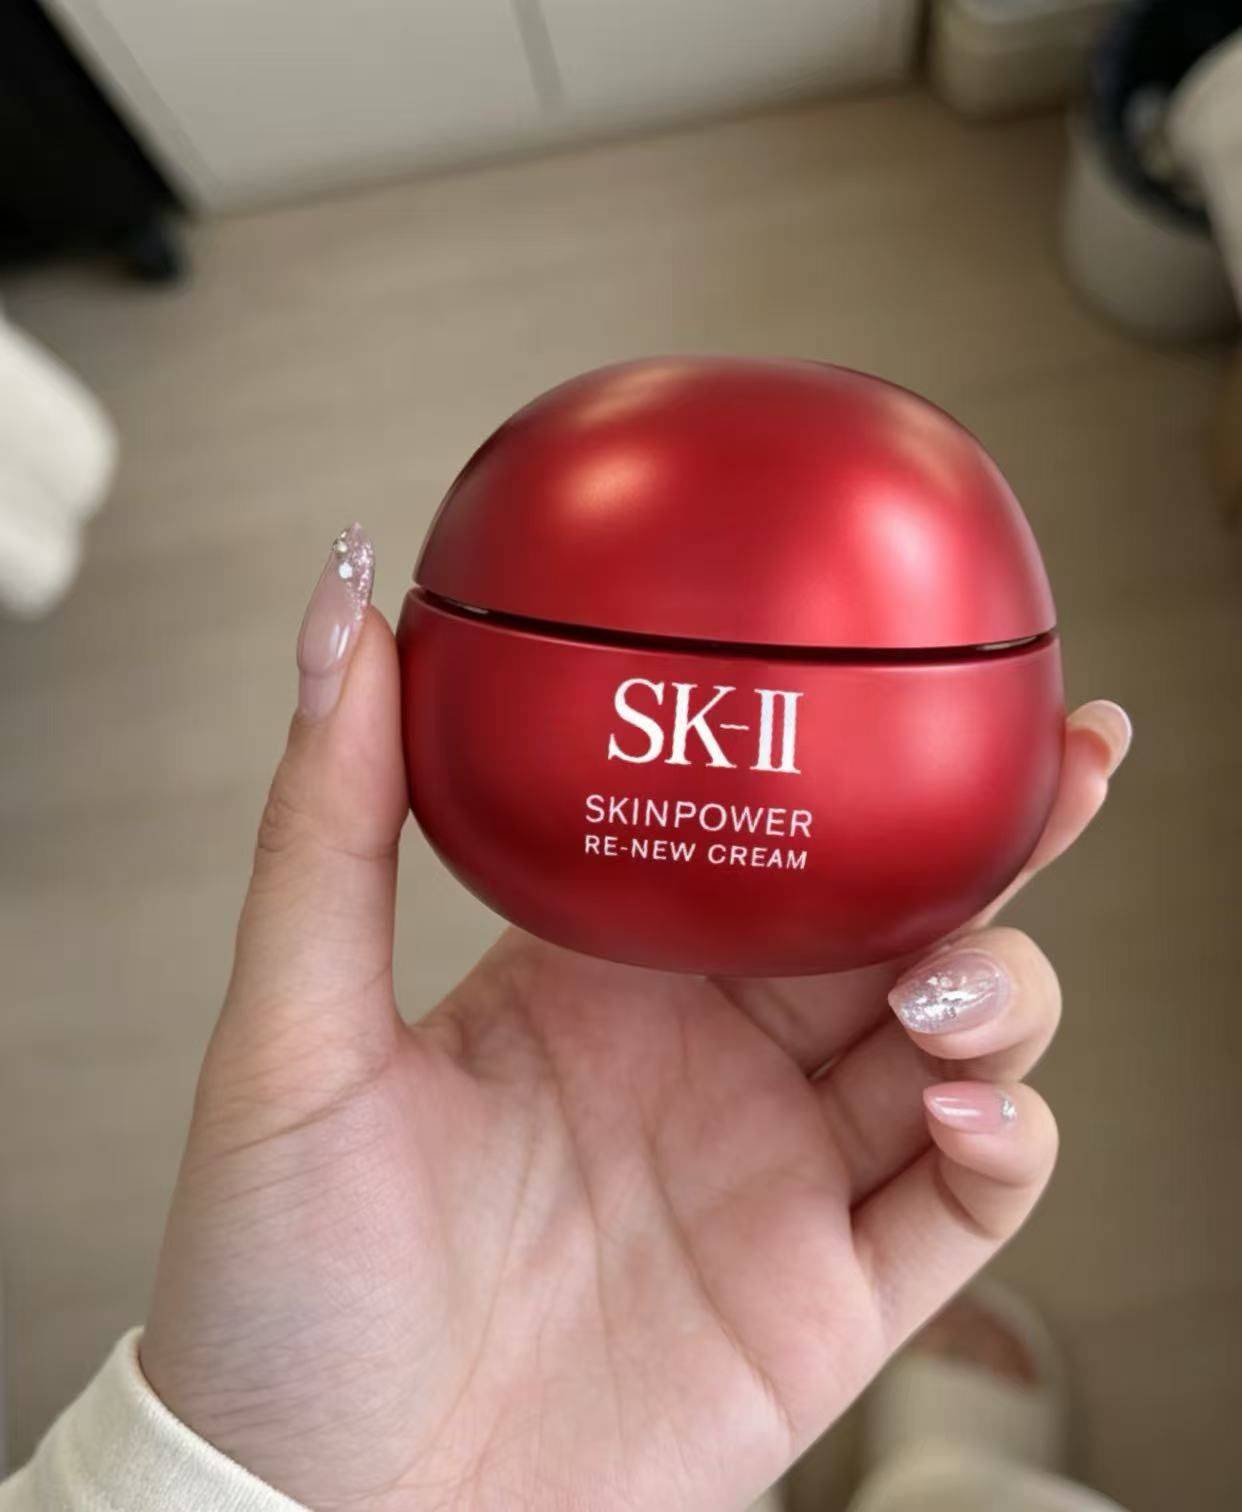 Original photo
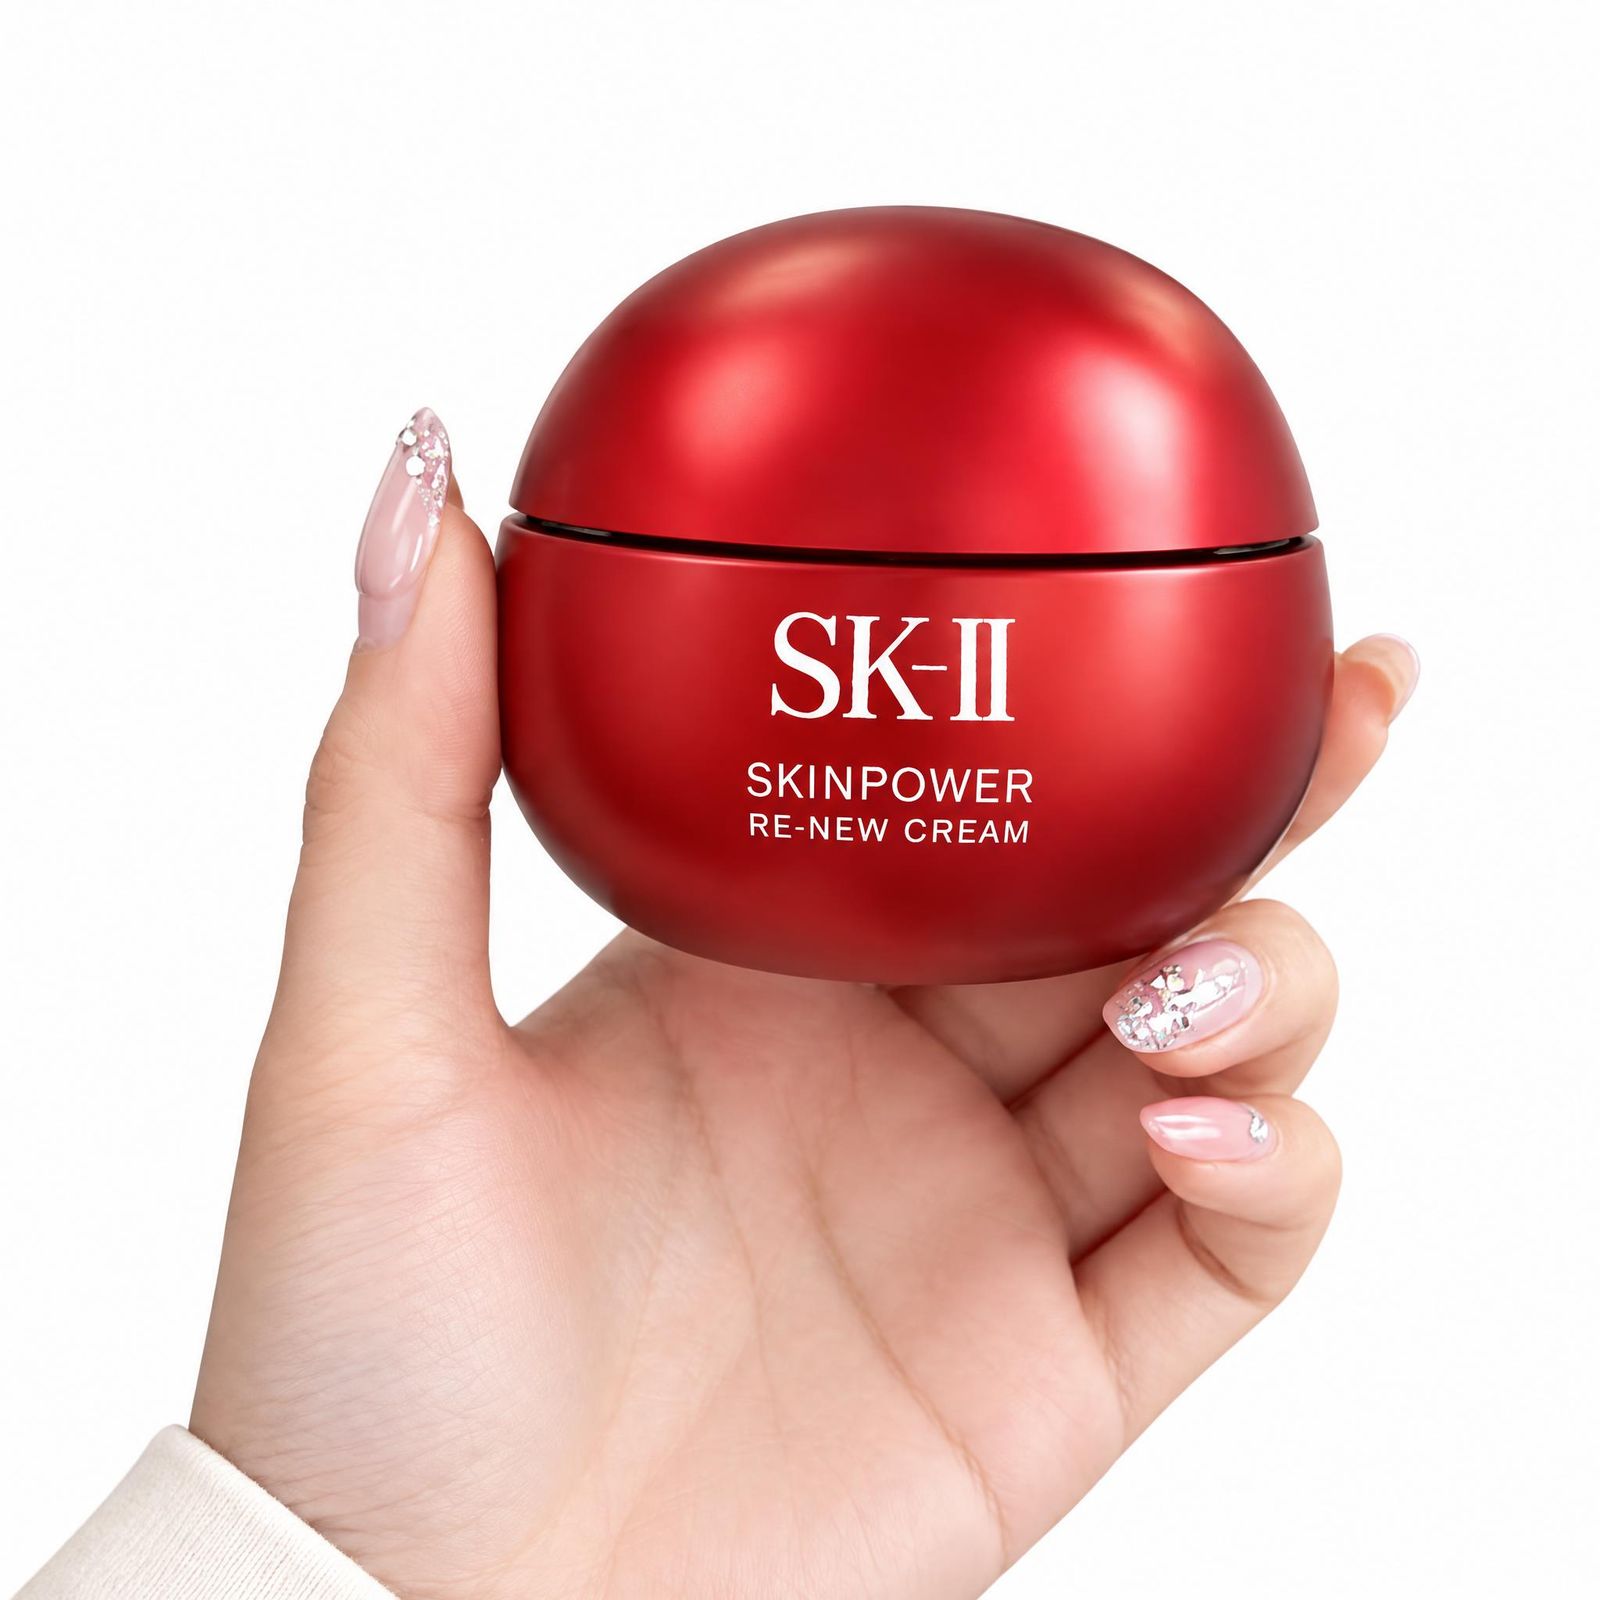 White-background result
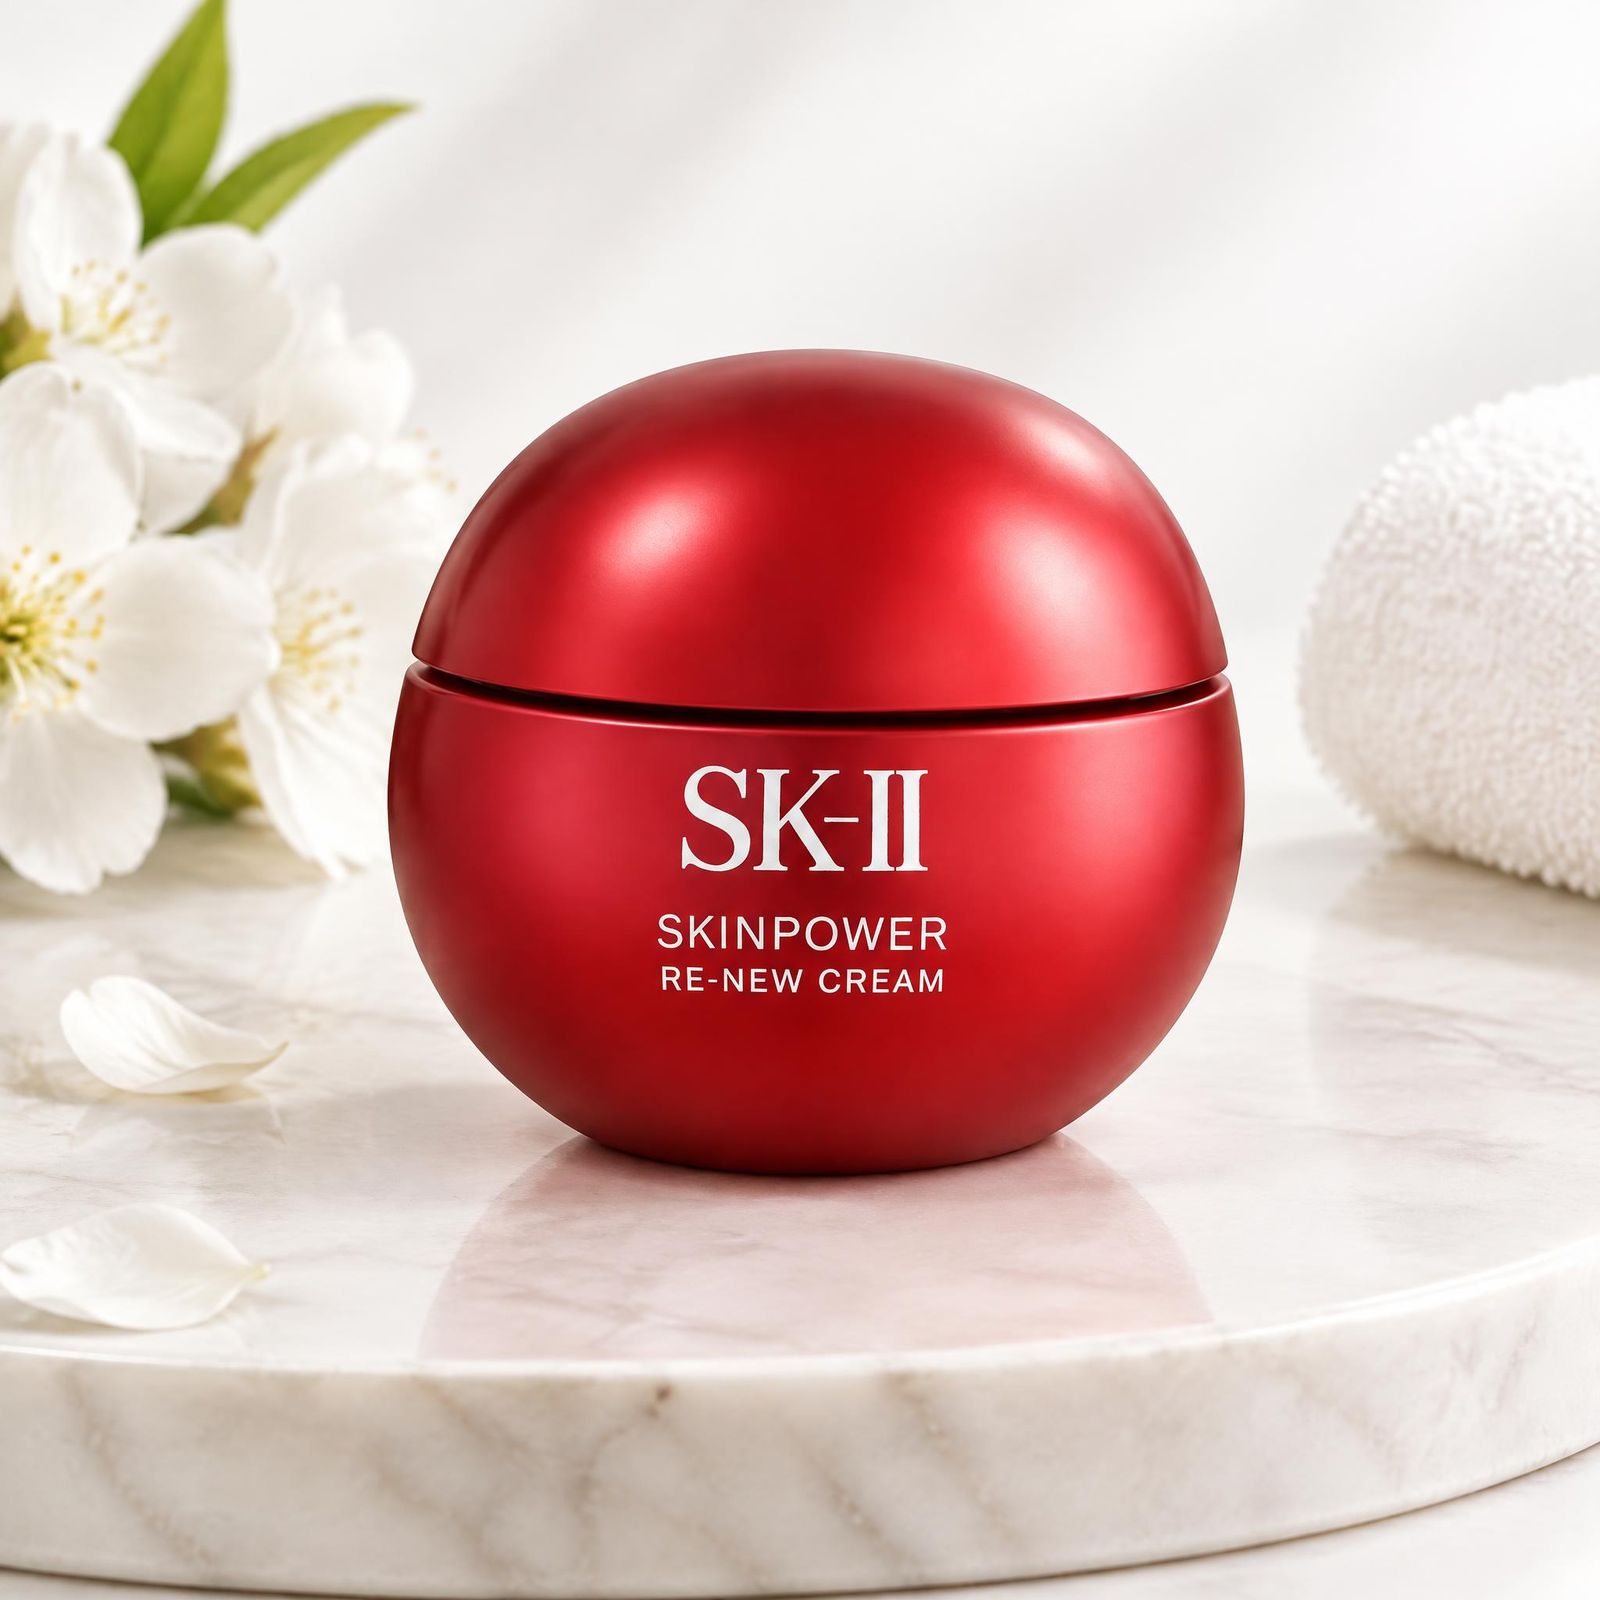 Scene result
Footwear: structure, stitching, and repeated details
The sneaker examples show two ways to present the pair: against white or in a retail setting. Compare the laces, eyelets, stitching, and sole before choosing an image for your listing.
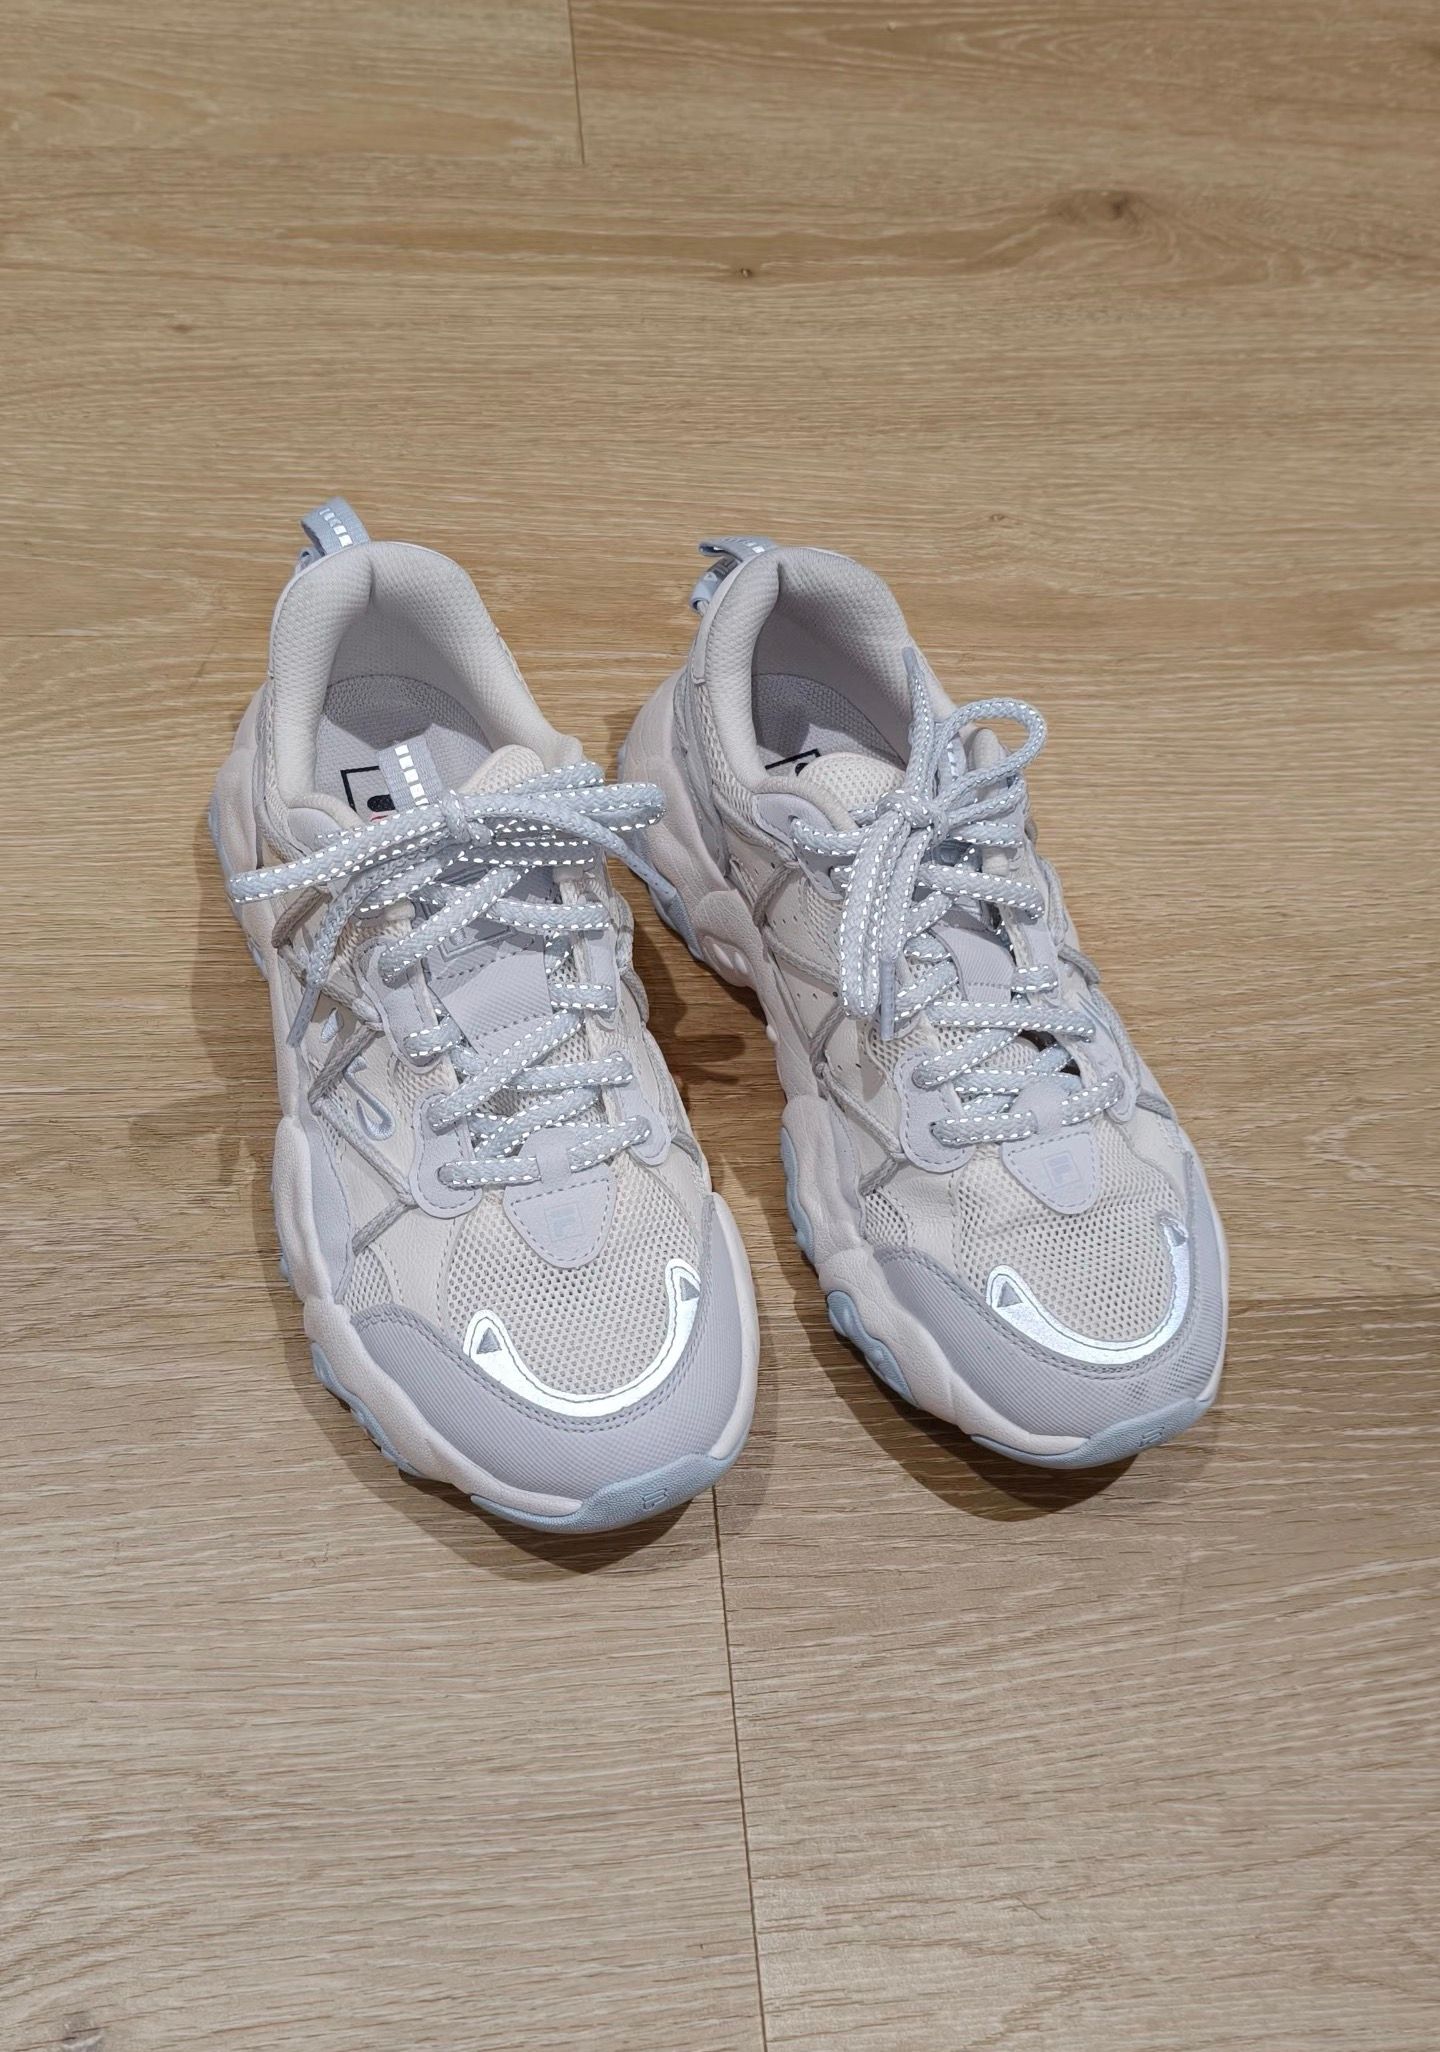 Original photo
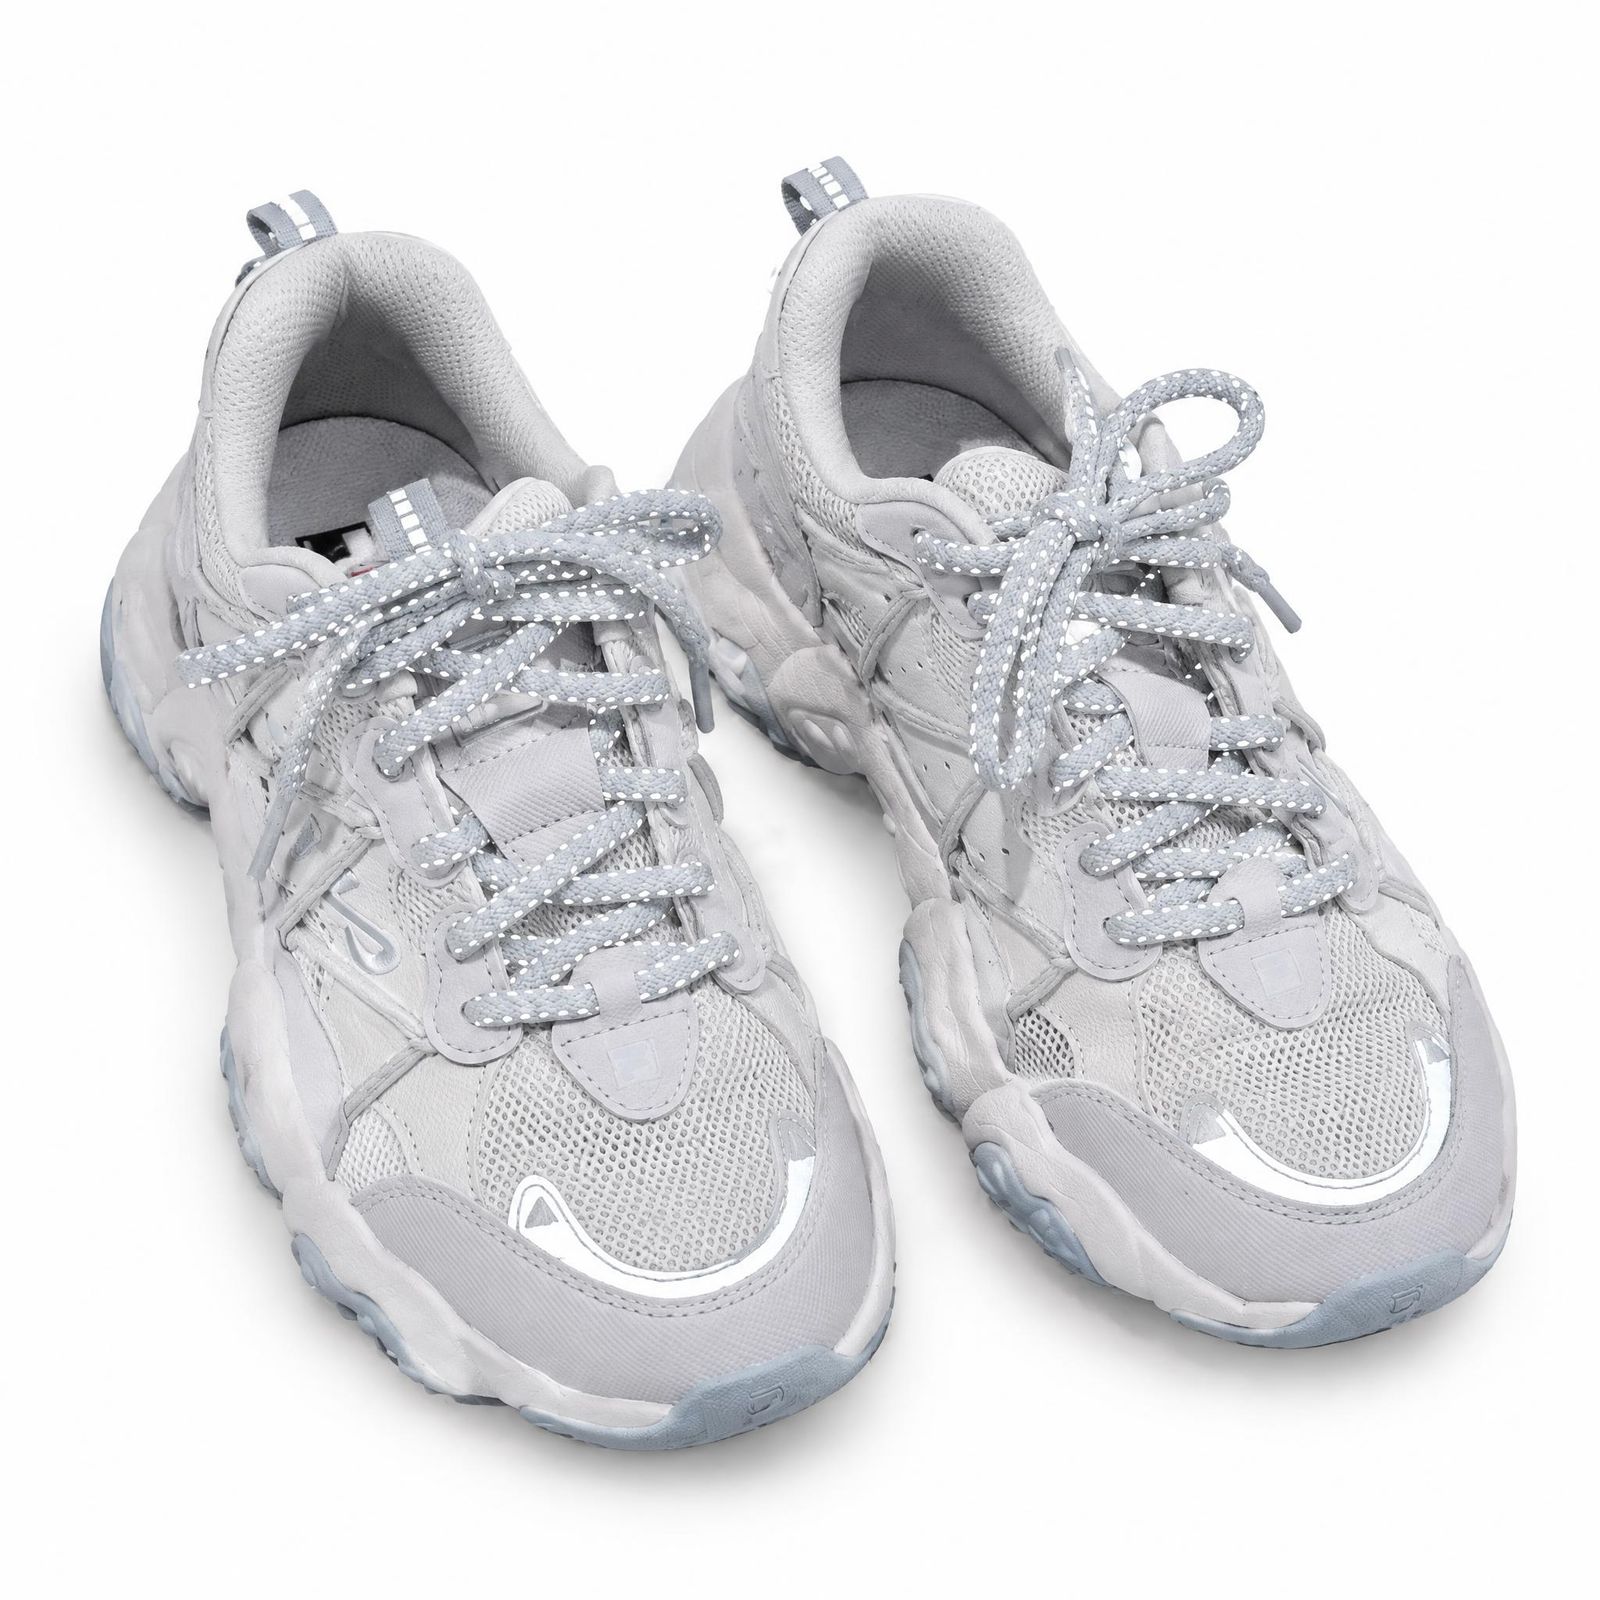 White-background result
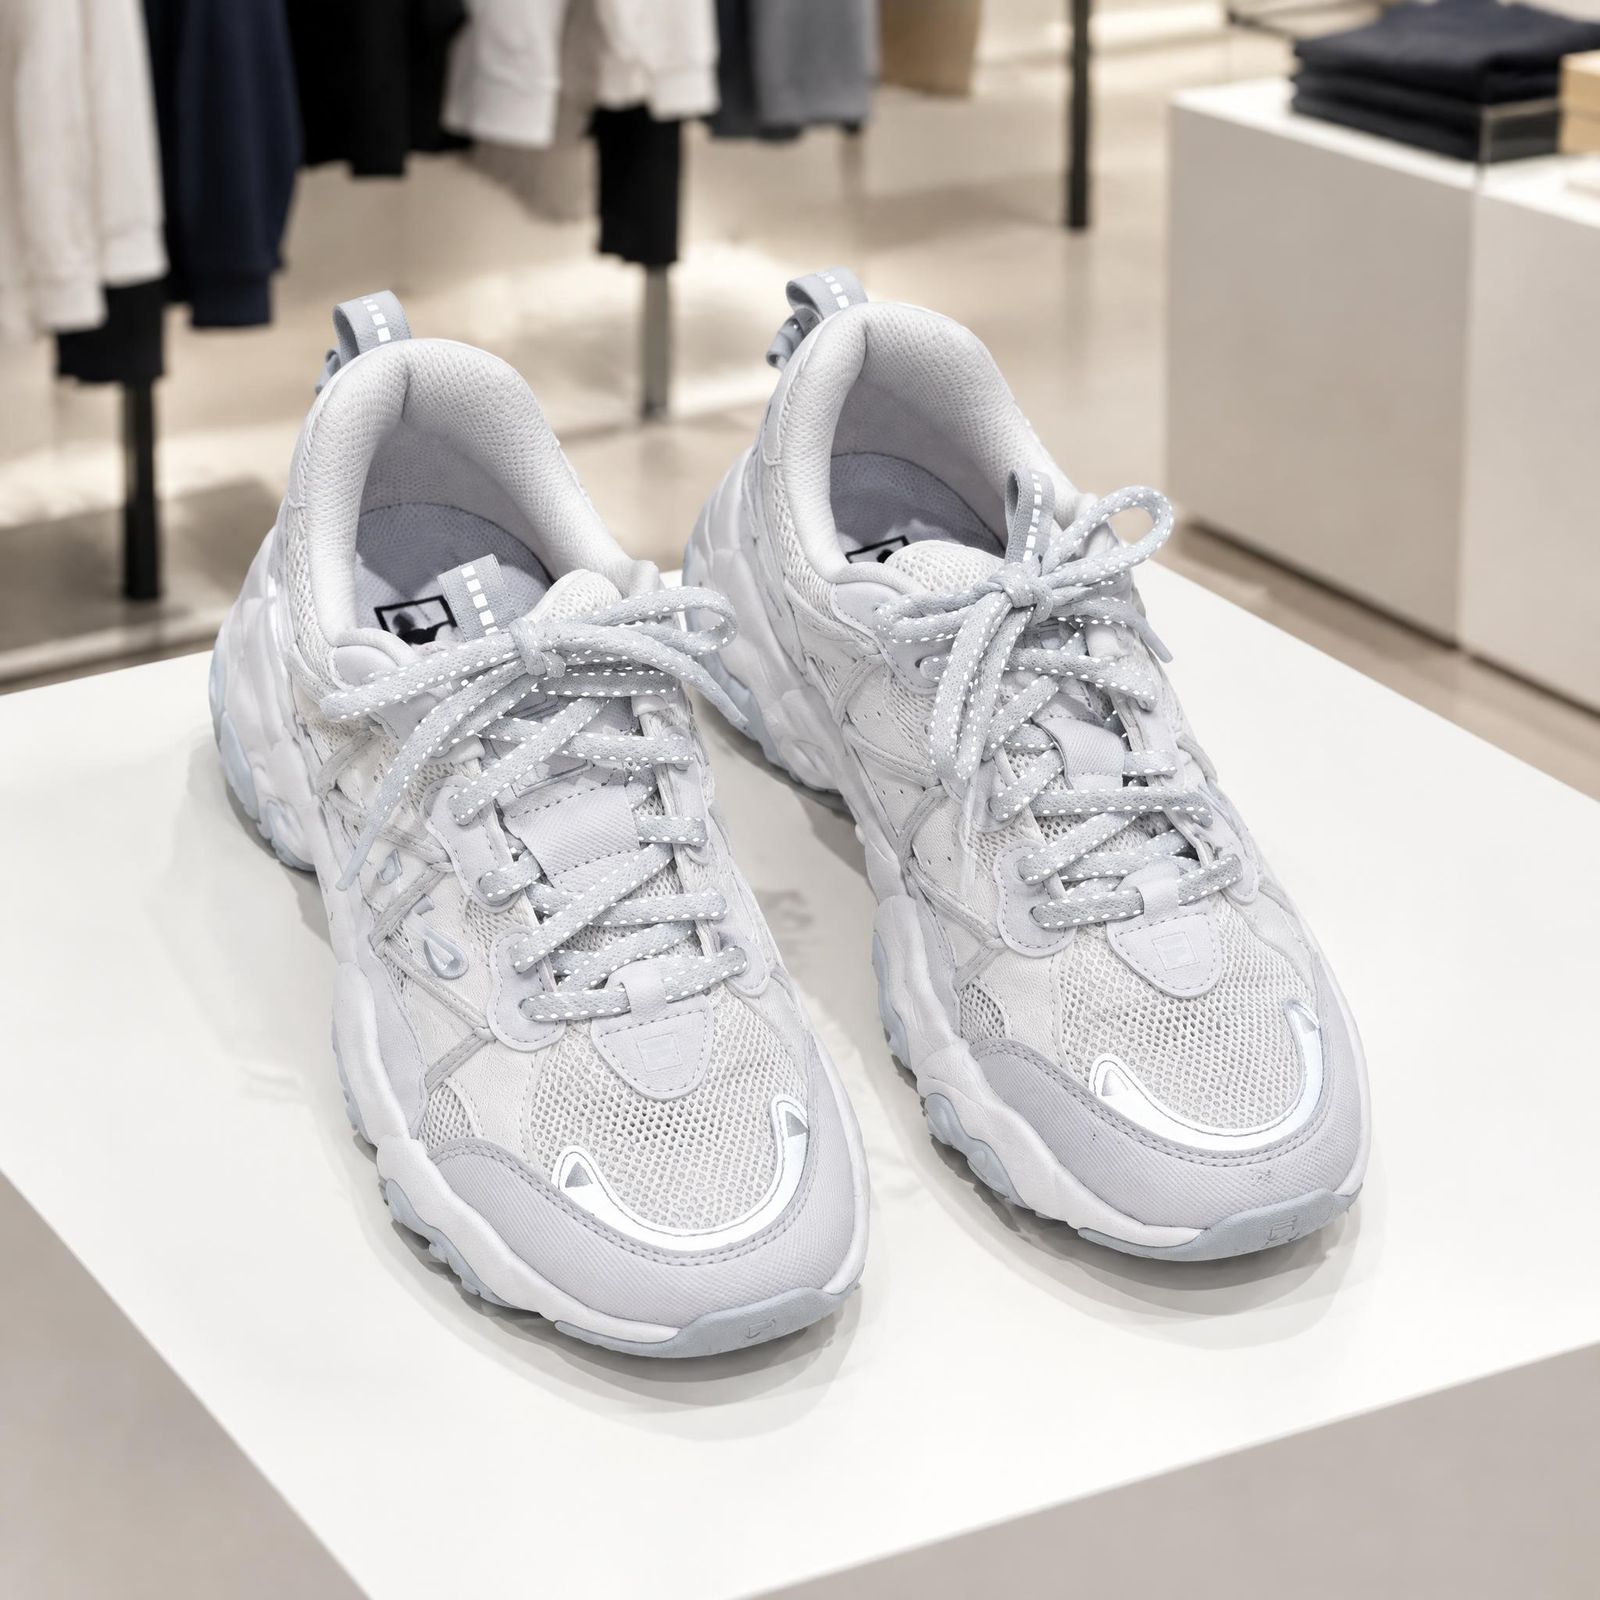 Retail scene result
Bags: long edges, straps, and hardware
For bags, look closely at straps, handle attachments, pockets, and hardware. These details help customers judge how the bag is made and what is included.
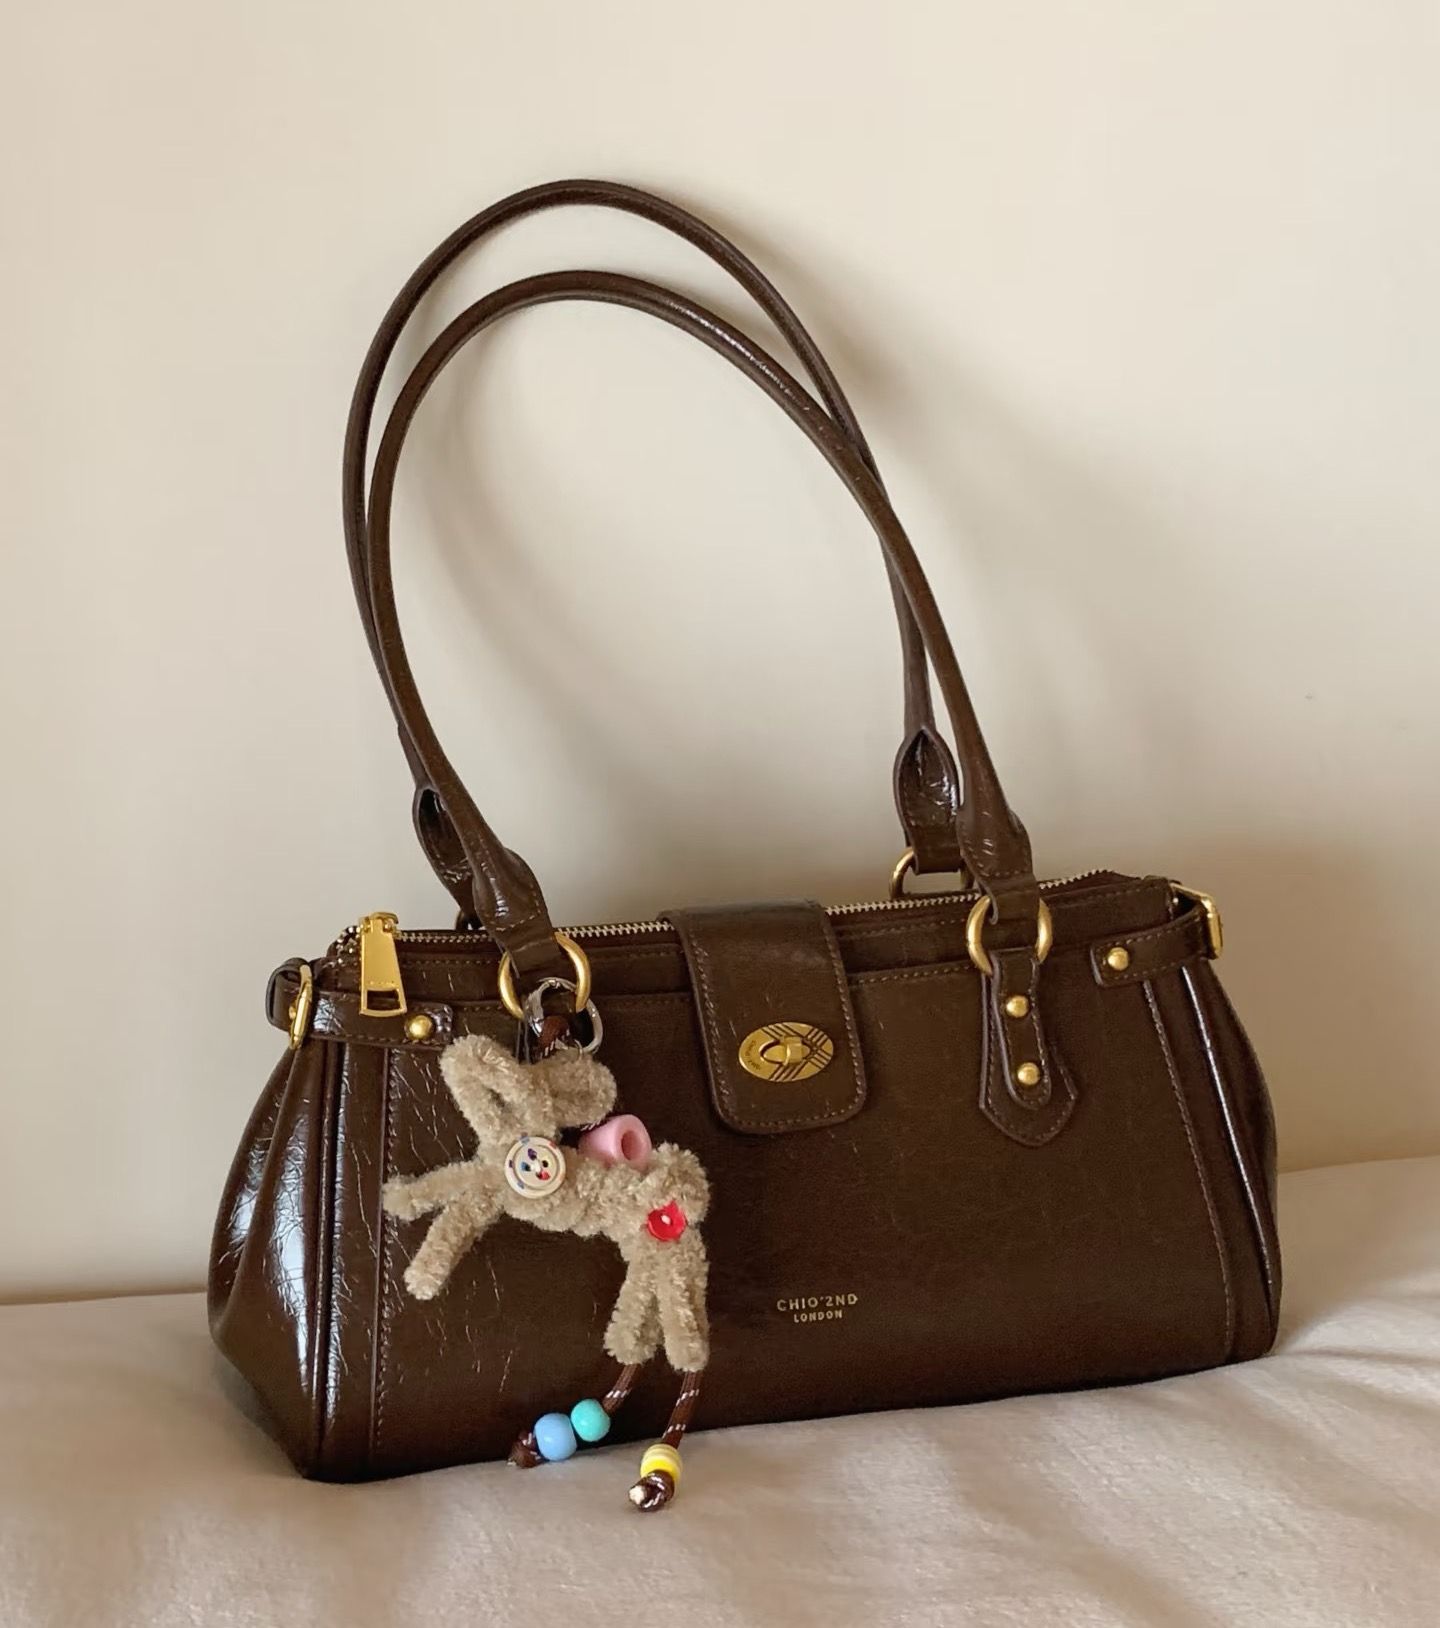 Original photo
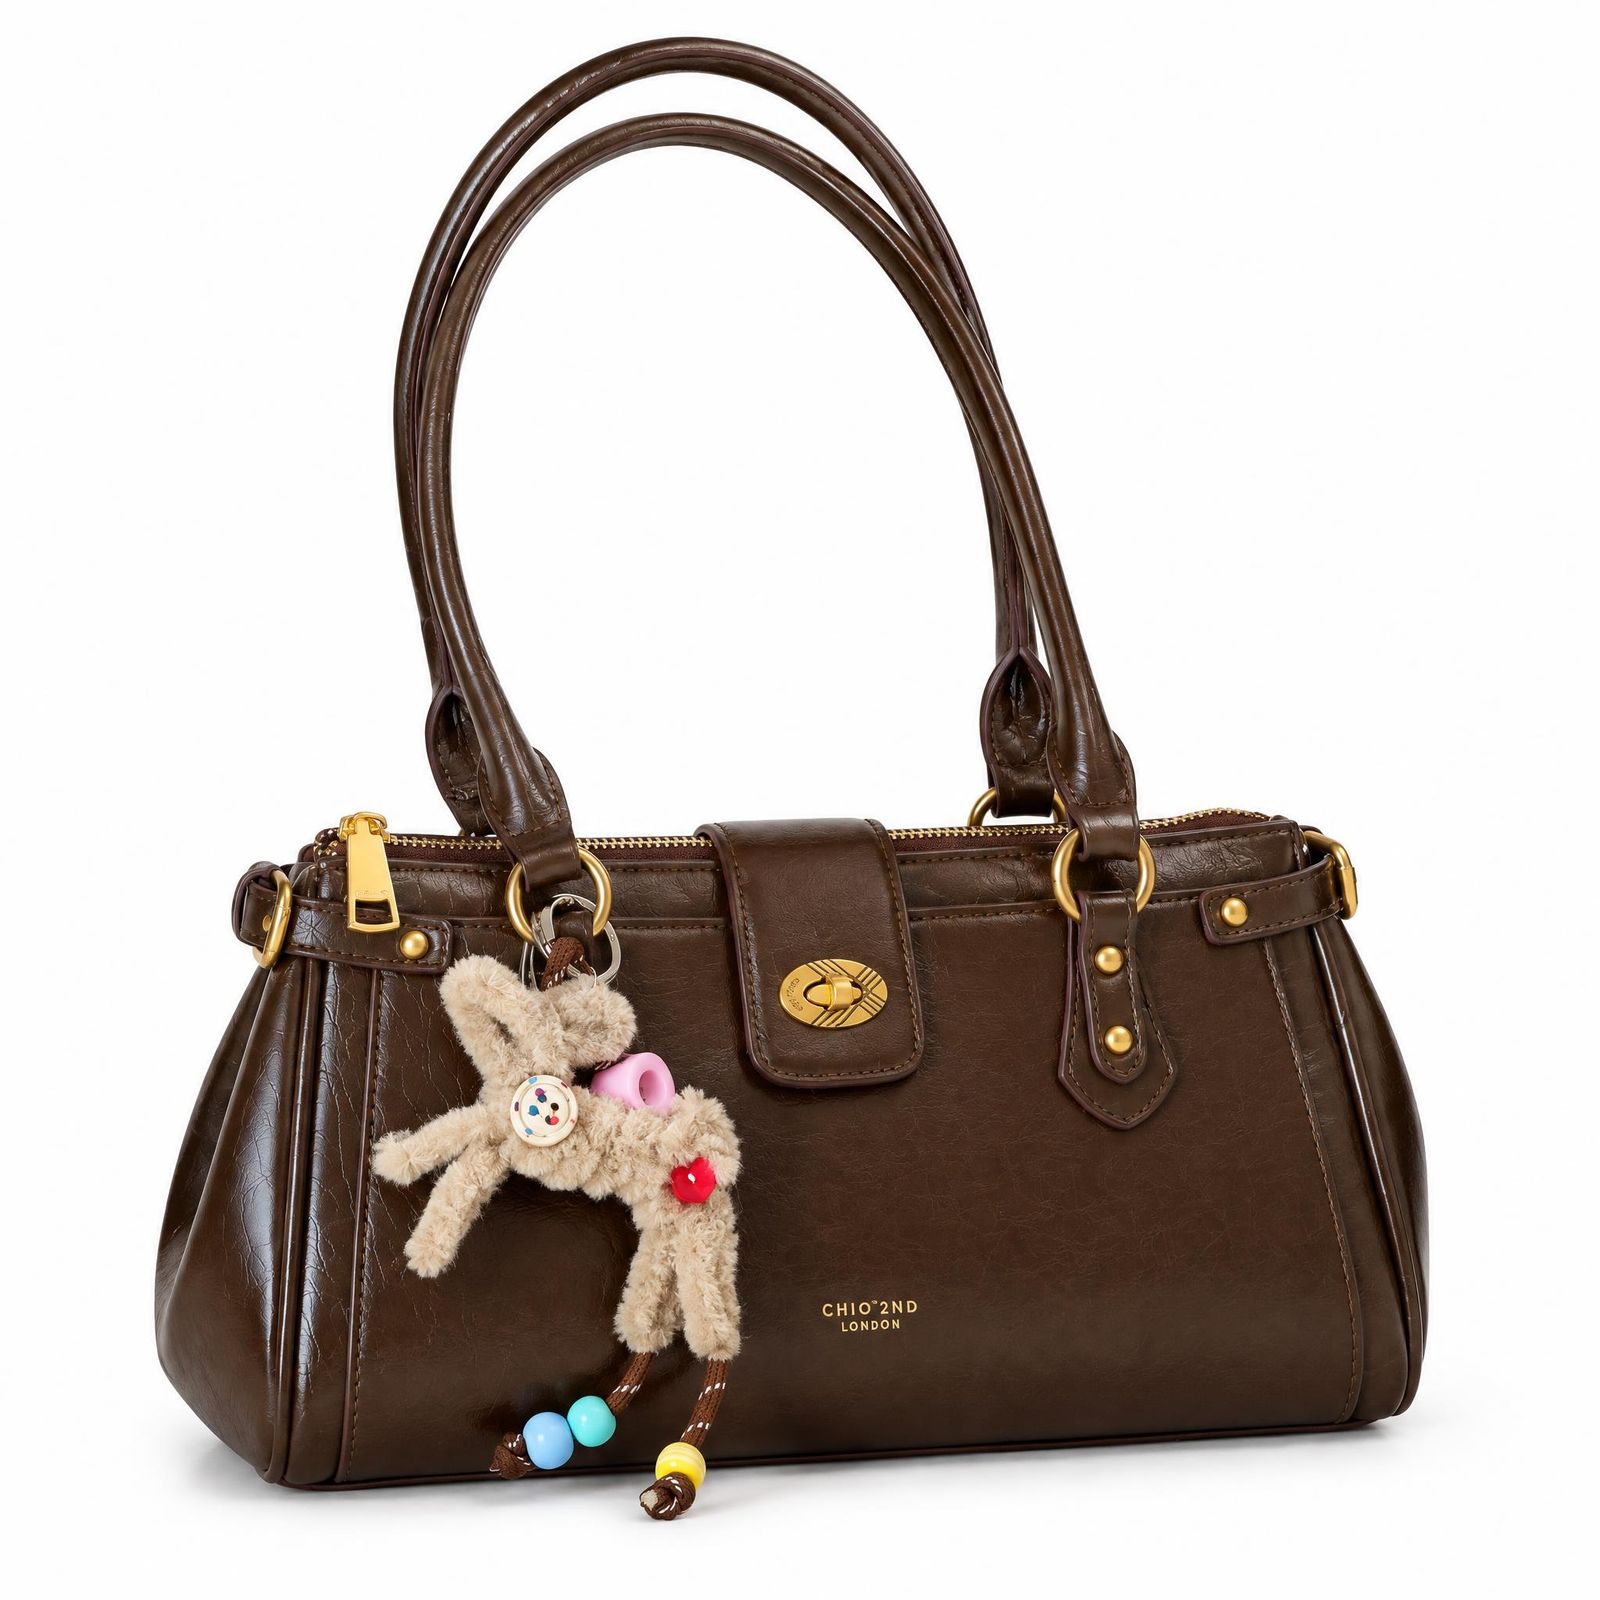 White-background result
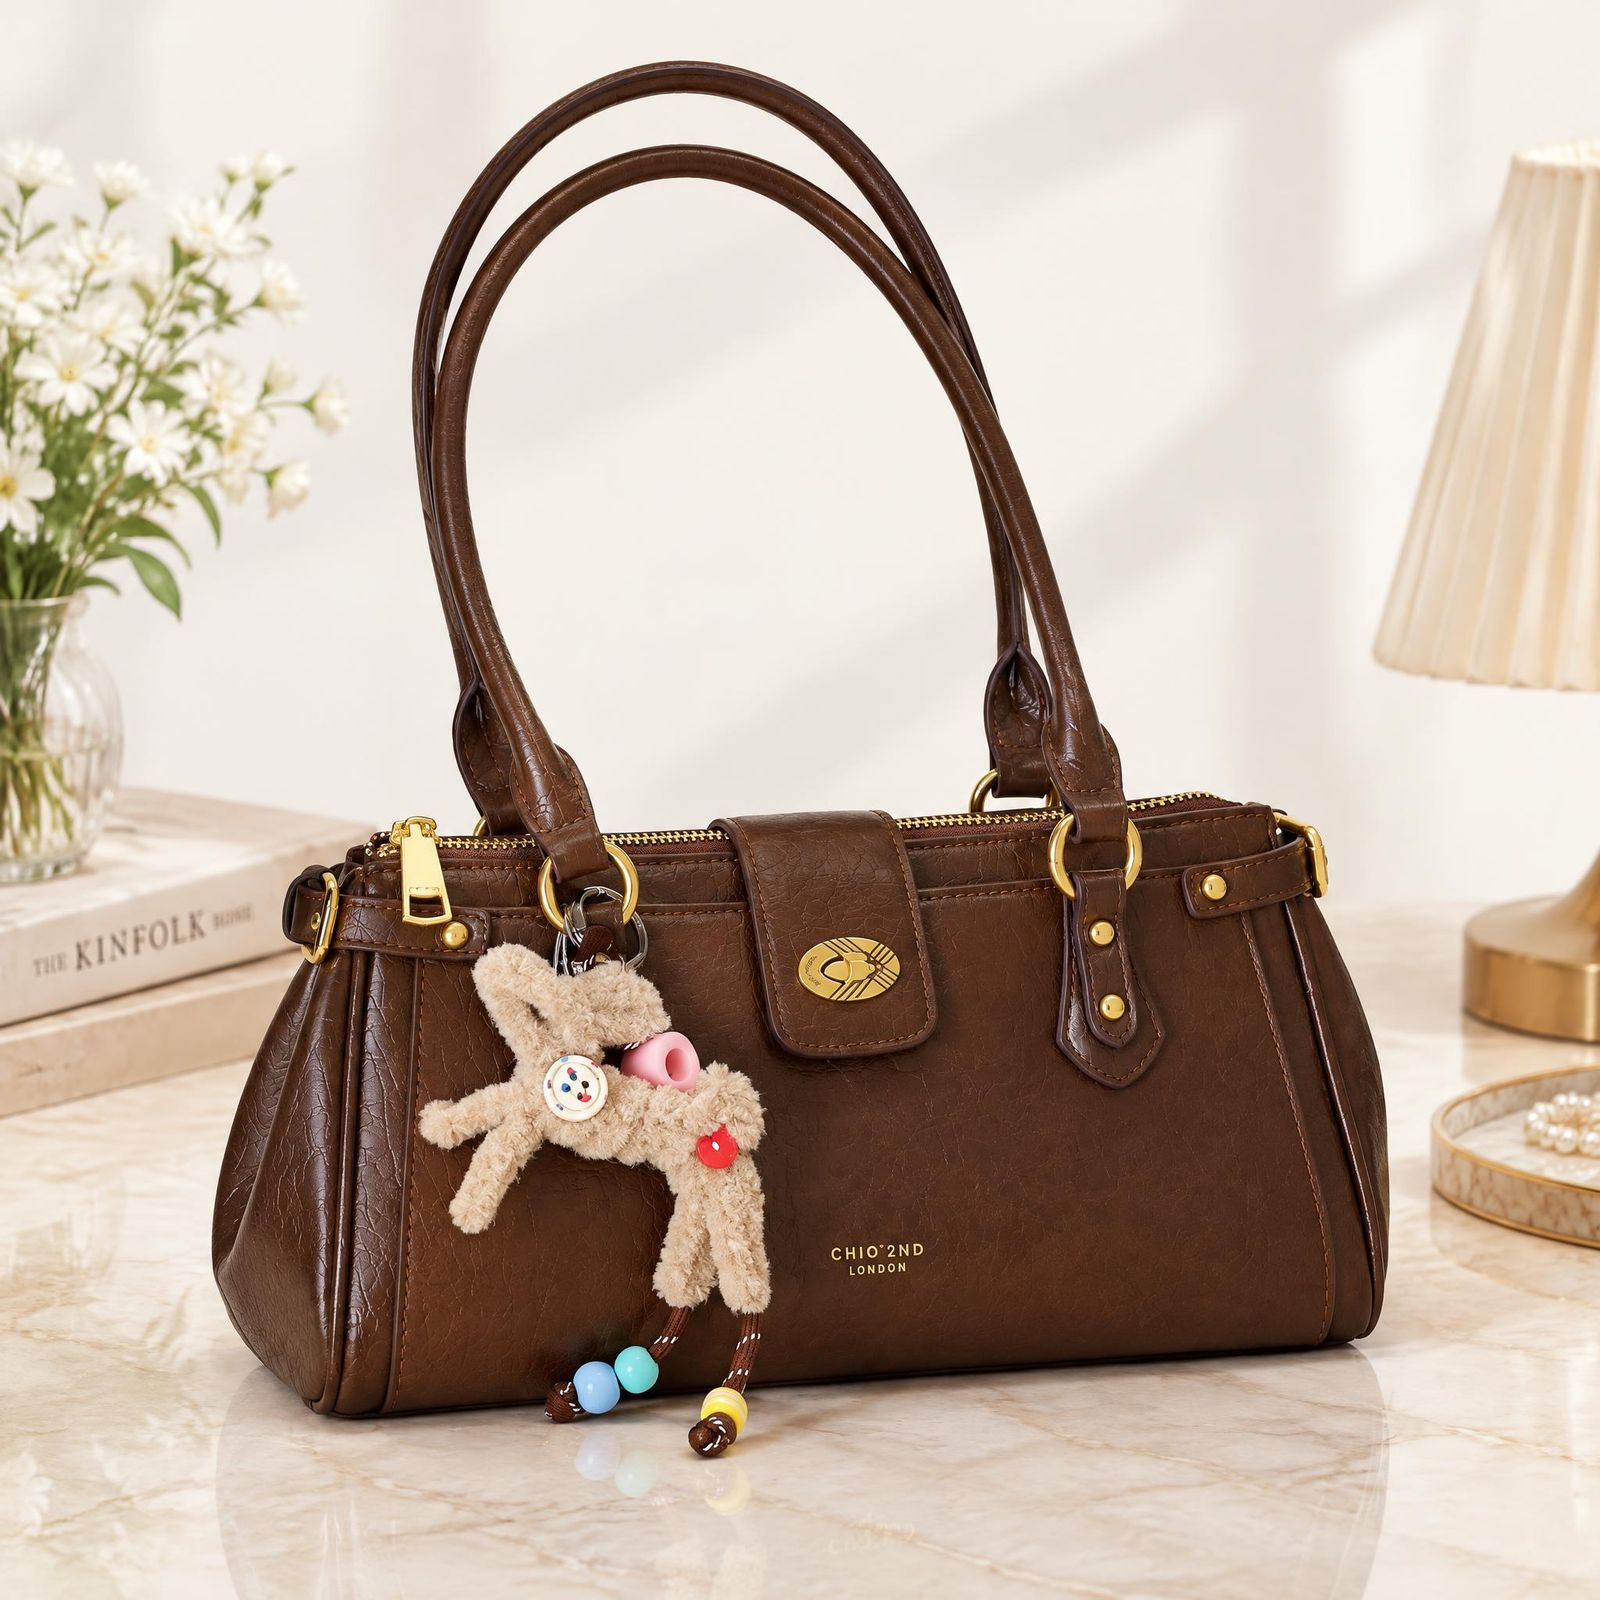 Scene result
Electronics: geometry and functional components
For electronics, a misplaced button or missing port can misrepresent the item. Check these small features at full size, along with the shape of the device and any included accessories.
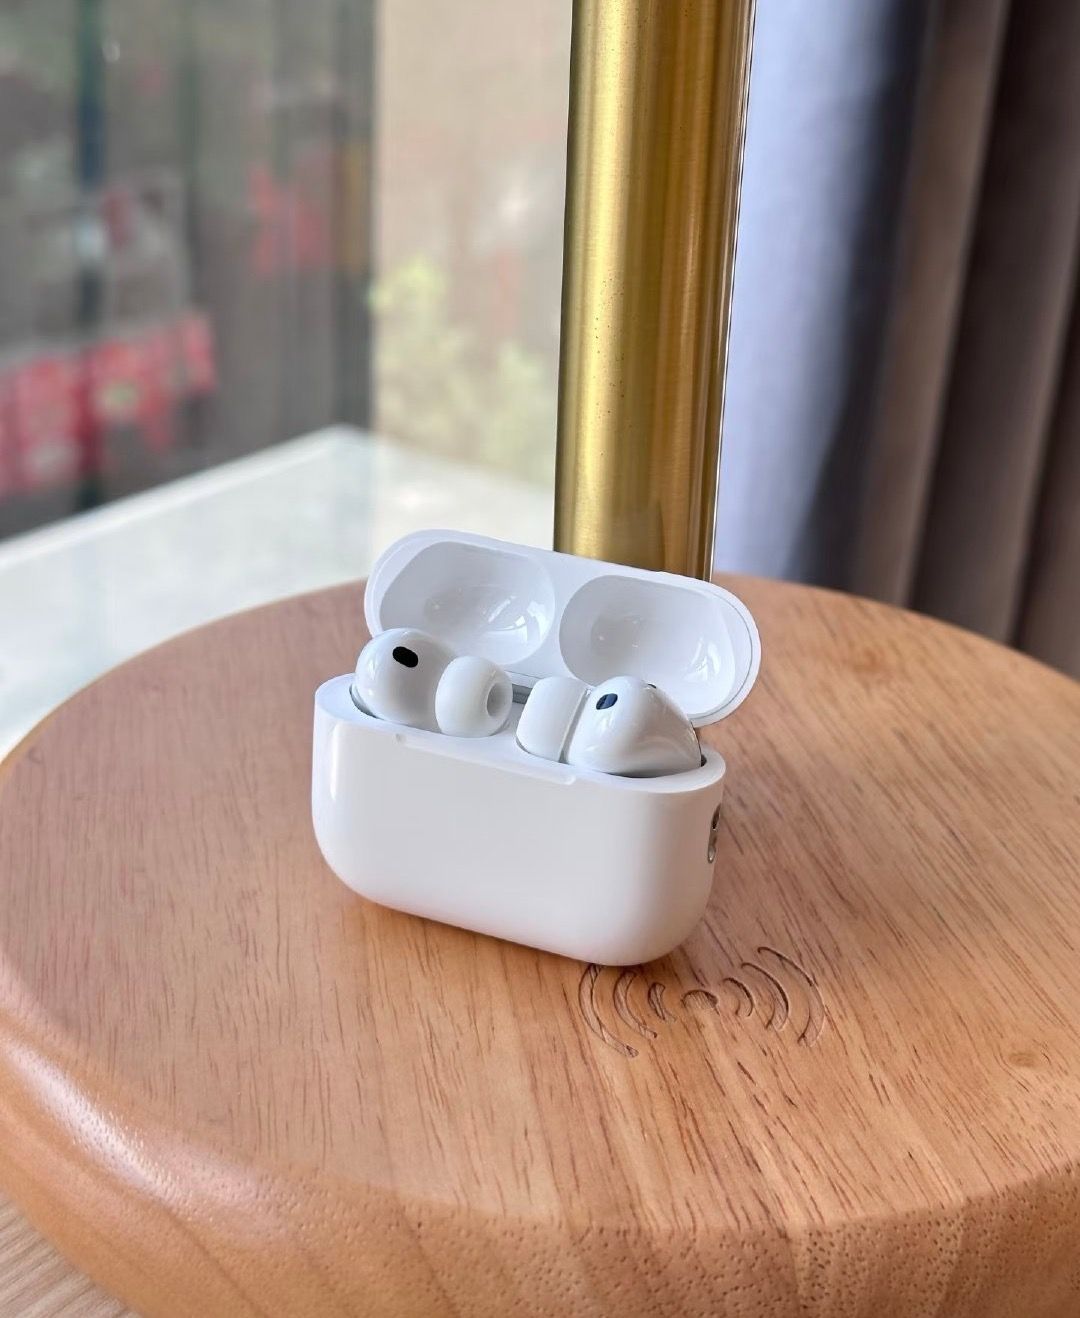 Earbuds · original
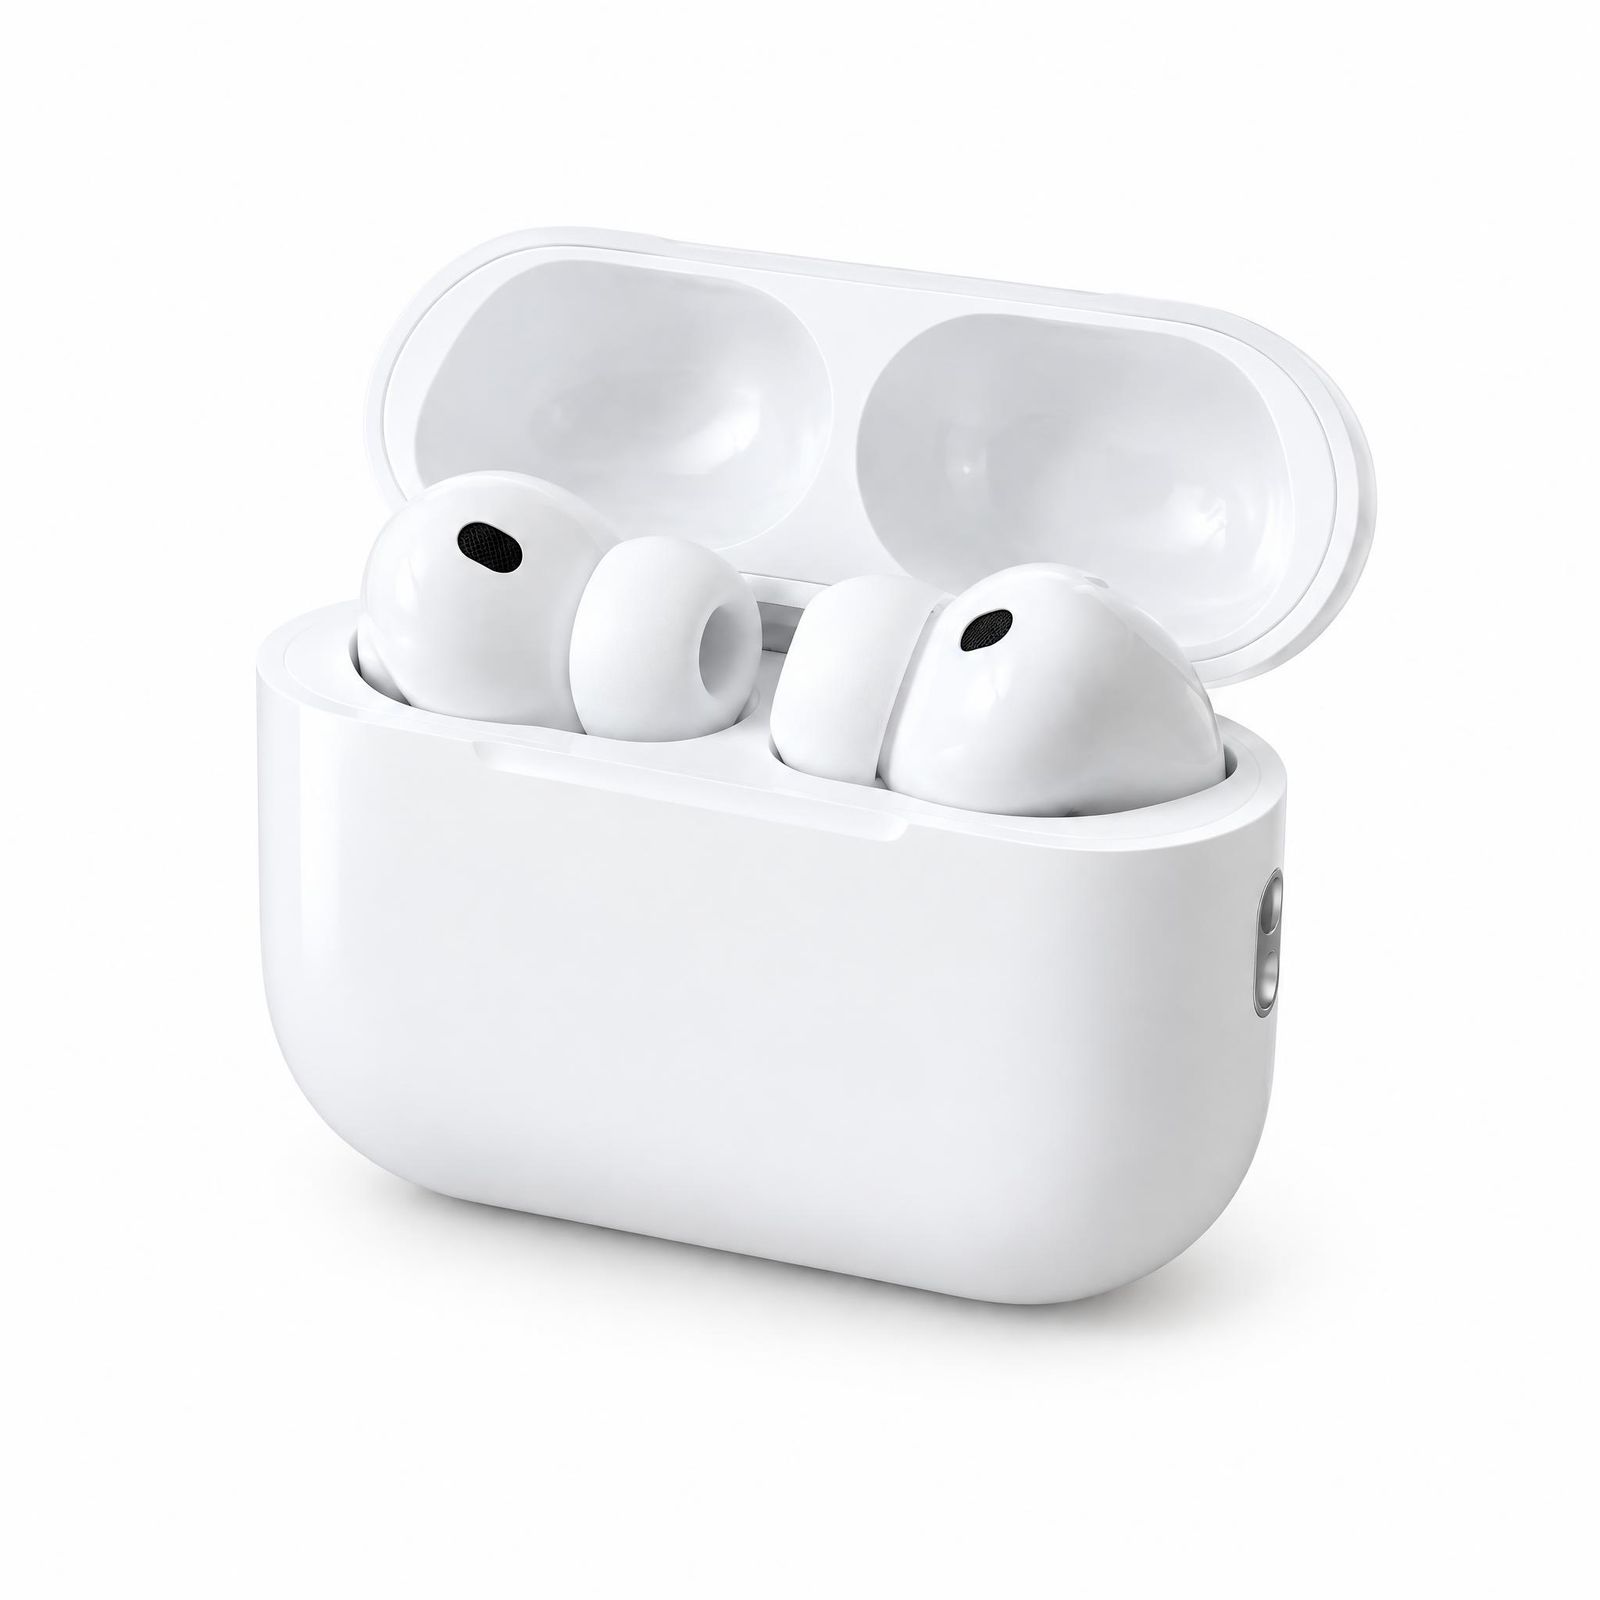 White-background result
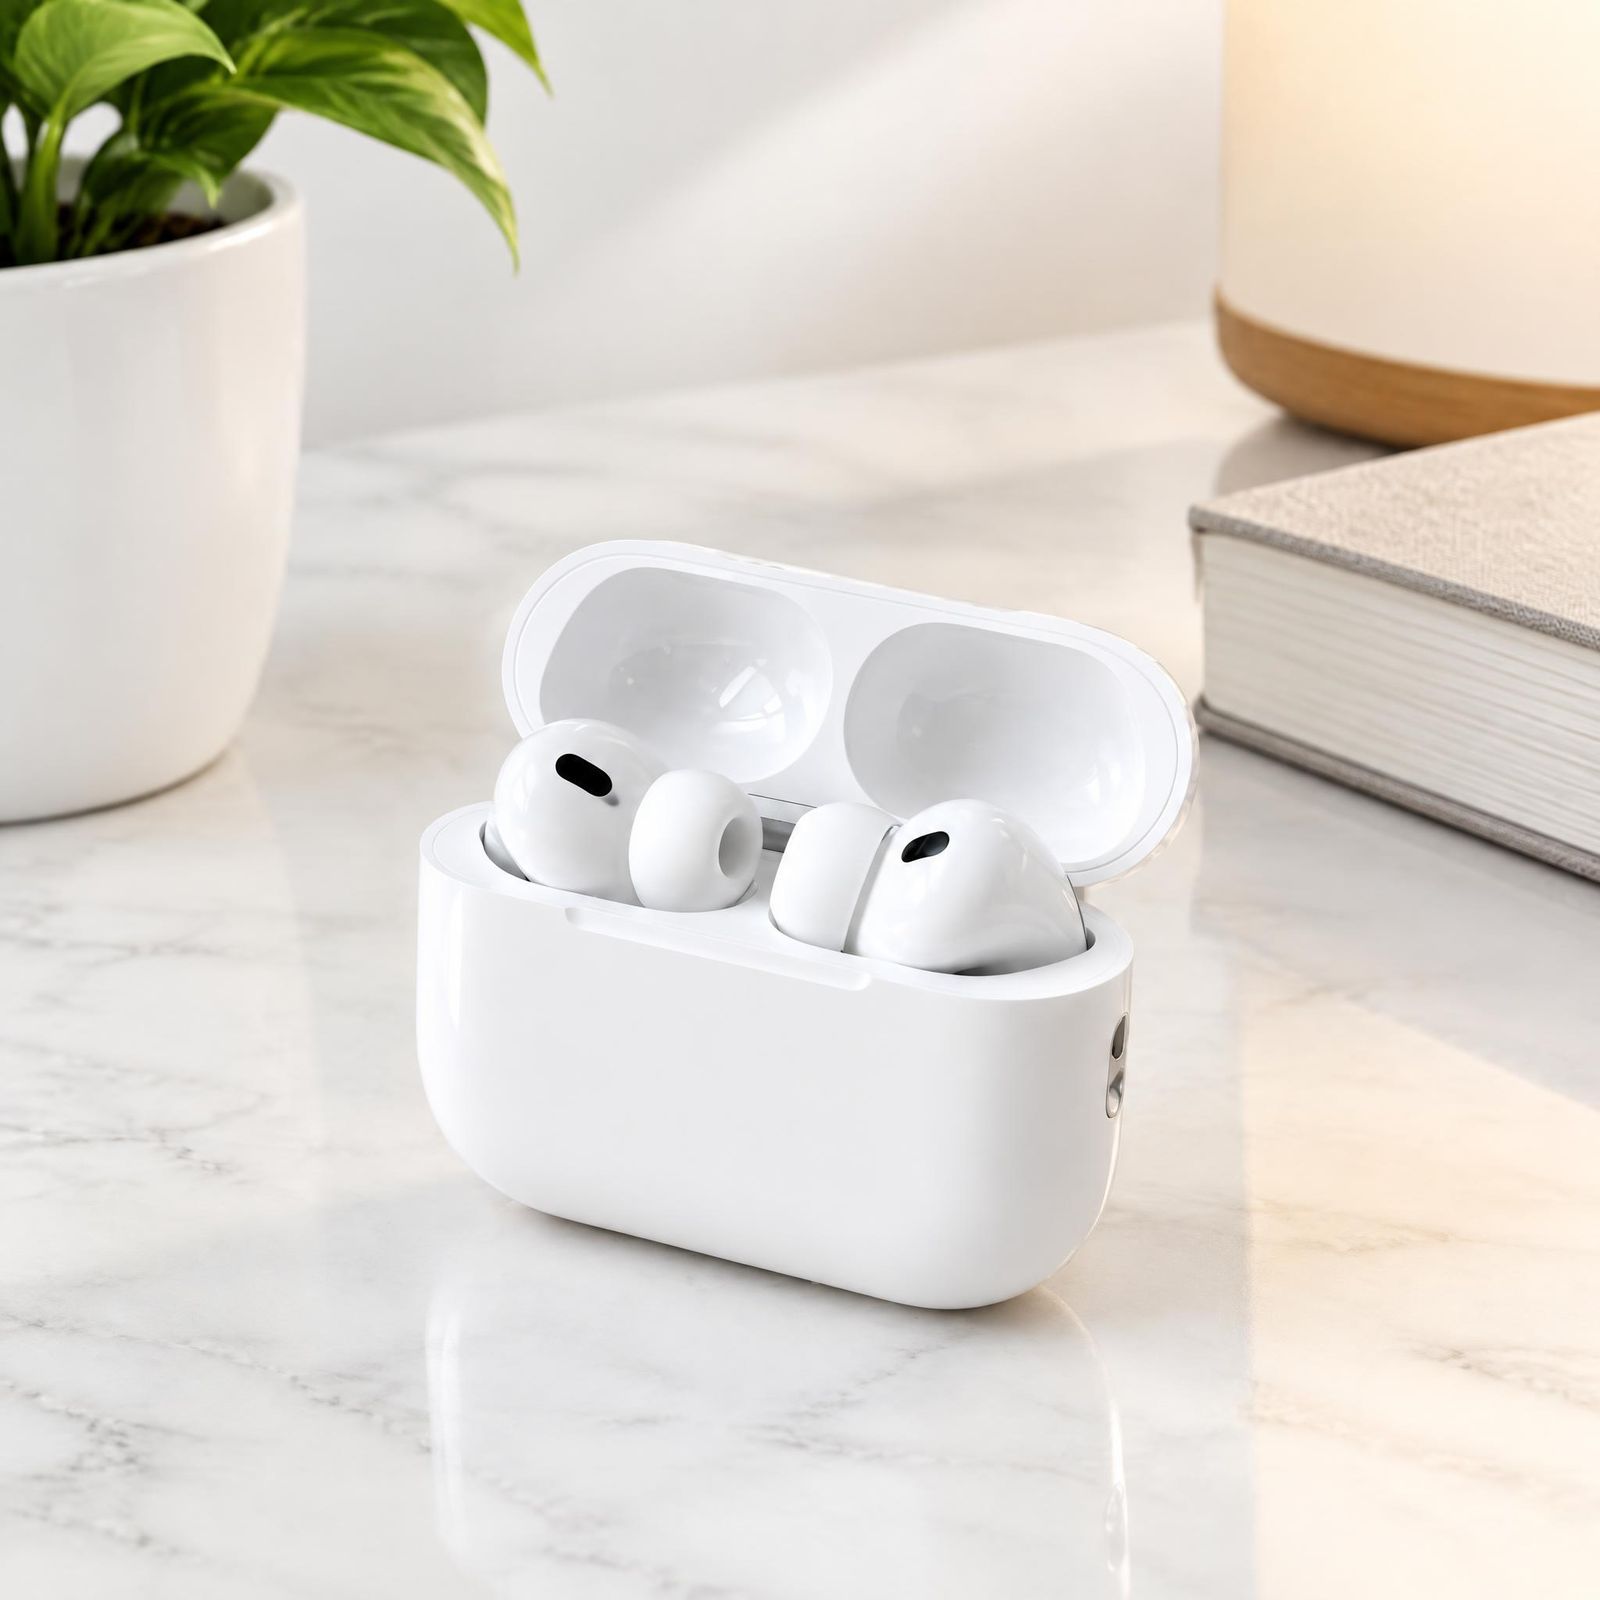 Scene result
Packaged goods: text, color, and pack structure
Food, drinks, supplements, and household consumables often depend on packaging recognition. The exact color, pack shape, opening, flavor or variant name, and required label information should stay legible and accurate.
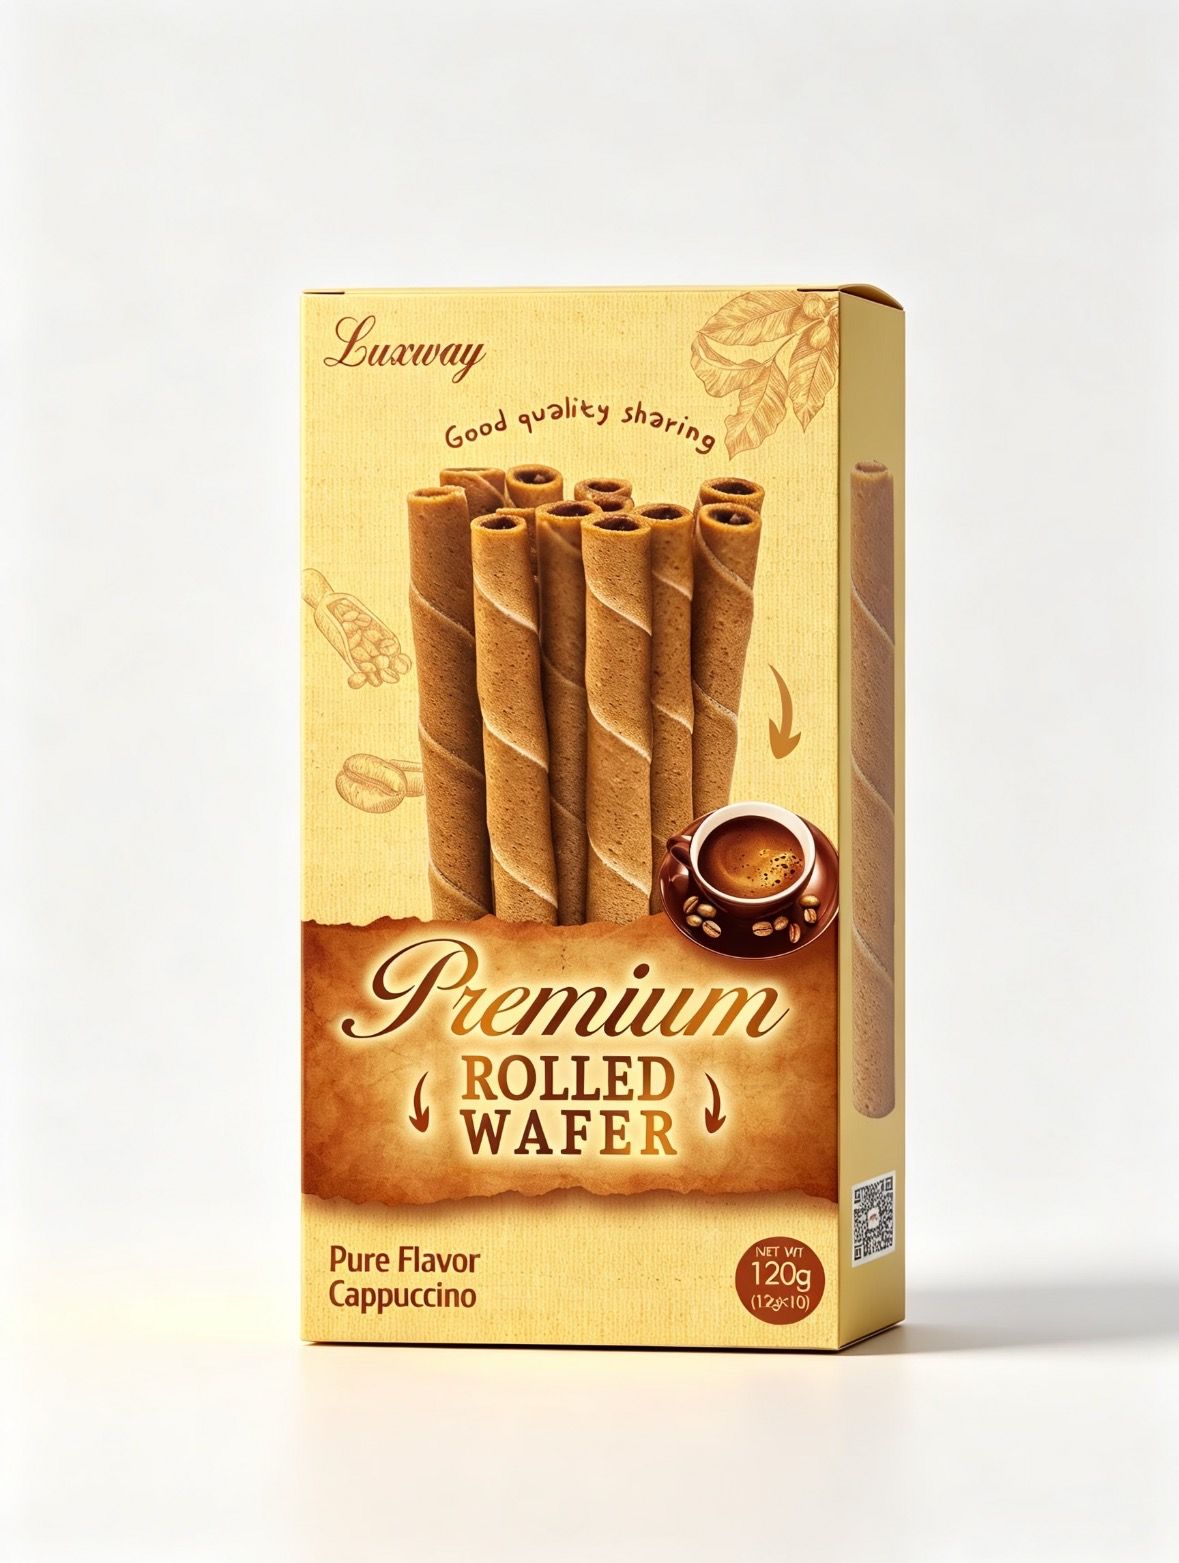 Original photo
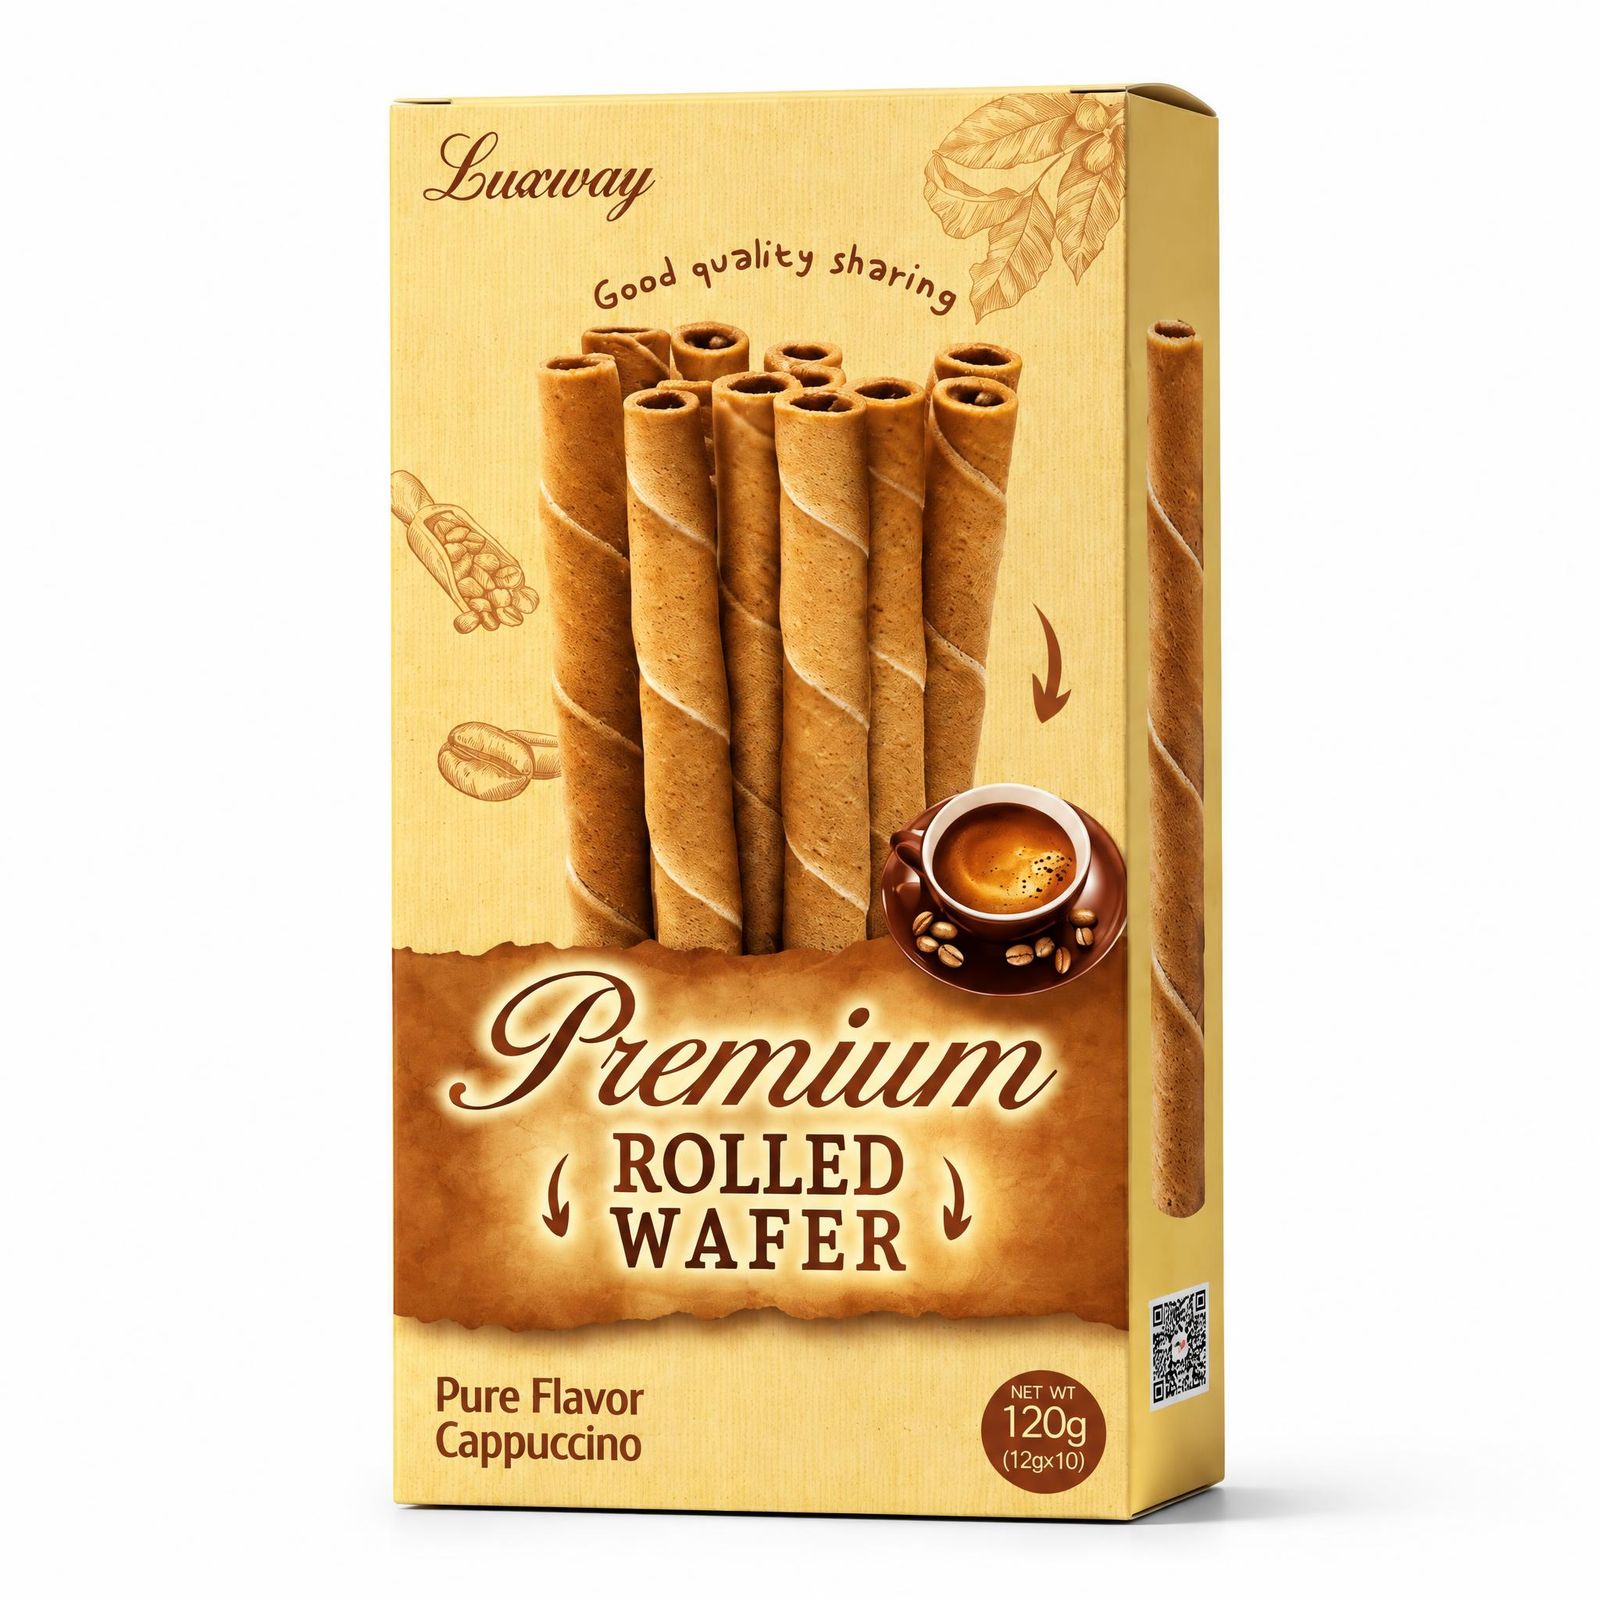 White-background result
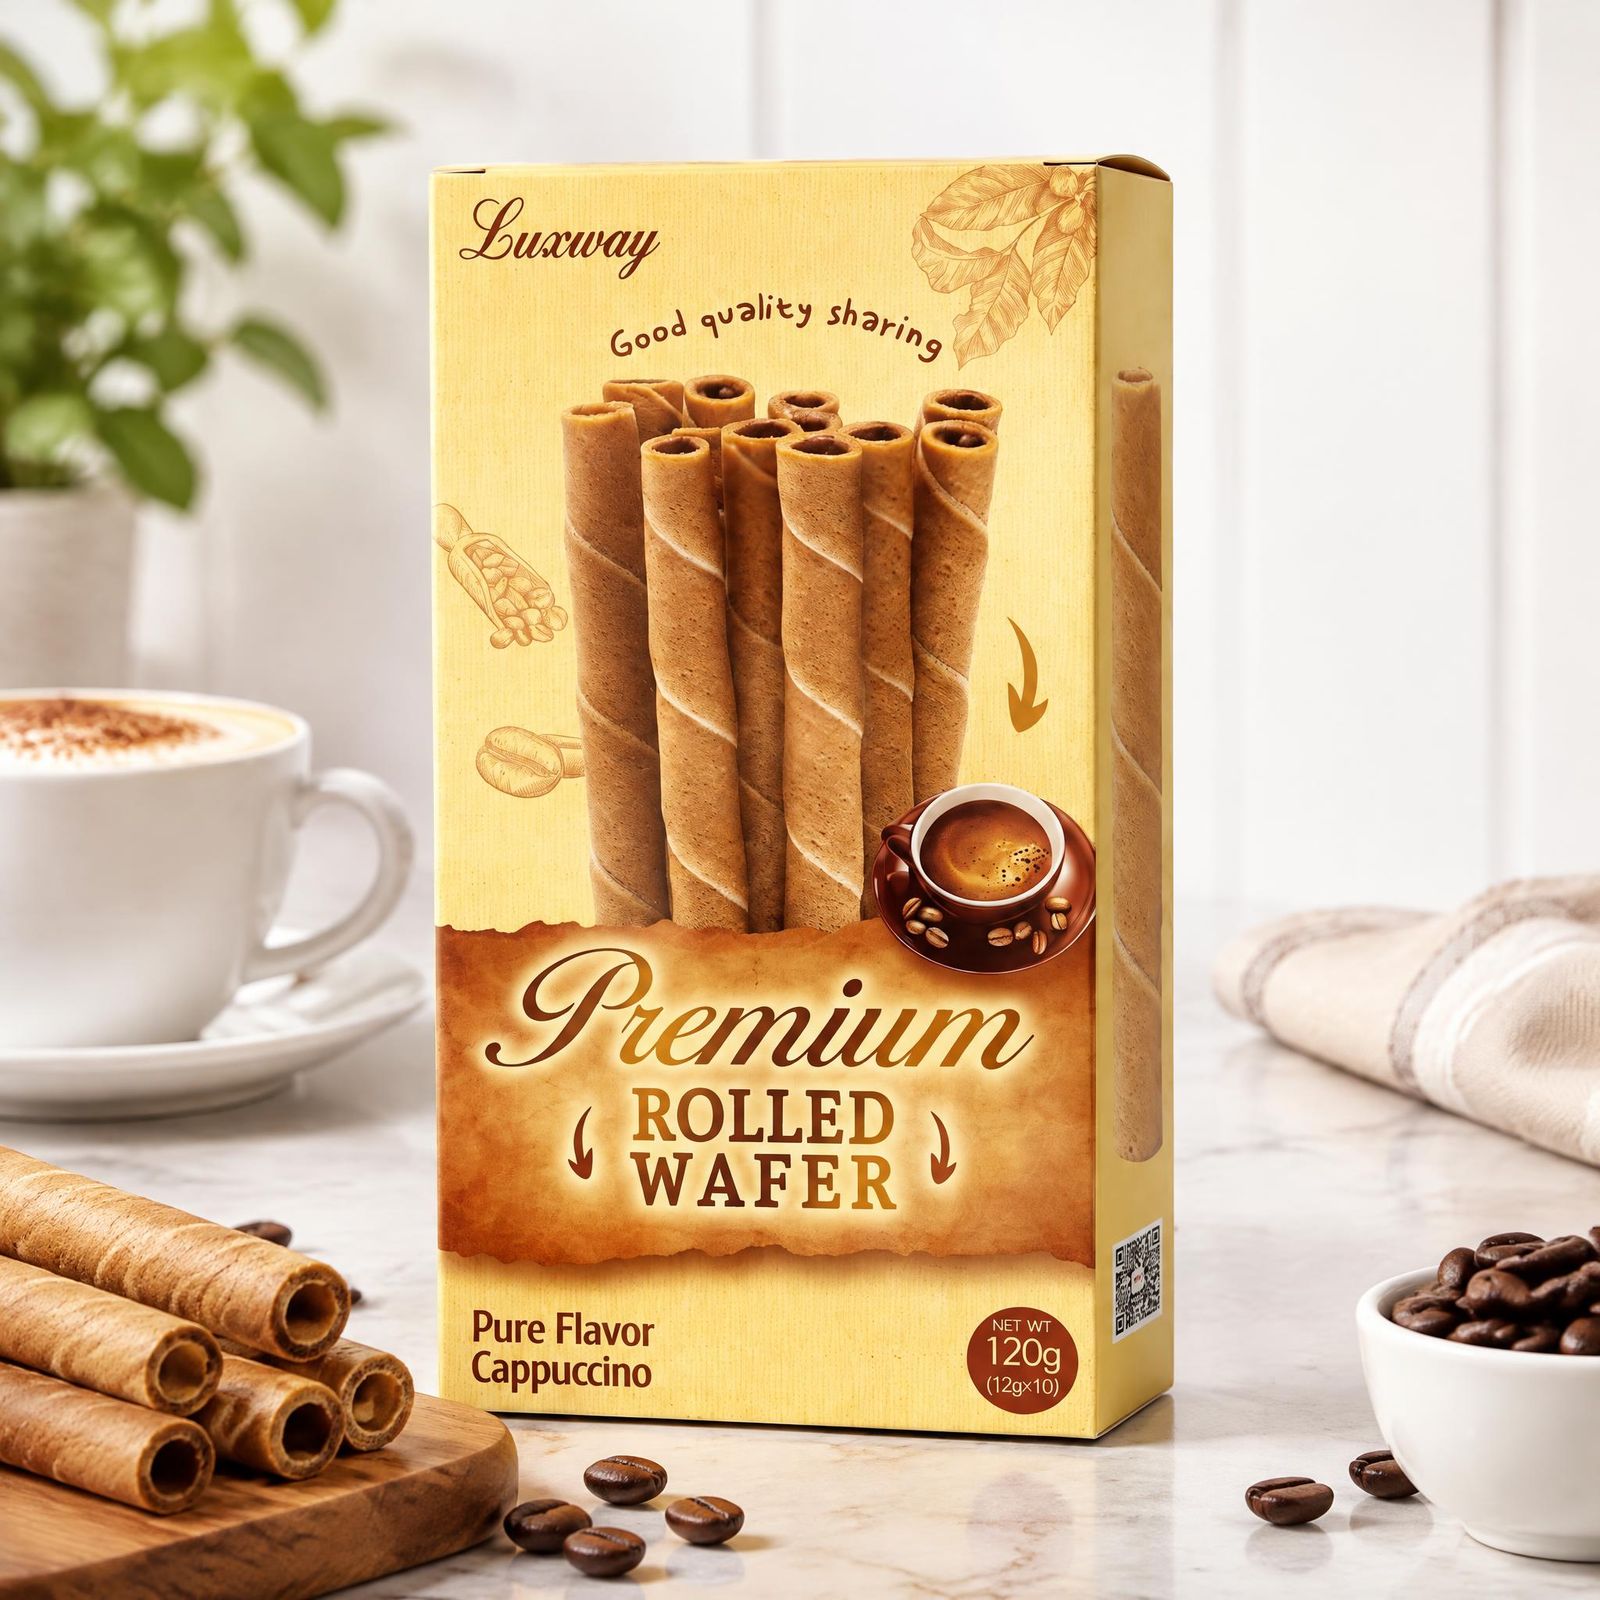 Scene result
Furniture: shape, fabric, and room context
A room scene helps shoppers picture a chair in their home. A white-background version draws attention to its shape. Check the frame, upholstery, and proportions in either version.
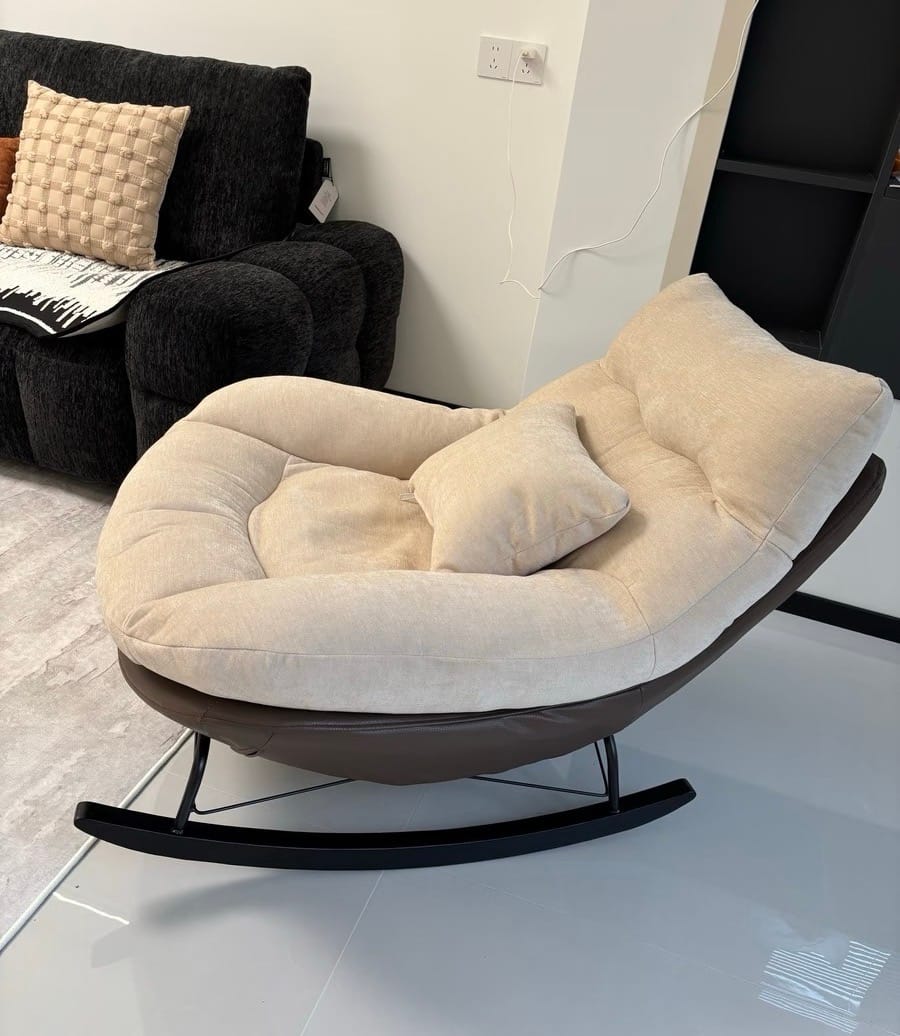 Original photo
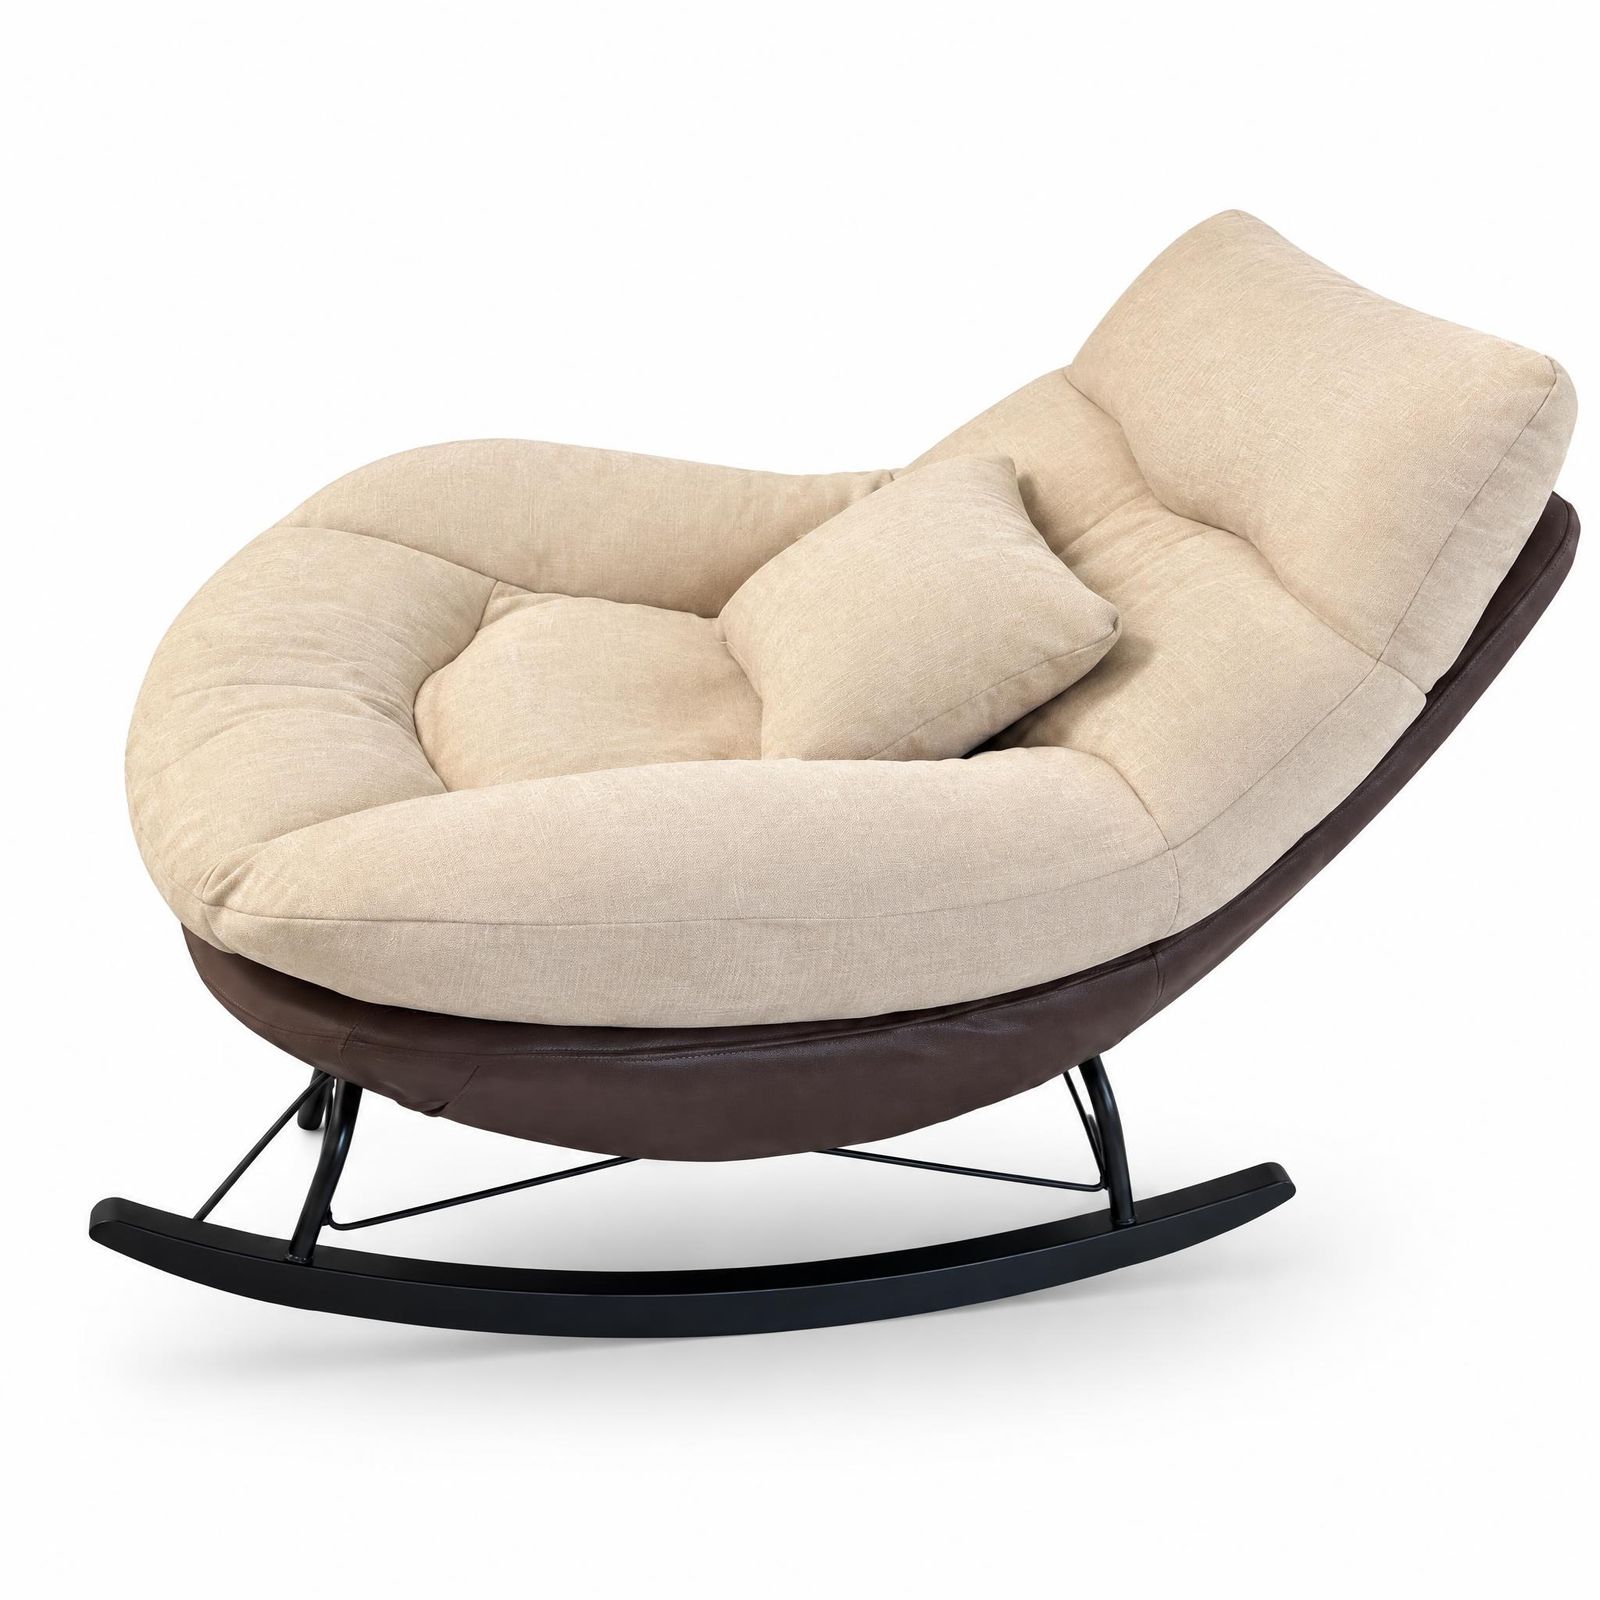 White-background result
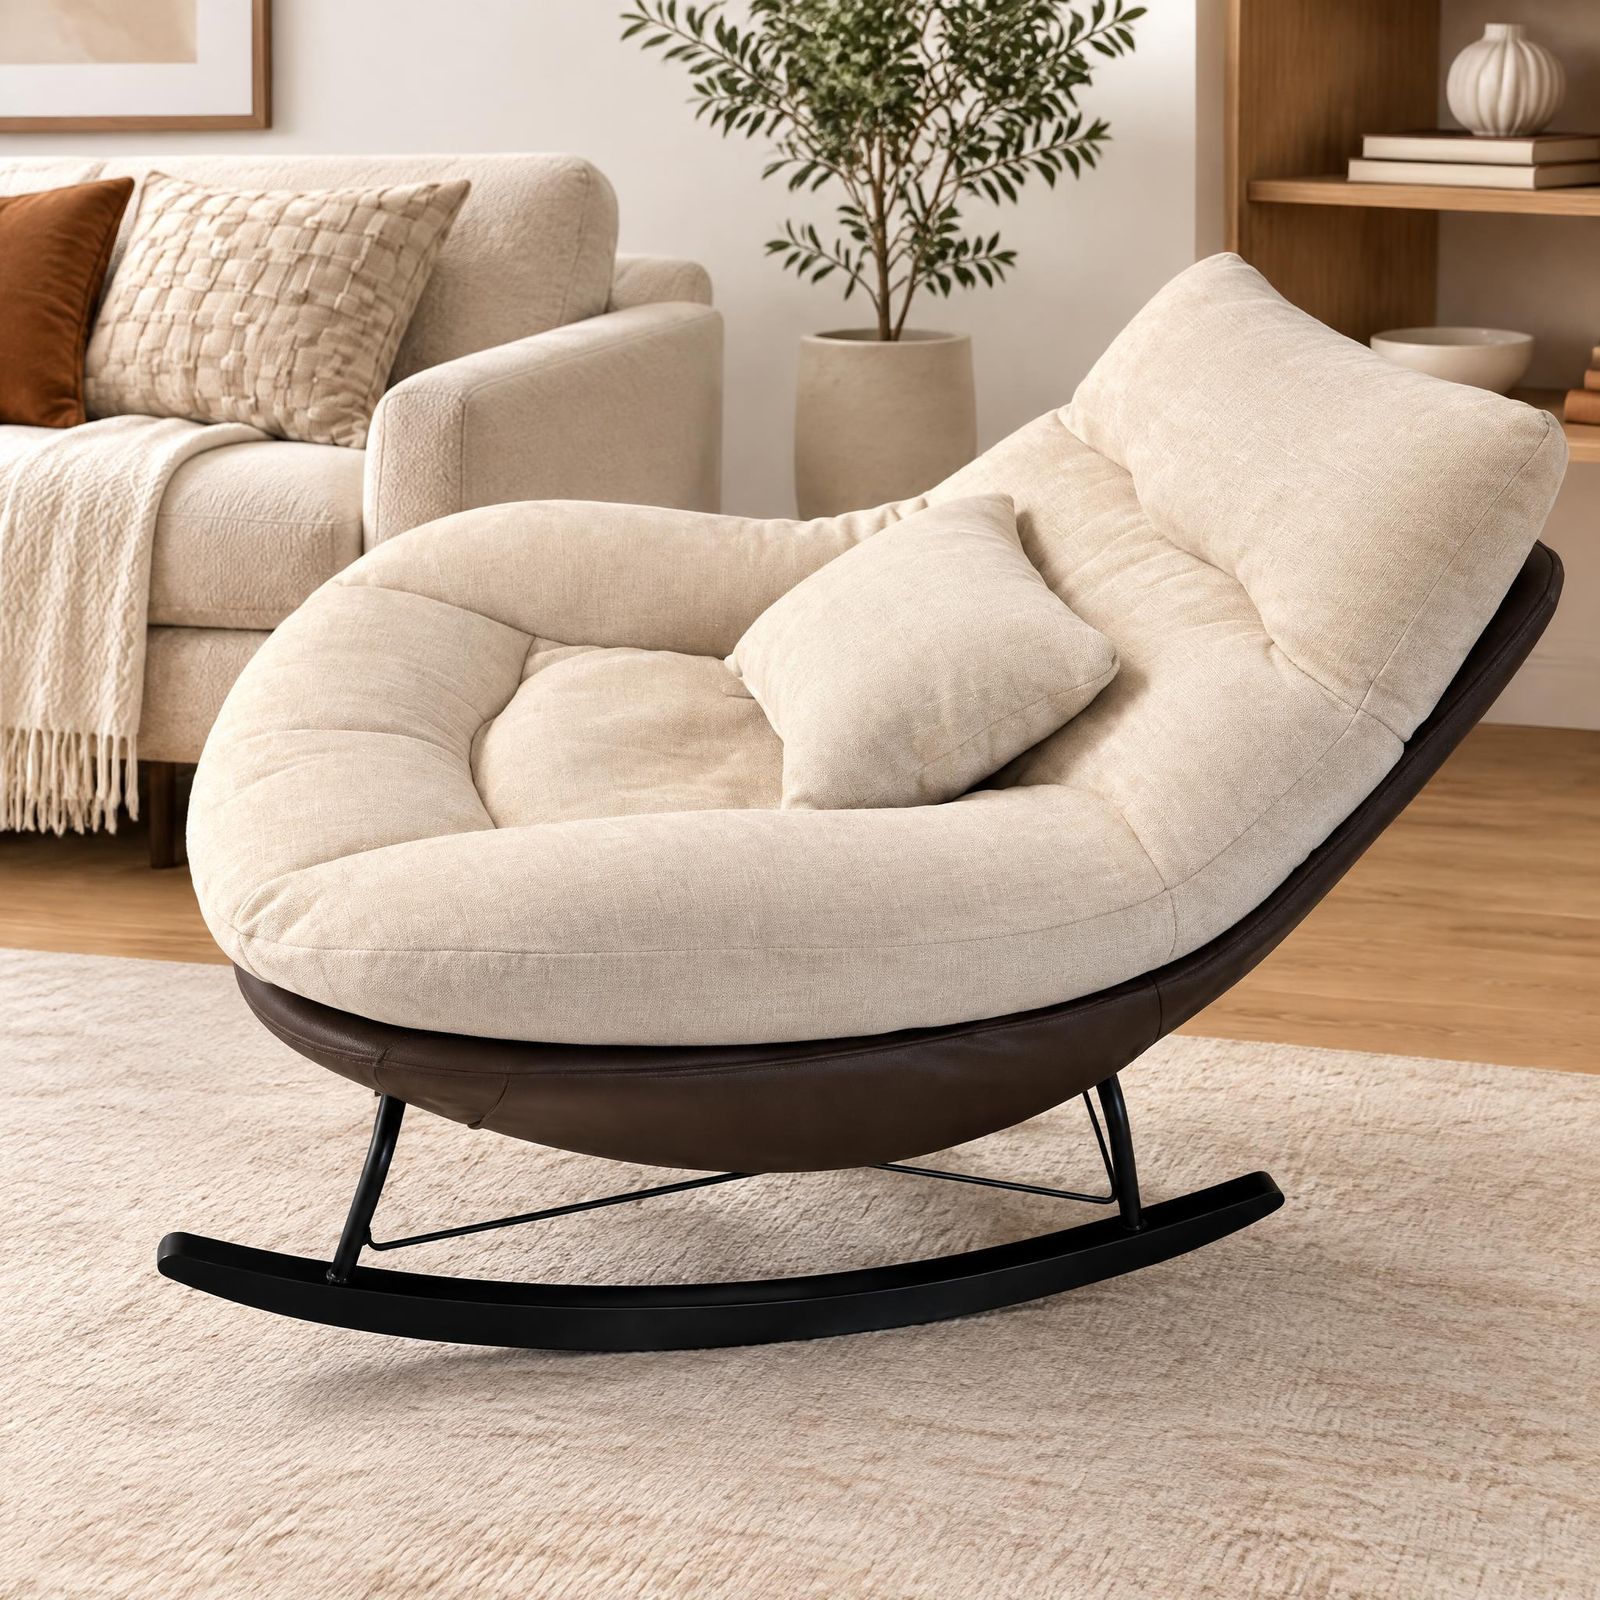 Scene result
Different materials need different checks
The material matters too: glass edges, metal reflections, and fabric texture each need a closer look.
| Material | What should remain believable | Common review focus |
|---|---|---|
| Fabric | Weave, softness, seams, and drape. | Texture smearing, invented folds, changed stitching. |
| Leather | Grain, edge paint, seams, and hardware contact. | Plastic-looking texture or broken straps. |
| Glass | Transparency, refraction, highlights, and contained liquid. | Missing edges, floating reflections, distorted labels. |
| Metal | Controlled reflections, finish, and clean geometry. | Melted edges, warped symmetry, impossible highlights. |
| Plastic | Molded form, finish, joins, and printed controls. | Invented seams, altered buttons, over-glossy surfaces. |
| Paper packaging | Panel geometry, folds, printed color, and readable text. | Garbled copy, changed pack size, softened corners. |
What makes a good Product Studio input?
A clear phone photo can be a useful starting point. Make sure it shows the details customers need to see.
- Keep the entire product inside the frame.
- Use stable focus and enough light to reveal edges and surface texture.
- Show the correct SKU color without a heavy filter.
- Avoid hands, props, and overlapping products that hide the silhouette.
- Make logos, packaging text, and functional parts visible.
- Use the original file rather than a screenshot or low-quality preview.
For a detailed preparation and review workflow, see the companion guide to product photo editing.
What to check before publishing
Before adding a result to your store, open it at full size beside the source and check the following:
- The product is still the same shape and proportion.
- The result represents the correct color variant.
- Logos and label text match the source.
- No component has been added, removed, duplicated, or moved.
- Material texture and reflections make physical sense.
- Edges are complete, especially around thin or transparent parts.
- The image is suitable for its intended channel and image position.
Where Product Studio images can fit
Once you have checked the product details, choose images for your product pages, collections, ads, social posts, or email campaigns.
Match the image to its placement. A scene that works in an ad may not suit a marketplace main image; check that platform’s current requirements before uploading.
AI Product Studio FAQ
What is an AI Product Studio?
An AI Product Studio uses your existing product photo to generate a studio-style image. Upload a photo, choose the presentation you want, then compare the result with the original before using it in your store.
Is Product Studio only for clothing?
No. Product Studio can support multiple product categories, including beauty products, footwear, bags, homeware, electronics, jewelry, and other products that can be shown clearly in a source photo.
What type of photo should I upload?
Upload a sharp, well-lit image with the complete product visible. Avoid cropped edges, heavy blur, extreme filters, and objects that cover important features such as labels, straps, buttons, or connectors.
Does an AI Product Studio preserve logos and labels?
Logos and labels can change during generation. Read the text character by character against the original, and reject any result that misrepresents the product.
Can Product Studio generate a background?
Yes. In Snappyit Product Studio, use Additional Information to describe the setting, surface, or lighting you want. Check the generated product against the original before publishing.
Can AI Product Studio images be used as ecommerce marketplace main images?
It depends on the marketplace, category, and image slot. A clean result may be appropriate for a main image only when it meets that destination's current rules. Check the platform requirements before publishing, and use a contextual scene for secondary images, ads, or social content when that better fits the channel.
When should I keep the original photo?
Keep the original or use a manually corrected version if the result changes a product detail, makes a label unclear, or leaves you unsure what is accurate.
References
- Snappyit — Product Studio: the product workflow described and used for the examples in this article.
- Google — Product Studio: an example of AI-assisted tools for creating and enhancing merchant product imagery.
- Photoroom — AI Product Photography: an overview of AI-generated product images and contextual backgrounds.
- Adobe — Product Photography: foundational product photography terminology, setup, lighting, and editing.
- Canva — Product Photography Guide: product-photo planning, styling, shooting, and editing guidance.






