





AT A GLANCE
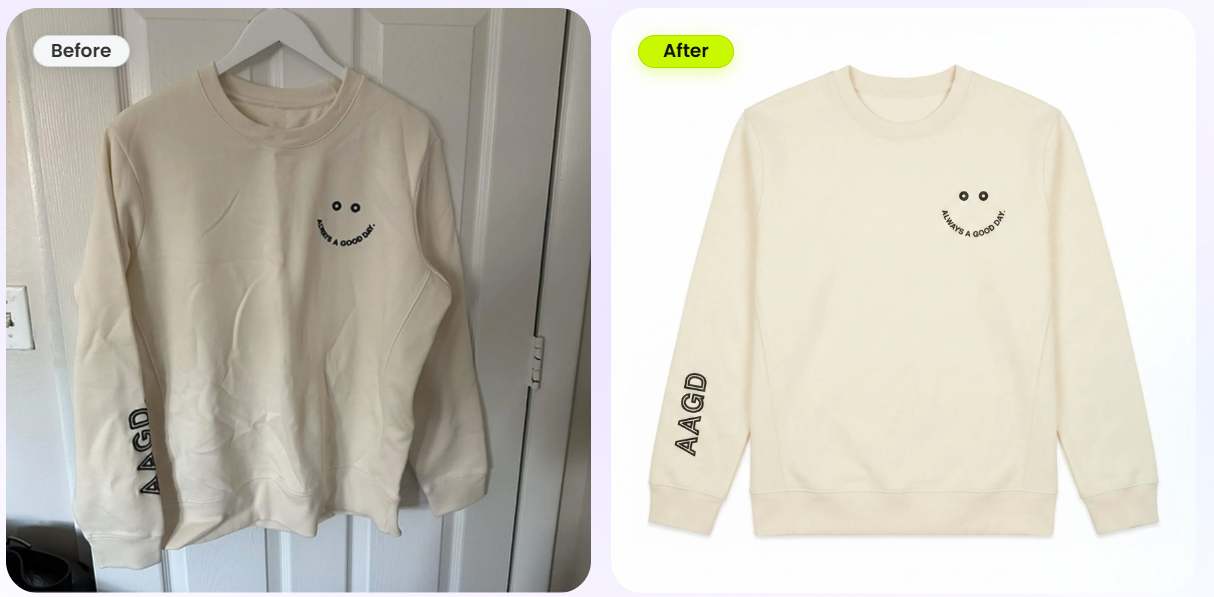
Start with a clear garment photo. Generate a flat lay. Check the details before saving. The neckline, cuffs, fastenings, and markings should still match the product you sell.
Choose a Source Photo for AI Flat Lay
What is an AI flat lay clothing photo?
A flat lay shows clothing arranged on a flat surface and photographed from above. An AI flat lay generator recreates that presentation from an existing garment photo, changing the arrangement and background.
For sellers, a clear flat lay shows the outline and front design, while consistent framing helps shoppers browse a collection. A suitable existing photo can provide a starting point without another shoot.
AI can redraw garment details, so compare the result with the actual product before adding it to your store.
Choose a source that shows the complete garment
A hanger photo works well when the full garment is visible. For the white off-shoulder top, the collar panels, waist seams, and front opening all provide useful references.
- Keep every edge visible. Leave space around the neckline, cuffs, and hem. A cropped sleeve gives AI no reliable reference for its missing end.
- Uncover the design. Move sleeves away from buttons and patches. Avoid hands, hair, belts, or overlapping garments that hide details.
- Use even light. Avoid deep shadows, mixed lighting, and filters that change color or texture.
- Upload the original file. Prefer a sharp photo over a screenshot or repeatedly compressed image. Keep real close-ups in your phone for later review.
Bad source
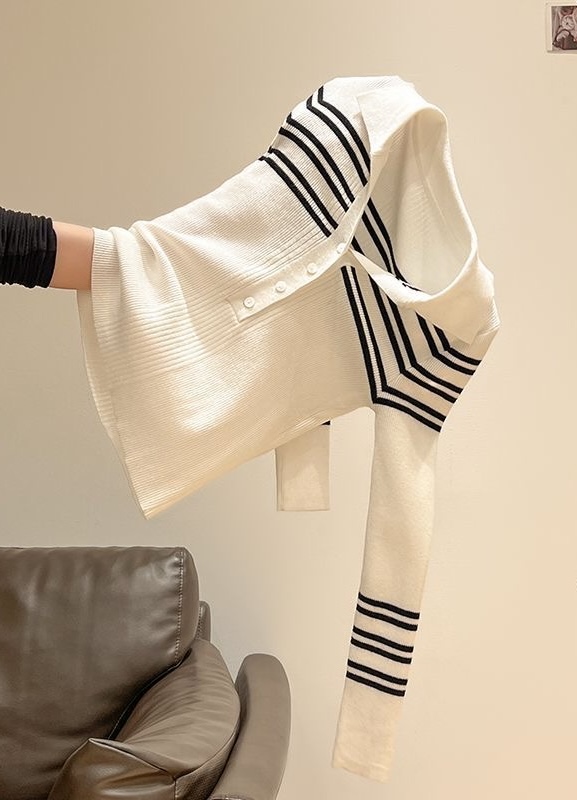
Held at an angle; folds obscure the natural shape.
Bad source
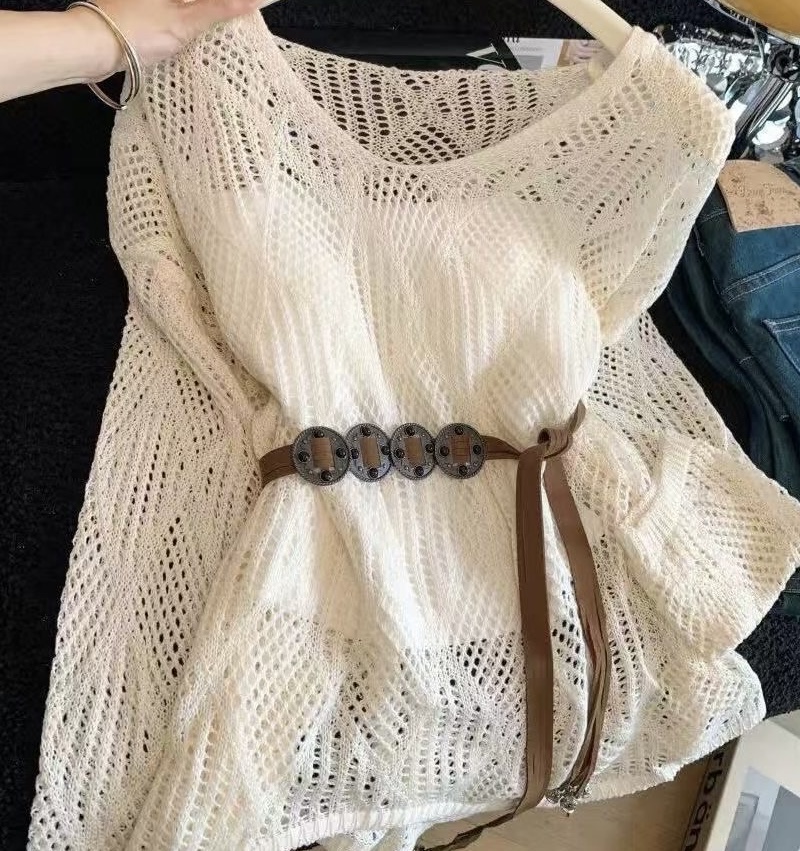
The belt and folds hide the waist and lower edge.
Good source
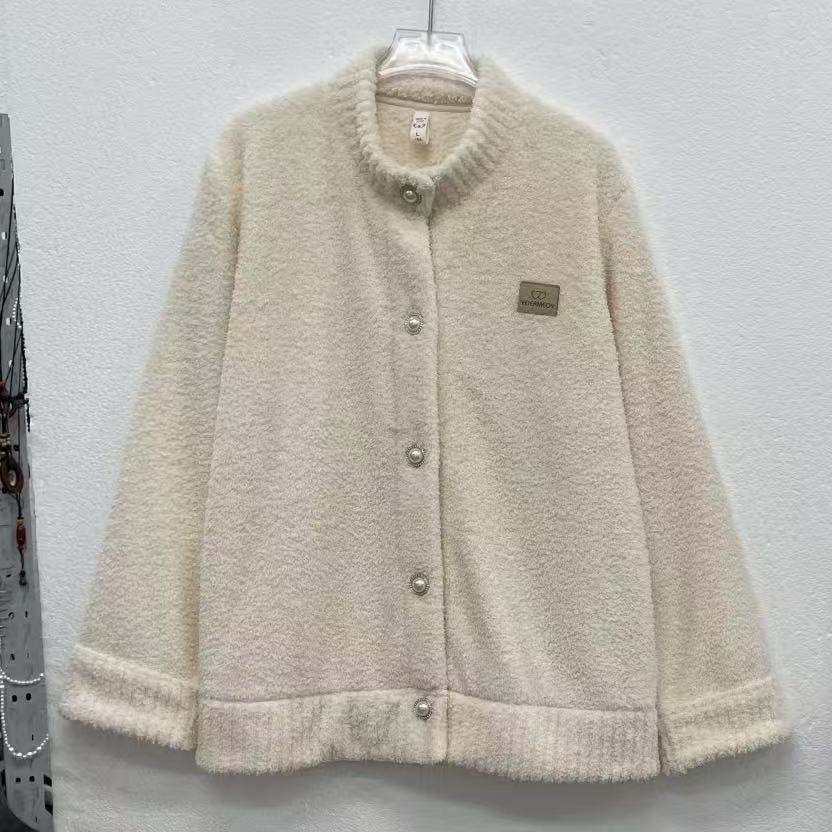
Full front, both sleeves, and button line visible.
Good source
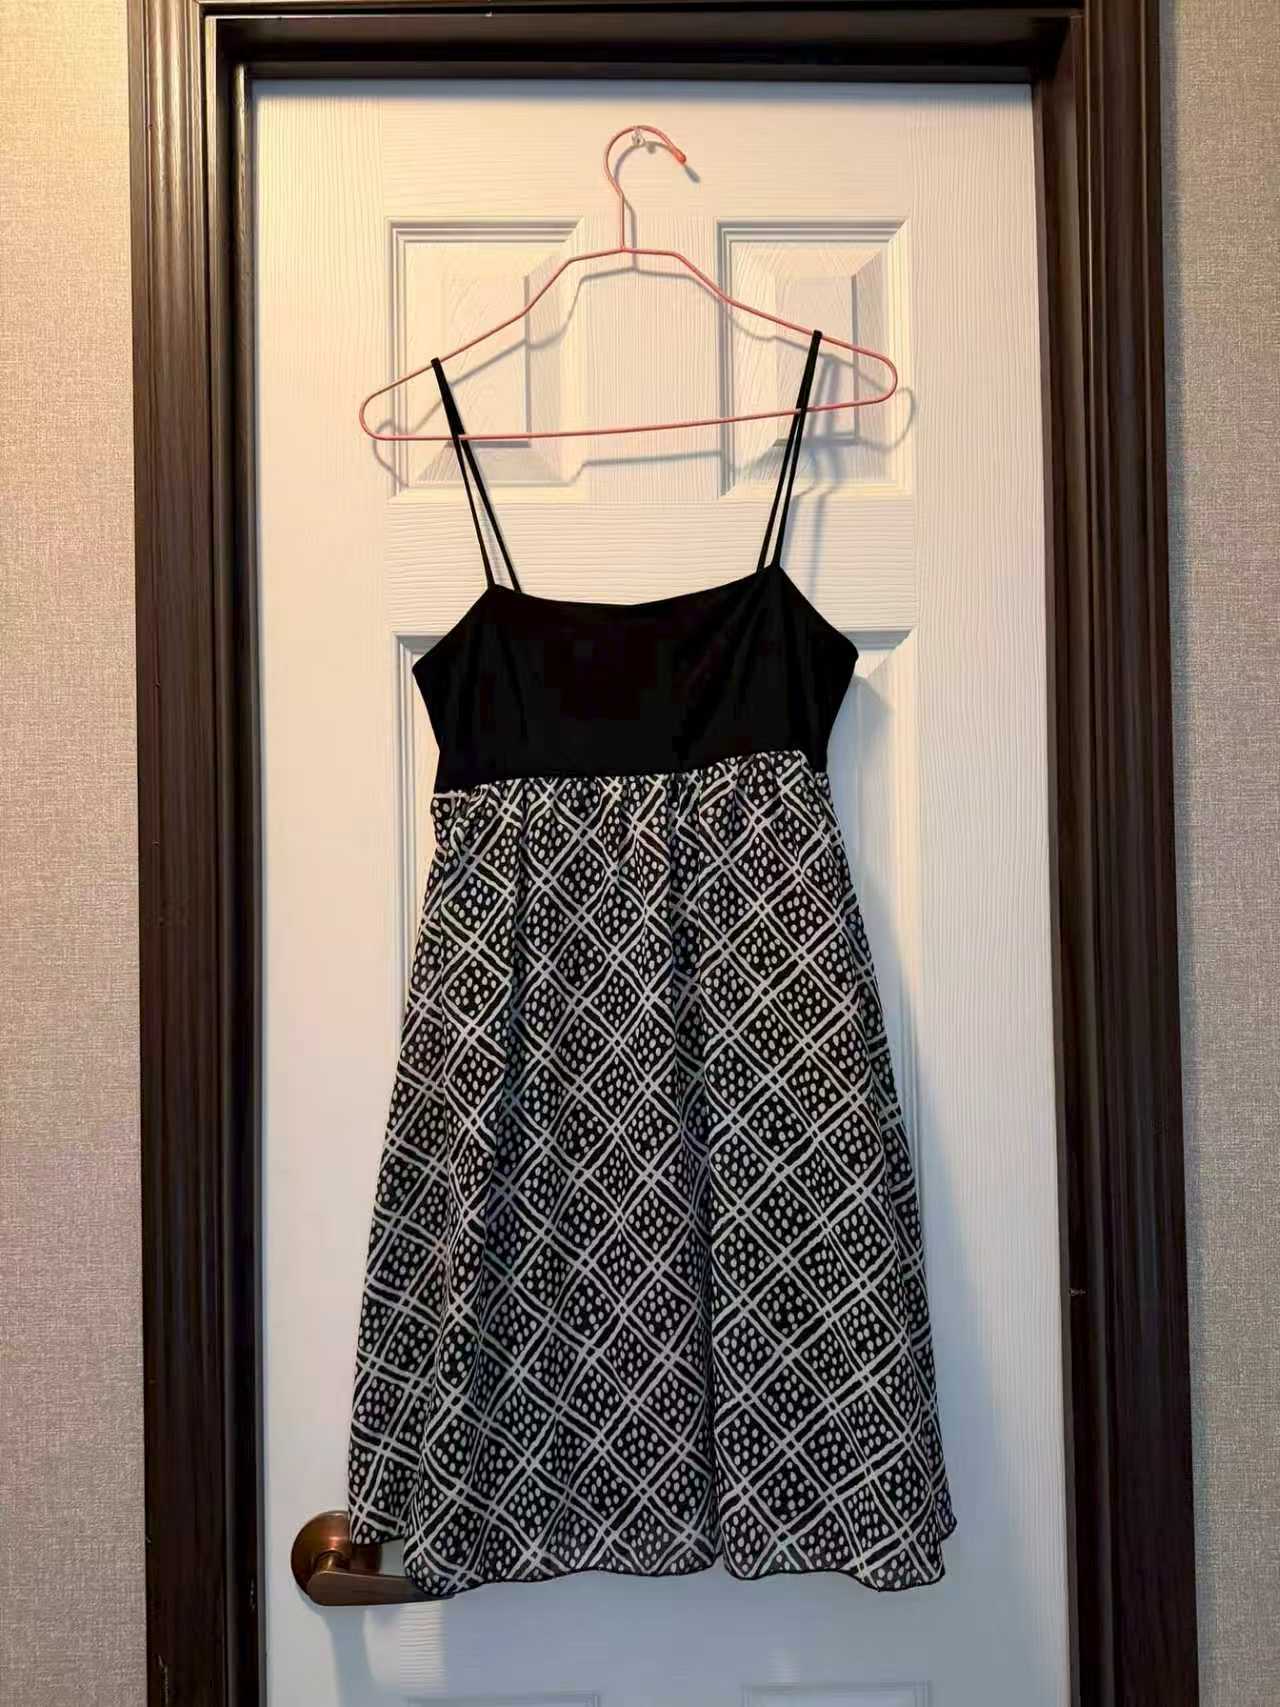
Complete outline; use neutral light to check color.
If you need another source, spread out the garment and hold your phone square to it. Prioritize visible construction over a studio finish. For setup and lighting, follow our guide to photographing clothing flat.
Create a Flat Lay in the Snappyit App
Get Snappyit through the Mobile App page. Start with a front view of one garment.
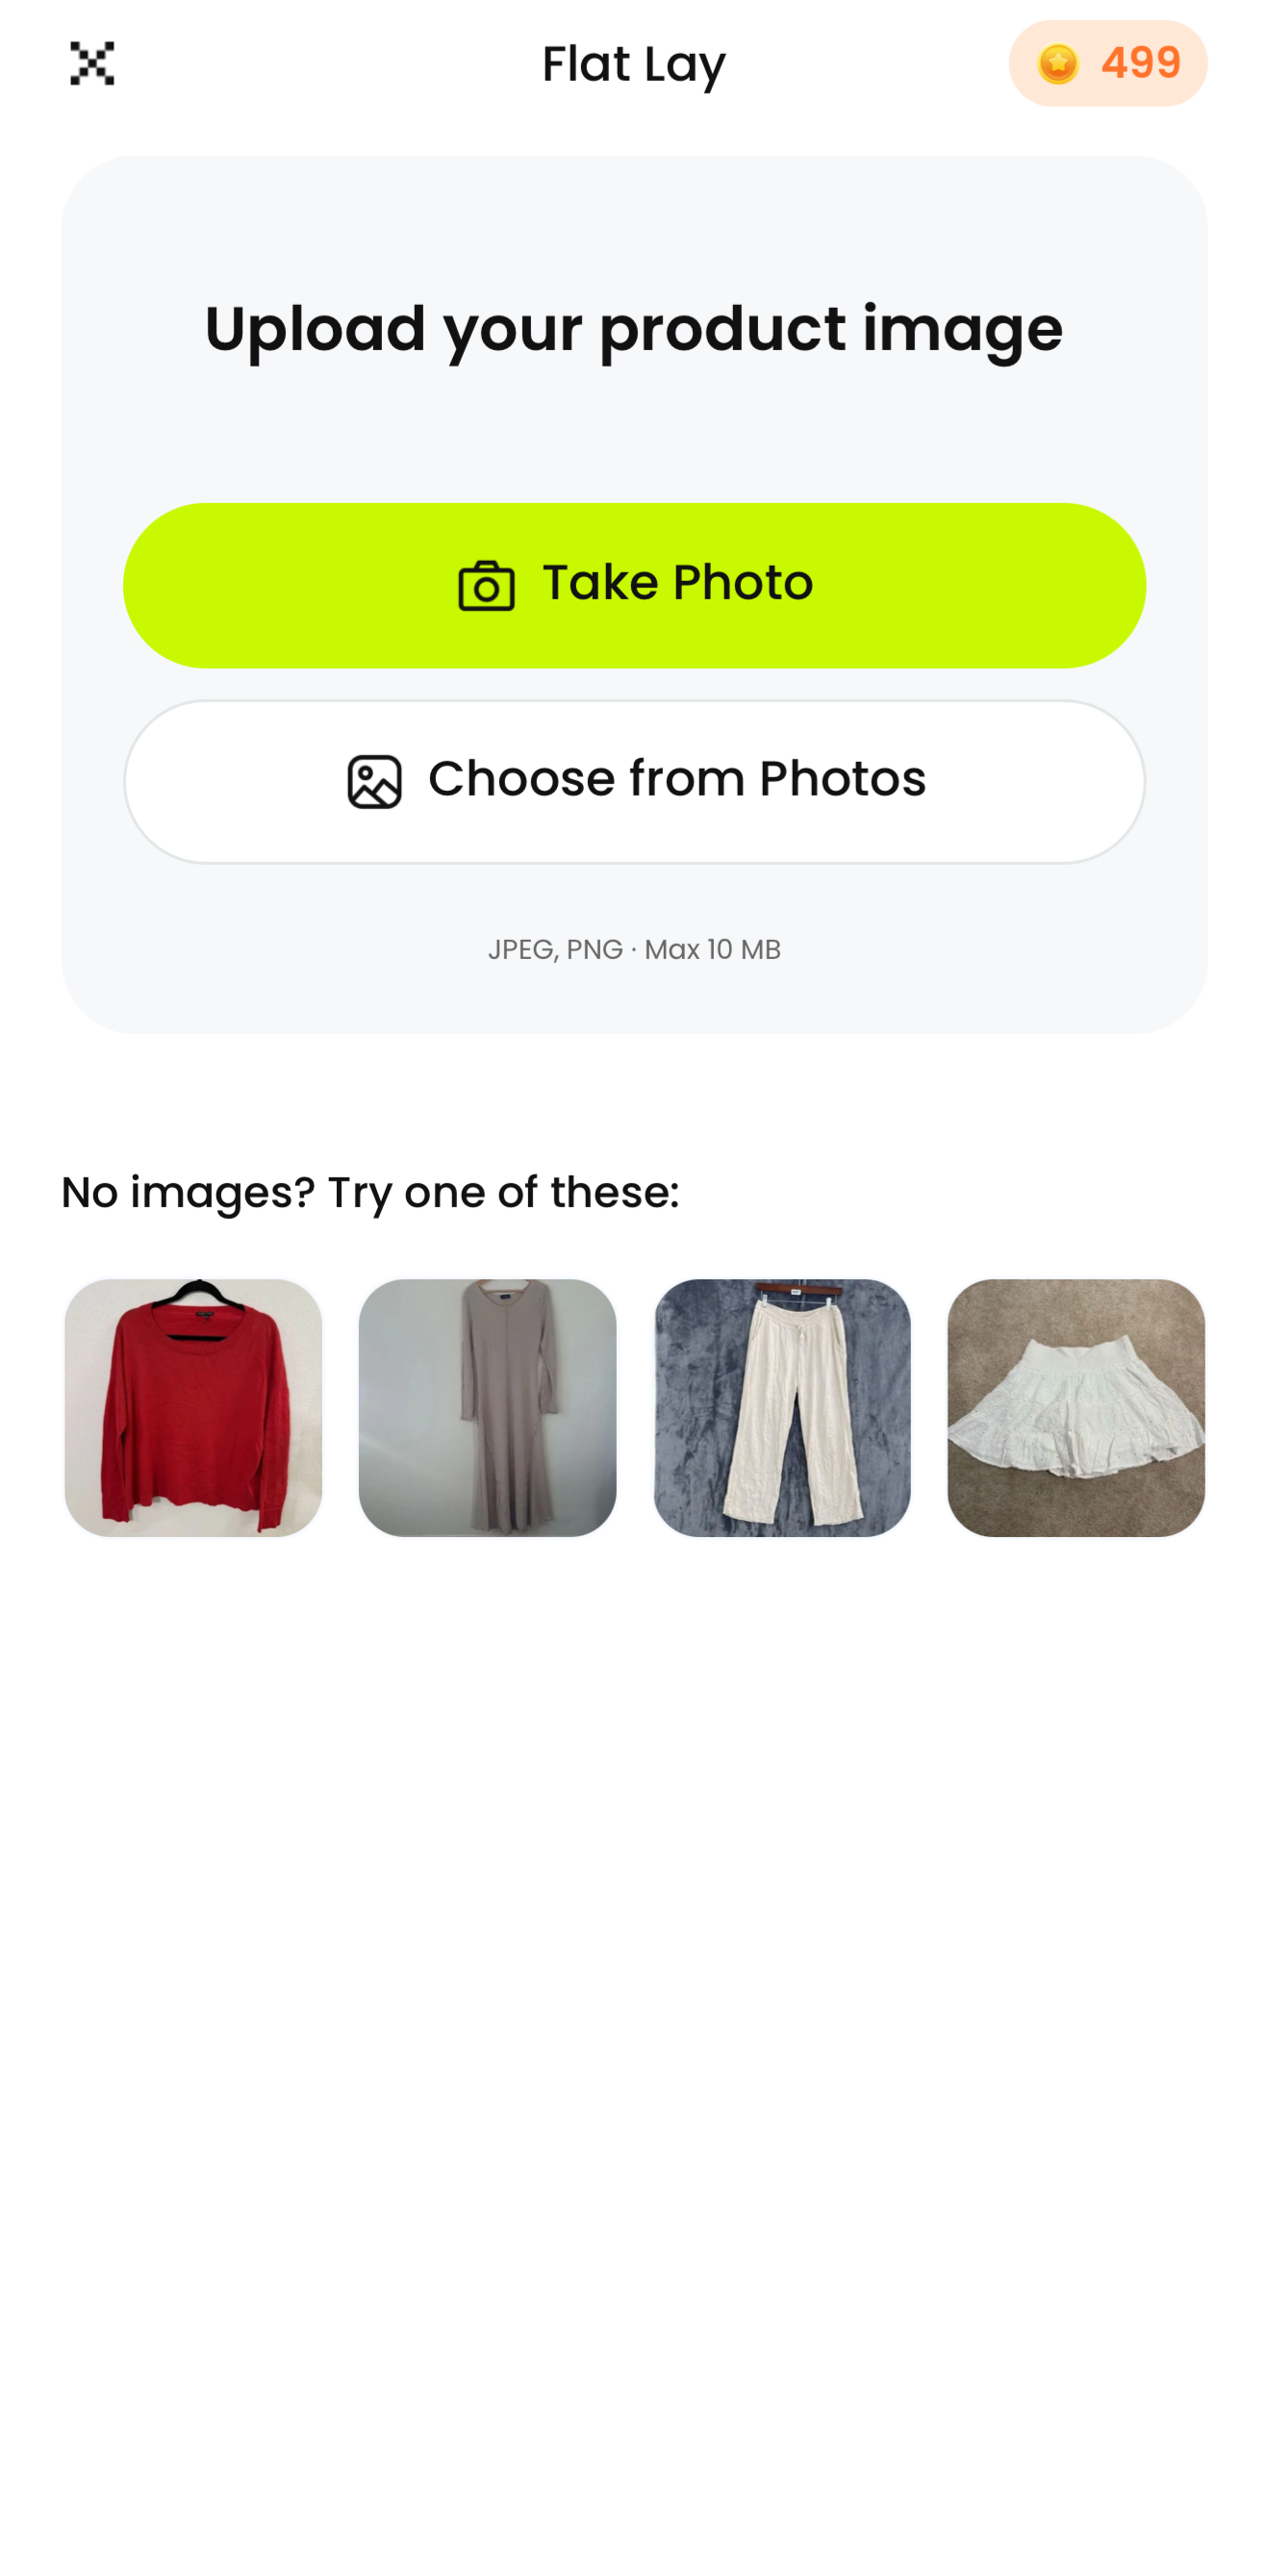
Upload
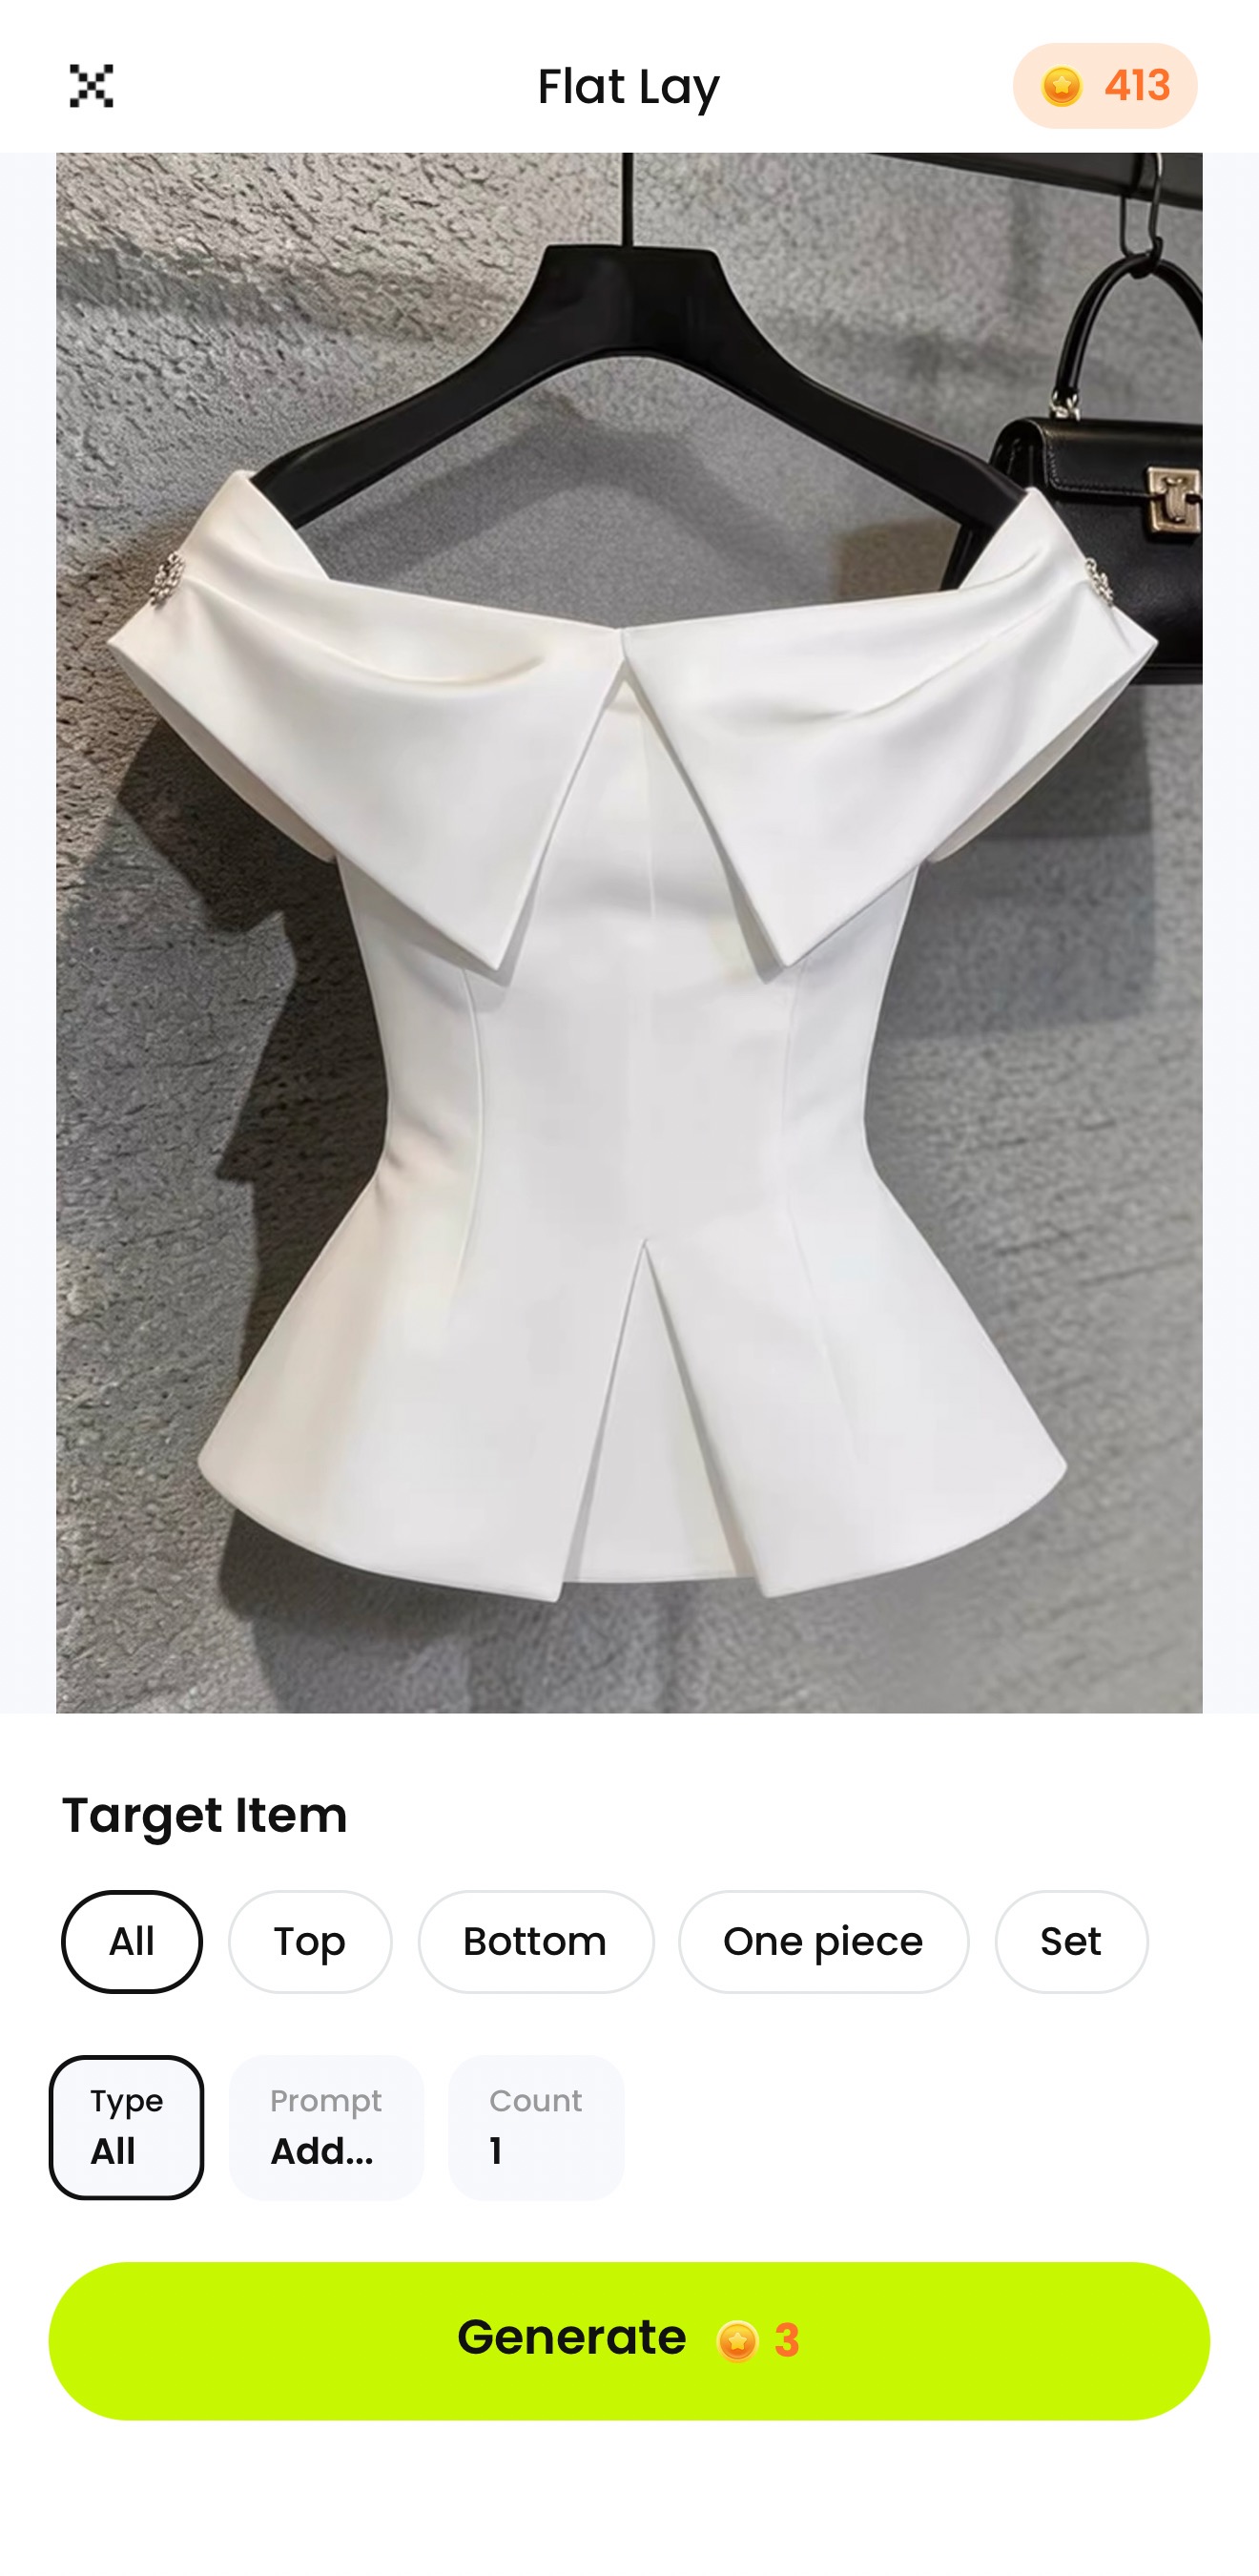
Workspace
Result
Step 1. Upload your garment photo
Open Flat Lay. Tap Choose from Photos to upload an existing image, or Take Photo to take a new one. Use a JPEG or PNG file up to 10 MB.
Confirm the product, colorway, and full outline in the upload preview. Library controls and permissions may differ by device.
Step 2. Choose the target garment
Tap Type to open Target Item. Keep All for a single garment, or choose Top, Bottom, One piece, or Set to select what you want to work on.
Step 3. Leave Prompt blank or add instructions
You can leave Prompt blank. To change the arrangement, add a short instruction about the background or sleeve position. Avoid asking the app to change the garment’s cut.
Step 4. Set Count and generate
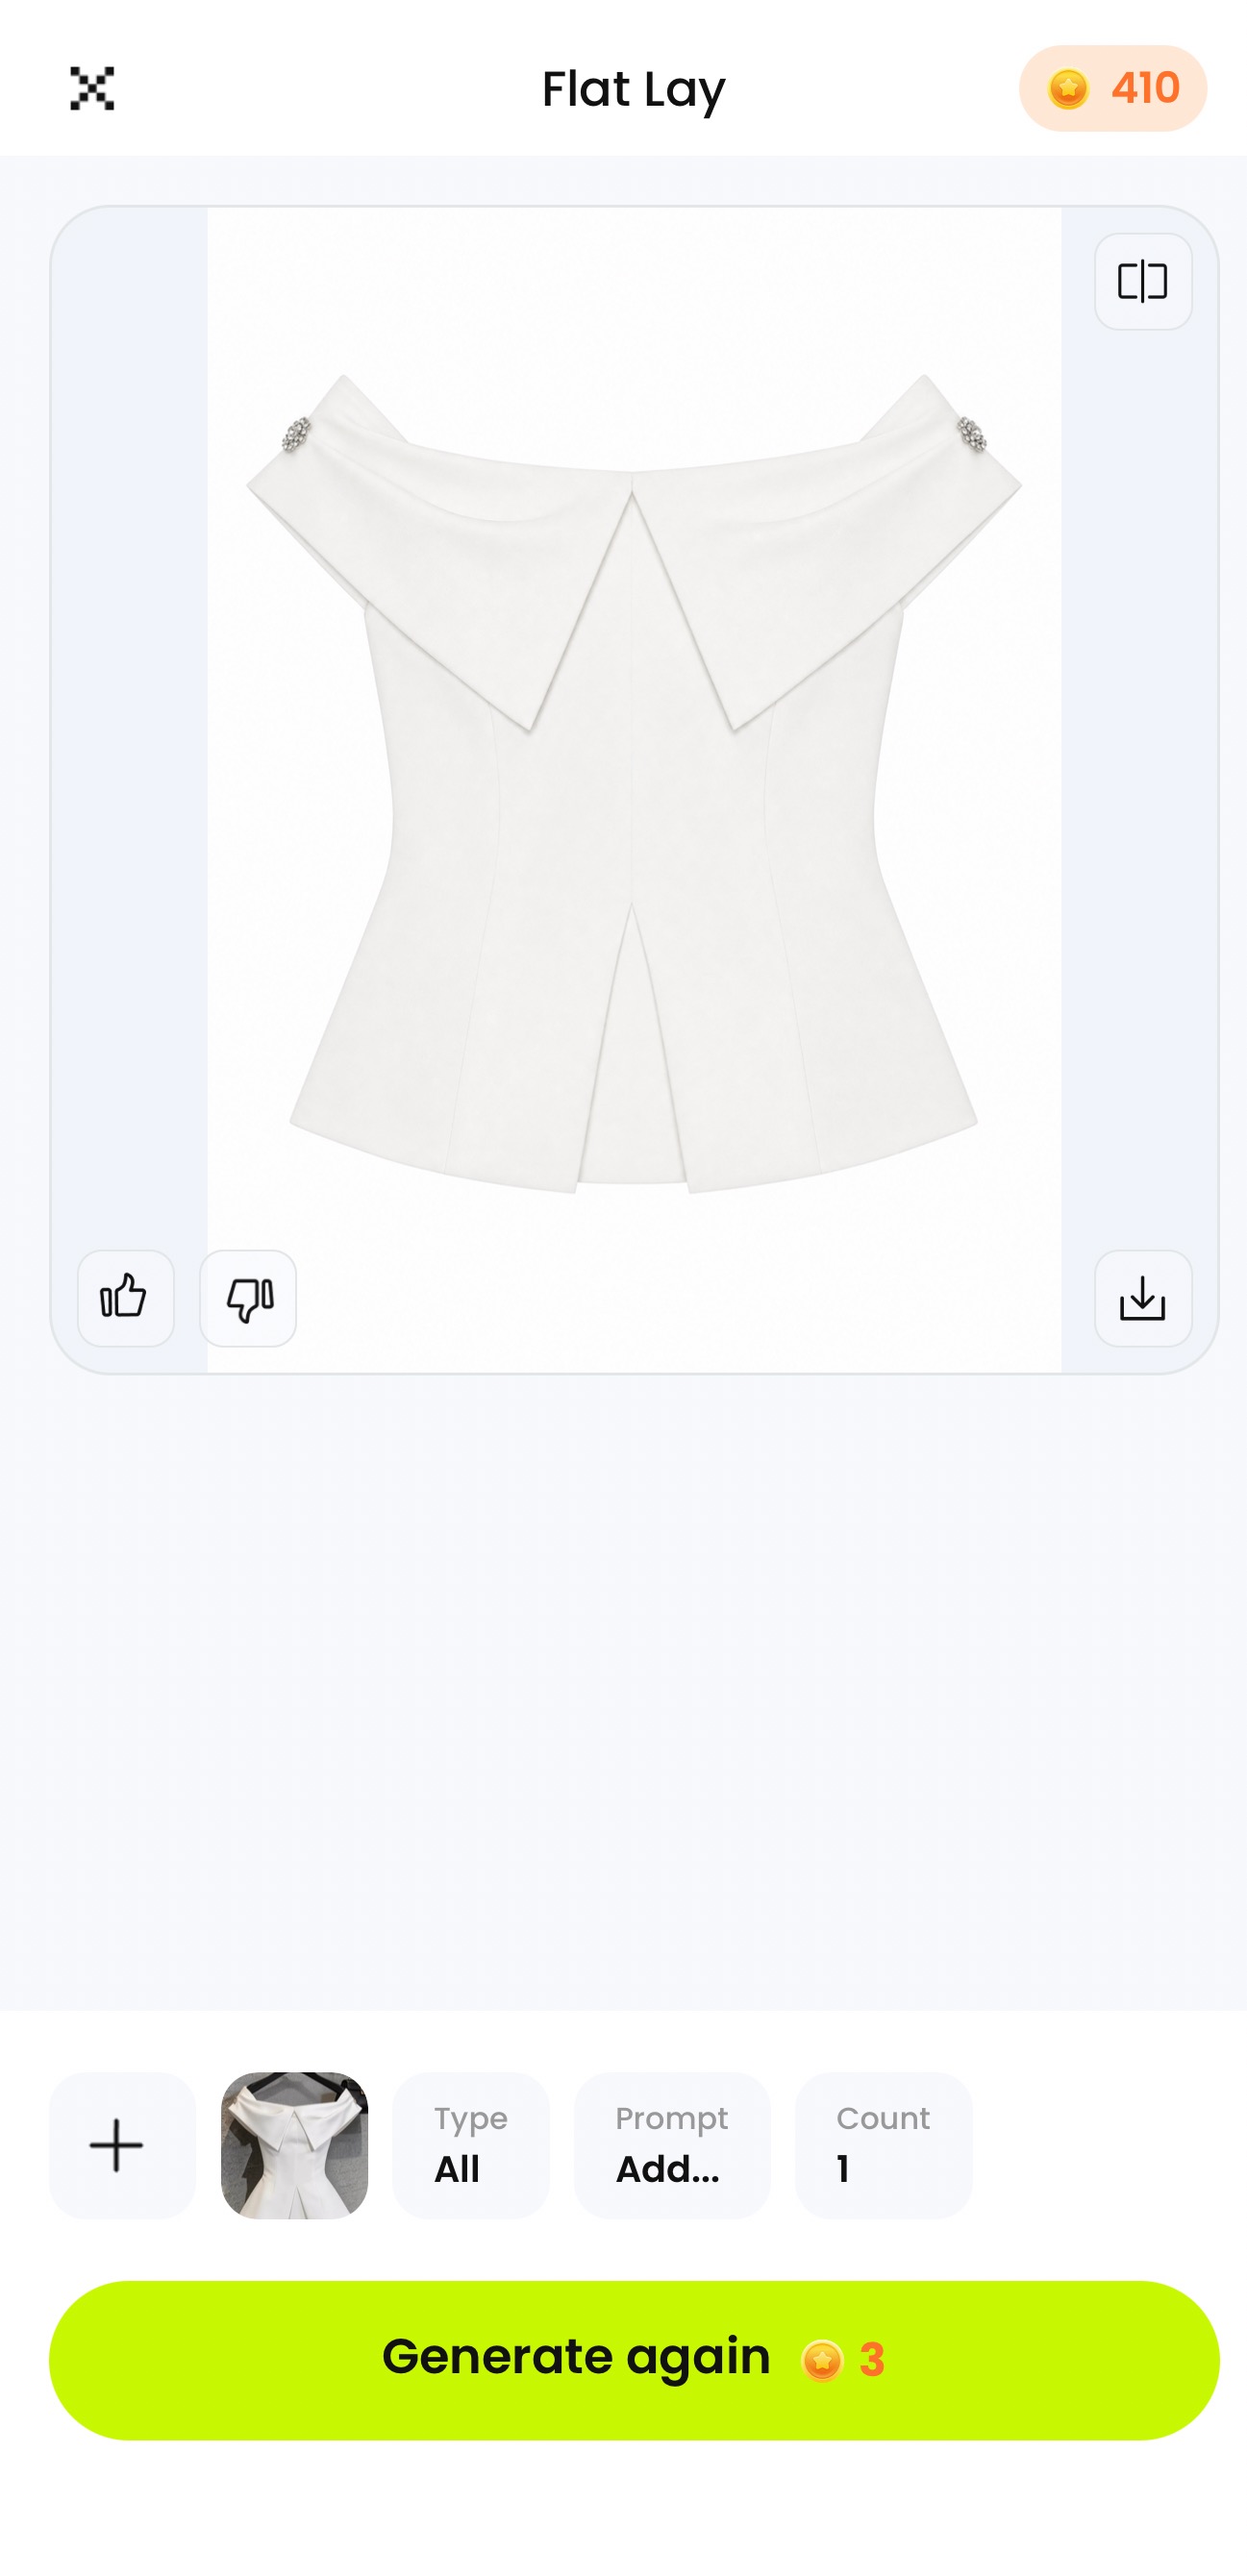
Set Count to 1, check the cost beside Generate, then tap to start. Generating the white top used 3 credits. Check your current balance and cost before each task.
The result screen keeps the source thumbnail below the image. Use the comparison control at the upper right to inspect the two views.
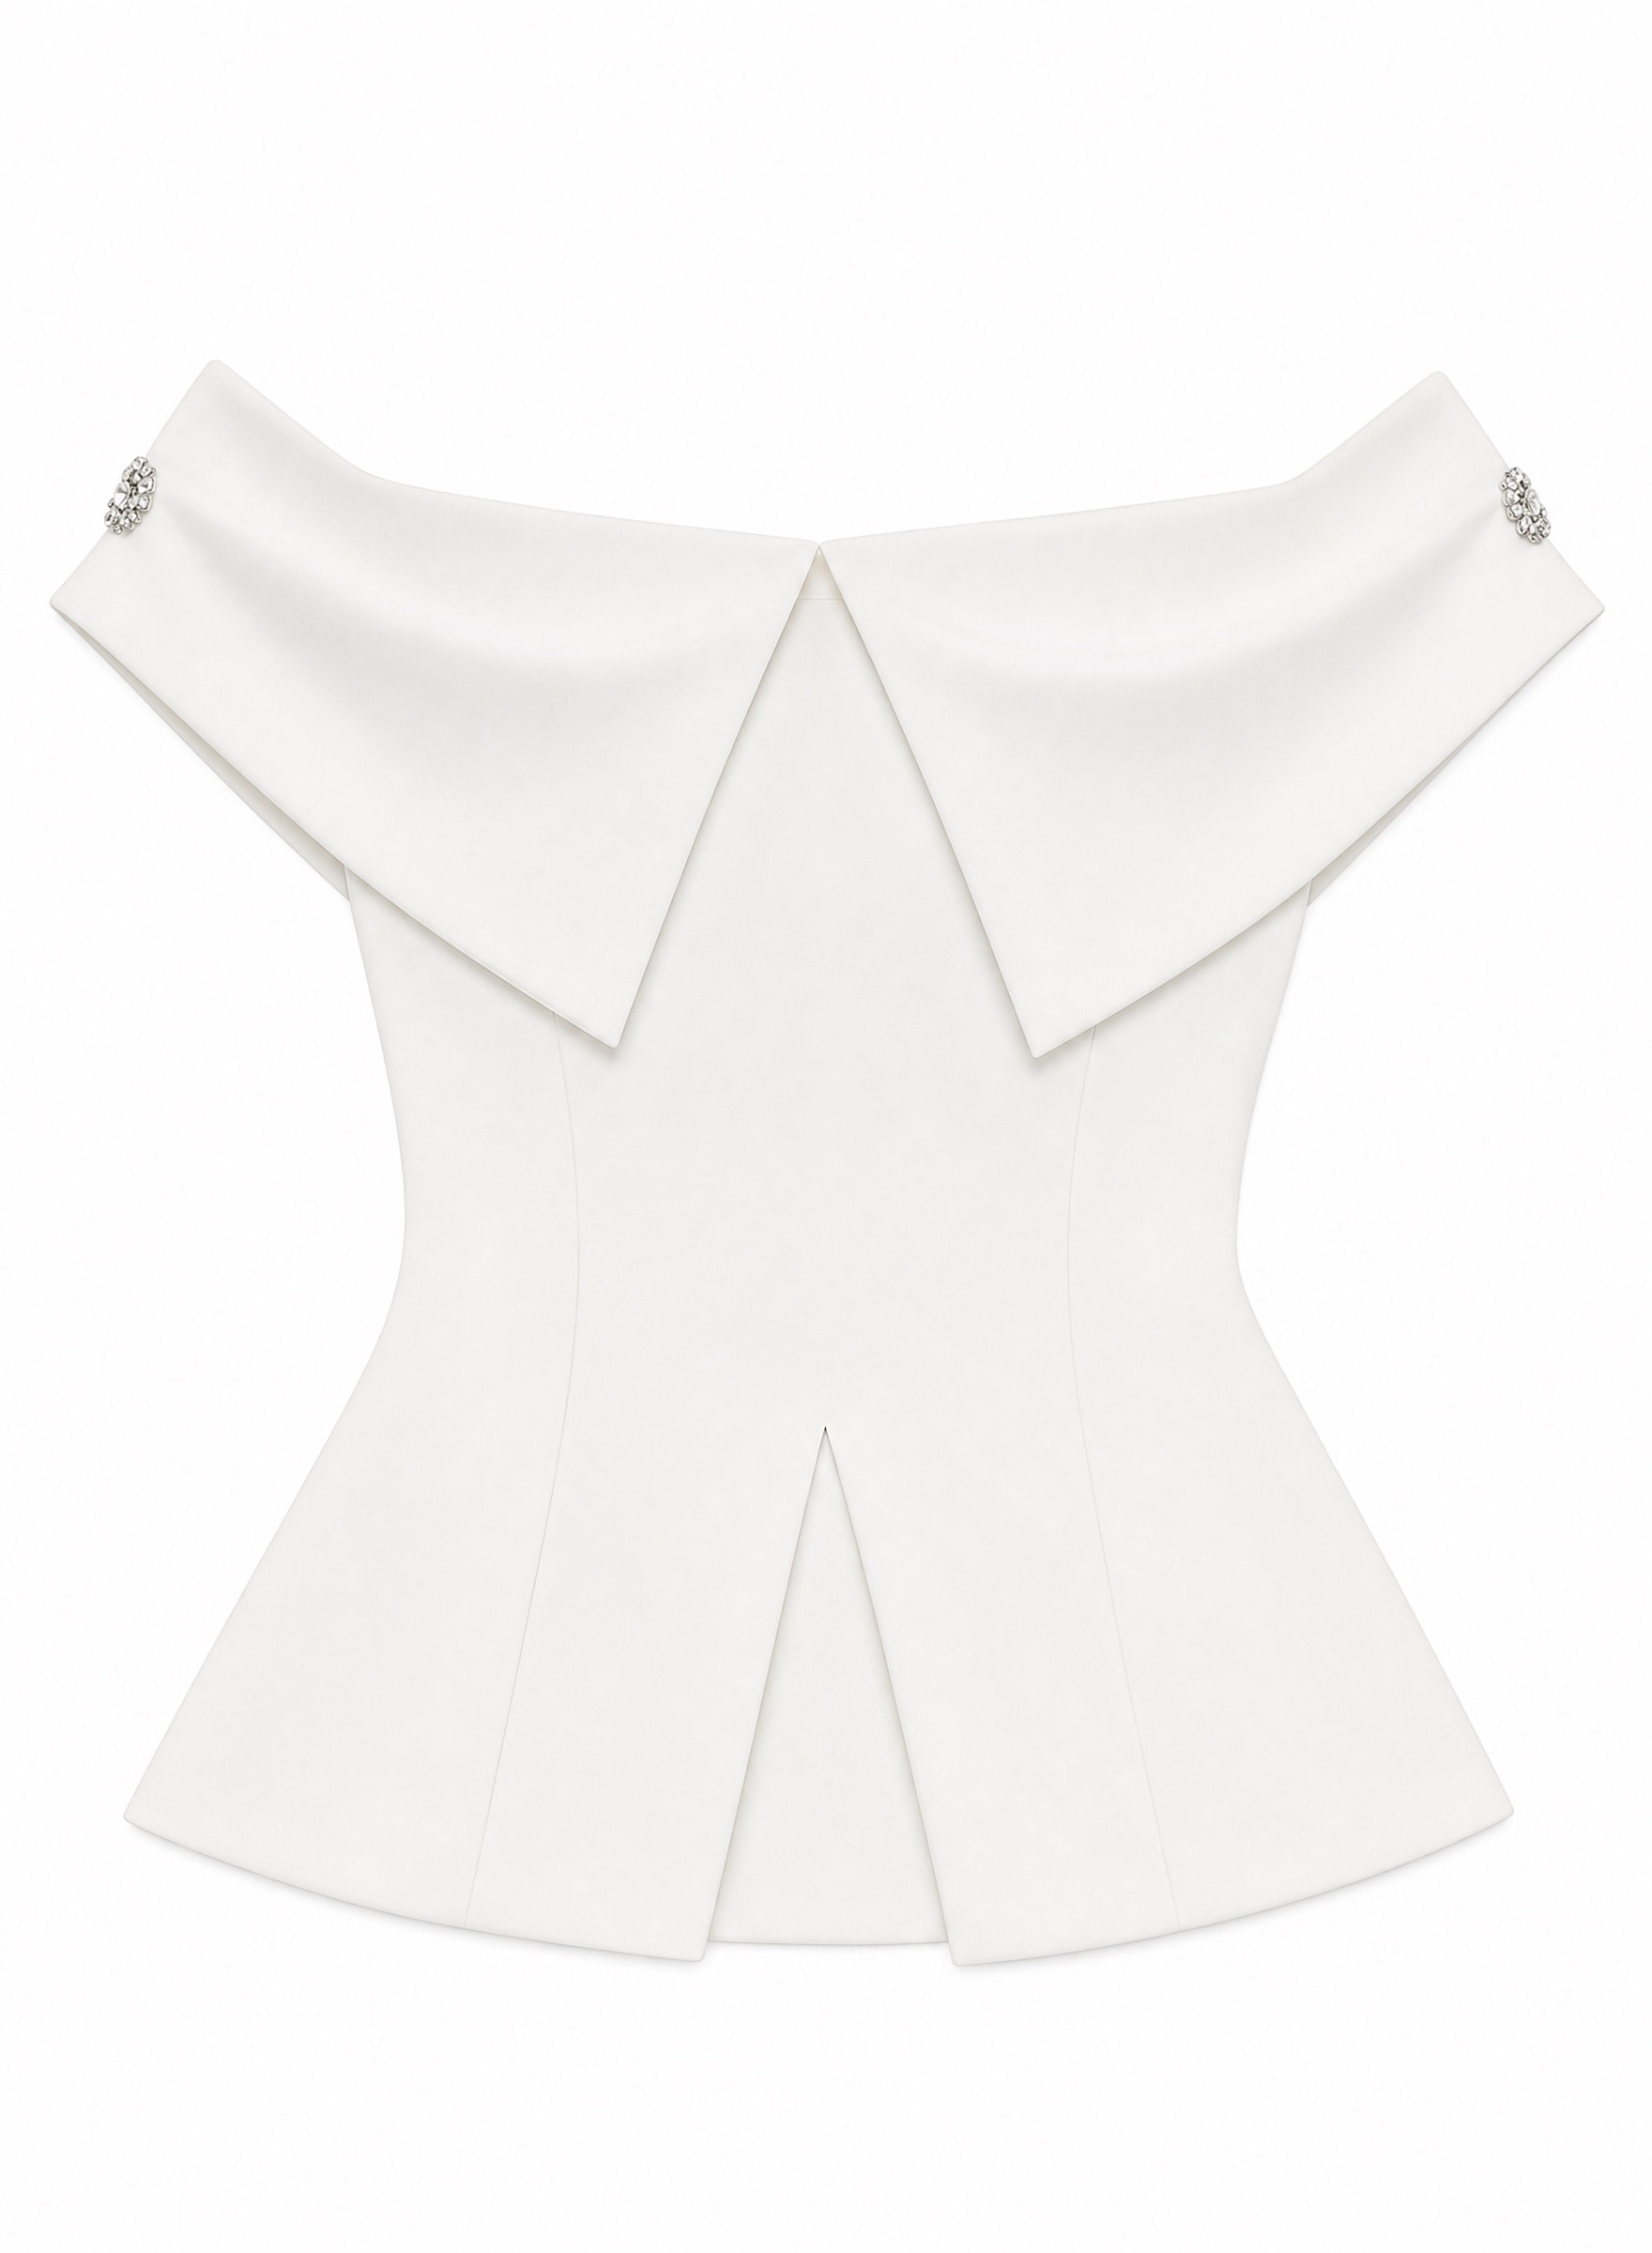
Step 5. Download and review
Tap the download icon at the lower right of the result and follow your device’s save prompts. Open the saved file at full size; avoid taking a screenshot of the app screen.
The white top was saved as a 1760 × 2400 px JPEG. Check your downloaded file’s dimensions and preview the crop before uploading it to your store.
Review the Result and Fix Common Problems
The white top’s flat lay removes the hanger and background while keeping both decorative ornaments, the folded collar panels, and the front hem opening visible.
The collar panels spread differently, and the waist contour and shading change as the hanging garment becomes a flat lay. These visible differences do not establish whether its real proportions are preserved; the source is photographed at an angle.
Before using this image in a listing, compare the panel lengths, ornaments, seams, and color with the actual top. These details need closer inspection than the hanger photo allows.
| Check | What should match | Common problem and fix |
|---|---|---|
| Outline and proportions | Complete edges; the same relationship between body and sleeve length. | Shortened sleeves or a cropped hem: use a complete front photo and remove instructions that alter the cut. |
| Neckline and cuffs | Neck shape, trim, and ribbed construction. | A deeper neckline or flattened cuffs: use a clearer source and specify the original structure. |
| Prints, logos, and text | Content, direction, placement, and relative size. | Distorted letters or a shifted graphic: retry with the original high-quality file. Use a real photo if errors persist. |
| Buttons, pockets, and seams | The same number, position, and opening direction. | Added pockets or missing buttons: check that the source shows them clearly before retrying. |
| Color and fabric | A color close to the garment and recognizable material texture. | Color shifts or over-smoothed knitwear: replace filtered or unevenly lit sources; retain real detail photos. |
| Edges and background | Continuous edges without stray objects or heavy shadows. | Hanger remnants or missing fabric: use a source with clearer separation from the background. |
Decide whether to retry or use a real photo
A new background or straighter sleeve changes presentation. A different cuff, label, or pocket changes the depicted product; intentional asymmetry should remain.
Acceptance rule: reject images with incorrect product details. If a feature is hidden in the source, photograph it again instead of asking AI to invent it.
Change one input at a time when retrying. If key details remain inaccurate, use a real flat lay with background cleanup or manual retouching.
AI Flat Lay Photos vs Ghost Mannequin Images
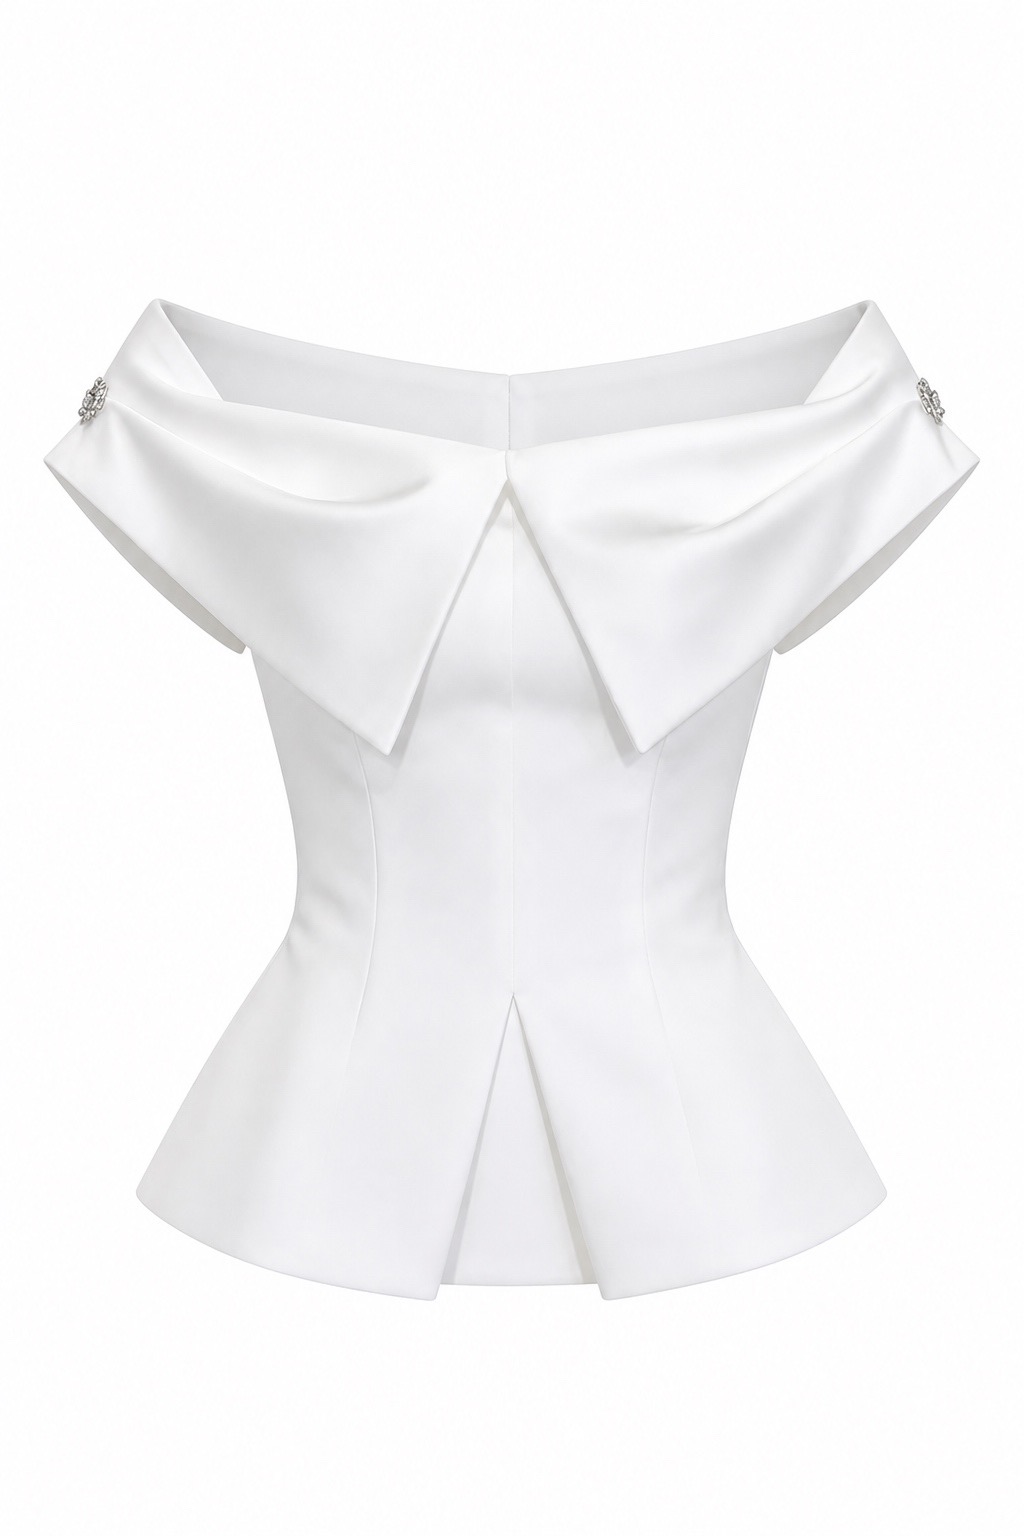
Use a flat lay for the outline and front design. A ghost mannequin presentation adds a hollow, three-dimensional shape around the neckline and torso.
Flat lay
Ghost mannequin
| Comparison | AI Flat Lay | Ghost Mannequin |
|---|---|---|
| Presentation | Top-down, arranged on a flat surface. | Upright, with a filled-out garment shape. |
| Useful for showing | Outline, front graphics, and item arrangement. | Neck openings, shoulders, and torso structure. |
| Review carefully | Sleeve length, hem, print, and proportions. | Inner neckline, shoulder seams, and generated volume. |
| Cannot verify alone | Real fit, fabric thickness, or measurements. | Real fit, support, or exact body proportions. |
Choose flat lay to emphasize the outline, or AI Ghost Mannequin to show more volume. Check either result against the garment before using it in a listing.
AI Flat Lay App FAQs for Clothing Sellers
Can I create AI flat lay clothing photos entirely on my phone?
Yes. Select a source, generate in the Snappyit mobile app, and download the result. You need an internet connection and enough credits. Publishing to your store depends on its mobile tools.
Can a flat lay app work with hanger or on-model photos?
A complete hanger photo gives the app a clear outline. With on-model photos, arms, hair, and poses can hide details. Choose an unobstructed front view and photograph hidden features separately.
Do I need a prompt to make flat lay photos on my phone?
No. Leave Prompt blank for a first attempt. Add a short instruction if you want a particular background or arrangement, then check the result against the garment.
Will AI preserve logos, prints, and text exactly?
Not always. Zoom in on lettering, graphics, and hardware and compare them with the product. A convincing overall image can still contain small errors. Learn why AI gets product text wrong, and use a real photo if those details are wrong.
Can I generate an accurate back view from a front photo?
A front photo cannot establish the real back design. Start with a photograph of the back so its seams, graphics, and closures have a reference.
What image size should I use for my store?
The white top’s JPEG is 1760 × 2400 px. Your store may require a different size or aspect ratio. Check the image size requirements for your marketplace and preview the listing crop so it does not cut off the garment.
How do I check the credit cost before generating?
Check the cost beside Generate and your balance at the top of the screen. The white top took 3 credits with Count set to 1. Costs and trial allowances can vary by app version and account.
Can I use the same settings for every item in my catalog?
Reuse the background, view, and prompt for similar garments, then adjust the category and framing. Review each result: identical settings do not guarantee consistent outputs.
References
- Snappyit — AI Flat Lay Generator: source requirements, generation workflow, and detail checks.
- Snappyit — Mobile App: mobile features and official download links.
- Snappyit — AI Ghost Mannequin Generator: garment presentation and source options.
- Shopify — Clothing Photography: How To Photograph Clothes: photography styles, preparation, and lighting.






