
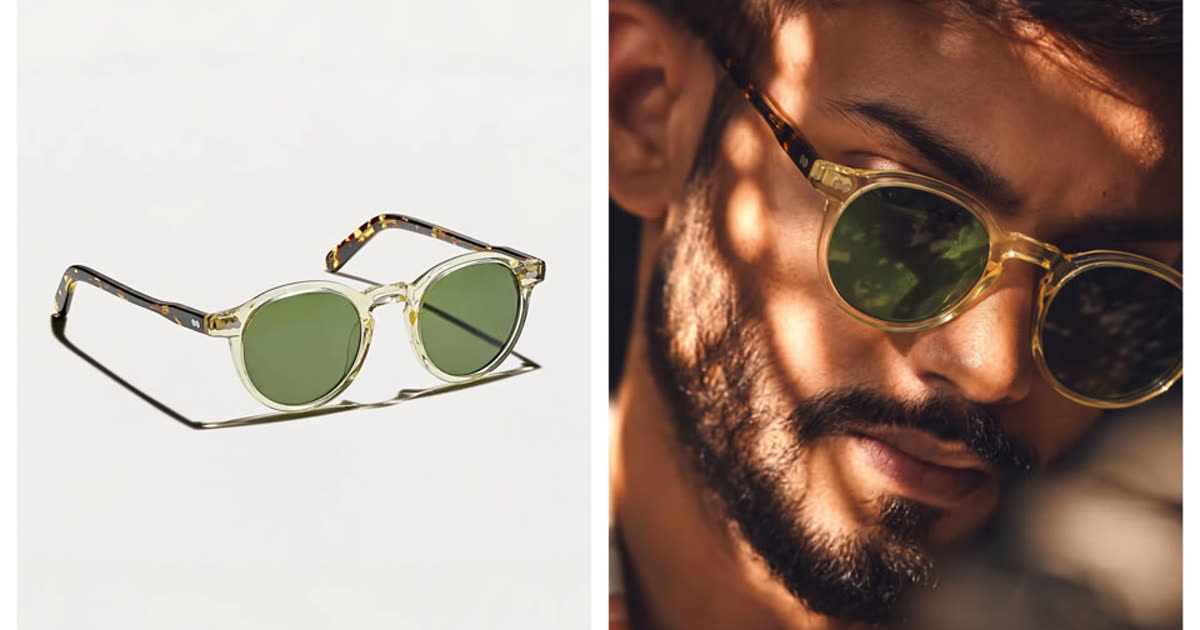

What eyewear product photography needs to show
Eyewear product photography is the image set that helps a shopper understand a frame before trying it on. For an ecommerce seller, that means more than one attractive model photo. The gallery must show the actual shape, color, material, lens treatment, construction and scale of the SKU.
A buyer compares small differences: whether a round frame is truly round, how thick the acetate looks, where the bridge sits, whether a metal rim is silver or warm gold, and how dark a sunglass lens appears over the eyes. If those details change, the image may still look polished, but it no longer represents the product.
Use three types of images together. Product-only images establish accuracy. On-face images provide visual context for scale, placement and styling, but they do not replace measurements. Lifestyle images show how the frame fits a beach, city, office, sport or travel setting.
Keep an accurate product-only image in every gallery. Add on-face and lifestyle images only after checking the generated frame against it.
A practical seven-view eyewear image set
Seven useful views are a practical starting point. Add more only when a frame has a feature that cannot be understood from the standard set.
| Image | What it should show | Why shoppers need it |
|---|---|---|
| Front view | Full rim outline, bridge, lens shape and frame color | Lets shoppers compare the actual silhouette across a collection |
| 45-degree view | Frame depth, hinge position, brow line and part of the temples | Makes flat product photos easier to understand |
| Side or temple view | Temple profile, hinge, branding and ear-piece material | Shows construction details hidden from the front |
| Lens detail | Tint, coating, transparency, gradient or mirrored finish | Reduces uncertainty about how the lens will look in use |
| Material close-up | Acetate pattern, metal finish, rivets, nose pads or texture | Supports quality and material claims |
| On-face view | Visual scale, bridge placement, lens height and styling | Provides context without replacing product measurements |
| Lifestyle image | Outfit, use case and channel-ready composition | Adds mood without replacing the accurate product views |
Keep the front image visually consistent across the collection. Use the same canvas, crop and apparent frame scale so a cat-eye frame does not look larger than an aviator simply because it was photographed closer. Colorways should also keep the same angle and placement; only the real product color should change.
Measurements still belong in the listing. Lens width, bridge width, temple length and total frame width answer fit questions that an on-face image cannot answer precisely.
Source photos and reflection control
You do not need a full studio to make useful source photos, but the input must be honest and complete. Place one clean frame on a simple surface, use soft light and keep the whole product inside the image. Capture a front or slight three-quarter view where both rims, the bridge, hinges and temples are visible.
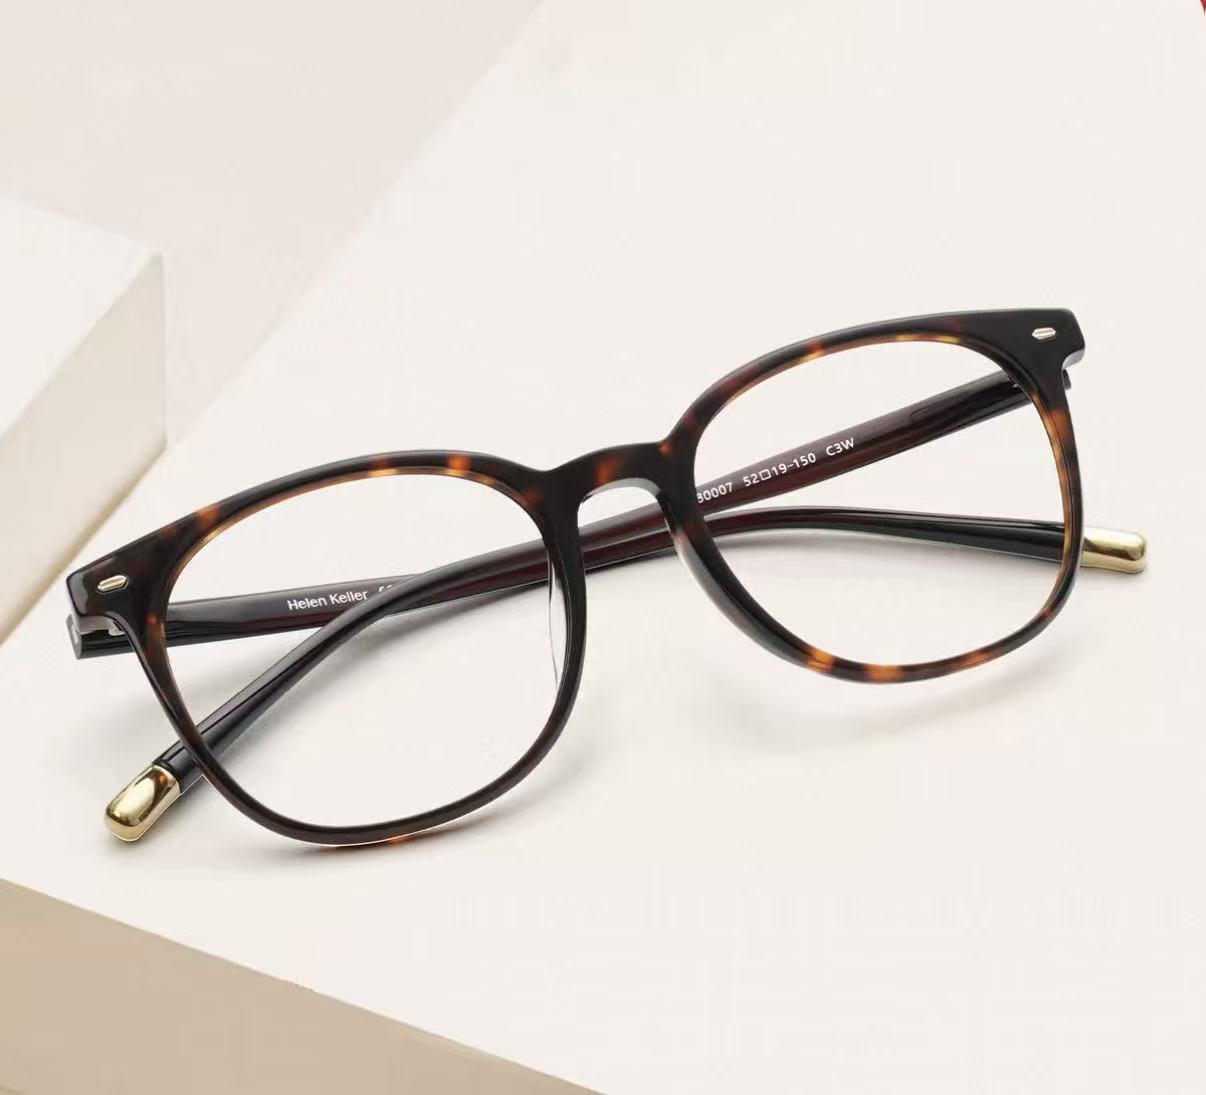
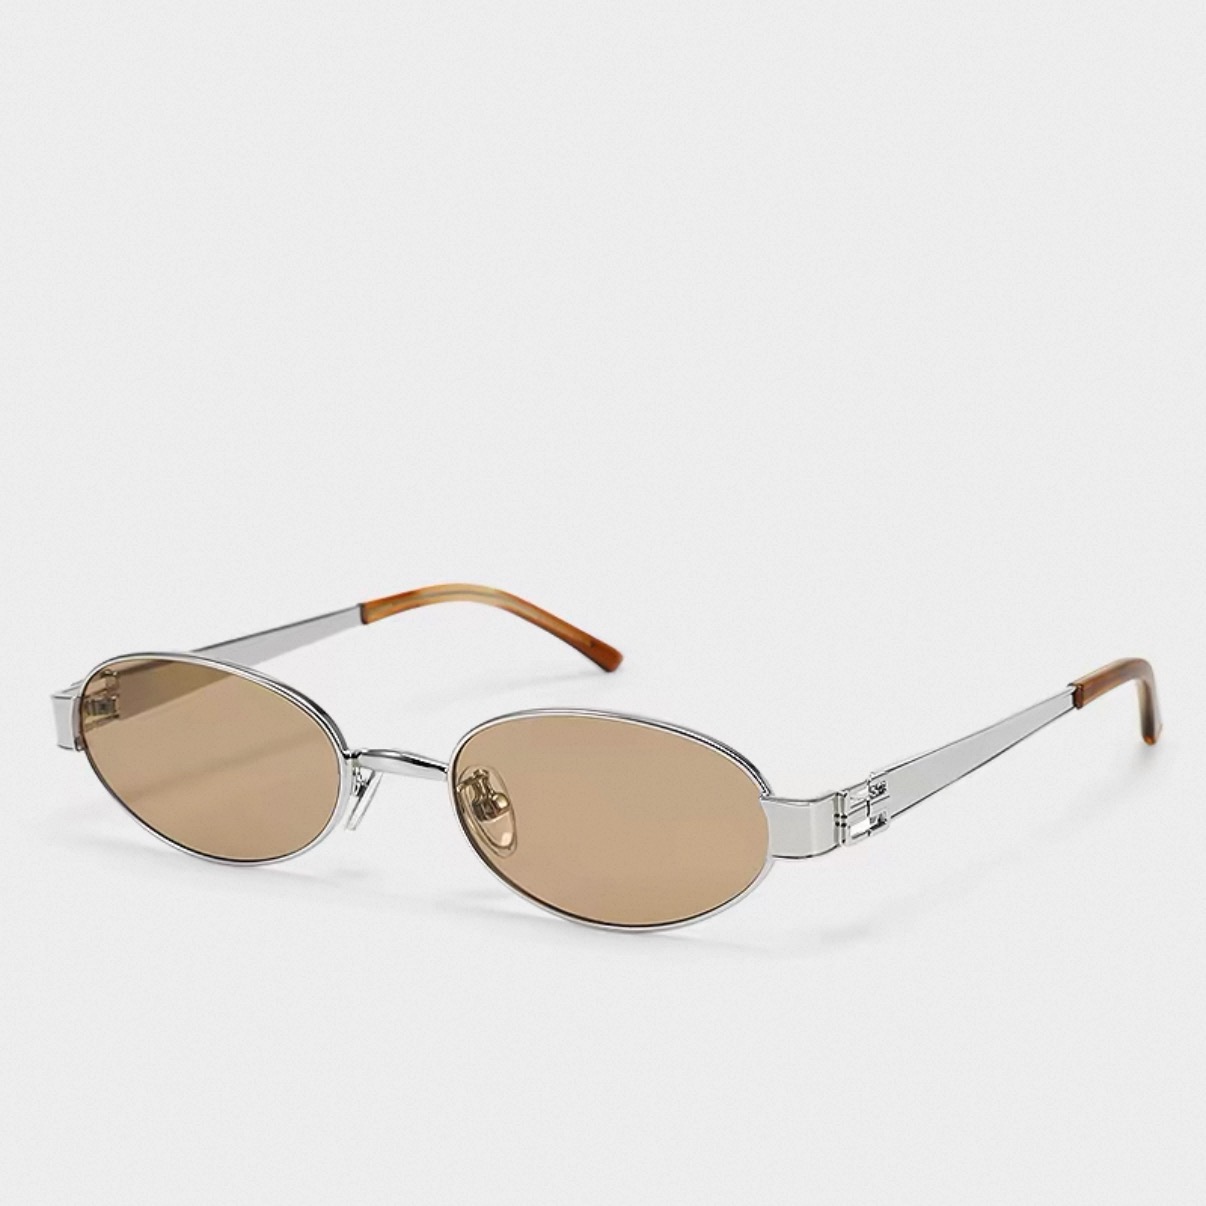
These two source images were used for every tool test later in this guide. The tortoise frame tests outline and pattern accuracy. The silver sunglasses test thin metal rims, light amber tint and a two-material temple.
Control reflections before retouching
Clean fingerprints from the lenses and frame. Use a large diffused light source rather than a small hard light, then move the frame or camera until windows, lamps and the room are no longer reflected across the lenses. A controlled highlight can help a mirrored coating read as reflective, but it should not hide the tint or make both lenses look different.
Polarized, gradient, mirrored and tinted lenses need their own review. The image should not claim the technical effect by appearance alone, but it must show the real color and degree of transparency. Avoid removing every reflection if that makes a mirrored lens look like a clear lens.
Photograph hidden details separately
AI cannot reliably reconstruct a real logo, hinge shape or measurement that never appeared in the source. Photograph those hidden details separately so the listing does not rely on a generated approximation.
AI workflow for product, on-face and lifestyle images
Use the real product photos as the catalog anchor, then choose the AI workflow according to the image you need. The broader accessory product photography guide follows the same principle across bags, hats, shoes and jewelry.
- Prepare the source set. Keep one clean front or three-quarter image plus any side, lens and detail views the listing needs.
- Edit the real source into the clean product image. Remove distractions, correct the background and keep the real outline, color and lens treatment.
- Create an on-face image. Use Virtual Try-On Glasses to show visual scale, placement and styling without booking a separate model for every SKU.
- Create lifestyle variations. Use AI Product Photography for campaign and social scenes while keeping product-only images as the accuracy reference.
- Export by channel. Prepare square, portrait and vertical crops from approved images rather than regenerating the product differently for every platform.
- Review against the SKU. Compare the final image with the source at full size and at the size shoppers will see in a grid.
Create an on-face eyewear image →
Sunglasses photography for ecommerce
Sunglasses add one complication to the standard eyewear shot plan: tint and transparency must remain true to the product. Keep the clean product image first, then use detail, on-face and campaign images to show tint and styling without replacing the accuracy reference.
Different frame families need different proof. Aviators need bridge and lens-tint detail. Cat-eye frames benefit from an on-face image because the shape carries much of the style. Sport sunglasses need the side arms, grip and face coverage. Oversized frames need scale. Clear frames need a background that keeps the rim visible without changing its color.
Lens treatments also change the shot plan. A gradient lens should show the transition from dark to light. Mirrored lenses need a controlled reflection that shows the finish without revealing the whole room. Light tints should keep the eyes visible if that is how the real product appears. Do not deepen a tint simply because a darker image looks more dramatic.
For seasonal selling, keep the product gallery stable and build separate campaign crops for summer travel, driving, resort, festival, sport or winter sun. Vertical versions can serve social commerce and ads, while the product page keeps a consistent comparison-friendly sequence.
5 AI eyewear try-on tools tested
We ran the same tortoise optical frame and silver oval sunglasses through Snappyit, Pic Copilot, Photta, Modelia and SellerPic on August 24, 2026. We judged each result against the source product, not against how attractive the generated model looked.
The three product checks were frame shape, product details, and placement on the face. We recorded model and scene controls separately but did not count them toward product accuracy.
| Tool | Frame accuracy | Lens and detail accuracy | Controls | Free-output limit | Best suited to |
|---|---|---|---|---|---|
| Snappyit | Both test frames kept their shape | Tortoise pattern and metal details held; sunglass tint needed three attempts | Model library, custom model and free-text guidance | Two free runs for new accounts; the corrected sunglasses required a third; no watermark in our test | Flexible on-face images with prompt control |
| Pic Copilot | Both outlines held | Tortoise became darker, branding moved and lens tint deepened | Eight eyewear faces or a custom face; fixed crop | Two trial runs; watermarked | Fast head-and-shoulders previews |
| Photta | Both outlines held | Temple text moved, tint became too light and the temple tip changed | Large model library, prompt, ratio, size and batch controls | Four trial runs; no watermark in our test | More model and output controls |
| Modelia | Sunglasses held; tortoise frame became more rectangular | Materials stayed recognizable but the sunglass tint deepened | Text-described model, body type, pose and background | Watermarked and non-commercial on the free plan | Editorial and lifestyle compositions |
| SellerPic | Sunglasses held; tortoise frame became more rectangular | Tint became darker and uneven; an extra necklace appeared | Preset or custom face, ratios, skin tones and placement control | Full-frame watermark on free output | Testing with placement controls |
Free allowances, pricing and commercial-use terms can change. Check each vendor's current plan before building a catalog workflow around it.
1. Snappyit
Snappyit kept both frame outlines and preserved the tortoise pattern, rivets, chrome rim and hinge emblem. The tortoise frame worked on the first run. New-account credits covered two runs; the silver sunglasses reached the source's light amber tint on a third run after we added a short instruction.
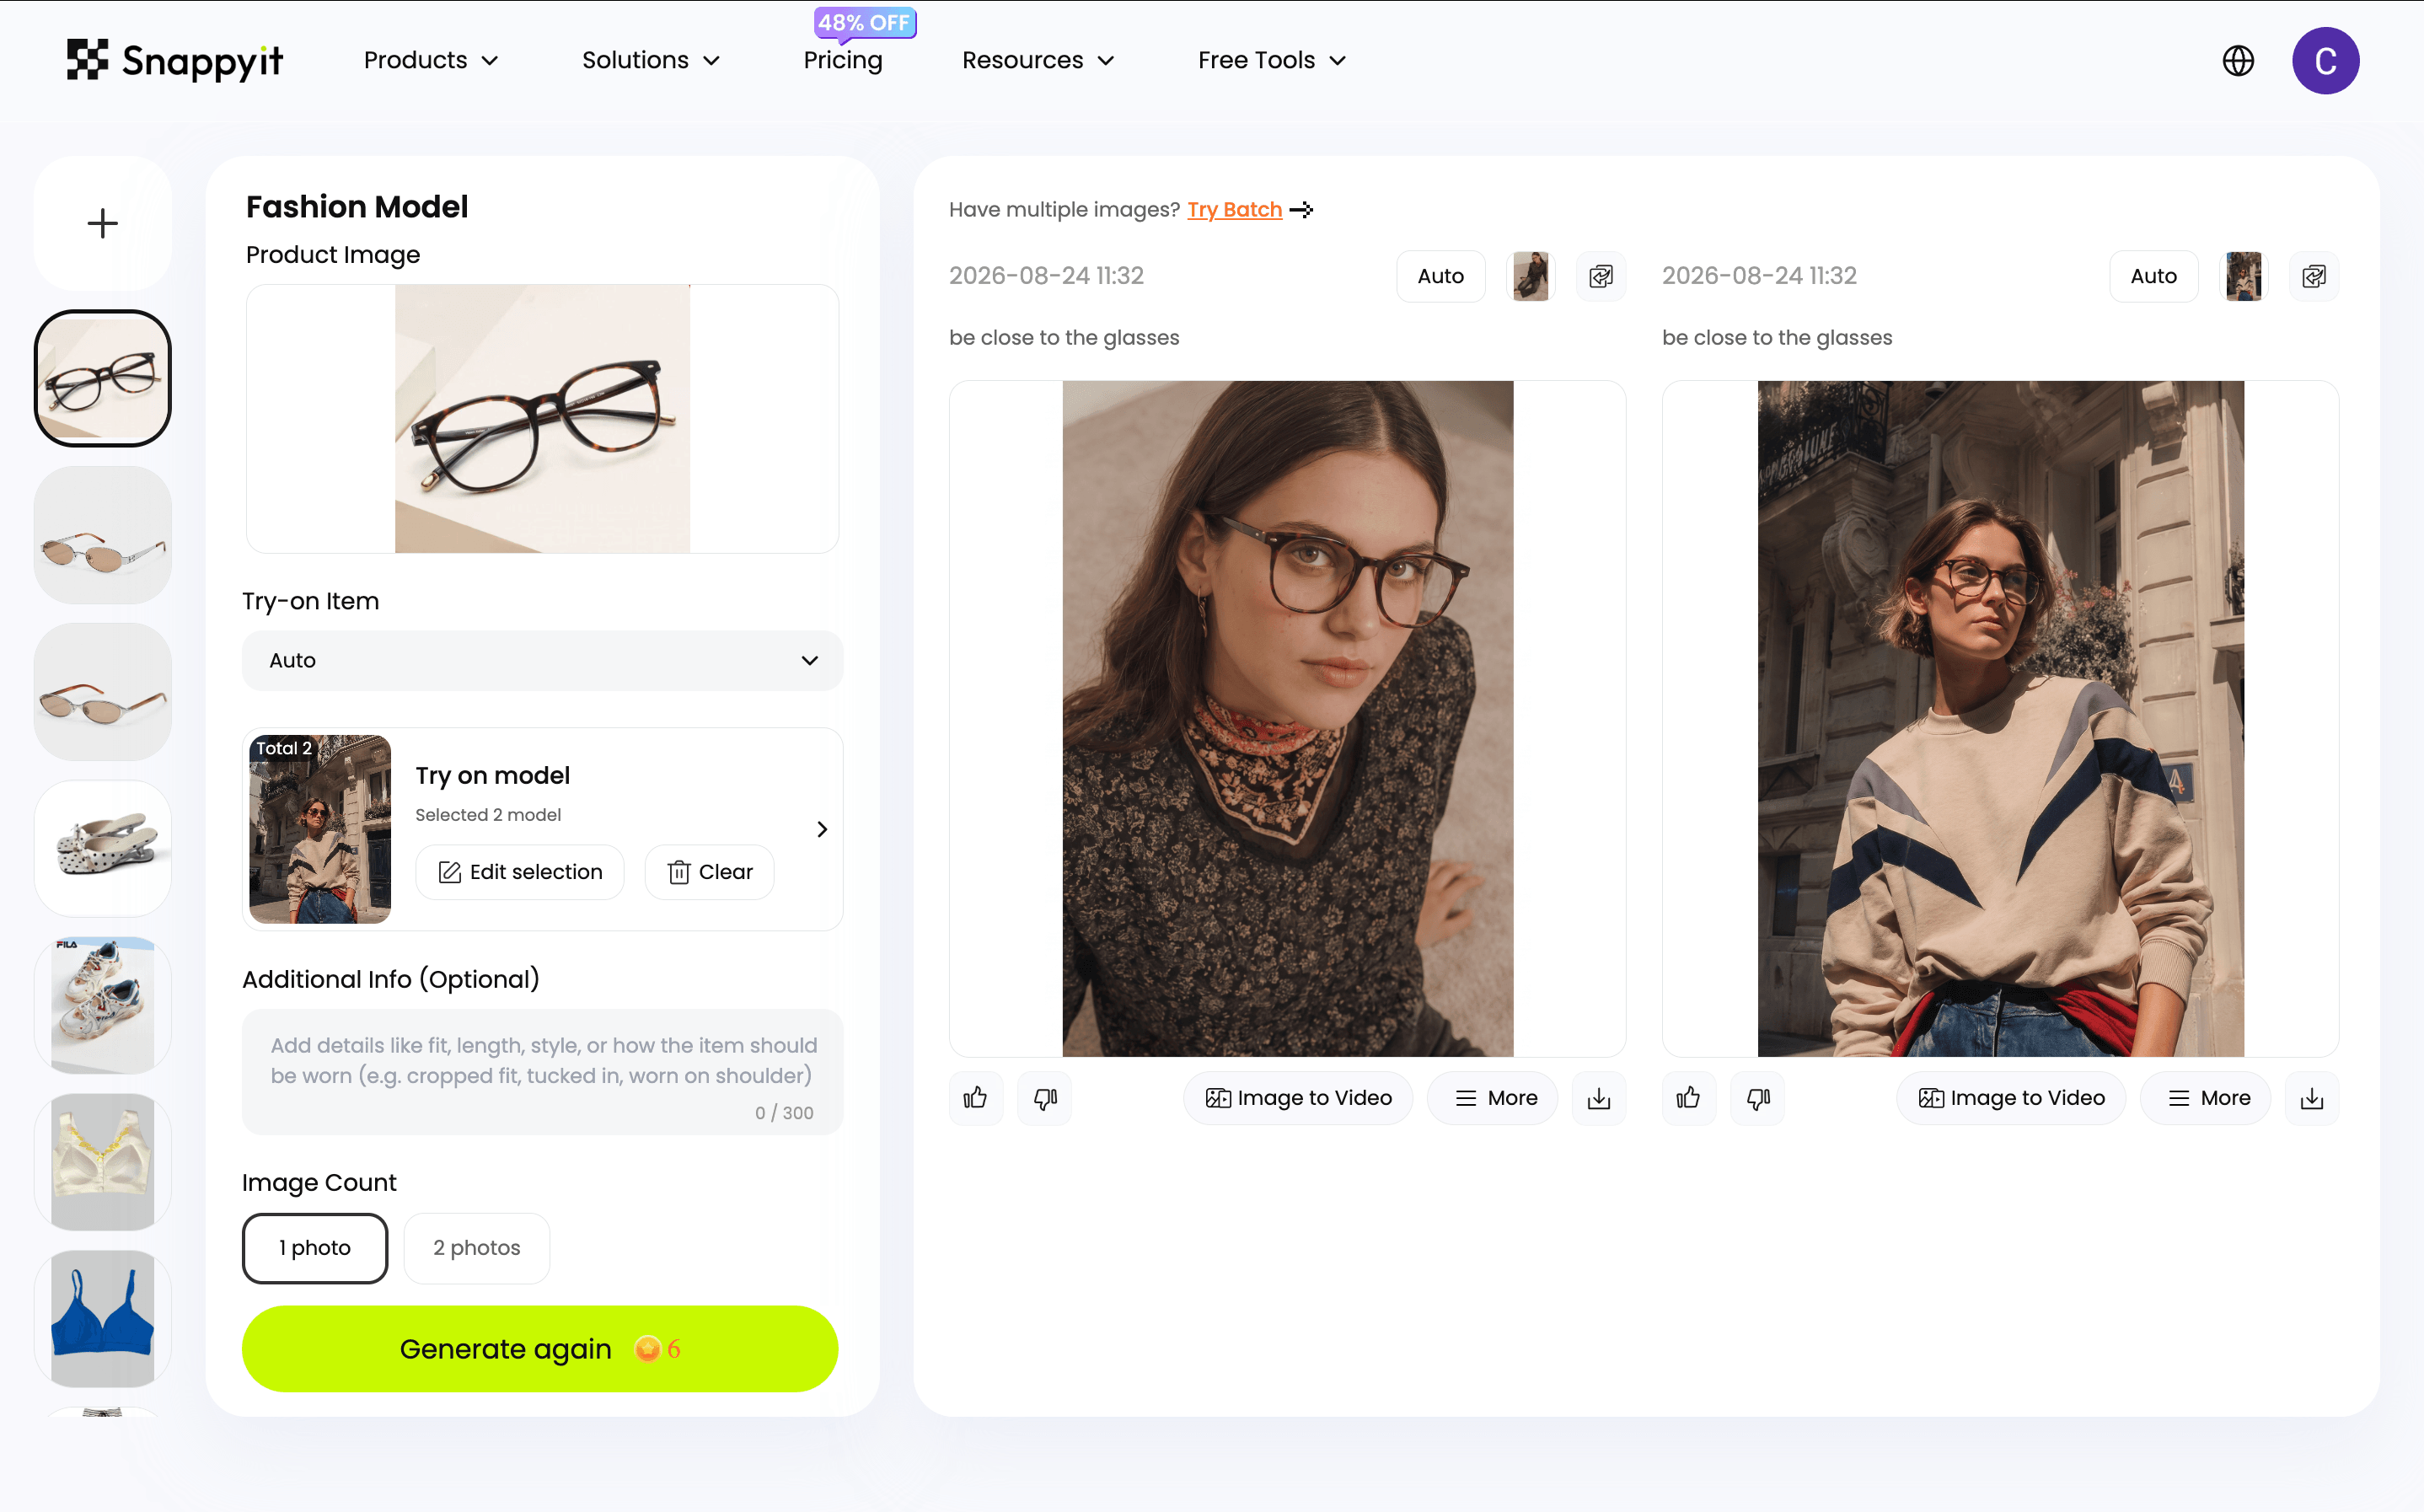
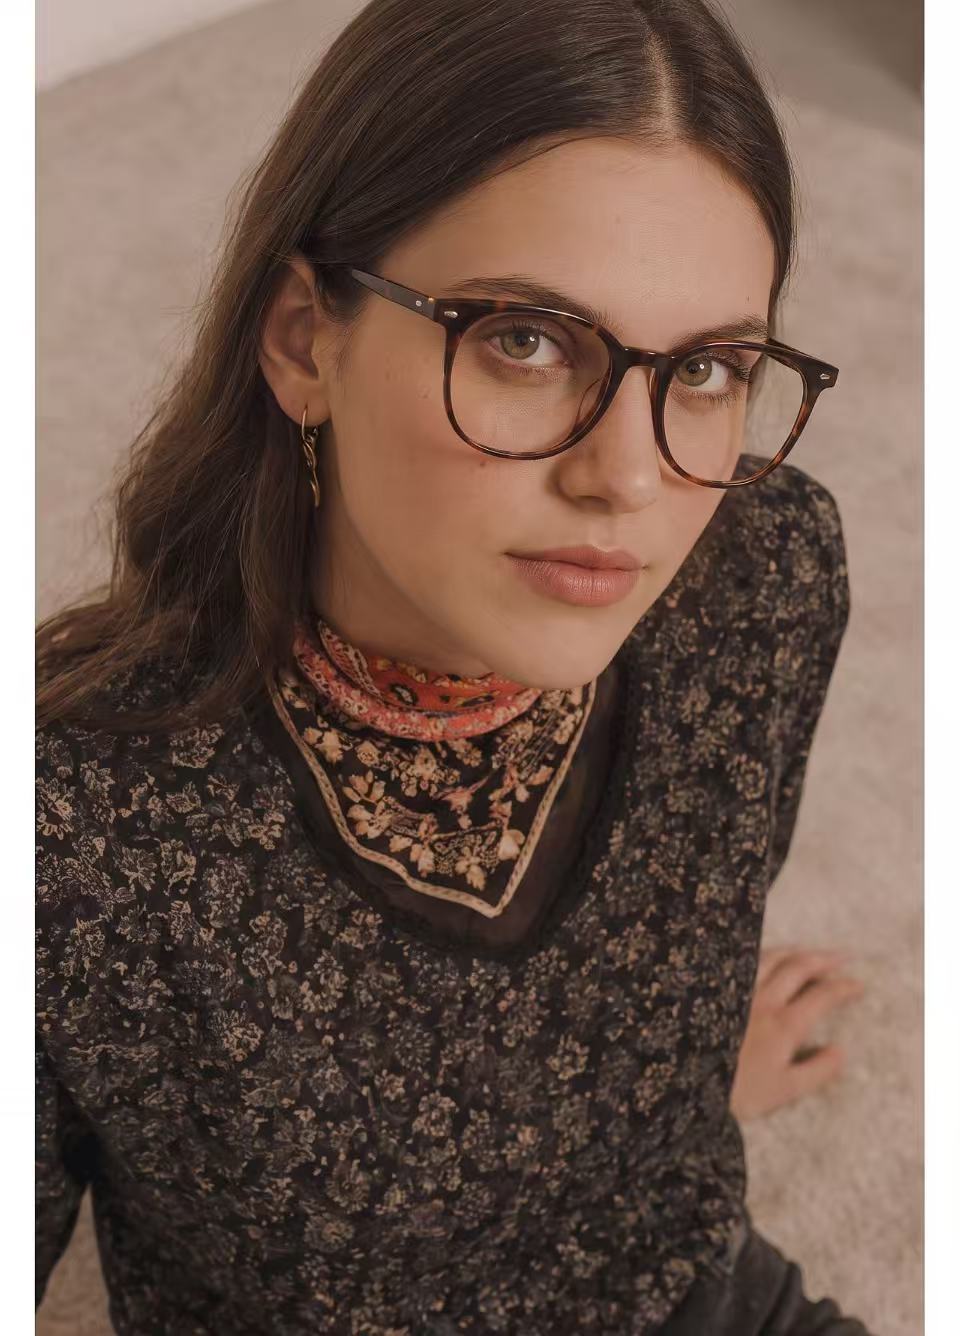
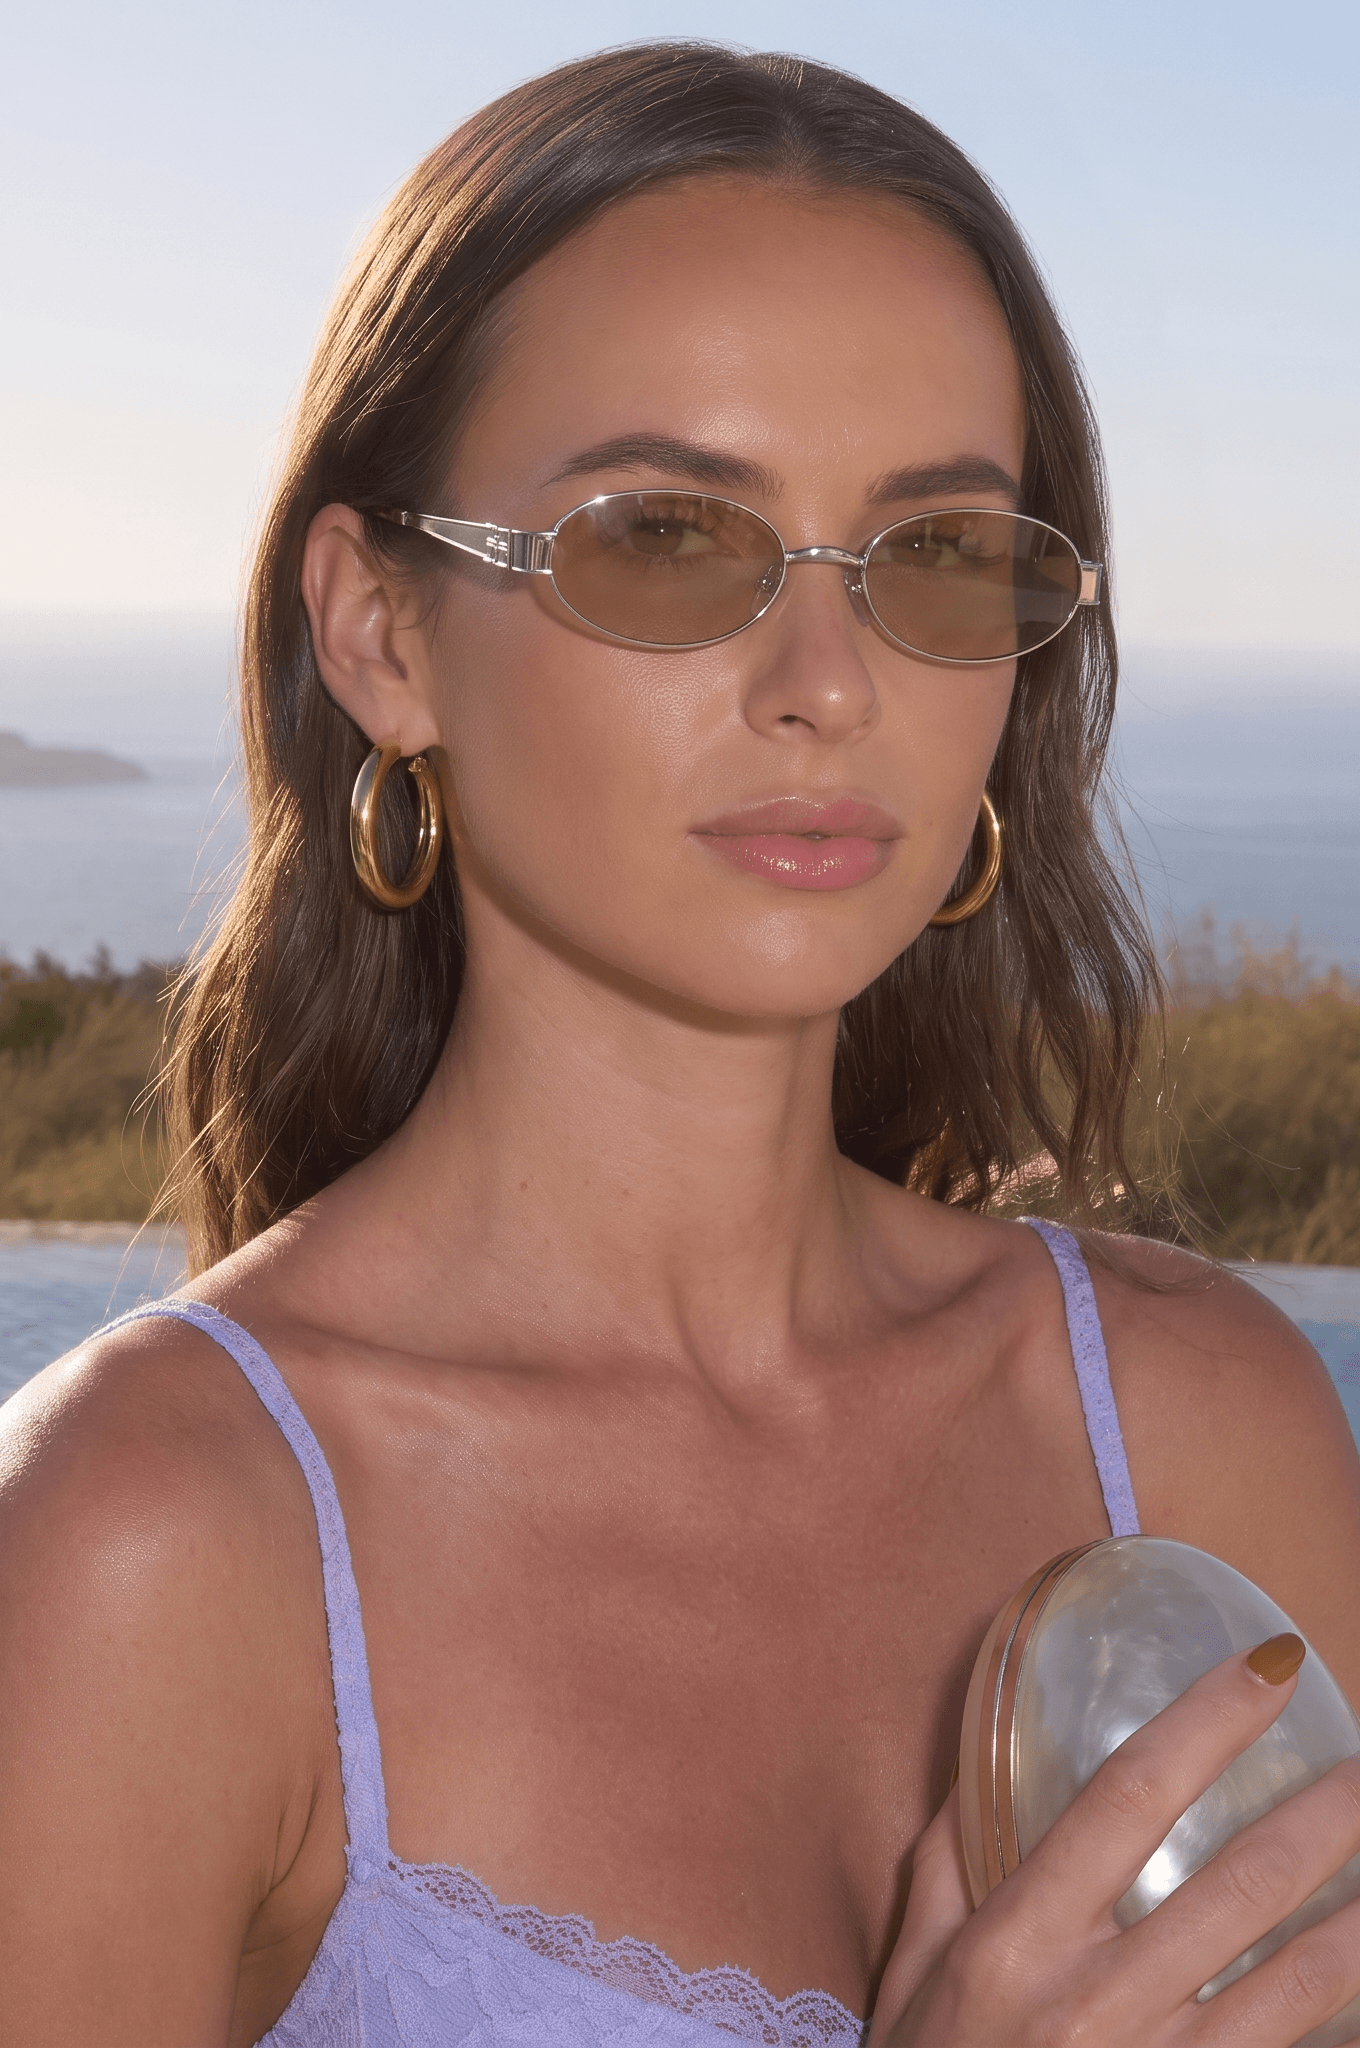
Placement looked visually plausible on both frames, but this is not a fit guarantee. Request a closer crop when the default result shows too much of the model, and keep the product measurements in the listing.
2. Pic Copilot
Pic Copilot was the quickest workflow in the test, but it changed the product most. The tortoise pattern became nearly black and temple branding appeared on the front of the lens in a different typeface. The sunglass tint also became darker than the source.
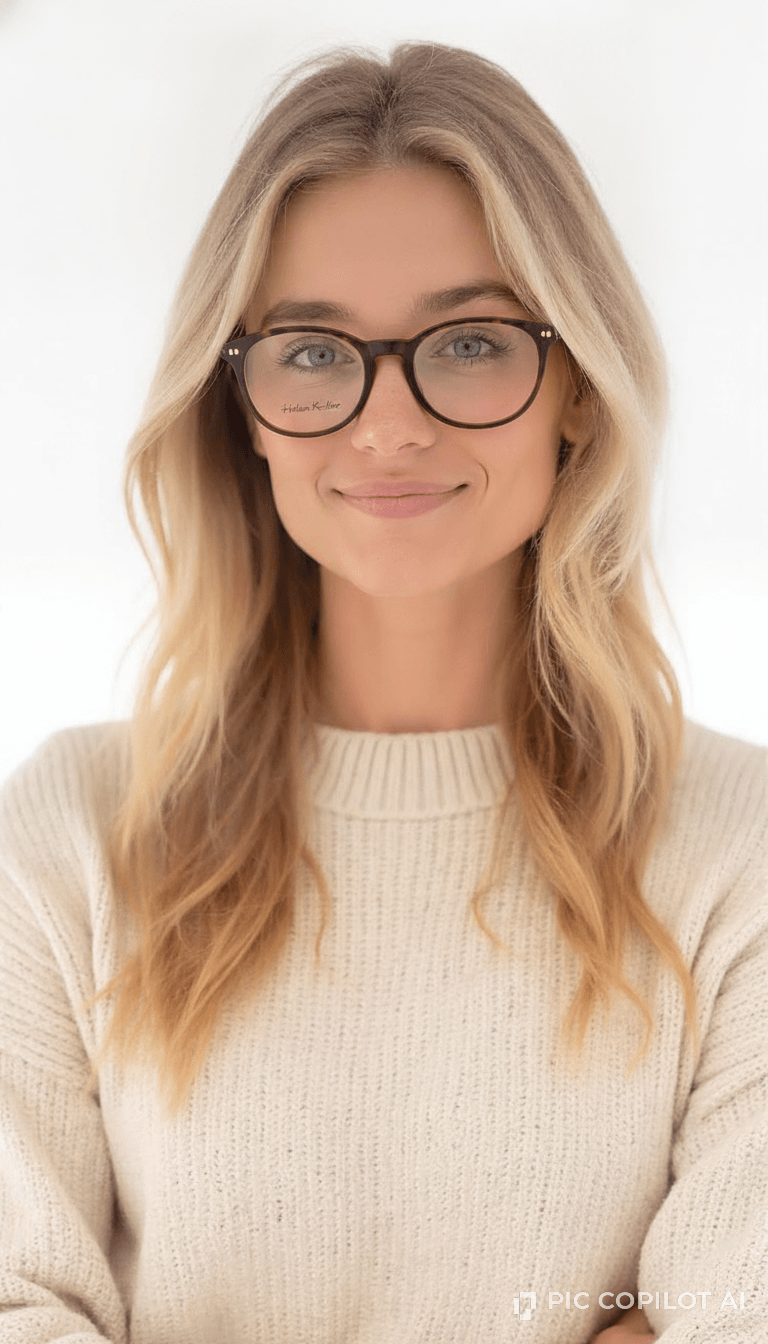
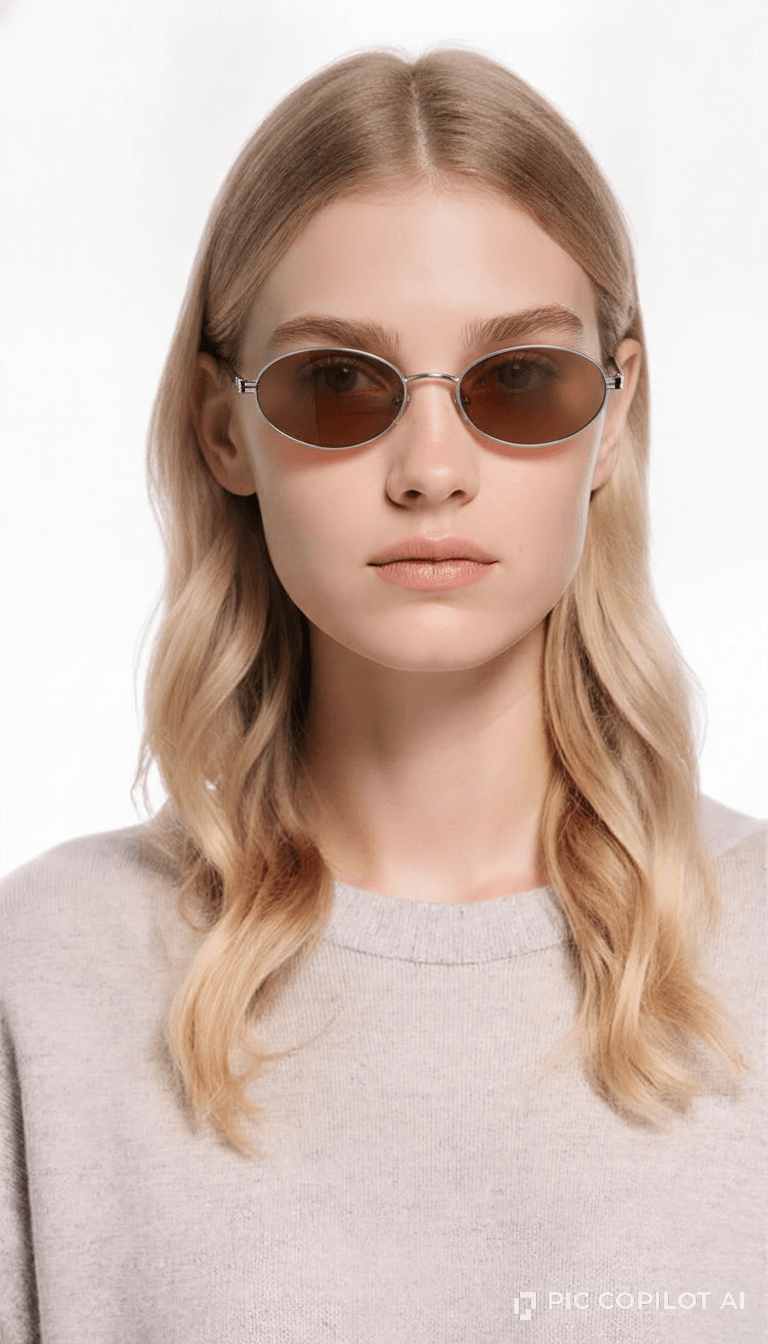
The frames sat naturally, but the product changes make the result unsuitable for a listing until the pattern, text and tint are corrected.
3. Photta
Photta kept both frame outlines and provided the broadest set of model and output controls in this test. Its wizard includes model selection, a scene prompt, aspect ratio, output size and batch count.
The tortoise pattern held, but temple text moved and became unreadable. The sunglass tint became almost clear, and the honey-colored temple tip changed to a darker wood-like finish. The requested lifestyle scene also returned as a plain studio portrait in our run.
4. Modelia
Modelia produced more editorial compositions. It kept the silver sunglasses thin and oval, but changed the round tortoise frame into a more rectangular outline. Product materials remained recognizable, although the sunglass tint was deeper than the source.
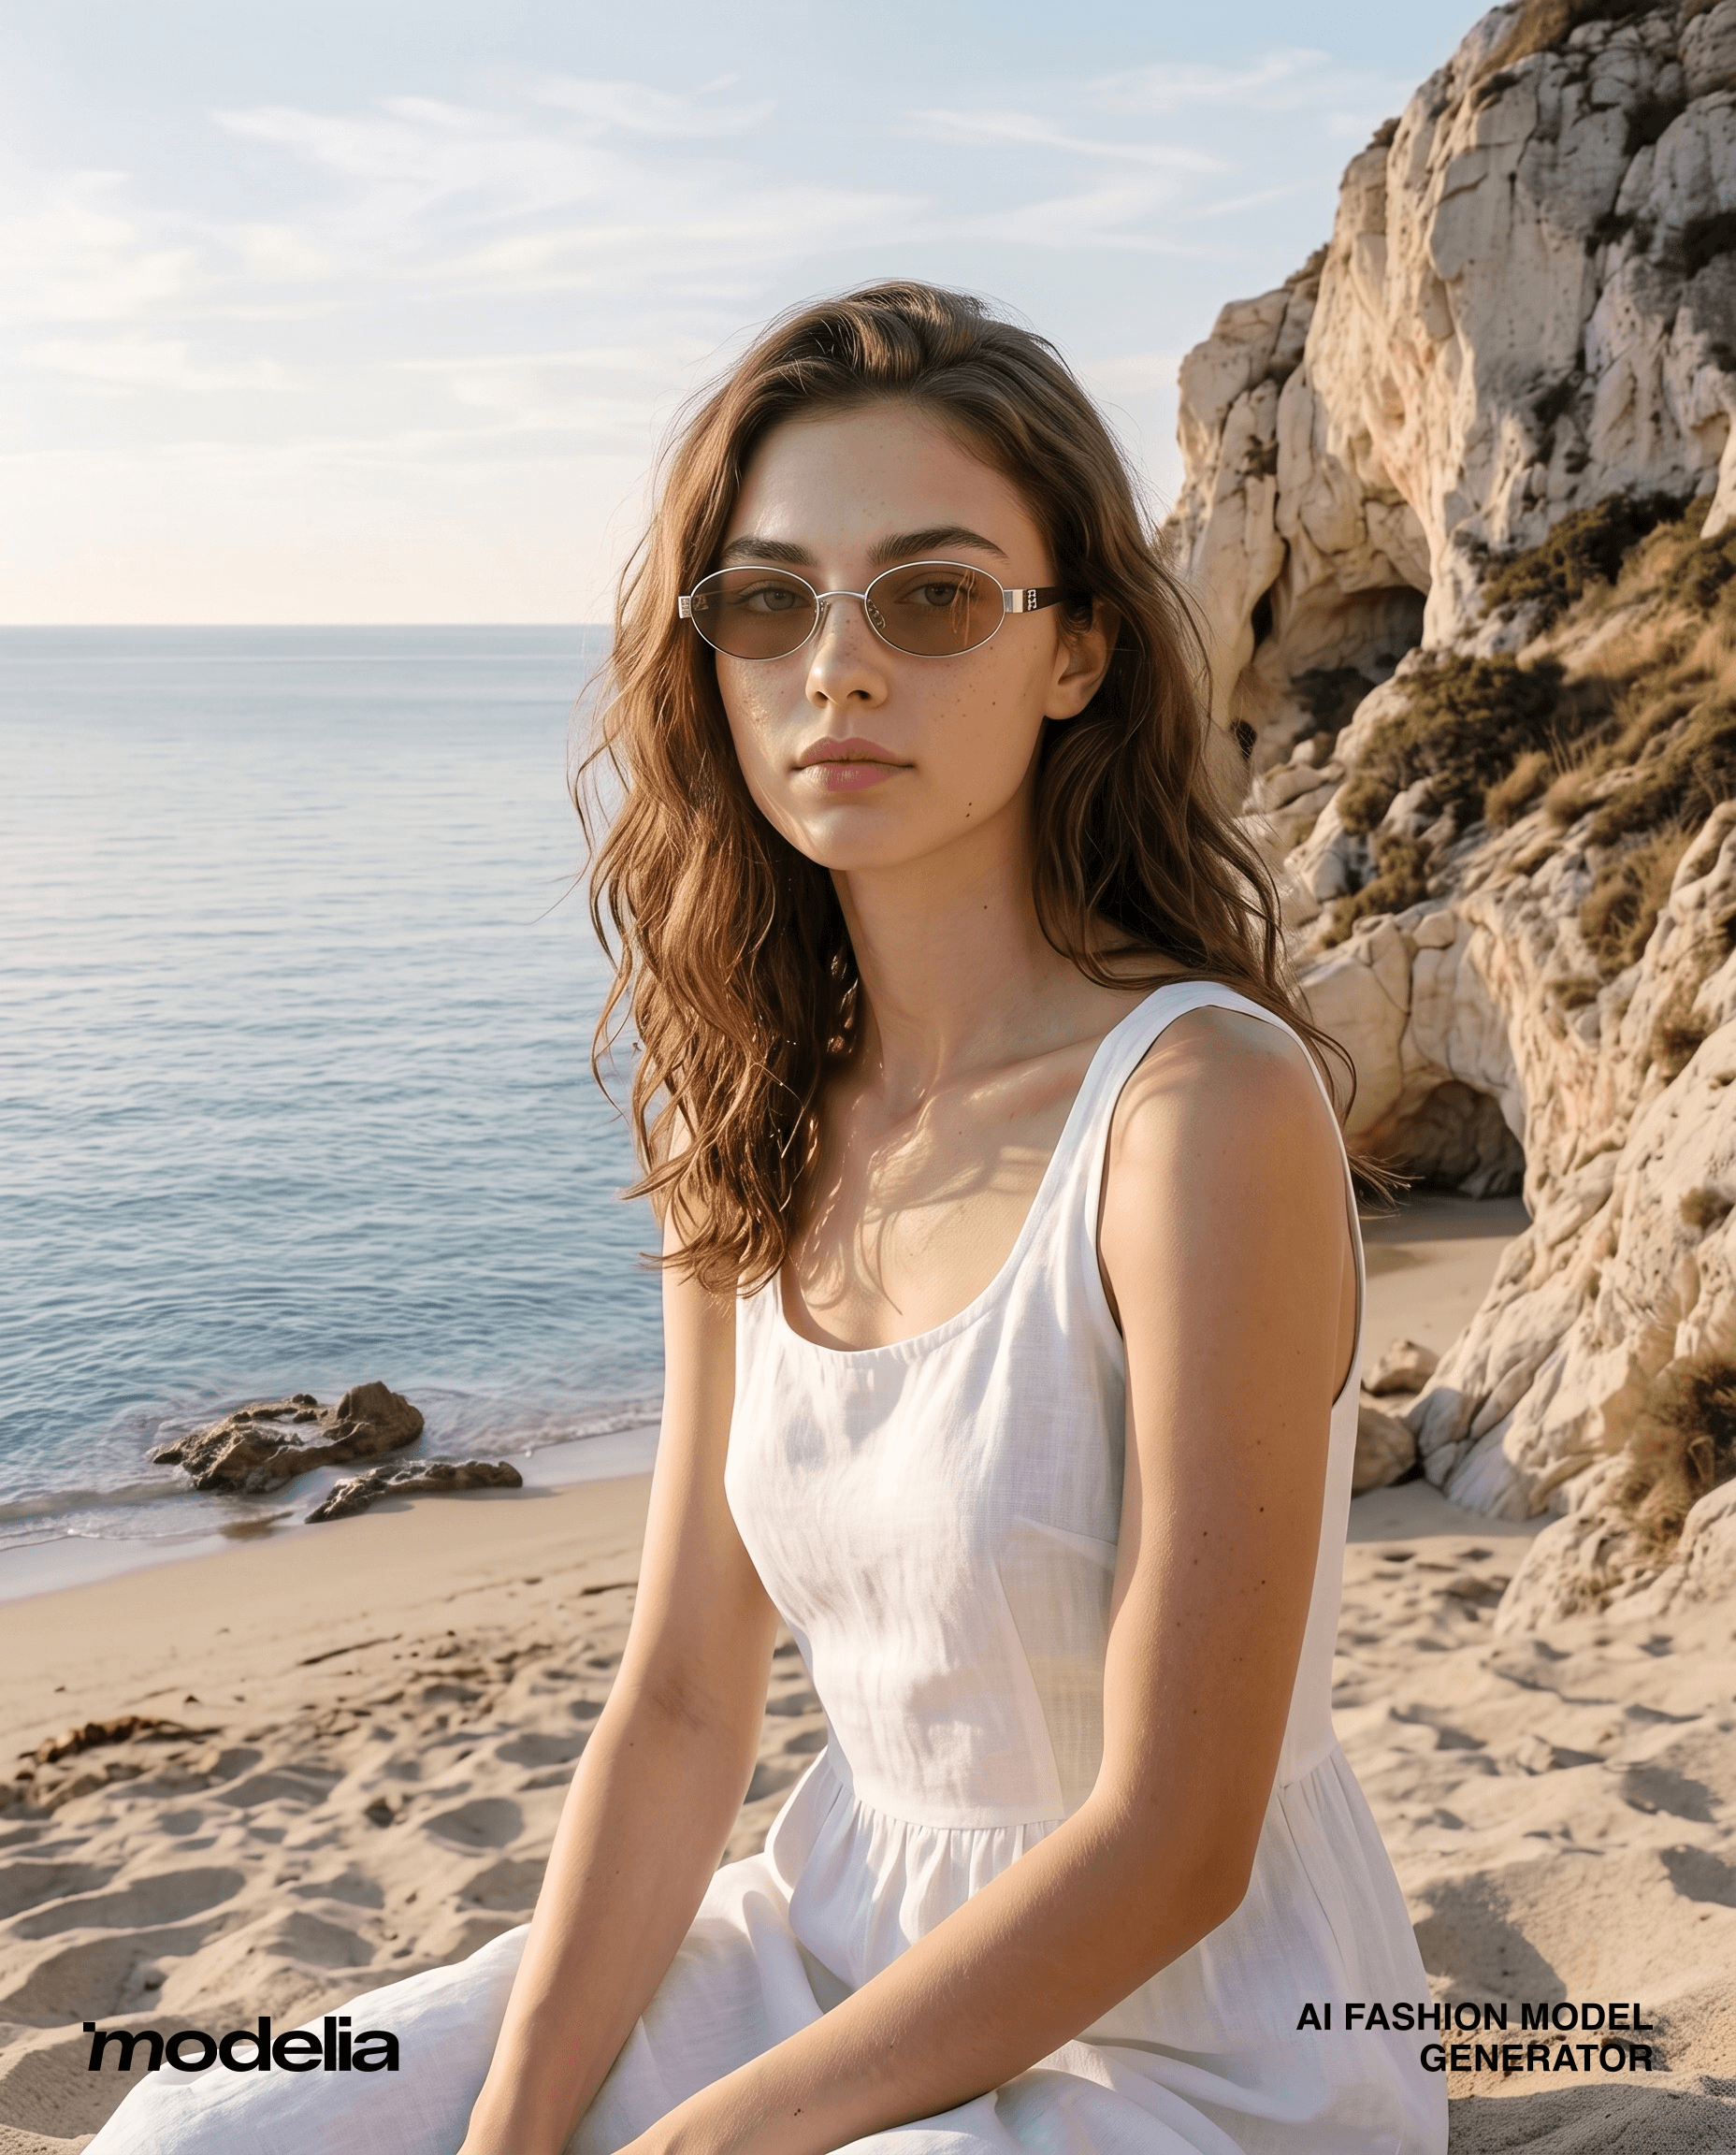
The wider beach image may work as campaign content, but the frame is too small in the composition to serve as the main proof image.
5. SellerPic
SellerPic kept the sunglasses outline but made the tortoise frame more rectangular. The silver pair retained its two-material construction, while the lens tint became darker and uneven. The generated model also wore a necklace that was not part of the product reference.
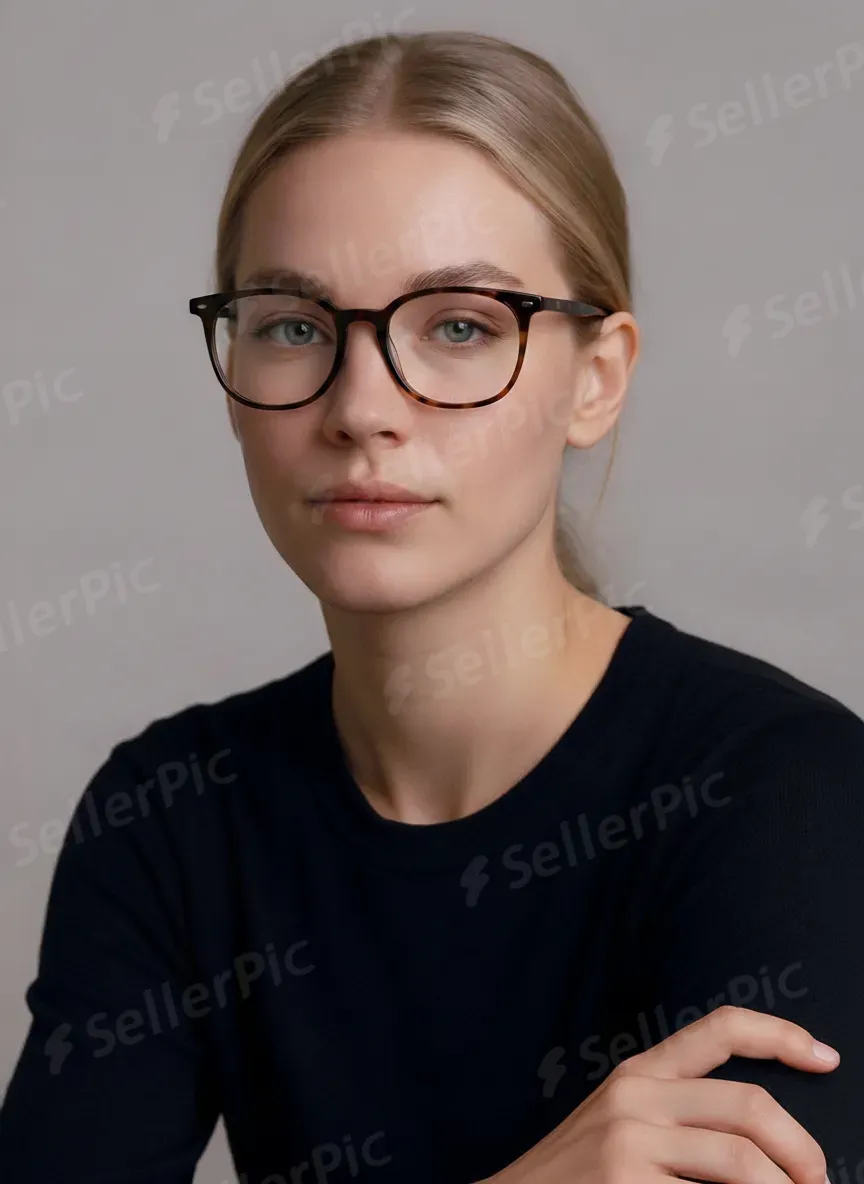
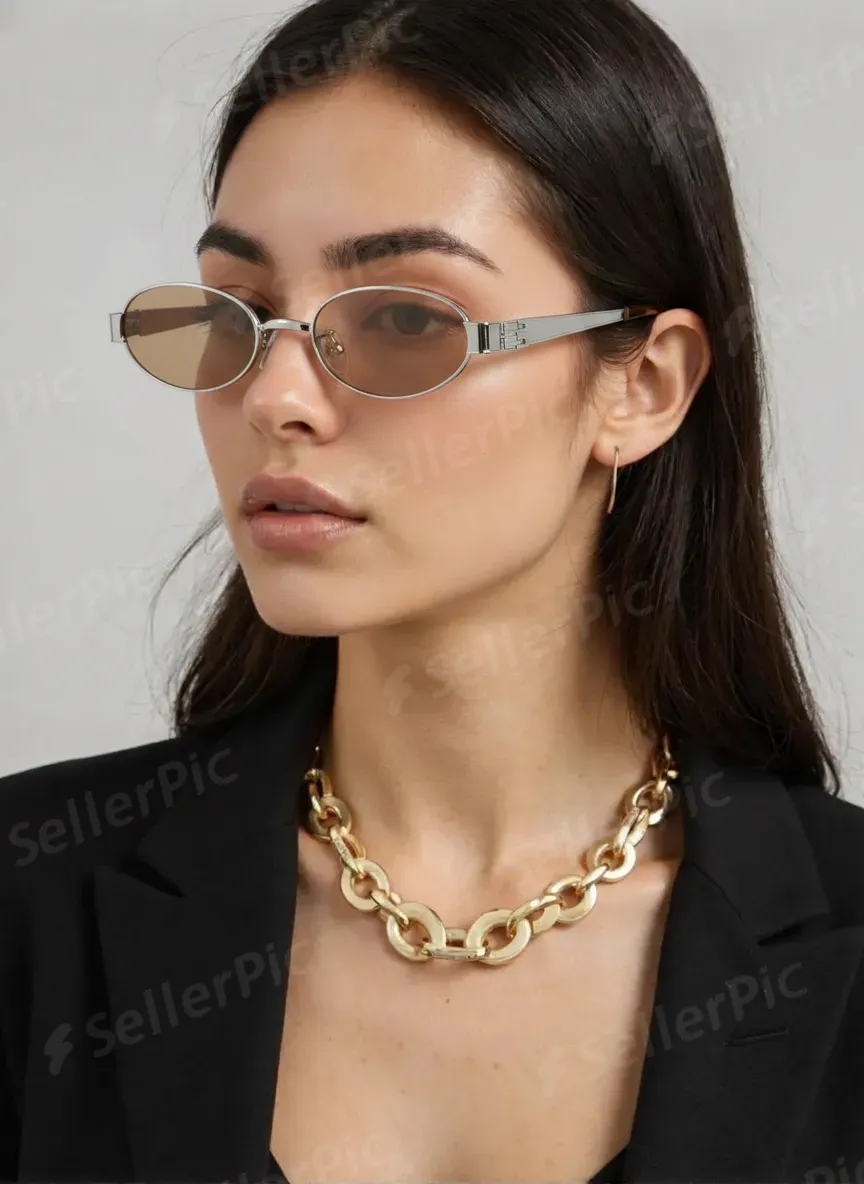
Placement controls are useful, but the repeated watermark across the face and product makes the free output unsuitable for publication.
Marketplace, Shopify and mobile requirements
After approving one master gallery, adapt those files for each storefront by changing the crop and order. Regenerating the frame for every channel can introduce avoidable differences in outline, tint and placement.
| Channel | Prioritize | Watch for |
|---|---|---|
| Marketplace grid | Clean front image, consistent canvas and visible frame outline | Thin rims or light tints disappearing at thumbnail size |
| Shopify product page | Ordered gallery with product, detail, placement, measurements and lifestyle | Mixing inconsistent crops or model scales across colorways |
| Mobile product page | Readable details, close-ups and concise measurement graphics | Relying on a wide image where the frame becomes too small |
| Social commerce and ads | Portrait or vertical lifestyle crop with the frame still visible | Letting the scene or outfit become more prominent than the product |
Marketplace rules vary by platform, region, category and image position. Check the current requirements before upload, especially for main-image backgrounds, text overlays, AI-generated people and commercial-use rights.
Before publishing: frame, lens, placement and crop checks
- Frame outline: compare the upper rim, lower rim, outer corners and thickness with the source.
- Symmetry: check that both lenses and temples remain balanced unless the product is intentionally asymmetric.
- Bridge and hinges: reject floating bridges, broken temples or invented hardware.
- Material and branding: confirm acetate patterns, metal color, rivets, logos and printed text.
- Lens treatment: verify tint, gradient, reflectivity and transparency on both sides.
- Placement: the bridge should rest on the nose and the temples should extend naturally toward the ears.
- Thumbnail view: reduce the image to storefront size and make sure the frame and lens treatment remain readable.
- Collection consistency: compare the approved image with neighboring SKUs for crop, canvas and apparent scale.
Frequently Asked Questions
1. What does eyewear product photography need to show?
Eyewear product photography should let shoppers judge the frame shape, color, material, lens tint, bridge, temples and hinges. A useful ecommerce gallery combines accurate product-only views with detail close-ups, an on-face image for visual scale and placement, measurements for fit, and a lifestyle image.
2. How many images should an eyewear listing include?
Start with seven useful views: front, 45-degree angle, side or temple, lens detail, hinge or material close-up, on-face view and lifestyle image. Add measurement graphics or extra detail views when the frame construction or lens treatment needs more explanation.
3. Can AI replace an eyewear model or studio photoshoot?
AI can replace part of the on-model and campaign workflow when you have accurate source photos. Keep real product-only images and measurements as the source of truth, then use AI for on-face, lifestyle and channel-specific variations. Review every generated image against the real frame before publishing.
4. How do you photograph sunglasses for ecommerce?
Photograph sunglasses from the front, at 45 degrees and from the side, then add a lens-tint view, hinge close-up, on-face image and lifestyle crop. Keep the lenses clean, control reflections and make sure polarized, mirrored, gradient or tinted lenses still look like the product shoppers will receive.
5. How do I reduce reflections in glasses and sunglasses photos?
Clean the lenses first, use large diffused light and adjust the frame or camera angle until bright room shapes disappear. Keep a controlled highlight when it helps show a mirrored or coated lens, but do not retouch the lens so heavily that its real tint or reflectivity changes.
6. What is the best source photo for AI eyewear images?
Use one uncropped frame on a simple background, photographed straight on or at a slight angle. Both rims, the bridge, hinges, temples, lens color and material should be visible. Photograph hidden details separately because a generated approximation is not product evidence.
7. What measurements should an eyewear listing show?
Show lens width, bridge width, temple length and total frame width. If lens height or frame height affects fit, include that too. Keep these measurements in the listing even when an on-face image suggests relative scale.
8. What should I check before publishing an AI eyewear image?
Compare the generated image with the source at full size and at thumbnail size. Check the rim outline, bridge, hinges, temples, logo, material pattern, lens tint, lens transparency, placement on the nose and whether both sides remain symmetrical. Reject any result that changes the SKU.